Download Kane & Lynch - SQUARE ENIX Support Center
Transcript
k&l ps3 final.qxd
10/29/07
9:01 AM
Page i
OUTSIDE FRONT COVER
PLACEHOLDER
k&l ps3 final.qxd
10/29/07
9:01 AM
Page ii
WARNING: PHOTOSENSITIVITY/EPILEPSY/SEIZURES
A very small percentage of individuals may experience epileptic seizures or blackouts when exposed
to certain light patterns or flashing lights. Exposure to certain patterns or backgrounds on a television
screen or when playing video games may trigger epileptic seizures or blackouts in these individuals.
These conditions may trigger previously undetected epileptic symptoms or seizures in persons who
have no history of prior seizures or epilepsy. If you, or anyone in your family, has an epileptic condition
or has had seizures of any kind, consult your physician before playing. IMMEDIATELY DISCONTINUE
use and consult your physician before resuming gameplay if you or your child experience any of the
following health problems or symptoms:
• dizziness
• eye or muscle twitches
• disorientation
• any involuntary movement
• altered vision
• loss of awareness
• seizures, or
or convulsion.
RESUME GAMEPLAY ONLY ON APPROVAL OF YOUR PHYSICIAN.
_____________________________________________________________________________
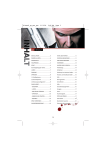
2 GETTING STARTED
Use and handling of video games to reduce the likelihood of a seizure
• Use in a well-lit area and keep as far away as possible from the television screen.
• Avoid large screen televisions. Use the smallest television screen available.
• Avoid prolonged use of the PLAYSTATION®3 system. Take a 15-minute break during each hour of play.
• Avoid playing when you are tired or need sleep.
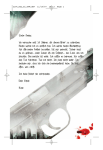
4 DEAR JENNY
_____________________________________________________________________________
Stop using the system immediately if you experience any of the following symptoms: lightheadedness,
nausea, or a sensation similar to motion sickness; discomfort or pain in the eyes, ears, hands, arms, or
any other part of the body. If the condition persists, consult a doctor.
NOTICE:
Use caution when using the SIXAXIS™ wireless controller motion sensor function. When using the
SIXAXIS™ wireless controller motion sensor function, be cautious of the following points. If the
controller hits a person or object, this may cause accidental, injury or damage. Before using, check
that there is plenty of space around you. When using the controller, grip it firmly to make sure it
cannot slip out of your hand. If using a controller that is connected to the PS3™ system with a USB
cable, make sure there is enough space for the cable so that the cable will not hit a person or object.
Also, take care to avoid pulling the cable out of the PS3™ system while using the controller.
6 DEATH ROW TRANSPORTATION FILE:
ADAM MARCUS A.K.A. “KANE”
7 DEATH ROW TRANSPORTATION FILE: LYNCH
8 BEING READY …
8 SIXAXIS™ WIRELESS CONTROLLER
10 OPERATIONAL GUIDELINES
11 TACTICAL VISUAL AWARENESS
13 INVENTORY
14 WORKING WITH YOUR CREW
15 GOOD TO KNOW
16 ADVANCED TACTICS
18 WORKING TOGETHER
19 SAVING & LOADING
19 PERSONAL PREFERENCES (OPTIONS)
WARNING TO OWNERS OF PROJECTION TELEVISIONS:
Do not connect your PLAYSTATION®3 system to a projection TV without first consulting the user manual
for your projection TV, unless it is of the LCD type. Otherwise, it may permanently damage your TV screen.
19 REST & RECUPERATION (PAUSE MENU)
HANDLING YOUR PLAYSTATION®3 FORMAT DISC:
• Do not bend it, crush it or submerge it in liquids. • Do not leave it in direct sunlight or near a radiator
or other source of heat. • Be sure to take an occasional rest break during extended play. • Keep this
disc clean. Always hold the disc by the edges and keep it in its protective case when not in use. Clean
the disc with a lint-free, soft, dry cloth, wiping in straight lines from center to outer edge. Never use
solvents or abrasive cleaners.
24 CREDITS
20 MULTIPLAYER GAME
22 COOPERATE — PLUNDER — FIGHT!
k&l ps3 final.qxd
10/29/07
9:01 AM
Page 2
GETTING STARTED
GETTING STARTED
PLAYSTATION®3 system front
Using the SIXAXIS™ wireless controller (for PLAYSTATION®3)
Port indicators
Slot cover
CF*1 slot
Eject button
L2 button
L1 button
R2 button
R1 button
Directional
buttons
button
button
button
button
Left stick/
L3 button*
Right stick/
R3 button*
SD*2 Memory
Card slot
Memory
Stick™ slot
CF
USB connector
SD/miniSD
*1 CompactFlash®
*2 Secure Digital
Insert the disc with the
label side facing up.
SELECT button
Disc slot
Power button
START button
PS button
* The L3 and R3 buttons function when the sticks are pressed.
Vent
Eject button
WLAN access indicator
HDD access indicator
Note: To use the controller, you must first register or “pair” the controller with the
PLAYSTATION 3 system and assign a number to the controller. For details, refer to the
instructions supplied with the system.
USB connectors
Starting a game: Before use, carefully read the instructions supplied with the PLAYSTATION®3
Saved data for PLAYSTATION®3 format software
computer entertainment system. The documentation contains information on setting up
and using your system as well as important safety information.
Saved data for PLAYSTATION 3 format software is saved on the system’s hard disk.
The data is displayed under “Saved Game Utility” in the Game menu.
Check that the MAIN POWER switch (located on the system rear) is turned on. Insert
the KANE AND LYNCH: DEAD MEN™ disc with the label facing up into the disc slot. Select
the icon for the software title under GAME in the PLAYSTATION®3 system’s home menu,
and then press the S button. Refer to this manual for information on using the software.
Quitting a game: During gameplay, press and hold down the PS button on the wireless
controller for at least 2 seconds. Then select “Quit Game” from the screen that is displayed.
Hint
To remove a disc, touch the eject button after quitting the game.
3
k&l ps3 final.qxd
10/29/07
9:02 AM
Page 4
is
ay
d
o
h
T
w it
.
s
r
s
yea take
st
ers
14
Mo
m is
pap
.
d
for
my
se
the
r
er
cau of
d
lett y fo
a
e
e
a
v
r
p
is
ha red
th
l
t
I
you
l ef
w il
sca
you
f
n
i
i
I
a
e
p
e
e
v
t
b
i
w
a
l
h
on
wr
al
the
k no
ny,
d
rno
I
to
Jen
e
ou l
afte
ll
ou
h
r
g
y
s
a
g
a
n
r
s
i
i
in
l
s
I
Dea
try e. Th
fee
, a y an d a ll.
You
n
fair
y
r
nc
l
a
.
a
bee
n
n
h
u
e
y
o
t
c
i
l
c
o
n
r
e
y
o
I'v
t
me
The
ret
w
las
It's
a
reg
kno
.
re.
my
s
e
d
o
a
f
l
i
o
m
u
l
t
o
y
h
e
n
s
a
l if
my
I
get
ant'
my
e.
d.
er
I c
v
e
tru
to o
n
.
is
l
not
ers
l
'
I
d
it
t
un
I'm
tha
of
ever
But
t
n
e
r
I
g.
Reg
ry
dyin
ret.
Sor
g
e
r
s.
is
ter
mat
e
Kan
that
er,
h
t
Fa
Your
4
5
k&l ps3 final.qxd
10/29/07
9:02 AM
Page 6
DEATH ROW TRANSPORTATION FILE
ADAM MARCUS A.K.A “KANE”
DEATH ROW TRANSPORTATION FILE
LYNCH
LAST NAME:
Marcus
LAST NAME:
(Unknown)
FIRST NAME:
Adam
FIRST NAME:
Lynch
ALIAS:
Kane
ALIAS:
n/a
RACE:
Caucasian
RACE:
Caucasian
NATIONALITY:
British citizen
NATIONALITY:
American citizen
D.O.B.:
Aug 27, 1969
D.O.B.:
Jan 12, 1966
SEX:
Male
SEX:
Male
EYE COLOR:
Blue
EYE COLOR:
Green
HEIGHT:
1.80m/5ft 11in
HEIGHT:
1.85m/6ft 1in
IDENTIFIERS:
Distinctive scar running
down through right eye
IDENTIFIERS:
Heavy build
CRIMINAL HISTORY — OFFENSE CATEGORY:
CRIMINAL HISTORY — OFFENSE CATEGORY:
Adam “Kane” Marcus has been found guilty of the manslaughter of 25 Venezuelan
citizens. He is sentenced to death and awaits transportation to death row.
Lynch was found guilty of the murder of his wife. He is sentenced to death
and awaits transportation to death row.
CASE NOTES:
CASE NOTES:
Kane’s son died at the age of four in a tragic accident when he got hold of
his dad’s gun. Kane’s wife blamed her husband for the death of their son and
left him.
Lynch was interviewed after he received the death sentence for killing his
wife. He remained calm throughout the interview, pointing out that he had
only admitted his crimes in court on the advice of a lawyer, and added that
he was innocent. Lynch represented himself as a perfect husband, but when it
was pointed out that this did not actually coincide with the crimes that he
admitted having committed, he responded excitedly and forcefully that he had
given everything to his wife.
Several years later Kane became a member of The7, the most powerful clan of
mercenaries in the world. Working with them, he fought in the world’s
troublespots for the highest bidder until a mission in Venezuela went badly
wrong: an action resulting in the deaths of 25 Venezuelan citizens.
Kane was the only survivor from the mercenary group. It is rumored that he
escaped with a vast amount of loot. There is little evidence of what happened
to this haul. Kane was arrested soon after his return to the USA. He was
found guilty of the accused crimes and sentenced. The money was never found.
Lynch displays all of the common characteristics of schizophrenia.It is
strongly advised that Lynch be considered highly dangerous to prison security
staff and other prisoners.
6
7
k&l ps3 final.qxd
10/29/07
9:02 AM
Page 8
B E I N G R E A D Y. . .
In your line of work, danger is paramount. In actions fraught with peril, knowing how to be
in control of every possible situation is a very important skill to learn.
AWARENESS
Hazardous situations don’t always come head-on! Always be aware of your surroundings, ammo
counts and the tasks in hand — it will make you more efficient.
ACTIONS
CONTROLS
SIXAXIS WIRELESS CONTROLLER
Radar/Objective
B button (hold when stationary)
This is your main device for maintaining control. Become familiar with all aspects
of this equipment — fast reactions might just save a life.
Open Inventory
N button (hold)
Pause
START button
Display Objectives/Briefing
SELECT button
™
MOVEMENT
A merc must be ready to move in a heartbeat. A moving target is always harder to hit
than a stationary one.
ACTIONS
CONTROLS
Movement
LEFT STICK
Sprint
B button while moving
Perform action
S button
Camera
right stick
Crouch/Sneak
Q button (toggle)
WEAPONS
A good merc must be well versed in the use of firearms and grenades. Getting them before
they get you will help keep you alive.
ACTIONS
CREW CONTROLS
Heists are never easy and can rarely be completed alone. Good leadership qualities
and understanding effective tactical positions are essential for keeping yourself
and your crew alive.
ACTIONS
CONTROLS
Scroll through crew members
directional button Z/X
Order individual “Regroup”
F button
Order crew “Regroup”
F button (hold)
Order individual “Fire at my mark”
D button
Order crew “Fire at my mark”
D button (hold)
Order individual “Move in”
A button
Order crew “Move in”
A button (hold)
CONTROLS
Fire weapon
R button (hold gently to raise weapon)
Aim
W button (hold)
Sniper Scope zoom in/out
directional button C/V while aiming
Throw grenade
E button (hold for longer throw)
Fast rifle/pistol switch
directional button C
Fast grenade switch
directional button V
8
9
k&l ps3 final.qxd
10/29/07
9:02 AM
Page 10
OPERATIONAL GUIDELINES
TA C T I C A L V I S U A L AWA R E N E S S
You must complete the following procedures
to achieve operational initialization.
3
The Main Menu presents three options:
CAMPAIGN, MULTIPLAYER and OPTIONS.
1
CAMPAIGN
Select CAMPAIGN to start a new game or continue
a saved game. You’ll proceed to the Briefing Screen.
2
4
BRIEFING SCREEN
This screen provides full on-screen operational
information, including:
CHAPTERS
The game is divided into Chapters that you must
complete in sequence. Once you successfully
complete a Chapter and save it, you can replay it
from this screen.
• Chapter Two is specifically structured
for Training.
GAME MODE
The game has two Campaign modes: SINGLE PLAYER and TWO-PLAYER COOPERATIVE.
• A second controller is required in order to play co-op mode.
DIFFICULTY LEVEL
You can play the game on three different skill levels: ASPIRIN, CODEINE OR MORPHINE.
Each higher level increases the game’s difficulty.
BRIEFING
Briefing text provides full details of the objective.
• Read the briefing notes to get an overview of Chapter objectives.
10
1 Weapon Aim Icon
3 Crew Controls
2 Radar/Next Objective/Cameo View
4 Weapons Carried
To be an effective merc, you must be able to visually assess a situation quickly. The screen above is
from a stolen CCTV video tape of a previous heist. It illustrates the detailed information you need
to absorb rapidly in order to be most efficient.
WEAPON AIM ICON
This icon locates where your weapon in hand is aiming.
PISTOLS/RIFLES/MACHINE GUNS
• While in Aim Mode, use the left stick View control to aim.
• Hold the W button to zoom in for a precise shot. The icon changes to a crosshair,
or to a Sniper Scope when you’re using a sniper rifle.
• If using the sniper rifle, zoom in/out with directional button C/V.
• Fire the weapon with the R button.
FIXED WEAPONS
Fixed weapons such as heavy duty machine guns are also available.
• Approach the fixed weapon.
• Press the S button when prompted to assume control.
• Aim and fire as normal.
• Press the S button again to leave the fixed weapon.
11
k&l ps3 final.qxd
10/29/07
9:02 AM
Page 12
GRENADES
You can throw grenades at varying distances,
indicated by a series of one to six marks
on screen.
• Select the target and aim the grenade.
• A quick tap on the E button produces a
small charge (shown as dots) and rolls the
grenade a short distance.
• A longer press on the E button
produces a higher charge and launches
the grenade in a longer, more powerful arc.
• Press the S button while a grenade is charged to cancel the charge.
AMMO
The ammo figure reduces as the weapon is fired. When that figure turns red, your ammo is low.
If you wait to reload until you reach the end of the clip/magazine, or remain stationary
for a period of time, you will auto-reload. This takes much longer than manually reloading,
and you will be powerless in those vital life-threatening moments.
• If carrying extra ammo, press the S button to force a reload.
• If there is no extra ammo in the Inventory, you must find more ammo or get it
from a fellow crew member. The Ammo icon is displayed if ammo is available
in Inventory or a fellow crew member has extra ammo.
RADAR/NEXT OBJECTIVE MARKER/
CAMEO VIEW
This is a very useful device that gives information
on what’s going on around you and keeps you
focused on your main objective.
• Click and hold the B button (when standing
still) to open the Radar Screen/
Next Objectives Marker.
• A radar-style graphic pops up in the center
of the screen, showing the relative positions
of any allies/crew members (white markers), and the general
direction to the next objective (green marker).
• This graphic also provides a cameo animated view of important events as they unfold
(such as a fellow crew member getting wounded). These events may influence
your future actions.
• When you release the B button, an Objectives marker remains on screen,
showing the direction to the objective.
INVENTORY
CHECKING INVENTORY
• Open your inventory by pressing and holding the N button. The Inventory appears
as a large format graphic in the center of the screen, where you to select whatever you require.
• Use the left stick to highlight an item, and release the N button to select it. The Inventory
graphic minimizes and drops to the lower right of the screen.
SWAPPING WEAPONS/INVENTORY
Another life-saving tactic you’ll find useful is swapping weapons and items with other
crew members.
• Stand close to another crew member.
• Open your Inventory. An outer circle of weapons/items will appear. This is your crew
member’s Inventory.
• Select the item you want using the left stick. That item/weapon will be put into your hands.
The weapon you are carrying will be transferred to the other crew member.
12
13
k&l ps3 final.qxd
10/29/07
9:02 AM
Page 14
WORKING WITH YOUR CREW
CONTROLLING A CREW
In this line of work you must frequently give effective
tactical orders to a crew.
This Crew Control graphic in the upper right of the game
screen displays your backup and lists the crew members
who are there with you.
You must make sure the wounded crew member can carry on through to the objective
by administering a large dose of adrenaline; this will boost the individual rapidly back into action.
You must act quickly and decisively, because you only have a limited amount of time to complete
this task before the wounded man dies.
If you are wounded, then crew members will try to heal you, but you must be within their reach.
If you have strayed too far and they are faced with a tough fight to get to you, they will find it hard
to heal you before you die.
Your supply of adrenaline boosters will run out, so exercise caution when administering them.
Be clear on this: too many injections in a short span of time will result in death by overdose.
• Scroll through available crew members with the directional button Z/X.
Names of individual crew members appear in the panel when highlighted. You can select
an individual and give him one of three commands:
• RETURN TO ME: Press the F button.
• ATTACK THIS LOCATION OR TARGET: Press the D button while pointing
to a specific location with the aim cursor.
• MOVE TO THIS LOCATION: Press the A button while pointing
to a specific location using with aim cursor.
GOOD TO KNOW
ACTION BUTTON
There are a wide variety of “actions” you must carry out successfully if you are to do your job,
from Silent Takedown (stealth attack), climbing ladders and using elevators to more specialist,
SWAT-type actions such as rappelling down buildings. You perform all these actions using
the Action button (S button).
• Stand close to the action area. Text will appear on screen naming the action.
• Press the S button to perform the action
• Hold down the F button, D button or A button to issue that button’s order
to your whole crew.
• When you issue an order, you get a verbal response from the crew member(s).
• If a crew member icon turns red, that character is wounded. You need to restore him
before he can respond to your order and continue with the operation.
RESTORING WOUNDED CREW MEMBERS
In a firefight, crew members get shot; there’s no avoiding that plain fact. When hit, they will slow
you down or stop you from completing the objective. The Crew Control graphic turns red and a red
cross appears on screen, locating where that crew member is lying wounded.
RELOADING
The S button also forces a reload of your weapon in hand, but this does not impede any other
more important action, such as climbing a ladder.
SILENT TAKEDOWN
A stealth attack on an unsuspecting enemy can also be carried out with the S button.
• Approach the target (preferably from behind) and press the S button. The enemy will be
neutralized silently in the most efficient way.
SUBTITLES
Subtitles are useful for gathering tactical intel during the noise or fog of a job in progress.
Even if you miss something important spoken into your earpiece, subtitles will
read out the same information on screen.
14
15
k&l ps3 final.qxd
10/29/07
9:02 AM
Page 16
A D VA N C E D TA C T I C S
FIRE ON THE MOVE
Firing any weapon on the move results in increased inaccuracy, and will draws attention
to yourself. Unless you’re carrying a large amount of ammo and want to escape from a lifethreatening situation, you’d be wise to concentrate on moving from cover to cover rather than
firing on the move.
USE COVER
Good use of cover will save your life. Use available
cover in all firefights. All hand weapons and grenades
can be used from cover. Cover comes in two basic
forms: high (such as standing behind a pillar)
and low (crouching behind a desk or low wall).
• Get very close to the cover you want to use
in combat and you will snap into cover mode.
• Firing your weapon (or throwing a grenade)
without aiming will “blindfire” — not the most
accurate firing solution, but it helps to keep an enemy’s head down.
• Briefly lean out of cover (by holding down the W button button) to take
a more accurate (but more exposed) shot.
• When in a narrow cover or behind a pillar, switch sides quickly by pressing the left analog
stick Z/X. You can perform this action in both cover and blind fire modes.
• Walk away from the cover object to exit Cover Mode.
KEEP CLOSE TO YOUR CREW
Always be aware of the position of all members of your crew and what their situation is (under fire,
awaiting orders, etc.). The further an individual strays from the crew, the more dangerous
the situation becomes, and the intrinsic strength of the crew is undermined. If an individual takes
a hit at some distance from other crew members, he may find they cannot get to him in time
to administer a life saving shot of adrenaline.
“CALL AND COVER”
Crews must be used to maximum effect in a combat situation. When a crew is not under fire,
progress through a combat zone must be by use of “call and cover.” In a crew of four, two crew
members take up a forward position in good cover, then call the other two members to take up
a new forward position. If attacked, one pair can provide cover fire to protect the other pair.
The second pair then position themselves in good cover, call forward the second team, provide
cover for them, and so on.
CREW FLANKING FIRE
When a crew is under fire, a main tactic is to try to outflank an enemy position with one, two
or three crew members. Moving to the flanks gives the crew a better shot at the enemy position,
and provides flanking or crossfire to destroy that defensive position so the other crew member(s)
can make progress. When in position to make a kill, remember that a head shot is more effective
than a body shot.
FIXED WEAPONS COVER FIRE
If you have use of a fixed weapon (e.g. a high-caliber machine gun) in combat, make sure it is
deployed to keep enemy heads down and help the crew make progress without being fired upon.
Fixed weapons are powerful and can destroy or demolish some enemy defensive positions
and adjacent explosive items.
TACTICAL USE OF SMOKE GRENADES
If you are forced to advance through a hazardous position that does not provide adequate cover,
you must resort to smoke grenades. Throw a smoke grenade to blind the enemy and give yourself
or your crew temporary cover to sprint forward. The enemy will still fire into the smoke, but they will
not have 100 percent accuracy. Make sure you can define your next cover position before you run
into the smoke; otherwise you might get lost.
USE EXPLOSIVE ITEMS
Be aware of your environment and look out for anything that might have an explosive potential,
such as a gas canister or petrol tank in a vehicle. These items can be fired upon and will do
extensive damage to individuals close to them. Similarly, beware of standing too close to these
items, because your opponents might use the same tactic on you.
THROW BACK GRENADES
16
If an enemy throws a grenade at you, you will have a short space of time to act:
run, take cover or, if you’re very fast, throw the grenade back at them.
If a grenade lands close to you, the Action button will be available,
allowing you to throw the grenade back (press the S button).
17
k&l ps3 final.qxd
10/29/07
9:02 AM
Page 18
WORKING TOGETHER
S AV I N G & L O A D I N G
In this business, having someone watching your back can mean the difference between living
and dying. When planning something big, it’s always good to consider who you can trust to help you
with the job in hand.
SAVING
The game uses an autosave feature to save data to your PlayStation®3 system’s
Hard Disk Drive (HDD).
TWO-PLAYER COOPERATIVE MODE
LOADING
Saved games are loaded automatically from your PlayStation®3 system’s HDD.
1. Select CAMPAIGN from the Main Menu.
2. Select GAME MODE/COOPERATIVE PLAY
from the Briefing Screen. This gives both
players equal on-screen control on a shared
split screen display:
• Both members must perform their duties
and look out for each other. Stay close, remain
in sight, don’t wander off, and help each other.
If involved in a gunfight, give covering fire
and back up. Most importantly, communicate
with each other to get the job done.
• Each member will have individual objectives to perform for the success of the job at hand.
These objectives are clearly listed on the Co-operative Play Briefing screen.
WARNING
Because of the extreme stress involved in this line of work, members may possibly show signs
of severe psychosis. This can make them have delusional visions and put them into varying
physical states.
NOTE
This game uses the system’s online name feature during online multiplayer games and to display
your online ranking. Some characters may be unsupported; these characters will be relaced with
another consistent symbol.
IMPORTANT
Do not turn off the system when the HDD access indicator is flashing.
PERSONAL PREFERENCE
(OPTIONS)
Doing your job efficiently relies on being prepared. You should always enter a heist knowing that
everything is how it should be.
All players have personal preferences (options) that they can adjust or change. Select OPTIONS
from the Main Menu or from the in-game Pause Menu. This opens a menu where you can view
and adjust the following options and settings:
• VIDEO (Brightness/Gamma/Show Blood/Subtitles)
• AUDIO (Effects, Speech, Music, Ambience Volume)
• CONTROLS (Turn Speed, X-Axis, Y-Axis, Switch Sticks)
• LAYOUT (Single Player/Co-operative Play Layout, Online Layout)
• CREDITS
REST & RECUPERATION
( PA U S E M E N U )
It’s always good to try and give yourself a second – especially when the bullets are flying!
Press the START button to open the Pause Menu. This suspends all action and gives you options to:
• CONTINUE (return to the job).
• RESTART SCENE from the last checkpoint.
18
• RESTART CHAPTER from the beginning.
• ACCESS OPTIONS.
19
k&l ps3 final.qxd
10/29/07
9:02 AM
Page 20
M U LT I P L AY E R G A M E
GAME RULES
STARTING & WINNING
NO HONOR AMONG THIEVES...
1. Select MULTIPLAYER from the Main Menu.
Doing this opens the Multiplayer Main Menu.
This screen also allows access to Game Rules,
Leaderboards and Game Stats
All players start together as an alliance of mercs that have to pull off a heist.
2. Select FRAGILE ALLIANCE.
The winner of Fragile Alliance is the player that leaves the heist with the most money.
3. Select the type of Multiplayer game:
• RANKED MATCH (Quick Match/Custom
Match/Host A Match)
• PLAYER MATCH (from Quick Match/Custom Match/Host A Match)
• LAN (from Quick Match/Custom Match/Host A Match)
THE SCORE/BECOMING A TRAITOR
The surviving mercs in the alliance share the score from the heist. Traitors do not share
their money with anyone. Killing one of your own makes you a traitor.
So, if you carry a big score and wanna keep it for yourself, you have to become a traitor.
It’s this kind of greed that breaks the alliance.
But on the other hand, any player gets an instant reward for killing a traitor.
3
1
IF YOU DIE
If you die, you respawn as a guard and have to stop mercs from escaping the heist.
The guards can also secure the stolen loot, and will get a 10% finder’s fee for all
the money they pick up.
If you take personal revenge and kill the traitor that killed you, you get a bigger reward.
2
YOUR GOAL
4
In Fragile Alliance, it pays to work together most of the time. The trick is to know
when it’s the best time to break the alliance, kill one of your own, become a traitor
and keep the score for yourself.
Good luck!
1 Player List
3 Total Money Secured
2 Radar/Objectives
4 Weapon/Ammo
On this specific heist, eight bank robbers were available. Eight was deemed the maximum
number for a job like this.
20
21
k&l ps3 final.qxd
10/29/07
9:02 AM
Page 22
COOPERATE–PLUNDER–FIGHT!
HOW TO WIN
Escape with the most cash after your chosen number of heists (3-10).
LOYALTY
Sometimes it pays off. Players in the alliance share the money equally between them.
BETRAYAL
If you kill another player, you are out of the alliance and marked a Traitor.
UPSIDE TO BEING A TRAITOR
You don’t have to share with anybody and you have a chance of getting away with more
than all the other suckers.
DOWNSIDES TO BEING A TRAITOR
• THE REVENGE-REWARD — Getting out won’t be easier. The player you killed respawns
as a Kevlar-clad policeman with a hefty Reward on your head.
• THE TRAITOR-REWARD — The remaining alliance members are free to kill you —
they even get a Reward for it.
• VISIBLE NAME TAG: Your name tag will shine orange and be visible through walls —
everybody will be have an easy time homing in on you.
• VISIBLE NAME TAG: In the next round, you will spawn slightly to the side — wearing
a black shirt — just to warn people about your tendencies.
BEING THE ENEMY
When you get killed the first time, you respawn as police. If you get killed again,
you’re out for the rest of the round.
UPSIDES TO BEING THE ENEMY
• You still have an excellent chance of winning the round.
• Not only can you collect Rewards, but you can also hinder the alliance to get away
with the cash.
• On top of that you can pick up any cash that is dropped by the alliance during the heist
— and get an instant finder’s fee. Tax-free, of course!
UPSIDE TO BEING RICH
Money Shields: When shot at, the money works as a shield. You can take more shots,
but the money will drop from you when it happens. You can either run and die poor —
or stand and fight and pick up the cash again.
DOWNSIDE TO BEING RICH
Your name tag will show how much cash you’re carrying — so you’re a prime target.
Get used to it, and think before you pick up $1 million in front of a bunch of poor suckers.
DOWNSIDE TO BEING POOR
Nobody wants to share their score with you — watch your back!
CROUCHING HIDES YOUR NAME TAG
When in the alliance, you can hide your name tag by crouching. So you can pick up $1 million
and try and sneak off with it — or you can creep up on traitors waiting to ambush you.
DROP MONEY
You can choose to drop money to lower the reason to kill you, or to use it as bait
for an ambush.
GET OUT
Run to the extraction point and your getaway vehicle will arrive. Do you dare to take it,
with the risk of somebody blowing it up? You can’t wait forever, you know. After a short time,
the round closes down and you get nothing!
WEAPON AND ARMOR PACKS
Risk your hard-earned money to buy weapon and armor packs. It might be worth it.
BALACLAVA
The higher the placement in the game, the darker the balaclava — making it easy to figure out
who you want to keep an eye on.
CHARACTER
The higher TrueSkill rank you have, the cooler character you’ll play with.
QUITE EXCLUSIVELY
Number 1 in the world will play as Kane. Number 2 as Lynch.
22
23
k&l ps3 final.qxd
10/29/07
9:02 AM
Page 24
CREDITS
IO-INTERACTIVE (continued)
QA Manager
Janus Rau Møller Sørensen
IO-INTERACTIVE
Game Director
Jens Peter Kurup
Art Director
Martin Kramme Guldbæk
Producer
Hugh Grimley
Associate Producer
Frederik Fusager
Technical Producer
Peter Andreasen
Lead Animator
Martin Madsen
Animators
Arie Doron Meir
Barbara Karolina Bernád
Craig J Christensen
Damien Simper
Martin Poulsen
Michael Lapitskiy
Pia Bojer Larsen
Simon Boscaro
Søren Lumholz
Thomas Peter
Theede Neubert
Lead Character Artist
Marit “Max” Abrahamsen
Character Artists
Charles Hu
Guy Robinson
Jørgen Ørberg
Oskar Lundqvist
Peter von Linstow
Technical Character Artists
Johan Flod
Timothy Evison
Concept Artists
Anders Poulsen
Chandra Larsson
Henrik Hansen
Jacob Østergaard
Jørgen Ørberg
Peter von Linstow
Peter Gornstein
Rasmus “No-go” Poulsen
Roberto Merchesi
Lead Environment Artist
Peter Eide Paulsen
Environment Artists
Alan Cameron Boyle
Bo Heidelberg
Daniel Ben-Noon
Henrik Kragh
Iryna Pshenychna
Israfel “Raffy” Abainza
Lothar Weiqian Zhou
Mads H Peitersen
Marek Bogdan
Martin Emborg
Miklos Büte
Oleksandr Pshenychnyy
Stephan Nilsson
Svend Christensen
Thomas Finn
Thomas Storm
Thorbjørn Mangaard
HiRes Artist
Balazs von Kiss
Technical Environment Artists
Sebastian Vlad Lindoff
Tobias Biehl
User Interface Designers
Chandra Larsson
Birgitte Bay Overgaard
Theo Engell-Nielsen
Additional Artist
Daniel Windfeld Schmidt
Allan Hansen
Tom Isaksen
Lead Coder
Peter Andreasen
Coders
Henrik Edwards
James Lee
Jesper Christiansen
Jim Malmros
Jonas Meyer
Martin Gram
Martin Harring
Morten Heiberg Rasmussen
Morten S. Larsen
Rasmus Hartvig
Rasmus Sigsgaard
Theo Engell-Nielsen
Lead Online Coder
Kasper Storm Engelstoft
Online Coders
Jens Skinnerup
Nis Haller Baggesen
Paul Onac
Rune Vendler
Stein Nygård
Thomas Riisbjerg
External Consultants
Frank Snowden Hickman
Jens Skinnerup
Rune Vendler
Lead Level Designer
Thor Frølich
Lead Online Game Designer
Kim Krogh
Co-Op Level Designer
Markus Friedl
Level Designers
Jacob Mikkelsen
Jamie Benson
Jesper Donnis
Jonas Lind
Michael Heilemann
Morten “Mazy” Hedegren
Ole Steiness
Oleksandr Pshenychnyy
Thomas Løfgren
Torbjørn V Christensen
Additional Level Design
Jeremy C. Petreman
Trey Turner
Additional Pre-Production
Jeremy C. Petreman
Karsten Lund
Mads Prahm
Localisation
Oliver Winding
Management
Janos Flösser
Niels Jørgensen
Rasmus Kjær
Steffen Toksvig
Outsourcing Manager
Christine Thaarup
Lead QA
Bjørn Meldal
QA
Jonas Carlsson
Klavs Kofod
Lars Lüning
Mikkel Havmand
Natasza Ashkanani
Petronela Cimpoesu
Thomas Møller
Additional QA
Alan Windfeld Schmidt
Anja Stensrud Wedell
Anupam Palit
Christian Egense Jørgensen
Christian V. Hjelm
Daniel Duh
Daniel Windfeld Schmidt
Gustav Emanuel Carlsson
Jakob Levring
Jakob Mygind Jensen
Jakob Vestergaard Pedersen
Jakob Rød
Jens Nirme
Jon Grinde
Kristian Rise
Laura Burbaite
Mads Rahbæk
Maksimilian Duks
Mikkel Dalfoss
Onur Karademir
Stephan Windfeld Schmidt
Stine Munch
Ulas Karademir
User Experience Assistants
Ann-Britt Viola Samuelsen
Frederikke Høegh-Guldberg Hoff
Script Writers
Jens Peter Kurup
Martin Madsen
Oliver Winding
Script Writer Consultant
Lars Detlefsen, DFI
Additional Writer
Greg Nagan
Sound Director
Frank Lindeskov
Lead Sound Designer
Simon Holm List
Sound Designers
Ivan Brandt
Jens Peter Brodersen
Michael Ziegler
Peter Wendelboe Hansen
Thomas Bärtschi
Thomas “Tomzen” Dietl
Additional Sound Designer
Rolf Auhagen
Sound Coders
Asger Friis-Vigh
Aleksandr Dubinskiy
Neil Coxhead
Torsten Kjær Sørensen
Support
Anders Nielsen
Anni Greve Andersen
Foad Mojib
Charlotte Delran
Cæcilie Heising
Else Andersen
Genevieve Ripeau
Jakob Bondesen
Jannik Kølbek
June Bonke Nielsen
Leonard Campell
Line Bundgaard
Mette Agerbæk
Morten Borum
Niels Jørgensen
Niels Ole Sørensen
Peter “Fleck” Fleckenstein
Rasmus Hjarup
Søren Reinhold Jensen
Tatiana Højengaard
Thomas Howalt
Torben Wennergren
Ulla Goldberg
Platform Coders
Gil Megidish
Jon Rocatis
Jens Skinnerup
Peter Marino
Render Coders
Henning Semler
Jens Bo Albretsen
Kasper Høy Nielsen
Mircea Marghidanu
Morten Mikkelsen
Tools Coders
Andreas Öberg
Matias Dons Dollerup
Michael Bach
Peder Holmgaard Pedersen
Thomas Andersen
Additional Coders
Gyula “Luppy” Szentirmay
Mads Ø. Olesen
Simon Mogensen
Ulf Johansen
William Nilsson
Zoltan Buzath
Section Management
Thomas Hagen Johansen
Technology Coordinator
Hakan Abrak
IT Development
Fredrik Ax
Jonas Nielsen
IT Support
Chris Edgar
Martin Schröder
Michael Andersen
Ulf Maagaard
Max Scripting
Petronela Cimpoesu
Physics Coders
Andreas Thomsen
Micky Kelager Christensen
24
25
k&l ps3 final.qxd
10/29/07
9:02 AM
Page 26
EXTERNAL
Music Composed & Produced by
Jesper Kyd
Peter Peter
Peter Kyd
Voice Acting
Brian Bloom
Charles Martinet
Cipriano Iguaran
Craig Marker
Dough Boid
David Acord
Francisco Hulse
Jarion Monroe
Jim Medellin
Joe Paulino
J. S. Gilbert
Louis Landeman
Mark Atherlay
Max Ewalt
Melissa Hutchison
Nobu Ushijima
Ron Obregon
Tom Chantler
Victor Mares
Vyvan Pham
Shizuka Ishizaki Nielsen
Mitsuru
Sarah Fujita
Voice Casting & Direction
Khris Brown
(KBA Voice Production)
Voice Recording Studios
Studiopolis
Outpost Studios
Polarity Post
Mineloader Team Leads
XU ZHEN
LING CHAO
Mineloader Characters
LI SHEN
GUO YING
WU YIQUN
Mineloader Environment Art
ZHOU WEI
WANG DAKAI
YANG JUPING
CHANG NING
ZENG QINGXUE
SHI QUANGU
ZHANG RONG
WANG FEI
XIAO QING
EIDOS INC.
Motion Capture Casting
Pernille Lembcke
CEO & President,
Eidos North America
Bill Gardner
Motion Capture Actors
Adam Brix Shächter
Dan Johansson
Tao Hildebrand
Executive Vice President
of Sales & Marketing
Robert Lindsey
Motion Capture Studios
Centroid 3D Group
Ghost A/S
Vice President,
Legal & Business Affairs
Joe Cademartori
Stand-in Models
Line Greve
Thida Katiyaporn
3D Face Models
Anders Jung Remark
Mikkel Guldbæk
Sarah Fujita
Shizuka Ishizaki Nielsen
Physics Middleware
Provider
Havok
Network Middleware
Provider
Quazal
Web Designer
John Lerma
Web Developer
Danny Jiang
National Sales Director
Joe Morici
U.S. Mastering
& Submissions Supervisor
Jordan Romaidis
Event Specialist
Rudy Geronimo
Regional Sales Manager
Holly Robinson
Senior Business
Development Manager
Tom Marx
Vice President of Finance
Malcolm Dunne
Senior Sales
& Marketing Analyst
Ilana Budanitsky
New Media Project
Administrator
Francesca Zuleta
Vice President
of Human Resources
Edie Dykstra
Legal & Business
Affairs Manager
Clint Waasted
Manual by
Hanshaw Ink & Image
Vice President of New
Business Development
Dave Clark
Channel Marketing
Manager
Leon Harmon Jr.
Director of Marketing
Matt Gorman
Channel Marketing
Specialist
Rafal Dudziec
Senior Marketing Manager
David Bamberger
Director of Public Relations
Michelle Seebach Curran
Public Relations
Jennie Sue
Oonagh Morgan
Stanley Phan
Senior Media, Promotion
& Partnerships Manager
Micheal Tran
Channel Marketing
Representative
David Bushee
Operations Manager
Gregory Wu
Director of North American
Development Relations
Nick Goldsworthy
Project Manager
Clayton Palma
Creative Director
Karl Stewart
Assistant Producer
Kari Hattner
Creative Services
Project Administrator
Julie Moretti
Product Specialist
Supervisor
Jeff Lowe
Graphic Designer
Connie Cheung
Product Specialists
Tom Bengford
Stephen Cavoretto
Nick Cooprider
Junior Graphic Designer
Chris Cheng
Web Producer
Roderick van Gelder
Special Thanks
Sandy Labrec
Brian Venturi
Barnaby Go
Richard Campbell
Jeff Schabowski
Tali Fischer
James O’Riordan
Annie Meltzer
Adrian Askarieh
Jeane Wong
Dana Whitney
Juan Castro
Barbara Gamlen
Molly Passanisi
Kim Bach Le
Amy Lovelace
Linda Philapil
Andrew Conway
Ed Meagher
Trisha Lindsley
Stephan Murray
Rob Eisenhardt
Ryan Duffy
Robert Kilburg
Stephen Gregory
Chris Johnston
Anders Lovell
Bruce Malone
Jenn Bass
26
27
k&l ps3 final.qxd
NOTES
10/29/07
9:02 AM
Page 28
Register online at
www.eidosregistration.com
EIDOS, INC., LICENSE & LIMITED WARRANTY
Eidos, Inc., warrants to you, the original purchaser of this disc, that for a period of ninety (90) days from the date
of your purchase, this disc shall be free from defects in materials and workmanship. If, at any time during the
applicable ninety (90) day warranty period you determine that this limited warranty has been breached, Eidos,
Inc., agrees, in its sole option, to repair or replace,
\free of charge, any such disc, provided the disc is returned postage-paid to the Eidos, Inc., Factory Service Center
and a proof of date of purchase is included. This limited warranty is not applicable to normal wear and tear and
shall be void with respect to any defects that arise from disc abuse, unreasonable use, mistreatment or neglect.
This disc is sold “as is” without any warranties of any kind, express or implied, including implied warranties
of merchantability or fitness for a particular purpose, other than the limited warranty expressly stated above.
No other claims arising out of your purchase and use of this disc shall be binding on or obligate Eidos, Inc.,
in any manner. Eidos, Inc., will not be liable to you for any losses or damages incurred for any reason as a result
of your use of this disc, including, but not limited to, any special, incidental, or consequential damages resulting
from your possession, use or malfunction of this disc.
This limited warranty states the entire obligation of Eidos, Inc., with respect to the purchase of your disc. If any
part of this limited warranty is determined to be void or illegal, the remainder shall remain in full force and effect.
For warranty support please contact our Customer Support department at (650) 421-7670 or email us at
[email protected] or visit our website at: support.eidosinterative.com. Our staff are available
Monday through Friday, 9:00 a.m. to 12:00 noon and 1:00 p.m. to 5:00 p.m. Pacific Time. You are responsible for
all toll charges. Customer Support Representatives will not provide game hints, strategies or codes.
PRODUCT RETURN PROCEDURE
In the event our support agents determine that your game disc is defective, you will need to forward material
directly to us. Please include a brief letter explaining what is enclosed and why you are sending it to us. The
agent you speak with will give you an authorization number that must be included and you will need to include
a daytime phone number so that we can contact you if necessary. Any materials not containing this authorization
number will be returned to you unprocessed and unopened.
Send your postage-paid package to the following address:
Eidos, Inc.
RMA# (state your authorization number here)
1300 Seaport Boulevard, Suite 100
Redwood City, CA 94063
You are responsible for postage of your game to our service center.
© 2007 IO Interactive A/S. Developed by Io Interactive. Published by Eidos, Inc. Kane and Lynch: Dead Men, Eidos and the Eidos
logo are trademarks of Eidos Interactive Ltd. Io and the Io logo are trademarks of Io Interactive A/S. All rights reserved.
Software platform logo (™ and ©) IEMA 2006. “PLAYSTATION” is a registered trademark and “PS3” is a trademark of Sony
Computer Entertainment Inc. The rating icon is a trademark of the Entertainment Software Association. SIXAXIS is
a trademark of Sony Computer Entertainment Inc. © 2007 Sony Computer Entertainment Inc.
Uses Bink Video. Copyright © 1997-2007 by RAD Game Tools, Inc.
28
k&l ps3 final.qxd
10/29/07
9:02 AM
Page 30
OUTSIDE BACK COVER
PLACEHOLDER






![ManualCover-3Panel10_03 [Converted]](http://vs1.manualzilla.com/store/data/005711777_1-408df82eece155ec198a9b3b174c8b0a-150x150.png)


