1
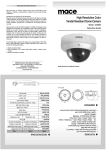
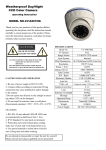
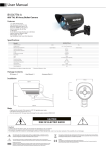
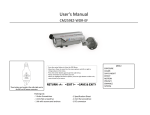
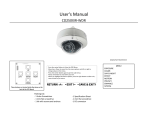
※Thank you for your purchase.
Please read this manual thoroughly before use.
Keep this manual handy for future reference.
SPECIFICATIONS
ITEM
Image Sensor
Effective Pixels
WDR Mini Camera
1/3" Sony Super HAD CCD II
PAL:976(H)*582(V);NTSC: 976(H)*494(V)
PAL:625 Lines, 50 Field/Sec;NTSC:525 Lines,60
Scanning System
Sync System
Field/Sec
Internal Synchronization
Resolution
700TVL
IIIumination Sensitivity
0.01Lux
Lens
3.6mm board lens
Gamma Characteristic
Selectable
S/N ratio
Selectable
Gain Control
Selectable
B.L.C.
Selectable
White Balance
Selectable
Video Output
Selectable
Mirror Image
Selectable
Day & Night
Selectable
Power Supply
DC12V±10%
Operational Temp
-10 ℃ ~ + 50℃, RH 95% Max
Storage Temp
-10 ℃ ~ + 50℃, RH 95% Max
Weight
Approx 50g
1. LENS
Using this function, you can control screen brightness
When the SETUP menu screen is displayed, select ‘LENS’ by using the UP and Down buttons so that the
arrow indicates’LENS’.
Select the connected type by using Left and Right buttons.
DC/VIDEO: Select Auto Iris Lens.
When DC is selected, you can control screen brightness. The range of
brightness control is between 0 and 100.
6.DPC
7. SPECIAL
Adjust the brightness appropriately for optimal screen brightness.
MANUAL: Select Manual lens
CAM TITLE: If you enter a title, the title will be appear on the monitor.
2. EXPOSURE
OFF/ON
MOTION: If you connect an alarm device to this camera, you can monitor activity
SHUTTER: You can select either auto or manual shutter
because a signal is generated by the camera whenever motion is detected.
— FLK: Select this when you experience picture flicker
Motion detection signal is output through the MD OUT port.
— AUto: Select this mode to control the shutter speed automatically.
PRIVACY: Hide an area you want to hide on the screen
Shutter speed is automatically controlled depending on the
PARK. LINE OFF/ON
brightness of the screen.
IMAGE ADJ.
BRIGHTNESS: You can control the brightness by using the Left and Right
button in Manual Lens mode.
AGC:(auto gain control)
DWDR: If there are bright area and dark area on the screen at the same time, this
function makes both areas to be in clear image.
—DWDR can be selected 2 steps ON/OFF
3. WHITE BALANCE
ATW: Auto trace white balance
AWB: Select this when the color temperature is between1800 ~ 10500K
COMM
AWC →SET: To find the optimal setting for the current Iuminance environment in
mode. Set the point the camera, towards a sheet of white paper and press
ADJ.
this
the SET
button, If the environment changes, readjust it.
MANUAL: Select this to find-tune White Balance manually. Set White Balance
first
by using the ATW or AWC mode. After that switch to MANUAL model.
4. BACK LIGHT
BLC: This function allows you to get a clear pictures of objects even the
objects in strong backlight.
L
LANGUAGE: Yo u can select the menu language according to your requirement.
HLC: This function allows you to get a clear pictures of objects even the
Supplied Language-ENGLISH/CHINESE
objects in highliaht
VERSION:
10/12/02
5. D AY&NIGHT
RETURN:
RET
8. RESET
FACTORY: Resets the camera settings to the factory defaults.
Communication status is not initialized.
9. EXIT
Press the SET button in the Exit mean to save the current settings and exit the Main SETUP menu.