1
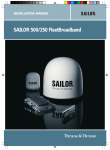
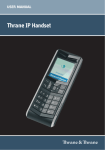
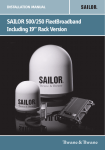
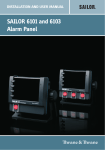
USER MANUAL Voice Distress (Non-SOLAS) Voice Distress (Non-SOLAS) User manual Document number: 98-133687-A Release date: July 4, 2011 Disclaimer Any responsibility or liability for loss or damage in connection with the use of this product and the accompanying documentation is disclaimed by Thrane & Thrane. The information in this manual is provided for information purposes only, is subject to change without notice and may contain errors or inaccuracies. Manuals issued by Thrane & Thrane are periodically revised and updated. Anyone relying on this information should acquire the most current version e.g. from thrane.com or from the distributor. Thrane & Thrane is not responsible for the content or accuracy of any translations or reproductions, in whole or in part, of this manual from any other source. Copyright © 2011 Thrane & Thrane A/S. All rights reserved. Printed in Denmark. Trademark acknowledgements • Thrane & Thrane is a registered trademark of Thrane & Thrane A/S in the European Union and the United States. • Inmarsat is a registered trademark of the International Maritime Satellite Organisation (IMSO) and is licensed by IMSO to Inmarsat Limited and Inmarsat Ventures plc. • Other product and company names mentioned in this manual may be trademarks or trade names of their respective owners. Safety summary 1 The following general safety precautions must be observed during all phases of operation, service and repair of this equipment. Failure to comply with these precautions or with specific warnings elsewhere in this manual violates safety standards of design, manufacture and intended use of the equipment. Thrane & Thrane assumes no liability for the customer's failure to comply with these requirements. DO NOT OPERATE IN AN EXPLOSIVE ATMOSPHERE Do not operate the equipment in the presence of flammable gases or fumes. Operation of any electrical equipment in such an environment constitutes a definite safety hazard. KEEP AWAY FROM LIVE CIRCUITS Operating personnel must not remove equipment covers. Component replacement and internal adjustment must be made by qualified maintenance personnel. Do not service the unit with the power cable connected. Always disconnect and discharge circuits before touching them. DO NOT SUBSTITUTE PARTS OR MODIFY EQUIPMENT Because of the danger of introducing additional hazards, do not substitute parts or perform any unauthorized modification to the equipment. iii Voice Distress calls iv 2 About the manual 3 Intended readers This manual is a user manual for the Voice Distress (Non-SOLAS) system. This manual is intended for anyone who is using or intends to use this system. No specific skills are required to operate the system. However, it is important that you observe all safety requirements listed in the beginning of this manual, and operate the system according to the guidelines in this manual and in other manuals that come with your system. Manual overview Note that this manual does not cover installation of the system. For information on installation refer to the installation manual. Part numbers for related manuals are listed in the next section. This manual has the following chapters: • Introduction contains a brief description of the system and of the FleetBroadband Voice Distress (Non-SOLAS) service. • Getting started explains how to insert SIM card and start up the unit. It also contains a short guide to making the first call. • Using the system explains how to use the system. • Troubleshooting contains a short troubleshooting guide and explains how to update software. Typography In this manual, typography is used as indicated below: Bold is used for the following purposes: • To emphasize words. Example: “Do not touch the antenna”. • To indicate what the user should select in the user interface. Example: “Select SETTINGS > LAN”. v Italic is used to emphasize the paragraph title in cross-references. Example: “For further information, see Connecting Cables on page...”. Related documents The below list shows the documents related to this manual and to the Voice Distress (Non-SOLAS) system. Title and description vi Document number SAILOR 3771 Alarm Panel FleetBroadband, Installation manual 98-133688 Voice Distress/ Urgency call FleetBroadband, Quick Guide 98-133143 Thrane IP Handset, User manual 98-126059 Thrane IP Handset, Wired, Quick Guide 98-127468 Thrane IP Handset, Wireless, Quick Guide 98-127528 SAILOR 500/250 FleetBroadband Including 19” Rack Version, User manual 98-125645 SAILOR 500/250 FleetBroadband Including 19” Rack Version, Installation manual 98-125646 SAILOR 150 FleetBroadband, User manual 98-129217 SAILOR 150 FleetBroadband, Installation manual 98-129218 Table of contents Chapter 1 Introduction The Voice Distress (Non-SOLAS) system .............................2 The Voice Distress (Non-SOLAS) service .............................6 Chapter 2 Getting started Service activation ...............................................................7 Checking the system ...........................................................7 Chapter 3 Using the system Making a Distress call ...................................................... 10 Making an Urgency call ..................................................... 11 Receiving Distress calls .....................................................12 Displaying faults ...............................................................13 General functions in the Alarm Panel ................................14 Configuring the system for Voice Distress ..........................17 Testing the Voice Distress (Non-SOLAS) system .................19 Chapter 4 Troubleshooting Status signalling .............................................................. 22 Event messages ................................................................25 Troubleshooting guide .....................................................28 Service and repair .............................................................31 Glossary ......................................................................................... 33 Index .........................................................................................35 vii Table of contents viii 1111 Chapter 1 Introduction This chapter introduces the Voice Distress (Non-SOLAS) and gives an overview of the system and services. It has the following sections: • The Voice Distress (Non-SOLAS) system • The Voice Distress (Non-SOLAS) service 1 Introduction 1 Chapter 1: Introduction The Voice Distress (Non-SOLAS) system The Voice Distress (Non-SOLAS) system is primarily used for Distress and Urgency calls using the FleetBroadband service. The SAILOR 3771 Alarm Panel is used together with a SAILOR 150, 250 or 500 FleetBroadband system and an IP handset designated for Distress use. SAILOR 150/250/500 System S150 / S250 / S500 Terminal Optional External Ringer Antenna Distress IP Handset SAILOR 3771 Alarm Panel Optional Non-Distress Handset (s) System components The system includes the following system components: SAILOR 3771 Alarm Panel (TT-3771A) Thrane IP Handset (TT-3670A or TT-3670B) FleetBroadband Terminal (TT-3739A or TT-3738A) FleetBroadband Antenna (TT-3050C, TT-3050A or TT-3052A/B/C) The system components are briefly described in the following sections. Apart from the above equipment your system may include additional handsets, routers etc. Instructions on how to assemble the system are found in the Installation manual, together with specifications and information on wiring. 2 The Voice Distress (Non-SOLAS) system 1111 Chapter 1: Introduction Introduction Thrane IP Handset The Thrane IP Handset is used in the Voice Distress system to make Distress calls initiated by the Alarm Panel. When the Thrane IP Handset is designated for Voice Distress by the FleetBroadband terminal, the top of the display shows . When the FB Distress button on the Alarm Panel is pressed, the Distress IP Handset rings and when you answer it you are automatically put through to the nearest Maritime Rescue Co-ordination Centre (MRCC). Additional IP Handsets may be used for normal voice communication (non-Distress). FleetBroadband system (terminal and antenna) The FleetBroadband system is a maritime broadband system, providing simultaneous high-speed data and voice communication via satellite. SAILOR 500/250 In the Voice Distress (Non-SOLAS) system, you can enable the use of priority calling for emergency use in the FleetBroadband terminal. This is done using the built-in web interface, where you also designate a specific IP Handset for Distress. To use the Voice Distress (Non-SOLAS) system you must connect a Thrane IP Handset to the LAN interface and designate it for Distress. You must also connect a SAILOR 3771 Alarm Panel to activate Distress calls. SAILOR 150 The Voice Distress (Non-SOLAS) system 3 Chapter 1: Introduction SAILOR 3771 Alarm Panel The SAILOR 3771 Alarm Panel is used for initiating Distress calls with the associated Distress IP Handset and for indicating incoming Distress or Urgency calls. The Alarm Panel must be placed close to the Distress Handset. The buttons and display text in the Alarm Panel are described below. a b c d 1 2 3 4 5 Buttons: 1. Test. Used for testing the Alarm Panel (buttons, light and sound). 2. Mute. Mutes the sound from the buzzer in the Alarm Panel until a new event activates the buzzer again. 3. Dim . Increases the light in the display. 4. Dim . Dims the light in the display. 4 The Voice Distress (Non-SOLAS) system 1111 Chapter 1: Introduction Introduction 5. FB Distress. Initiates a Distress call to the nearest Maritime Rescue Coordination Centre (MRCC). For a more detailed description of the function of the buttons, see General functions in the Alarm Panel on page 14. Display: a. FB . Shows that the Alarm Panel is connected and associated with the FleetBroadband system. b. Distress. Shows that there is a Distress call - either incoming or outgoing. c. Fault. Shows that there is a fault in the system. This can be a network problem, a fault in the equipment or wrong configuration. d. Test. Shows that there is a Distress test in progress (Distress test is activated from the IP Handset). Buzzer: The Alarm Panel also has a buzzer, which sounds when there is a Distress call or a fault. For the behaviour of the buzzer, see Buzzer on page 14. The Voice Distress (Non-SOLAS) system 5 Chapter 1: Introduction The Voice Distress (Non-SOLAS) service The Inmarsat Voice Distress (Non-SOLAS) service uses FleetBroadband to provide priority call access - interrupting all non-distress calls as soon as the red distress button is pushed. When the red distress button on the Alarm Panel is pushed during an emergency, the service will interrupt any ongoing non-distress calls - ship to shore or shore to ship. The emergency caller is then connected to an operator at one of three Maritime Rescue Co-ordination Centres (MRCCs) strategically located around the globe. For further details on the Inmarsat services, see inmarsat.com. 6 The Voice Distress (Non-SOLAS) service 2 This chapter describes how to make sure the system is ready for making a call. For information on how to install the system, insert SIM card and connect cables, refer to the installation manuals for the SAILOR 3771 Alarm Panel and for the FleetBroadband system. This chapter has the following sections: • Service activation • Checking the system Service activation Before you can use your Voice Distress (Non-SOLAS) system, you must make an airtime subscription with your airtime provider and acquire a SIM card for your FleetBroadband terminal. The airtime subscription must include the supplementary services Voice Distress (eMLPP) and Call Waiting. The terminal can only access the satellite network and use the Voice Distress service when the right type of SIM card is installed. For information on how to insert the SIM card, refer to the installation manual for the FleetBroadband system. Checking the system Note Before you can use the Voice Distress functions, the system must be configured for Voice Distress. For details, see Configuring the system for Voice Distress on page 17. When the system is powered, you can check that it is ready by looking at the display of the IP Handset and the Alarm Panel. 7 Getting started Getting started 2222 Chapter 2 Chapter 2: Getting started In IP Handset Note The software version of the Distress IP Handset must be at least version 1.12, in order to support the Voice Distress function. Check that the top of the IP Handset display shows . This symbol indicates that the IP Handset is designated for Distress by the connected FleetBroadband terminal. When the display shows , the system is ready to make a call. In Alarm Panel Check that the display of the SAILOR 3771 shows FB (the dot after FB is flashing during startup until the system is ready for use). This indicates that the Alarm Panel is connected and associated with a FleetBroadband terminal. Check that the display does not show Fault. 8 Checking the system Chapter 3 3333 Using the system 3 Note This manual only describes functions related to Voice Distress. For information on other functions of the IP Handset and/or the FleetBroadband system see the user manuals for these products. The manuals are listed in Related documents on page vi. This chapter has the following sections: • Making a Distress call • Making an Urgency call • Receiving Distress calls • Displaying faults • General functions in the Alarm Panel • Configuring the system for Voice Distress • Testing the Voice Distress (Non-SOLAS) system 9 Using the system This chapter describes how to make Distress and Urgency calls and explains the functions of the Alarm Panel. It also describes how to configure the system (FleetBroadband terminal and IP Handset) for Voice Distress and how to test the system. Chapter 3: Using the system Making a Distress call Before you can make a Distress call, the system must be configured for Voice Distress and ready for use. For configuration, see Configuring the system for Voice Distress on page 17. The system is ready for use when: • the IP Handset display shows (ready for making calls), and (designated for Distress) and • the Alarm panel shows FB (connected to FleetBroadband terminal). To make a Distress call, do as follows: 1. On the SAILOR 3771 Alarm Panel, lift the cover for the red FB Distress button. 2. Push and hold the red FB Distress button for 5 seconds, until the buzzer changes to a longer tone. Then release the button. 3. When the Distress IP Handset rings, pick up the handset and accept the call. You are now put through to the nearest MRCC. Follow the procedure for Voice Distress calls, see Voice Distress calls on page iv. Any ongoing calls with lower priority are automatically disconnected. During the Distress call the display in the Distress IP Handset and in the Alarm Panel shows Distress. 10 Making a Distress call Note You can only make Urgency priority calls from the Distress IP Handset, not from any other connected Handsets. The following short codes are available for Urgency calls: • 32: Urgency Medical Advice • 38: Urgency Medical Assistance • 39: Urgency Maritime Assistance Using the system Making an Urgency call 3333 Chapter 3: Using the system To make an Urgency call from your Voice Distress system, do as follows: 1. On the Distress IP Handset, dial the short code for the assistance needed and press the off-hook key . The handset display shows which type of assistance you have called for, e.g. “Medical Advice”. Any ongoing calls with lower priority are automatically disconnected. 2. When your call is answered, proceed with the normal procedure for Urgency calls and provide the information needed to assist you. Making an Urgency call 11 Chapter 3: Using the system Receiving Distress calls Incoming calls with Distress priority will cause the Distress IP Handset to ring, if it is not engaged in a call. The display in the IP Handset shows Distress. Pick up the handset and accept the call. If you are already engaged in a Distress call when receiving an incoming Distress call, you will hear a Call Waiting tone and you can accept or ignore the second call. If there was an ongoing lower-priority call, you will hear a tone before the first call is terminated and the Distress call is put through. When an incoming call with Distress priority is ringing, the Distress indicator in the Alarm Panel flashes. When the call is established, the indicator lights constantly until the call is terminated. 12 Receiving Distress calls 3333 Chapter 3: Using the system Displaying faults If there is a fault in the connected equipment or network, the buzzer in the Alarm Panel sounds and the display of the Alarm Panel shows Fault. Note The Fault indicator is also lit if Voice Distress is disabled in the connected FleetBroadband terminal. Using the system If the Alarm Panel loses connection to the FleetBroadband terminal, the dot after FB disappears and FB and Fault are flashing. If the Fault indicator is shown, and the fault is not in the IP Handset, you can check the list of active alarms in the IP Handset as follows: 1. From the IP Handset, select Menu > BGAN. If there are any active faults, the BGAN menu has a menu item called Active alarms. 2. Select Active alarms. If there are more than one active alarm, the display shows a list. Select an alarm in the list to see details. You can also see a list of active events and an event log in the built-in web interface of the FleetBroadband terminal. For details, see the user manual for your FleetBroadband system. Displaying faults 13 Chapter 3: Using the system General functions in the Alarm Panel Buzzer The Alarm Panel has a buzzer, which has the following behaviour: Event Behaviour FB Distress button is pressed. Buzzer sounds intermittently until the Distress function is activated, then with a longer tone (1 second) followed by silence. Incoming Distress call ringing. Buzzer sounds intermittently until the call answered. A fault has occurred. Buzzer sounds with three beeps pause - three beeps - pause etc. until the problem has been solved or the Mute button is pressed. Distress call has been established. Distress call is cleared. Buzzer is silent until a new event causes it to sound. Mute button is pressed. Buttons Apart from the FB Distress button, the front panel has four other buttons: Test, Mute, Dim and Dim . The functions of all the buttons are described in the following sections. 14 General functions in the Alarm Panel 3333 Chapter 3: Using the system FB Distress button Event Behaviour FB Distress button is pressed. Button light flashes. Distress call is being established (dialling). Button lights constantly. Distress call has been established. Button lights, but is briefly off every 20 seconds. Distress call is cleared. Button light is off. Using the system For how to make a Distress call, see Making a Distress call on page 10. The behaviour of the button (for Distress as well as Distress test) is as follows: Testing the SAILOR 3771 Alarm Panel Note This test only verifies the function of the Alarm Panel itself, not of any connected equipment or the total system. For information on how to test the system, see Testing the Voice Distress (Non-SOLAS) system on page 19. To test the light and sound indicators in the Voice Distress (Non-SOLAS), do as follows: 1. Push and hold the Test button. Verify that the FB Distress button and all light indicators are flashing. 2. While holding the Test button, push and hold any other button, including the Distress button. The buzzer starts to sound intermittently with increasing strength to indicate that the pushed button and the buzzer is working. General functions in the Alarm Panel 15 Chapter 3: Using the system Muting the alarm sound To mute the alarm sound while it is on, press the Mute button. Note Alarm sound is muted until it is activated by a new event. Adjusting the light To increase the light intensity, press and hold the button. To decrease the light intensity, press and hold the button. To go directly to full light intensity, press both Dim buttons at the same time. Note The light always goes to full intensity if there is an event such as a Distress message, a fault or the Test button is pressed. You can always use the Dim buttons to dim the light again if you want to. 16 General functions in the Alarm Panel Configuring the system for Voice Distress To configure the system for Voice Distress, do as follows: 1. Connect the FleetBroadband system. See the installation manual for your system. 3333 Chapter 3: Using the system 3. Connect a computer to another LAN connector on the FleetBroadband terminal. Note You may use a switch if you do not have enough LAN ports on the FleetBroadband terminal, but be aware that the IP Handset and the Alarm Panel are normally powered through their Ethernet interface using PoE. 4. On the computer, start an Internet browser. 5. Enter http://ut.bgan or the IP address of the FleetBroadband terminal in the address bar. If your computer is set up to obtain a DNS server address automatically, the name http://ut.bgan is automatically translated into the IP address of the terminal. The default IP address of the terminal is http://192.168.0.1. Configuring the system for Voice Distress 17 Using the system 2. Connect the SAILOR 3771 Alarm Panel and the Thrane IP Handset to the LAN connectors on the FleetBroadband terminal. Chapter 3: Using the system 6. The built-in web interface opens on the Dashboard page. 7. From the left navigation pane, select ADMINISTRATION > Voice Distress settings. 8. Select Enable to enable the use of Voice Distress. 9. Select the local number of the IP handset you want to use for Distress. 10. Click Apply. Note You must reset the terminal for the new configuration to take effect. To check that the system is configured correctly, look at the Distress IP Handset and the Alarm Panel. 18 • the Distress IP Handset display should show and (designated for Distress), • the Alarm panel should show FB (connected to FleetBroadband terminal). Configuring the system for Voice Distress Testing the Voice Distress (Non-SOLAS) system 3333 Chapter 3: Using the system To test the Distress function, do as follows: 1. In the Distress IP Handset, select Menu > BGAN. 2. Select Voice Distress test. 3. Select Edit to select Distress test on. 4. Verify that the Alarm Panel shows Test. Important Only test the Distress function when the Alarm Panel shows Test. Otherwise you may accidently start a real Distress call! The FleetBroadband terminal automatically exits the Distress test mode after 120 seconds or, if no call has been made, 30 seconds. it also exits test mode when the call is ended or has failed. 5. When the Alarm Panel shows Test, push and hold the red FB Distress button for 5 seconds, until the buzzer changes to a longer tone. Then release the button. 6. When the Distress IP Handset rings, pick it up. You should now hear a pre-recorded Distress test message. The Handset display shows Distress test. Note In case of heavy network traffic you may not be able to establish a test call, because it has low priority in the BGAN network. If that is the case, try again later. Testing the Voice Distress (Non-SOLAS) system 19 Using the system Apart from checking the displays of the Alarm Panel and the IP Handset as described in the previous section and testing the Alarm Panel itself as described in Testing the SAILOR 3771 Alarm Panel on page 15, you can test the Distress function for the total system. Chapter 3: Using the system 20 Testing the Voice Distress (Non-SOLAS) system Chapter 4 4444 Troubleshooting 4 • Status signalling • Event messages • Troubleshooting guide • Service and repair Troubleshooting This chapter gives guidelines for troubleshooting and provides an overview of the different means of status signalling. It has the following sections: 21 Chapter 4: Troubleshooting Status signalling Both the Alarm Panel, the IP Handset and the FleetBroadband terminal have means of signalling the status of the system. Alarm Panel The Alarm Panel display can show: 22 Event/Status Display Connected to FleetBroadband terminal FB Fault in connection to FleetBroadband terminal FB (flashing) without Fault in connected equipment, network or configuration Fault Distress communication ongoing (incoming or outgoing) Distress System is in Distress test mode Test Status signalling Chapter 4: Troubleshooting The Distress IP Handset can show warnings and display a list of active events in the total FleetBroadband system. To see the list of events, select Menu > BGAN > Active alarms. For a list of the event messages related to Voice Distress, see the next section, Event messages. For further information on the IP Handset, see the user manual for your IP Handset. Related manuals are listed in Related documents on page vi. FleetBroadband terminal Light indicators The FleetBroadband terminal has a number of light indicators (LEDs) that signal the status of different parts of the system. For details, refer to the user manual for your FleetBroadband system. Status signalling 23 Troubleshooting 4444 Distress IP Handset Chapter 4: Troubleshooting Built-in web interface The FleetBroadband terminal also has a built-in web interface that is accessed using a computer with an Internet browser. In the web interface you can see a list of active events (if any) as well as an event log. For a list of the event messages related to Voice Distress, see the next section, Event messages. For further information on the FleetBroadband terminal, see the user manual for your FleetBroadband system. Related manuals are listed in Related documents on page vi. 24 Status signalling Chapter 4: Troubleshooting 4444 Event messages In the IP Handset and in the web interface of the FleetBroadband terminal you can see events/alarms that are currently active. . Displayed event text Explanation Remedy Device is in Voice Distress mode This device is in Voice Distress mode. None - information only. No Network service (ThraneLink SNMP or SLP missing) The FleetBroadband terminal has lost contact with the satellite. See the manual for the FleetBroadband system for information on how to troubleshoot errors. Connection to Voice Distress IP Handset is failing The handset is not connected or has an old SW installed. Check the connection and the software version of the handset (must be minimum 1.12). Connection to Voice Distress Alarm Panel is failing No connection to Voice Distress Alarm Panel. Check the connection to the Alarm Panel. Voice Distress eMLPP registration to Core Network is failing Voice Distress registration fails. The service has not been enabled on your SIM card. Contact your service provider and request that Voice Distress is enabled in your SIM card. Event messages 25 Troubleshooting The list below shows the events messages that may appear in connection with the Voice Distress function Chapter 4: Troubleshooting 26 Displayed event text Explanation Remedy Voice Distress SS Call Waiting is not active The FleetBroadband terminal is not able to activate the Call Waiting service in the network. Check with your service provider that the Call Waiting service is commissioned. Voice Distress call initiated Voice Distress call has been initiated. None - information only. Voice Distress call established Voice Distress call has been established. None - information only. Voice Distress call failed Voice Distress call has failed. See call log for further details. Voice Distress test call initiated Voice Distress test call has been initiated. None - information only. Voice Distress test call established Voice Distress test call has been established. None - information only. Voice Distress test call failed Voice Distress test call has failed. See call log for further details. Voice Distress call received Voice Distress has been received from shore. None - information only. Voice Distress is disabled Voice Distress has been disabled - the Voice Distress service will not work. The service can be reenabled in the web interface of the FleetBroadband terminal. Event messages Chapter 4: Troubleshooting Remedy Voice Distress urgency call initiated Urgency call has been initiated. None - information only. Voice Distress urgency call established Urgency call has been established. None - information only. Voice Distress urgency call failed Urgency call has failed. See call log for further details. Troubleshooting Explanation 4444 Displayed event text Event messages 27 Chapter 4: Troubleshooting Troubleshooting guide The below table provides information on some of the problems that might occur, including possible causes and remedies to solve the problems. Problem The Voice Distress function does not work 28 Possible Cause Remedy 1) The IP Handset is not recognized by the FleetBroadband terminal. 1) Connect a computer to the FleetBroadband terminal, access the web interface and check under SETTINGS > IP Handsets that the IP Handset is connected. 2) The IP Handset has not been designated for Distress by the FleetBroadband terminal. 2) Connect a computer to the FleetBroadband terminal, access the web interface and check under ADMINISTRATION > Voice Distress that the IP Handset is selected. See also 3) below. 3) The Voice Distress function does not change when enabled/disabled in the web interface of the FleetBroadband terminal. 3) Restart the terminal after enabling or disabling Voice Distress. If you do not restart, the change does not take effect. 4) The software version of the IP Handset is too old to support Voice Distress. 4) Check that the software version of your Distress IP Handset is minimum version 1.12. 5) The SIM card for your FleetBroadband terminal is not commissioned for Voice Distress (eMLPP) 5) Check your airtime subscription and contact your provider to be commissioned for Voice Distress. Troubleshooting guide Chapter 4: Troubleshooting The Alarm Panel does not show that it is connected to a FleetBroadband terminal Remedy 1) The PIN code has not been entered in the FleetBroadband terminal. 1) Enter the menu system of the IP Handset and select BGAN > Enter PIN code. Then enter the PIN code. 2) There is an error in the terminal or the BGAN network. 2) See the manual for the FleetBroadband system for information on how to troubleshoot errors. 1) The cable is damaged or not connected properly. 1) Check the cable connection between the Alarm Panel and the terminal. 2) There is an error in the terminal. 2) See the manual for the FleetBroadband system for information on how to troubleshoot errors. Troubleshooting guide Troubleshooting No connection to the BGAN network. Possible Cause 4444 Problem 29 Chapter 4: Troubleshooting Problem The Alarm Panel shows Fault The Distress IP Handset does not work 30 Possible Cause Remedy 1) There is a fault in the FleetBroadband terminal or in the connection to the terminal. 1) Check that all cables are connected correctly. Check the event list in the IP Handset or in the web interface of the FleetBroadband terminal. 2) There is a fault in the IP Handset or in the connection to the handset. 2) Check the connection to the handset. If possible, select BGAN > Active alarms in the IP Handset to see the error. If not possible, connect a computer to your FleetBroadband terminal and use the built in web interface to see the list of events. 3) There is an error in the BGAN network. 3) If the error persists, contact your airtime provider. 4) The FleetBroadband terminal is not configured for Voice Distress. 4) Connect a computer to the FleetBroadband terminal, access the web interface and select ADMINISTRATION > Voice Distress. Select Enable and select your Distress IP Handset. Then restart the terminal. The Distress IP Handset may have been configured with the same local number as another connected IP Handset. Check that all connected IP Handsets have different local numbers. You can find the local number (which is also the user name) in the SIP settings menu of the handset. For further details see the IP Handset User manual. Troubleshooting guide Chapter 4: Troubleshooting Your dealer, installer or Thrane & Thrane partner will assist you whether the need is user training, technical support, arranging on-site repair or sending the product for repair. Your dealer, installer or Thrane & Thrane partner will also take care of any warranty issue. Repacking for shipment Should you need to send the product for repair, please read the below information before packing the product. The shipping carton has been carefully designed to protect the Voice Distress (Non-SOLAS) and its accessories during shipment. This carton and its associated packing material should be used when repacking for shipment. Attach a tag indicating the type of service required, return address, part number and full serial number. Mark the carton FRAGILE to ensure careful handling. Note Correct shipment is the customer’s own responsibility. If the original shipping carton is not available, the following general instructions should be used for repacking with commercially available material. 1. Wrap the defective unit in heavy paper or plastic. Attach a tag indicating the type of service required, return address, part number and full serial number. 2. Use a strong shipping container, e.g. a double walled carton. Service and repair 31 Troubleshooting Should your Thrane & Thrane product fail, please contact your dealer or installer, or the nearest Thrane & Thrane partner. You will find the partner details on thrane.com where you also find the Thrane & Thrane Self Service Center web-portal, which may help you solving the problem. 4444 Service and repair Chapter 4: Troubleshooting 3. Protect the front- and rear panel with cardboard and insert a layer of shock-absorbing material between all surfaces of the equipment and the sides of the container. 4. Seal the shipping container securely. 5. Mark the shipping container FRAGILE to ensure careful handling. Failure to do so may invalidate the warranty. 32 Service and repair AAAA Glossary Glossary D DNS Domain Name System. A system translating server names (URLs) to server addresses. E eMLPP Enhanced Multi-Level Precedence and Preemption. A supplementary service used to deliver Maritime Safety Priority Voice Calls as defined by Inmarsat. I IMSO International Maritime Satellite Organisation. An intergovernmental body established to ensure that Inmarsat continues to meet its public service obligations. IP Internet Protocol. The method or protocol by which data is sent from one computer to another on the Internet. L LAN Local Area Network. A computer network covering a small physical area, like a home, office, school or airport. The defining characteristics of LANs, in contrast to wide-area networks (WANs), include their usually higher data-transfer rates, smaller geographic area, and lack of a need for leased telecommunication lines. LED Light Emitting Diode M MMSI Maritime Mobile Service Identity. A series of nine digits which are sent in digital form over a radio frequency channel in order to uniquely identify ship stations, ship earth stations, coast stations, 33 Glossary A Glossary coast earth stations, and group calls. These identities are formed in such a way that the identity or part thereof can be used by telephone and telex subscribers connected to the general telecommunications network to call ships automatically. MRCC Maritime Rescue Coordination Centre N Non-SOLAS Not covered by the SOLAS convention S SIM Subscriber Identity Module. The SIM provides secure storing of the key identifying a mobile phone service subscriber but also subscription information, preferences and storage of text messages. SOLAS (International Convention for the) Safety Of Life At Sea. Generally regarded as the most important of all international treaties concerning the safety of merchant ships. 34 Index Alarm Panel buttons, 4 buzzer, 5 description, 4 display and controls, 4 functions, 14 alarm sound mute, 16 alarms list of, 25 B buttons Alarm Panel, 4 Dim, 16 FB Distress, 15 Mute, 16 Test, 15 buzzer Alarm Panel, 5 function, 5 C call Distress, 10 receiving Distress, 12 Urgency, 11 components of the system, 2 configuration, 17 B display Alarm Panel, 4, 5 Distress button, FB, 15 Distress call making, 10 receiving, 12 Distress function test, 19 document number this manual, i Index A BBBB Index E error displaying in Alarm Panel, 13 events list of, 25 see list, 22 F fault displaying in Alarm Panel, 13 FB Distress button, 15 features, 2 FleetBroadband system configuring, 17 description, 3 functions in Alarm Panel, 14 G getting started, 7 D Dim buttons, 16 35 Index I IP Handset description, 3 L LEDs in FleetBroadband terminal, 22 light adjusting, 16 M manual document number, i mute alarm sound, 16 system components, 2 system test, 19 T test Voice Distress (Non-SOLAS) system, 19 Test button, 15 test of Alarm Panel, 15 troubleshooting, 28 typography used in this manual, vi U Urgency call making, 11 R V receiving Distress call, 12 repacking for shipment, 31 repair, 31 returning units, 31 Voice Distress (Non-SOLAS) configuring, 17 service, 6 service activation, 7 system components, 2 system overview, 2 S safety summary, iii SAILOR 3771 buttons and display, 4 buzzer, 5 description, 4 service activation, 7 service and repair, 31 service description Voice Distress (Non-SOLAS), 6 status signalling, 22 support, 31 36 W warranty, 31 98-133687-A [email protected] • thrane.com