1
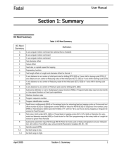
24817G-GB (rev.1)
Installation, Operation & Maintenance Manual
Stabilizing Hydraulic Winch
HSN 02
For Spider Slope Mowers IDL01 & IDL02
WARNING: If incorrectly used this machine can cause severe
injury. Those who use and maintain this machine should be
trained in its proper use, warned of its dangers and should
read the entire manual before attempting to set up, operate,
adjust or service the machine.
RJ 100 / 03 2007
YEARS OF MOWING
EXCELLENCE
INSTALLATION, OPERATION & MAINTENANCE MANUAL HSN02
CONTENTS
CONTENTS ............................................................................................................................... 2
INTRODUCTION...................................................................................................................... 3
CONFORMITY CERTIFICATE ............................................................................................... 4
1. PRODUCT DESCRIPTION .................................................................................................. 5
1.1 GENERAL DESCRIPTION ............................................................................................ 5
1.2 PROHIBITED USE.......................................................................................................... 5
2. PRODUCT IDENTIFICATION ............................................................................................ 6
3. SAFETY INSTRUCTIONS ................................................................................................... 6
3. SAFETY INSTRUCTIONS ................................................................................................... 7
3.1 GENERAL SAFETY INSTRUCTIONS ......................................................................... 7
3.1 SAFETY DECALS .......................................................................................................... 8
3.2 WINCH DELIVERY ....................................................................................................... 9
3.3 PROTECTIVE AND SAFETY ELEMENTS OF THE WINCH .................................... 9
4. WINCH ASSEMBLY .......................................................................................................... 11
4.1 CONTROLLERS .......................................................................................................... 12
4.1.1 Controllers on the mower ........................................................................................ 12
5. WORKING WITH THE WINCH........................................................................................ 13
5.1 ANCHORING ................................................................................................................ 13
5.1.1 Anchoring procedure............................................................................................... 13
5.2 CUTTING ...................................................................................................................... 14
5.2.1. Emergency situations during winch operation ....................................................... 16
6. TECHNICAL SPECIFICATION:........................................................................................ 18
6.1 BASIC TECHNICAL SPECIFICATION ...................................................................... 18
7. WINCH MAINTENANCE .................................................................................................. 18
7.1 MAINTENANCE CHART ............................................................................................ 18
7.2 MAINTENANCE OF THE HYDRAULIC CIRCUIT .................................................. 19
7.2.1. Checking and refilling oil........................................................................................... 19
7.3 ROLLER CHAIN MAINTENANCE ............................................................................ 20
7.3.1 Drum drive chain..................................................................................................... 20
7.4 ROPE AND SNAP HOOK MAINTENANCE.............................................................. 20
7.4.1 Inspection ................................................................................................................ 20
7.4.2 Linking the snap hook ............................................................................................. 20
7.4.3 Mounting the rope on the winch drum .................................................................... 21
7.5 WINCH CLEANING..................................................................................................... 21
7.6 TORQUE........................................................................................................................ 21
8. TROUBLESHOOTING ....................................................................................................... 22
9. AFTER SEASON MAINTENANCE .................................................................................. 23
10. DISASSEMBLY AND LIQUIDATION ........................................................................... 24
11. WARRANTY CONDITIONS ........................................................................................... 25
12. DIAGRAM OF HYDRAULIC CIRCUIT ......................................................................... 27
13. WIRING DIAGRAM ......................................................................................................... 27
13. WIRING DIAGRAM ......................................................................................................... 28
EN - 2
INSTALLATION, OPERATION & MAINTENANCE MANUAL HSN02
INTRODUCTION
Thank you for purchasing the stabilizing hydraulic winch HSN 02 (further referred to
as “winch”).
The winch was designed as an accessory to slope mowers Spider (further referred to
as “mower”) and increases the possibilities of their application. Our company devoted
great efforts to the development of this device.
This INSTALLATION, OPERATION & MAINTENANCE MANUAL describes proper
winch operation and installation on the mower
Your dealer provides you with this Operation and Maintenance Manual, which is an
inseparable part of the machine. Get acquainted with this Manual while taking over
the delivery of your new machine and make sure you fully understand everything you
need to know. Should you have any difficulties understanding any part of this
Manual, don’t hesitate and contact your local dealer in order to find an explanation.
Full understanding of and complying with all instructions in this Manual are the basic
preconditions for your safe work with this machine.
The manufacturer reserves the right to make modifications to the product and the
accompanying documentation without a prior notice of such a change and without
undertaking any obligation or liability.
The manufacturer – company Dvorak – svahove sekacky s.r.o. - does not
recognize or bear responsibility for any damage caused by the neglect of this
Manual.
In several places the Operation Manual contains instructions for safe work. These
instructions are marked in text by the following symbol:
WARNING:
We warn you against danger of severe injury or life threat
if appropriate instructions are not followed.
other symbols:
NOTICE:
Provides useful information
No part of this document may be further reproduced without a prior written consent.
EN - 3
INSTALLATION, OPERATION & MAINTENANCE MANUAL HSN02
CONFORMITY CERTIFICATE
EN - 4
INSTALLATION, OPERATION & MAINTENANCE MANUAL HSN02
1. PRODUCT DESCRIPTION
1.1 GENERAL DESCRIPTION
The winch was designed as an accessory to slope mowers Spider. The winch is a
stabilizing device, which improves the mower stability on slopes, prevents the mower
from sliding down and reduces lawn erosion.
1.2 PROHIBITED USE
The winch must not:
- be used with a damaged rope
- be used with a damaged snap hook
- be mounted on other types of mowers of for other purposes that the
stabilization of Spider mowers
- be used for pulling objects, securing persons or other objects on slopes.
- be used on slopes with terrain obstacles, which could catch or damage the
rope
EN - 5
INSTALLATION, OPERATION & MAINTENANCE MANUAL HSN02
2. PRODUCT IDENTIFICATION
The winch can be identified by the serial number, which can be found on the factory
label. The serial number and the year of manufacturing must be provided during
every request for servicing and with every order of spare parts.
EN - 6
INSTALLATION, OPERATION & MAINTENANCE MANUAL HSN02
3. SAFETY INSTRUCTIONS
3.1 GENERAL SAFETY INSTRUCTIONS
-
-
-
-
-
The mower may only be used and operated with Spider slope mowers.
When operating the winch the operator must respect and follow the Operation
Manual of the Spider mower.
The operator must be acquainted with both the winch and mower operation
and their Operation Manuals. The operator must receive a practical training in
the winch operation.
The user’s manual must be stored at a place permanently accessible to the
operator and must be available to him at any time.
Do not ever allow children or unauthorised persons use the product.
The winch may only be used on areas without obstacles, bushes, trees, sharp
rocks and other objects and obstacles, which could damage the rope.
The operator of the machine is responsible for any damage caused to third
parties by operating the machine.
Do not remove or damage any of the safety labels.
Do not remove any covers or safety elements. They are here for your
protection.
Do not use the machine if any of the protecting devices or covers are
damaged or missing.
Keep the machine and its accessories clean and in a good technical condition
at all times.
It is strictly prohibited to make any changes or modifications to the machine
that were not previously approved by the manufacturer. Any modification to
the machine may lead to a hazardous situation or injury. If these instructions
are not followed, the manufacturer does not bear any liability for the machine.
Do not lead or anchor the rope across roads, pavements and other areas
where other people may be present.
The operator/user is responsible for the safety of persons that enter the
working area of the machine. Immediately interrupt your work and stop the
machine if third persons enter the working area or approach the mower.
Every time you stop the mower on a slope, turn its wheels across the slope in
order to prevent the mower from moving down the slope.
Do not use the machine when other persons, children or animals are nearby.
Do not place any objects or tools on the product.
Check the tightness of bolted connections at regular intervals. The first check
should be done after 5 operating hours. For their tightening use a torque
wrench and a specified torque.
Winch servicing and maintenance may only be performed when the machine
is turned off.
Keep the product clean by brushing and wiping it after use. Do not use
gasoline or similar oil products while cleaning.
Do not touch the surface of the hydraulic motor and the hydraulic coupling,
danger of getting burned.
Before operating test the function of safety devices (EMERGENCY STOP…)
on the mower and the radio remote controller, which cut off the hydraulic oil
supply to the hydraulic motor of the winch.
EN - 7
INSTALLATION, OPERATION & MAINTENANCE MANUAL HSN02
-
-
-
-
Do not operate the machine after drinking alcohol or using drugs or
medicaments influencing perception.
Before storing the machine in a closed room, let the engine and the hydraulic
drive of the mower cool properly.
The operator’s position while using the winch should always be above the
mower and above the point where the mower is anchored so as to avoid cross
the path of the rope.
Do not step over the tightened rope
Do not operate the mower with the winch if you cannot see it
While operating the mower, make sure the mower is clearly visible at all times
and within the range of the remote control unit and that you can clearly
recognize dangerous situations and react to them properly. Do not abuse the
maximum reach of the remote control or the maximum length of the rope
When using the mower, follow all general work safety regulations.
Work with the mower may only be started if the mower and the winch
(including the rope) are not damaged by previous operation.
The winch may only be used with maximum engine speed.
Do not reach with your hand into the coiling drum and do not try to align or
adjust the rope. The rope will align onto coiling drum according to the
momentary situation.
The snap hook must not be exposed to other outer forces than the pulling
force.
The snap hook must always be properly closed and secured by the lock – the
snap hook will work safely only when it is closed and locked.
3.1 SAFETY DECALS
This chapter is devoted to the safety label symbols (pictograms) used on the product
and their meaning. Under each symbol you will find a number of the position of the
label on the machine. Safety labels inform the operator about risks while using the
product. Understanding their meaning will make the use of this product safe.
1
Před použitím
prostuduj
návod k
používání
2
Nebezpečí
vtažení
končetin mezi
vodící válce
3
Nezasahuj do
rotujícího
navijáku,
bubnu
4
Nebezpečí
popálení, horké
části
EN - 8
INSTALLATION, OPERATION & MAINTENANCE MANUAL HSN02
3.2 WINCH DELIVERY
The winch is supplied by the manufacturer as part of the machine and will be
installed on the mower if ordered together with a new machine.
If the winch is ordered separately, it will be installed on the mower by
the manufacturer.
3.3 PROTECTIVE AND SAFETY ELEMENTS OF THE WINCH
The winch is supplied in such a condition, which eliminates health and safety risks to
the operator and to third persons as well as the risk of damage to their property. For
this purpose the hydraulic circuit is equipped with an electric valve, which closes the
oil outlet from the winch and blocks its further use in emergency situations.
Proper adjustment of the throttle valve is also important for the proper functioning of
the winch. This valve was pre-set by the manufacturer. Do not change this setup.
The use of the right rope and snap hook are crucial for the reliable
functioning of the winch. The winch is equipped by a safety snap hook and
a rope with guaranteed strengths. These parts must not be replaced by
parts with lower lifting capacity.
EN - 9
INSTALLATION, OPERATION & MAINTENANCE MANUAL HSN02
EN - 10
INSTALLATION, OPERATION & MAINTENANCE MANUAL HSN02
4. WINCH ASSEMBLY
During the assembly it is necessary to make certain modifications to the machine. It
is recommended to have the assembly performed by a manufacturer or an authorized
service / dealer.
The winch is mounted on the upper part of the skeleton, just above the exhaust pipe.
There are no other possibilities to mount winch elsewhere as this might disturb other
mower operating or safety functions.
Mounting items of the winch bracket. The bracket is mounted on the both sides.
During winch assembly you must connect hydraulic lines and all controllers.
EN - 11
INSTALLATION, OPERATION & MAINTENANCE MANUAL HSN02
4.1 CONTROLLERS
4.1.1 Controllers on the mower
The winch on/off switch button is placed on the
controller bracket of the mower. This button activates
electromagnetic valve, which closes the outlet of the
oil from the winch. The winch drum stops rotating after
the winch is switched off.
There is the throttle valve on the
feeding oil line. This valve is preadjusted and secured. This valve
reduces oil flow inside of the
hydraulic motor during its work
and regulates power output of the
winch.
You can adjust the power output
of the winch so that is meets the
performance/tension force
requirement of a particular terrain.
This will prevent the slipping of the
wheels during work on a slope.
Wrong throttle valve adjustment may result
and may lead to damage on the mower or to
operator.
in hazardous situation
severe injuries to the
EN - 12
INSTALLATION, OPERATION & MAINTENANCE MANUAL HSN02
5. WORKING WITH THE WINCH
The winch is a device, which extends and improves the mower application
possibilities, but it doesn’t allow you can use the mower on all kinds of slopes.
The winch has a folding part, which guides the rolling rope on the drum. This part is
in upper position for the transport and it must be folded down before anchoring. The
upper position is secured by a latch. (see the figure)
5.1 ANCHORING
For the best function of the winch and optimum tension force of the rope it is
necessary to choose a fixed point where you can mount the end of the rope with the
snap hook.
Choose a sufficiently firm anchoring point, which to be able to carry the
continuous load caused by mower (max. tension in the center line of the
rope 200 kg) and possible dynamic effects such as a sudden slip or fall of
the mower.
Mount the rope at least 300mm above the ground. Never anchor the rope directly to
the ground!!!
Conditions for anchoring point:
-There must not be any obstacles, which could jam or damage the rope such
as trees, bushes etc. in operating area of the rope and the mower
- The surface of the anchoring point must be smooth without sharp edges so
as to preserve the rope with snap hook in the preset position throughout the
operation of the mower
5.1.1 Anchoring procedure
1. Transport the mower to the area you want to mow and to the suitable
anchoring point.
2. Turn the across the slope.
3. Switch on the electromagnetic valve
EN - 13
INSTALLATION, OPERATION & MAINTENANCE MANUAL HSN02
4. Set and idle engine speed, slightly deflect the joystick in backward direction
and watch the winch drum, which will start rotating in one direction. If the rope
is unwinding, grasp the end of the rope with the snap hook and unwind
necessary length for anchoring.
NOTICE: When the drive joystick is only slightly deflected, the mower is not moving
and only the winch is driven. This allows you to wind or unwind the rope.
Unwinding the rope, procedure according to
points 1. – 4.
Procedure according to the points 5-8
5. Mount the rope around a fixed point, loose the screw lock on the snap hook,
lock it to the rope and finally fasten the screw lock.
6. Deflect the drive joystick in order to wind in the loose rest of the rope. The
rope on the winch drum should be slightly tight.
7. Increase engine speed from idling to the running revolutions
8. Turn the wheels down the slope and by slight deflection find out the direction
of wheels motion and winch un/winding.
If the wheels rotation direction is synchronized with the winch un/winding
direction, drive mower into the bottom starting position for the mowing of the
desired area. If you drive mower down from a slope (forward) and the rope is wind
on the winch you MUST turn the wheels by 180° so that the driving direction is
synchronized with the rotation of the winch.
5.2 CUTTING
When driving on a slope the operator of the machine must carefully watch and
evaluate the movements of the mower and the characteristics of the terrain,
especially momentary adhesion of the wheels to the ground.
Pay attention to climatic conditions. Do not rely on the anchoring the mower on
the rope.
Climbing ability of the mower will rapidly change on dry, wet or moist grass.
It also depends on soil characteristics. Sideslip is much bigger on the newly bulit
slopes then on hard ground. When working on a slope with the winch, mow only
in two directions: vertically or horizontally
EN - 14
INSTALLATION, OPERATION & MAINTENANCE MANUAL HSN02
Horizontal mowing
Vertical mowing
the mower is able to work on slopes listed in the mower operation
manual under dry surface conditions. If the grass is wet or moist, safe
working angle is 26°
check the area and terrain very carefully before starting to cut the
grass.This procedure is very important. Pay attention to stones and uneven
ground. Remove all obstacles if it is possible.
tyre pressure must be 250 kPa (2,5bar)
start cutting the grass at the bottom of the slope and proceed to the top.
Always start on less steeper slopes. You will be able to analyze the actual
climbing ability for further work. Be careful about dynamic effects during
mowing. These can cause extreme tension of the rope.
DO NOT try to stop the mower in case it is slipping or rolling over,
DO NOT approach the mower, especially the area below the mower!!!!!
Always stay above the working mower or aside in its driving line.
Make sure no other persons are present in the working area of the
mower. Always check the area before operating. DO NOT endanger third
persons or their property by the movement of the mower.
Stay in the safe distance from the area to which the mower may fall of
throw grass. The direction of the thrown grass may change according to the
driving direction.
Working on a slope increase demands on the hydraulic circuit,
especially in hot weather. This may cause overheating of the hydraulic oil.
For optimization of the hydraulic oil temperature mow across the slope.
For the proper functioning of the winch drive the mower always in
the forward direction when mowing across the slope. The direction of
winch rotation will change it you drive backwards. The rope will get loose
and may jam in the drum. WINCH WILL STOP PERFORMING THE
STABILIZING FUNCTION
Do not drive the mower into bushes or similar obstacles that you want
to cut (especially when driving down from a slope). These obstacles may
stop the mower, cause the rope to unwind undesirably and consequently
jam. The rope must be always tight.
AVOID:
- Sudden sharp steering or braking
- driving too fast. Use only the Low (turtle) speed range.
- driving on uneven surfaces
EN - 15
INSTALLATION, OPERATION & MAINTENANCE MANUAL HSN02
-
changing wheel adhesion (moving from areas exposed to sun to
shade)
driving on the grass that has been already cut
Prohibited use
-
-
Do not work on a slope with a loose or unwound rope
Do not drive on slopes with idling engine speed
Do not leave the mower on a slope with wheels positioned down the slopes.
Avoid maintenance work on slopes. The mower may uncontrollably drive
down from a slope.
Do not operate in the are bellow the mower
Do not manipulate with the anchoring if the rope is tight or the ground extremely
slippery.
Always leave at least 3 coils of wound rope on the winch drum.
Do not use human power for the stabilization of the mower or for
tensioning/holding the rope
Do not use the High (rabbit) speed range when working or driving on a slope.
5.2.1. Emergency situations during winch operation
Emergency situation
Sudden loosening of the rope or
anchoring point.
Rope fracture /fraying
Snap hoop failure
Speed drop, the mower starts running
uncontrollably
Hydraulic line breakage
Unwinding the whole length of the rope
from the winch drum and winding in the
different direction on the drum.
Failure of the chain drive of the drum
Recommended action
Turn wheels immediately to be positioned
across a slope and stop driving. Find a
new anchoring point.
Turn wheels immediately to be positioned
across a slope and stop driving. Use a
new rope. You must not connect (tie)
the rope again.
Turn wheels immediately to be positioned
across a slope and stop driving.
Immediately increase the engine speed
to maximum. Turn wheels to be
positioned across a slope and stop
driving. Push the STOP button.
Turn wheels immediately to be positioned
across a slope and stop driving. Push the
STOP button.
- Turn wheels 180° around and keep
on working or
- Drive in the opposite direction,
unwind the part of rope that has
been already winded and drive in the
forward direction and turning wheels
180° around.
Turn wheels immediately to be positioned
across a slope and stop driving. Replace
the chain.
EN - 16
INSTALLATION, OPERATION & MAINTENANCE MANUAL HSN02
EN - 17
INSTALLATION, OPERATION & MAINTENANCE MANUAL HSN02
6. TECHNICAL SPECIFICATION:
Basic assembly:
welded frame
drum
hydraulic motor
control
The welded frame is the base component of the supporting structure of the winch.
Other components are mounted on this frame. The frame is mounted on the skeleton
by four bolts M10. The drum is set in side plates of the frame, and it is driven by a
roller chain leading from the hydraulic motor.
The hydraulic motor is connected to oil pressure circuit of the mower through the oil
pressure hoses, throttle and electromagnetic valve. Control switch for operation of
the electromagnetic valve is situated on the controller bracket.
6.1 BASIC TECHNICAL SPECIFICATION
parameters
length
length with guiding frame
width
height
weight
rope length
rope diameter
min. strength
type of snap hook
min. strength
Drum drive chain
length (number of chain links)
Hydraulic mottoe - type
unit
mm
mm
mm
mm
kg
m
mm
kN
kN
value
350
650
460
240
12
15
8
11
SINGING ROCK kN 30/9
20
3
½“ / /16“
40
SAUER DANFOSS, OMM 20
-
7. WINCH MAINTENANCE
The winch as an accessory for the mower is not demanding in terms of maintenance,
but requires regular maintenance.
-
- Replace regularly pressure hoses between the hydraulic motor and
hydraulic generator. Make the replacement at least once every three years
starting from the date printed on the hose.
Check tension and wear of the roller chain for the drum drive.
Make regular inspections
7.1 MAINTENANCE CHART
1600
1400
1200
1000
800
400
200 2. Maintenance
5 h. 1. maintenance
Before working
600
State of operating hours counter
action/intervals in hours
EN - 18
INSTALLATION, OPERATION & MAINTENANCE MANUAL HSN02
Check for oil leakage in the hydraulic system
Inspect the rope
Check tension and wear of the roller chain
Clean and lubricate the roller chain (*)
Check mounting of the drum
Check mounting of the winch
Check the level of the hydraulic oil
Check right function of the electromagnetic valve by
switching the ON/OFF switch and the EMERGENCY
STOP button
Check throttle valve adjustment
• x x •
•
x
• x x •
x x •
• x x •
• x x •
• x x •
• x x •
x
Replace the rope
•
• •
•
•
•
•
•
•
•
•
•
•
•
•
•
•
•
•
•
•
•
•
•
•
•
•
•
•
•
•
•
•
•
•
•
x
•*
•*
•
Replace the snap hook
Replace the roller chain
•
Replace the hydraulic oil (min. once a year)
•
•
•
•
•
•
x
•*
•*
•
•
•
Replace the hydraulic hoses (min. once / 3 years)
x performed by service technician
• performed by operator
* replacement is carried on after certain number of operating hours or before season.
Device check
Parts replacement
7.2 MAINTENANCE OF THE HYDRAULIC CIRCUIT
Maintenance of the hydraulic should be performed only by a trained and authorized
person. For maintenance call specialized service / dealer.
Regular maintenance should focus on checking for possible leakage between
connections, replacement of pressure hoses and oil.
NOTICE: Maintenance of the hydraulic may only be performed in a perfectly clean
working area. Dirt inside the hydraulic system can cause very serious trouble or
failure!!! Wash every part in clean liquid before replacement.
even
NOTICE: The winch MUST NOT work without oil or with lack of oil. Not
even for a short time.
7.2.1. Checking and refilling oil
Check regularly the oil level in the hydraulic tank. Measure the level by dipstick
mounted in the cap. The level must be between two dipstick marks. When working on
extreme slopes, the required cold oil level must reach to the upper limit mark.
The machine must be switched off. Always check cold oil.
NOTICE: When checking warm or hot oil, the oil level can reach above the mark due
to its heat expansion.
DO NOT overfill hydraulic oil tank with cold oil. (above „MAX“ level in cold oil). After
warming up the oil may overflow from the tank and cause trouble or serious injury.
EN - 19
INSTALLATION, OPERATION & MAINTENANCE MANUAL HSN02
7.3 ROLLER CHAIN MAINTENANCE
7.3.1 Drum drive chain
Check the chain tightness and wear. If wear is too big, the risk of failure of the
winch is much higher. The chain is tensioned by the movement of the hydraulic motor
in its oval mounting holes.
Do not over tension the chain, this may reduce its service life. Lubricate the chain
with oil.
7.4 ROPE AND SNAP HOOK MAINTENANCE
7.4.1 Inspection
Inspect the rope before every shift especially when you were previously
working in hard conditions.
Min. after 200 hours of operation unwind the whole length of the rope and
check very carefully if the external surface of the rope has not been damaged.
In the case of damages you must replace the rope or shorten it if its length
is suitable for your further work. Usage of damaged rope is strictly
forbidden.
Do not put the rope on hot items!!!
7.4.2 Linking the snap hook
Link the rope to the snap hook by the help of knot of love. See the figure
EN - 20
INSTALLATION, OPERATION & MAINTENANCE MANUAL HSN02
Leave at least 8 cm free at the end of the rope. Tight the knot properly to
avoid its loosening.
Clean the rope with only dry stuff without using any water or chemical
liquid.
The rope must not come in contact with oil products and lubricants.
7.4.3 Mounting the rope on the winch drum
The winch drum has got two opposite drilled holes on its case. One is bigger then the
other one. First lead the rope through the smaller hole and proceed to the bigger
one. Pull the end of the rope trough the bigger hole, approximately 20 cm and make
the knot in the middle of the section. Pull the rope before the drum and elongate the
knot inside of the drum.
Wind the whole length of the rope by turning the drum with the help of hydraulic. The
direction of drum rotation is arbitrary.
7.5 WINCH CLEANING
Remove all dirt from the surface of the winch as well as from hydraulic hoses
after every shift. Clean surface helps better cooling of the hydraulic oil and simplifies
the detection of faults. Sweep out dirt with a brush. Do not use pressure water. In the
case of using water, lubricate the chain.
Do not use petrol or other oil products for cleaning.
7.6 TORQUE
Bolt
Torque /Nm/
M6
M8
10
25
M 10
M 12
M 14
M 16
M 20
50
85
135
215
410
EN - 21
INSTALLATION, OPERATION & MAINTENANCE MANUAL HSN02
8. TROUBLESHOOTING
Trouble shooting
The drum is not turning
Jerking motion of the
drum
Possible reason
Lack of oil in the
hydraulic system of the
machine
The throttle valve closed
too much
Roller chain failure
Lack of oil in the
hydraulic system
Dirt screen in pump
Loose chain skipping
over teeth
The drum is turning only Worn out the hydraulic
until the oil gets warm.
motor
Bad throttle valve
Low engine revolutions
The drum is too noisy
Bad bearings of the
winch drum
Throttle valve is closed
too much
Correction
Add hydraulic oil
Loose and call authorized
service for adjustment
Replace the roller chain
Add hydraulic oil
Clean
Tension the chain, replace
Replace
Replace
Increase revolutions on max.
Replace bearings
Loose and call authorized
service for adjustment
EN - 22
INSTALLATION, OPERATION & MAINTENANCE MANUAL HSN02
9. AFTER SEASON MAINTENANCE
After the end of the season or when not using the machine for longer than one
month, it is advisable to prepare it for the storage.
Check the whole machine according to the maintenance schedule and the
number of operating hours.
- clean the whole machine
- replace worn or damaged parts
- check all bolted connections. Tighten loose bolts and nuts.
- Lubricate all moving parts – the whole machine (lubrication chart – see figure)
When working on the winch you must switch the mower engine off
and push the STOP button
EN - 23
INSTALLATION, OPERATION & MAINTENANCE MANUAL HSN02
10. DISASSEMBLY AND LIQUIDATION
The winch is made predominantly of metal parts. This metal includes mainly iron.
Before disposal and scrapping it is recommended:
- to let out hydraulic oil from the machine into a special tanks and dispose of this
oil in specialized places for oil disposal.
- to separate steel, plastic and rubber parts and hand them over for recycling.
When disposing of the machine, you must follow all rules and statutory
regulations for waste disposal.
EN - 24
INSTALLATION, OPERATION & MAINTENANCE MANUAL HSN02
11. WARRANTY CONDITIONS
1.
The Producer provides a guarantee for new Products according to the set
regulations for a period of 24 months from the day the Product is delivered
by the Distributor/Dealer or their contractual partner to the Customer, or
from such a Product being set into operation, according to whichever
happens first.
2.
The guarantee begins on delivery of the Product by the Distributor or by
their contractual partner or on the Product being set into operation,
according to whichever happens first.
3.
Claims stemming from the guarantee must be exercised with the
Distributor/Dealer and also resolved by them. A properly completed
guarantee sheet must be presented and all of the inspections prescribed
by the Producer must have been implemented. Incorrect information,
additional extracts or overwriting on the guarantee card lead to loss of the
guarantee.
4.
The guarantee applies to defects on the Product caused by defective raw
materials, construction faults or made workmanship. Defective parts on the
Product will be replaced free of charge with a new part or repaired. No
entitlement to immediate delivery is created and the Producer takes on no
liability for damage claimed for as a result of delayed delivery.
5.
The guarantee does not relate to regular wear and tear (parts susceptible
to regular wear and tear especially include the following: chains, sealing
and hydraulic hoses).
6.
The guarantee cannot be claimed against if the cause of the defect is:
a) The effects of external mechanical or chemical influences on the
Product
b) Unreasonable handling of the Product, overloading it, neglect or
incorrect operation
c) Repair of maintenance of the Product performed by a third party,
which was not authorised to carry out such work by the Distributor or
Producer
d) Installation of such parts into the Product, the use of which is not
approved by the Producer
e) Implementation of changes to the Product, which were not approved
by the Producer
f) The fact that the Producer’s regulations were not adhered to for
handling the Product, its maintenance and treatment (e-g. the
instruction and maintenance manual), especially if the prescribed
guarantee inspections were not carried out
g) The fact that the use neglected declaration and removal of defects,
which were apparent when they took receipt of the Product or which
they did not immediately provide notification of an have removed,
EN - 25
INSTALLATION, OPERATION & MAINTENANCE MANUAL HSN02
which arose later
7.
All claims stemming from the guarantee are forfeit on expiry of the
guarantee period. In the case of defects, for which notification was made
during the course of the guarantee period and which were not removed
during this period, this guarantee remains valid until the defect is removed.
In this case, the guarantee is terminated at the latest within 1 month of the
last repair or after declaration by the Distributor that the defect was
removed or that this does not concern a defect.
8.
The Producer is not liable for any economic loss or for any subsequent
damage caused to persons or their property, which was created as a result
of failure of the Product.
9.
The guarantee applies to the Product in the condition in which it leaves the
production plant. The Producer is not liable for damage during
transportation.
10. In the event of a change in owner, it is possible to transfer the remaining
part of the guarantee period to the new owner if the Producer is requested
to do so. The new owner confirms that they have taken receipt of the
instruction manual at the same time as the Product as well as the
guarantee conditions and that they agree with these.
EN - 26
INSTALLATION, OPERATION & MAINTENANCE MANUAL HSN02
12. DIAGRAM OF HYDRAULIC CIRCUIT
Reduce valve
Drive motor
Winch motor
Hydraulic pump
Electr.mag. valve
EN - 27
INSTALLATION, OPERATION & MAINTENANCE MANUAL HSN02
13. WIRING DIAGRAM
Reduce valve
Drive motor
Winch motor
Hydraulic pump
Electr.mag. valve
EN - 28
World Class Quality, Performance and Support
Equipment from Ransomes Jacobsen Limited is built to
exacting standards ensured by ISO 9001 registration at
all our manufacturing locations. A worldwide dealer
network and factory-trained technicians backed by
Ransomes Jacobsen Parts Xpress provide reliable,
high-quality product support.
BOB-CAT
BUNTON
CUSHMAN
JACOBSEN
Ransomes Jacobsen Limited
West Road, Ransomes Europark, Ipswich, England, IP3 9TT
English Company Registration No. 1070731
www.ransomesjacobsen.com
RANSOMES
RYAN
E-Z-GO