1
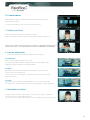
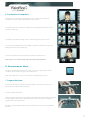
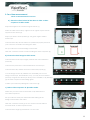
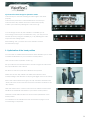
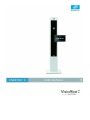
VISIOFFICE 2 - USER MANUAL ® Summary A. Introduction.............................................................................................................................................................................................................................................................3 1. Main screen.............................................................................................................................................................................................................................................................3 a. Main Screen......................................................................................................................................................................................................................................................................3 b. Main Screen Menus................................................................................................................................................................................................................................................4 2. Client menu..............................................................................................................................................................................................................................................................4 a. New Client……………………………………………………………………………………………………………………………………………………………………………………………………..4 b. Existing Client………………………………………………………………………………………………………………………………………………………………………………………………4 3. Quick Jump..............................................................................................................................................................................................................................................................5 B. Creating a New Patient File.....................................................................................................................................................................................................5 1. Fill in client information.......................................................................................................................................................................................................................................5 2. Create new eyeglasses.....................................................................................................................................................................................................................................5 C. Frames menu.......................................................................................................................................................................................................................................................6 1. Position your client....................................................................................................................................................................................................................................................6 2. Camera adjustments ...........................................................................................................................................................................................................................................6 a) Luminosity........................................................................................................................................................................................................................................................6 b) Optic.....................................................................................................................................................................................................................................................................6 c) Color......................................................................................................................................................................................................................................................................6 3. Take photos or videos..........................................................................................................................................................................................................................................6 4. Presentation of snapshots................................................................................................................................................................................................................................7 D. Measurement menu...............................................................................................................................................................................................................................7 1. Prepare the frame......................................................................................................................................................................................................................................................7 2. Far vision measurement ..................................................................................................................................................................................................................................8 a) Place the customer in front of the mirror and take a video sequence in static mode ...........................................8 b) Choose the best image in static mode..........................................................................................................................................................................8 c) Take a video sequence in dynamic mode................................................................................................................................................................8 d) Choose the best image in dynamic mode................................................................................................................................................................9 3. Optimisation of the head position.......................................................................................................................................................................................................9 4. Dominant eye (for the Varilux S-Series only).......................................................................................................................................................................10 5. Measurement of reading distance (for Varilux lenses only).........................................................................................................................11 6. Visual behaviour measurement.............................................................................................................................................................................................................12 7. Boxing your measurements..........................................................................................................................................................................................................................13 a) Adjust the tangential lines..............................................................................................................................................................................................................13 b) Results screen...............................................................................................................................................................................................................................................13 E. Measurement menu camera adjustments...............................................................................................................................................14 1. Adjust brightness and corneal reflection LED......................................................................................................................................................................14 2. Adjust camera focus...............................................................................................................................................................................................................................................14 3. Adjust camera colors.............................................................................................................................................................................................................................................15 For technical assistance please contact Equipment Support team 877.457.3760 2 A. Introduction Visioffice 2 lets you take all the measurements necessary for even the most demanding changes in personalized lenses and provides numerous solutions to help you sell lenses and frames. 1. Main screen Push up on the blackbutton behind the base of the unit. To start Visioffice 2, double click either on the icon located on the Windows desktop or in the start menu. This screen is displayed after Visioffice 2 starts. It is the home screen. It lets you: - Create a new client file; - Open an existing client file and access information on this client; - Access the “Frame”, “Measurements” and “Lens Demo” menus. a. Main screen menus • Client: - Client file - Prescription - Create new eyeglasses for this client • Choice of frames: - Allows you to take multiple pictures of clients wearing frames. • Measurements: Access the different measurements: - Physiological (center of eye rotation, pupil distance) - Behavioral (dominant eye, visual behavior) - Postural (reading distance, pantoscopic angle, height) - Frame parameters (wrap angle, A, B and DBL) • Lens demo: - High-definition demonstrations to help you sell added-value products. 3 b. Main screen buttonsThese can be used to navigate within a client to different sections Create a new client folder. Search for an existing client folder. Shortcuts to the different menus. Choice of language. Exit Visioffice 2. 2. Client menu-New a. New Client Click the “Client” button to create a new client file. This menu contains client information such as name and address*(1), as well as lens prescription*(2). You can also enter the salesperson’s name and include comments on this folder (3). If you can interface with your practice management system, you can import all client data by clicking on “export”. (4) b. Existing Client Visioffice 2 opens a window for choosing client files. Choose an existing client or click on “New Client” (5) to create a new folder which will automatically be filled with data from your practice management system, if it is compatible with Visioffice 2. *Information not required 4 3. Quick Jump Quick jump (6) and shortcuts (7) give you fast access to different Visioffice 2 menus and functions: Main Menu Client search Frames menu Measures menu Export client files to your PMS Print menu B. Creating A New Patient File 1. Fill in Client Information Last and First Name (A) Address* (B) Comments* (C) To enter data, choose the area to be filled in and click on the keyboard icon (1). The keyboard will appear and you can enter your data. When you have finished typing, close the keyboard by clicking on the keyboard icon. 2. Create New Eyeglasses Click in reference, then click keyboard, type frame name and close keyboard. Yo u c an n a me t he se differ en t fi le s b y en t eri ng th e n a me of th e fr a me i n the “Reference” area (5). You can create multiple files for the same client by clicking on “Frame+” button (4). *Information not required 5 C. Frames menu Photograph or video your client with the different frames to help them make a choice To access the Frames menu, click on “Frames” button: 1. Position your client Place your client in front of the Visioffice 2 mirror. Adjust the camera: lower or raise the camera by using the arrows (1). Please note: Visioffice 2 has an autofocus system. To highlight a detail, bring it closer to the mirror. If an adjustment is needed set LUMINOSITY to MANUAL. 2. Camera adjustments (For more details on camera adjustment see pg ?) a) Luminosity Click on the “camera settings” button (2). The adjustment sliders will be displayed and you can adjust image brightness and the intensity of the lighted LED. b) Optic By default, the camera is adjusted in automatic mode; focusing can be done at any distance. If necessary, you can change to manual mode and adjust the focal distance yourself. c) Color By default, color is adjusted automatically, but if you need to rectify this adjustment, check “Manual” mode and change the color parameters. 3. Take photos or videos To take photos or videos, click on the “Picture” (3) or “Video” (4) button. You can take up to eight different shots. The photos or videos you take will appear on the right side of your screen (5). 6 4. Presentation of snapshots Compare your snapshots by clicking on the “Compare” button (1). The last four photos will be displayed on the screen. To choose one for comparison, slide it from the right-hand column to the desired position (2). To obtain a full-screen image, click on the image you have chosen. You can now scroll through your images using the number icon (3) or by sliding them across the screen (4). You can send the chosen pictures by email or print them out. Please note: You cannot send videos by email with Visioffice 2. D. Measurements Menu To get to the Measurements Menu, you can use the quick jump option or hit the home button to get to the main menu Click the "Measures" button to access the measurements menu: 1. Prepare the frame You should remove the demo lenses if possible, except in the case of 3 piece rimless or grooved lens frames. Precisely adjust the frame. Place the clip on the frame by lining up the center of the clip with the center of the bridge of the frame, and make sure that the back of the clip rests against the rear of the frame. Be sure the frame with frame clip sits on the client’s face in a comfortable position. 7 2. Far vision measurement -Click on measurement to access a) Place the client in front of the mirror to take a video sequence in static mode. Adjust the height of the camera using the arrows (1). Place the client 2 feet away: a green dot in a green square should appear on the screen (2). Adjust your client’s head position (3). The given angle is called: head cape. Check that the clip and the frame are positioned properly and that your customer’s shoulders are facing the mirror. Ask your client to look at the bridge of the frame. Click the “Camera” button to start recording the video sequence (4). b) Choose the best image in static mode. Check that the head cape roughly matches the value indicated previously. Check for the presence of corneal reflections on both eyes. Check that the clip markers have been detected properly (1). >> If the image chosen by Visioffice 2 is unsuitable (out of focus image, closed eyes, bad detection, etc), you may choose another photo by using the two arrows (a and b) on the scrollbar, or by deleting (2) the video sequence and starting again. Confirm your choice by clicking the “OK” button (3). a b c) Take a video sequence in dynamic mode. Make sure you don’t remove the frame or clip between the two video sequences. Ask your client to slowly turn their head while staring at the bridge of the frame in the mirror. Click the “Camera” button (4) as soon as the customer starts to turn their head. A video sequence starts. Check that the angle (5) is between +15° and +25°. 8 d) Choose the best image in dynamic mode. Check that your customer is staring at their image in the mirror properly. Check for the presence of corneal reflections on both eyes. Check that the clip markers have been detected properly. Confirm your choice by clicking the “OK” button (6). >> If the image chosen by the software is unsuitable (out of focus image, closed eyes, bad detection, etc), you may choose another photo by using the scrollbar (a), or by deleting the video a sequence and starting again. After clicking “OK”, you’ll be sent to the Visioffice 2 home measurement page. 3. Optimization of the head position You can take an additional measurement which will allow you to make a statistical calculation of your customer’s head position. Click “Head Posture Optimizer” button (1). Ask your client to turn their head 90° to the left or right. The client must be perpendicular to the camera. Ask them to stare at a point in the distance at eye level. Make sure the two clip markers are visible and select the icon corresponding to the direction of his/her gaze (right or left of the mirror). Part of the screen will become grey. The clip should be situated in the clear part of the screen and the red crosses should be centred on the clip markers. Click the video button: a video of around 5 sec will be recorded that will allow the statistical calculation of your client’s head position. Visioffice 2 results will now take into account this optimisation of the head position. You will return to the Visioffice 2 home measurement page as soon as measuring is completed. 9 4. Dominant eye (for the Varilux S-Series only) Select the “Dominant eye” measurement (2). While your client is wearing the frame and the clip, adjust their position in front of the Visioffice, at around 4 feet from the mirror. Hand the tablet to your client with the image at the bottom and notch at the top. 1 Ask your client to hold the tablet with both hands, arms extended comfortably in front of them, looking for the blue target at the bottom of the mirror through the notch in the tablet with both eyes open. (1) Verify the client’s position using the green square and the green dot. Adjust the camera’s height so that the clip appears above the grey area on the screen. Click the camera icon to start the identification of the dominant eye. The dominant eye will be identified in a few seconds. If you need to take measurements again, press “reset”. You will return to the Visioffice 2 home measurement page after you click the “OK” button. 10 5. Measurement of reading distance (for Varilux lenses only) Select “Reading distance” measurement (1). While your client is wearing the frame and the clip, adjust their position in front of the Visioffice, at around 4 feet from the mirror. Hand the tablet to your client with the image at the bottom and notch at the top. Verify the client’s position using the green square and the green dot. Adjust the camera's height so that the clip appears above the grey area on the screen. Ask the client to hold the tablet comfortably with both hands, elbows at the side of the body, and look at the image on the bottom of the tablet. The client should hold the tablet as they would something they are reading. Click the camera icon to make the reading distance measurement. The reading distance is measured in a few seconds and displayed on the screen. If you need to take measurements again, press “reset”. You will return to the Visioffice 2 home measurement page after you click the “OK” button. 11 6. Visual behaviour measurement ***Please note : move the monitor to the back of the unit before lowering the antennae to avoid damage.*** Place the behavioural measurement antennas in the horizontal position. Select the “Dynamic head/eye ratio” measurement (1). While your client is wearing the frame and the clip, adjust their position in front of the Visioffice, to around 1 ½ feet from the mirror. Raise or lower the camera in order to see the clip on the screen. Check the client’s position by using the green square and the green dot. Visioffice 2 has three LEDs: one on the end of each antenna and one in the center. Your client watches the LED every time they light up (alternately and randomly). The device makes a periodic beeping sound to indicate that the client should look at the central LED. Do at least one test with them. Click the “Start” button. Ask your client to look for the LED that lights up. Once the measurement is complete, the results are displayed on two gauges (head/eye coefficient and stability coefficient). Click the “OK” button to return to the Visioffice 2 home measurement page. The two displayed values are required to determine the design and to order your lenses. Stability coefficient: The lower this value is, the smoother and more constant your client’s visual behaviour. Essilor recommends that this stability coefficient should be < 0.15 to validate the measurement. Head/eye quotient: 0 > 0.5 Leading movement from the eyes = Static visual behaviour ( Eye Mover). 0.5 > 1 Leading movement from the head = Dynamic visual behaviour (Head Mover). ***Please make sure to close Ipseo Arms once measurement is complete 12 7. Boxing your measurements Click “Far vision measurement” button (1). a) Adjust the tangential lines (red lines on the screen) Use the onscreen keyboard or touchscreen to position the flashing line so that it lines up with the inner edge of the frame. The software will indicate every step to be followed, in both static and dynamic view. Don’t take into account the depth of the groove. This value will be automatically included in the results during selection of the type of frame. Access the results by choosing the type of frame and by clicking the “OK” button. b) Results screen All the results are available on this screen. By default, Visioffice 2 automatically corrects the detected head cape angle and adjusts the calculation of the monocular pupillary distances as if the client was staring straight at the mirror with an angle of zero degrees. To turn head cape on for Eyecode/VS 4D or other lenses that require head cape, touch the box with the value on the right. ONLY use for above listed lenses. (2) PD = monocular pupillary distance and total distance Fitting Height: Height ERC Distance/Eye lenses distance Bifocal Height: defaults to lower lid unless manually adjusted Pantoscopic Tilt Head Cape Size: frame size and wrap angle You can now print or export your measurements. Print: Click on “Print” button. Choose the desired format along the left side of the screen then choose the printer by clicking on “Print Properties” then click Print. Export: Click on “Export” button. Your measurements are now complete! You may either hit customer info from the quick start to measure another frame for the same patient or click main menu, save and close, and create 13 E. Measurement menu camera adjustments Click on the “camera settings” button (1): 1. Adjust brightness and corneal reflection LED You can adjust image brightness by moving the “Brightness” (2) slider. • By default, brightnes adjustment is in “semi-automatic” mode. Using the slider, obtain the desired brightness and the camera will automatically be adjusted according to lighting. • In manual mode (3), you can choose an adjustment which will not change according to the lighting. Increase or decrease the intensity of the luminous LEDs (4) to obtain a clear and precise corneal reflection. When you have finished making adjustments, click on OK (5) and Visioffice 2 will keep a record of them. 2. Adjust camera focus Click on “Optics” (6). By default, this adjustment is automatic. If the automatic mode is not appropriate, adjust the camera to fixed focus using either: - the slider to adjust for the desired distance, - the “Focus Now” button (adjustment will focus on the face and will remain at this distance), - or the “Default Focus” button to adjust for the ideal distance for the current measurement. When adjustments have been made, click on OK (5) to keep a record of them or continue below to next adjustment 14 3. Adjust camera colors Click on “Colors” (7). By default, color adjustment is automatic, but if you need to rectify this adjustment, check “Manual” mode Bc/rw ver11/13 and change the color parameters. To easily obtain a “manual” balance of whites, place a sheet of white paper in front of the camera and click on “WB NOW”. When adjustments have been made, click on OK (5) to keep a record of them. 15