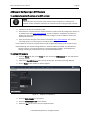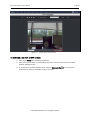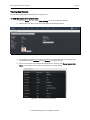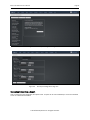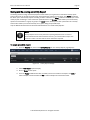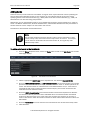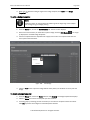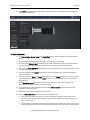
1
Administrator’s Manual Legal Disclaimers Canada-Underwriters Laboratories (C-UL) Compliancy For C-UL Listed applications, the unit shall be installed in accordance with Part 1 of the Canadian Electrical Code. Documentation Disclaimer and Restrictions Information in this document is subject to change without notice and does not represent a commitment on the part of Brivo Systems, LLC. For the most up-to-date information, visit www.brivo.com. This document and the data herein shall not be duplicated, used or disclosed to others for procurement or manufacturing, except as authorized with the written permission of Brivo Systems, LLC. The information contained within this document or within the product itself is considered the exclusive property of Brivo Systems, LLC. All information in this document or within the hardware and software product themselves is protected by the copyright and/or other intellectual property laws of the United States. Activation of Services Agreement Any use of this product is subject to the activation of the Brivo Systems Services Agreement. Please request a copy from Brivo Systems, LLC and review this agreement carefully. © 2014 Brivo Systems, LLC. All rights reserved. Brivo® is a registered trademark of Brivo Systems, LLC. Brivo Systems, LLC, 7700 Old Georgetown Road, Suite 300, Bethesda, MD 20814. © 2014 Brivo Systems LLC. All rights reserved. Brivo OnAir Administrator’s Manual Page 3 Table of Contents 1. Home .......................................................................................................................................................... 10 Brivo OnAir Overview ........................................................................................................................................ 11 Browser Requirements .................................................................................................................................... 12 Brivo OnAir Support .......................................................................................................................................... 13 2. Activity ........................................................................................................................................................ 15 What is Activity? ............................................................................................................................................... 16 Browsing the Activity Log ................................................................................................................................. 17 Index of Events ................................................................................................................................................. 20 3. Video .......................................................................................................................................................... 23 What is the Video tab? ..................................................................................................................................... 24 Search Video..................................................................................................................................................... 25 Live Feed........................................................................................................................................................... 27 What is the Online Video Recorder (OVR) for Brivo OnAir? ............................................................................ 30 Browsing the OVRs List .................................................................................................................................... 31 Adding and Configuring an OVR Camera ........................................................................................................ 32 Managing OVR Cameras .................................................................................................................................. 34 What is a DVR/NVR? ........................................................................................................................................ 39 DVR/NVR Overview .......................................................................................................................................... 40 Browsing the DVRs List .................................................................................................................................... 43 Adding a DVR .................................................................................................................................................... 44 Managing DVRs ................................................................................................................................................ 46 Browsing the DVR Cameras List ...................................................................................................................... 47 Adding a DVR Camera ...................................................................................................................................... 48 Managing DVR Cameras .................................................................................................................................. 49 Viewing DVR Video ........................................................................................................................................... 50 Browsing the OVR Gateway Directory List ....................................................................................................... 53 Adding an OVR Gateway .................................................................................................................................. 54 Managing OVR Gateways ................................................................................................................................. 55 Browsing the Gateway Cameras List ............................................................................................................... 56 Adding a Gateway Camera ............................................................................................................................... 57 Managing Gateway Cameras ........................................................................................................................... 58 Viewing OVR Gateway Video ............................................................................................................................ 59 4. Users and Groups ....................................................................................................................................... 61 What are Users and Groups? .......................................................................................................................... 62 Browsing the Group Directory .......................................................................................................................... 63 Viewing Group Details ...................................................................................................................................... 64 Creating a Group .............................................................................................................................................. 66 Editing Group Information................................................................................................................................ 67 Creating a Group Enabled Schedule ............................................................................................................... 69 Deleting a Group .............................................................................................................................................. 70 Browsing the User Directory ............................................................................................................................ 71 Viewing User Details......................................................................................................................................... 73 Creating a User ................................................................................................................................................. 74 Managing Users................................................................................................................................................ 78 Managing Badges............................................................................................................................................. 80 Managing Custom Fields ................................................................................................................................. 82 5. Reports ....................................................................................................................................................... 85 What are Reports? ........................................................................................................................................... 86 © 2014 Brivo Systems LLC. All rights reserved. Brivo OnAir Administrator’s Manual Page 4 Public versus Private Reports .......................................................................................................................... 87 My Reports ........................................................................................................................................................ 88 Generating a User Report ................................................................................................................................ 96 Saving and Re-running an Activity Report ....................................................................................................... 99 Running an In/Out Report ............................................................................................................................. 103 6. Account ................................................................................................................................................... 105 What is an Account? ......................................................................................................................................106 My Login ..........................................................................................................................................................107 Managing Time Zone Display ........................................................................................................................112 Managing Company Information ...................................................................................................................114 Managing Account Settings ........................................................................................................................... 115 7. Administrators ......................................................................................................................................... 116 What are Administrators? .............................................................................................................................. 117 Browsing the Administrators Directory..........................................................................................................118 Viewing Administrator Details ........................................................................................................................120 Creating an Administrator .............................................................................................................................. 123 Editing Assistant Administrator Permissions ................................................................................................ 125 Permission Templates....................................................................................................................................128 Understanding Administrator Permissions ...................................................................................................130 Managing Administrators ............................................................................................................................... 132 Viewing History ...............................................................................................................................................135 8. Cards ....................................................................................................................................................... 136 What is a Card? ..............................................................................................................................................137 Browsing the Card Bank ................................................................................................................................ 138 Adding Cards ..................................................................................................................................................140 Managing Cards .............................................................................................................................................143 9. Badging ................................................................................................................................................... 146 What is a Badge? ...........................................................................................................................................147 Badge Templates ...........................................................................................................................................149 Bulk Badge Printing ........................................................................................................................................160 10. Sites ........................................................................................................................................................ 162 What are Sites? ..............................................................................................................................................163 Browsing the Site Directory ........................................................................................................................... 164 Viewing Site Details ........................................................................................................................................165 Managing Sites ...............................................................................................................................................167 11. Doors and Devices .................................................................................................................................. 169 What are Doors and Devices? .......................................................................................................................170 Viewing Door Details ......................................................................................................................................171 Managing Doors .............................................................................................................................................172 Viewing Door Relationships ........................................................................................................................... 179 Viewing Device Details ...................................................................................................................................180 Managing Devices ..........................................................................................................................................181 Viewing Valid Credential Relationships .........................................................................................................186 12. Elevators ................................................................................................................................................. 187 What is an Elevator? ......................................................................................................................................188 Managing Elevators........................................................................................................................................189 © 2014 Brivo Systems LLC. All rights reserved. Brivo OnAir Administrator’s Manual Page 5 13. Floors....................................................................................................................................................... 192 What is a Floor? ..............................................................................................................................................193 Viewing Floor Details ......................................................................................................................................194 Viewing Floor Relationships ........................................................................................................................... 195 Managing Floors .............................................................................................................................................196 14. Control Panels ......................................................................................................................................... 198 What are Control Panels? .............................................................................................................................. 199 Browsing the Control Panel Directory ...........................................................................................................200 Viewing Control Panel Details ........................................................................................................................201 Creating a Control Panel ................................................................................................................................ 203 Managing Control Panels ............................................................................................................................... 204 Managing Control Boards .............................................................................................................................. 205 Configuring Antipassback .............................................................................................................................. 210 Managing Antipassback Controls ..................................................................................................................211 Viewing Control Panel Relationships .............................................................................................................213 15. Schedules and Holidays .......................................................................................................................... 214 What are Schedules? .....................................................................................................................................215 What are Holidays? ........................................................................................................................................216 Browsing the Schedules Directory ................................................................................................................217 Viewing Schedule Details ............................................................................................................................... 218 Printing a Schedule Report ............................................................................................................................ 220 Creating a Schedule .......................................................................................................................................221 Managing Schedules ......................................................................................................................................224 Copying Schedules .........................................................................................................................................225 Viewing Schedule Relationships....................................................................................................................226 Deleting Schedules ........................................................................................................................................227 Browsing the Holidays Directory ....................................................................................................................229 Viewing Holiday Details ..................................................................................................................................230 Creating a Holiday ..........................................................................................................................................231 Managing Holidays .........................................................................................................................................232 16. Email Notifications .................................................................................................................................. 233 What are Notifications? .................................................................................................................................234 Managing Notification Rules .........................................................................................................................235 Sample Email Notifications ........................................................................................................................... 238 Cell Phone Reference.....................................................................................................................................240 17. Journal..................................................................................................................................................... 241 Understanding the Journal ............................................................................................................................ 242 18. Lockdown ................................................................................................................................................ 244 What is Lockdown? ........................................................................................................................................245 19. Brivo OnAir Integrations........................................................................................................................... 247 Intellex DVR Installation Notes ......................................................................................................................249 Dedicated Micros DVR Installation Notes .....................................................................................................251 Speco DVR Installation Notes ........................................................................................................................253 Pelco DVR Installation Notes .........................................................................................................................255 Matrix DVR Installation Notes ........................................................................................................................257 Samsung DVR Installation Notes ..................................................................................................................259 Exacq DVR Installation Notes ........................................................................................................................260 © 2014 Brivo Systems LLC. All rights reserved. Brivo OnAir Administrator’s Manual Page 6 IPAC Integration ..............................................................................................................................................261 Salto Router Integration .................................................................................................................................268 20. Appendices .............................................................................................................................................. 270 Appendix 1: Troubleshooting .........................................................................................................................271 Appendix 2: Glossary ......................................................................................................................................273 © 2014 Brivo Systems LLC. All rights reserved. Brivo OnAir Administrator’s Manual Page 7 List of Figures Figure 1. Figure 2. Figure 3. Figure 4. Figure 5. Figure 6. Figure 7. Figure 8. Figure 9. Figure 10. Figure 11. Figure 12. Figure 13. Figure 14. Figure 15. Figure 16. Figure 17. Figure 18. Figure 19. Figure 20. Figure 21. Figure 22. Figure 23. Figure 24. Figure 25. Figure 26. Figure 27. Figure 28. Figure 29. Figure 30. Figure 31. Figure 32. Figure 33. Figure 34. Figure 35. Figure 36. Figure 37. Figure 38. Figure 39. Figure 40. Figure 41. Figure 42. Figure 43. Figure 44. Figure 45. Figure 46. Figure 47. Figure 48. Figure 49. Figure 50. Figure 51. Figure 52. Figure 53. Figure 54. View Welcome Page ...................................................................................................................... 13 Contact Us Page ............................................................................................................................ 14 Release Notes ............................................................................................................................... 14 View Activity Log ............................................................................................................................ 17 User Photo Comparison ................................................................................................................ 19 Searching OVR Video .................................................................................................................... 25 Search OVR Video Display Page ................................................................................................... 26 Live Feed Display .......................................................................................................................... 27 Live Video ...................................................................................................................................... 28 Create Camera Group ................................................................................................................... 29 View OVR Cameras List ................................................................................................................. 31 Register an OVR Camera .............................................................................................................. 32 Motion Detection Window............................................................................................................. 35 List of OVR Cameras ..................................................................................................................... 35 Delete Camera Message .............................................................................................................. 36 View Activity-Based Playback for OVR Camera ............................................................................ 37 Unlock a Door via Live Feed ......................................................................................................... 38 Network View of DVR Integration ................................................................................................. 41 View DVRs List ............................................................................................................................... 43 Add a DVR ...................................................................................................................................... 44 Edit a DVR ...................................................................................................................................... 46 View Cameras List ......................................................................................................................... 47 Add a DVR Camera ........................................................................................................................ 48 Edit a Camera ................................................................................................................................ 49 View Live DVR Video...................................................................................................................... 50 View Live DVR Video Feed ............................................................................................................ 51 View DVR Event Based Video ....................................................................................................... 52 View Video Gateways List ............................................................................................................. 53 Add a New Video Gateway ............................................................................................................ 54 Edit a Video Gateway .................................................................................................................... 55 View Video Cameras List............................................................................................................... 56 Add a Video Camera...................................................................................................................... 57 Edit a Video Camera ..................................................................................................................... 58 View Activity-Based Playback for Gateway Camera ..................................................................... 59 View Group Directory..................................................................................................................... 63 View Group Details ........................................................................................................................ 64 View Users in a Group ................................................................................................................... 65 Create a Group .............................................................................................................................. 66 Edit a Group Name ........................................................................................................................ 67 Edit Group Privileges ..................................................................................................................... 68 View User Directory ....................................................................................................................... 71 View User Details .......................................................................................................................... 73 View All Custom Field Values ........................................................................................................ 73 Create a User ................................................................................................................................. 74 Select Card .................................................................................................................................... 75 Upload a Photo .............................................................................................................................. 76 Insert User Image .......................................................................................................................... 76 Edit Custom Field Values .............................................................................................................. 77 Edit a User ..................................................................................................................................... 78 Viewing Users With Stored Images .............................................................................................. 80 Printing a Badge ............................................................................................................................ 81 View Custom Fields Directory ....................................................................................................... 82 Add a Custom Field Definition ...................................................................................................... 83 Edit a Custom Field Definition ..................................................................................................... 84 © 2014 Brivo Systems LLC. All rights reserved. Brivo OnAir Administrator’s Manual Figure 55. Figure 56. Figure 57. Figure 58. Figure 59. Figure 60. Figure 61. Figure 62. Figure 63. Figure 64. Figure 65. Figure 66. Figure 67. Figure 68. Figure 69. Figure 70. Figure 71. Figure 72. Figure 73. Figure 74. Figure 75. Figure 76. Figure 77. Figure 78. Figure 79. Figure 80. Figure 81. Figure 82. Figure 83. Figure 84. Figure 85. Figure 86. Figure 87. Figure 88. Figure 89. Figure 90. Figure 91. Figure 92. Figure 93. Figure 94. Figure 95. Figure 96. Figure 97. Figure 98. Figure 99. Figure 100. Figure 101. Figure 102. Figure 103. Figure 104. Figure 105. Figure 106. Figure 107. Figure 108. Figure 109. Figure 110. Figure 111. Page 8 New Report Configuration Page One ........................................................................................... 91 New Report Configuration Page Two ........................................................................................... 91 My Report Configurations ............................................................................................................. 92 Report Scheduling ......................................................................................................................... 93 Report Schedules .......................................................................................................................... 94 Report Shortcuts ........................................................................................................................... 95 View Reports List ........................................................................................................................... 96 Generate a User Report ................................................................................................................ 97 User Report in .csv Format ........................................................................................................... 98 Activity Reports Display ................................................................................................................. 99 Creating an Activity Report .........................................................................................................100 Activity Report User options........................................................................................................101 Activity Report Occurred Fields ..................................................................................................101 Activity Report filter options ........................................................................................................102 Run In/Out Report .......................................................................................................................103 View In/Out Report ......................................................................................................................104 Change Password........................................................................................................................108 Changing Secret Question and Answer ......................................................................................108 Two Factor Authentication Setup – Step One ...........................................................................109 Two Factor Authentication Setup – Step Two............................................................................110 Two Factor Authentication Setup – Step Three .........................................................................110 Login Screen with Two Factor Authentication ...........................................................................111 Change Two Factor Method ........................................................................................................111 Set Time Zone ............................................................................................................................. 112 Edit Company Information ..........................................................................................................114 Account Settings .........................................................................................................................115 View Administrators Directory ....................................................................................................118 View Administrator Details..........................................................................................................120 Copy Administrator Permissions ................................................................................................ 122 Create an Assistant Administrator ............................................................................................. 123 Edit Assistant Administrator Permissions ..................................................................................126 Enabling self-serve password reset and soft lockout ............................................................... 132 Edit Administrator Status ............................................................................................................133 Edit Administrator Contact Information .....................................................................................134 View History Link .........................................................................................................................135 View the Card Bank .....................................................................................................................138 Add Cards to the Card Bank .......................................................................................................140 View Unknown Cards ..................................................................................................................141 Add an Unknown Card ................................................................................................................142 View the Unassigned Card in the Card Bank .............................................................................142 Delete Cards ................................................................................................................................ 144 View Template List ......................................................................................................................149 Template Orientation and Name Options ..................................................................................150 Select a Background Color .........................................................................................................151 Item Properties ............................................................................................................................ 152 Layering Buttons.....................................................................................................................153 Badging Interface Icons .........................................................................................................153 Text Icon ..................................................................................................................................154 Static Text Layout and Rotation............................................................................................. 155 User Photo Properties ............................................................................................................157 Print Badge ............................................................................................................................. 159 Create Bulk Badge Print Job ..................................................................................................160 Bulk Print Badges Page ..........................................................................................................161 Bulk Print Badge Error Message Window .............................................................................161 Completed Bulk Badge Print Job ........................................................................................... 161 View the Site Directory ...........................................................................................................164 View Site Details .....................................................................................................................165 © 2014 Brivo Systems LLC. All rights reserved. Brivo OnAir Administrator’s Manual Figure 112. Figure 113. Figure 114. Figure 115. Figure 116. Figure 117. Figure 118. Figure 119. Figure 120. Figure 121. Figure 122. Figure 123. Figure 124. Figure 125. Figure 126. Figure 127. Figure 128. Figure 129. Figure 130. Figure 131. Figure 132. Figure 133. Figure 134. Figure 135. Figure 136. Figure 137. Figure 138. Figure 139. Figure 140. Figure 141. Figure 142. Figure 143. Figure 144. Figure 145. Figure 146. Figure 147. Figure 148. Figure 149. Figure 150. Figure 151. Figure 152. Figure 153. Figure 154. Figure 155. Figure 156. Figure 157. Figure 158. Figure 159. Figure 160. Figure 161. Figure 162. Figure 163. Figure 164. Figure 165. Page 9 Create a Site ........................................................................................................................... 167 Edit a Site’s Name and Address ............................................................................................ 168 View Door Details ...................................................................................................................171 Add a Door to a Site ...............................................................................................................172 Define a Door..........................................................................................................................173 Define a Salto Door ................................................................................................................175 Edit a Door .............................................................................................................................. 177 Unlock a door ..........................................................................................................................178 View Door Relationships ........................................................................................................179 View Switch Device Details ....................................................................................................180 Add a Device to a Site ............................................................................................................181 Specify a Device Type ............................................................................................................181 Define a Switch Device ..........................................................................................................183 Edit a Device ........................................................................................................................... 185 Add an Elevator to a Control Panel ........................................................................................189 View Elevator Details ..............................................................................................................190 Edit an Elevator ......................................................................................................................191 View Floor Details ...................................................................................................................194 Add a Floor to a Site ...............................................................................................................196 Edit a Floor .............................................................................................................................. 197 View Control Panels Directory ................................................................................................ 200 View Control Panel Details .....................................................................................................201 Create a Control Panel ...........................................................................................................203 Edit a Control Panel ................................................................................................................204 Add a Control Board to a Control Panel ................................................................................205 Configure a Door Control Board ............................................................................................ 206 Configure an I/O Board .........................................................................................................208 Antipassback Access ..............................................................................................................211 Configuring Antipassback Settings ........................................................................................211 Antipassback Reset Time.......................................................................................................212 View Control Panel Relationships ..........................................................................................213 View Schedules Directory.......................................................................................................217 View Schedule Details ............................................................................................................218 Print Schedules Report ..........................................................................................................220 Create a Schedule ..................................................................................................................221 Delete Schedule Block ...........................................................................................................222 Edit a Schedule.......................................................................................................................224 View Schedule Relationships .................................................................................................226 View Holidays Directory ..........................................................................................................229 View Holiday Details ...............................................................................................................230 Create a Holiday .....................................................................................................................231 Edit a Holiday ..........................................................................................................................232 View Notification Rules Directory ..........................................................................................235 Create a Notification Rule ......................................................................................................236 View the Journal .....................................................................................................................243 Activate Lockdown..................................................................................................................246 Disable “Run at Startup”........................................................................................................255 Add an IPAC device to a Site ..................................................................................................262 Create an IPAC Device ...........................................................................................................263 Create a Telephone Directory ................................................................................................ 265 Create New Resident .............................................................................................................266 List Residents Page ................................................................................................................267 Add a Salto Router .................................................................................................................268 Edit Salto Wireless Router .....................................................................................................269 © 2014 Brivo Systems LLC. All rights reserved. Brivo OnAir Administrator’s Manual Page 10 1. Home © 2014 Brivo Systems LLC. All rights reserved. Brivo OnAir Administrator’s Manual Page 11 Brivo OnAir Overview Brivo OnAir is a software application, accessed via the Internet that enables an organization to manage its access control system (ACS) account. The Brivo OnAir interface is divided into seven high level tabs. When your mouse hovers over a tab, a dropdown menu is displayed. With certain dropdown menus, a third dropdown menu can appear. Click the menu item to access the Brivo OnAir pages, in order to view and maintain your account data. The Home section provides access to Technical Support contact information and Release Notes. The Activity section provides access to the Activity Log and Search OVR Video that shows when individual doors were accessed and by whom. The Video section lets you view live video as well as search for and view recorded video clips. The Users section lets you view and manage the users and groups who have access privileges to your premises. The Reports section lets you generate customized reports as well as run User Reports, Activity Reports, and In/Out Reports. The Setup section lets you view and manage the initial aspects of account setup and design including basic account information, cards, sites/doors, schedules, notifications, and video. The Account section lets you view and manage account-specific information, such as company contact information, the type of access your Administrators have to Brivo OnAir, and time zone preferences. The Cards section lets you view and manage your card inventory. The Sites/Doors section lets you view and manage the individual sites defined for your account, as well as their associated doors and devices. This section also allows you to configure the control panel(s) associated with each site in your account. The Schedules section lets you view and manage schedules, which are used to define your users’ access privileges and to control device operations. The Notifications section lets you view and define rules for determining who within your organization will receive emails when certain events occur. The Video section provides the configuration tools for defining OVR cameras, Digital Video Recorders (DVRs) and Closed Circuit Television (CCTV) cameras for integration with your Brivo OnAir account. The Journal button provides quick access to a log of Administrator activities. The Lockdown section enables you to override regular access privileges in an emergency situation. The Help section provides access to support documentation At the top right of each page: The Administrator link allows you to access your account settings, your administrator settings, your personal login information, or logout of Brivo OnAir in a secure manner. © 2014 Brivo Systems LLC. All rights reserved. Brivo OnAir Administrator’s Manual Page 12 Browser Requirements If you are using DVR/OVR functionalities, you must use Internet Explorer 9.0 or higher as your Web browser. If you are not using either of these features, you can use Internet Explorer 9.0 or higher, or the latest versions of Firefox, Chrome, or Safari to access Brivo OnAir. Brivo OnAir uses cookies to preserve session information. If your browser disallows cookies, the interface will not function properly. Brivo OnAir uses JavaScript™ to validate form data, control navigation and display images. If your browser has scripting disabled, the interface will not function properly. Some functional elements require the Flash™ Player. If Flash™ is not detected in your browser, you will be prompted to download it. The Digital Video Recorder (DVR) functionality uses ActiveX Controls. These will be downloaded by Internet Explorer during the installation process. Some functional elements appear in popup windows. If you have installed software that blocks popup windows, the interface will not function properly. © 2014 Brivo Systems LLC. All rights reserved. Brivo OnAir Administrator’s Manual Page 13 Brivo OnAir Support The Home section of Brivo OnAir provides access to a variety of support options, including contact information for your Brivo dealer and access to online assistance. Welcome The Welcome page displays when you first log in to Brivo OnAir. Figure 1. View Welcome Page This page displays basic information related to the account and to you, as an Administrator, including: Account Name. The name assigned to the account when it was first created. Account Number. The financial number assigned to the account. Administrator ID. The ID you used to log in to Brivo OnAir for the current session. Status. Your Administrator status: Master, Senior, or Assistant. Time Zone. The time zone used to track all events maintained for the account through Brivo OnAir. Dealer. The dealer who installed and maintains your system. Shortcuts – links to some of the more common Brivo OnAir features. Report Shortcuts – links to reports that have been selected from the Reports tab. Console – a link to the video console feature. Help – a link to the Brivo OnAir support documentation. Administrator Name – the name of the administrator. Clicking on the name provides a dropdown list of additional features. Contact Us Click the Contact Us link, found at the bottom of every page, and the Contact Us page displays. This page contains the contact information for the dealer who created the account. © 2014 Brivo Systems LLC. All rights reserved. Brivo OnAir Administrator’s Manual Page 14 Figure 2. Contact Us Page Release Notes Click the Release Notes link, found at the bottom of every page, to access information for the most recent Brivo OnAir release. The Release Notes display as PDF documents in a popup window. Figure 3. Release Notes © 2014 Brivo Systems LLC. All rights reserved. Brivo OnAir Administrator’s Manual Page 15 2. Activity © 2014 Brivo Systems LLC. All rights reserved. Brivo OnAir Administrator’s Manual Page 16 What is Activity? Under the Activity tab, the Activity Log is a near real-time display of Access Events, Exception Events, Device Events Control Panel/Board Events, and Camera events. For each event, the Activity Log shows the date and time, user name or nature of the event, site name and door or device name (or control panel ID if the event is not device-specific). Additionally, the Activity Log page allows administrators to unlock doors that are configured to allow such actions, allows for user photo comparison, and displays event based video playback. NOTE: User, site, door and device names appear in the Activity Log as they were at the time of the event. © 2014 Brivo Systems LLC. All rights reserved. Brivo OnAir Administrator’s Manual Page 17 Browsing the Activity Log The Activity Log displays Access Events, Exception Events, Device Events, Camera Events, and Control Panel Events as they occur. See To Search OVR Video for more information. Additionally, in the upper right side of the screen, an administrator can use the Unlock Door feature. On the right side of the screen, an administrator can view user images and view video playback for events linked to an OVR camera. For each event, the Activity Log shows the date and time, User name (or nature of the event), Site name and Door or Device name (or control panel ID if the event is not device-specific). To view the Activity Log: 1. Click on the Activity tab. The Activity Log displays. Figure 4. View Activity Log Features of this page include: To reset the activity log page back to its original settings by clicking on the icon in the upper left corner. To filter the activity log by date by clicking the and buttons to the right of the Date/Time field. This allows sorting activity into 24 hour blocks for easy viewing. To filter the activity log display by clicking on the Select Event Filters button which allows filtering by nonexception events, exception events, and camera events. To search for activities related to a specific site, enter the site name for that site in the Site field, and click on the option that appear in the dropdown field. To search for activities related to a specific door/device, enter the door/device name for that door/device in the Door/Device field, and click on the option that appear in the dropdown field. © 2014 Brivo Systems LLC. All rights reserved. Brivo OnAir Administrator’s Manual Page 18 To scroll to the next page in the activity log, click the green right arrow in the upper left corner of the page. To scroll back to the previous page in the activity log, click the left green arrow. The Activity Log shows 20 events per page. The Date/Time column indicates the date and time at which the activity took place. The User/Event column indicates either the name of the user related to the event (for example, the user who presented a credential at the door specified), or the event itself if there is no identifiable user involved, (for example, Failed Access: Unknown Credential). Click the user name to access the User detail page. To view only those events related to a single user, click on the user name in the User/Event column of the Activity Log. The User Details page will display. Click on the View User Activity link and the page refreshes, displaying only those events related to the specified person. To clear this filter, click Reset at the top of the page. To view a subset of the log based on site, type in the name of a specific site in the Site filter and select it. The page refreshes displaying only those events related to the specific site. Click on the dropdown menu and select Clear Filter to return to the complete activity log. To view a subset of the log based on door/device, type in the name of a door/device in the Door/Device filter and select it. The page refreshes displaying only those events related to the specific door/device. Click on the dropdown menu and select Clear Filter to return to the complete activity log. The Door/Device field identifies the door, device, or camera affected by the event. To view details related to a specific door, device, or camera, click the door, device, or camera name. The associated detail page displays. The Video column provides a link to video related to a specific device if there is either a Digital Video Recorder or Online Video Recorder set up for the account. If there is a user photo associated with a user access or failed access event, the user photo will be displayed along with the video feed associated with that event. The Unlock Door field allows a user to unlock doors set to be controlled from the browser. Simply click on the button and a popup window will appear with all of the available devices. Click on the device you wish to unlock and you are returned to the main activity log page with the Unlock Door field filled in with the selected device. Click on the icon to unlock the selected door. A popup window shows the action taken as well as the event appearing in the activity log. The User Image box allows an administrator to view a stored user image from the user profile after clicking NEXT TO the user name in the User/Event column of the Activity Log. If there is no user image attached to the user name, the user image box will remain blank. The Video Playback box allows an administrator to view a video event from an OVR camera by clicking on the OVR icon (hovering over the icon will show which camera it represents) in the Video column of the Activity Log. This feature only works for OVR cameras. Video linked to DVR cameras, accessed by clicking on the DVR icon, will not appear in the Video Playback box, but will appear in a popup window. An administrator may view the clips before and after the current clip by clicking on the and buttons. Clicking on the Search Video icon will take you to the Search tab of the Video page. Finally, to download the current clip, click on the icon and a popup window will appear allowing you to save the clip as a file. © 2014 Brivo Systems LLC. All rights reserved. Brivo OnAir Administrator’s Manual Page 19 Figure 5. User Photo Comparison The Auto-Refresh dropdown menu at the top left of the page allows you to choose how frequently the Activity Log should reload itself. The optional intervals are: 30 seconds, 1 minute, 2 minutes, and 5 minutes. By default, Auto-Refresh is set to None. To turn Auto-Refresh on, click on the dropdown menu and select an option. NOTE: User, site, door and device names appear in the Activity Log as they were at the time of the event. © 2014 Brivo Systems LLC. All rights reserved. Brivo OnAir Administrator’s Manual Page 20 Index of Events The following events appear in the Activity Log and can be transmitted via email notifications (excluding Telephone Entry Events). Access Events Access by User Exception Events Door Ajar1 Door Ajar Cleared2 Too Many Invalid PINs3 Door Forced Open4 Door Forced Open by Key5 Door Locked by Keypad6 Door Unlocked by Keypad Door Locked by Timer Door Unlocked by Timer Door Schedule Unlock Override Begin Door schedule Unlock Override End Failed Access (by Unknown Person): Unknown credential 7 Failed Access (by Unknown Person): Card never issued Failed Access (by Known User): User was deleted Failed Access (by Known User): User’s credential was revoked Failed Access (by Known User): User is out of effective date range Failed Access (by Known User): User is at unauthorized door Failed Access (by Known User): User is out of schedule Failed Access (by Known User): User suspended Failed Access (by Known User): Invalid credential type (Card required) Device Events Auxiliary Input Engaged8 Auxiliary Input Disengaged Device Engaged Device Disengaged Wire cut set Wire cut cleared Wire short set Wire short cleared Camera Events Camera Connect Camera Disconnect 1 Door Ajar threshold can vary by door. See Managing Doors. Door Ajar Cleared requires control panel firmware v2.15+. 3 Too Many Invalid PINs applies to keypads or dual readers only. Threshold can vary by door. 4 Door Forced Open applies to doors with Request-to-Exit switches/sensors only. See Managing Doors. 5 Door Forced Open by Key applies only to doors using a Salto Lock. 6 Door Locked/Unlocked by Keypad applies to keypads and dual readers only. Users must have Keypad Unlock-Hold privilege. See Editing Group Privileges. 7 All Failed Access Events require control panel firmware v2.15+. 8 Auxiliary Input Engaged/Disengaged requires control panel firmware v2.15+. 2 © 2014 Brivo Systems LLC. All rights reserved. Brivo OnAir Administrator’s Manual Page 21 Video Motion Control Panel Events Control Panel Events correspond to sites, not to doors. If a control panel serves multiple sites, the event will appear once for each site. AC Power Loss (Switch to Battery)9 AC Power Restoral Unit Opened (Tamper) Unit Closed (Tamper Cleared) Control Panel Communication Failure Board Battery Set Board Battery Cleared Board Chip Reset Board Communication Failure Set Board Communication Failure Cleared Board Opened (Tamper) Board Closed (Tamper Cleared) Communication Lost10 Telephone Entry Events Calling Resident: (Resident Name) Call Connected: (Resident Name) Call Terminated: (Resident Name) Resident: (Resident Name)11 Failed Access Events A Failed Access Event is an incident of an invalid credential being presented. Failed Access Events are a subset of Exception Events; the system logs Failed Access Events according to the following rules of precedence: Failed Access by Unknown Persons: If the credential is unknown to the account: Failed Access: Unknown Credential [Card/PIN value] 12 If the credential is in the Card Bank but has never been issued to a user: Failed Access: Card never issued [Card value] Failed Access by Known Users: If the credential last belonged to a deleted user10: Failed Access by John Doe: User was deleted [Card/PIN value] 13 If the credential is an old PIN or a revoked card, but the user has not been deleted: Failed John Doe: Revoked credential [Card/PIN value] 9 All Control Panel Events require control panel firmware v2.15+. Communication Lost refers to comm failure of a Salto router. 11 Appears when a resident successfully grants entry. 12 Unknown card values are displayed as hexadecimal numbers. 13 A card must remain in the Card Bank in order for it to be associated with its last owner. 10 © 2014 Brivo Systems LLC. All rights reserved. Access by Brivo OnAir Administrator’s Manual Page 22 If the credential belongs to a user who attempts access outside of his or her effective date range: Failed Access by John Doe: Out of effective date range If the credential belongs to a user who attempts access at an unauthorized door: Failed Access by John Doe: Unauthorized Door If the credential belongs to a User who attempts access at an authorized door, but at an unauthorized time: Failed Access by John Doe: Out of Schedule If the credential belongs to a User who is suspended: Failed Access by John Doe: User Suspended. If the credential is not the proper type of credential: Failed Access: [User Name] Invalid credential type (Card required) © 2014 Brivo Systems LLC. All rights reserved. Brivo OnAir Administrator’s Manual Page 23 3. Video © 2014 Brivo Systems LLC. All rights reserved. Brivo OnAir Administrator’s Manual Page 24 What is the Video tab? The Search feature is a customized query of OVR Video that allows a search by date and time of day from the selected site. The clip length is 20 minutes (with 10 minutes prior and 10 minutes after the selected time). The Live Feed feature of Brivo OnAir allows an administrator to view live video using different cameras either alone or in sets of two, four, or six. Different cameras can be selected and joined together in a Camera Group so that certain views can be accessed quickly from a dropdown menu. Definitions for the Icons on Live Feed - The number of cameras that will appear in Live Feed (one, two, four, or six). – Refreshes the connections of the current camera group. - Clears Live Feed of all selected cameras. – Updates the current camera group to reflect any changes made. - Deletes the current camera group. – Makes the current camera group the default camera group. - Scroll left and scroll right to move between camera pages. © 2014 Brivo Systems LLC. All rights reserved. Brivo OnAir Administrator’s Manual Page 25 Search Video The Search feature is a customized query of OVR Video that allows a search by date and time of day from the selected site. The clip length is 20 minutes (with 10 minutes prior and 10 minutes after the selected time). To Search Video 1. Click on the Video tab then choose the Search toggle at the top center of the screen. The Begin Your Search page displays. Figure 6. Searching OVR Video 2. The Begin Your Search box, the first section to select is your Site. Choose your site from the dropdown menu. Your selected site will now remain displayed. 3. The next field to select is your Date field. Either enter the date manually, using the MM/DD/YYYY format, or click on the calendar icon and select the date by clicking on it. Your selected date will now remain displayed. 4. Next, we move to the Time field. Click on the Time field and the time wheel apears. Choose the time (which will include 10 minutes before and after) and choose AM or PM. Your selected time will remain displayed. 5. Finally, click on the Page displays. button to perform the search. The Search OVR Video Display © 2014 Brivo Systems LLC. All rights reserved. Brivo OnAir Administrator’s Manual Page 26 Figure 7. Search OVR Video Display Page 6. Each available camera will display on the left side of the screen. Click on the Camera name on the left to select the camera you want to view. The Camera name will appear at the bottom of the screen along with a 20 minute time period (10 minutes before and 10 minutes after your selected time). Each event that occurred will appear along the timeline in blue (normal priority), yellow (medium priority), or red (high priority). 7. Click on the icon (this example is a normal priority event) and the requested video clip will play. A matching color stripe to the priority will show across the top of the video display area confirming you are watching the matching clip. You may pause the clip, as well as rewind and fast-forward through the clip (jumping forward or back in one minute increments) using the buttons provided at the bottom of the video display area. 8. You may download a clip by clicking on the icon, which will open a File Download popup window, allowing you to save the clip as a file. 9. You may reset the search parametes by clicking on the icon at the top of the Search OVR Video page. This returns you to the Begin Your Search page. © 2014 Brivo Systems LLC. All rights reserved. Brivo OnAir Administrator’s Manual Page 27 Live Feed The Live Feed feature of Brivo OnAir allows an administrator to view live video using different cameras either alone or in sets of two, four, or six. To access Live Feed 1. Click on the Video tab then choose the Live Feed toggle at the top center of the screen. The Live Feed page displays. Figure 8. Live Feed Display To view live video using Live Feed 1. Click on the Video tab then choose the Live Feed toggle at the top center of the screen. The Live Feed page displays. NOTE: If you have already selected a Default Camera Group, this Default Camera Group will automatically appear when you click Live Feed. 2. Choose a camera by clicking on the icon in the upper right hand corner of the camera live video display. Live video will display. If the camera selected is linked to a door with Control from Browser enabled, an Unlock Door icon along with the door name will appear below the camera name in the dropdown display. © 2014 Brivo Systems LLC. All rights reserved. Brivo OnAir Administrator’s Manual Page 28 Figure 9. Live Video 3. Multiple cameras may be selected at the same time. Simply choose a different camera view window and choose a camera from the dropdown menu. The video streams will display simultaneously. To create a camera group 1. Click on the Video tab then choose the Live Feed toggle at the top center of the screen. The Live Feed page displays. 2. Select the number of camera view windows you want to display simultaneously (one, two, four or six). 3. Select cameras by clicking on the icon for each camera view window. 4. Once they are displaying, click the icon at the top of the Live Feed display page. A popup window will appear asking you to name the Camera Group. 5. Enter a name for the camera group into the Name field and click OK. 6. A popup window will appear telling you the camera group was added successfully. Click OK and you are returned to the Live Feed display page. NOTE: An account may only view one live video stream per camera at a time. You cannot have more than one live feed window open viewing the same camera feed, even if different administrators are logged in. One live feed window will show the camera and the rest will show a Stream Lost error message. © 2014 Brivo Systems LLC. All rights reserved. Brivo OnAir Administrator’s Manual Page 29 Figure 10. Create Camera Group To edit a camera group 1. Click on the Video tab then choose the Live Feed toggle at the top center of the screen. The Live Feed page displays. 2. From the dropdown menu, select the camera group you wish to edit. 3. Once the camera group displays, make whatever changes are needed. 4. Click Save. A popup window will appear. If you want to keep the same camera group name, simply click OK. 5. If you wish to save the changes under a new camera group name, change the name and click OK. To delete a camera group 1. Click on the Video tab then choose the Live Feed toggle at the top center of the screen. The Live Feed page displays. 2. From the dropdown menu, select the camera group you wish to delete. 3. Click on the icon at the top of the Live Feed page. A popup window will appear. 4. Click OK. A popup window will appear informing you that you have successfully removed the camera group. NOTE: Deleting a Camera Group does not delete the cameras in that Camera Group. © 2014 Brivo Systems LLC. All rights reserved. Brivo OnAir Administrator’s Manual Page 30 What is the Online Video Recorder (OVR) for Brivo OnAir? Brivo’s Online Video Recorder OVR) enables Brivo OnAir users to select from a variety of subscription models. Dependent upon the subscription model chosen, a Brivo OnAir user may view only live video or live video and activity-based playback at five or seven frames per second, depending upon camera model. In addition to a live view only subscription model, activity-based video can also be stored on Brivo’s Hosted Video server for 15, 30, 60, 90, 180, or 365 days, dependent upon the subscription model chosen. The only required equipment for this service is a compatible AVHS IP-based camera. The video is recorded over an encrypted connection at 7 frames per second at 640 x 480 resolution in H.264 encoding or at 5 frames per second with 320 x 240 resolution in MPEG 4 encoding. NOTE: Brivo’s OVR functionality currently requires Java Plugin Version 6, as well as Flash Player Version 9 or higher. © 2014 Brivo Systems LLC. All rights reserved. Brivo OnAir Administrator’s Manual Page 31 Browsing the OVRs List The OVR Cameras list identifies all the OVR cameras currently associated with the account. For each, the name, serial number, the site the camera is attached to, number of devices it is linked to, the camera model, and the camera’s connection status is displayed. The Master and all Senior Administrators can view the list of OVRs. To view the list of OVRs for your account: 1. From the Setup tab, click on the Video tab then click on OVR Camera Directory. The OVR Cameras list displays. Figure 11. View OVR Cameras List Features of this page include: Click the Video Click the Edit Click the Delete icon associated with the specific OVR camera to view live video. icon associated with a specific OVR to update it. icon associated with a specific OVR to remove it from the account. © 2014 Brivo Systems LLC. All rights reserved. Brivo OnAir Administrator’s Manual Page 32 Adding and Configuring an OVR Camera To configure the static IP address of an OVR camera: NOTE: These steps are only necessary if the camera will be configured on a network that requires a static IP address; otherwise, the cameras function as plug-and-play cameras. 1. Connect the camera via an Ethernet cable. 2. Disconnect the computer from the wireless network in order to manually configure the static IP to an address other than http://192.168.0.90, as that IP address is assigned to the camera by default. For more information on how to manually configure a static IP address, contact your Network Administrator. 3. Open your browser and type in the camera’s IP address: http://192.168.0.90. The camera’s main page opens. From this page you can adjust the following: Focus: allows you to view the camera’s focus in order to determine whether or not the view is clear. Network Settings: the network settings default to “obtain IP address via DHCP;” for networks that require a static IP, you must check the box “use the following IP address” and configure the settings according to the information from your Network Administrator. To add an OVR camera: 1. From the Setup tab, click on the Video tab, then choose the OVR Cameras tab. The OVR Camera list page appears. 2. Click on the New OVR Camera link at the top of the page. The New Camera page displays. 3. Enter a Name for the camera you wish to register. Figure 12. Register an OVR Camera 4. Enter the Serial Number for the camera. 5. Enter the Authentication Key for the camera. 6. Select the Site for the camera from the dropdown menu. © 2014 Brivo Systems LLC. All rights reserved. Brivo OnAir Administrator’s Manual Page 33 7. Select an Associated Device to link the camera with. Click on the Add Device link. A popup window will appear with all available devices, which can be filtered as necessary. When selected, the device will disappear from the list. Scroll to the bottom of the list and click Close Window when you are finished. 8. Select the Subscription Model from the dropdown menu. NOTE: Once selected, the subscription model cannot be changed locally. If the subscription model needs to be changed, call your dealer. 9. Select the Time Zone from the dropdown menu. 10. Click Save OVR Camera at the bottom of the page. You are taken to the Edit Camera page. NOTE: The system automatically detects the camera model by the serial number and authentication key entered. 11. The Brightness, Color, and Contrast fields may be edited (the default is 50). 12. The Rotation (the default is 0) of the camera can be changed. 13. To edit the White Balance (the default is automatic), click on the dropdown list and make a selection. 14. The Motion Sensitivity, Motion History, and Motion Object Size may be edited (the defaults are 90, 70, and 15 respectively). 15. Click Save OVR Camera at the bottom of the page. You are redirected to the View Camera page. © 2014 Brivo Systems LLC. All rights reserved. Brivo OnAir Administrator’s Manual Page 34 Managing OVR Cameras Once added to an account, an OVR Camera can be updated or deleted at any time. The Master and all Senior Administrators can edit or delete an OVR Camera. To create/edit a motion detection zone for an OVR camera: NOTE: The Inclusion Window in the Motion Detection Window initially covers the entire screen, but may be edited. 1. From the Setup tab, click on the Video tab, then choose the OVR Cameras tab. The OVR Camera list page appears. 2. Click on the edit icon next to the camera you would like to edit or click on the Edit Camera link. The Edit Camera page displays. 3. Click on the Edit Motion Window link. The Motion Detection Window displays. 4. To add an Exclusion Window click on the icon in the upper left hand corner. An exclusion window will appear in the upper left corner and may be moved to fit the area needed. NOTE: Only five (5) Exclusion Windows may be added to any camera window. 5. To delete an Exclusion window, simply highlight the window and click on the delete the selected Exclusion Window icon which will 6. When finished, click Save Motion Window and any motion detected within an Exclusion Window will not appear in the Activity log. You are returned to the Edit Camera page. Click Save OVR Camera to save. © 2014 Brivo Systems LLC. All rights reserved. Brivo OnAir Administrator’s Manual Page 35 Figure 13. Motion Detection Window To edit an OVR camera: 1. From the Setup tab, click on the Video tab, then choose the OVR Cameras tab. The OVR Camera list page appears. Figure 14. List of OVR Cameras 2. Click on the edit icon next to the camera you would like to edit or click on the Edit Camera link. The Edit Camera page displays. 3. After you are finished editing information about the camera, click Save. You are returned to the list of hosted cameras. To delete an OVR camera: 1. From the Setup tab, click on the Video tab, then choose the OVR Cameras tab. The OVR Camera list page appears. © 2014 Brivo Systems LLC. All rights reserved. Brivo OnAir Administrator’s Manual Page 36 2. Click on the trash can icon next to the camera you would like to delete. A pop-up warning appears, asking if you are sure you want to delete the camera. 3. Click OK. You are returned to the OVR Camera Directory page. 4. To complete the process, perform a factory reset on the camera. For more information on how to perform a factory reset, please consult the user manual for the camera. Figure 15. Delete Camera Message NOTE: A camera cannot be deleted unless it is listed as Connected under Camera Status. If the camera is listed as Disconnected, please contact Brivo Technical Support for further assistance in deleting your camera from the system. Camera Connection Status Connected: the camera is connected to AVHS. Disconnected: the camera is no longer visible to AVHS. This could be the result of a power failure, lack of network connection, etc. To view live video from an OVR camera: 1. From the Setup tab, click on the Video tab, then choose the OVR Cameras tab. The OVR Camera list page appears. 2. Click on the camera icon next to the camera you would like to view. A popup window appears displaying the live video feed from that camera. NOTE: Only one instance of live video can be viewed at a time. To view activity-based playback from an OVR camera: 1. From the Activity tab, click on the Activity Log tab. The Activity Log displays. © 2014 Brivo Systems LLC. All rights reserved. Brivo OnAir Administrator’s Manual Page 37 2. Next to the event for which you would like to view video, click the video camera icon. Video will appear in the Video Playback box only if the event’s corresponding device is associated with an OVR camera and will also display the subsequent two following clips. Otherwise, a popup window will appear to display the video linked to a DVR camera. Figure 16. View Activity-Based Playback for OVR Camera To Unlock a Door via Live Feed 1. Click on the Video tab. The Begin Your Search page displays. Switch to Live Feed and the Live Feed page displays. 1. Choose a camera window and select a camera from the dropdown menu. The video window will display along with the camera name and a door name with an unlock door icon (if the door has Yes selected for Control From Browser). 2. Click the Unlock Door icon. The door will unlock and the event will appear in the activity log. © 2014 Brivo Systems LLC. All rights reserved. Brivo OnAir Administrator’s Manual Page 38 Figure 17. Unlock a Door via Live Feed To download a clip from an OVR camera: 1. Click on the Activity tab. The Activity Log displays. 2. Next to the event for which you would like to view video, click the video camera icon. Video playback will begin to play. 3. At the bottom of the video playback screen, click the Download Clip destination for where you would like the file to be saved. © 2014 Brivo Systems LLC. All rights reserved. icon and choose a Brivo OnAir Administrator’s Manual Page 39 What is a DVR/NVR? A DVR is a Digital or Network Video Recorder that can be integrated with your Brivo OnAir account, along with related Closed Circuit Television (CCTV) cameras. The DVR/NVRs section provides the configuration tools for defining a DVR/NVR and related CCTV cameras. It also provides “live” viewing links to any cameras defined within your account. Because no physical connection is required between the control panel and the video equipment, a DVR/NVR and cameras may be added to your account at any time. However, for ease of administration, it is recommended that they be added after you have already defined the Doors and Devices with which the cameras will be associated. © 2014 Brivo Systems LLC. All rights reserved. Brivo OnAir Administrator’s Manual Page 40 DVR/NVR Overview This section answers basic questions about the use of DVR/NVRs and CCTV cameras with ACS5000 and IPDC. How is video integrated with Brivo OnAir? The primary integration between your DVR and Brivo OnAir is via the Activity Log, which allows you to retrieve a video segment related to a specific event. (See Viewing Video below). From the Activity Log, Brivo OnAir uses the time stamp of each event to query the DVR/NVR. It also uses the configuration data supplied on the DVR/NVRs page to determine which camera is associated with an event, via the door or device at which the event took place. The DVR/NVR then returns the requested video stream for the time and camera indicated, and plays it in a popup window. Throughout this entire process, the video images are streamed directly from the DVR to your browser; they do not pass through Brivo’s network, nor is any of your video data stored on Brivo’s servers. Brivo OnAir simply acts as a “directory” for associating events in your Activity Log with specific DVR/NVRs, cameras, and time periods. What types of devices can be integrated with video? Brivo OnAir treats both doors and inputs as special cases of devices; for example, an auxiliary input on a Door Board, or an input on an Input/Output board. All of these device types can be associated with a camera for the sake of providing a link between events in the Activity Log and video segments stored on the DVR/NVR. Can I configure my DVR/NVR from Brivo OnAir? The Brivo OnAir interface to your DVR is not intended to replace the native interface provided by the DVR/NVR itself. Thus, all DVR/NVR configuration is still performed via the manufacturer’s configuration tools. By the same token, the Brivo OnAir interface does not disable or change any of the existing viewing tools provided with your DVR/NVR. These tools may offer a different range of viewing options from the Brivo OnAir interface, and the two should be seen as complementary, and used accordingly. Which Brivo products will integrate with DVR/NVRs? The DVR/NVR integration feature works with any ACS4000, ACS5000 or IPDC series control panel. Which DVR/NVR products are supported? Brivo is integrating a growing list of DVR/NVRs with Brivo OnAir. Please contact your Dealer for a current list of compatible DVR/NVRs. What are the networking requirements? In order to view video data from Brivo OnAir, your DVR must be configured to allow your Internet browser to connect from any location where you will need to view video. As shown in the figure below, the Administrator’s browser may be either local or remote to the LAN on which the DVR is set up. Network configuration requirements will vary depending on whether you wish to view video from within your corporate network only, or from anywhere on the Internet. Please consult with your network administrator and the manual for your DVR model to determine the detailed procedures for setting up parameters as described below. Your DVR will need to be configured with static IP parameters in order for your browser to address it from within Brivo OnAir. Your network administrator may even wish to establish a DNS entry for the DVR, although this is not strictly necessary. You will need to enter either the static IP address or the DNS name for your DVR into Brivo OnAir in order for it to reach your DVR from the Activity Log and elsewhere within the application. If you wish to access video from the Internet (i.e., outside your LAN), then your Firewall and Router will need to make the DVR address available outside of your LAN. This may be done through assigning a publicly routable © 2014 Brivo Systems LLC. All rights reserved. Brivo OnAir Administrator’s Manual Page 41 IP address to your DVR, or by setting up port mapping from one of your other publicly routable IP addresses to the DVR. Consult your network administrator for the configuration that best fits your network architecture and information security policies. Figure 18. Network View of DVR Integration What must I do to synchronize my DVR with Brivo OnAir? The correct operation of the video retrieval software depends on having the DVR’s internal clock synchronized with the Brivo OnAir clocks, which are synchronized to public reference clocks via the Network Time Protocol (NTP). It is important that you configure your DVR to use NTP to set its time; otherwise, the time stamps on events in the Activity Log will not agree with time stamps for the video stream, and you will not see the correct video footage. What Internet browser plug-ins are required to use a DVR/NVR with Brivo OnAir? Depending on your DVR/NVR brand and model, you may be required to install browser plug-ins from the manufacturer before you can view video from Brivo OnAir. Follow the directions in your DVR/NVR manual if the plug-in is not installed automatically. Does the DVR need to be connected directly to the Brivo OnAir control panel? For some applications, it may be desirable to have the access control system communicate alarms and events back to the DVR system in order to record those events directly in the DVR database. However, it is not necessary to perform any “hard wire” interconnection between the DVR and the Brivo OnAir control panel in order to support the integration features described in this chapter. If you do wish to connect the control panel directly to the DVR, conventional integration techniques can be used to connect relay outputs from a Brivo OnAir control panel to the inputs on a DVR. See the Devices section of this manual for instructions on how to set up output devices. See your DVR installation manual for information on how to connect relays to the inputs of the DVR. © 2014 Brivo Systems LLC. All rights reserved. Brivo OnAir Administrator’s Manual Page 42 Are there any setting requirements for the DVR/NVR? The DVR/NVR must be set for continuous (24 x 7) recording. Brivo OnAir presumes this setting and will not interact properly with the DVR/NVR otherwise. Consult your DVR/NVR manual for information on how to change this setting. © 2014 Brivo Systems LLC. All rights reserved. Brivo OnAir Administrator’s Manual Page 43 Browsing the DVRs List The DVRs list identifies all the digital video recorders currently associated with the account. For each, the name and URL is displayed. The Master and all Senior Administrators can view the list of DVRs. To view the list of DVRs for your account: 1. From the Setup tab, click on the Video tab then click on DVRs. The DVRs list displays. Figure 19. View DVRs List Features of this page include: Click the Edit icon associated with a specific DVR to update it. Click the Delete icon associated with a specific DVR to remove it from the account. © 2014 Brivo Systems LLC. All rights reserved. Brivo OnAir Administrator’s Manual Page 44 Adding a DVR Because no physical connection is required between the control panel and the video equipment, a DVR and cameras may be added to your account at any time. However, for ease of administration, Brivo recommends adding them after you define the doors and devices that the cameras will monitor. The Master Administrator and all Senior Administrators can add a DVR to the account. NOTE: This section only describes how to add a DVR to your Brivo OnAir account. For tips on installing your DVR to work with Brivo OnAir, please refer to the DVR Installation Notes section. To add a DVR to your account: 1. From the Setup tab, click on the Video tab then click on DVRs. The DVRs list displays. 2. Click New DVR. The New DVR page displays. Figure 20. Add a DVR 3. Enter a brief, descriptive Name for the DVR. The name can be any convenient, alphanumeric designator for the DVR. It does not need to agree with any naming established in the DVR itself, as Brivo OnAir only uses this reference internally. 4. From the Type dropdown list click the type of digital video recorder you are adding. 5. You will need to contact your network administrator and/or DVR administrator in order to determine the URL of the DVR. Enter the URL in one of the following formats: http://NNN.NNN.NNN.NNN (for a direct IP address) http://dvr-name.subdomain.top-level-domain (if a DNS name has been established for your DVR) The URL may also contain additional information, such as port numbers, for non-standard configurations. 6. From the dropdown list, click the Time Zone used by the DVR. For the DVR feature to work properly, the value selected from this list must mirror the time zone setting for the DVR. 7. For some DVRs, a Playback User Name and Playback Password are required which can be entered into the corresponding fields. © 2014 Brivo Systems LLC. All rights reserved. Brivo OnAir Administrator’s Manual Page 45 8. In the Max Video Age (days) field, enter the number of days for which the DVR has been configured to store data. Brivo OnAir uses this information to control its display of information on the Activity Log. 9. If there is a time difference between the clock on the DVR and the clock on the Control Panel, enter that difference in the Playback Offset (seconds) field. For example, if the Control Panel clock is five seconds slower than the DVR clock, enter -5. If the Control Panel clock is ten seconds faster, enter 10. 10. If using a Speco CS/GS/LS/PS model, the option to use DVRNS is available. To do so, simply check the DVRNS checkbox. Additionally, enter the Watch Port Number and Seek Port Number. 11. Click Save DVR. You are returned to the DVRs list with the new DVR listed in alphabetical order. © 2014 Brivo Systems LLC. All rights reserved. Brivo OnAir Administrator’s Manual Page 46 Managing DVRs Once added to an account, a DVR can be updated or deleted at any time. The Master and all Senior Administrators can edit or delete a DVR. To edit a DVR: 1. From the Setup tab, click on the Video tab then click on DVRs. The DVRs list displays. 2. Click the Edit icon associated with the DVR you want to edit. The Edit DVR page displays with the current information displayed. Figure 21. Edit a DVR 3. Edit the DVR settings as needed. 4. Click Save DVR. You are returned to the DVRs list with the updated information displaying. To delete a DVR: 1. From the Setup tab, click on the Video tab then click on DVRs. The DVRs list displays. 2. Click the Delete trashcan icon associated with the DVR you want to delete. A warning prompt asks you to confirm that you want to delete the DVR. 3. Click OK. You are returned to the DVRs list with the deleted DVR removed from the list. © 2014 Brivo Systems LLC. All rights reserved. Brivo OnAir Administrator’s Manual Page 47 Browsing the DVR Cameras List The Cameras list identifies all the CCTV cameras currently associated with the account. The list shows the DVR to which each camera is attached, the number assigned to the camera, the camera’s name, and the device monitored by the camera. The Master and all Senior Administrators can view the list of cameras for an account. To view the list of DVR cameras for your account: 1. From the Setup tab, click on the Video tab then click on DVR Cameras. The DVR Cameras list displays. Figure 22. View Cameras List Features of this page include: Click the Video icon associated with a specific camera to view the video stream. Click the Edit icon associated with a specific camera to update it. Click the Delete icon associated with a specific camera to remove it from the account. © 2014 Brivo Systems LLC. All rights reserved. Brivo OnAir Administrator’s Manual Page 48 Adding a DVR Camera Because no physical connection is required between the control panel and the video equipment, a DVR and cameras may be added to your account at any time. However, for ease of administration, Brivo recommends adding them after you define the doors and devices that the cameras will monitor. The Master and all Senior Administrators can add a camera to the account. To add a new DVR camera to your account: 1. From the Setup tab, click on the Video tab then click on DVR Camera Directory. The DVR Cameras list displays. 2. Click New DVR Camera. The New DVR Camera page displays. Figure 23. Add a DVR Camera 3. Enter the Name of the camera. The name can be any convenient alphanumeric designator. It does not need to agree with any naming established in the camera itself, as Brivo OnAir only uses this reference internally. 4. From the dropdown list, select the DVR to which the camera is attached. This list includes all the DVRs defined for your account. 5. Enter the camera Number. Brivo OnAir uses this number when querying the DVR for video, so it must agree with the numbering scheme you have used within your DVR. 6. From the dropdown list, select the Device this camera will monitor. For example, if you have installed “Camera 1” to provide a view of the area near “Front Door,” select “Front Door” from the list. The camera and device must be associated on this page in order for events in the Activity Log to be correlated with the correct video stream. 7. Click Add Camera. You are returned to the Cameras list with the new camera listed in alphabetical order. © 2014 Brivo Systems LLC. All rights reserved. Brivo OnAir Administrator’s Manual Page 49 Managing DVR Cameras Once associated with a DVR, a camera can be updated or deleted at any time. The Master and all Senior Administrators can edit and delete cameras. To edit a DVR camera: 1. From the Setup tab, click on the Video tab then click on DVR Camera Directory. The DVR Cameras list displays. 2. Click the Edit icon for the camera you want to edit. The Edit DVR Camera page displays. Figure 24. Edit a Camera 3. Edit the values as needed. 4. Click Save Camera. You are returned to the Cameras list with the updated information displaying. To delete a DVR camera: 1. From the Setup tab, click on the Video tab then click on DVR Camera Directory. The DVR Cameras list displays. 2. Click the Delete trash can icon associated with the camera you want to delete. A warning prompt asks you to confirm that you want to delete the camera. 3. Click OK. You are returned to the Cameras list with the deleted camera removed from the list. © 2014 Brivo Systems LLC. All rights reserved. Brivo OnAir Administrator’s Manual Page 50 Viewing DVR Video When DVRs are in use, Administrators have multiple options for viewing video, both live and activity based. NOTE: Brivo OnAir only supports video playback with Internet Explorer 8.0 or later. If you attempt to view video using any other Internet browser, you will receive an error message. To view live DVR video: 1. From the Setup tab, click on the Video tab then click on DVR Camera Directory. The DVR Cameras list displays. Figure 25. View Live DVR Video 2. Click on the Video icon for the camera you wish to view. The video begins playing in a popup window. © 2014 Brivo Systems LLC. All rights reserved. Brivo OnAir Administrator’s Manual Page 51 Figure 26. View Live DVR Video Feed NOTE: Assistant Administrators do not have access to this functionality. To view the DVR video stream for a particular event: 1. From the Activity tab, click on the Activity Log tab. The Activity Log displays. © 2014 Brivo Systems LLC. All rights reserved. Brivo OnAir Administrator’s Manual Page 52 Figure 27. View DVR Event Based Video 2. Select the event you wish to view and in the Video column, click the camera icon for the access event you want to view. A popup window opens, showing the video associated with the selected access event. If no camera is associated with the Event, the video icon will be absent. The icon may also be grayed out if the event is older than the oldest video data on the DVR. To Unlock a Door via DVR Live Video: 1. From the Setup tab, click on the Video tab then click on DVR Cameras. The DVR Cameras list displays. 2. Select the Video icon for the camera you wish to view. The video begins playing in a popup window. 3. Click the Unlock Door button. The door will pulse and the event will appear in the activity log. © 2014 Brivo Systems LLC. All rights reserved. Brivo OnAir Administrator’s Manual Page 53 Browsing the OVR Gateway Directory List The Video Gateway list identifies all the Video Gateways currently associated with the account. For each, the name is displayed. The Master and all Senior Administrators can view the list of Video Gateways. To view the list of Video Gateways for your account: 1. From the Setup tab, click on the Video tab then click on OVR Gateway Directory. The Video Gateways list displays. Figure 28. View Video Gateways List Features of this page include: Click the Edit icon associated with a specific Video Provider to update it. Click the Delete icon associated with a specific Video Provider to remove it from the account. © 2014 Brivo Systems LLC. All rights reserved. Brivo OnAir Administrator’s Manual Page 54 Adding an OVR Gateway Because no physical connection is required between the control panel and the video equipment, an OVR Gateway and cameras may be added to your account at any time. However, for ease of administration, Brivo recommends adding them after you define the doors and devices that the cameras will monitor. The Master Administrator and all Senior Administrators can add an OVR Gateway to the account. NOTE: This section only describes how to add an OVR Gateway to your Brivo OnAir account. For tips on configuring your OVR Gateway to work with Brivo OnAir, please refer to the Brivo Smartvue Configuration Guide. To add an OVR Gateway to your account: 1. From the Setup tab, click on the Video tab then click on OVR Gateway Directory. The Video Gateways list displays. 2. Click New Video Gateway. The New Video Gateway page displays. Figure 29. Add a New Video Gateway 3. Enter a brief, descriptive Name for the Video Gateway. The name can be any convenient, alphanumeric designator for the Video Gateway. It does not need to agree with any naming established in the Video Provider itself, as Brivo OnAir only uses this reference internally. 4. From the Video Gateway Site dropdown list, select the site to which you are attaching the video provider. 5. Enter the Authentication Key and Serial Number in the fields provided. 6. Click Save. © 2014 Brivo Systems LLC. All rights reserved. Brivo OnAir Administrator’s Manual Page 55 Managing OVR Gateways Once added to an account, an OVR Gateway can be updated or deleted at any time. The Master and all Senior Administrators can edit or delete an OVR Gateway. To edit a Video Gateway: 1. From the Setup tab, click on the Video tab then click on OVR Gateway Directory. The Video Gateway list displays. 2. Click the Edit icon associated with the Video Gateway you want to edit. The Edit Video Gateway page displays with the current information displayed. Figure 30. Edit a Video Gateway 3. Edit the Video Gateway settings as needed. 4. Click Save. You are returned to the Video Gateway list with the updated information displaying. To delete a Video Gateway: 1. From the Setup tab, click on the Video tab then click on OVR Gateway Directory. The Video Gateway list displays. 2. Click the Delete icon associated with the Video Gateway you want to delete. A warning prompt asks you to confirm that you want to delete the Video Provider. 3. Click OK. You are returned to the Video Providers list with the deleted Video Gateway removed from the list. © 2014 Brivo Systems LLC. All rights reserved. Brivo OnAir Administrator’s Manual Page 56 Browsing the Gateway Cameras List The Video Cameras list identifies all the Video Cameras currently associated with the account. The list shows the Name, the Video Camera Model, the Video Gateway to which each camera is attached, the connection status, and a link to view live video. The Master and all Senior Administrators can view the list of cameras for an account. To view the list of video cameras for your account: 1. From the Setup tab, click on the Video tab then click on Gateway Camera Directory. The Video Cameras list displays. Figure 31. View Video Cameras List Features of this page include: Click the Edit icon associated with a specific camera to update it. Click the Delete icon associated with a specific camera to remove it from the account. © 2014 Brivo Systems LLC. All rights reserved. Brivo OnAir Administrator’s Manual Page 57 Adding a Gateway Camera Because no physical connection is required between the control panel and the video equipment, an OVR Gateway and cameras may be added to your account at any time. However, for ease of administration, Brivo recommends adding them after you define the doors and devices that the cameras will monitor. The Master and all Senior Administrators can add a camera to the account. To add a new Video Camera to your account: 1. From the Setup tab, click on the Video tab then click on Gateway Camera Directory. The Video Cameras list displays. 2. Click New Video Camera. The New Video Camera page displays. Figure 32. Add a Video Camera 3. Enter the Name of the camera. The name can be any convenient alphanumeric designator. It does not need to agree with any naming established in the camera itself, as Brivo OnAir only uses this reference internally. 4. Click on the Add Device button and select the Associated Device this camera will monitor. For example, if you have installed “Camera 1” to provide a view of the area near “Front Door,” select “Front Door” from the list. The camera and device must be associated on this page in order for events in the Activity Log to be correlated with the correct video stream. 5. Select the Video Gateway Name from the dropdown list and then click the Select Camera button and pop-up window will all available cameras will appear. 6. Select the camera and the corresponding camera serial number will appear below. 7. Click Save. You are returned to the Cameras list with the new camera listed in alphabetical order. Once saved, the Video Camera Site and Video Camera Model Name will populate with the appropriate information and can be viewed later. © 2014 Brivo Systems LLC. All rights reserved. Brivo OnAir Administrator’s Manual Page 58 Managing Gateway Cameras Once associated with an OVR Gateway, a camera can be updated or deleted at any time. The Master and all Senior Administrators can edit and delete cameras. To edit a Video Camera: 1. From the Setup tab, click on the Video tab then click on Gateway Camera Directory. The Video Cameras list displays. 2. Click the Edit icon for the camera you want to edit. The Edit Video Camera page displays. Figure 33. Edit a Video Camera 3. Edit the values as needed. 4. Click Save. You are returned to the Video Cameras list with the updated information displaying. To delete a Video Camera: 1. From the Setup tab, click on the Video tab then click on Gateway Camera Directory. The Video Cameras list displays. 2. Click the Delete icon associated with the camera you want to delete. A warning prompt asks you to confirm that you want to delete the camera. 3. Click OK. You are returned to the Video Cameras list with the deleted camera removed from the list. © 2014 Brivo Systems LLC. All rights reserved. Brivo OnAir Administrator’s Manual Page 59 Viewing OVR Gateway Video When OVR Gateways are in use, Administrators have multiple options for viewing video, both live and activity based. To view live video from a Gateway camera: 1. From the Setup tab, click on the Video tab, then choose the Gateway Camera Directory tab. The Video Camera list page appears. 2. Click on the camera icon next in the Video column for the camera you would like to view. A popup window appears displaying the live video feed from that camera. Click the X in the upper right hand corner of the pop-up window to close the live video feed. NOTE: Only one instance of live video can be viewed at a time. To view activity-based playback from a Gateway camera: 1. From the Activity tab, click on the Activity Log tab. The Activity Log displays. 2. Next to the event for which you would like to view video, click the video camera icon. Video will appear in the Video Playback box only if the event’s corresponding device is associated with a Gateway Video Camera and will also display the subsequent two following clips. Otherwise, a popup window will appear to display the video linked to a DVR camera. Figure 34. View Activity-Based Playback for Gateway Camera © 2014 Brivo Systems LLC. All rights reserved. Brivo OnAir Administrator’s Manual Page 60 To download a clip from a Gateway camera: 1. Click on the Activity tab. The Activity Log displays. 2. Next to the event for which you would like to view video, click the video camera icon. Video playback will begin to play. 3. At the bottom of the video playback screen, click the Download Clip destination for where you would like the file to be saved. © 2014 Brivo Systems LLC. All rights reserved. icon and choose a Brivo OnAir Administrator’s Manual Page 61 4. Users and Groups © 2014 Brivo Systems LLC. All rights reserved. Brivo OnAir Administrator’s Manual Page 62 What are Users and Groups? A user is any person who requires access to one or more doors or floors at a given site or set of sites. A user has unique credentials, such as a card or PIN, that enable entry and exit at the specified doors. Users are listed in alphabetical order in the User Directory. A user can belong to one or more groups, depending on the version of the hardware and/or firmware. A group is a set of users with the same access privileges to one or more sites within an account. A group has a descriptive name, such as “Washington Staff.” Groups are listed in alphabetical order in the Group Directory. Access privileges are defined at the group level. A user inherits privileges from the groups to which he or she belongs. A user’s privileges can be set to start and/or expire on specified dates. Administrators vs. Users Throughout Brivo OnAir, the term user refers to an individual who has access privileges to a building or some part of a building. It does not refer to end-users of the interface; users do not have direct access to the Brivo OnAir interface. Instead, Administrators add and manage user-related information. The term Administrator, on the other hand, refers to an individual who has access permissions to the interface. Administrators manage the interface itself. For an Administrator to have access privileges to a building, he or she must also be defined as a user in the interface. Filtering The filtering system allows administrators to sort results using a variety of criteria. For users, filtering allows for sorting by the following: First Name – all first names containing the provided criteria Last Name - all last names containing the provided criteria Status – the status of all users using the selected status (active, pending/expired, suspended, deleted or orphaned) Group – all users belonging to the selected group Custom Field – all users that have matching information for the selected custom field For groups, filtering allows for sorting by the following: Group Name – all groups containing matching information for what was entered in the filter field Permission to Site – all groups with permission to the selected site Permission to Device – all groups with permission to the selected device © 2014 Brivo Systems LLC. All rights reserved. Brivo OnAir Administrator’s Manual Page 63 Browsing the Group Directory The Group Directory displays a list of groups in your account. The directory displays up to 20 groups at a time, listed alphabetically. To view the list of groups for your account: 1. From the Users tab, click the Group Directory tab. The Group Directory displays. Figure 35. View Group Directory Your Administrator privileges determine which groups display on this page. The Master Administrator and Senior Administrators can see all groups in the account. Assistant Administrators can see only the groups for which they have been given View privileges. Features of this page include: To Filter the group directory page by selecting from the dropdown menu. For example, to locate all groups which contain the letter P, select Group Name from the filter, type “P” into the text field and click Go. The results will display below. To Jump to any point in the alphabet, click a letter in the alphabet bar at the top of the page. For example, to locate the group “Managers,” click the letter M. Letters with no corresponding last names are grayed out. For all viewable groups, you will see: Left (back) and right (forward) scroll arrows if the list is more than one page long. An icon next to each group indicating whether or not the group has access privileges. (A grey icon indicates the group has not yet been assigned privileges.) The Group Name, serving as a link to the Group detail page The number of Users in the group A summary of your Administrator permissions for each group (View, Edit, Append) The date on which the group was Created An option at the bottom of the page, Print All Groups, allows you to print a report of all current groups along with a list of the schedules used by each. © 2014 Brivo Systems LLC. All rights reserved. Brivo OnAir Administrator’s Manual Page 64 Viewing Group Details The Group detail page displays information for a specific group. To view the details for a specific group: 1. From the Users tab, click the Group Directory tab. The Group Directory displays. 2. Click the group you wish to view. The associated Group detail page displays. Figure 36. View Group Details This page lists the group name, if the group has keypad unlock-hold privileges, is immune to Antipassback, the Antipassback reset time, and all doors and devices to which the group has access. Links on this page allow you to: Edit the group’s access privileges via the Edit Group button (See Editing Group Information) Edit the group’s name via the Edit Group button See a list of users who belong to the group Delete the group, if your Administrator permissions allow that action View the history of the group in the Administrative Journal To view a list of users in a group: 1. From the Users tab, click the Group Directory tab. The Group Directory displays. 2. Click the group for which you wish to view a list of users. The Group detail page displays. © 2014 Brivo Systems LLC. All rights reserved. Brivo OnAir Administrator’s Manual Page 65 3. Click the More Operations dropdown and select See Users in this Group. The list of users currently associated with the selected group displays. 4. Click a user’s name to access the associated User detail page. Figure 37. View Users in a Group © 2014 Brivo Systems LLC. All rights reserved. Brivo OnAir Administrator’s Manual Page 66 Creating a Group A group is a set of users with the same access privileges. For example, your account might have one site, “Maple Street Office,” which has two doors. If we assume that all employees require the same level of access to both doors, then a single group, “Maple Street Staff,” would be sufficient. Or, your account might have one site, “Elm Street Diner,” which has three doors. If we say that waiters require access to “Front Door” and “Back Door” but not “Office Door,” while managers require access to all three doors, then it would make sense to create two groups, one called “Elm Street Waiters” and one called “Elm Street Managers.” Or, your account might have two sites, “Miami Store” and “Orlando Store,” which have two doors each. At each store, staff members require access to “Front Door,” while managers require access to “Front Door” and “Stock Room.” In this case, you probably would want to create four groups: “Miami Staff,” “Miami Managers,” “Orlando Staff” and “Orlando Managers.” To create a group: 1. From the Users tab, click the New Group tab. The New Group page displays. Figure 38. Create a Group 2. In the Group Name field, enter a brief, descriptive name for the group, such as “Chicago Staff.” 3. Click Save Group. The group is created and you are transferred to the Edit Group page. See Editing Group Information for instructions on setting access privileges for this group. NOTE: The maximum number of groups to which a user may belong is sixteen (16). © 2014 Brivo Systems LLC. All rights reserved. Brivo OnAir Administrator’s Manual Page 67 Editing Group Information Only the Master Administrator and Senior Administrators can edit a group’s name or privileges. To edit a group name: 1. From the Users tab, click the Group Directory tab. The Group Directory displays. 2. Click the group you want to rename. The group detail page displays. 3. Click Edit Group. The Edit Group Page displays. Figure 39. Edit a Group Name 4. In the Group Name field, enter a new name for the group. 5. Click Save. You are returned to the detail page with the new name displayed. To edit group privileges: 1. From the Users tab, click the Group Directory tab. The Group Directory displays. 2. Click the group you wish to edit. The associated Group detail page displays. 3. Click Edit Group. The Edit Group page displays. © 2014 Brivo Systems LLC. All rights reserved. Brivo OnAir Administrator’s Manual Page 68 Figure 40. Edit Group Privileges 4. Click the Keypad Unlock-Hold Privileges checkbox to allow any member of this group to override a door unlock schedule by presenting his or her credentials and entering 99#. To reactivate the door unlock schedule, the group member enters 00#. 5. If you wish for this group to be immune to the Antipassback Reset Time, click the box next to Immune to Antipassback. 6. Set the Antipassback Reset Time. For more information, see Configuring Antipassback. 7. To specify which site privileges you want, select them from the Site dropdown menu. The default is Current Privileges. 8. To specify when the group will have access to each device, scroll through the Schedule dropdown list and click the desired access schedule. 9. Click See Schedules to view a report of all the currently defined schedules for the account. 10. Click Save. The group’s privileges are updated. To save changes but continue working with the same group privileges, click Save and Continue. © 2014 Brivo Systems LLC. All rights reserved. Brivo OnAir Administrator’s Manual Page 69 Creating a Group Enabled Schedule Brivo OnAir’s new Group Enabled Schedule feature allows you to implement a First-Person-In or Supervisor-onSite functionality at your facility. With First-Person-In, you stipulate that the schedule controlling a specific door or elevator cannot be activated until a member of the enabling group accesses it. For example, you may have scheduled the front door of your building to be unlocked at 9:00AM, but only if a security guard is present. If no member of the Front Door Guard group arrives until 9:15, the door remains locked until that time and can only be accessed with a valid credential. Supervisor-on-Site performs essentially the same function, but applies to a situation where you want to ensure that no other employees enter a designated building or area until a supervisor has arrived. Not only does the door remain locked until that time, but card readers and keypads also remain inactive. Implementing either of these features requires careful thought to ensure that you do not inadvertently bar your employees when you do not intend to, nor leave doors unlocked when they should not be. To ensure the security of your facility you must perform the following steps in the order indicated: 1. Create a group that includes only those people you want to activate a specific schedule at a specific door or device. Give the group an identifying name, such as “Openers.” These users will almost certainly belong to at least one other group as well, a group that defines their overall access privileges; their membership in the group Openers means only that they can activate the schedule for a specific door or elevator. See Creating a Group on page 66 for procedural information. 2. Associate a schedule with the enabling group. When you make this association you are NOT indicating that members of the group will only have access privileges during that schedule’s time period; it means that when the first member of the enabling group accesses the designated door or elevator the schedule will then become active. See Creating a Schedule on page 221 for guidelines on associating a schedule with an enabling group. WARNING: Enabling Group Grace Periods When you assign an enabling group to a schedule, you are prompted to specify a Grace Period. Without a grace period, the schedule only becomes active if a group member arrives at or after the schedule start time, not before. For example, if the schedule starts at 9:00 and a member of the enabling group arrives at 8:55, the schedule will not become active at 9:00. With a grace period of ten minutes, a member of the enabling group could arrive any time after 8:50 and the schedule would still become active at its 9:00 start time. 3. Assign the enabling group access privileges at the desired door or device. By giving the enabling group access privileges at a specific door or device according to a specific schedule you tell the system “This schedule does not allow access for any user until it is first activated by a member of the enabling group,” If the group “Day Shift” has access to the Front Door according to the schedule “Mon-Fri 9-5,” but the “Day Hours” schedule is associated with the enabling group “Openers,” an employee arriving at work at 9:05 will not be allowed entry at the Front Door unless an Opener has already accessed it. See the instructions for Editing Group Information above for instructions on managing group privileges. © 2014 Brivo Systems LLC. All rights reserved. Brivo OnAir Administrator’s Manual Page 70 Deleting a Group A group can be deleted at any time. When you delete a group, any user in that group who does not also belong to another group becomes unaffiliated and loses all access privileges. To delete a group: 1. From the Users tab, click the Group Directory tab. The Group Directory displays. 2. Click the group you wish to delete. The Group detail page displays. 3. Click Delete Group at the bottom of the page. 4. Click OK in both confirmation prompts. The group is deleted. For information about deleting a single user, please see Managing Users. © 2014 Brivo Systems LLC. All rights reserved. Brivo OnAir Administrator’s Manual Page 71 Browsing the User Directory The User Directory is a list of users for an account. It displays 20 users per page, in alphabetical order by last name. To view the list of users for your account: 1. From the Users tab, click on the User Directory tab. The User Directory displays. Figure 41. View User Directory Your Administrator permissions determine which users display on this page. The Master Administrator and all Senior Administrators can see all users in the account. Assistant Administrators can see only users who belong to groups for which they have View privileges. See Editing Assistant Administrator Permissions on page 125 for more information. Features of this page include: To Filter the user directory page by selecting from the dropdown menu. For example, to locate all users whose last name contains the letter S, select Last Name from the filter, type “S” into the text field and click Go. The results will display below. To Jump to any point in the alphabet, click a letter in the alphabet bar at the top of the page. For example, to locate the user “Tom Smith,” click the letter S. Letters with no corresponding last names are grayed out. © 2014 Brivo Systems LLC. All rights reserved. Brivo OnAir Administrator’s Manual Page 72 To scroll forward in the alphabet, click the right arrow in the top right corner. To scroll backward in the alphabet, click the left arrow. To the left of the arrows, the system indicates which set of user records you are currently viewing, i.e., 1-20 (of 25). The icon next to each user name indicates that user’s current status: Active (green icon), Suspended (yellow icon), Deleted (red out icon), or Unaffiliated (grey icon). Unaffiliated users are users who do not belong to any group and therefore have no access privileges. NOTE: All Administrators can view unaffiliated users. To view information about a user, click the user’s name. The User detail page displays. The first three custom fields from the User detail page display on the User Directory. In the example above, Department, Parking Spot, and License Plate are all custom fields. For information about renaming the field labels, please see Managing Custom Fields. To print a badge for a user, click the Print Badge icon associated with that user’s name to access the Print Badge page. See Managing Badges for more info. To delete an individual user, click the delete icon next to that user’s name, and then click OK in the confirmation window. To locate a deleted user, use the filter dropdown to select Status, choose Deleted, and click Go. The page will refresh. Deleted users are represented by an icon with a red X. You can view, but not edit, the details of a deleted user. NOTE: Only the Master Administrator and Senior Administrators can view deleted users. Click Print All Users to generate a report of the users in the account. The report does not include deleted users. © 2014 Brivo Systems LLC. All rights reserved. Brivo OnAir Administrator’s Manual Page 73 Viewing User Details The User detail page displays information for a specific user. To view the details for a specific user: 1. From the Users tab, click on the User Directory tab. The User Directory displays. 2. Click the user you wish to view. The associated User detail page displays. Figure 42. View User Details 3. This page lists all information currently maintained for an individual user, including up to ten custom defined fields (Hire Date through Birthday in the figure above). 4. If there are more than ten custom fields defined for this account, click View all custom field values. The complete list of custom fields displays in a popup window. Figure 43. View All Custom Field Values © 2014 Brivo Systems LLC. All rights reserved. Brivo OnAir Administrator’s Manual Page 74 Creating a User The Master Administrator and all Senior Administrators can create users and assign them to any group. When Assistant Administrators create users, however, they can only assign them to groups for which they have Edit permission. NOTE: Before creating a user, you must create one or more groups. Please see Creating a Group for more information. Before assigning cards, the cards must be added to the Card Bank. Please see Adding Cards for more information. To create a user: 1. From the Users tab, click the New User tab. The New User page displays. Figure 44. Create a User 2. Enter the user’s First Name and Last Name. 3. If your doors have keypads, enter a PIN. A PIN can be four- to eight-digits long. Click 4 ... to have the system generate a random four-digit PIN, click 5 ... for a five-digit PIN, etc. 4. If your doors have card readers and you would like to: 5. Assign ONE card to a user: enter a card number in the blank field next to Card #, or click Select ... to view a popup list of all currently unassigned cards. 6. Assign MULTIPLE cards to a user: enter a card number in the blank field next to Card # and click Add, adding up to 16 cards for that user. You may also click Select ... to view a popup list of all currently unassigned cards. © 2014 Brivo Systems LLC. All rights reserved. Brivo OnAir Administrator’s Manual Page 75 NOTE: It is possible to manually enter a card number in the Card # field. However, if the card is not listed in the Card Bank, or if there are multiple cards with the number you entered, you must choose Select… to specify which card has the corresponding facility code you would like to add. Figure 45. Select Card NOTE: If any of the doors or elevators to which this user will have access uses two-factor credentials, you must enter both a PIN and a Card #. 7. The Effective from date defaults to today’s date. Change the date if the user’s access privileges should take effect on a later date. The to field is empty by default. Enter a date if the user’s access privileges should expire on a pre-determined date; otherwise leave the field blank. 8. If you want to associate an image with this user, click Upload Photo to upload an already existing image. The select image popup window displays. © 2014 Brivo Systems LLC. All rights reserved. Brivo OnAir Administrator’s Manual Page 76 Figure 46. Upload a Photo 9. If you wish to take a new photo with a webcam, click on Take Photo. The Upload Image popup window displays. When you are ready, click on the Take Photo button. NOTE: The Brivo OnAir webcam interface uses Adobe Flash. This program must be loaded in order for the webcam to function. Additionally, the first time the webcam is used, right click on the image area (which will be black) and select Settings. Click the Allow button and the Remember checkbox and Close. Figure 47. Insert User Image 10. Follow the instructions to click and drag the mouse on the image over the area you want to select for this photo. This allows the user to crop the photo to the desired size. 11. When finished, click Save. You are returned to the New User page with the user image displayed. 12. Following the Badge Image field is a set of 10 custom fields that can be used for account-specific purposes. These fields are optional and can be renamed to meet the needs of your organization. To rename a custom field, click the Rename Custom Fields. (See Managing Custom Fields on page 80 for more information.) © 2014 Brivo Systems LLC. All rights reserved. Brivo OnAir Administrator’s Manual Page 77 13. To assign a user to a group, click the Add Group button. A popup window of all available groups will appear. Click on the group(s) you want the user to join. Those groups will disappear from the list and appear in the Group(s) box on the New User page. When finished, click on the Close Window link at the bottom of the popup window and you are returned to the New User page. The group(s) you added will be shown in the Group(s) box. To remove a user from a group, click on the group in the Group(s) box and click Remove. Users can be assigned to up to 16 groups at a time. The user inherits access privileges from the groups to which he or she belongs. (For users who belong to multiple groups, their access privileges are cumulative.) 14. If there are more than ten custom fields defined for the account, click Add User/Edit Custom Fields to access the Save Custom Field page. Edit the fields as needed and then click Save. The User detail page displays. Figure 48. Edit Custom Field Values 15. If there are ten or fewer custom fields, simply click Save User. The new user is created and the User detail page displays. Give the PIN and/or card to the user to whom they are assigned. WARNING: Group Membership Multiple group membership requires all control panels in the account to be 4000 series or higher and firmware version 2.0.0 or higher. © 2014 Brivo Systems LLC. All rights reserved. Brivo OnAir Administrator’s Manual Page 78 Managing Users The Master Administrator and Senior Administrators can edit and delete all users. Assistant Administrators can only edit and delete users who belong to groups for which they have Edit permission. To edit a user: 1. From the Users tab, click on the User Directory tab. The User Directory displays. 2. Click the user you wish to edit. The User detail page displays. 3. Click Edit User. The Edit User page displays. Figure 49. Edit a User 4. All fields on this page can be edited following the steps for Creating a User, described above. 5. Click Rename Custom Fields to change the names of the existing custom fields, or click Edit all custom field values to change the values for custom fields that are not displayed on this page. 6. On the Edit User page, you can also remove a user image by clicking on the the upper right hand corner of the user image. icon located in 7. Click Save User. The user is updated. To suspend/reinstate a user: 1. From the Users tab, click on the User Directory tab. The User Directory displays. 2. Click the user you wish to edit. The User detail page displays. 3. Below the User Name is a link that will state either Suspend User or Reinstate User. 4. Click on the link to either suspend or reinstate the user. © 2014 Brivo Systems LLC. All rights reserved. Brivo OnAir Administrator’s Manual Page 79 5. Click OK in the popup window. 6. A message appears noting that the user was suspended or user was reinstated. NOTE: A suspended user’s credentials will not work at any device. To delete a user: 1. From the Users tab, click on the User Directory tab. The User Directory displays. 2. If your Administrator permissions permit this action, the Delete function is active on this page. Locate the user you wish to delete, and click the delete icon next to that name. 3. Click OK in the confirmation prompt. The user is deleted. WARNING: Deleting Users When you delete a user, the user is removed from all groups to which he or she belongs. Accordingly, the user’s access privileges are revoked. If the user has a PIN, it will no longer be viable. If the user has a card, the card will become unassigned and can be assigned to another user at a later date. Once a user is deleted, the user cannot be undeleted. To add the user back, he or she must be re-created as a new user. © 2014 Brivo Systems LLC. All rights reserved. Brivo OnAir Administrator’s Manual Page 80 Managing Badges Once you have one or more badge templates defined for your account, you can use those templates with any user for whom you have an image stored. This allows you to generate a badge for the user. To print a badge: 1. From the Users tab, click on the User Directory tab. The User Directory displays. Figure 50. Viewing Users With Stored Images 2. There is a Print Badge icon associated with each user for whom an image is stored in the system. Click this icon for the user for whom you want to print a badge. The badging window displays. © 2014 Brivo Systems LLC. All rights reserved. Brivo OnAir Administrator’s Manual Page 81 Figure 51. Printing a Badge 3. Select a layout from the Badge Template Name dropdown list. A preview of the badge displays. 4. Click Print. If you have a card printer configured to work with your system, the badge prints, and you are returned to the User Directory. © 2014 Brivo Systems LLC. All rights reserved. Brivo OnAir Administrator’s Manual Page 82 Managing Custom Fields Only the Master Administrator and Senior Administrators can manage custom fields. Custom fields store optional information about a user, such as parking space assignment or cell phone number. You can create up to fifty custom fields, and each can hold up to 40 alpha-numeric characters. The first ten custom fields display on the User details, New User and Edit User pages. The first three appear as columns in the User Directory. To view the list of custom fields for your account: 1. From the Setup tab, choose the Account tab then click the Custom Fields tab. The Custom Fields directory displays. Figure 52. View Custom Fields Directory Only the Master Administrator and all Senior Administrators can view, create, edit or delete custom fields. Features of this page include: Click the Up arrow associated with any custom field to move it up in Order. Click the Down arrow to move it down. NOTE: The Order is significant because only the first ten custom fields on this list will display on the User details, New User and Edit User pages, and only the first three will display on the User Directory. The Field Name indicates the type of data stored in the field. The Field Type indicates if the field is used to store text, numbers or dates. Click Edit to change the field name or order. Click Delete to remove a specific custom field from the account. © 2014 Brivo Systems LLC. All rights reserved. Brivo OnAir Administrator’s Manual Page 83 To create a new custom field: 1. From the Setup tab, choose the Account tab, then click the Custom Fields tab. The Custom Fields directory displays. 2. Click Add a custom field definition. The Add Custom Field Definition page displays. Figure 53. Add a Custom Field Definition 3. Enter a brief, descriptive Field Name. 4. From the dropdown list, click a Field Type. 5. If the Field Type is Date, enter a Date Format, such as MM-dd-yyyyy. Only dates entered in the specified format will be valid on data entry pages such as New User or Edit User. NOTE: You must use MM, with capitalization, to signify months in the Date Format field. Lower case mm will be read as minutes by the application. Also, DD is used to indicate the day of the year and can therefore have a value of 1-366, while dd is used to indicate day of the month and can only have a value of 1-31. 6. In the Display Order Position field enter the number indicating where this custom field should appear in the list of fields. For example, if you enter 1, this field will appear first. By default, the new field is assigned the highest number possible, but you can easily change it. So, if there are 11 fields already, when you create a new one it will be assigned the Display Order Position of 12, but you can change that to any number from 1 to 12. NOTE: The Display Order Position is significant because Custom Fields 1, 2 and 3 are the only ones to display on the User Directory and only 1 through 10 display on the User detail, New User and Edit User pages. 7. Click Save. You are returned to the Custom Fields directory with the new field listed in the order you specified. To edit a custom field: 1. From the Setup tab, choose the Account tab then click the Custom Fields tab. The Custom Fields directory displays. © 2014 Brivo Systems LLC. All rights reserved. Brivo OnAir Administrator’s Manual Page 84 2. Click the Edit checkbox associated with the field you want to edit. The Edit Custom Field page displays. Figure 54. Edit a Custom Field Definition 3. You can change the Field Name and Display Order Position of the field, and if the field has been defined as a date, you can also change the Date Format. However, you cannot change the Field Type once a custom field is created. Instead, you must delete the existing field and create a new one of the type desired. 4. Click Save. You are returned to the Custom Fields directory with the updated information displayed. The changes are automatically effective throughout the account. NOTE: Because changes to custom fields are reflected throughout the account, you should think carefully before making any such changes. For example, if there is a custom field named Department and you change it to Office Number, all department data enter previous to the change will now be recorded as office numbers. To delete a custom field: 1. From the Setup tab, choose the Account tab, then click the Custom Fields tab. The Custom Fields directory displays. 2. Click the Delete icon associate with the field you want to delete. A warning prompt displays. 3. Click OK. The field and any content stored in it are permanently removed from the account. WARNING: Deleting Custom Fields When you delete a custom field you delete all data stored in that field. For example, if you delete the custom field Cell Phone, all cell phone numbers for all users are also permanently removed from the account. © 2014 Brivo Systems LLC. All rights reserved. Brivo OnAir Administrator’s Manual Page 85 5. Reports © 2014 Brivo Systems LLC. All rights reserved. Brivo OnAir Administrator’s Manual Page 86 What are Reports? Brivo OnAir provides reporting capabilities on a variety of levels. Under the Reports tab, My Reports is a query and configuration tool for predefined commonly run reports, allowing these reports to be generated and parameterized depending upon administrator permissions. This section is subdivided into Report Jobs, Report Schedules, and Report Configurations. Brivo OnAir supports customized User Reports. This functionality enables you to query your database for information related to a specific user. Brivo OnAir also supports customized Activity Reports. This functionality is a customized query of system activity for information related to devices, sites, groups, and/or users. The In/Out Report allows you identify which users have gained credentialed access to a site (In), and who amongst that group has subsequently used a credential to leave the site (Out). Finally, all created reports now can be marked as private at the time of creation. Private reports are only viewable by the master administrator as well as the super/senior administrator who created it © 2014 Brivo Systems LLC. All rights reserved. Brivo OnAir Administrator’s Manual Page 87 Public versus Private Reports At the time of creation, administrators have the ability to mark a user or activity report as private. A private report can only be seen by the Master Administrator of the account as well as the Super/Senior Administrator who created it. NOTE: Private Reports cannot have the owner changed once created nor can a private report ever be made public again. NOTE: Private Reports CANNOT be assigned to Assistant Administrators. NOTE: If an administrator who created a report is deleted, the report remains private and the owner is automatically changed to the Master Administrator. © 2014 Brivo Systems LLC. All rights reserved. Brivo OnAir Administrator’s Manual Page 88 My Reports My Reports is a query tool for predefined commonly run reports, allowing these reports to be generated and parameterized depending upon administrator permissions. My Reports will generate two types of canned reports: immediate and scheduled. Canned reports have fixed data so they do not require user input, beyond output format(s) and potential recipient(s). These reports allow the Master Administrator to run these reports for immediate consumption without requiring any additional set up. My Reports also allows the Master Administrator to quickly assign permissions to other users in the account so that they are able to use the same report configuration. NOTE: Administrators can generate reports for a 90 day window using data from up to 365 days ago. List of Reports Definition of the available reports in My Reports: (D) denotes that this is one of the default reports created at account creation. Account Activity Report (D) – An alphabetized list of all sites with summarized information (for the last 24 hours) that includes Access Events, Failed Access Events, Exception Events, Door Locked/Unlocked Events, Device Events (for ACS3000 and ACS4000), Programmable Device Events, Wiring Events, and Control Panel and Board Events. Account Summary Report – All sites sorted alphabetically (by site name) with Site Name, Address (City Name and State), Quantity of Doors, Quantity of Devices, Quantity of Users, and name of Unlock Schedule(s). Active Users Report (D) – All active users sorted alphabetically (by last name) (for a 90 day window within the last 365 days) with Last Name, First Name, Cards, PIN Credentials, and Last Credential Use Date. All Doors Report – All doors sorted alphabetically (by site) with Door Name, Control Panel ID, Device Type, and Created Date. All Users Report – All users sorted alphabetically (by last name) (for a 90 day window within the last 365 days) with Last Name, First Name, Cards, PIN credentials, Status, Expiration Date, and Last Credential Use Date. NOTE: After 10.12.2, Last Credential Used will default to No. Legacy Reports will continue to function as before. Control Panel Report (D) – All control panels sorted alphabetically (by control panel name) with Control Panel Name, Last Contact (Date/Time), Control Panel ID, Model Type, and current Firmware Version. Daily Summary Report (D) – Available in English, French, or Spanish, a list sorted alphabetically by site which the following summary information (for the last 24 hours): Unique users on site, successful access events, failed access events, forced door events, door ajar events, too many invalid PINs, schedule override events, © 2014 Brivo Systems LLC. All rights reserved. Brivo OnAir Administrator’s Manual Page 89 pulse door events, lockdown events, communication loss events, power loss events, control panel opened events, wire cut events, and wire short events. Door/Device Rights Report – All doors and devices grouped by site showing all users (listed alphabetically by name) with rights to those doors and devices. Elevator Report – All elevators sorted alphabetically with the names of the floors being controlled and the output. First/Last Access Report – A list of all users sorted alphabetically with First Access, showing credential used, device accessed, and time used, and Last Access, showing credential used, device accessed, and time used (since midnight in the report runner’s time zone). Group Directory Report (D) – All groups sorted alphabetically (by group name) with Group Name, Number of Users in Group, and the Created Date. Holiday Report – A list of all holidays in the account sorted by date that includes Site, Holiday Description, and From and To Dates. Inactive Users Report (D) – All inactive users sorted alphabetically (by last name) with Last Name, First Name, Cards, PIN Credentials, and Status. Journal Report (D) – A listing of journal entries for a particular event type. Displays the Date and Time, Action, Details, and who performed the action. Schedule Relationship Report (D) – A list sorted alphabetically by site with Groups and Devices to which the selected schedule is applied. Site Activity Report (D) – A chronological list of a selected site(s) and/or device(s) with summarized information for a selected time period that can include one of the following event types: Access Events, Failed Access Events, Exception Events, Door Locked/Unlocked Events, Device Events (for ACS3000 and ACS4000), Programmable Device Events, Wiring Events, and Control Panel and Board Events. Unused Credential Report – A list of all users sorted alphabetically who have never used their credentials within the specified time frame showing First Name, Last Name, and Credential (card value or PIN). User Activity Report (D) - A chronological list of activity by group and/or user at selected site(s) and/or device(s) with summarized information for a selected time period. © 2014 Brivo Systems LLC. All rights reserved. Brivo OnAir Administrator’s Manual Page 90 Creating a New Report Configuration 1. From the Reports tab, click on My Reports, then click on Report Configurations. The Report Configurations page displays. 2. Click on Create New Report. The Report Configuration page displays. 3. Select a report from the My Reports box. 4. Click on the Create this Report link in the Report Definition box. 5. Enter a name in the Report Name field. 6. If desired, change the parameters of the report as needed. 7. Click Submit. © 2014 Brivo Systems LLC. All rights reserved. Brivo OnAir Administrator’s Manual Page 91 Figure 55. New Report Configuration Page One Figure 56. New Report Configuration Page Two Generating Output from a Report Once a report has been configured, two options exist. A report can be run immediately or it can be scheduled to run on a determined schedule. © 2014 Brivo Systems LLC. All rights reserved. Brivo OnAir Administrator’s Manual Page 92 Figure 57. My Report Configurations To Run a Report Now 1. From the Reports tab, click on My Reports, then click on Report Configurations. All existing report configurations will appear. 2. Select the Report Name you wish to run and click on the Run Report link under the Run Now column. The Create Report Job page will appear. 3. Select the report Output Format. Formats available are CSV, HTML, and PDF. 4. Under Select Report Recipients, the name of the current administrator will automatically appear. If additional recipients are wanted, click on the Add Recipient link. A list of administrators will appear. Click on whichever administrator you want and that administrator will disappear from the list and appear in the Select Reports Recipient box. When a report is generated, it takes into account the administrator’s permission. When finished, click on the Close Window link and you are returned to the Create Report Job page. 5. The Email Report dropdown menu defaults to none, but also allows the Report Recipients to be notified via email (the email listed in the admin profile) that the report has been run or to be notified and to have a copy of the report included as an attachment to the email. 6. Click Run Report and you are returned to the Reports Jobs page. 7. The report is now listed in the Queue. To view the report, click on the Output link under the Output column. The report outputs in whatever form was selected when the job was created. To Run a Report on a Schedule 1. From the Reports tab, click on the My Reports tab, then click on the Report Configurations tab. The Report Configurations page displays. Select the report you wish to create a schedule for. Click on the Create Schedule link. You are taken to the My Reports Create Schedule page. 2. Enter a Schedule Name for this schedule. © 2014 Brivo Systems LLC. All rights reserved. Brivo OnAir Administrator’s Manual Page 93 3. In the Define Schedule section, report schedules can be set up to run daily, on certain day(s) of the week, or on specific day(s) of a month. NOTE: To select the last day of the month, simply choose Monthly and then select the 31 st day. Even if the month has only 28 or 30 days, selecting 31 automatically configures the report schedule for the “last day of the month.” Figure 58. Report Scheduling 4. Select the time and date. To select multiple days of the week or month, hold down the CTRL key when you select the days of the week or month. 5. Under Select Report Recipients, the name of the current administrator will automatically appear. If additional recipients are wanted, click on the Add Recipients link. A list of administrators will appear. Click on whichever administrator you want and that administrator will disappear from the list and appear in the Select Reports Recipient box. When finished, click on the Close Window link and you are returned to the Report Schedule page. 6. Under Additional Emails, if additional recipients who are not administrators are wanted, check the Additional Emails checkbox and then enter the email(s) separating them by commas. 7. Select the report Output Format. Formats available are CSV, HTML, and PDF. © 2014 Brivo Systems LLC. All rights reserved. Brivo OnAir Administrator’s Manual Page 94 8. The Email Report dropdown menu defaults to none, but also allows the Report Recipients to be notified via email (the email listed in the admin profile) that the report has been run or to be notified and to have a copy of the report included as an attachment to the email. 9. When finished, click Submit. You are returned to the Report Schedule Details page. Click on the Report Schedules button and you are returned to the Report Schedules list page where the report is now listed. Figure 59. Report Schedules 10. At the scheduled time, the report will automatically generate using the format selected. Assigning Permissions for Reports to Assistant Administrators Permissions can be granted to Assistant Administrators to run reports. If permitted, the Assistant Administrator can edit the configuration of a report, run a report, and/or schedule a report to be run. 1. From the Reports tab, click on the My Reports tab, then click on the Report Configurations tab. The Report Configurations page displays. Click on the report to which you want to grant permissions. The Report details page displays. 2. Click on the More Operations tab and select the Grant Report Permissions link. 3. Select the Assistant Administrator from the dropdown menu that you wish to grant permissions to. 4. Select which permissions you want to grant the selected Assistant Administrator by checking the appropriate boxes. 5. Click Submit. You are returned to the Report Configuration page and the Assistant Administrator along with the chosen permissions is listed. To grant permissions to another Assistant Administrator, simply follow the process above again. Managing Shortcuts for My Reports Managing Shortcuts allows administrators to link often used reports to the Home page for quick and easy access under the Run Report Shortcuts… section. 1. From the Reports tab, click on the My Reports tab. The My Reports page displays. 2. Click on the Manage Shortcuts link. The Reports Shortcuts page will display with a list of all current reports. © 2014 Brivo Systems LLC. All rights reserved. Brivo OnAir Administrator’s Manual Page 95 Figure 60. Report Shortcuts 3. Check the report(s) you want to appear on the Home page under the Run Report Shortcuts… section. 4. Click Save. If you click on the Home tab, you will see the selected reports as links under the Run Report Shortcuts… section. NOTE: Assistant Administrators are able to manage their own shortcuts, but only for reports for which they have permissions. © 2014 Brivo Systems LLC. All rights reserved. Brivo OnAir Administrator’s Manual Page 96 Generating a User Report The User Report function lets you generate a customized report of user properties, including the date on which a user record was created or updated in Brivo OnAir as well as any custom field data maintained for one or more users. Only the Master Administrator and all Senior Administrators can create User Reports. To browse the complete list of user reports currently defined for your account: 1. From the Reports tab, click on the User Reports tab. The User Reports list displays. Figure 61. View Reports List Features of this page include: Click New Report to create a new user report. Click Run Report to generate the report. Click the Edit icon associated with a specific report to update it. Click the Delete icon associated with a specific report to remove it from the account. © 2014 Brivo Systems LLC. All rights reserved. Brivo OnAir Administrator’s Manual Page 97 To create a new User Report: 1. From the Reports tab, click on the User Reports tab. The User Reports list displays. 2. Click New Report. The User Report page displays. Figure 62. Generate a User Report 3. Enter a Report Name for the report. 4. From the User Fields scrolldown list click the fields you want to include in the report. Use Shift to select multiple consecutive fields or Ctrl to select multiple non-consecutive fields. 5. When the field(s) you want to include in the report are highlighted, click the right arrow . The selected fields appear in the right-hand list. To remove fields from the report, click the field name(s), and then click the left arrow . 6. If you want to include only a subset of the users in your report, you can add a filter to any field. From the Add filter dropdown list, select the field to which you want to add a filter and then click the plus (+) button. A set of corresponding filter fields displays: a formula dropdown list and a properties data entry field. 7. For Text fields, the formula dropdown list includes the options Is, Is Not, Starts with, and Ends with. Select a formula from the dropdown list, and then enter the corresponding properties in the adjoining data entry field. For example, if you want a report of all users with the last name Smith, you might select Last Name from the Add filter dropdown list, and then select Is from the formula dropdown list, and enter Smith in the adjoining properties field. 8. For Number fields, the formula dropdown list includes the options Is, Is Not, Less than, Less than or equal to, Greater than, Greater than or equal to, and Between. If you select Between, two properties fields display. 9. For Date fields, the formula dropdown list includes the options Is, Is Not, Before, After, and Between. As with Number fields, if you select Between you must enter two property values. NOTE: Dates must be entered in the format MM/dd/yyyy. © 2014 Brivo Systems LLC. All rights reserved. Brivo OnAir Administrator’s Manual Page 98 10. To remove a filter after defining it, click the minus [ - ] button at the end of the filter property field. NOTE: You can enter more than one filter for any given field. Simply select that field multiple times from the Add Filter dropdown menu, and make sure that any filter combinations you enter are logical. 11. From the Show dropdown list click the users you want to include in the report: All Users, Only Enabled Users, Only Disabled Users, Only Active Users, Only Suspended Users. 12. From the Report Format dropdown list, select the format you want the report generated in. 13. Check the Create As Private box if you would like the report to be private. 14. Click Save. You are returned to the Reports list page with the new report displaying. To edit a User Report: 1. From the Reports tab, click on the User Reports tab. The User Reports list displays. 2. Click the Edit icon associated with the report you want to run. The User Report page displays with the customization criteria displaying. 3. Edit the criteria according to the preceding guidelines for creating a new report. 4. Click Save. You are returned to the Reports list page with the new report displaying. To generate a User Report: 1. From the Reports tab, click on the User Reports tab. The User Reports list displays. 2. Click the Run Report icon. The report displays in a popup window. Use your Web browser’s print capabilities to generate a hardcopy of the report. Figure 63. User Report in .csv Format © 2014 Brivo Systems LLC. All rights reserved. Brivo OnAir Administrator’s Manual Page 99 Saving and Re-running an Activity Report The Saving and Re-running and Activity Report function allows you to generate a customized activity report. This function lets you choose the criteria that will comprise the columns in your report. The Device scrolldown list allows you to view activity reports according to doors or devices. The Sites scrolldown list allows you to view activity reports according to a site rather than particular doors. The Groups section allows you to view activity reports for all members of a group or groups. The Users section allows you to view a particular user’s activity. This function allows you to view all activity at any point during the past 365 days. Only the Master Administrator and all Senior Administrators can create Activity Reports. NOTE: Activity Reports are currently limited to reporting 65,000 events. In order to accommodate events that exceed this amount, you must divide the report into sections in order to ensure that all events have been reported. To create an activity report: 1. From the Reports tab, click on the Activity Reports tab. The Activity Reports page displays. Figure 64. Activity Reports Display 2. Select New Report. Options display. 3. Enter a Name for the report. 4. From the Fields scrolldown list click, the fields you want to include in the report. Use Shift to select multiple consecutive fields or Ctrl to select multiple non-consecutive fields. © 2014 Brivo Systems LLC. All rights reserved. Brivo OnAir Administrator’s Manual Page 100 Figure 65. Creating an Activity Report 5. When the field(s) you want to include in the report are highlighted, click the right arrow . The selected fields appear in the right-hand list. To remove fields from the report, click the field name(s), and then click the left arrow . 6. When you have selected the field(s) that will be reported on, move onto the Devices list to click any doors or devices for which you wish to generate an activity report. 7. Next you move onto Sites, selecting from the Sites list the site(s) for which you wish to generate an activity report. 8. You may also specify which groups for whom you wish to generate an activity report by selecting from the Groups list. 9. If you wish to generate an activity report that is sorted by a user’s activity, click on the Add User link. A pop-up will display with a list of users that you can then add by clicking on the user names. The user appears in the Users field. When finished adding users, click on the icon in the upper right hand corner to close the popup window. You are returned to the Activity Report page. © 2014 Brivo Systems LLC. All rights reserved. Brivo OnAir Administrator’s Manual Page 101 Figure 66. Activity Report User options 10. To specify the time frame during which the activity occurred, you can add a filter to the report by using the dropdown lists at the bottom of the page. The default time frame is set for today. 11. You may select the time during which the activity occurred as Absolute or Relative by selecting either option from the buttons shown. 12. If you select Absolute for your activity report option, the Start and End fields will become active. From these fields you can click on the calendar to select the exact dates and times to include in your activity report. 13. If you select Relative for your activity report option, a dropdown box next to Relative will appear that includes Next or Last. Next, select the number of days to include in the report by filling in the Days field. Figure 67. Activity Report Occurred Fields 14. If you want to include only a subset of the fields in your report, you can add a filter to any field. From the Add filter dropdown list, select the field to which you want to add a filter and then click the plus (+) button. A set of corresponding filter fields displays: a formula dropdown list and a properties data entry field. To remove a filter, click the minus (-) button. © 2014 Brivo Systems LLC. All rights reserved. Brivo OnAir Administrator’s Manual Page 102 15. For Text fields, the formula dropdown list includes the options Is, Is Not, Starts with, and Ends with. Select a formula from the dropdown list, and then enter the corresponding properties in the adjoining data entry field. For example, if you want a report of all users with the last name Smith, you might select Last Name from the Add filter dropdown list, and then select Is from the formula dropdown list, and enter Smith in the adjoining properties field. 16. For Date fields, the formula dropdown list includes the options Is, Is Not, Before, After, and Between. As with Number fields, if you select Between you must enter two property values. Figure 68. Activity Report filter options 17. If you want to include a subset for the type of event that occurred, select an event from the dropdown list Report Event Type. This list includes several events: 18. Device events, which report on any I/O device activity; 19. Control Panel events, which report on power status and/or tamper activity; 20. Access and Failed Access events, which report on all events pertaining to entry and on failed access attempts; 21. User events, which report on a particular user’s activity; 22. Administrator Events, which report on door pulsing. 23. Choose the format for which you would like to view this report from the dropdown menu. You may view the report as an Excel file (csv) or as an HTML file (html). 24. If you want the report to be marked as Private, check the Create As Private box. 25. You may save this report in order to run it again in the future by clicking the Save button. 26. Click Run Report to view an existing report. © 2014 Brivo Systems LLC. All rights reserved. Brivo OnAir Administrator’s Manual Page 103 Running an In/Out Report In/Out Reports enable you to identify which users have gained credentialed access to a site (In), and who amongst that group has subsequently used a credential to leave the site (Out). For the purpose of this report, a user cannot be Out on any given day unless he or she was first In. In other words, if a user has not accessed a site on the day the report is generated, he or she will not be listed as Out; rather, that user’s name will not appear on the report at all. To run an In/Out Report: 1. From the Reports tab, click the In/Out Report tab. The In/Out Report page displays. Figure 69. Run In/Out Report 2. Click the site for which you want to run the report. 3. Click Run Report. The report displays in a popup window. Use your browser’s print capabilities to generate a hardcopy of the report. © 2014 Brivo Systems LLC. All rights reserved. Brivo OnAir Administrator’s Manual Page 104 Figure 70. View In/Out Report NOTE: Events are purged 12 hours after they occur, not at a specific time each day. © 2014 Brivo Systems LLC. All rights reserved. Brivo OnAir Administrator’s Manual Page 105 6. Account © 2014 Brivo Systems LLC. All rights reserved. Brivo OnAir Administrator’s Manual Page 106 What is an Account? An account is essentially a “span of control.” It is a group of affiliated control panels all under the management of a single Master Administrator. An account might be a small building with a single control panel. Or it might be a large building with multiple control panels, controlling access to several exterior as well as interiors doors. Or it might be multiple buildings, located in different cities or even different countries. In each one of these situations, however, the account has one and only one Master Administrator. © 2014 Brivo Systems LLC. All rights reserved. Brivo OnAir Administrator’s Manual Page 107 My Login Managing Passwords, Secret Questions, and Two Factor Methods Administrators can access and manage an account through the Brivo OnAir interface using the My Login link. Each Administrator manages his or her own password. Administrators who forget their passwords may use the self-serve password reset feature or, if the soft lockout feature is enabled, merely wait for the timeout period to expire before attempting to log in again. NOTE: The soft lockout feature allows for the resetting of the lockout that occurs after an administrator has failed to enter the correct password and locked the account as a result. The soft lockout can be set anywhere from 1 to 999 minutes. After this time has elapsed, the administrator may again attempt to enter the correct password rather than having to call Technical Support. The administrator will be required to correctly answer a secret question before receiving an email with a new randomly generated password. Like passwords, secret questions are maintained by each individual Administrator. NOTE: If you have not established a secret question and answer and have forgotten your password, you will be required to contact Technical Support for further assistance. To change your password: NOTE: The password must contain a minimum of 2 of the following: lower case, upper case, digit, or non-alphanumeric characters. 1. Go to the Administrator Name link on the top right of the page. 2. From the dropdown, click the My Login link. The My Login page displays. 3. Click on Change Password. © 2014 Brivo Systems LLC. All rights reserved. Brivo OnAir Administrator’s Manual Page 108 Figure 71. Change Password 4. To change your password, enter a new password in both the New Password and Confirm New Password fields. 5. Enter your current password in the Current Password field, the password you used to log in to the current session. 6. Click Save. If you changed your password you will need to use the new password the next time you log in to your account. If you ever forget your password, you may use the self-serve password reset or you will need to be able to answer your secret question before Technical Support will assign you a new one. To change a secret answer and question: 1. Go to the Administrator Name link on the top right of the page. 2. From the dropdown, click on the My Login link. 3. Click on the Change Secret Question and Answer link. The secret question and answer page displays. 4. Enter a new secret question and/or answer as desired. The secret question can be anything that is meaningful to you and can be used for identification purposes, such as “What was the name of my first pet?” Do not create a question involving readily available information, such as “When is my birthday?” 5. Enter your current password to confirm your identity. 6. Click Save. Figure 72. Changing Secret Question and Answer To use the self-serve password reset: 1. At the login screen, click on the Forgot your password link. © 2014 Brivo Systems LLC. All rights reserved. Brivo OnAir Administrator’s Manual Page 109 2. Enter the Administrator ID and click the Submit button. An email will be sent to the email address registered to the Administrator ID provided. Please check the email and follow the instructions. NOTE: The email will contain a link. This link is only valid for 4 hours. If the link is not used during that time, the process will have to be restarted from the beginning. 3. When you click on the link, you will be returned to the Reset Password page. Please reenter the Administrator ID and click the Submit button. 4. The secret question will appear along with a field for the secret answer. Fill in the secret answer and click the Submit button. 5. An email will be sent to the email address on file for your Administrator ID with further instructions. 6. Use the Click Here link to return to the login page. Enter your Administrator ID and the temporary password provided in the second email. You will then be instructed to enter a new permanent password. 7. Enter your Administrator ID and your new permanent password to complete the login process. Activation and Configuration of Two-Factor Authentication For additional security precautions, Brivo OnAir offers the option for two-factor authentication logins. This feature, which must be activated by Brivo Technical Support, affects all administrators on an account. Once activated, when an administrator logs into the system, he or she will receive an email with a login token which they must use to complete the login process. This token, which is only valid for a limited time, will be emailed to the email on file with the administrator’s profile. To set up Two-Factor Authentication 1. After Brivo Technical Support has enabled Two Factor Authentication, log in to your account. 1. Go to the Administrator Name link on the top right of the page. 2. From the dropdown, click on the My Login link. 3. Click on the Change Two-Factor Method link. The Two Factor Authentication Setup page displays. Figure 73. Two Factor Authentication Setup – Step One 4. Select a Two-Factor Method from the dropdown menu. Currently, only e-mail is available. 5. Enter the e-mail address to which you want the token to be e-mailed. 6. Click on the Test Two-Factor Method button. © 2014 Brivo Systems LLC. All rights reserved. Brivo OnAir Administrator’s Manual Page 110 Figure 74. Two Factor Authentication Setup – Step Two 7. You should momentarily receive an e-mail with the token. Copy the token from the e-mail into the token field and click Save Two-Factor Method. Figure 75. Two Factor Authentication Setup – Step Three 8. The Two-Factor Authentication Method approval message will appear. 9. Click on the Log In Again link to complete the process. 10. The Administrator Login screen will now appear asking for your Administrator ID and Password. Once both are successfully entered, a second Administrator Login page will appear displaying your Administator ID (which cannot be altered) and a blank Token field. 11. A new token will have been automatically generated and sent to your e-mail address. Enter this new token in the Token field and click Log In. © 2014 Brivo Systems LLC. All rights reserved. Brivo OnAir Administrator’s Manual Page 111 Figure 76. Login Screen with Two Factor Authentication 12. Proceed with your normal activities. To change the two-factor method 1. Go to the Administrator Name link on the top right of the page. 2. From the dropdown, click on the My Login link. 3. Click on the Change Two-Factor Method link. Figure 77. Change Two Factor Method 4. Select the Two-Factor Method from the drop down menu. 5. If EMAIL, please enter a valid e-mail address and click on the Test link. 6. Enter the token you received in the Token field. 7. Click on Save Two-Factor Method. 8. Click on the Log In Again link to begin using Two-Factor Authentication. © 2014 Brivo Systems LLC. All rights reserved. Brivo OnAir Administrator’s Manual Page 112 Managing Time Zone Display There are two ways to display time in Brivo OnAir: Site Time and My Time. Site Time When you set your account to use Site Time, time stamps throughout your account reflect each site’s time zone. For example, in this excerpt from the Activity Log, time for the Demo Kit (Eastern) is recorded as Eastern Daylight Time (EDT), while time for the Wesley site is recorded as Pacific Daylight Time (PDT). My Time The My Time option allows you specify a single time zone to be used for all time stamps in your account. For example, if you set My Time to Pacific Daylight Time (PDT), all events in the Activity Log will be recorded as such. NOTE: The Time Zone setting is Administrator-specific; each Administrator may set his or her own time zone preference. To set your time zone and display mode: 1. Go to the Administrator Name link on the top right of the page. 2. From the dropdown menu, click the My Login link. Figure 78. Set Time Zone 3. Click the Time Zone link. The Time Zone page displays. 4. Select your time zone from the Time Zone dropdown list. © 2014 Brivo Systems LLC. All rights reserved. Brivo OnAir Administrator’s Manual Page 113 5. In the Show Activity Log Events in field, click either My Time or Site Time. 6. Click Save. Activity Log events will begin displaying in the specified mode. © 2014 Brivo Systems LLC. All rights reserved. Brivo OnAir Administrator’s Manual Page 114 Managing Company Information The Company Information page displays the name and address of your company. Typically, this information will be entered at the time the account is created. The Master Administrator and all Senior Administrators can edit company information at any time. To edit company information: 1. From the Setup dropdown menu, choose the Accounts tab and click on the Company Info link. The Company Information page displays. 2. Click Edit Company Information near the top of the page. The Edit Company Information page displays. Figure 79. Edit Company Information 3. Update the desired fields. All of the fields on this page may be edited. Company Name, Street 1, City, State/Province, ZIP/Postal Code, and Phone are required fields. Street 2, Ext., Fax, and Industry are optional. 4. Click Save Company Information. You are returned to the Company Information page with the updates displayed. © 2014 Brivo Systems LLC. All rights reserved. Brivo OnAir Administrator’s Manual Page 115 Managing Account Settings The Account Settings screen allows for an administrator to enable or disable certain tools in an account, including user activation, self-serve password reset, and soft lockout for self-serve password reset. To manage account settings: 1. From the Setup dropdown menu, choose the Accounts tab and click on the Account Settings link. The Account Settings page displays. 2. If you would like all users to be created as suspended, check the Create Users as suspended box. NOTE: By default, new users are created as activated. In order to create users as suspended, the box must be checked. 3. To enable the self-serve password reset option on the account, check the Enable self-serve password reset box. 4. To enable soft lockout for self-serve password reset, check the Enable soft lockout box. Choose the soft lockout timeout period by filling in the box. 5. Once finished, click Save Account Settings. Figure 80. Account Settings © 2014 Brivo Systems LLC. All rights reserved. Brivo OnAir Administrator’s Manual Page 116 7. Administrators © 2014 Brivo Systems LLC. All rights reserved. Brivo OnAir Administrator’s Manual Page 117 What are Administrators? An Administrator is a person who administers an account. Administrators access and manage an account through the Brivo OnAir interface. There are four types of Administrators: Master Administrator: Each account must have one and only one Master Administrator. The Master Administrator can operate on all account data, as well as view, create, edit and delete Super, Senior and Assistant Administrators. Super Administrator: An account may have multiple Super Administrators. Super Administrator permissions are granted by the Master Administrator or another Super Administrator. A Super Administrator is actually a Senior Administrator (refer to description below) with “super” permissions. Super Administrators are Senior Administrators who can view, create, edit and delete all other Administrators except the Master Administrator. Senior Administrator: An account may have multiple Senior Administrators. Senior Administrator permissions are granted by the Master Administrator or a Super Administrator. Senior Administrators can operate on all account data, but cannot manage other Administrators. Assistant Administrator: An account may have multiple Assistant Administrators. Assistant Administrator permissions are granted by the Master Administrator or a Super Administrator. Assistant Administrators have access to only a subset of the account data. Depending on their permissions, they may be able to view and/or manage some site and group data, but they cannot view or manage other Administrators. Administrators vs. Users Throughout Brivo OnAir, the term Administrator refers to an individual who has access permissions to the interface. Administrators manage the interface itself. The term user, on the other hand, refers to an individual who has access privileges to a building or some part of a building. Users do not have direct access to Brivo OnAir. Instead, Administrators add and manage userrelated information in the interface. Typically, all Administrators will also be defined as users in the interface, but most users will not also be defined as Administrators. © 2014 Brivo Systems LLC. All rights reserved. Brivo OnAir Administrator’s Manual Page 118 Browsing the Administrators Directory The Administrators directory displays a list of all Administrators actively associated with an account. Administrators are organized first by status (Master, Senior or Assistant) and then alphabetically. To view the list of Administrators for your account: 1. From the Setup tab, choose the Account tab then click on the Administrators tab. The Administrator directory displays. Figure 81. View Administrators Directory Your Administrator permissions determine which Administrators are listed on this page. The Master Administrator and Super Administrators will see a complete list of all Administrators for the account. Senior and Assistant Administrators will see only the Master Administrator and their own names listed. Your Administrator permissions also determine what actions you can perform on this page. The Master Administrator and Super Administrators can view Administrator details, as well as create, edit and delete Super, Senior and Assistant Administrators. Senior and Assistant Administrators have View access only to the information displayed. NOTE: No Administrator can delete him- or herself. © 2014 Brivo Systems LLC. All rights reserved. Brivo OnAir Administrator’s Manual Page 119 For all viewable Administrators, you will see the following information: The Administrator’s Name in the format Last, First An Admin ID number, unique to the Administrator The Administrator’s Phone number An Email address The final column in the Administrators list page details the time and date stamp of when each administrator has logged in. Master Administrators can view all Administrator last logins. Super Administrators can see all Administrator last logins except the Master Administrator. Senior Administrators cannot see any last logins. Assistant Administrator cannot see any last logins. If you have Master or Super Administrator permissions, you will also see a trashcan icon in the Delete field for each person listed. © 2014 Brivo Systems LLC. All rights reserved. Brivo OnAir Administrator’s Manual Page 120 Viewing Administrator Details The Administrator detail page provides an overview of the information maintained for a particular Administrator. To view the details for a specific Administrator: 1. From the Setup tab, choose the Account tab then click on the Administrators tab. The Administrator directory displays. 2. Click the Administrator for whom you wish to view details. The associated detail page displays. Figure 82. View Administrator Details Your Administrator permissions determine what actions you can perform on this page. Information displayed on this page includes: The Administrator ID, a unique alpha-numeric ID that identifies the Administrator. This ID determines what access the Administrator has to account data and is also used to track his or her actions in the Journal. NOTE: Administrator IDs cannot be changed. For this reason, you do not want to use an employee’s name for an ID in case that person leaves the organization. Instead, you should make it as generic as possible. The First Name and Last Name of the Administrator. The E-mail address of the Administrator as well as the Phone number. The Status of the Administrator as Master, Senior or Assistant Administrator. © 2014 Brivo Systems LLC. All rights reserved. Brivo OnAir Administrator’s Manual Page 121 Whether or not the Administrator Can Edit Admins. The time and date stamp of when the Administrator Last Logged In. Which Site, Group, and Report permissions the Administrator has been granted. An option to Edit Contact Info for the Administrator. (See Managing Administrators for more information.) An Edit Status link that lets you change an Administrator’s status from Assistant to Senior and vice versa, or to grant or deny Super Administrator permissions to a Senior Administrator. (See Managing Administrators for more information.) An option to Edit Permissions for an Assistant Administrator. (See Editing Assistant Administrator Permissions for more information.) An option to Bulk Edit Permissions for an Assistant Administrator. (See Editing Assistant Administrator Permissions for more information.) An option to Copy Permissions to Template for an Administrator. An option to Copy Administrator Permissions for an Administrator. Copying Administrator Permissions The Copy Administrator Permissions feature allows the creation of a new Assistant Administrator using the administrator permissions of an already existing Assistant Administrator. To copy an administrator’s permissions: 1. From the Setup tab, choose the Account tab then click on the Administrators tab. The Administrator directory displays. 2. Click the Assistant Administrator from whom you wish to copy permissions. The associated detail page displays. 3. Click the Copy Administrator Permissions link. The New Assistant Administrator creation page appears. 4. Fill in the necessary fields. 5. Click Save Administrator. You are returned to the Assistant Administrator details page. © 2014 Brivo Systems LLC. All rights reserved. Brivo OnAir Administrator’s Manual Page 122 Figure 83. Copy Administrator Permissions © 2014 Brivo Systems LLC. All rights reserved. Brivo OnAir Administrator’s Manual Page 123 Creating an Administrator An Administrator is a person who manages account data in Brivo OnAir. There are four types of Administrators: Master, Super, Senior and Assistant. Each account can have one and only one Master Administrator. The Master Administrator is created when the account is first set up. The Master Administrator can create new Super, Senior and Assistant Administrators. Super Administrators are actually Senior Administrators with “super” permissions that allow them to view, create, edit and delete other Administrators, as well as oversee permission templates and account settings. To create an Administrator: 1. From the Setup tab, choose the Account tab then click on the Administrators tab. The Administrator directory displays. 2. Click the New link associated with the type of Administrator you wish to create: Senior (including Super) or Assistant. Depending on the link you click, either the New Senior Administrator or the New Assistant Administrator page displays. Figure 84. Create an Assistant Administrator 3. Enter the new Administrator’s First Name, Last Name, Email Address, and Phone number. 4. Select a Time Zone from the dropdown list. 5. If you are creating an Assistant Administrator, you can assign a Permission Template to the new administrator, select it from the dropdown list. This field does not display for Senior Administrators. © 2014 Brivo Systems LLC. All rights reserved. Brivo OnAir Administrator’s Manual Page 124 6. If you are creating a Senior Administrator, click Yes or No to indicate if this person should be a Super Administrator who can create, edit and delete other Administrators. This field does not display for Assistant Administrators. 7. Enter an Administrator ID. The ID must be unique and 6- to 30-characters long. 8. Enter a password in the Password and Confirm Password fields. After you assign the Administrator this password, he or she can change it at any time. 9. Enter a Secret Question and Secret Answer for the Administrator. The Administrator can change his or her secret question and secret answer at any time. 10. Enter Your Password. Be sure to enter the password you used to log in to the current session. 11. Click Save Administrator. If you created a Super or Senior Administrator, you are returned to the Administrators directory page. If you created an Assistant Administrator, the View Permissions page displays. For information on managing access permissions for Assistant Administrators see Editing Assistant Administrator Permissions and Understanding Administrator Permissions. © 2014 Brivo Systems LLC. All rights reserved. Brivo OnAir Administrator’s Manual Page 125 Editing Assistant Administrator Permissions Assistant Administrators can perform routine tasks such as creating, editing and deleting users, monitoring the Activity Log, and running reports. However, the degree to which an Assistant Administrator can view or edit account data is determined by his or her permissions. Account data includes information related to sites or groups. NOTE: The process of exposing different sets of account data to different Administrators is called Tiered Administration. Tiered Administration requires careful planning, especially in accounts with multiple sites and Administrators. To edit an Assistant Administrator’s permissions: 1. If you are not already on the Edit Permissions screen from having just created a new Administrator: 2. From the Setup tab, choose the Account tab then click on the Administrators tab. The Administrator directory displays. 3. Click the Assistant Administrator you wish to edit. The Administrator detail page displays. 4. Click Edit Permissions. The Edit Permissions page displays, showing only that information to which you have access and for which you have permission to make changes. © 2014 Brivo Systems LLC. All rights reserved. Brivo OnAir Administrator’s Manual Page 126 Figure 85. Edit Assistant Administrator Permissions Site Permissions 1. To grant an Assistant Administrator permission to view site-specific data, click the View box associated with the desired site(s). 2. To grant an Assistant Administrator permission to edit site-specific data, click the Edit box associated with the desired site(s). 3. To grant an Assistant Administrator permission to activate devices for specific sites, click the Activate Devices box associated with the desired site(s). Group Permissions 1. To grant an Assistant Administrator permission to view users in a specific group, click the View box associated with the desired group(s). 2. To grant an Assistant Administrator permission to edit users in a specific group, click the Edit box associated with the desired group(s). Again, when the Edit box is clicked, the View box is automatically selected as well. 3. To grant an Assistant Administrator permission to add and remove users from a specific group, click the Append box associated with the desired group(s). © 2014 Brivo Systems LLC. All rights reserved. Brivo OnAir Administrator’s Manual Page 127 NOTE: Understanding the following relationships between the checkboxes will make it easier for you to manage permissions on this page. o Click Check All at the top of any column to check that level of access for all listed sites or groups. o Check All is not a toggle. It cannot be used as an Uncheck All option. o When Edit is clicked, View automatically becomes selected as well. o If Edit and View are both checked, de-selecting View automatically deselects Edit as well. o De-selecting Edit does not automatically de-select View. o Clicking Append does not affect View and Edit in any way. Report Permissions 1. To grant an Assistant Administrator permission to run a specific report, click the Run box associated with the desired report. 2. Click Save. 3. If you are creating a new Assistant Administrator, verify the permissions you’ve assigned. First, record the ID and password created for the new Administrator, then log off and log back in using that ID and password. This lets you experience the interface from the Administrator’s perspective. If necessary, log back in as yourself and edit the permissions using the steps outlined above NOTE: Assistant Administrators can only run existing reports. They cannot create their own reports, edit existing reports, or delete existing reports. Additionally, Assistant Administrators cannot be assigned permissions to run reports marked as private. NOTE: Assistant Administrator’s reports may be different than what the Senior/Super/Master Administrator sees. o The Assistant Administrator will not see any deleted users in a user report. o The Assistant Administrator will not see any users in groups he/she does not have permission to in user reports. o The Assistant Administrator will not see any activity for sites he/she does not have permission to in activity reports. o If a user report contains the Group Name user field, the Assistant Administrator will not see any groups he/she does have permission to. o If a user report contains the PIN user field, the Assistant Administrator will see a masked PIN if the Assistant Administrator cannot edit that user. © 2014 Brivo Systems LLC. All rights reserved. Brivo OnAir Administrator’s Manual Page 128 Permission Templates A set of administrator permissions can be saved as a template and applied later to an existing administrator or to a new administrator at the time of creation. Permission Templates can be created from scratch or by copying an existing administrator’s permissions as a template. NOTE: Changing the permission template will not affect the permissions of any administrator who has been assigned permissions from that template in the past. There is no relationship maintained between an administrator and a permission template after the template is used by that administrator. To create a permission template from scratch: 1. From the Setup tab, choose the Account tab then click the Permissions tab. The Administrator Permission Templates page displays. 2. Click the New Permission Template link. 3. Enter a Name for the template. 4. Enter the View, Edit, and Activate Devices choices under Site Permissions that you want this template to have. 5. Enter the View, Edit, and Append choices under Group Permissions you want this template to have. 6. Enter the Run choices under the Report Permissions you want this template to have. 7. Click Save. You are returned to the Administrator Permission Templates list page. To create a permission template from an existing administrator: 1. From the Setup tab, choose the Account tab then click on the Administrators tab. The Administrator directory displays. 2. Select the Assistant Administrator whose permissions you wish to copy to a template. 3. Click on the Copy Permissions to Template link. 4. Enter a Name for the template. 5. Click Save. You are returned to the Administrator Permission Templates list page. To apply a permission template to an existing administrator: 1. From the Setup tab, choose the Account tab then click on the Administrators tab. The Administrator directory displays. 2. Select the Assistant Administrator you want to assign a permission template to. The Administrator details page displays. 3. Click on Edit Permissions link. 4. Directly below the name is the Permission Templates dropdown menu. Click on the dropdown list and select the template you wish to assign. 5. Click Save. © 2014 Brivo Systems LLC. All rights reserved. Brivo OnAir Administrator’s Manual Page 129 NOTE: To assign a permission template to a new Assistant Administrator, follow the instructions under Creating a New Administrator. © 2014 Brivo Systems LLC. All rights reserved. Brivo OnAir Administrator’s Manual Page 130 Understanding Administrator Permissions Assistant Administrators have two types of permissions: general permissions that are automatically granted to all Administrators, and assigned permissions that are granted on the Edit Permissions page. The Master Administrator and all Senior Administrators are automatically granted all assigned permissions. General Permissions View all schedules View all holidays as they pertain to viewable sites (sites for which the Administrator has View access) View all unassigned cards (cards not currently assigned to a user) View all unaffiliated users (users not currently associated with a group) Edit personal password, secret question and secret answer Edit personal contact information (name, phone number and email address) Edit personal interface preferences View company information (company name and address) View the name, phone number and email address of the Master Administrator View personal actions in the Journal View personal permissions as they pertain to viewable sites and groups Assigned Permissions Site/View permission lets the Assistant Administrator: View the site in the Site Directory View the Site detail page View the detail page of any door or device associated with the site View all site activity in the Activity Log Run a report of site activity Create email notification rules that apply to the site; and view, edit and delete those rules View OVR Camera associated with the site Site/Edit permission lets the Assistant Administrator: Edit door settings, of any door that belongs to the site Edit the parameters of any device that belongs to the site Edit certain parameters of any OVR cameras that belongs to the site Site/Activate Devices permission lets the Assistant Administrator: Unlock any door (for the pass through period) that belongs to the site and view video associated with that unlock door action Group/View permission lets the Assistant Administrator: View the group in the Group Directory View the Group detail page, which lists all doors, floors and valid credential devices accessible to the group View a list of users who belong to the group, via the User Directory View the User detail page of any user who belongs to the group View cards that belong to users who belong to the group, via the Card Bank Group/Edit permission lets the Assistant Administrator: Edit the credentials (card and/or PIN) and personal information of any user who belongs to the group Delete any user who belongs to the group Group/Append permission lets the Assistant Administrator: View the group in the Group Directory View the Group detail page, which lists all doors, floors and valid credential devices accessible by the group View a list of users who belong to the group who also belong to one of the Administrator’s viewable groups If the Administrator has Edit permissions for the group, she or he can: o Create a new user in the group © 2014 Brivo Systems LLC. All rights reserved. Brivo OnAir Administrator’s Manual Page 131 Add an existing user to the group if the user belongs to a group for which the Administrator has Edit permissions If the Administrator does not have Edit permissions for the group, she or he can: o Add an existing user to the group if the user belongs to a viewable group o Remove any user from the group o NOTE: Multiple Group membership requires all control panels in the account to be 4000 series or higher with firmware version 2.0.0 or higher. NOTE: Assistant Administrators who can only append are not able to suspend/reinstate users. Report/Run Permission lets the Assistant Administrator: This feature allows an assistant administrator to run existing reports. Assistant Administrators are not able to create their own reports or delete existing reports. They may only edit report configurations if they are given permission to do so. © 2014 Brivo Systems LLC. All rights reserved. Brivo OnAir Administrator’s Manual Page 132 Managing Administrators The Master Administrator and Super Administrators can manage all other Administrators. Senior and Assistant Administrators do not have permission to manage Administrators. NOTE: Once the Master Administrator is created it is very difficult to edit that record. Changes to the Master Administrator can only be made through Technical Support. To create users as suspended: 1. From the Setup tab, choose the Account tab then click on the Account Settings tab. The Account Settings page displays. 2. If you wish to create all users as suspended, click the appropriate checkbox. 3. Click Save Account Settings. All future users will be created as suspended. To enable self-serve password reset and soft lockout: 1. From the Setup tab, choose the Account tab then click on the Account Settings tab. The Account Settings page displays. 2. If you wish to enable self-serve password reset, click the appropriate checkbox. 3. If you wish to enable soft lockout, check the appropriate checkbox. 4. If you check soft lockout, select a soft lockout timeout time period between 1 and 999 minutes. 5. Click Save Account Settings. A message will appear notifying you that your account settings have been successfully updated. Figure 86. Enabling self-serve password reset and soft lockout © 2014 Brivo Systems LLC. All rights reserved. Brivo OnAir Administrator’s Manual Page 133 To change an Administrator’s status: 1. From the Setup tab, choose the Account tab then click on the Administrators tab. The Administrators directory displays. 2. Click the Administrator whose status you wish to change. The Administrator detail page displays. 3. Click the More Operations dropdown and then select Edit Status. The Edit Status page displays. Figure 87. Edit Administrator Status 4. To give the Administrator “Super” or “Senior” status: 5. Click Senior Administrator on the Status dropdown list. 6. To create a Super Administrator, click Yes to indicate the Administrator can create, edit or delete other Administrators. To create a Senior Administrator, click No. 7. Click Save Status. The Administrator detail page displays, reflecting the Administrator’s new permissions. Edit Permissions is now inactive, since all Senior and Super Administrators are automatically granted the complete set of assigned permissions. 8. To give the Administrator “Assistant” status: 9. Click Assistant Administrator on the Status dropdown list. 10. Ignore the Can create, edit, delete Admins field. 11. Click Save Status. The Administrator detail page displays, indicating that the Administrator now has no assigned permissions. 12. Click Edit Permissions to grant site- and group-specific permissions to the Administrator. See Editing Assistant Administrator Permissions for more information. To edit an Administrator’s contact information: Any Administrator can edit his or her own contact information. The Master and all Super Administrators can also edit the contact information of any other Administrator. 1. From the Setup tab, choose the Account tab then click on the Administrators tab. The Administrators directory displays. 2. Click the Administrator whose contact information you wish to edit. The Administrator detail page displays. 3. Click Edit Contact Info. The Edit Contact Info page displays. © 2014 Brivo Systems LLC. All rights reserved. Brivo OnAir Administrator’s Manual Page 134 Figure 88. Edit Administrator Contact Information 4. Enter the new contact information in the appropriate fields. 5. Click Save Contact Info. The Administrator detail page displays with the new contact information. To delete an Administrator: 1. From the Setup tab, choose the Account tab then click on the Administrators tab. The Administrators directory displays. 2. If your Administrator permissions allow this action, the trashcan icon associated with each Administrator is active. Click the icon associated with the Administrator you wish to delete. 3. Click OK in the confirmation prompt. The Administrator directory refreshes and the deleted Administrator is no longer listed. NOTE: Creating an Administrator does not simultaneously create a user; user access privileges for an Administrator must be created separately. Likewise, deleting an Administrator does not delete the corresponding user. © 2014 Brivo Systems LLC. All rights reserved. Brivo OnAir Administrator’s Manual Page 135 Viewing History In addition to viewing the entire Journal directly, administrators may refine their search by using the View History link allowing them to see certain journaled events. Administrators can view the specific history for users, groups, sites, elevators, floors, doors, and devices. As listed above, the Journal shows the Date/Time, details of the Action, and the Administrator ID of the person who performed the action (By) for the specified target. To View History (for a User) 1. From the Users/Groups tab, click on the User Directory tab. The User Directory displays. 2. Click on the user whose history you wish to view. The user profile will display. 3. Click on the More Operations dropdown list and select the View History link. Any journal activity concerning that user within the past ninety (90) days displays. Figure 89. View History Link © 2014 Brivo Systems LLC. All rights reserved. Brivo OnAir Administrator’s Manual Page 136 8. Cards © 2014 Brivo Systems LLC. All rights reserved. Brivo OnAir Administrator’s Manual Page 137 What is a Card? A card is a physical credential carried by a user, such as a proximity card, magnetic stripe card, or smart card. It has a number printed on its surface, such as “789” or “00789.” A user presents his or her card to a card reader — or “swipes” it — to enter a door. The card reader reads the card and sends the data to a control panel, which processes the request. The card reader flashes green when a valid card is presented, and the door unlocks. If the card is rejected, the card reader flashes red and the door remains locked. Cards are displayed in alpha-numeric order in the Card Bank, with numeric identifiers listed before alphabetic identifiers. NOTE: For card readers without indicator lights, a valid card will still cause the door to unlock; there is just no green light to indicate success or red light to indicate failure. Filtering The filtering system allows administrators to sort results using a variety of criteria. For the card bank, filtering allows for sorting by the following: Card # – all card numbers that start with the provided criteria Card Format - all cards that match the selected card format Facility Code – all cards that match the provided criteria Agency Code – all cards that match the provided criteria Assigned – all cards that are either assigned or unassigned © 2014 Brivo Systems LLC. All rights reserved. Brivo OnAir Administrator’s Manual Page 138 Browsing the Card Bank The Card Bank is an inventory of cards associated with an account. It indicates which cards are assigned to users and which cards are unassigned. (Unassigned cards do not allow any type of access to a site.) Cards can be assigned, revoked or deleted. When a card is assigned, it allows a user access to a site and one or more of its doors. When a card is revoked from a user, it becomes unassigned and can be assigned later to another user. When a card is deleted, it is erased from the account. If deemed appropriate (i.e. a card reported lost or destroyed is later recovered), deleted cards may be recreated. To view the list of cards for your account: 1. From the Setup dropdown menu, choose the Cards tab then click on the Card Bank tab. The Card Bank page displays. Figure 90. View the Card Bank The Master Administrator and all Senior Administrators can see all cards associated with an account. Assistant Administrators can see only those cards assigned to users affiliated with groups for which they have Edit permissions, and currently unassigned cards. Cards are listed in numeric order on the Card Bank. For each card, the page displays the card format and the name of the user to whom the card is currently assigned if applicable. The following functions can be performed on this page: To scroll forward through the list of cards, click the right arrow in the top right corner. To scroll backward, click the left arrow. To the left of the arrows, the system indicates which set of user records you are currently viewing, for example, “1-20 (of 48).” To Filter the card bank by selecting from the dropdown menu. For example, to locate all cards using “Standard 26 Bit” card format, select Card Format from the filter and “Standard 26 Bit” from the options dropdown and click Go. The results will display below. © 2014 Brivo Systems LLC. All rights reserved. Brivo OnAir Administrator’s Manual Page 139 To jump to a specific card, enter the card number in the Jump to field located in the bottom left corner of the page, and then press Enter. Click Print All Cards in the bottom right corner of the page to display a report of all cards in a popup window. Click the name in the Assigned To field to access the detail page for a specific user. Cards that are not currently assigned to a user have a green arrow and an icon displayed in the Assign field. Click the icon to access the New User page, on which you can assign the card to a new user. Cards that are currently assigned to a user have a red arrow and an icon displayed in the Revoke field. Click the icon to revoke a card for a user, making the card unassigned, and possibly leaving the user without access privileges. To delete a card from the Card Bank, click the associated delete icon. If you delete a card currently assigned to a user, that user loses his or her access privileges. © 2014 Brivo Systems LLC. All rights reserved. Brivo OnAir Administrator’s Manual Page 140 Adding Cards There are two ways to add cards to the Card Bank. A range of cards may be added all at once by defining the first and last External Numbers for the set. For example, you can add 100 cards all at the same time by specifying the first card’s External Number (e.g., 3000) and the last card’s External Number (e.g., 3100). All Administrators can add cards using this procedure. Alternatively, you can add individual cards on an as-needed basis through a process referred to as “swipe-toenroll.” The Master Administrator, all Senior Administrators, and Assistant Administrators with permissions at the site where the card is “swiped” can add cards in this manner. Procedures for both methods are described below. NOTE: You can have cards with the same external number, but the combination of card number, facility code, and format must be unique within an account. For example, you can have two cards that both have card number 42, as long as they have different facility codes. To add a set of cards to the Card Bank: 1. From the Setup dropdown menu, choose the Cards tab then click on the Add Cards tab. The Add Cards page displays. Figure 91. Add Cards to the Card Bank 2. Click the appropriate Card Format on the dropdown list. The default is Standard 26 Bit. 3. Enter the FIRST External Number and LAST External Number. The external number is the number printed on the card’s surface. For example, card #200 will have “200” or “00200” printed on its corner. The external number is a reference to the card itself within the set (i.e. “John Doe has card #200 of 300 cards"). External numbers must be unique; your account cannot have two cards with the same external number). 4. Enter the FIRST Internal Number if the internal numbers and external sequences are different. The internal number is part of the card’s embedded value. The internal number and external number are often the same, but in some cases they are offset. For example, you can have a series of 100 cards in which the external numbers are 3001-3100 and the internal numbers are 5001-5100. 5. Enter the Facility Code that came from the card manufacturer. Not all cards have facility codes. 6. Click Add Cards. © 2014 Brivo Systems LLC. All rights reserved. Brivo OnAir Administrator’s Manual Page 141 7. Review the information in the confirmation prompt, and then click OK. A message displays, indicates that the cards have been added to the Card Bank. 8. Click Add Cards again if appropriate. Otherwise click Card Bank to view the new cards. Unknown Cards The following functions can be performed on this page: To Filter the Unknown Cards by selecting from the dropdown menu. For example, to locate all unknown cards from the “Storage DC” site,, select Site Name from the filter and enter “Storage DC” in the text field and click Go. The results will display below. To jump to a specific time, click on the time and all unknown card events after that occurred after that time will display. To add individual cards through swipe-to-enroll: 1. Using a card that has not yet been added to the Card Bank, swipe it through your card reader. The card is automatically added a list of “unknown cards.” 2. From the Setup dropdown menu, choose the Cards tab then click on the Unknown Cards tab. The Unknown Cards page displays. Figure 92. View Unknown Cards 3. This page indicates the Date/Time that the unknown card was enrolled in the system, as well as the Site Name and Door Name at which it was swiped. A Hex Value and Number of Bits are also identified for the card. Click the Hex Value of the card you want to add to the Card Bank. The Add Unknown Card page displays. © 2014 Brivo Systems LLC. All rights reserved. Brivo OnAir Administrator’s Manual Page 142 Figure 93. Add an Unknown Card 4. In the Card External ID field, enter an identifying label for the card, such as the name of the person to whom the card will be assigned. 5. Click Add as Unknown Format. A green message bar displays stating that the card has been added to the Card Bank. 6. Brivo OnAir also automatically calculates Potential Formats which show the format name, facility code, and internal number of the unknown card allowing you to enter the card using a known card format, for example Standard 26 Bit. To enter the card into the Card Bank using this method, simply click on the Add as Standard 26-Bit button instead of the Add as Unknown Format button. A green message bar displays stating the card has been added to the Card Bank. Figure 94. View the Unassigned Card in the Card Bank In the Card # field, find the Card Identifier for the card you just added. It will have either an unknown card format or the selected potential format and will be unassigned. To assign the card to a new user, click the Assign icon associated with that card to access the New User page. To assign the card to an existing user, go to the Edit User page. © 2014 Brivo Systems LLC. All rights reserved. Brivo OnAir Administrator’s Manual Page 143 Managing Cards A disciplined approach to card management is a prerequisite to a secure access control system. Store all unassigned cards in a secure place, such as a locked cabinet or safe. Keep all unassigned cards in numeric order for easier distribution. Encourage users to immediately report lost cards. When a card is reported lost, revoke the card immediately. To assign a card to a new user: 1. From the Users dropdown menu, click on the New Users tab. The New User page displays. 2. Enter an unassigned card number in the Card # field. (Click Select ... to see a list of all unassigned cards.) 3. Complete the other required fields, and click Add User. The User detail page displays. (For more information on adding a new user, see Creating a User.) 4. Give the card to the user. To assign a card to an existing user: 1. From the Users dropdown menu, click on the User Directory tab. The User Directory displays. 2. Click the user to whom you would like to assign a card. The User detail page displays. 3. Click Edit User. The Edit User page displays. (See Managing Users on page 78 for more information.) 4. If the user has no card assigned, enter an unassigned card number in the Card # field. If the user has lost or damaged his or her card and you want to assign a new one, type the new card number over the old. Click Select ... to see a list of all unassigned cards. NOTE: When you enter a new card number over an old one, the old card is revoked when you click Save; it can then be re-assigned to another user or deleted from the Card Bank. 5. Click Save. The User detail page displays. 6. Give the card to the user. To revoke a card from the Card Bank: 1. From the Setup dropdown menu, choose the Cards tab then click on the Card Bank tab. The Card Bank displays. 2. Locate the card you want to revoke and click the associated Revoke icon. 3. Click OK in the confirmation prompt. The page refreshes and the card displays as “unassigned.” 4. Retrieve the actual card from the user and put it back in your deck of unassigned cards. To revoke a card from the Edit User page: 1. From the Users dropdown menu, click on the User Directory tab. The User Directory displays. © 2014 Brivo Systems LLC. All rights reserved. Brivo OnAir Administrator’s Manual Page 144 2. Click the user for whom you want to revoke the card. The User detail page displays. 3. Click Edit User. The Edit User page displays. 4. Click on the card number in the field below and click Remove. 5. Click Save. The card becomes unassigned. 6. Retrieve the actual card from the user and put it back in your deck of unassigned cards. NOTE: Revoked cards can be re-assigned to other users. To delete a single card: 1. From the Setup dropdown menu, choose the Cards tab then click on the Card Bank tab. The Card Bank displays. 2. Locate the card to be deleted, and click the associated trashcan icon. 3. Click OK in the confirmation prompt. The page refreshes and the card is no longer listed in the Card Bank. 4. Deleting a card does NOT delete the associate user. To delete multiple cards: 1. From the Setup dropdown menu, choose the Cards tab then click the Delete Cards tab. The Delete Cards page displays. Figure 95. Delete Cards 2. From the Card Format dropdown list, click the format of the cards to be deleted. 3. In the FIRST Delete Number field, enter the number of the first card to be deleted. 4. In the LAST Delete Number, enter the number of the last card to be deleted. 5. In the Facility Code field, enter the code for the facility to which the cards are currently assigned. 6. Click Delete Cards. A confirmation message displays 7. Click OK at the confirmation prompt. A green message bar displays, indicating that all of the cards within the specified range, including the first and last card entered, have been deleted from the card bank. © 2014 Brivo Systems LLC. All rights reserved. Brivo OnAir Administrator’s Manual Page 145 NOTE: If a card is lost, damaged or not returned, you can delete the card from the Card Bank. Deleted cards cannot be re-issued, but they can be recreated if deemed appropriate. NOTE: If a user attempts to gain access to a door with a deleted card, the event will be logged as a Failed Access Event by an unknown person with unknown credentials. © 2014 Brivo Systems LLC. All rights reserved. Brivo OnAir Administrator’s Manual Page 146 9. Badging © 2014 Brivo Systems LLC. All rights reserved. Brivo OnAir Administrator’s Manual Page 147 What is a Badge? Brivo OnAir’s badging capability allows users to design highly customizable badges. Brivo OnAir provides the option to customize the following: Badge orientation One or Two-sided Background color and/or image Color, font, and size of text, as well as custom text fields (first name & last name; first name; last names; Job Title) User photos and images, and custom image objects. Bulk badge print jobs For more information regarding custom fields, see the section in Users and Groups on Managing Custom Fields. Brivo OnAir’s Badging application supports the following file formats for importing images: GIF PNG JPEG To print badges, either singly or in bulk, you must have a card printer connected to and operating correctly with your system. You can use images already stored on your system or use the virtually any webcam. NOTE: Brivo does not provide support for webcams or badge printers. Please contact the individual manufacturers for assistance with installation, configuration, operation and basic troubleshooting of these items. WARNING: MagiCard printer drivers and printer settings The badge printer MUST have the latest drivers from Magicard. www.ultramagicard.com/technical-support is the website to acquire these drivers. If your drivers are out of date, dual sided badging will not function properly. Additionally, the badge printer must have dual sided printing enabled to print any two sided badges. If not enabled, the printer may not print properly. WARNING: Magicard “Colour Sure” Printer Warning If you wish to use background colors or images you must change your printer settings to support "Colour Sure" Printing. Please go to the advanced properties of your printer and check the "Colour Sure" Printing checkbox or call Brivo technical support for assistance. © 2014 Brivo Systems LLC. All rights reserved. Brivo OnAir Administrator’s Manual Page 148 NOTE: Brivo recommends that if you are printing a two-sided badge, be absolutely certain to make sure that your printer settings are configured to print the back side of the badge in color. If set to black and white, the resolution of the print job is very poor. Some printers do not carry the settings from one print job to the next. Be sure to check any printer specific settings prior to printing a badge. To generate a single badge, you must perform the following steps: Ensure that your webcam and card printer are working properly. Associate an image with a specific user on either the New User or Edit User page. See Creating a User for more information. Print the badge. See Managing Users for more information. To generate a bulk job, you must perform the following steps: Ensure that your webcam and card printer are working properly Associate an image with a specific user on either the New User or Edit User page. See Creating a User for more information. Create a Badge Print Job. Print the badges. See Bulk Badge Printing for more details. © 2014 Brivo Systems LLC. All rights reserved. Brivo OnAir Administrator’s Manual Page 149 Badge Templates To view the list of templates currently defined for your account: 1. From the Setup tab, choose the Cards tab then click Badging. The badge template list displays. Figure 96. View Template List Information displayed on this page includes: Badge Template Name. The name assigned to the customized badge layout. Sides. Whether or not a badge is one-sided or two-sided. Features of this page include: To Filter the badge template page by selecting from the dropdown menu. For example, to locate all badges which contain the letter S, select Name from the filter, type “S” into the text field and click Go. The results will display below. To Jump to any point in the alphabet, click a letter in the alphabet bar at the top of the page. For example, to locate the badge “Storage Unit Key,” click the letter S. Letters with no corresponding last names are grayed out. Click New Badge Template to create a new customized template for your account. Click Bulk Print Badges to create a bulk badge print job. Click the Edit Front icon associated with a specific template to update the front of a two-sided badge. Click the Edit Back icon associated with a specific template to update the back of a two-sided badge. Click the Create Badge Back icon associated with a specific template to create a back side to an existing badge template. Click the Delete icon associated with a specific template to remove it from the account. To create a badge template: 1. From the Setup tab, choose the Cards tab then click Badging. The badge template list displays. If there are preexisting badge templates, the page displays them. 2. Click New Badge Template. The badging interface displays with an editable area for creating a badge template. 3. In the Badge Properties box, enter a name for the template in the Name field. © 2014 Brivo Systems LLC. All rights reserved. Brivo OnAir Administrator’s Manual Page 150 4. Select either Portrait or Landscape for the orientation of the template from the dropdown list in the Badge Properties box. The orientation of the card determines the scale of both image and text objects. Figure 97. Template Orientation and Name Options To choose a background color for the badge template, click the box next to the color field in the Badge Properties box under the Background section. A pop up window will display color options. Select a color and click Ok to save, or Cancel to exit the pop up. If you wish to clear the background, click the Reset button next to the color box. © 2014 Brivo Systems LLC. All rights reserved. Brivo OnAir Administrator’s Manual Page 151 Figure 98. Select a Background Color To add an image as your background, click Browse to import an image. Click Open to apply the image or Cancel to delete it. Choose from the list of items on the palette on the left and drag them to the blank badge in the middle to create your badge template. Depending on which items you dragged from the palette onto the badge template, text will appear in the box next to the badge template. Though the field may read “First Name,” the user’s first name will appear automatically when using that template to print a badge for the user. To adjust the settings of any palette object, refer to the Item Properties box. © 2014 Brivo Systems LLC. All rights reserved. Brivo OnAir Administrator’s Manual Page 152 Figure 99. Item Properties If you wish to layer objects, use the layering icons at the bottom of the Item Properties box to move the item to the front or back of the badge template. © 2014 Brivo Systems LLC. All rights reserved. Brivo OnAir Administrator’s Manual Page 153 Figure 100. Layering Buttons 5. Once you have finished specifying the options for your template, click the Save icon to save your badge. If you wish to return to the last saved version of the badge, click the Revert icon. If you wish to clear the entire badge and start over, click the Clear icon. If you wish to return to the list of badges, click the Back to List icon. Figure 101. Badging Interface Icons Badging options: For Static Text: 1. Drag the text icon from the palette to the editable box. © 2014 Brivo Systems LLC. All rights reserved. Brivo OnAir Administrator’s Manual Page 154 Figure 102. Text Icon General o Content: You will see the contents updated on the template as you type. All other text types will display the information that was entered when creating the user for whom you wish to create the badge. Layout and Rotation o Dimensions: The “left,” “top,” “width,” “height,” and “rotation” fields represent the dimensions of the text object on the badge. You may click the arrows to rotate the text. You may also either manually enter the desired dimensions for the text, or you can simply click on a corner of the text box and drag to increase or decrease the dimensions. o Word Wrap: The Word Wrap box is checked by default to avoid text breaks. o Best Fit: If the Word Wrap box is unchecked, the Best Fit option scales the text to fit the space. NOTE: If word wrapping is not enabled, you cannot change the horizontal text alignment. © 2014 Brivo Systems LLC. All rights reserved. Brivo OnAir Administrator’s Manual Page 155 Figure 103. Static Text Layout and Rotation Text o Color: Choose a color for the static text from the pop up color box. To keep the selected color, click Save. To cancel the selection, click Cancel. o Font: Select a font from the dropdown list. o Effects: The B and I icons allow you to select either bold or italic typeface. o Size: Select a size font from the dropdown list. o Horizontal Alignment: Select an icon for left-aligned, center-aligned, or right-aligned text. o Vertical Alignment: Select the vertical alignment for the text object from the dropdown list. o Opacity: To alter how transparent the text is, use the scale next to the Opacity field. Background o Color: To choose a background color for the text object, click Set and click on the box next to the Color field. A pop up window will display color options. Select a color and click Ok to save, or Cancel to exit the pop up. If you have set a color for the background text, the Set text will change to Reset, providing you with the option to clear the color selection. o Opacity: To set the opacity of the background color, use the scale next to the Opacity field. NOTE: Because of scaling and other factors, the badge font size may or may not correspond to the font point size from word processing programs. For Custom Text: 1. Drag the text icon (Full Name, First Name, Last Name, or Custom Field) from the palette to the editable box. Layout and Rotation © 2014 Brivo Systems LLC. All rights reserved. Brivo OnAir Administrator’s Manual Page 156 o The “left,” “top,” “width,” “height,” and “rotation” fields represent the dimensions of the text on the badge. You may click the arrows to rotate the text. You may also either manually enter the desired dimensions for the text, or you can simply click on a corner of the text box and drag to increase or decrease the dimensions. o Color: Choose a color for the text from the pop up color box. To keep the selected color, click Save. To cancel the selection, click Cancel. o Font: Select a font from the dropdown list. o Effects: The B and I icons allow you to select either bold or italic typeface. o Size: Select a size font from the dropdown list. o Horizontal Alignment: Select an icon for left-aligned, center-aligned, or right-aligned text. o Vertical Alignment: Select the vertical alignment for the text object from the dropdown list. o Opacity: To adjust how transparent the text is, use the scale next to the Opacity field. Text Background o Color: To choose a background color for the text, click Set and click on the box next to the Color field. A pop up window will display color options. Select a color and click Ok to save, or Cancel to exit the pop up. If you have set a color for the background text, the Set text will change to Reset, providing you with the option to clear the color selection. o Opacity: To adjust how transparent the background text color is, use the scale next to the Opacity field. For User Photos: 1. Drag the user photo icon from the palette to the editable box. General Opacity: To set the opacity of the photo object, use the scale next to the Opacity field. Layout and Rotation o The “left,” “top,” “width,” “height,” and “rotation” fields represent the dimensions of the photo object on the badge. You may click the arrows to rotate the object. You may also either manually enter the desired dimensions for the object, or you can simply click on a corner of the photo object box and drag to increase or decrease the dimensions. o Lock Aspect: Check the Lock Aspect box if you wish to resize the image as large as possible without distorting the image. Background o Color: To choose a background color for the photo object, click Set and click on the box next to the Color field. A pop up window will display color options. Select a color and click Ok to save, or Cancel to exit the pop up. If you have set a color for the background text, the Set text will change to Reset, providing you with the option to clear the color selection. o Opacity: To adjust how transparent the user photo is, use the scale next to the Opacity field. © 2014 Brivo Systems LLC. All rights reserved. Brivo OnAir Administrator’s Manual Page 157 Figure 104. User Photo Properties For Images: 1. Drag the image icon from the palette to the editable box. General o Uploading an Image: Upload a photo from your computer by clicking the Browse button. o Opacity: To adjust how transparent the image is, use the scale next to the Opacity field. Layout and Rotation o The “left,” “top,” “width,” “height,” and “rotation” fields represent the dimensions of the photo object on the badge. You may click the arrows to rotate the object. You may also either manually enter the desired dimensions for the object, or you can simply click on a corner of the photo object box and drag to increase or decrease the dimensions. o Lock Aspect: Check the Lock Aspect box if you wish to resize the image as large as possible without distorting the image. Background o Color: To choose a background color for the photo object, click Set and click on the box next to the Color field. A pop up window will display color options. Select a color and click Ok to save, or Cancel to exit the pop up. If you have set a color for the background text, the Set text will change to Reset, providing you with the option to clear the color selection. o Opacity: To adjust how transparent the background of the image is, use the scale next to the Opacity field. For Colored Boxes: 1. Drag the colored box icon from the palette to the editable box. General o The “left,” “top,” “width,” “height,” and “rotation” fields represent the dimensions of the color box object on the badge. You may click the arrows to rotate the object. You may also either manually enter the desired dimensions for the object, or you can simply click on a corner of the color box and drag to increase or decrease the dimensions. © 2014 Brivo Systems LLC. All rights reserved. Brivo OnAir Administrator’s Manual Page 158 o Color: To choose a color for box, click on the box next to the Color field. A pop up window will display color options. Select a color and click Ok to save, or Cancel to exit the pop up. o Opacity: To adjust how transparent the colored box is, use the scale next to the Opacity field. For Barcodes: 1. Drag the barcode icon from the palette to the editable box. 2. Select the Barcode Properties on the right. o Static Text or Custom Field: The Static Field will display the same combination of numbers and/or letters for every badge printed with this template. If you wish for any static characters to appear below the barcode, you may enter it into the content field. The Custom Fields value varies according to the user for whom you wish to print the badge. If you wish for a Custom Field value to appear, select the custom field from the dropdown list. o Encoding: Select a code style from the dropdown list. o Position: You may either manually enter the position where you’d like the image, or you can simply drag the image to the desired area of the template. o Dimensions: You may either manually enter the desired dimensions for the image, or you can simply click on a corner of the image box and drag to increase or decrease the dimensions. o Rotation: Select the orientation of the barcode from the layout field. o Checksum: Select this box to generate a number to verify that the barcode matches the code specified in the user’s file. o Label: Check this box if you want numbers to be shown on the barcode. 3. Once you have finished specifying the options for the barcode field, select Apply to apply your options. If you wish to return to the default settings, click Revert. If you wish to delete the barcode, click Delete. NOTE: Because different barcodes specify particular formats, an exclamation point may appear in the barcode field if the properties have not been entered correctly. To create a two-sided badge template: 1. From the Setup tab, choose the Cards tab then click Badging. The badge template list displays. 2. Choose the badge template you wish to make two-sided and click on the Create Badge Back icon. 3. Follow the instructions in the Create a Badge Template section above. 4. When you are finished, click Save in the Badge Properties box. The Sides column of the template will have changed from One-Sided to Two-Sided. To edit a badge template: 1. From the Setup tab, choose the Cards tab then click Badging. The badge template list displays. 2. If the badge is one-sided, choose from the list of templates the badge you would like to edit and click on the Edit icon. 3. If the badge is two-sided, click on either the Edit Front or Edit Back icon to select the side of the badge you wish to edit. © 2014 Brivo Systems LLC. All rights reserved. Brivo OnAir Administrator’s Manual Page 159 4. When you are finished making changes to the badge template, click Save in the Badge Properties box. To print a badge template: NOTE: Please be certain to read the Notes and Warnings at the beginning of this chapter prior to beginning your badge printing. 1. From the Users tab, choose the User Directory tab. The list of users displays. 2. Next to the user for whom you would like to print a badge, click the Print Badge up displays the available badge templates. icon. A pop 3. Choose a template from the dropdown list to apply to that user. The template loads with the user’s photo and information. Figure 105. Print Badge 4. Click the Print button to print the badge. Select which printer you would like to use to print the badge. To delete a badge template: 1. From the Setup tab, choose the Cards tab then click Badging. The badge template list displays. 2. Click the Delete icon next to the template you wish to delete. 3. A warning pops up advising you that the action you are about to complete cannot be undone. Click OK to proceed. The badge has successfully been deleted. © 2014 Brivo Systems LLC. All rights reserved. Brivo OnAir Administrator’s Manual Page 160 Bulk Badge Printing Brivo OnAir’s bulk badging capability allows users to print in batches of up to 100 badges in a total print job size of up to 500. To bulk print badges: 1. From the Setup tab, choose the Cards tab then click Badging. The badge template list displays. 2. Click the Bulk Print Badges button. The Create Badge Print Job page displays. Figure 106. Create Bulk Badge Print Job 3. Select a Badge Template from the dropdown list. 4. Apply any Filters as needed. 5. Select the Check All checkbox below Jump to select all users on the current page. To select additional users, click on the icon. To advance to the last page, click on the number of selected users will appear at the top of the user list. icon. The 6. To unselect an individual user, simply uncheck the checkbox next to the user name. To unselect all users, click the Clear link next to the number of selected users. 7. Once the users are selected, click the Submit button. The Bulk Print Badges page displays. © 2014 Brivo Systems LLC. All rights reserved. Brivo OnAir Administrator’s Manual Page 161 Figure 107. Bulk Print Badges Page 8. The users in the bulk print job are listed on the right. To begin printing, press the Print Next Batch button. If any problems are found, the Bulk Print Badges Error Message window will appear detailing any problems. Once those problems are addressed or ignored, the printer window will appear. Figure 108. Bulk Print Badge Error Message Window 9. Select the correct printer and click Print. A Badges are printing message will appear during the print process. Once complete, the Status will change from Not Printed to Sent to Printer and the Time Printed fields will populate. Figure 109. Completed Bulk Badge Print Job 10. If another printing of the job is required, click on the Reprint Job button. 11. To begin another bulk print job, click on the Create Badge Print Job button. © 2014 Brivo Systems LLC. All rights reserved. Brivo OnAir Administrator’s Manual Page 162 10. Sites © 2014 Brivo Systems LLC. All rights reserved. Brivo OnAir Administrator’s Manual Page 163 What are Sites? A site is a logical group of doors, devices, and floors. An account can have one or more sites associated with it. Sites are typically added to an account after the control panels have been defined. Only after control panels and sites are created, can access privileges be defined. Filtering The filtering system allows administrators to sort results using a variety of criteria. For sites, filtering allows for sorting by the following: Site Name – all site names containing the provided criteria © 2014 Brivo Systems LLC. All rights reserved. Brivo OnAir Administrator’s Manual Page 164 Browsing the Site Directory The Site Directory is a list of all sites currently defined for your account. Sites are listed in alphabetical order. To view the list of sites for your account: 1. From the Setup dropdown menu, choose the Sites/Doors tab then click on the Site Directory tab. The Site Directory displays. Figure 110. View the Site Directory Your Administrator permissions determine which sites you can view on this page. The Master Administrator and all Senior Administrators can view all sites defined for the account. Assistant Administrators can view only those sites for which they have assigned permissions. For all viewable sites, you will see: The Site Name, which serves as a link to the Site detail page The site Address The number of Doors and Devices currently defined for the site Checkboxes indicating if your Administrator permissions allow you to View, Edit, and/or Activate Devices information maintained for the site Features of this page include: To Filter the site directory page by selecting from the dropdown menu. For example, to locate all the sites that contains the letter S, select Site Name from the filter, type “S” into the text field and click Go. The results will display below. To Jump to any point in the alphabet, click a letter in the alphabet bar at the top of the page. For example, to locate the site “Maple Street Office” click the letter M. Letters with no corresponding sites are grayed out. © 2014 Brivo Systems LLC. All rights reserved. Brivo OnAir Administrator’s Manual Page 165 Viewing Site Details The Site detail page displays a list of information associated with a specific site. To view the details for a specific site: 1. From the Setup dropdown menu, choose the Sites/Doors tab then click on the Site Directory tab. The Site Directory displays. 2. Click the site you wish to view. The associated detail page displays. Figure 111. View Site Details This page provides links to other pages that enable you to manage the site, including: Site Directory (takes you back to the Site Directory) Edit Site Name/Address Add Door Add Device Add Floor View History New Site The Site detail page also lists all the doors and devices currently associated with the site, sorted according to the following categories: Doors Auxiliary Devices Switches Timers Valid Credentials Event Trackers Floors For each door or device, the following information is provided: The door or device Name, which serves as a link to the corresponding detail page. An ID that consists of the name and ID number of the control panel with which the door or device is associated A Type indicator, consisting of the control panel version (ACS4000, ACS5000, or IPDC) and type (Ethernet, CDMA or GSM) The control panel firmware Version number © 2014 Brivo Systems LLC. All rights reserved. Brivo OnAir Administrator’s Manual Page 166 The date on which the door or device was Created A link to the Activity Log maintained for the door or device A Delete icon, if your Administrator permissions allow you to delete doors and devices. © 2014 Brivo Systems LLC. All rights reserved. Brivo OnAir Administrator’s Manual Page 167 Managing Sites The Master Administrator and all Senior Administrators have permission to manage site-related data. This includes creating, editing and deleting sites associated with an account. To create a site: 1. From the Setup dropdown menu, choose the Sites/Doors tab then click the New Site tab. The New Site page displays. Figure 112. Create a Site 2. Enter a brief, descriptive name for the site in the Site Name field, such as “Maple Street Branch.” 3. Enter the site’s address in the Address 1, Address 2, and City, State/Province, and ZIP/Postal Code fields. 4. Click the appropriate Time Zone from the dropdown list. 5. Click Save Site. You are returned to the Site Directory, with the newly created site listed in alphabetical order. To edit the site name and address: 1. From the Setup dropdown menu, choose the Sites/Doors tab then click on the Site Directory tab. The Site Directory page displays. 2. Click the site you wish to edit. The Site detail page displays. © 2014 Brivo Systems LLC. All rights reserved. Brivo OnAir Administrator’s Manual Page 168 3. Click Edit Site Name/Address. The Edit Name and Address page displays. Figure 113. Edit a Site’s Name and Address 4. Update the appropriate fields. All the fields on this page can be updated. 5. Click Save Site. You are returned to the Site detail page with the new contact information displaying. To delete a site: 1. From the Setup dropdown menu, choose the Sites/Doors tab then click on the Site Directory tab. The Site Directory displays. 2. Click the site you wish to delete. The Site detail page displays. 3. If there are no doors or devices associated with the site, and if your Administrator permissions allow you to delete sites, a trashcan icon appears at the bottom of the page. Click Delete Site next to the icon. NOTE: You must first delete all doors and devices associated with a site before you can delete it. See Managing Doors and Managing Devices for more information. 4. Click OK in the confirmation prompt. You are returned to the Site Directory with the deleted site removed from the list. © 2014 Brivo Systems LLC. All rights reserved. Brivo OnAir Administrator’s Manual Page 169 11. Doors and Devices © 2014 Brivo Systems LLC. All rights reserved. Brivo OnAir Administrator’s Manual Page 170 What are Doors and Devices? A door is any exterior or interior door with an electronic means of entry, such as a keypad or card reader. Doors are linked in this way to a control panel. A door belongs to a site and has a descriptive name such as “Lobby Door” or “Server Room.” A site can have one or more doors associated with it. All doors associated with a given site are listed on that site’s detail page. A device is a logical definition of how a control panel interacts with the world. A device may have logical or physical inputs and outputs. A logical input may be a schedule input to a timer. A physical input is any input point on a board. Each device has a descriptive name such as “Server Room Temp Sensor.” A site can have one or more devices associated with it. All devices associated with a given site are listed on that site’s detail page. © 2014 Brivo Systems LLC. All rights reserved. Brivo OnAir Administrator’s Manual Page 171 Viewing Door Details The Door detail page displays a list of information associated with a specific door. To view the details for a specific door: 1. From the Setup dropdown menu, choose the Sites/Doors tab then click the Site Directory tab. The Site Directory displays. 2. Click the site at which you want to view a door. The Site detail page displays. 3. Click the door you wish to view. The associated detail page displays. Figure 114. View Door Details This page provides links to pages that enable you to manage the door, including: Edit Door Add Door More Operations: Delete Door View Relationships View History Beneath this set of links is overview information for the door, including: The Control Panel field, which provides a link to the Control Panel detail page. (For more information, see Viewing Control Panel Details.) The Door Unlock Schedule field, which provides a link to the Schedule detail page if there is a schedule selected. (For more information, see Viewing Schedule Details.) The Two Factor Schedule field, which provides a link to the Schedule detail page. (For more information, see Viewing Schedule Details.) The Card Required Schedule field, which provides a link to the Schedule detail page. (For more information, see Viewing Schedule Details.) The Control From Browser field, which shows whether or not a door can be unlocked using the Unlock Door feature on the Activity Log page. © 2014 Brivo Systems LLC. All rights reserved. Brivo OnAir Administrator’s Manual Page 172 Managing Doors The Master Administrator and all Senior Administrators have permission to manage doors. This includes creating the door, editing its name, and managing its security settings (including the Unlock Door feature). NOTE: The procedures for managing doors vary depending on the control panel with which the door is associated. The following instructions apply to doors associated with ACS5000 and IPDC control panels only. NOTE: Two types of doors may be added to a Brivo OnAir account: a standard door attached to a door node or a door attached to a Salto router. To add a door to a site: 1. From the Setup dropdown menu, choose the Sites/Doors tab then click the Site Directory tab. The Site Directory displays. 2. Click the site to which you want to add a door. The Site detail page displays. 3. Click More Operations and select Add Door. The Add Door page displays. Figure 115. Add a Door to a Site 4. Enter a brief, descriptive name in the Door Name field, such as “Front Door” or “Server Room Door.” The door name does not need to include a reference to the site where the door is located, because the site name is automatically appended to the description you enter in this field. 5. Select a Control Panel from the dropdown list and click Next. All control panels/routers currently associated with the account are listed, but if there are no available nodes on the panel you select, it will inform you that boards or nodes are available. 6. Select the Board then Node. The Define Door page displays. © 2014 Brivo Systems LLC. All rights reserved. Brivo OnAir Administrator’s Manual Page 173 Figure 116. Define a Door To define a door: 1. The Door Name and Control Panel fields cannot be edited on the Define Door page. 2. Click a Door Board/Node combination from the Board and Node dropdown list. Only valid, available combinations are listed. If the door you are configuring is a Salto door, select the Salto Router from the Board and Node dropdown list. Additional instructions for configuring a Salto Door are found below. 3. In the Door Ajar Enabled field, click Yes or No to indicate if you want to enable the Door Ajar feature. This feature controls how long a door can be left propped or held open before it is considered a security risk, causing the event to be recorded in the Activity Log and an optional email notification to be sent. The default setting is Yes. 4. If the Door Ajar feature is enabled, use the Door Ajar Threshold field to indicate the maximum length of time (30-600 seconds) the door can be left ajar without causing a security violation. The default setting is 120. 5. In the Invalid PINs Threshold field, enter the maximum number of consecutive invalid PINS that can be entered in the door’s keypad (1-10) before it is considered a security risk and the keypad freezes. The default setting is 3. 6. In the Invalid PINs Shutdown field, indicate the length of time (10-600 seconds) the keypad should remain frozen if the maximum number of invalid PINs is exceeded. The default setting is 120. 7. In the Pass-through Period field, enter the maximum length of time (1-600 seconds) the door should remain unlocked after a user presents his or her credentials and is authenticated or presses a Request-to-Exit switch. For example, if this value is set to 15, the user has 15 seconds to pass through the door before it automatically re-locks. The default setting is 5. 8. In the Use Request-to-Exit field, click Yes or No to indicate if a Request-to-Exit (REX) motion sensor is in use for the door. With a REX switch, if the door is opened without a credential or a request to exit, the Activity Log records a Door Forced Open event and an optional email notification is sent. The default setting is No. © 2014 Brivo Systems LLC. All rights reserved. Brivo OnAir Administrator’s Manual Page 174 NOTE: A Request-to-Exit motion sensor (as opposed to a wall-mounted button) can fail to engage if a person exits too quickly. Likewise, if a person engages the motion sensor, then waits for the sensor to disengage, then pushes the door open, the “request” will not be processed. In either case, the system will log a Door Forced Open event. 9. In the REX Unlock field, click Yes or No to indicate if the REX switch causes the door to unlock. The default is No. 10. In the In/Out field, click In to track when a user enters through the door; click Out if you want to track when a user exits through the door; or click Neither if you don’t want to track either event. The default is Neither. NOTE: If you want to track entries as well as exits at an individual door, you must define the door twice in Brivo OnAir: once with an In/Out value of In, and a second time with an In/Out value of Out. 11. In the Door Unlock Schedule field, click a schedule from the dropdown list if you want the door to remain unlocked for pre-specified periods of time. 12. On the Two Factor Schedule dropdown list, click the schedule during which you want this door to require two credentials. During the selected time period, users with privileges at this door will need scan a security card and enter a PIN to gain access. 13. In the Two Factor Interval field, enter the amount of time (3-60 seconds) the user will have to present both credentials. If the user takes more than the allotted time, access will be denied. 14. In the Card Required Schedule field, click the schedule during which you want this door to require a card credential to be used. During the selected time period, users with privileges at this door will need to scan a card credential to gain access. Use of a PIN will not be sufficient. 15. In the Use Alarm Shunt field, click Yes or No to indicate if the door is connected to an alarm system that should be shunted (temporarily disabled) for a specified period of time after the Pass-through Period has expired. The shunt time is in addition to the Pass-through Period. For example, if the Pass-through Period is 10 seconds, and the Alarm Shunt duration is 3 seconds, the alarm will engage only if the door remains in an open state for more than 13 seconds after the user was authenticated. The default setting is Yes. 16. In the Alarm Shunt Duration field, enter the length of time (1-240 seconds) the alarm system should be shunted. The default and recommended setting is 1. If the alarm shunt is in use by a device, a message displays indicating that there is no alarm shunt available for this door node. NOTE: The Alarm Shunt feature applies to Request-to-Exit events as well as authorized entries. WARNING: Alarm Shunt Restrictions If any device is connected to the AUX RELAY 1 terminal block on the Door Board, the Alarm Shunt feature cannot be enabled. © 2014 Brivo Systems LLC. All rights reserved. Brivo OnAir Administrator’s Manual Page 175 17. In the Control from Browser field, click Yes or No to indicate if you want to enable the Control from Browser feature to allow Unlock Door to function. NOTE: The control panel firmware must be version 5.0.12 or later for the Unlock Door feature to function. If the control panel has firmware version 5.0.11 or earlier, the Unlock Door feature is not available. 18. Click Save Door. The Door detail page displays. NOTE: If the In/Out value is set to In when a door is created or edited, the value appears as Ingress on the Door detail page; if it is set to Out, it appears as Egress on the Door detail page; and if it is set to Neither, this field does not display at all on the Door detail page. To define a Salto door: 1. Once the Salto Router is selected from the Board and Node dropdown list, the Lock field appears. Enter the lock number for the new Salto door. If the lock number selected is unavailable, a warning will appear in red. 2. In the Pass-through Period field, enter the maximum length of time (1-600 seconds) the door should remain unlocked after a user presents his or her credentials and is authenticated or presses a Request-to-Exit switch. For example, if this value is set to 15, the user has 15 seconds to pass through the door before it automatically re-locks. The default setting is 5. 3. In the Door Unlock Schedule field, click a schedule from the dropdown list if you want the door to remain unlocked for pre-specified periods of time. 4. In the Control from Browser field, click Yes or No to indicate if you want to enable the Control from Browser feature to allow Unlock Door to function. Figure 117. Define a Salto Door 5. Click Save Door. The Door detail page displays. © 2014 Brivo Systems LLC. All rights reserved. Brivo OnAir Administrator’s Manual Page 176 NOTE: The control panel firmware must be version 5.0.19 or later for the Salto Wireless Door feature to function. If the control panel has firmware version 5.0.18 or earlier, the Salto Wireless Door feature is not available. To edit a door: 1. From the Setup dropdown menu, choose the Sites/Doors tab then click the Site Directory tab. The Site Directory displays. 2. Click the site for which you want to edit a door. The Site detail page displays. 3. Click the door you want to edit. The Door detail page displays. 4. Click Edit Door. The Edit Door page displays. © 2014 Brivo Systems LLC. All rights reserved. Brivo OnAir Administrator’s Manual Page 177 Figure 118. Edit a Door 5. All of the fields on this page can be edited. See the preceding section on adding doors for more information. 6. Click Save Door. You are returned to the Door detail page with the new information displaying. To delete a door: 1. From the Setup dropdown menu, choose the Sites/Doors tab then click the Site Directory tab. The Site Directory displays. 2. Click the site for which you want to delete a door. The Site detail page displays. 3. If your Administrator permissions allow you to delete doors, a trashcan icon is associated with each door on this page. Click the trashcan for the door you want to delete. 4. Click OK in the confirmation prompt. You are returned to the Site detail page, and the deleted door is no longer listed. WARNING: Managing Doors Once a door is added to a site, the Control Panel ID# and Board ID# cannot be changed. You will have to delete the door and recreate it in order to change these values. To unlock (pulse) a door: The Unlock Door feature provides a standard remote “buzz-through” access on doors for authorized administrators who may need to remotely open a locked door. The door will pulse for the time defined in the door’s Pass-through Period. This feature is only available to panels that have firmware 5.0.12 or later. Wireless panels or panels with firmware version 5.0.11 or earlier do not have access to this feature. © 2014 Brivo Systems LLC. All rights reserved. Brivo OnAir Administrator’s Manual Page 178 NOTE: There are four areas from which you may access the Unlock Door feature. Under the Home section, the Unlock Door link is listed under shortcuts. Under the Activity section, in the Activity Log, the Unlock Door link is on the right side of the page below the Administrator’s Name. Under the Setup tab, under the Sites/Doors link, the Unlock Door link is listed in the sub-navigation bar. Finally, the Unlock Door feature is accessible through the Console button at the top right of any page. NOTE: A door must have Control From Browser set to Yes under the Edit Door page in order to take advantage of the Unlock Door feature. 1. From the Setup dropdown menu, choose the Sites/Doors tab then click the Unlock Door tab. The Unlock Door page displays. 2. Select the appropriate door you wish to pulse. Click the Unlock Door button. Figure 119. Unlock a door 3. Once the button is pushed, a message will appear noting that the request was sent successfully. If you wish to view the event, click on the Activity Log link that appears. © 2014 Brivo Systems LLC. All rights reserved. Brivo OnAir Administrator’s Manual Page 179 Viewing Door Relationships Since multiple Administrators may be managing access privileges for the doors at a site, a View Relationships page provides an overview of the type of access individual user groups have for a specific door. The View Relationships report can be generated at any time to show all of the current relationships for a given door. To view a list of groups with access to a specific door: 1. From the Setup dropdown menu, choose the Sites/Doors tab then click the Site Directory tab. The Site Directory displays 2. Click the site for which you wish to view door relationships. The Site detail page displays. 3. Click the door for which you wish to view relationships. The associated detail page displays. 4. Click View Relationships. The View Relationships page displays. Figure 120. View Door Relationships 5. This report lists all the relationships currently associated with the door: The Group field lists the groups of users with access privileges for the door. The Site field indicates the site at which each door is located. The Schedule Name field identifies the schedule with which the door is currently associated, and by which access to the door is currently managed. 6. The report also lists any event track devices associated with the door. 7. Use your Web browser’s print capabilities to generate a hardcopy of the report. © 2014 Brivo Systems LLC. All rights reserved. Brivo OnAir Administrator’s Manual Page 180 Viewing Device Details The Device detail page displays a list of information associated with a specific door. To view the details for a specific device: 1. From the Setup dropdown menu, choose the Sites/Doors tab then click the Site Directory tab. The Site Directory displays. 2. Click the site for which you wish to view device details. The associated site detail page displays. 3. Click the device for which you wish to view details. The associated device detail page displays. Figure 121. View Switch Device Details 4. The appearance of this page differs depending on the type of the device being viewed. For more information, see Managing Devices. © 2014 Brivo Systems LLC. All rights reserved. Brivo OnAir Administrator’s Manual Page 181 Managing Devices The Master Administrator and all Senior Administrators have permission to manage devices. This includes creating the device, editing its name, and managing its settings. NOTE: The procedures for managing devices vary depending on the control panel with which the device is associated. The following instructions apply to devices associated with ACS5000 or IPDC control panels only. To add a device to a site: 1. From the Setup dropdown menu, choose the Sites/Doors tab then click the Site Directory tab. The Site Directory displays. 2. Click the site to which you want to add a device. The Site detail page displays. 3. Click Add Device. The Add Device page displays. Figure 122. Add a Device to a Site 4. Enter a brief, descriptive name in the Device Name field, such as “Heat Sensor.” The device name does not need to include a reference to the site, because the site name is automatically appended to the description you enter in this field. 5. Click a Control Panel from the dropdown list. 6. Click Next. If the control panel you selected in step 5 is an ACS5000 or IPDC control panel, the Choose Device Type page displays. Figure 123. Specify a Device Type 7. The Device Name and Control Panel fields cannot be edited on this page. 8. Click a Device Type from the dropdown list. Switch. A device with one input point and 0 to N output points that has state (On or Off). The device can have these behaviors: Latch, Unlatch, Pulse, or Follow. A schedule associated with the device causes it to be available for activation via its input point during the selected times for the schedule. © 2014 Brivo Systems LLC. All rights reserved. Brivo OnAir Administrator’s Manual Page 182 Timer. A device whose input is a schedule and that has 0 to N output points associated with it. The timer's state is On during the times selected in its schedule; otherwise it is Off. The device can have these behaviors: Latch, Unlatch, Pulse, or Follow. Valid Credential. A device whose input is a card reader and that has 0 to N output points associated with it. A valid credential device has no state, so its behaviors are limited to: Latch, Unlatch, and Pulse. Valid credential devices have permissions associated with them and appear in the group permissions area. Valid credential devices do not have Disengage messages because they do not have state, nor do they have schedules. Event Track. A device whose input is the specific event associated with it from the door that the event track device is created to watch. An event track device can have 0 to N outputs associated with it. The device can always have these behaviors: Latch, Unlatch, or Pulse. If an event track device is watching for Door Ajar events, then it has state and can have a Follow behavior. If the Follow behavior is selected, then the device can have a Disengage message. The schedule associated with an event track device defines when it is active because a client might want to respond to the event differently during business hours than during nonbusiness hours. © 2014 Brivo Systems LLC. All rights reserved. Brivo OnAir Administrator’s Manual Page 183 9. Click Next. The Define Device page displays. The appearance of this page differs depending on the device type selected. Figure 124. Define a Switch Device To define a device: 1. The Device Name, Control Panel, and Device Type fields cannot be edited on the Define Device page. 2. The next field on this page varies depending on the Device Type selected: 3. For Switch, the Physical Input field displays. From this dropdown list, click the input terminal for the device. All valid, available input terminals for the specified control panel are listed. 4. For Timer, the Timer Schedule field displays. From the dropdown list, click the schedule on which the timer should operate. 5. For Valid Credential, the Reader field displays. From the dropdown list, click the appropriate reader or keypad. 6. For Event Track, the Event and Door fields display. From the Event dropdown list, click the event to be tracked by the device. From the Door dropdown list, click the door for which the event is being tracked. 7. In the Physical Outputs field, identify the output terminal(s) for the device. By default, no terminals are selected. To select an output terminal: 8. In the left-hand box, click the output terminal. Click Add an output. The terminal name now appears in the right-hand box. 9. Repeat for each output terminal used by the device. 10. Click an Output Behavior for the device from the dropdown list: Latch. When the device is activated, it causes the device’s outputs to latch (move to the opposite of their normal state). Example: A buzzer is activated when a switch is turned on to call a service person. Unlatch. When the device is activated, it causes the device’s outputs to unlatch (move to their normal state). Example: A buzzer is silenced when the switch is turned off by a service person. © 2014 Brivo Systems LLC. All rights reserved. Brivo OnAir Administrator’s Manual Page 184 Follow. When the device is activated, the outputs are activated until the state that is being followed terminates and the duration period elapses. This behavior is only valid for devices that have state, such as switches, timers, or event trackers when Door Ajar is the selected event. Example: If you have an Event Track device set to watch Door Ajar messages, you can set the output to follow the input, and it will engage its output when the door is left ajar. Likewise, when the Door Ajar condition is cleared, the Event Track device will disengage its output. Pulse. When the device receives an input it waits the amount of time defined in the Pulse Duration field before executing its output behavior. Example: If a Valid Credential device controls access to a Copy Machine, the machine is only accessible, once a credential is verified, for the amount of time specified in the Pulse Duration field. 11. In the Pulse Duration field, enter the amount of time (0-999 seconds) that should elapse between when the input is received and the output behavior is executed. The default is 0. 12. The Schedule field only displays if the Device Type is Switch or Event Track. From the dropdown list, click the schedule during which the device should operate. 13. In the Report Engage field, click Yes or No to indicate if engagement of this device should be reported in the Activity Log. The default is Yes. 14. If Report Engage is set to Yes, enter an Engage Message to be used in the Activity Log, such as “Timer activated.” The default is No. 15. The Report Disengage and Disengage Message fields only display if the Device Type is Switch or Timer. Click Yes in the Report Disengage field to record in the Activity Log when the device is disengaged. In the Disengage Message field, enter a message to be used in the Activity Log. 16. Click Save. The Device detail page displays. To edit a device: 1. From the Setup dropdown menu, choose the Sites/Doors tab then click the Site Directory tab. The Site Directory displays. 2. Click the site for which you want to edit a device. The Site detail page displays. 3. Click the device you want to edit. The Device detail page displays. © 2014 Brivo Systems LLC. All rights reserved. Brivo OnAir Administrator’s Manual Page 185 4. Click Edit Device. The Edit Device page displays. Figure 125. Edit a Device 5. All the fields on this page can be edited except Control Panel and Device Type. See the preceding section on adding devices for more information. 6. Click Save. You are returned to the Device detail page with the new information displaying. To delete a device: 1. From the Setup dropdown menu, choose the Sites/Doors tab then click the Site Directory tab. The Site Directory displays. 2. Click the site for which you want to delete a device. The Site detail page displays. 3. If your Administrator permissions allow you to delete devices, a trashcan icon is associated with each device on this page. Click the trashcan for the device you want to delete. 4. Click OK in the confirmation prompt. You are returned to the Site detail page, and the deleted device is no longer listed. © 2014 Brivo Systems LLC. All rights reserved. Brivo OnAir Administrator’s Manual Page 186 Viewing Valid Credential Relationships Since multiple Administrators may be adding, editing and deleting valid credentials over a period of time, you can generate a list of the relationships associated with a specific Valid Credential device at any time, via this link. To view a list of groups with access to a specific Valid Credential device: 1. From the Setup dropdown menu, choose the Sites/Doors tab then click the Site Directory tab. The Site Directory displays. 2. Click the site for which you wish to view Valid Credential relationships. The Site detail page displays. 3. Click the Valid Credential for which you wish to view relationships. The associated detail page displays. 4. Click View Relationships. The View Relationships page displays. 5. As with the View Relationships report generated for doors, this report lists all the relationships currently associated with the Valid Credential device: 6. The Group field lists the groups of users with access privileges for the device. 7. The Site field indicates the site at which each device is located. 8. The Schedule Name field identifies the schedule with which the device is currently associated, and by which access to the device is currently managed. 9. Use your Web browser’s print option to generate a hardcopy of the report. © 2014 Brivo Systems LLC. All rights reserved. Brivo OnAir Administrator’s Manual Page 187 12. Elevators © 2014 Brivo Systems LLC. All rights reserved. Brivo OnAir Administrator’s Manual Page 188 What is an Elevator? An elevator is linked to a set of sites that are connected to the floors that the elevator services. While an elevator may be shared by multiple accounts, the floors they service typically are not. For more information see Managing Floors. Elevators must have a reader installed in each car; however, for each individual elevator you can set where this reader is wired to the control panel. © 2014 Brivo Systems LLC. All rights reserved. Brivo OnAir Administrator’s Manual Page 189 Managing Elevators Configuring a control panel includes managing the elevators linked to that control panel. To add an elevator to a control panel: 1. From the Setup dropdown menu, choose the Sites/Doors tab then click the Control Panels tab. The Control Panels directory displays. 2. Click the control panel to which you wish to add an elevator. The Control Panel detail page displays. 3. Click More Operations and select Add Elevator. The New Elevator page displays. Figure 126. Add an Elevator to a Control Panel NOTE: In order to add an elevator to a control panel, there must be an existing site and an available card reader with which to associate the elevator. Otherwise, you will receive an error message when you access the Add Elevator page. 4. In the Elevator Name field, enter a short, descriptive name for the elevator, such as “Main Lobby.” 5. On the Reader dropdown list, click a card reader with which to associate the elevator. All available readers are listed. 6. In the Pulse Time field, enter the number of seconds (1-600) you want a floor selection to remain available after a card is flashed at or passed through the reader. The default is 10. © 2014 Brivo Systems LLC. All rights reserved. Brivo OnAir Administrator’s Manual Page 190 7. In the Sites field, identify the site(s) at which this elevator operates. By default, no sites are selected. To select a site: 8. In the left-hand box, click the site you wish to associate with the elevator. 9. Click Add a site. The site name now appears in the right-hand box. 10. Repeat for each site you wish to associate with the elevator. 11. On the Two Factor Schedule dropdown list, click the schedule during which you want this elevator to require two credentials. During the selected time period, users with privileges at this elevator will need to scan a security card and enter a PIN to gain access. 12. In the Two Factor Interval field, enter the amount of time (3-60 seconds) the user will have to present both credentials. If the user takes more than the allotted time, access will be denied. 13. On the Card Required Schedule dropdown list, click the schedule during which you want the elevator to require a card credential. During the selected time period, users with privileges at this elevator will need to scan a security card in order to gain access. 14. Click Save Elevator. The Elevator detail page displays. Figure 127. View Elevator Details To edit an elevator: 1. From the Setup dropdown menu, choose the Sites/Doors tab then click the Control Panels tab. The Control Panels directory displays. 2. Click the control panel for which you wish to edit an elevator. The Control Panel detail page displays. 3. Click the elevator you wish to edit. The Elevator detail page displays. 4. Click Edit Elevator. The Edit Elevator page displays. © 2014 Brivo Systems LLC. All rights reserved. Brivo OnAir Administrator’s Manual Page 191 Figure 128. Edit an Elevator 5. All the fields on this page can be edited. See the preceding section on adding elevators for more information. 6. Click Save Elevator. You are returned to the Elevator detail page with the new information displayed. To delete an elevator: 1. From the Setup dropdown menu, choose the Sites/Doors tab then click the Control Panels tab. The Control Panels directory displays. 2. Click the control panel for which you wish to delete an elevator. The Control Panel detail page displays. 3. If your Administrator permissions allow you to delete elevators, you will see a trashcan icon associated with each elevator listed on this page. Click the icon for the elevator you wish to delete. 4. Click OK in the confirmation prompt. You are returned to the Control Panel detail page, and the deleted elevator is no longer listed. © 2014 Brivo Systems LLC. All rights reserved. Brivo OnAir Administrator’s Manual Page 192 13. Floors © 2014 Brivo Systems LLC. All rights reserved. Brivo OnAir Administrator’s Manual Page 193 What is a Floor? A floor is any floor accessed via an elevator which requires a valid credential for entry. When an elevator is linked to a site, it automatically becomes available to be linked to the floors defined for that site. © 2014 Brivo Systems LLC. All rights reserved. Brivo OnAir Administrator’s Manual Page 194 Viewing Floor Details The Floor detail page displays basic information about a specific floor associated with an account. To view the details for a specific floor: 1. From the Setup dropdown menu, choose the Sites/Doors tab then click the Site Directory tab. The Site Directory displays. 2. Click the site for which you wish to view floor details. The associated site detail page displays. 3. Click the floor for which you wish to view details. The associated Floor detail page displays. Figure 129. View Floor Details This page provides links to pages that enable you to manage the floor, including: Edit Floor Add Floor More Operations (which contains): Delete Floor View History View Relationships The Floor detail page also provides information any unlock schedules associated with the floor and about any elevators associated with the floor, including: The Elevator name The corresponding Control Panel, which serves as a link to the Control Panel detail page The associated Elevator Output. © 2014 Brivo Systems LLC. All rights reserved. Brivo OnAir Administrator’s Manual Page 195 Viewing Floor Relationships Since multiple Administrators may be managing access privileges for the floors at a site, a View Relationships page provides an overview of the type of access individual user groups have for a specific floor. The View Relationships report can be generated at any time to show all of the current relationships for a given floor. To view a list of groups with access to a specific floor: 1. From the Setup dropdown menu, choose the Sites/Doors tab then click the Site Directory tab. The Site Directory displays. 2. Click the site for which you wish to view floor details. The associated site detail page displays. 3. Click the floor for which you wish to view details. The associated Floor detail page displays. 4. Click View Relationships. The View Relationships report displays. 5. As with the View Relationships report generated for doors, this report lists all the relationships currently associated with a specific floor: The Group field lists the groups of users with access privileges to floor. The Site field indicates the site at which each floor is located. The Schedule Name field identifies the schedule with which the floor is currently associated, and by which access to the floor is currently managed. 6. Use your Web browser’s print option to generate a hardcopy of the report. © 2014 Brivo Systems LLC. All rights reserved. Brivo OnAir Administrator’s Manual Page 196 Managing Floors The Master Administrator and all Senior Administrators have permission to manage floors. This includes creating the floor, editing its name, and managing its settings. You must create elevator(s) prior to creating floors. To add a floor to a site: 1. From the Setup dropdown menu, choose the Sites/Doors tab then click the Site Directory tab. The Site Directory displays. 2. Click the site for which you want to manage floors. The Site detail page displays. 3. Click Add Floor. The Add Floor page displays if you have one or more elevators associated with the current site. Figure 130. Add a Floor to a Site 4. Enter a brief, descriptive name in the Floor Name field, such as “Lobby.” The floor name does not need to include a reference to the site where the floor is located, because the site name is automatically appended to the description you enter in this field. 5. Click an output terminal from each elevator dropdown list. (A dropdown list appears for each elevator defined for the account. The field names are the names of the elevators by which the floor can be accessed.) In this way, the floor becomes associated with one or more elevators. 6. In the Unlock Schedule field, click a schedule during which the floor will remain unlocked and no credential will be required to access it from the elevator. 7. Click Save. The Floor detail page displays. © 2014 Brivo Systems LLC. All rights reserved. Brivo OnAir Administrator’s Manual Page 197 To edit a floor: 1. From the Setup dropdown menu, choose the Sites/Doors tab then click the Site Directory tab. The Site Directory displays. 2. Click the site for which you want to edit a floor. The Site detail page displays. 3. Click the floor you want to edit. The Floor detail page displays. 4. Click Edit Floor. The Edit Floor page displays. Figure 131. Edit a Floor 5. All the fields on this page can be edited. See the preceding section on adding floors for more information. 6. Click Save. You are returned to the Floor detail page with the new information displaying. To delete a floor: 1. From the Setup dropdown menu, choose the Sites/Doors tab then click the Site Directory tab. The Site Directory displays. 2. Click the site for which you wish to delete a floor. The Site detail page displays. 3. If your Administrator permissions allow you to delete floors, a trashcan icon is associated with each floor on this page. Click the trashcan for the floor you want to delete. 4. Click OK in the confirmation prompt. You are returned to the Site detail page, and the deleted floor is no longer listed. © 2014 Brivo Systems LLC. All rights reserved. Brivo OnAir Administrator’s Manual Page 198 14. Control Panels © 2014 Brivo Systems LLC. All rights reserved. Brivo OnAir Administrator’s Manual Page 199 What are Control Panels? NOTE: Unless otherwise noted, the term “control panel” in this document refers to either ACS5000 panels or IP Door Controllers (IPDC). While the general procedures for managing earlier versions of control panels may be similar, you should refer to the documentation for your specific Brivo OnAir product for instructions on creating, editing and deleting control panels. Control panel: For the ACS5000, a control panel is a complete system of chassis, control boards, power supplies, and associated interconnected wiring referred to as a common Control Panel ID number. This includes the Main Board and up to 14 additional control boards (Door Boards and/or Input Output Boards). While each control panel can have a maximum of only 15 control boards (including the Main Board), an account can manage multiple control panels. For the IPDC, a control panel is a complete system of the IPDC unit, power supply (if needed), and associated interconnected wiring referred to as a common Control Panel ID number. For configuration instructions for the IPDC unit, please consult the IPDC-E Configuration Guide on our website. A control board is either a Door Board or an Input Output Board (I/O Board). Each control board has a number of input and output points, which are actual connections wired to switches, relays and Wiegand readers. In the case of Door Boards, the points are grouped into two door nodes per board, each node containing all of the inputs and outputs necessary to control a single door. Door boards can therefore be configured to drive two doors (one per node). Or, they can be used to control one door and multiple devices, since the input and output points of the second door node can be used to drive devices such as elevators. NOTE: Although it is labeled DOOR BOARD, the ACS5000 Door Board can be used to drive any type of device that can be wired to close contacts or driven by a relay; it does not have to be used to control just a door. NOTE: Keep in mind, when configuring the control board input and output points in Brivo OnAir, that the configuration must match the actual physical wiring of the panel. Consult your dealer to ensure that the configuration in Brivo OnAir matches the actual control panel wiring. © 2014 Brivo Systems LLC. All rights reserved. Brivo OnAir Administrator’s Manual Page 200 Browsing the Control Panel Directory The Control Panels directory is a list of all control panels currently associated with your account. Control panels are listed in alphabetical order. To view the list of control panels for your account: 1. From the Setup dropdown menu, choose the Site/Doors tab then click on the Control Panels link. The Control Panels directory displays. Figure 132. View Control Panels Directory Your Administrator permissions determine which sites you can view on this page. The Master Administrator and all Senior Administrators can view all control panels associated with the account. Assistant Administrators can view only those control panels for which they have assigned permissions. For all viewable control panels, you will see: The Control Panel Name The date on which the most recent message was generated by the panel. This Last Contact date indicates when all the control panels for the account last communicated. The Control Panel ID number The Model type The Firmware version © 2014 Brivo Systems LLC. All rights reserved. Brivo OnAir Administrator’s Manual Page 201 Viewing Control Panel Details The Control Panel detail page displays a list of information associated with a specific control panel. You can the detail page for any site viewable to you on the Control Panels directory page. To view the details for a specific control panel: 1. From the Configuration dropdown menu, choose the Setup tab then click on the Sites/Doors link. Click the Control Panels tab. The Control Panels directory displays. 2. Click the control panel you wish to view. The associated detail page displays. Figure 133. View Control Panel Details This page provides links to other pages that enable you to manage the control panel that depending up on the model may include: Control Panels Edit Control Panel New Control Panel More Operations: Add Board Add Salto Router Add Elevator Configure Antipassback View Relationships Beneath these links, the control panel details are displayed, including: A Control Panel Name, assigned when the control panel was first created or last updated by an Administrator. The Control Panel ID number, found with the control panel. The control panel Model, indicating the version (ACS3000, ACS4000, ACS5000, IPDC-1, or IPDC-2). For ACS5000 models, this field will also indicate the type of control panel: Ethernet or GSM. The version of control panel Firmware installed on the control panel. A Note field that displays miscellaneous information related to the functioning of the control panel, such as where the panel is located. © 2014 Brivo Systems LLC. All rights reserved. Brivo OnAir Administrator’s Manual Page 202 On the bottom half of the page, all control boards and elevators associated with the control panel are listed. The information displayed for each board includes: A Board name that is comprised of the board type and the board number, and which serves as a link to the Board detail page. The assigned Board #. Each of the up to 15 circuit boards in a control panel has a unique Board #. Board #1 is always the Main Board. The other boards may be either Door Boards or I/O Boards. WARNING: Board # The Board # must match the address configured on each board in the system. A brief description of the board’s physical Location. A trashcan icon associated with each board listed, if your permissions allow you to delete control boards. The information shown for each elevator associated with the control panel includes: A brief, descriptive Elevator name, which serves as a link to the Elevator detail page. The Wiegand Reader configured for the elevator. A delete icon associated with each board listed, if your permissions allow you to delete elevators. © 2014 Brivo Systems LLC. All rights reserved. Brivo OnAir Administrator’s Manual Page 203 Creating a Control Panel The Master Administrator and all Senior Administrators have permission to manage control panel-related data. To create a control panel: 1. From the Configuration dropdown menu, choose the Setup tab then click on the Sites/Doors link. Click the New Control Panel link. The New Control Panel page displays. Figure 134. Create a Control Panel 2. Enter a brief, descriptive name in the Control Panel Name field, such as “12 Pine Street” or “Main Reactor.” 3. Enter the Control Panel ID number found on the inside door of the control chassis, the one containing the Main Board. You will receive an error message if you enter an invalid ID number. 4. In the Note field, enter any miscellaneous information related to the functioning of the control panel, such as when the battery was last changed or the most recent service date. 5. Click Save. You are taken to the Control Panel detail page. © 2014 Brivo Systems LLC. All rights reserved. Brivo OnAir Administrator’s Manual Page 204 Managing Control Panels Once a control panel is added to an account, you can change its name but not its ID number. You can also associate control boards and elevators with it. For more information see Managing Control Panels and Managing Elevators. To edit a control panel: 1. From the Setup dropdown menu, choose the Sites/Doors tab then click on the Control Panels link. The Control Panels directory displays. 2. Click the control panel you want to edit. The Control Panel detail page displays. 3. Click Edit Control Panel. The Edit Control Panel page displays. Figure 135. Edit a Control Panel 4. Update the information in the Control Panel Name and Notes field as desired. 5. Click Save. You are returned to the Control Panels directory. WARNING: Deleting Control Panels To have a control panel deleted from your account, you must contact Technical Support. © 2014 Brivo Systems LLC. All rights reserved. Brivo OnAir Administrator’s Manual Page 205 Managing Control Boards Using the ACS5000, configuring a control panel involves managing the control boards associated with it, including Door Boards and Input Output (I/O) Boards. To add a control board to a control panel: 1. From the Setup dropdown menu, choose the Sites/Doors tab then click on the Control Panels tab. The Control Panels directory displays. 2. Click the control panel to which you wish to add a control board. The Control Panel detail page displays. 3. Click More Operations and select Add Board. The Add Board page displays. Figure 136. Add a Control Board to a Control Panel 4. From the dropdown list, click the appropriate Board Type. 5. In the Board # field, assign a number to this board. The dropdown list includes all valid board numbers (2-15) not currently in use. NOTE: When a control panel is first created, one Door Control Board is automatically associated with it and assigned Board #1. This is the Main Board for the system, and it cannot be deleted. 6. In the Location field, enter a brief description of the board’s location, such as “HQ 3 rd floor utility closet.” 7. Click Continue. Depending on the type of board being added, either the Door Control Board detail page or the I/O Board detail page displays. To configure a Door Board: 1. If you are not already on the Door Control Board detail page: 2. From the Setup dropdown menu, choose the Sites/Doors tab then click on the Control Panels tab. The Control Panels directory displays. 3. Click the control panel for which you wish to configure a Door Board. The Control Panel detail page displays. 4. Click the Door Board you wish to configure. The Door Control Board detail page displays. © 2014 Brivo Systems LLC. All rights reserved. Brivo OnAir Administrator’s Manual Page 206 Figure 137. Configure a Door Control Board 5. The Board Type and Board # fields cannot be edited on this page, but the Location field can be. 6. All Door Boards contain two nodes, each of which can be used to control either one door or one door and multiple devices. On this page, these two nodes are identified as DOOR 1 and DOOR 2, and for each there is a set of input and output points that corresponds to a block of terminals on the actual Door Board. All of the labels match the text silk-screened on the board. NOTE: A Door Board node does not have to be used to control a door; it can be used to control any number of devices. However, the following terminal blocks cannot be used by any other device if the node is to be used for a door: REX, DOOR CONTACT, and READER. 7. For each I/O point, there is a set of fields used to define the operation of the associated terminals. 8. In the Label field a default label for the I/O Point displays. To change the label, enter a short, descriptive value, such as “Loading Dock Door Lock.” 9. In the EOL Supervision field, click Yes or No to indicate if the input point is wired for end-of-line supervision. EOL supervision is not relevant for output points (DOOR LOCK RELAY, AUX RELAY 1, and AUX RELAY 2) or for the READER point. © 2014 Brivo Systems LLC. All rights reserved. Brivo OnAir Administrator’s Manual Page 207 10. In the Normal State field, click NC to indicate that the I/O Point is normally closed, or NO to indicate that it is normally open. As with EOL Supervision, this field is not relevant for output points. 11. Click Save. You are returned to the Control Panel detail page with the new Door Board listed in alphabetical order with the other control boards. To configure an Input Output (I/O) Board: 1. If you are not already on the Door Control Board detail page: 2. From the Setup dropdown menu, choose the Sites/Doors tab then click on the Control Panels tab. The Control Panels directory displays. 3. Click the control panel for which you wish to configure an I/O Board. The Control Panel detail page displays. 4. Click the I/O Board you wish to configure. The I/O Board detail page displays. © 2014 Brivo Systems LLC. All rights reserved. Brivo OnAir Administrator’s Manual Page 208 Figure 138. Configure an I/O Board 5. The Location field can be edited on this page, but not the Board Type and Board # fields. 6. You can define up to eight inputs and eight outputs for each I/O Board. I/O points can be reused by devices, and some devices use multiple points; therefore, the number of devices controlled by an I/O Board is undefined. 7. For each input device (INPUT1-INPUT8): 8. In the Label field a default label displays. To change the label, enter a short, descriptive value, such as “Computer Room Fan.” 9. In the EOL Supervision field, click Yes or No to indicate if the input device is wired for end-of-line supervision. 10. In the Normal State field, click NC to indicate that the I/O Point is normally closed, or NO to indicate that it is normally open. 11. For each output device (OUTPUT1-OUTPUT8), accept the default Label or enter a new short, descriptive value for the device. 12. Click Save. You are returned to the Control Panel detail page with the new I/O Board listed in alphabetical order. To delete a control board: 1. From the Setup dropdown menu, choose the Sites/Doors tab then click on the Control Panels tab. The Control Panels directory displays. 2. Click the control panel for which you wish to delete a control board. The Control Panel detail page displays. 3. If your administrator permissions allow you to delete control boards, you will see a trashcan icon associated with each Door Board and I/O Board listed on this page. Click the trashcan associated with the board you wish to delete. © 2014 Brivo Systems LLC. All rights reserved. Brivo OnAir Administrator’s Manual Page 209 4. Click OK in the confirmation prompt. You are returned to the Control Panel detail page, and the deleted board is no longer listed. © 2014 Brivo Systems LLC. All rights reserved. Brivo OnAir Administrator’s Manual Page 210 Configuring Antipassback Antipassback controls allow administrators to determine whether or not individual users are permitted to enter or exit a particular door. With these controls come the following options: Hard Antipassback, Soft Antipassback, Antipassback Reset Interval and Antipassback Reset Time. NOTE: Salto Door Locks cannot utilize Brivo OnAir antipassback functionality. Hard Antipassback Hard Antipassback controls keep individuals from using their card to enter the premises if they are already inside, or exiting if they are already outside. With Hard Antipassback implemented, once a user presents his credential, Brivo OnAir recognizes his entry and will not allow the user re-enter unless he or she first exits. Soft Antipassback Soft Antipassback design allows administrators to specify controls for both individuals and groups: The Antipassback Reset Interval offers the ability to determine a time interval that prevents a user who enters or exits from doing so again before a period of time elapses. After elapsed interval, the user is free to enter or exit. The Antipassback Reset Time refers to the option where a group’s status as inside or outside the Antipassback Zone is automatically reset to being outside at a specific time of day, with the ability to enter the time on a 24hour clock with minute-by-minute detail. Important Antipassback Considerations: The panel’s firmware must be at least version 5.0.9 in order to configure Antipassback settings. Antipassback is not configurable with Edge devices. The maximum number of doors that can be configured for Antipassback is 30, as long as one door is configured as an entrance and one is an exit. Administrators cannot delete a door once it has been configured for Antipassback. To do so, the administrator must first unconfigure Antipassback and then delete the door. If an individual enters a door without showing his credential, he will not be able to exit when he presents his credential. Similarly, individuals who exit a door without presenting a credential will not be allowed to reenter until the Antipassback Reset Interval has elapsed. If you wish for only one individual to have immunity to Antipassback controls, create a group with only one user—the user you wish to have immunity. Then check the box “Immunity to Antipassback.” Groups who are immune to Antipassback controls do not follow the same Antipassback controls as those who are not immune. These users are free to enter or exit a door even if the Antipassback Reset Interval has not elapsed. © 2014 Brivo Systems LLC. All rights reserved. Brivo OnAir Administrator’s Manual Page 211 Managing Antipassback Controls To configure controls for Antipassback Reset Interval: 1. From the Setup dropdown menu, choose the Sites/Doors tab then click on the Control Panels tab. The Control Panels directory displays. 2. Click the control panel for which you wish to configure Antipassback Reset Interval. The page displays the panel details and control boards. Figure 139. Antipassback Access 3. Click the More Operations dropdown list and click on the Configure Antipassback link. The Antipassback page displays with information regarding the panel’s sites, doors, boards, nodes, and alternate readers, and allows you to choose whether you would like to configure the door as an ingress or egress. Figure 140. Configuring Antipassback Settings 4. Enter the number of minutes from 0 to 240 for the Antipassback Reset Interval. 5. Select whether from the drop down list whether you wish to configure Antipassback controls for the door as an ingress, egress, or neither. 6. If you would like the door to be controlled by two readers, you may configure Antipassback controls for an alternate reader by selecting a board from the Alternate Reader dropdown list. 7. Click Save Antipassback Settings. You are returned to the panel details page. © 2014 Brivo Systems LLC. All rights reserved. Brivo OnAir Administrator’s Manual Page 212 To configure Antipassback Reset Time: 1. From the Users/Groups dropdown menu, click the Group Directory tab. The group directory displays. 2. Click the group for which you wish to configure the Antipassback Reset Time. The page displays the group details. 3. Click Edit Group Privileges at the bottom of the group details list. The Edit Privileges page displays. 4. If you would like the group to remain immune from the Antipassback Reset Time, check the “Immune to Antipassback” box underneath the “Edit Privileges” title. If you would like for only a particular user to remain immune from Antipassback controls, you may create a group containing just that particular user. Figure 141. Antipassback Reset Time 5. Enter a time that you would like the Antipassback controls to be reset. 6. Click Save. You are returned to the group details page. © 2014 Brivo Systems LLC. All rights reserved. Brivo OnAir Administrator’s Manual Page 213 Viewing Control Panel Relationships Doors and devices may be added to or deleted from a control panel any time. To facilitate control panel management, you can generate a complete list of a control panel’s current relationships at any time. To view a list of the doors and devices associated with a specific control panel: 1. From the Setup dropdown menu, choose the Sites/Doors tab, then click the Control Panels tab. The Control Panels directory displays. 2. Click the control panel for which you wish to view relationships. The detail page displays. 3. Click More Operations and select View Relationships. The View Panel Relationships report displays in a popup window. Figure 142. View Control Panel Relationships 4. This report lists all the relationships currently associated with the control panel. 5. For each door, the report displays the Door Name as well as the number assigned to the Door Board and the number of the Door Board Node to which the door is wired. 6. For Floors, Elevators and devices the report shows the: 7. I/O Point Label, the label for the access point on the I/O Board 8. I/O Board number, the number assigned to the I/O Board 9. I/O Point , the number of the I/O Board node to which the device is wired 10. If the Floor is accessed by an elevator, the Elevator Name displays. 11. Use your Web browser’s print capabilities to generate a hardcopy of the report. © 2014 Brivo Systems LLC. All rights reserved. Brivo OnAir Administrator’s Manual Page 214 15. Schedules and Holidays © 2014 Brivo Systems LLC. All rights reserved. Brivo OnAir Administrator’s Manual Page 215 What are Schedules? A schedule is an editable, reusable time template that can be used to control such things as when a door is accessible or when a device is activated. A user’s access privileges are the result of a three-way relationship that is created between: (1) a group, (2) a schedule, and (3) a secured device, such as a door, floor or valid credential device. Doors. A group of users is permitted access to a door according to a predefined schedule. This access is granted on the group’s Edit Privileges page. This page enables you to define access to a single door differently for individual groups of users. For example, the group “Staff” may have access to the “Front Door” according to the schedule “Work Day,” which allows them to access the door, using a valid credential, between the hours of 7:00AM and 6:00PM. At the same door, the group “Cleaning Crew” may have access according to the “Night Shift” schedule, permitting them access only during the hours of 8:00PM and midnight. A door may also be assigned a Door Unlock Schedule, which specifies a period of time during which no credential is required to access the door. All users have free access during the Door Unlock Schedule period. Floors. Using the Floor Unlock Schedule, you can specify periods of time during which no credential is required to access a floor. At other times, groups of users may be permitted credentialed access to the floor. For example, the floor “Cafeteria” may be assigned a Floor Unlock Schedule of “Lunch” which allows anyone free access to the floor between the hours of 10:45 AM and 1:15 PM. Before 10:45 and after 1:15, however, a user must present valid credentials to access the floor. The group “Cooks” may have access to the floor according to the “Lunch Prep” schedule, while the group “Cleaning Crew” may have access according to the “Night Shift” schedule. In this way, multiple schedules are used to control access to a single floor. Devices. A schedule assigned to a timer defines when the timer will go off; a schedule assigned to a switch controls when the activation of the input point will cause the output point to be activated; and a schedule assigned to an event track device defines when the event will be tracked at the specified door. Before any of these devices is created, you must first define the schedule according to which they will operate. (No schedule is assigned to valid credential devices.) Filtering The filtering system allows administrators to sort results using a variety of criteria. For schedules, filtering allows for sorting by the following: Name – all schedules containing the provided criteria Site - all schedules that are linked to the selected criteria © 2014 Brivo Systems LLC. All rights reserved. Brivo OnAir Administrator’s Manual Page 216 What are Holidays? An observed holiday is a period of time during which schedules refer to their Holiday override columns instead of to the day of week. If the Holiday column is blank, no access is allowed during that period. For example, the holiday “Winter Break” might apply to “Front Door” between Wednesday, Dec. 25, 2002 12:00 AM and Thursday, Dec. 27, 12:00 AM. All Schedules in effect at “Front Door” during “Winter Break” will refer to their respective Holiday override columns. If this column is blank, the door unlock schedule will be suspended for the duration of the holiday. Filtering The filtering system allows administrators to sort results using a variety of criteria. For holidays, filtering allows for sorting by the following: Description – all holidays containing the provided criteria Site - all holidays that are linked to the selected criteria Start Date – all holidays that match the selected start date End Date – all holidays that match the selected end date © 2014 Brivo Systems LLC. All rights reserved. Brivo OnAir Administrator’s Manual Page 217 Browsing the Schedules Directory The Schedules directory displays a list of all schedules currently defined for the system. The schedules are organized by control panel type. Schedules are listed alphabetically. To view the list of schedules for your account: 1. From the Setup dropdown menu, choose the Schedules tab then click on the Schedules tab. The Schedules directory displays. Figure 143. View Schedules Directory Features of this page include: Click the name of a schedule to view the associated Schedule detail page. Click Print All Schedules in the bottom right corner of the page to display a report of all currently-defined schedules in a popup window with print capabilities. To Filter the schedules list page by selecting from the dropdown menu. For example, to locate all schedules that belong to the “Storage-DC” site, select Site from the filter, type “Storage-DC” into the field and select the site from the dropdown options that appear. Then click Go. The results will display below. To Jump to any point in the alphabet, click a letter in the alphabet bar at the top of the page. For example, to locate the schedule “Total Access,” click the letter T. Letters with no corresponding last names are grayed out. © 2014 Brivo Systems LLC. All rights reserved. Brivo OnAir Administrator’s Manual Page 218 Viewing Schedule Details The Schedule detail page indicates the daily time periods during which a specific schedule is in effect. To view the details for a specific schedule: 1. From the Setup dropdown menu, choose the Schedules tab then click on the Schedules tab. The Schedules directory displays. 2. Click the schedule you want to view. The corresponding schedule detail page displays. Figure 144. View Schedule Details This page provides links to other pages that enable you to manage the schedule, including: Schedules Edit Schedule New Schedule More Operations (which contains): Delete Schedule View Relationships Copy Schedule Beneath this set of links is overview information for the schedule, including: The list of days and times during which the schedule is active. For example, when this schedule is associated with a particular door all groups with access to the door will be able to use their credentials to enter or exit through the door during the indicated time periods. The Enabling Group associated with this schedule, if any. Next to the name of the group is a note that provides a link to the Edit Privileges page so you can ensure that the group does, in fact, have privileges associated with this schedule. (For more information on assigning group privileges, see Editing Group Information starting.) The Grace Period assigned to the Enabling Group. For a complete explanation of Group Enabled © 2014 Brivo Systems LLC. All rights reserved. Brivo OnAir Administrator’s Manual Page 219 Schedules, refer to the Creating a Group Enabled Schedule section beginning. A list of Schedule Exceptions, if any, that are observed by this schedule. A list of Holidays, if any, that are observed by this schedule. © 2014 Brivo Systems LLC. All rights reserved. Brivo OnAir Administrator’s Manual Page 220 Printing a Schedule Report At any time you can print a report of the complete list of schedules currently defined for your account. To print the list of schedules for your account: 1. From the Setup dropdown menu, choose the Schedules tab then click on the Schedules tab. The Schedules directory displays. 2. Click Print All Schedules in the lower right corner. A report of all currently defined schedules displays in a popup window. 3. Use your browser’s print capabilities to generate a printed copy of the report. Figure 145. Print Schedules Report © 2014 Brivo Systems LLC. All rights reserved. Brivo OnAir Administrator’s Manual Page 221 Creating a Schedule Brivo OnAir offers the ability to create two types of schedules: Universal Schedules and Site Schedules. Master and Senior Administrators can create and edit both Universal and Site Schedules. Assistant Administrators, if they have the edit permission to a site, can create and edit Site Schedules for that site. To create a schedule: 1. From the Setup dropdown menu, choose the Schedules tab then click on the New Schedule tab. The New Schedule page displays. Figure 146. Create a Schedule 2. Enter a brief, descriptive name in the Schedule Name field. 3. You can create schedules to be used by the entire account or by individual sites. If you want this schedule to apply only to a specific site, click that option on the Site dropdown list. Otherwise accept the default, Universal. 4. For site-specific schedules, you can define this as a Group Enabled Schedule. When you select the site from the Site dropdown list, an Enabling Group dropdown list displays. Select an Enabling Group, and enter an associated Grace Period. Refer to the Creating a Group Enabled Schedule section beginning on page 69 before assigning an enabling group to any schedule. WARNING: Group Enabled Schedules Group Enabled Schedules support Brivo OnAir’s First-Person-In and Supervisor-on-Site functionality. If you assign an enabling group to a schedule without first understanding how this feature works you may inadvertently create a security risk. Refer to the Creating a Group Enabled Schedule section before assigning an enabling group to any schedule. © 2014 Brivo Systems LLC. All rights reserved. Brivo OnAir Administrator’s Manual Page 222 5. If any holidays have been defined for the account, they will be listed under Holidays Observed. Click the Add Holiday link to call up the holiday popup window. Select the holiday(s) that you want to be observed by this schedule and then click the Close Window link. If you wish to remove a holiday from the list, highlight the holiday in question and click the Remove link. 6. Draw blocks of time for which general access should be allowed. 7. To define an access period, click on a gray column, drag up or down with your cursor, then release. As you drag, portions of the column are highlighted, indicating a period during which general access is allowed. When you release your cursor, the block snaps to the nearest hour. 8. To extend an access period, highlight the gray area above or below the existing block. Make sure the new block touches the existing block. When you release your cursor, the blocks merge together. 9. To adjust the access period to some fraction of an hour, click the existing blue block once. The Block field displays the start and end of the time period. Select the hour, minute and time of day from the dropdown menu to adjust the start or stop time. When you have the time set correctly, click Update Block. 10. To delete an access period, click once on the blue block to select the time period, and then click Delete Block. Figure 147. Delete Schedule Block 11. To repeat an access period for the work week or the entire week, fill in the Monday column, and then click Copy Mon to Fri or Copy Mon to Sun. 12. To clear all access periods, click Clear All. 13. To revert to the most recently saved settings, click Revert. © 2014 Brivo Systems LLC. All rights reserved. Brivo OnAir Administrator’s Manual Page 223 NOTE: You must save a schedule first before choosing to Revert; if the schedule has not been saved, clicking Revert will result in returning to a blank schedule. NOTE: The maximum number of time periods per day is 32, with the option to have a schedule block as short as one minute. A schedule is in effect only when it is applied to a group, device or floor. 14. A schedule refers to its Holiday column during defined holiday periods. In the Holiday column, enter the general hours during which the door or floor can be accessed or the device activated during the holiday periods for this schedule. For example, you might have a schedule called “Work Day” that allows general access from 8AM to 6PM Monday through Friday. But on holidays, you want to limit access to 9AM to 1PM. For more information, see Creating a Holiday. NOTE: If the Holiday column is left blank, no access will be permitted during observed holidays. 15. Schedule Exceptions allow an administrator to create a One-Time Exception or Repeating Exceptions. 16. For One-Time Exceptions, select whether or not it will be active during a normally closed portion of the schedule (Enabling Exception) or to be inactive during a normally open portion of the schedule (Disabling Exception). Then select the date from the popup calendar and then select the time in the Starts At: and Ends At: fields. Once complete, click the Add Exception button to add the One-Time Exception to the Schedule Exceptions list. 17. For Repeating Exceptions, select whether or not the exception will be to be active during a normally closed portion of the schedule (Enabling Exception) or to be inactive during a normally open portion of the schedule (Disabling Exception). Repeated exceptions are based on a weekly rotation, so select the 1st through the 5th , then the day of the week, and finally the time of day in the Starts At: and Ends At: fields. Once complete, click the Add Exception button to add the Repeating Exception to the Schedule Exceptions List. NOTE: Schedule Exceptions are only available to accounts with panels that have firmware version 5.0.16 or later. An error message will appear above the Schedule Exceptions box informing you if any of the panels on the account have earlier firmware. 18. Click Save Schedule. The Schedule details page displays. © 2014 Brivo Systems LLC. All rights reserved. Brivo OnAir Administrator’s Manual Page 224 Managing Schedules The Master Administrator, all Senior Administrators and any Assistant Administrators with Edit permissions for the associated Site can edit and delete schedules. To edit an existing schedule: 1. From the Setup dropdown menu, choose the Schedules tab then click on the Schedules tab. The Schedules directory displays. 2. Click the schedule you wish to edit. The Schedule detail page displays. 3. Click Edit Schedule. The Edit Schedule page displays. Figure 148. Edit a Schedule 4. Edit the schedule according to the guidelines for Creating a Schedule. NOTE: You cannot edit the Site designation on this page. Instead, you must create a new schedule for the desired site. 5. Click Save. You are returned to the Schedule detail page. © 2014 Brivo Systems LLC. All rights reserved. Brivo OnAir Administrator’s Manual Page 225 Copying Schedules Master Administrators, all Senior Administrators and any Assistant Administrators with View and Edit permissions for the associated Site can copy site schedules. This feature allows users to export an existing schedule’s time frame into a new schedule. To copy a schedule: 1. From the Setup dropdown menu, choose the Schedules tab then click on the Schedules tab. The Schedules directory displays. 2. Click the schedule you wish to copy. The Schedule detail page displays. 3. Click Copy Schedule. The Copy Schedule Page displays with the highlighted time frame from the schedule you copied, creating a new schedule. 4. Enter a name for the new schedule. 5. Choose a site from the dropdown list where the schedule will be applied. Site options will vary depending on user’s administrator permissions. 6. Choose which holidays (if any) you’d like this schedule to observe. 7. Click Save. NOTE: Schedule Exceptions do not copy over from one schedule to another. Any schedule exceptions wanted for the new schedule must be recreated. © 2014 Brivo Systems LLC. All rights reserved. Brivo OnAir Administrator’s Manual Page 226 Viewing Schedule Relationships Once created, a schedule may be associated with various user groups, doors, floors or devices. These relationships may be created by multiple Administrators over time, and a single schedule may eventually become associated with numerous entities. At any time, Administrators can generate a report that lists all the associations for a specific schedule. To view a list of groups associated with a specific schedule: 1. From the Setup dropdown menu, choose the Schedules tab then click on the Schedules tab. The Schedules directory displays. 2. Click the schedule for which you wish to view relationships. The associated Schedule detail page displays. 3. Click More Operations and select View Relationships. A View Schedule Relationships popup window displays. Figure 149. View Schedule Relationships 4. This report lists all the relationships currently associated with the schedule. For Group associations, the report indicates the Site, Device, and Device Type for which the schedule defines access. For doors, floors, devices and notifications rules, the report indicates the associated Site. Only those groups, doors, floors, devices and notification rules with which the schedule is associated are listed. 5. Use your Web browser’s print option to generate a hardcopy of the report. © 2014 Brivo Systems LLC. All rights reserved. Brivo OnAir Administrator’s Manual Page 227 Deleting Schedules A schedule can be deleted only if it is not assigned to a group or associated with a door, floor, switch, timer, event track device, or notification rule. Before attempting to delete a schedule, you must first identify its existing relationships using the procedures described in the preceding section, Viewing Relationships. Use a printout of the View Schedule Relationships report to identify which associations must be terminated before you can delete a specific schedule. To disassociate a schedule from a group: 1. From the Users/Groups dropdown menu, choose the Group Directory tab. The Group Directory page displays. 2. Click the first group from which you wish to disassociate the schedule. The corresponding Group detail page displays, listing all the devices to which the group has access and according to which schedules. 3. Click Edit Group Privileges. The Edit Privileges page displays. 4. For each device associated with the schedule you wish to delete, in the Schedule dropdown list, click (no access) or another custom schedule. 5. Repeat step 4 for all devices associated with the schedule to be deleted. 6. Click Save. The Group detail page displays. 7. Click the Group Directory tab to return to the Group Directory. 8. Repeat steps 3-8 for all groups associated with the schedule to be deleted. To disassociate a schedule from a door, floor or device: 1. From the Setup dropdown menu, choose the Sites/Doors tab, then click on the Site Directory tab. The Site Directory page displays. 2. Click the first site from which you wish to disassociate the schedule. The Site detail page displays. 3. Click the name of a door with which the schedule is associated. The Door detail page displays. 4. Click Edit Door. The Edit Door page displays. 5. In the Door Unlock Schedule field, select none or an alternate schedule. 6. Click Save. You are returned to the door detail page. 7. Go the Site Directory tab to return to the Site detail page, and repeat steps 1-3 for every door with which the schedule is associated. 8. When all doors are disassociated, return to the Site detail page. 9. Click the name of a floor with which the schedule is associated. The Floor detail page displays. 10. Click Edit Floor. The Edit Floor page displays. 11. In the Unlock Schedule field, select none or an alternate schedule. 12. Click Save. You are returned to the floor detail page. 13. Go the Site Directory tab to return to the Site detail page, and repeat steps 12-14 for every floor with which the schedule is associated. 14. When all floors are disassociated, return to the Site detail page. © 2014 Brivo Systems LLC. All rights reserved. Brivo OnAir Administrator’s Manual Page 228 15. Click the name of a device with which the schedule is associated. The Device detail page displays. 16. Click Edit Device. The Edit Device page displays. 17. For Switches or Event Track devices, in the Schedule field select None or an alternate schedule. For Timers, in the Timer field select None or an alternate schedule. 18. Click Save. You are returned to the device detail page. 19. Go to the Site Directory tab to return to the Site detail page, and repeat steps 18-20 for every device with which the schedule is associated. 20. When all devices are disassociated, return to the Site Detail page. 21. Only when all of a schedule’s relationships have been ended can you delete it. To disassociate a schedule from a notification rule: 1. From the Setup dropdown menu, choose the Notifications tab, then click on the Notification Rules tab. The Notification Rules directory displays. 2. Click the first notification rule from which you wish to disassociate the schedule. The Notification Rule detail page displays. 3. Click Edit Notification Rule. The Edit Rule page displays. 4. From the Notification Schedule dropdown list, select an alternate schedule. 5. Click Save. The Notification Rule detail page displays. 6. Repeat steps 2-5 for all notifications rules associated with the schedule. To delete a schedule: 1. From the Setup dropdown menu, choose the Schedules tab then click on the Schedules tab. The Schedules directory displays. 2. Click the schedule you wish to delete. The Schedule detail page displays 3. Click Delete Schedule. 4. Click OK in the confirmation prompt. The Schedules Directory displays with the deleted schedule no longer listed. © 2014 Brivo Systems LLC. All rights reserved. Brivo OnAir Administrator’s Manual Page 229 Browsing the Holidays Directory The Holidays directory lists all holidays currently defined for your account. To view the list of holidays for your account: 1. From the Setup dropdown menu, choose the Schedules tab then click the Holidays tab. The Holidays directory displays. Figure 150. View Holidays Directory For each holiday, the following information is provided: The name of the Site with which the holiday is associated. Since a site may have multiple holidays, an individual site name may appear more than one time in this column. A brief Description of the holiday, which serves as a link to the Holiday detail page. The start date and time (From) for the holiday. The end date and time (To) for the holiday. A delete icon, if your Administrator permissions allow you to Delete holidays. Features of this page include: Click the name of a holiday to view the associated Holiday detail page. To Filter the holiday list page by selecting from the dropdown menu. For example, to locate all holidays that belong to the “Storage-DC” site, select Site from the filter, type “Storage-DC” into the field and select the site from the dropdown options that appear. Then click Go. The results will display below. © 2014 Brivo Systems LLC. All rights reserved. Brivo OnAir Administrator’s Manual Page 230 Viewing Holiday Details The Holiday detail page provides overview information for a specific holiday, such as the date and time range during which it is in effect and how it is currently being observed. To view the details for a specific holiday: 1. From the Setup dropdown menu, choose the Schedules tab then click the Holidays tab. The Holidays directory displays. 2. Click the Description associated with the holiday you want to view. The corresponding Holiday detail page displays. Figure 151. View Holiday Details This page provides a link to the Edit Holiday and Holidays page. Beneath the link is a summary of the holiday, including: A brief Description of the holiday, such as “Spring Break.” This description is used to identify the holiday throughout the account. The Site(s) at which the holiday is currently observed The date and time From which the holiday is in effect The end date and time (To) for the holiday A list of Schedules using, or observing the holiday © 2014 Brivo Systems LLC. All rights reserved. Brivo OnAir Administrator’s Manual Page 231 Creating a Holiday Only the Master Administrator, all Senior Administrators and any Assistant Administrators with Edit permissions for the associated Site can create a holiday. Holidays are associated with schedules when the schedule is created or edited. To create a holiday: 1. From the Setup dropdown menu, choose the Schedules tab then click the New Holiday tab. The New Holiday page displays. Figure 152. Create a Holiday 2. Enter a brief, meaningful Description for the holiday, such as “Veteran’s Day” or “Summer Fridays.” 3. You can create holidays to be used by the entire account or by individual sites. If you want this holiday to apply only to a specific site, click that option on the Site dropdown list. Otherwise accept the default, Universal. 4. In the From and To fields, enter the time period during which the holiday is in effect. 5. Click the checkbox for All Schedules if you want all schedules to observe this holiday. Otherwise, click the Add Schedule link below and the available schedules popup window will appear. Click on the schedules you want to follow this holiday. They will disappear from the popup window and appear on the new holiday page in the schedule box. When finished selecting schedules, click the Close Window link and you are returned to the New Holiday page. This list includes all schedules currently defined for the account. To remove a schedule, highlight the schedule in the box and click Remove. 6. Click Save. The Holidays directory displays with the new holiday listed. © 2014 Brivo Systems LLC. All rights reserved. Brivo OnAir Administrator’s Manual Page 232 Managing Holidays Only the Master Administrator, all Senior Administrators, and any Assistant Administrators with Edit permissions for the associated Site can edit or delete a holiday. To edit a holiday: 1. From the Setup dropdown menu, choose the Schedules tab then click the Holidays tab. The Holidays directory displays. 2. Click the holiday you wish to edit. The Holiday detail page displays. 3. Click Edit Holiday. The Edit Holiday page displays. Figure 153. Edit a Holiday 4. Update the appropriate fields. 5. Click Save. You are returned to the Holidays directory. To delete a holiday: 1. From the Setup dropdown menu, choose the Schedules tab then click the Holidays tab. The Holidays directory displays. 2. Click the delete icon associated with the holiday you wish to delete. 3. Click OK in the confirmation prompt. The page refreshes, and the deleted holiday is no longer listed. © 2014 Brivo Systems LLC. All rights reserved. Brivo OnAir Administrator’s Manual Page 233 16. Email Notifications © 2014 Brivo Systems LLC. All rights reserved. Brivo OnAir Administrator’s Manual Page 234 What are Notifications? An email notification is an email message that corresponds to an Access Event (such as when a member of the group “Janitors” enters the “Main Office"), an Exception Event (such as when the “Front Door” is ajar for three minutes), a Device Event (such as when a motion sensor engages), or a Control Panel Event (such as when the control panel loses AC power). Email notifications are sent to specific people under specific circumstances according to a set of notification rules. For more information, please see Managing Notification Rules. Email notifications are formatted in plain text. © 2014 Brivo Systems LLC. All rights reserved. Brivo OnAir Administrator’s Manual Page 235 Managing Notification Rules An email notification rule is a set of conditions for routing email notifications. A rule states who should be notified about what events. A rule has a descriptive name, such as “Cleaning Crew On Site,” and applies to a single site. To create a rule: 1. From the Setup tab, click on the Notifications tab, then choose Notification Rules. The Notification Rules directory displays. 2. If there are multiple sites defined for an account and you can view more than one of them, you will be prompted to select a site to which the rule applies. The New Notification Rule page then displays. Figure 154. View Notification Rules Directory © 2014 Brivo Systems LLC. All rights reserved. Brivo OnAir Administrator’s Manual Page 236 Figure 155. Create a Notification Rule 3. Enter a brief Description, such as “Robert’s Door Ajar Events.” 4. Enter one or more email addresses in the Recipients field. Multiple addresses must be separated by commas. 5. Select each desired Exception Event, Successful Access Event (by group and/or by user), Device Event, Control Pane/Board Event, and Camera Event. 6. From the Notification Schedule dropdown list, click the schedule during which the notification rule should be enforced. The identified recipients will only receive emails about events occurring during the selected schedule of time. 7. From the Notification Language dropdown list, select the language in which you want to receive the notification. 8. Click Save Notification. The Notification Rule detail page displays. To edit a rule: A rule can be edited by its creator or by the Master Administrator or a Super Administrator. 1. From the Setup tab, click on the Notifications tab, then choose Notification Rules. The Notification Rules directory displays. 2. Click on the Notification Rule you wish to edit. The Notification Rules details page displays. 3. Click Edit Notification Rule. The Edit Rule page displays. 4. Edit the appropriate fields using the preceding instructions for creating a notification rule. © 2014 Brivo Systems LLC. All rights reserved. Brivo OnAir Administrator’s Manual Page 237 5. Click Save Notification. To delete a rule: A rule can be deleted by its creator or by the Master Administrator or a Super Administrator. 1. From the Setup tab, click on the Notifications tab, then choose Notification Rules. The Notification Rules directory displays. 2. Click the delete icon that corresponds to the rule you wish to delete. 3. Click OK in the confirmation prompt. The page refreshes, with the rule deleted from the list. © 2014 Brivo Systems LLC. All rights reserved. Brivo OnAir Administrator’s Manual Page 238 Sample Email Notifications Following are several sample email notification messages. Please see the Index of Events for more information. Access by User To: [email protected] Subject: ACCESS by Mary Smith at Headquarters The following User gained access: User: Mary Smith Site: Headquarters Door: Front Door Date: 01/02/03 Time: 12:34 PM EST Antipassback Violation To: [email protected] Subject: ANTIPASSBACK VIOLATION by Mary Smith at Headquarters The following User was denied access: User: Mary Smith Site: Headquarters Door: Front Door Date: 01/02/03 Time: 12:34 PM EST Door Ajar To: [email protected] Subject: DOOR AJAR at Headquarters The following door was left ajar: Site: Headquarters Door: Front Door Date: 01/02/03 Time: 12:34 PM EST Door Forced Open To: [email protected] Subject: DOOR FORCED OPEN at Headquarters The following door was opened without a credential or a request-to-exit: Site: Headquarters Door: Front Door Date: 01/02/03 Time: 12:34 PM EST Door Locked or Unlocked by Timer To: [email protected] Subject: DOOR LOCKED [UNLOCKED] BY TIMER at Headquarters The following door was locked [unlocked] automatically: Site: Headquarters Door: Front Door Date: 01/02/03 Time: 12:34 PM EST © 2014 Brivo Systems LLC. All rights reserved. Brivo OnAir Administrator’s Manual Page 239 Failed Access by Unknown Person(Unknown Credential) To: [email protected] Subject: FAILED ACCESS at Headquarters An unknown credential (Card Hex. ABC123) was presented: Site: Headquarters Door: Front Door Date: 01/02/03 Time: 12:34 PM EST Failed Access by Known User (User’s credential was revoked) To: [email protected] Subject: FAILED ACCESS by John Doe at Headquarters The following User attempted access with an old credential (Card #123): User: Mary Smith Site: Headquarters Door: Front Door Date: 01/02/03 Time: 12:34 PM EST Control Panel AC Power Loss To: [email protected] Subject: CONTROL PANEL AC POWER LOSS at Headquarters The following Control Panel lost AC power and switched to battery: Site: Headquarters Panel: CP123456 Door: Front Door Date: 01/02/03 Time: 12:34 PM EST Control Panel Communication Failure To: [email protected] Subject: CONTROL PANEL COMMUNICATION FAILURE at Headquarters The following Control Panel failed to send a Device Status Report. This may indicate a problem with your access control system. Site: Headquarters Panel: CP123456 Door: Front Door Date: 01/02/03 Time: 12:34 PM EST Group(s) Put into Lockdown To: [email protected] Subject: Group(s) Have Been Locked Down! The administrator, AcmeCorp1, has locked down one or more user groups. Be advised that while these groups are locked down your doors and other devices will not function normally. Review the Lockdown page for more information on which groups are currently affected and to unlock any of them. © 2014 Brivo Systems LLC. All rights reserved. Brivo OnAir Administrator’s Manual Page 240 Cell Phone Reference Email Notifications can be sent directly to your cell phone. Enter your phone’s “address” into a Notification Rule template as shown below. See Managing Notification Rules for more information. NOTE: Cell Phone Reference Chart The Cell Phone Reference chart is subject to change by providers. If you are experiencing difficulties, please contact your service provider directly to verify the domain name of your service provider prior to creation of any notifications or summaries using a phone “address” as a recipient. US Provider Format AT&T (Phone Number @ Domain) [email protected] Alltel [email protected] Centennial Wireless [email protected] Cingular [email protected] Metrocall [email protected] Nextel [email protected] Sprint PCS [email protected] T-Mobile [email protected] US Cellular [email protected] Verizon [email protected] Canadian Provider Format Aliant (Phone Number @ Domain) [email protected] Bell [email protected] Fido [email protected] MTS [email protected] Rogers [email protected]. Telus [email protected] Sasktel [email protected] NOTE: Consult your cellular provider to determine if your calling plan includes text messaging and if your phone can receive text messages. © 2014 Brivo Systems LLC. All rights reserved. Brivo OnAir Administrator’s Manual Page 241 17. Journal © 2014 Brivo Systems LLC. All rights reserved. Brivo OnAir Administrator’s Manual Page 242 Understanding the Journal The Journal is a 90 day record of all actions performed by Administrators broken into 24 hour segments, including when each Administrator logged on, what actions he or she performed, and when he or she logged out. Filtering The filtering system allows administrators to sort results using a variety of criteria. For the Journal, filtering allows for sorting by the following: Event Type – all event types that equal the selected Account Events criteria which include: Administrator Events Badge Events Control Panel Events Credential Events Custom Field Events Device Events Holiday Events Notification Events Permission Template Events Report Events Schedule Events Site/Group Events User Events Video Events Performed On Events - all events performed on the selected criteria which include: Performed on Administrator Performed on Device Performed on Group Performed on Holiday Performed on Schedule Performed on Site Performed on User Performed By Events – all events performed by the selected Administrator © 2014 Brivo Systems LLC. All rights reserved. Brivo OnAir Administrator’s Manual Page 243 To view the Journal, click the Journal tab. The Journal displays the current 24 hour period. To switch to a different date, simply click on the date and a popup calendar will appear. Select the date desired within the past 90 days and the information will appear. To move forward or backward one day at a time, click on the or icons. Figure 156. View the Journal The Master Administrator and all Senior Administrators can view all actions. Assistant Administrators can view only their own actions. For each action, the Journal shows the Date/Time, details of the Action, and the Administrator ID of the person who performed the action (By). The Journal shows 50 events per page. To move through the complete list, click the Previous 50 link and Next 50 link at the top of the page. The journal shows links in the action column for users, devices, schedules, holidays, sites, groups, reports, and control panels. Administrators may click on those links and be taken to a new journal page filtered for that particular link. © 2014 Brivo Systems LLC. All rights reserved. Brivo OnAir Administrator’s Manual Page 244 18. Lockdown © 2014 Brivo Systems LLC. All rights reserved. Brivo OnAir Administrator’s Manual Page 245 What is Lockdown? The Lockdown feature allows an Administrator to quickly revoke access privileges from a large number of users, such as in an emergency situation. Lockdown can be activated for all users at all sites, or for only specific groups of users. When activated, lockdown overrides all schedules, holidays and door timers. When it is de-activated, all schedules, holidays and effects return to their normal settings. All lockdown activities are recorded in the Journal. Additionally, when an administrator puts an account into Lockdown for any reason, an email is sent to the email address that is in the Account section that was specified when the account was created. Lockdown is considered de-activated only when all groups have been de-selected on the Lockdown page. If even one group remains selected, the schedules and holidays associated with that group are affected and all door timers are overridden. NOTE: For Brivo OnAir panels using firmware version 5.0.12 or higher, the Lockdown feature will now respond in near real time to changes. Wireless panels and panels with firmware version 5.0.11 or lower will continue to have access to the Lockdown feature, only without the near real time functionality. © 2014 Brivo Systems LLC. All rights reserved. Brivo OnAir Administrator’s Manual Page 246 Employing Lockdown Only the Master Administrator and Senior Administrators have access to the Lockdown section. To activate lockdown: 1. Click on the Lockdown tab. The Lockdown page displays. Figure 157. Activate Lockdown 2. To revoke access for individual groups, click the check-box (on the right side of the page) associated with each desired group. 3. To revoke access for all groups associated with all sites, click Toggle All. 4. Click Save Lockdown Settings. All access privileges associated with the selected groups are revoked within five minutes; no group member will be allowed entry or exit at any secured door. To extend or retract lockdown: 1. Click on the Lockdown tab. The Lockdown page displays. 2. To extend lockdown to additional groups, click the check-boxes associated with those groups. 3. To retract lockdown from select groups, uncheck the box associated with the desired groups. 4. Click Save Lockdown Settings. All access privileges associated with the newly selected groups are instantly revoked and access privilege is restored to groups for whom lockdown has been retracted. Users affiliated with groups under lockdown will not be allowed entry or exit at any secured door. To de-activate lockdown: 1. Click on the Lockdown tab. The Lockdown page displays. 2. If all groups are selected, click Toggle All to de-select them. If only some groups are selected, click Toggle All once to select all groups, and then click Toggle All again to de-select all groups. 3. Once all groups are de-selected, click Save Lockdown Settings. All access privileges are restored. © 2014 Brivo Systems LLC. All rights reserved. Brivo OnAir Administrator’s Manual Page 247 19. Brivo OnAir Integrations © 2014 Brivo Systems LLC. All rights reserved. Brivo OnAir Administrator’s Manual Page 248 Brivo OnAir Integrations This section contains the following integration resources: Intellex DVR Installation Notes Dedicated Micros DVR Installation Notes Speco DVR Installation Notes Pelco DVR Installation Notes Matrix DVR Installation Notes Samsung DVR Installation Notes Exacq DVR Installation Notes © 2014 Brivo Systems LLC. All rights reserved. Brivo OnAir Administrator’s Manual Page 249 Intellex DVR Installation Notes Before you can use the Intellex DVR with Brivo OnAir you must first install the Intellex client software, provided by Brivo, and specify Brivo OnAir as a trusted site in Internet Explorer. NOTE: American Dynamics has limited who is authorized to utilize the Intellex DVR interface with the Brivo Access Control System. Please check with your Brivo representative if you have any questions about your access to this integration. To install the Intellex client software: 1. Create a temporary directory on the C: drive named c:\temp. 2. Go to http://www.brivo.com/support/downloads.php. 3. Download the file intellex_client.zip to the directory just created. 4. After the zip file is downloaded, open it. Inside you will find the file this file. intellex_client.msi. Extract 5. When the intellex_client.msi file is extracted, double click on it. The Intellex installation program begins running. Follow the default prompts to install the program. NOTE: To uninstall the Intellex software, you must rerun the installation program and select Remove when prompted. To add Brivo OnAir as a trusted site on Internet Explorer when using the Intellex DVR: 1. In Internet Explorer, click Internet Options on the Tools menu. 2. Click the Security tab. 3. Click Trusted sites. The Sites button becomes active. 4. Click Sites. The Trusted sites window opens. 5. In the Add this Web site to the zone field, enter https://acs.brivo.com/access/. 6. Click Add. The url now displays in the Web sites field. 7. Click OK to return to the Sites window. 8. Click OK to close the Internet Options window. To configure the Windows NTP synchronization program for Intellex. 1. Right click on the time displayed in the lower right-hand corner of the Start bar. The Date/Time popup menu displays. 2. Click Adjust Date/Time. The Date and Time Properties dialog box opens. © 2014 Brivo Systems LLC. All rights reserved. Brivo OnAir Administrator’s Manual Page 250 3. Click the Internet Time. 4. Click the Automatically synchronize with an Internet time server checkbox. The Server field becomes active. 5. In the Server field, enter ntp.brivo.com. 6. Click OK. The Date and Time Properties dialog box closes. NOTE: Brivo OnAir supports Intellex DVR version 4.0 and greater. At this time, support for the Intellex DVR does not include password-authenticated video playback. Nor does it include custom network ports; the Intellex DVR must be configured to use the default network ports. © 2014 Brivo Systems LLC. All rights reserved. Brivo OnAir Administrator’s Manual Page 251 Dedicated Micros DVR Installation Notes NOTE: Due to changes in the Dedicated Micros 4.5 firmware release, client PCs must have version 6 of the Java browser plugin. If the upgrade is necessary, users will be prompted to perform this upgrade when they attempt to view video for the first time through Brivo OnAir. Customers may also be prompted by the Java update mechanism to install further Java6 updates. Brivo recommends that users install all updates suggested by the Java update application. It is important to note that this upgrade process may be required on each client PC used to view video. Additionally, customers using both badging and Dedicated Micros video integration on same client PC, will also be asked to re-install the Java Media Framework (JMF) following the upgrade when performing image capture. This behavior is expected, and following the re-installation, image capture and other badging features will operate normally. To use a Dedicated Micros DVR with Brivo OnAir, you must take steps to ensure that the DVR’s system time is synchronized with your Brivo control panel(s). Failing to do so may result in the incorrect video being displayed for events in the Activity Log. To install the Dedicated Micros time synchronization utility: 1. Download the Dedicated Micros Time Synchronization Utility from http://www.brivo.com/support/downloads.php. 2. Extract the zip file into a directory on the machine that will host time synchronization tool. 3. Open DVIPSync.exe in the directory used in Step 2. The DVIP Time Sync V0.3 application window displays. 4. Left-click on the toolbar. A popup text edit window opens, displaying the following text: ; This is the file defining servers to have the time set by the ; VuSync program. It is in a standard ini file format with each ; server address as a section enclosed in [] brackets. Parameters ; in each section then define the time of day each server should ; be updated and how many days to wait between each update. Lines ; (like these) starting with a ; will be ignored ; Example: ; This is the section header defining the server and can be a URL ; or an IP address ; [server1.net1.pridomain] ; This line defines the time of day to send the update - default ; is 12:00 ; SyncTime=13:00 ; This line defines the number of days to wait between each update ; default is 1 ; Freq=1 ; This is the date and time of the last update and will normally ; be updated by the program ; Lasttime=06/09/02 13:18:33 © 2014 Brivo Systems LLC. All rights reserved. Brivo OnAir Administrator’s Manual Page 252 5. In the tenth line, replace the text [server1.net1.pridomain] with the IP address or DNS name of the DVR and remove the leading ; character. 6. In the thirteenth line, replace the text SyncTime=13:00 with the time at which you want to synchronize the DVR and your Brivo control panel(s), and remove the leading ; character. 7. In the sixteenth line, replace the text Freq=1 with the number of days between each update, and remove the leading ; character. It is generally best to leave this value as 1. 8. In the last line, remove the leading ; character. 9. Click Save, then Close the text edit window. 10. Right-click on the grid in the DVIP Time Sync V0.3 window and click Reload List on the popup men. The DVR IP address or DNS name should appear in the grid. 11. Close the DVIP Time Sync V0.3 application window. To schedule the execution of the time synchronization utility: 1. Open the Windows Start menu. 2. Click All Programs or Programs, depending on your operating system.) The Programs popup menu displays. 3. Click Accessories. The Accessories popup menu displays. 4. Click System Tools. The System Tools popup menu displays. 5. Click Scheduled Tasks. The Scheduled Tasks window opens. NOTE: For Microsoft® Windows™ NT, the location will be slightly different: Click on the My Computer icon, and then click Scheduled Tasks. The Scheduled Tasks window opens. 6. Double-click Add Scheduled Task. The Scheduled Task Wizard beings running. 7. Click Next. 8. On the next screen, click Browse, and select the DVIPSync.exe from the directory to which it was saved in step 2 of the procedures for installing the Dedicated Micros time synchronization utility above. 9. On the next page, enter a descriptive name for the task, click the Daily radio button, and then click Next. 10. Enter the Start time as one minute before the time entered in step 2 of the procedures for installing the Dedicated Micros time synchronization utility above; click the Every Day radio button; enter today's date as the Start date; and then click Next. 11. Enter the user name and password of the account that will execute the time synchronization task, and then click Next. For most installations, the logged in user name and password is sufficient. 12. Click Open Advanced properties for this task when I click Finish, and then click Finish. A dialog box with the advanced settings displays. 13. Click the Settings tab. Enter 5 minutes for the Stop tasks if it runs for value, and then click OK. © 2014 Brivo Systems LLC. All rights reserved. Brivo OnAir Administrator’s Manual Page 253 Speco DVR Installation Notes The Brivo OnAir supports the following Speco DVR models DVR-4TN (all hard drive sizes) DVR-8TN (all hard drive sizes) DVR-16TN (all hard drive sizes) Speco TL or TH series Speco TN Series Speco CS/GS/LS/PS Series Firmware Upgrade The DVR's firmware must be updated to version d2b02-66n1148E02581480. This firmware version is available through the Brivo support web site at http://www.brivo.com/support/downloads.php. The following steps describe the process to upgrade the DVR’s firmware 14: 1. Burn the contents of the zip file downloaded from the Brivo web site onto a blank CD. When extracting the files, ensure that the “Use Folder Names” option is enabled. Following the creation of the CD, verify that the only sub-folder in the CD’s root directory is “upd200s”. 2. Reboot the DVR. 3. Enter the DVR menu using the front panel or remote control. 4. Enter the DVR password and press <Select>. This action will cause the Main menu to be displayed. 5. Select Option 10, “Shutdown”, on the Main menu. This action will cause the Shutdown menu to be displayed. 6. Select Option 2, “Reboot”, on the Shutdown menu. This action will cause the DVR to reboot. 7. Following the restart of the DVR, place the CD created during Step 1 in the DVR's CD drive. 8. Enter the DVR menu using the front panel or remote control. 9. Select Option 1, System, from the Main menu. This action will cause the System menu to be displayed. 10. Selection Option 1, Version, from the System menu. This action will cause the Version menu to be displayed. 11. Select the “Upgrade Via Local Device” from the System menu. This action will cause the DVR to search the CD for a suitable firmware version to install. After a few minutes, a dialog will be displayed to confirm the installation of firmware version d2b02-66n1148E02581480. 12. Answer affirmatively. This action will cause the DVR to install the new firmware version and will result in the restart of the DVR. 13. Upon the successful restart, the DVR will be ready for use with Brivo OnAir. Configuration Notes and Limitations The following limitations and guidelines should be considered when configuring a Speco DVR in Brivo OnAir: 14 This process requires physical access to the DVR. © 2014 Brivo Systems LLC. All rights reserved. Brivo OnAir Administrator’s Manual Page 254 The URL must be specified in the form of http://<DVR name or IP address>:port DVR name or IP address>:port. By default, Speco DVRs use port 100 for HTTP communication. Therefore, the URL for Speco DVRs using the default configuration would be http://<DVR name or IP address>:port name or IP address>:100. N.B. Please consult the DVR’s documentation to change the port for HTTP configuration. Do not specify an administrative-level user account (typically named “admin”) in the configuration of the DVR as it permits only one (1) concurrent connection. Instead, select a user-level account (typically named “user”) which permits up to four (4) concurrent connections. N.B. Speco DVRs permit a maximum of four (4) concurrent connections. Playback controls for time-based playback (i.e. rewind, play, pause, and fast forward) are not currently supported. They may be supported in a future release. N.B. Speco DVRs do not support these operations for live playback. © 2014 Brivo Systems LLC. All rights reserved. Brivo OnAir Administrator’s Manual Page 255 Pelco DVR Installation Notes Brivo OnAir supports the following Pelco DVR models: Pelco DX8100 Pelco DX8000 NOTE: Pelco DVRs must not be added to an account with an Intellex DVR. The two DVRs are incompatible for usage on the same account. NOTE: You must wait 120 seconds (2 minutes) after an event has occurred before viewing it when using a Pelco DVR. To run the Pelco DVR: Before you can use the Pelco DVR with Brivo OnAir you must first install the driver, available through the Brivo technical support website at http://www.brivo.com/support/downloads.php. While installing the Pelco X-Portal driver, you must uncheck the “Run at startup” field. Figure 158. Disable “Run at Startup” 1. After installing the driver, you must install the Pelco DVR X-Portal 3.2 Service Pack 3 available through the Brivo technical support website at http://www.brivo.com/support/downloads.php. 2. Once you have installed the driver and service pack, login to the Brivo OnAir application and add the DVR according to the instructions in Adding a DVR. © 2014 Brivo Systems LLC. All rights reserved. Brivo OnAir Administrator’s Manual Page 256 3. When configuring a Pelco DVR for Brivo OnAir, users must keep in mind that the DVR IP address is assigned by the customer's network administration; the URL specified must be an IP address and not a host name, entered as http://<dvrIPaddress>:9002, where <dvrIPaddress> is the value specified in the Pelco DVR manual. 4. Viewing footage on a Pelco DVR requires the viewer to enter a specific user name and password per DVR on that account. If a user has more than one Pelco DVR on an account, the user must have separate login information per DVR. Additionally, only one user may enter a given username and password at a time to view live video, and the user accounts on the DVR must be created in the “Power User Group.” For more information on login names, please refer to the Pelco DVR manual or your system administrator. 5. The Network Time Protocol (NTP) must be configured on the DVR. Instructions for configuring NTP are available in the DVR manual. © 2014 Brivo Systems LLC. All rights reserved. Brivo OnAir Administrator’s Manual Page 257 Matrix DVR Installation Notes Brivo OnAir supports the following Matrix DVR models: Matrix ADT/A-XDP To run the Matrix DVR: 1. Login to the Brivo OnAir application and add the DVR according to the instructions in Adding a DVR. 2. To sync the time of the DVR with the time server, refer to the Time and Date Set Up section in your Matrix DVR manual. 3. When adding the DVR in Brivo OnAir, enter the URL value for the Matrix that you received from your Network Administrator. 4. If you do not have the Matrix Active X control installed, you will be prompted to install it when you click on the link from Brivo OnAir to view live video. The prompt reads: “This website wants to install the following add-on: ‘RASPlus WatSear Active X Control:’ from IDIS. If you trust the website and the add-on and want to install it, click here.” Once you have installed the active control, you should be able to view live video. 5. If you receive an “Invalid Product Version” message while trying to view video from a Matrix DVR, you will need to reinstall the ActiveX control used to play the video. ActiveX controls have been updated and will not be installed unless the old ones are removed first. To remove the ActiveX control, follow the instructions below for the version of Internet Explorer you are using. 6. For Internet Explorer 8 7. Click Tools -> Manage Add-ons 8. Select RASplus_WatSear Control 9. Right Click on the control and select “More Information” 10. Click “Remove” at the bottom of the dialog 11. Confirm confirmation dialogs 12. Close all windows and restart Internet Explorer. 13. For Internet Explorer 7 or earlier, please upgrade your browser to IE8 or IE9 or IE10 14. You will be prompted to install the control again when you return to the video playback page and attempt to play video. NOTE: If you are using Internet Explorer 8, it is recommended to turn “Protected Mode” off while installing the new Active X Control. NOTE: You must press “pause” on the Matrix DVR before rewinding or fast-forwarding through footage. © 2014 Brivo Systems LLC. All rights reserved. Brivo OnAir Administrator’s Manual Page 258 NOTE: You must wait 120 seconds (2 minutes) after an event has occurred before viewing it when using a Matrix DVR. © 2014 Brivo Systems LLC. All rights reserved. Brivo OnAir Administrator’s Manual Page 259 Samsung DVR Installation Notes NOTE: Do not use the administrative user (admin) for accessing video from Brivo OnAir. This user blocks access to other users when logged in – causing a single user to prevent others from viewing video from Brivo OnAir. Instead, configure Brivo OnAir to the default user (user) or another regular user configured in the DVR with the appropriate privileges. Brivo OnAir supports the following Samsung DVR models: Samsung SHR-504x Samsung SHR-508x Samsung SHR-516x Samsung SHR-604x Samsung SHR-608x Samsung SHR-616x Samsung SHR-708x Samsung SHR-716x Samsung SHR-808x Samsung SHR-816x To configure the Windows NTP synchronization program for Samsung: 1. Right click on the time displayed in the lower right-hand corner of the Start bar. The Date/Time popup menu displays. 2. Click Adjust Date/Time. The Date and Time Properties dialog box opens. 3. Click the Internet Time. 4. Click the Automatically synchronize with an Internet time server checkbox. The Server field becomes active. 5. In the Server field, enter 6. Click OK. The Date and Time Properties dialog box closes. ntp.brivo.com. © 2014 Brivo Systems LLC. All rights reserved. Brivo OnAir Administrator’s Manual Page 260 Exacq DVR Installation Notes Brivo OnAir supports the following Exacq DVR models: Exacq EL Series Exacq Z Series For instructions on the installation and configuration of Exacq DVRs, please consult the manufacturer’s documentation. © 2014 Brivo Systems LLC. All rights reserved. Brivo OnAir Administrator’s Manual Page 261 IPAC Integration NOTE: Before the installation and configuration of the IPAC device with Brivo OnAir, please follow all preliminary instructions from Liftmaster to ensure the IPAC device is properly configured. Please refer to the IPAC Quick Start Guide on the Brivo website for further details. What is IPAC? IPAC Integration allows the integration of IPAC Devices with Brivo OnAir. IPAC functionality includes: The addition of Telephone Entry System to the Users dropdown list. Under the Telephone Entry System tab are New Telephone Directory, New Resident, Telephone Directories, and Residents. o Telephone Directories are essentially groups of Residents. o Residents are entities (persons or offices) that control a defined space (home, apartment, office, etc.) within the area controlled by the IPAC Device. o A Resident can be assigned an access code which will allow them to grant access to individuals requesting access through the IPAC device. The ability to select Add IPAC Device from the More Operations dropdown list. To create an IPAC device 1. From the Setup dropdown menu, choose the Sites/Doors tab then click the Site Directory tab. The Site Directory displays. 2. Click the site to which you want to add an IPAC device. The Site detail page displays. 3. Click More Operations and select Add IPAC device. The Add IPAC device page displays. © 2014 Brivo Systems LLC. All rights reserved. Brivo OnAir Administrator’s Manual Page 262 Figure 159. Add an IPAC device to a Site 4. Select a Control Panel from the dropdown list 5. Enter the name of the IPAC device in the Device Name field. 6. Enter the SIP Domain. 7. Enter the Username. 8. Enter the Authorization ID if required. 9. Enter the Password. 10. Enter the Server Port (the default is 5060). 11. If required, enter the Outbound Proxy information and the Stun Server information. 12. Enter the maximum call time in seconds (the default is 60). 13. Enter the maximum waiting time for the call to establish in seconds (the default is 20). 14. Enter an IPAC Greeting Message. 15. If SIP Diagnostics are required, click the Yes button. Do not click the Yes button if SIP Diagnostics are not required. 16. For Gate 1, select the DTMF key from the dropdown list. 17. Select the Gate/Door from the dropdown list. If the Gate/Door can Accept Access Code, select Yes. NOTE: The DTMF (Dual Tone Multi Frequency) Key is the number a tenant would push on the telephone keypad to grant entry to someone calling from outside. 18. Complete steps 16 and 17 again for Gate 2. 19. Enter the Speaker Volume (Zero Off - 100 Max) (the default is 80). 20. Enter the MIC volume (Zero Off – 100 Max) (the default is 80). 21. Select the IPAC Directory from the dropdown list. © 2014 Brivo Systems LLC. All rights reserved. Brivo OnAir Administrator’s Manual Page 263 22. When finished, click Save. Figure 160. Create an IPAC Device To edit an IPAC device 1. From the Setup dropdown menu, choose the Sites/Doors tab then click the Site Directory tab. The Site Directory displays. 2. Click the site in which you want to edit an IPAC device. The Site detail page displays. © 2014 Brivo Systems LLC. All rights reserved. Brivo OnAir Administrator’s Manual Page 264 3. Under the IPAC Device Name section, click on the IPAC Device you wish to edit. 4. After you have finished making changes, click Save. You are returned to the View Site page. To delete an IPAC device 1. From the Setup dropdown menu, choose the Sites/Doors tab then click the Site Directory tab. The Site Directory displays. 2. Click the site in which you want to delete an IPAC device. The Site detail page displays. 3. Under the IPAC Device Name section, click on the IPAC Device you wish to delete. 4. Click the Delete IPAC device button. Click OK in the confirmation prompt. You are returned to the View Site page. Telephone Directories and Residents NOTE: The Telephone Directory and Resident features are only available if the Brivo OnAir account has IPAC functionality enabled. Residents are entities (persons or offices) that control a defined space (home, apartment, office, etc.) within the area controlled by the IPAC device. A Resident can be assigned an access code which will allow them to grant access to individuals requesting access through the IPAC device. Telephone Directories are essentially groups of residents. NOTE: It is important to note that a resident may only belong to a single Telephone Directory. Therefore, if more than one IPAC device exists on an account and a Resident needs to appear in more than one Telephone Directory, a new Resident entry will have to be established in each new Telephone Directory. To create a Telephone Directory 1. From the Users dropdown menu, choose Telephone Entry System then select New Telephone Directory. The New Telephone Directory page appears. 2. Enter the Name of the Telephone Directory. 3. Enter a Code Length of between 4 to 6 digits (the default is 4). 4. Click Save. © 2014 Brivo Systems LLC. All rights reserved. Brivo OnAir Administrator’s Manual Page 265 Figure 161. Create a Telephone Directory To edit a Telephone Directory 1. From the Users dropdown menu, choose Telephone Entry System then select Telephone Directories. The List Telephone Directories page appears. 2. Click on the Telephone Directory you wish to edit. 3. Click Edit Telephone Directory. The Edit Telephone Directory page appears. NOTE: Once a code length is selected for a Telephone Directory, it may not be edited. If a different code length is desired, a new Telephone Directory must be created. 4. After you finish making changes, click Save. You are returned to the List Telephone Directories page. To delete a Telephone Directory 1. From the Users dropdown menu, choose Telephone Entry System and then select Telephone Directories. The List Telephone Directories page appears. 2. Click on the Telephone Directory you wish to delete. 3. Click Delete Telephone Directory. Click OK at the confirmation prompt. You are returned to the List Telephone Directories page. To create a Resident 1. From the Users dropdown menu, choose Telephone Entry System and then select New Resident. The New Resident page appears. 2. Choose the Telephone Directory to which the Resident will belong from the dropdown menu. 3. Type the Directory Name as it will appear in the Resident List. 4. Enter the Directory Code for the Resident. 5. Enter the First Name of the Resident. © 2014 Brivo Systems LLC. All rights reserved. Brivo OnAir Administrator’s Manual Page 266 6. Enter the Last Name of the Resident. 7. Enter the Primary Phone of the Resident. 8. Enter the Alternate Phone of the Resident. 9. If desired, select a Do Not Disturb schedule from the dropdown menu. 10. If you desire to hide the resident from the Directory List, click the Yes button. Do not click the No button unless you want the resident to be hidden. 11. Click Save. Figure 162. Create New Resident To edit a Resident 1. From the Users dropdown menu, choose Telephone Entry System then select Residents. The List Residents page appears. 2. Click on the Edit icon for the Resident you wish to edit. The Edit Resident page will appear. 3. After you finish making changes, click Save. You are returned to the List Residents page. © 2014 Brivo Systems LLC. All rights reserved. Brivo OnAir Administrator’s Manual Page 267 Figure 163. List Residents Page To delete a Resident 1. From the Users dropdown menu, choose Telephone Entry System and then select Residents. The List Residents page appears. 2. Click on the Delete Icon for the Resident you wish to delete. 3. Click OK at the confirmation prompt. You are returned to the List Residents page. © 2014 Brivo Systems LLC. All rights reserved. Brivo OnAir Administrator’s Manual Page 268 Salto Router Integration What is a Salto Router? A Salto Router is a device that allows a Brivo OnAir account to utilize Salto Wireless door locks. Once a Salto Router is configured on a Brivo OnAir account, new doors added to the account may select the router as a controller. NOTE: You must preconfigure your Salto Router and Salto Door Locks using the Sallis installation software provided before attempting to configure them on your Brivo OnAir account. If they are not preconfigured, you will be unable to properly configure the equipment in your account. Consult the Brivo Salto Installation Guide as well as the installation instructions provided with your Salto equipment for details on how to proceed. Managing Salto Routers Configuring a control panel includes managing the Salto Routers linked to that control panel. To add a Salto Router to a control panel: 1. From the Setup dropdown menu, choose the Sites/Doors tab then click the Control Panels tab. The Control Panels directory displays. 2. Click the control panel to which you wish to add a Salto Router. The Control Panel detail page displays. 3. Click the More Options dropdown list and select Add Salto Router. The Add Salto Router page displays. Figure 164. Add a Salto Router 4. In the Location field, denote where the Salto Router is located. 5. Enter the MAC Address of the Salto Router. 6. Enter the Service Port of the Salto Router (default is 1234). 7. Click Save Salto Wireless Router. The View Salto Wireless Router page displays. To edit a Salto Router: 1. From the Setup dropdown menu, choose the Sites/Doors tab then click the Control Panels tab. The Control Panels directory displays. © 2014 Brivo Systems LLC. All rights reserved. Brivo OnAir Administrator’s Manual Page 269 2. Click the control panel for which you wish to edit a Salto Router. The Control Panel detail page displays. 3. Click the Salto Router you wish to edit. The View Salto Wireless Router detail page displays. 4. Click Edit Salto Wireless Router. The Edit Salto Wireless Router page displays. Figure 165. Edit Salto Wireless Router 5. All the fields on this page can be edited. See the preceding section on adding Salto Routers for more information. 6. Click Save Salto Wireless Router. You are returned to the View Salto Wireless Router detail page with the new information displayed. To delete a Salto Router: 1. From the Setup dropdown menu, choose the Sites/Doors tab then click the Control Panels tab. The Control Panels directory displays. 2. Click the control panel for which you wish to delete a Salto Router. The Control Panel detail page displays. 3. If your Administrator permissions allow you to delete Salto Routers, you will see a delete icon associated with each Salto Router listed on this page. Click the icon for the Salto Router you wish to delete. 4. You may instead click on the name of the Salto Router. You are directed to the View Salto Wireless Router page. Click on the Delete Salto Wireless Router. 5. Click OK in the confirmation prompt. You are returned to the Control Panel detail page, and the deleted elevator is no longer listed. NOTE: Only one router can be added to a panel. Additionally, you may not delete a Salto Router that has doors associated with it. To delete a Salto Router, all doors associated with it must first be deleted. © 2014 Brivo Systems LLC. All rights reserved. Brivo OnAir Administrator’s Manual Page 270 20. Appendices © 2014 Brivo Systems LLC. All rights reserved. Brivo OnAir Administrator’s Manual Page 271 Appendix 1: Troubleshooting Which web browser can I use to log in to my account? We support Internet Explorer™ 9, 10, and 11 as well as the latest stable versions of Firefox, Chrome, and Safair. The Brivo OnAir interface is not displaying properly. Make sure you are using a supported browser. The DVR functionality uses ActiveX Controls that require you to use Internet Explorer™ 9.0 as your browser and to allow this browser to install these controls on your system. Other functional elements, such as OVR functionality, require the Flash™ Player. My computer won’t let me install the Flash™ Player. Some computer networks prevent users from installing software of any kind. Please contact your network administrator for assistance. When I click certain links, nothing happens. You might be trying to open a popup window, but your browser is suppressing popup windows or your browser is disabling JavaScript™. Check the Settings, Options or Privacy and Security menu and make sure that popup windows are permitted at this Web site, and that scripting is enabled. Alternatively, a popup blocker application is preventing certain windows from opening. Try turning off the popup blocker during your session, or instructing the popup blocker to allow popup windows at this Web site. My computer asks me to accept a cookie when I log on. Click Accept. A cookie is used to create a session between your computer and our server. If you reject or disable cookies, you won’t be able to log on. I got kicked out of my session. As a security precaution, sessions are terminated after 20 minutes of inactivity. If you are transferred to the Administrator Login page in the middle of your session, re-enter your login information, and your session will continue where it left off. Some of my data seems to have disappeared. Where did it go? Another Administrator for your account may have edited your permissions (i.e. changed which groups and sites you can view or edit). Click the Setup tab then the Administrators tab then click on your Administrator ID to view your permissions. For further assistance, please contact your Master Administrator. There appears to be new data in my account. Where did it come from? See the previous question. Why are some links and navigation tabs grayed out or missing? There are a number of tasks that cannot be performed by Assistant Administrators. Some of these include accessing lockdown creating groups, editing group privileges, and, in some cases, creating schedules. Please contact the Master Administrator of your account for assistance. I can’t reach the Web site at all. Make sure your Internet connection is active: Can you go to other Web sites? Are you able to check email? If you are able to reach other Web sites, but not this Web site, please contact Technical Support. I just added cards to the Card Bank, but they don’t work. Cards don’t work until they are assigned to users. If you attempt to use a card that has not been issued to a user, you should receive a Failed Access: Card never issued message in the Activity Log. Tip: Before adding a range of cards, add one or two, then assign them to users, and then test them. I created a new user, but his or her card isn’t working. Was the user’s card added to the Card Bank correctly? (Did you enter an incorrect facility code or choose the wrong card format?) Try deleting the card from the Card Bank, then re-adding the card, then re-assigning it to the user. Or, does the user belong to a group with correct privileges? Go to the User Directory and click the user’s name. Then, Click the group (or groups) to which the user belongs. Does the group have permission to access the door in question (at the time in question)? Please note, only the Master Administrator and Senior Administrators can create groups and edit group privileges. © 2014 Brivo Systems LLC. All rights reserved. Brivo OnAir Administrator’s Manual Page 272 I deleted a user. What happens next? The user is removed from any group(s) to which he or she belongs. As a result, his or her access privileges are terminated. If a deleted user attempts access with his former card or PIN, you should receive a Failed Access: User was deleted message in the Activity Log. After deleting a user, should I delete his or her card from the Card Bank? No. If you delete it, you won’t receive Failed Access messages if the card is presented at a reader. I deleted a user and repossessed his or her card. Should I delete the card from the Card Bank? No. Leave it in the Card Bank so you can issue it to another user at a later date. Can I “undelete” a user? No. A user’s card or PIN stopped working. Was the user deleted or suspended by another Administrator of your account? Does the user belong to a group with appropriate privileges? Or, have the user’s access privileges expired? Go to the Users/Groups section and click the user’s name. Make sure the user is within his or her effective date range. If the user’s access privileges have expired, you can reactivate the user by editing or erasing the Effective To date. Or, is the door in question observing a holiday period? Go to the Schedules section, and then see if any holidays are in effect at that door at that time. Or, is there a problem with the card reader? Does it appear to have lost power? If you suspect the problem is related to the reader or door hardware, please contact your dealer immediately. © 2014 Brivo Systems LLC. All rights reserved. Brivo OnAir Administrator’s Manual Page 273 Appendix 2: Glossary Account A group of affiliated control panels all under the management of a single Master Administrator Activity Log A 90-day record of Access Events, Exception Events, device Events and Control Panel Events. For each event, the Activity Log shows the date and time, user name (or nature of the event), site name and door or device name (or control panel ID if the event is not device-specific). Administrator A person who administers an account. There are four types of Administrators: Master, Super, Senior and Assistant. Administrators access and manage an account through the interface. Administrator ID An Administrator’s unique screen name. Antipassback Controls that allow administrators to determine whether or not individual users are permitted to enter or exit a particular door. Badge A user identification card generated by Brivo OnAir. Biometric A measurable, physical characteristic, such as a fingerprint, that can be used to verify a person’s identity. Card A proximity card, magnetic stripe card, smart card or similar token issued to a user. Card Bank A list of all cards associated with an account. The card bank displays which cards are assigned to users and which cards are currently unassigned. Card Reader A device that reads cards as they are presented by users. A card reader is connected to a control panel. A card reader that includes a keypad is called a dual reader. CCTV Camera Closed circuit television camera. An optional device for monitoring doors and devices, providing live video feed via Brivo OnAir. Console A feature that allows for the live monitoring of one or more video streams along with the ability to unlock door remotely. Control Panel A system consisting of 1-15 control boards: one Main Board and up to 14 Door Boards and/or Input Output Boards. While each control panel is limited to 15 control boards, an account may have more than one control panel. Credential A card, PIN or biometric. Device A device is a logical definition of how a control panel interacts with the world. A motion detector, a temperature sensor, and an EAS pedestal are just a few examples of devices. A device belongs to a site and has a descriptive name such as “Server Room Temp Sensor.” Device, Switch A device with one input point and 0 to N output points that has state (On or Off). The device can have these behaviors: Latch, Unlatch, Pulse, or Follow. A schedule associated with the device causes it to be available for activation via its input point during the selected times for the schedule. © 2014 Brivo Systems LLC. All rights reserved. Brivo OnAir Administrator’s Manual Page 274 Device, Timer A device whose input is a schedule and that has 0 to N output points associated with it. The timer's state is On during the times selected in its schedule; otherwise it is Off. The device can have these behaviors: Latch, Unlatch, Pulse, or Follow. Device, Valid Credential A device whose input is a card reader and that has 0 to N output points associated with it. A valid credential device has no state, so its behaviors are limited to: Latch, Unlatch, and Pulse. Valid credential devices have permissions associated with them and appear in the group permissions area. Valid credential devices do not have Disengage messages because they do not have state, nor do they have schedules. Device, Event Track A device whose input is the specific event associated with it from the door that the event track device is created to watch. An event track device can have 0 to N outputs associated with it. The device can always have these behaviors: Latch, Unlatch, or Pulse. If an event track device is watching for Door Ajar events, then it has state and can have a Follow behavior. If the Follow behavior is selected, then the device can have a Disengage message. The schedule associated with an event track device defines when it is active because a client might want to respond to the event differently during business hours than during non-business hours. Door A door with an electronic means of entry, such as a keypad or card reader. A door belongs to a site and has a descriptive name such as “Lobby Door” or “Server Room.” Door Ajar An instance of a door being propped open or held open for an extended period of time. Door Forced Open A type of Exception Event. An instance of a door being opened without a credential or a request to exit. Dual Reader A combination card reader and keypad. DVR Digital Video Recorder. An optional device for capturing video of access events. Email Notification An email message that corresponds to an Access Event, Exception Event, Device Event or Control Panel Event. Email Summary A daily email bulletin that summarizes activity at all sites. Event, Access A successful access by a user. Event, Control Panel A power-related incident, such as “AC Power Loss,” or tamper-related incident, such as “Unit Opened,” experienced by the control panel. Event, Device An input engagement or disengagement. Event, Exception An event that causes a security risk (e.g. “Door Ajar") or is out of the ordinary. Event, Failed Access A failed access attempt by a User, or an incident of an unknown or unauthorized credential being presented. Failed Access Events are a subset of Exception Events. First-Person-In A security feature which lets you define a schedule so that it does not become active until the first member of a specific group accesses the door or device to which that schedule is linked. © 2014 Brivo Systems LLC. All rights reserved. Brivo OnAir Administrator’s Manual Page 275 Group A group of users with the same access privileges (group privileges). A group has a descriptive name such as “Washington Staff.” Group Enabled Schedule A group of users responsible for enabling a schedule. Until a member of this group accesses the door or device to which the schedule is linked, the schedule remains inactive and does not permit any type of access. Group Privileges A set of privileges that defines a group’s level of access. For example, members of the Group “D.C. Staff” can access “Front Door” and “Back Door” at “D.C. Headquarters” according to the Schedule named “Weekdays 95.” Holiday A period of time during which schedules refer to their Holiday override columns instead of to the day of week. Journal A 90-day record of actions performed by Administrators, such as logging in and editing the properties of a user. Keypad A device that accepts numeric input (e.g. a PIN) from a User. A typical Keypad has 12 keys. A Keypad is connected to a control panel. Keypad Unlock-Hold A type of group privilege which allows any member of the group to override a door unlock schedule by presenting his or her credentials and entering 99#. To reactivate the door unlock schedule, the group member enters 00#. Layout A customized badge layout which contains static field values, such as company name and address; user profile information, such as full name; and a user image. NVR Network Video Recorder. An optional network connected device for capturing video of access events. OVR Online Video Recorder. An optional device for capturing live and event based video. Permissions Permissions control an Administrator’s access to account data. Permissions, General Permissions that are automatically granted to all Administrators. Permissions, Assigned Permissions that are assigned to individual Assistant Administrators by the Master Administrator and Super Administrators. Request-to-Exit (REX) Switch A button or motion sensor that causes a Door latch to disengage, allowing a person to exit. Rule A set of conditions for routing email notifications. Schedule A schedule is an editable, reusable time template that can be used to control such things as when a door is accessible or when a device is activated. A Schedule has a descriptive name such as “Mon-Fri 7AM-7PM.” Site A logical group of doors and devices. A site has a descriptive name such as “Maple St. Office” or “Warehouse.” Static Field A background color or image, graphic image, or chunk of text used in a customized badge layout. Static fields remain the same on all badges using that layout. Examples include company logo, name, and address. © 2014 Brivo Systems LLC. All rights reserved. Brivo OnAir Administrator’s Manual Page 276 Supervisor-on-Site A security feature that lets you define a schedule so that it does not become active unless or until a member of a specific group accesses the door to which that schedule is linked Tiered Administration A framework for wide-area, distributed access control administration. Two Factor Authentication A security feature that generates a random one time use token which must be used in addition to an Administrator ID and password to gain access to the account. Two Factor Credential A security feature that requires users to provide both forms of credentials, a card and a PIN, at a door or elevator. User A person who requires access to one or more doors. A user has unique credentials, such as a Card or PIN, and belongs to a group. User, Unaffiliated A user who is not yet affiliated with any groups, and therefore has no access privileges. © 2014 Brivo Systems LLC. All rights reserved.