1
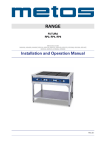
RANGE
FUTURA RP4, RP6
Accessories
CHEF 200
CHEF 220
CHEF 240
Installation and Operation Manual
S/N: 095523/03
Rev.: 4.0
7.5.2009
Rev. 4.0
Dear Customer,
Congratulations on deciding to choose our appliance for your kitchen activities. You
made an excellent choice. We will do our best to make you a satisfied customer like thousands of customers we have around the world.
Please read this manual carefully. You will learn correct, safe and efficient working methods in order to get the best possible benefit from the appliance. The instructions and hints
in this manual will give you a quick and easy start, and you will soon note how nice it is
to use this equipment.
All rights are reserved for technical changes.
You will find the main technical data on the rating plate fixed to the appliance. When you
need service or technical help, please let us know the serial number shown on the rating
plate. This will make it easier to provide you with correct service.
For your convenience, space is provided below for you to record your local service contact information.
Service phone number:...............................................................................................
Contact person:....................................................................................................................
7.5.2009
Rev. 4.0
7.5.2009
Rev.
1. General .......................................................................................................... 1
1.1 Symbols used in the manual .......................................................................................... 1
1.2 Symbols used on the appliance ...................................................................................... 1
1.3 Checking the relationship of the appliance and the manual .......................................... 1
2. Safety .............................................................................................................. 2
2.1 Safe use of the appliance ............................................................................................... 2
2.2 Disposal of the appliance ............................................................................................... 2
3. Functional description .................................................................................. 3
3.1 Intended use of the appliance ........................................................................................ 3
3.1.1 Prohibited use ........................................................................................................ 3
3.2 Operating principle and construction ........................................................................... 3
4. Operation instructions ................................................................................. 4
4.1 Before use ......................................................................................................................
4.1.1 Selecting cookware ................................................................................................
4.2 Operation procedures .....................................................................................................
4.2.1 Using the range ......................................................................................................
4.3 After use ........................................................................................................................
4.3.1 Cleaning .................................................................................................................
4.3.2 Other service measures ..........................................................................................
4
4
4
4
5
5
6
5. Installation ..................................................................................................... 7
5.1 General ..........................................................................................................................
5.2 Transporting and unpacking the range ..........................................................................
5.3 Positioning the range .....................................................................................................
5.4 Electrical connections ....................................................................................................
5.5 Test-run ..........................................................................................................................
7
7
7
7
8
6. Troubleshooting ............................................................................................ 9
7. Spare parts .................................................................................................. 11
7.1 Voltage codes .............................................................................................................. 13
7.2 Product codes ............................................................................................................... 13
8. Technical specifications .............................................................................. 19
7.5.2009
Rev.
7.5.2009
Rev. 4.0
General
1. General
Carefully read the instructions in this manual as they contain important information regarding proper, efficient and safe installation, use and maintenance of the appliance.
Keep this manual in a safe place for eventual use by other operators of the appliance.
The installation of this appliance must be carried out in accordance with the manufacturer’s instructions and following local regulations. The connection of the appliance to the
electric and water supply must be carried out by qualified persons only.
Persons using this appliance should be specifically trained in its operation.
Switch off the appliance in case of failure or malfunction. The periodical function checks
requested in the manual must be carried out according to the instructions. Have the appliance serviced by a technically qualified person authorized by the manufacturer and using
original spare parts.
Not complying with the above may put the safety of the appliance in danger.
1.1
Symbols used in the manual
This symbol informs about a situation where a safety risk might be at hand. Given instructions are mandatory in order to prevent injury.
This symbol informs about the right way to perform in order to prevent bad results, appliance damage or hazardous situations.
This symbol informs about recommendations and hints that help to get the best performance out of the appliance.
1.2
Symbols used on the appliance
This symbol on a part informs about electrical terminals behind the part. The removal of
the part must be carried out by qualified persons only.
1.3
Checking the relationship of the appliance and the manual
The rating plate of the appliance indicates the serial number of the appliance. If the manuals are missing, it is possible to order new ones from the manufacturer or the local representative. When ordering new manuals it is essential to quote the serial number shown
on the rating plate.
1
7.5.2009
Rev. 4.0
Safety
2. Safety
2.1 Safe use of the appliance
Because the range is a heated appliance that has hot surfaces during normal use, the following warnings and instructions must be followed in order to avoid burns.
During long-time operation even the frame surrounding the cooking plates gets hot.
The capability of the cooking plates to store and even out the heat also keeps them hot for
a long time after switching them off.
For safe handling of cookware on the cooking top, always use heat protective gloves.
Do not leave the range on for long periods totally without supervision.
2.2
Disposal of the appliance
The destroying of the appliance when its economical lifetime has been reached may be
harmful to the environment if not properly handled. Utilization of materials that are reusable is best done by professional personnel specialized in recycling.
2
7.5.2009
Rev. 4.0
Functional description
3. Functional description
3.1
Intended use of the appliance
The Futura range is intended for preparing different kinds of foodstuffs using cookware.
3.1.1 Prohibited use
Use of the appliance for other purposes than stated above is prohibited.
Covering the gaps between the range cooking plates and the upper frame with folio is prohibited.
Preparing food directly on the cooking plate without cookware is prohibited.
The manufacturer of the appliance takes no responsibility for situations that might occur
if the warnings and instructions in this manual are neglected.
3.2
Operating principle and construction
Depending on the model, the range is equipped with four or six cooking plates.
Each cooking plate is equipped with a 7-position power regulator which allows power
regulation in several steps. A green pilot light for every cooking plate indicates that the
plate is on.
In order to ease daily cleaning the cooking plates are hinged and can be swinged up in an
upright position. In addition, the range is equipped with a removable spillage tray.
3
7.5.2009
Rev. 4.0
Operation instructions
4. Operation instructions
4.1
Before use
The cooking plates of the range are protected with a thin layer of oil for the duration of
storage and transportation. When heating up the range for the first time the oil may create
some smoke and unpleasant smell. This is quite normal and disappears quickly when using the range.
4.1.1
Selecting cookware
Always use flat-based cookware in order to achieve good heat transfer and to increase the
service life of the cooking plate. Placing a cold and wet pan on a red-hot cooking plate
should be avoided as the thermal tensions created considerably decrease the service life
of the plate.
You get the best benefit from the range as well as from the cookware by observing the
following:
•
•
•
•
•
•
Use good quality flat-based cookware.
Wait for pans to cool before putting them in cold water.
Always ensure pans have clean, dry bases before use.
Ensure pan handles are positioned safely and away from heat sources.
Always use pan lids except when frying.
Remember good quality pans retain heat well, so generally only low or medium
heat is necessary.
4.2 Operation procedures
4.2.1 Using the range
Switch the appliance off if it is damaged or is malfunctioning. Contact authorised service
personnel using original spare parts for service of the appliance.
Ranges intended for use aboard ships are equipped with a potrack. Using a range aboard
a ship without the potrack is prohibited.
During the installation, a mains switch may have been fitted near the range, often on a wall
nearby. Check that the mains switch is in the ON position.
The range is controlled with power regulators and pilot lights.
4
7.5.2009
Rev. 4.0
Operation instructions
1
2
3
4
Operating panel
1.
Spillage tray
2.
Pilot light, cooking plate on
3.
Power regulator, front plate
4.
Power regulator, rear plate
Each cooking plate is equipped with a 7-position power regulator which allows power
regulation in several steps. A green pilot light for every cooking plate indicates that the
plate is on.
Cooking is started by turning the power regulator to position 6. When boiling starts, the
power is decreased as needed. Usually it is possible to use a small or medium power setting.
Do not leave the cooking plate on without any load, because it then overheats, which considerably decreases the service life of the plate. By turning the cooking plate off when not
needed, energy is saved and a cooler working environment is achieved.
If there are longer interruptions in the electricity distribution, all power regulators of the
range should be set to the 0 position. This should be done in order to prevent unexpected
start-up of the range when the electricity distribution is restored.
4.3
After use
4.3.1 Cleaning
Use of a water hose or pressure cleaning jet is strictly forbidden.
It is not allowed to wipe the undersides of cooking plates swung up to a cleaning position
with a wet sponge, cloth etc., because water flowing down the plate is absorbed into the
insulating material thus causing earth leakage.
5
7.5.2009
Rev. 4.0
Operation instructions
When cleaning the cooking plates, observe that they are hot a long time after they have
been switched off. When the cooking plates are swinged up for cleaning, it is advisable to
support the plate in the upper position with one hand thus preventing the possibility that
they unexpectedly return to their working position.
Be careful when removing the spillage tray, as it may contain spillages that are still hot.
Cleaning is very easy, if possible spillovers are removed immediately with a damp cloth.
Sugar and mixes containing much sugar must be removed immediately, because later removing is laborious.
In all cleaning, prefer chemical cleaning methods rather than mechanical rubbing. Use a
slightly alkaline detergent (pH 8-10) diluted in water according to instructions when
cleaning the surfaces of the range.
Always dry the cooking plates after cleaning by heating them up.
Clean cooking plates give an efficient heat transfer to the cookware. Cooking is then fast
and the service life of the cooking plates is extended.
The spillage tray is pulled out and cleaned. Outer surfaces are wiped off with a damp cloth
and then wiped dry.
4.3.2 Other service measures
The appliance does not include any user serviceable parts inside. Service must be left to
authorised service personnel.
6
7.5.2009
Rev. 4.0
Installation
5. Installation
5.1 General
The installation of this appliance must be carried out in accordance with the manufacturer’s instructions and following local regulations. This installation manual must be used
together with the installation drawing of the appliance.
The connection of the appliance to the electrical and water supply must be carried out by
qualified persons only.
5.2
Transporting and unpacking the range
The best way to move the range is to keep it in its package as long as possible while it also
protects the range from outer damage. If it is necessary to unpack the range, possible lifting must be done from the bottom frame using suitable spacers of wood. In order to avoid
damages it is not allowed to use the cooking top as a workbench during installation.
5.3 Positioning the range
Because the temperature of a cooking plate accidentally forgotten on without a pan may
reach even 550°C, it is mandatory to follow local fire safety regulations when installing
the range.
The range is positioned in the installation place and adjusted in a horizontal position from
the adjustable legs.
On ranges fitted with a convection oven the horizontal position should be checked from
the runners of the oven in order to achieve good browning results.
When the range is on the correct location and in a horizontal position, it must be bolted to
the floor, the land models by the flanges in the rear adjusting legs and the marine models
from all four leg flanges.
5.4 Electrical connections
Besides the live electrical parts, also look out for possible moving mechanisms inside the
appliance, if there is a need for testing during installation and the guards or cover plates
are detached.
7
7.5.2009
Rev. 4.0
Installation
In order to make eventual future service easier and increase safety, a mains switch must
be installed near the appliance. This switch must disconnect the appliance completely
from the electrical supply network.
The cable gland for the supply cable is located on the rear wall of the oven (right lower
corner). In order to make the connection, the right side panel must be removed.
5.5
Test-run
Acquaint yourself with the user manual of this appliance before testing it. The appliances
under the cooking top are provided with their own manuals.
After connecting the cable check the function of the range.
Check that
•
•
every cooking plate heats up and the corresponding pilot light turns on when the
plate is switched on with the power regulator
no wires inside the appliance get jammed before refitting the outer panels.
Refit the outer panels.
8
7.5.2009
Rev. 4.0
Troubleshooting
6. Troubleshooting
If the appliance does not function, check the following:
•
•
•
•
Has the appliance been used according to the instructions?
Are all possibly removable parts refitted?
Is the mains switch on the appliance or nearby - often on the wall - in the ON position?
Are the circuit breakers (fuses) of the appliance in the electricity distribution board
in working order? Ask an authorised person to check the circuit breakers.
If even this does not help, figure out in advance how to briefly describe the breakdown
and contact an authorised service person.
9
7.5.2009
Troubleshooting
10
Rev. 4.0
7.5.2009
Rev. 4.0
Spare parts
7. Spare parts
11
7.5.2009
Spare parts
12
Rev. 4.0
7.5.2009
Rev. 4.0
Spare parts
Voltage
Voltage codes
7.2
Product codes
Voltage code
A
3/N/PE∼400/230V 50Hz
B
∼250V 16A 50Hz
C
3/N/PE∼380/220V 50Hz
D
3/PE∼200V 50-60Hz
F
2/PE 220−240V 50Hz
G
3/N/PE∼415/240V 50Hz
H
3/PE∼230V 50Hz
I
3/PE∼220V 60Hz
J
3/PE∼380 50Hz
K
3/PE∼400V 50Hz
L
3/PE∼415V 50Hz
M
3/PE∼440V 60Hz
N
3/PE∼460V 60Hz
O
3/PE∼480V 60Hz
P
1/N/PE~220-240V 50Hz
R
2/PE~220-230V 60Hz
S
3/N/PE∼400/230V 50Hz
T
3/PE∼230V 60Hz
U
1/N/PE~100V 50-60Hz
Product code
7.1
Full name
Model codes
RP
FUTURA RP
Type codes
4
4
6
6
Accessory codes
200
CHEF 200
220
CHEF 220
240
CHEF 240
13
7.5.2009
Spare parts
14
Rev. 4.0
7.5.2009
Rev. 4.0
Spare parts
ID
Code
Model
Type
Voltage Description
Module:
10
3752924
RP
4,6
A,H,I
Cooking plate
20
3752971
RP
4,6
A,H,I
Cable conduit
30
3752940
RP
4,6
A,H,I
Eyebolt M12x90
40
3752937
RP
4
A,H,I
Rear panel
50
3753140
RP
6
A,H,I
Rear panel
80
3752933
RP
4,6
A,H,I
Side panel
90
3493234
RP
4,6
A,H,I
Knob, black
100
3442159
RP
4,6
A,H,I
Pilot light, green
110
3753180
RP
4,6
A,H,I
Set of wires
120
3288997
RP
4,6
A,H,I
Switch
130
3752935
RP
4
A,H,I
Front panel
140
3753139
RP
6
A,H,I
Front panel
150
3752936
RP
4
A,H,I
Spillage tray
160
3753157
RP
6
A,H,I
Spillage tray
RP=FUTURA RP
200=CHEF 200, 220=CHEF 220, 240=CHEF 240
A=3/N/PE∼400/230V 50Hz, H=3/PE∼230V 50Hz, I=3/PE∼220V 60Hz, J=3/PE∼380 50Hz, L=3/PE∼415V 50Hz, M=3/
PE∼440V 60Hz
15
7.5.2009
Spare parts
16
Rev. 4.0
7.5.2009
Rev. 4.0
Spare parts
ID
Code
Model
Type
Voltage Description
Module:
10
3753052
RP
4,6
J,L,M
Cooking plate
20
3752971
RP
4,6
J,L,M
Cable conduit
30
3752940
RP
4,6
J,L,M
Eyebolt M12x90
40
3752937
RP
4
J,L,M
Rear panel
50
3753140
RP
6
J,L,M
Rear panel
80
3752933
RP
4,6
J,L,M
Side panel
90
3493234
RP
4,6
J,L,M
Knob, black
100
3442159
RP
4,6
J,L,M
Pilot light, green
110
3753180
RP
4,6
J,L,M
Set of wires
120
3288997
RP
4,6
J,L,M
Switch
130
3752935
RP
4
J,L,M
Front panel
140
3753139
RP
6
J,L,M
Front panel
150
3752936
RP
4
J,L,M
Spillage tray
160
3753157
RP
6
J,L,M
Spillage tray
170
3512984
RP
4,6
J,L,M
Transformer
180
3521812
RP
4
J,L,M
Storm rail RP4 Marine
190
3521837
RP
6
J,L,M
Storm rail RP6 Marine
200
3753155
RP
4
J,L,M
Kettle support RP4 Marine
210
3753167
RP
6
J,L,M
Kettle support RP6 Marine
RP=FUTURA RP
200=CHEF 200, 220=CHEF 220, 240=CHEF 240
A=3/N/PE∼400/230V 50Hz, H=3/PE∼230V 50Hz, I=3/PE∼220V 60Hz, J=3/PE∼380 50Hz, L=3/PE∼415V 50Hz, M=3/
PE∼440V 60Hz
17
7.5.2009
Spare parts
18
Rev. 4.0
7.5.2009
Rev. 4.0
Technical specifications
8.
Technical specifications
Main and control circuit T02119 B3
Main and control circuit T02120 B3
Main and control circuit T02121 B3
Main and control circuit T02122 B3
Main and control circuit T02123 B3
Main and control circuit T02124 B3
Main and control circuit T02130 B3
Main and control circuit T02131 B3
Main and control circuit T02132 B3
Main and control circuit T02146 A3
Installation drawing T02194 B3
Installation drawing T02195 B3
Installation drawing T02196 B3
Installation drawing T02197 B3
Installation drawing T02198 B3
Installation drawing T02199 B3
19
Main and control circuit T02119 B3
Main and control circuit T02120 B3
Main and control circuit T02121 B3
Main and control circuit T02122 B3
Main and control circuit T02123 B3
Main and control circuit T02124 B3
Main and control circuit T02130 B3
Main and control circuit T02131 B3
Main and control circuit T02132 B3
Main and control circuit T02146 A3
Installation drawing T02194 B3
Installation drawing T02195 B3
Installation drawing T02196 B3
Installation drawing T02197 B3
Installation drawing T02198 B3
Installation drawing T02199 B3
7.5.2009
Rev. 4.0
Technical specifications
Item
Model
Type
Accessory Specification
Outer dimensions WxDxH
RP
4
800 x 800 x 900 mm
Outer dimensions WxDxH
RP
6
1200 x 800 x 900 mm
Cooking plates
RP
4
4
Cooking plates
RP
6
6
Power regulation
RP
7-position power regulator, a pilot light for each
plate.
Material
RP
Cooking plates of cast iron. All outer surfaces of
stainless steel
Weight with package
RP
4
200
appr. 160 kg
Weight with package
RP
4
220
appr. 160 kg
Weight with package
RP
4
240
appr. 170 kg
Weight with package
RP
6
200
appr. 210 kg
Weight with package
RP
6
220
appr. 210 kg
Weight with package
RP
6
240
appr. 220 kg
Weight without package
RP
4
200
appr. 125 kg
Weight without package
RP
4
220
appr. 125 kg
Weight without package
RP
4
240
appr. 135 kg
Weight without package
RP
6
200
appr. 155 kg
Weight without package
RP
6
220
appr. 155 kg
Weight without package
RP
6
240
Package dimensions WxDxH
4
Package dimensions WxDxH
6
appr. 165 kg
860 x 920 x 1050 mm
1260 x 920 x 1050 mm
Electrical connection
See installation drawing.
Operating conditions
Normal commercial kitchen conditions, temperature over 0°C.
RP=FUTURA RP
200=CHEF 200, 220=CHEF 220, 240=CHEF 240
A=3/N/PE∼400/230V 50Hz, H=3/PE∼230V 50Hz, I=3/PE∼220V 60Hz, J=3/PE∼380 50Hz, L=3/PE∼415V 50Hz, M=3/
PE∼440V 60Hz
36


![Deep Time User Manual ver.1.3 [ENG]](http://vs1.manualzilla.com/store/data/005775250_1-8eb61345983a4e3ef84e4b82ef32f1cf-150x150.png)