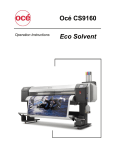
1
ENGLISH
APW-896/IP-420
INSTRUCTION MANUAL
* "CompactFlash(TM)" is the registered trademark of SanDisk Corporation, U.S.A.
CONTENTS
!. CAUTIONS BEFORE OPERATION................................................................................1
@. CONFIGURATION OF THE MACHINE...........................................................................2
#. SPECIFICATIONS...........................................................................................................3
1. MECHANICAL SPECIFICATIONS.......................................................................................................... 3
2. ELECTRICAL SPECIFICATIONS............................................................................................................ 3
$. INSTALLATION...............................................................................................................4
1. REMOVING PACKING MATERIALS....................................................................................................... 4
2. SECURING THE MACHINE.................................................................................................................... 4
3. CONNECTING THE FOOT PEDAL......................................................................................................... 5
4. CONNECTING THE AIR COUPLER ...................................................................................................... 5
5. CONNECTING THE POWER PLUG ...................................................................................................... 6
6. ASSEMBLING THE THREAD STAND AND ATTACHING ITTO THE MACHINE................................... 7
7. INSTALLING SP-46 (CLAMP BAR STACKER) (OPTIONAL PART NO. : 40058952)........................... 7
8.INSTALLING SP-47 (ROLLER STACKER) (OPTIONAL PART NO. : 40058953).................................. 8
9. REMOVING THE HEAD FIXING PLATE................................................................................................. 9
10. INSTALLING THE SUB-TABLE............................................................................................................ 9
11. INSTALLING OPERATION PANEL IP-420............................................................................................ 9
12. LUBRICATING THE OIL TANK........................................................................................................... 10
13. INSTALLING SA-120 (INTERLINING SUPPLYING DEVICE) (OPTIONAL PART NO. : 40045772)..... 11
14. ADJUSTMENT OF SA-120 (INTERLINING SUPPLYING DEVICE)
(OPTIONAL PART NO. : 40045772)..................................................................................................... 12
%. PREPARATION OF THE SEWING MACHINE..............................................................13
1. HOW TO OPERATE THE SEWING MACHINE HEAD.......................................................................... 13
(1) How to attach the needles............................................................................................................... 13
(2) Thread used..................................................................................................................................... 13
(3) How to pass the needle thread........................................................................................................ 14
2. HOW TO REMOVE THE SEWING TABLE............................................................................................ 15
(1) When replacing the bobbin thread................................................................................................... 15
(2) Cautions to be taken when the sewing tables are removed............................................................ 16
3. HOW TO WIND THE BOBBINS............................................................................................................ 17
4. HOW TO THREAD THE BOBBIN CASE.............................................................................................. 18
5. HOW TO INSTALL THE BOBBIN CASE.............................................................................................. 18
6. HOW TO ADJUST THE THREAD TENSION........................................................................................ 19
7. SETTING THE MATERIAL TO BE SEWN............................................................................................. 20
(1) Setting a garment body . ................................................................................................................. 20
8. ADJUSTING THE MATERIAL GUIDE................................................................................................... 20
^. HOW TO USE THE OPERATION PANEL.....................................................................21
1. PREFACE.............................................................................................................................................. 21
2. BASIC OPERATION OF THE OPERATION PANEL (IP-420) .............................................................. 24
(1) Configuration of IP-420 ................................................................................................................... 24
(2) Buttons used in common................................................................................................................. 25
(3) Basic operation................................................................................................................................ 25
3. EXPLANATION OF THE BASIC SCREEN............................................................................................ 28
(1) Input screen (Independent sewing mode)....................................................................................... 28
(2) Sewing screen (Independent sewing mode) . ................................................................................. 29
(3) Input screen (Alternate sewing mode)............................................................................................. 30
(4) Sewing screen (Alternate sewing mode)......................................................................................... 31
(5) Input screen (Cycle sewing mode).................................................................................................. 32
(6) Sewing screen (Cycle sewing mode) . ............................................................................................ 33
4. USING THE COUNTER......................................................................................................................... 34
(1) Setting procedure of the counter..................................................................................................... 34
(2) Releasing procedure of count-up..................................................................................................... 37
(3) Counter value changing procedure during sewing.......................................................................... 37
5. USING THE BOBBIN THREAD AMOUNT ADJUSTMENT COUNTER................................................ 38
(1) Setting procedure of the bobbin thread remaining amount adjustment counter.............................. 38
(2) Releasing procedure of the bobbin thread remaining amount detection count-up.......................... 40
6. CHANGING THE SEWING MODE........................................................................................................ 41
7. USING THE SEWING PATTERN........................................................................................................... 42
(1) Performing the selection of pattern.................................................................................................. 42
(2) Performing the new creation of pattern............................................................................................ 43
(3) Copying the pattern......................................................................................................................... 44
(4) Erasing the pattern.......................................................................................................................... 46
(5) Naming the pattern.......................................................................................................................... 47
(6) Editing procedure of the cycle sewing data..................................................................................... 48
8. CHANGING THE SEWING DATA.......................................................................................................... 50
(1) Changing procedure of the sewing data.......................................................................................... 50
(2) Sewing data list................................................................................................................................ 51
(3) Copying function of the upper and lower alternate sewing data...................................................... 62
9. CHANGING THE MEMORY SWITCH DATA......................................................................................... 64
(1) Changing procedure of the memory switch data............................................................................. 64
(2) Memory switch data list................................................................................................................... 65
10. PERFORMING OPTIONAL SETTING................................................................................................. 73
(1) Changing procedure of the optional setting..................................................................................... 73
(2) Optional setting list.......................................................................................................................... 74
11. CHANGING THE DEVICE SETTING................................................................................................... 75
(1) Changing procedure of the device setting....................................................................................... 75
(2) Device setting list............................................................................................................................. 76
12. CUSTOMIZING THE PEDAL OPERATION......................................................................................... 77
(1) Method to select and use the customized data............................................................................... 77
(2) Customizing the pedal operation data............................................................................................. 78
13. CUSTOMIZING THE DATA INPUT SCREEN...................................................................................... 80
(1) Customizing procedure.................................................................................................................... 80
14. PERFORMING THE CUSTOMIZING SETTING OF THE SEWING SCREEN.................................... 82
(1) Customizing procedure.................................................................................................................... 82
15. USING THE INFORMATION................................................................................................................ 84
(1) Observing the maintenance inspection information......................................................................... 85
(2) Releasing procedure of the warning................................................................................................ 86
(3) Observing the production control information.................................................................................. 87
(4) Performing setting of the production control information................................................................. 89
(5) Observing the operation measurement information......................................................................... 91
16. USING THE COMMUNICATION FUNCTION...................................................................................... 93
(1) Handling possible data ................................................................................................................... 93
(2) Performing communication by using the media............................................................................... 93
(3) Performing communication by using USB....................................................................................... 93
(4) Take-in of the data........................................................................................................................... 94
(5) Take-in of plural data together......................................................................................................... 95
ii
17. PERFORMING FORMATTING OF THE MEDIA.................................................................................. 97
&. MAINTENANCE............................................................................................................98
1. INSPECTION......................................................................................................................................... 98
(1) Maintenance and inspection of the pneumatic device..................................................................... 98
(2) Maintenance and inspection related to the sewing machine........................................................... 98
(3) With regard to the waste oil of the hook oil...................................................................................... 99
(4) With regard to the cleaning of the hook shaft base......................................................................... 99
2. MARKING LIGHT................................................................................................................................ 100
(1) Marking light for sewing reference setting..................................................................................... 100
(2) Adjusting the marking light irradiation position............................................................................... 100
3. REPLENISHING GREASE TO THE DESIGNATED PLACE............................................................... 101
(1) Grease-up procedure..................................................................................................................... 102
4. CONSUMABLE REPLACEMENT COMPONENTS............................................................................ 104
5. TILTING THE MACHINE...................................................................................................................... 105
6. STANDARD OF REPLACING TIME OF THE GAS SPRING.............................................................. 106
7. REPLACING PROCEDURE BETWEEN DOUBLE-WELT AND SINGLE-WELT................................ 107
(1) Replacing procedure between double-welt and single-welt........................................................... 107
(2) Fine adjustment of the position of garment body clamp................................................................ 107
(3) Replacing the binder...................................................................................................................... 108
8. CORNER KNIFE.................................................................................................................................. 109
(1) Corner knife unit............................................................................................................................ 109
(2) Adjusting the corner knife...............................................................................................................110
(3) Corner knife adjustment function screen........................................................................................111
(4) Corner knife actuating position setting procedure..........................................................................113
(5) Feature of the corner knife actuating position setting.....................................................................114
(6) Deflection amount setting...............................................................................................................116
9. CENTER KNIFE................................................................................................................................... 117
(1) Center knife actuating position setting procedure...........................................................................117
(2) Feature of the center knife actuating position setting.....................................................................118
10. ADJUSTING THE POSITION OF THE SENSOR FOR DETECTING FLAPS................................... 120
11. CAUSES AND CORRECTIVE MEASURES AGAINST TROUBLES WITH THE BOBBIN THREAD
REMAINING AMOUNT DETECTING DEVICE.................................................................................... 121
12. HOW TO ADJUST THE FOOT PEDAL............................................................................................. 122
13. ERROR CODE LIST.......................................................................................................................... 124
14. INPUT NUMBER TABLE................................................................................................................... 136
iii
!. CAUTIONS BEFORE OPERATION
Following items have to be checked every working day before the operation of the machine
and before the start of work hours.
1. Ascertain that the sewing machine is filled with the predetermined amount of oil.
3. Ascertain that the pressure gauge indicates the designated air pressure of 0.5 MPa.
* (This is necessary particularly when the compressor is stopped for a lunch break or the like.)
If the compressed air pressure is equal to or less than the designated value, troubles such
as interference between the parts can occur. It is therefore necessary to carefully check the
compressed air pressure.
4. Check whether the needle thread/bobbin thread need to be replenished.
5. To perform sewing immediately after turning ON the power switch, perform trial stitching
first, then proceed with sewing of actual products after the test sewing.
6. In order to prevent the optical fiber sensor of the bobbin thread remaining amount detecting
device from showing a detecting failure, be sure to clean thread waste around the hook
using an air gun once or more times a day.
7. In order to protect the flap sensor from showing a detecting failure, be sure to clean dust on
the reflecting tapes of the folding plate and the left flap base using an air gun once or more
times a day.
−−
ENGLISH
2. Never operate the machine unless the lubricating part in the hook has been filled up with oil.
@. CONFIGURATION OF THE MACHINE
E
K
D
G
I
B
J
F
H
C
A
The APW-896 consists mainly of the following units.
A Frame and structural components (Framesewing table, covers, foot switch, etc.)
B Clamp foot unit and feed mechanism
C Corner knife unit
D Binder unit (Binder components and its driving components)
E Pneumatic control unit (Pneumatic control devices and pipings)
F Stacker unit (Optional)
G Sewing machine head
H Electric control unit (Control panel)
I Operation panel
J Power switch (Also used as the emergency stop switch)
K Temporary stop switch
With this machine consisting of the aforementioned 11 units, you can do desired welting work simply
by setting materials (garment body, interlining piece, welting patch, etc.) in place and operating the
switches on the operation panel.
In addition, when temporary stop switch K is pressed during operation of the device, the device stops.
−−
#. SPECIFICATIONS
1. MECHANICAL SPECIFICATIONS
Sewing machine
LH-896 model of 2-needle, lockstitch machine with a center knife
2
Sewing speed
3,000 sti/min (max.)
3
Stitch length
Lockstitch: 2.0 to 3.4 mm (standard: 2.5 mm)
Condensation stitch: 0.5 to 1.5 mm (standard: 1.0 mm)
Back tack stitch: 0.5 to 3.0 mm (standard: 2.0 mm)
Condensation/Back tack stitch selectable
4
Types of welt
5
Pocket lip size
(Welt lenght)
Parallel double welt, parallel single welt
slant double welt, slant single welt
6
Welting width
(Needle gauge)
8, 10, 12, 14, 16, 18and 20 mm
* However, for
with dart stretcher, 8, 10, and 12 mm
For
with breast pocket, 8, 10 and 12 mm
For
with zipper attachment, 16 mm, 18 mm, 20 mm
7
Needles
ORGAN DP X 17 #14 to #18 (standard #16)
8
Thread
Spun thread #60 (Recommended)
9
Hook
Full rotary, vertical-axis, self-lubrication hook
Each with flap or without flap
Possible to set in increments of 0.1 mm within the range of 18 mm (min.) to 220 mm (max.)
* Parallel flap : Min. 47.5 mm
* Slant flap
: Dependent on deflection amount
(Reference)
20 mm gauge, deflection amount 20 mm, back-tuck 7.5 mm
/ Min. 67.5 mm
10 Thread take-up lever
Slide thread take-up lever
11 Needle bar stroke
33.3mm
12 Cloth feed mechanism
Driven by stepping motor
13 Control
By a micro-computer
14 Safety mechanism
Machine operation is automatically stopped if the cloth feed mechanism error detector,
the needle thread breakage detector or any of the various safety devices is actuated.
15 Lubricating oil
JUKI New Defrix Oil No. 1
16 Operating air pressure
0.5MPa
17 Air consumption
Approx. 40dm3/min.(ANR)
18 Dimensions of machine
Width : 1,095 mm (1,580 mm - when including the stacker)
Length : 1,500 mm
Height : 1,165 mm (1,800 mm - when including the thread stand)
19 Weight
238.5kg
20 Noise
- Equivalent continuous emission sound pressure level (LpA) at the workstation :
A-weighted value of 80.0 dB; (Includes KpA = 2.5 dB); according to ISO 10821- C.6.3
-ISO 11204 GR2 at 3,000 sti/min for the sewing cycle, 4.8s ON.
(Pattern : No.1, Jump feed speed of clamp foot : Max speed)
2. ELECTRICAL SPECIFICATIONS
1
The number of independent sewing patterns that can
be stored in memory
99 (1 to 99)
The number of alternate sewing patterns that can be
stored in memory
20 (1 to 20)
The number of cycles that can be stored in memory
20 (1 to 20)
4
Input power: Single phase/3-phase
200 to 240V 50/60 Hz (Optional 380V)
Voltage fluctuation : Within + 10% of the rated voltage
5
Power consumption
350VA
2
3
−−
ENGLISH
1
$. INSTALLATION
1. REMOVING PACKING MATERIALS
Remove the upper cover and remove
the string and packing materials that
have fixed the clamp foot.
Remove the string that has fixed the
binder unit.
Remove the string and packing
materials that have fixed the clamp
bar stacker.
Wooden table
Frame
Draw out the corner knife, cut the
clip band has fixed the unit, and
remove the clip band and packing
material.
Cut and remove the clip band that
has fixed the needle bar.
When lifting the machine, hold the frame without holding the wooden table.
2. SECURING THE MACHINE
CAUTION :
To prevent a fatal accident, lower and fix adjust bolts 2 (4 places) located at the side of caster 1 after
moving the machine to the level and stabilized place.
2
1
−−
3. CONNECTING THE FOOT PEDAL
CAUTION :
When installing the pedal, perform the work paying attention to the overhead table.
1
2
1 Install the pedal base to the machine frame
with screws 2.
2 Connect pedal bases A and B with two
screws 1.
B
Position of the pedal can be optionally
adjusted within the range of the slot.
1
A
3 Connect the connecting rods with fixing screw
3.
1. When connecting, do not connect the
rods with connecting rod C on the
sensor side pulled downward,
2. Install so that connecting rod on the
pedal side D and the caster 4 do not
interfere with each other within the
range of pedal operation.
C
3
D
4
4. CONNECTING THE AIR COUPLER
Connect one end of air coupler A supplied with
the machine as an accessory to air hose 2. Then
connect the other end to coupler 3 on the main
unit side.
1
•
3
•
A
2
−−
Connect coupler A to the main
unit with air cock 1 closed, then
carefully open air cock 1 to allow the
compressed air to be supplied.
Make sure that the pressure gauge of
the regulator reads 0.5 MPa.
5. CONNECTING THE POWER PLUG
CAUTION :
To prevent possible accidents caused by leakage or dielectric strength, an appropriate power plug
shall be installed by a person who has an expert knowledge of electricity. Be sure to connect the
power plug to the receptacle that is well grounded.
Connection of the power plug to the power depends on the specifications of the product. Adjust the
power plug to the power specifications to connect.
1 In case of the product of single-phase, 200 to 240V specifications :
Connect the sky-blue and brown wires of the power cord to the power terminal (AC200 to 240V)
and the yellow/green wire to the ground (earth) terminal respectively.
2 In case of the product of 3-phase, 200 to 240V specifications :
Connect the red, white and black wires of the power cord to the power terminal (AC200 to 240V)
and the yellow/green wire to the ground (earth) terminal respectively.
3 In case of the product with the optional high voltage transformer (with SA-128) :
Connect the black wires (3 pieces) of the power cord to the power terminal (AC380 to 415V) and
the yellow/green wire to the ground (earth) terminal respectively.
It is possible to connect to 380/400/415V by setting of the input tap of transformer (standard setting
at the time of delivery : 380V).
This product performs operation by the single-phase connection for 3-phasse 380/400/415V.
[Caution when changing the power source of the high voltage optional transformer]
1
2
When using high voltage optional transformer
1 with the input voltage of 400V or 415V, it is
necessary to replace input power source cord 2
of high voltage optional transformer 1. Change
power source input cord 2 (sky blue) that is
connected to 380V to the connection of 400V or
415V.
To prevent accidents, perform the work
after leaving the sewing machine alone
more than 4 minutes in the state that the
power switch is turned OFF and the power
cord is drawn out.
3
High voltage optional transformer 1 is set on the
rear side of the table.
When performing changeover of voltage, remove
transformer box 4 after removing top cover 3.
4
−−
6. ASSEMBLING THE THREAD STAND AND ATTACHING IT
TO THE MACHINE
Putting nut and washer between main unit frame
1 and fix the thread stand as illustrated in the lefthand figure.
Washer
Spring washer
1
Nut
7. INSTALLING SP-46 (CLAMP BAR STACKER)
(OPTIONAL PART NO. : 40058952)
Clamp bar stacker is delivered in the state
that it is fixed in the frame at the time
of delivery with the clamp bar stacker
mounted. It is necessary to change the
installing position to the normal using
1
B
position.
1 Remove stacker fixing plate 1.
2 Turn the whole stacker in the direction of the
arrow and take it out from inside of the frame.
3 Change stacker turning shaft A section to
stacker base hole B.
A
At this time, take care to prevent the stacker cord, the air piping, etc. from being caught.
D
3
4 Lock the whole stacker with hinge 2.
5 Enter safety bar 3 from C and D directions
and fix it at the position where is almost
parallel to the floor.
At this time, confirm that air is being
supplied.
2
C
−−
8. INSTALLING SP-47 (ROLLER STACKER)
(OPTIONAL PART NO. : 40058953)
(1) Adjusting the position
① Confirming parallelism
Make sure that stacker
table ❹ and rubber roller
3 are installed parallel
with each other.
2
❺
3
If not, loosen four
setscrews ❷ to adjust.
0.5mm
② Confirming the clearance
Make sure that the
clearance between
stacker table ❹ and
rubber roller ❸ is
approximately 0.5 mm.
If it is not approximately
0.5 mm, loosen nut ❺ to
adjust.
❹
(2) Maintenance
(Working state)
❷
❶
When the roller stacker is not used or adjusting
the corner knife, the roller stacker can be turned
upward with the procedure below.
Pull release lever ❶ . Lift up the roller section to
thrust pin ❸ into fixing spring ❷ , then bring them
into locked state (see Fig. 1). This puts the sewing
machine in standby state.
(Waiting state)
Fig. 1
❸
−8−
9. REMOVING THE HEAD FIXING PLATE
Remove fixing screws ❷ of head fixing plate ❶ .
Be sure to fix the machine and the frame
when performing re-transportation.
❷
❶
10. INSTALLING THE SUB-TABLE
Install the sub-table with four screws ❶ as shown
in the figure.
At this time, fix the sub-table so as to be
flush with the main table.
❶
❶
11. INSTALLING OPERATION PANEL IP-420
B
C
Tape
Connector
As shown in the figure above, open the lid on the right-hand section C of IP-420 and connect the
connector which is fixed with tape to the right-hand top surface B of the table.
To prevent malfunction due to static electricity, install operation panel IP-420 on the panel base to
use and do not change the position of the panel base.
−9−
12. LUBRICATING THE OIL TANK
CAUTION :
1. To prevent accidents caused by abrupt start of the sewing machine, do not connect the power
plug until lubrication has been completed.
2. To prevent inflammation or rash, immediately wash the part when oil has stuck to your eyes or
body.
3. If oil has been swallowed, diarrhea or vomiting may occur. Put oil to the place where children
cannot reach.
Fill the oil tank with the oil for hook lubrication
before operating the sewing machine.
1 Remove oil cap 1 and fill the oil tank
with JUKI MACHINE OIL No. 1 (Part No. :
MDFRX1600C0) using the oiler supplied with
the machine as accessories.
1
3
Upper
engraved
marker line
2
Lower
engraved
marker line
A
A
To prevent entering of dust, be sure to
attach the cap for use.
2 Fill the oil tank with the oil until the top end of
oil amount indicating rod 3 comes between
the upper engraved marker line and the lower
engraved marker line of oil amount indicating
window 2.
When oil amount is excessively large, oil
leaks from the air hole or adequate lubrication
cannot be performed. So, be careful.
3 When operating the sewing machine and
the top of oil amount indicating rod 3 has
lowered up to oil amount indicating window 2,
start lubricating.
− 10 −
• At the time of initial filling, fill the oil
tank with oil of 200cc as the standard
and confirm that the oil amount
indicating rod is working.
• When operating a newly installed
machine or a machine which has not
been used for a relatively long period
of time, make the machine run at 2,000
sti/min or less for the purpose of
break-in. In addition, use the machine
after applying oil to races A of the
right/left hooks.
• For the oil for hook, purchase JUKI
MACHINE OIL No. 1 (Part No. :
MDFRX1600C0).
• Be sure to fill the oil tank with clean
oil.
• Never fill the oil tank with dirty oil.
13. INSTALLING SA-120 (INTERLINING SUPPLYING DEVICE)
(OPTIONAL PART NO. : 40045772)
CAUTION :
Turn OFF the power before starting the work so as to prevent accidents caused by abrupt start of the
sewing machine.
1 Fix interlining installing plate 1 to the
machine frame with two screws 2.
2
1
Roller
Sewing table
Notch
Guide A
Guide plate
Guide B
Guide B
Spring
Set collar
Side plate
Interlining
2 Set interlining as shown in the figure above.
The roll core that can be used is 40 to 70 mm wide and 200 mm in roller diameter (max.).
3 Pass the interlining between guide B and guide A and roller, and route it up above the table.
Feed the interlining up to the roller section using the notch of the guide plate.
4 Adjust the lateral position of two guides, two guide pins and side plate (on the right) to allow the
interlining to be fed straight up above the sewing table.
5 Position the set collar on the left-hand side to allow the side plate to lightly hold the interlining by
spring. Then fix the set collar there.
− 11 −
14. ADJUSTMENT OF SA-120 (INTERLINING SUPPLYING DEVICE)
(OPTIONAL PART NO. : 40045772)
CAUTION :
Turn OFF the power before starting the work so as to prevent accidents caused by abrupt start of the
sewing machine.
❶
① Adjustment of the interlining feeding amount
is performed with memory switch (U003).
However, perform further fine adjustment
with the speed controller ❷ of the interlining
feeding cylinder ❶ .
(When tightening the speed controller ❷ , the
amount is decreased and when loosening it,
the amount is increased.)
❷
❸
② When a new interlining ❸ is mounted, press
interlining supply button ❹ , perform feeding
of the trial sewing several times and use the
device after confirming the feeding amount
and the parallel feeding of the interlining.
❹
❺
❻
(Caution when operating)
When using the interlining supplying device
with rear reference ❺ , the interlining at the
sewing start remains long since it is away
from interlining outlet ❻ . So, use the device
with front reference ❼ .
For handling the sewing tables, refer to
"V-2-(2) Cautions to be taken when the
sewing tables are removed" p.16.
❼
− 12 −
%. PREPARATION OF THE SEWING MACHINE
1. HOW TO OPERATE THE SEWING MACHINE HEAD
(1) How to attach the needles
CAUTION :
• Turn OFF the power before starting the work so as to prevents accidents caused by abrupt start of
the sewing machine.
• When replacing the needle, be careful not to allow your fingers to touch the blade section of the
center knife.
1
2
2
(2) Thread used
Needles used are DP X 17 #14 to #18 (standard
#16). Use the specified needle.
Insert left- and right-hand sides needles as far as
they will go pointing their long grooves 1 at each
other and tighten needle clamp screws 2.
• Use the left hand twist thread for the needle
thread.
• Either twist thread will do for the bobbin thread.
Right hand twist thread
Use a new thread which is uniformly
twisted.
Left hand twist thread
− 13 −
(3) How to pass the needle thread
CAUTION :
Turn OFF the power before starting the work so as to prevent accidents caused by abrupt start of the
sewing machine.
1 Lift binder 1 in the direction A, Hold section
B by hand and turn the whole binder in the
direction C.
Be sure to press section B since welting
B
width may become improper when the
binder is pressed and turned in the
direction C.
Binder is locked with the ball plunger.
A
Rather strongly turn the binder in the
C
1
direction C to release the lock.
2 Then pass needle thread in the order as shown in the figure below.
A
B
B
A
A
C
B
B
A
A B
A
B
Periodically replace thread guide felt C. Sewing trouble due to rough motion of thread during
sewing can be prevented.
Pass the needle thread in the illustrated order.
Left-hand side needle thread toward the sewing machine
Right-hand side needle thread toward the sewing machine
− 14 −
A
B
2. HOW TO REMOVE THE SEWING TABLE
CAUTION :
Turn OFF the power before starting the work so as to prevent accidents caused by abrupt start of the
sewing machine.
(1) When replacing the bobbin thread
2
1
Pin
1 Move the clamp foot to the rear end of its
stroke.
2 Insert your fingers into notches A in the bottom
of right- and left-hand sewing tables 1 and 2,
and push up the sewing tables.
Move
the tables in the direction of the arrow
3
keeping the above state, and you can see the
bobbin case.
At this time, move the sewing tables so as
not to allow the sewing tables to come in
contact with the needles.
A
4 After replacing the bobbin thread, return the
sewing tables in place by following the abovementioned steps of procedure in the reverse
order. Now, firmly set the sewing tables on the
throat plates and the pins.
− 15 −
(2) Cautions to be taken when the sewing tables are removed
CAUTION :
Turn OFF the power before starting the work so as to prevent accidents caused by abrupt start of the
sewing machine.
When you remove the sewing tables, be sure to accurately set them by following the points below.
Pins, rear
1
Pin holes, front
1 Securely fit the pins, rear (left) (right) over the
pin holes.
2 Securely fit pin holes, front (left) (right) over
the pins.
2
Plate spring
1. In case of the machine provided
with SA-120 (automatic interlining
supplying device), return the sewing
tables to their home positions while
lifting the sewing tables so that the
plate spring section is not bent.
Outlet of interlining
supply
2. In case of removing the sewing tables with the types below, take care not to bend pocket bag
clamping device and interlining clamping device.
1 Pocket bag clamping device (standard)
2 Pocket bag clamping device (for interlining supply)
− 16 −
3. HOW TO WIND THE BOBBINS
CAUTION :
To prevent damage, avoid contact with bobbins while the machine is in operation.
1 Put bobbin into the thread winder
shaft until it will go no further.
2 Pass thread through thread guide
plate 8, open thread tension disk
7 and put the thread into the slit of
thread tension rod 4.
4
2
1
Direction
of rotation
8
3 Pass thread in the order as
shown in the figure, and wind the
thread onto bobbin by four or five
turns. (The direction of the arrow
corresponds to the direction of
rotation of the bobbin.)
4 Press bobbin thread guide 1 and
the bobbin rotates.
5 The thread winder will automatically
stop as soon as it has wound up
the bobbin to a predetermined
amount.
7
3
5
9
6
1. If you want to wind a bobbin, start winding it from recess 5 as illustrated in the figure above. If
you start to wind a bobbin from portion 6, the detection of run-out of bobbin thread will fail to
be performed normally.
2. To ensure the appropriate remaining amount of bobbin thread, it is important to wind the bobbin
uniformly. Be sure to check that the bobbin is uniformly wound particularly at the start of
bobbin winding.
If the bobbin fails to be uniformly wound with thread, properly adjust the lateral position of
tension post socket 3.
3. It is most suitable to wind the bobbin with thread to approximately 80% of the outer diameter of
the bobbin. The winding amount can be adjusted with winding amount adjustment screw 2.
4. Do not press lever 1 except when winding bobbin thread. Motor continues to run and trouble
will be caused.
5. When abnormalities such as overload of the thread winding motor, etc. are delected, thermal
switch 9 is shut off. When thermal switch is shut off, turn ON thermal switch 9 again after
turning OFF it to return.
− 17 −
4. HOW TO THREAD THE BOBBIN CASE
1 Hold in hand a bobbin in the way that it spins
clockwise and put it into the bobbin case.
2 Pass the thread through slot 1 in the bobbin
case.
3 Pull the thread to pass it under the tension
spring.
Bobbin case
Bobbin
1
5. HOW TO INSTALL THE BOBBIN CASE
CAUTION :
Turn OFF the power before starting the work so as to prevent accident caused by abrupt start of the
sewing machine.
1 Raise hook levers 1 and take out the bobbin
cases together with the bobbins.
2 When fitting, fit the bobbin cases into the
2
hook driving shaft and tilt levers 1.
When bobbin cases, left and right, 2 are
replaced, make sure that the clearance
between the opener which is extremely
receded and the bobbin case is 0.2 to 0.3
mm. If the clearance is not 0.2 to 0.3 mm,
1
loosen setscrew 3 and adjust it.
3
0
m
.3m
o0
.2 t
− 18 −
6. HOW TO ADJUST THE THREAD TENSION
1 Adjusting bobbin thread tension
Turn bobbin thread tension adjustment screw
clockwise to increase the bobbin thread
tension or turn the screw counterclockwise to
decrease it.
Bobbin case
Bobbin
Bobbin thread
tension adjustment
screw
As shown in the left-hand figure, standard
bobbin thread tension is 0.25 to 0.35N when
measuring with the tension gauge.
2 Adjusting needle thread tension
First, adjust the right- and left-hands bobbin
thread tension.
Then in accordance with the bobbin thread
tension obtained, adjust the right- and
left-hand sides needle threads tension
appropriately by turning thread tension
adjustments nuts 1 and 2 respectively.
Turning the nuts clockwise will increase
the thread tension or turning them
counterclockwise to decrease it.
1
2
− 19 −
7. SETTING THE MATERIAL TO BE SEWN
(1) Setting a garment body
Garment body
clamp (left)
Garment body
Garment body
clamp rubber
Garment body
clamp (right)
Use a garment body that is
larger than the garment body
clamp rubber piece adhered
under the right and left garment
body clamps.
If a garment body of which size
is smaller than the garment
body clamp rubber piece, the
rubber piece can come off or the
machine can malfunction.
If it is necessary to use a small
material, mount a shim type
gauge (optional) on the machine.
8. ADJUSTING THE MATERIAL GUIDE
Material guide functions to stabilize the welt patch at the edge of the machine needle.
Adjust the height and the presser pressure of material guide 1 in accordance with the thickness of
material.
Material guide
spring
Material guide arm
1
0.5 to 1.0 mm
4
1 The height of material guide can be adjusted
by loosening nut 2 and screw 3.
2
3
(Clearance between material guide and welt
patch scale has been adjusted to 0.5 to 1.0
mm at the time of delivery.)
2 Presser pressure can be adjusted with spring
pressure adjust screw 4.
(Adjust the pressure so that there is no
excessive resistance when the material
passes.)
− 20 −
^. HOW TO USE THE OPERATION PANEL
1. PREFACE
1)
To use the data for APW-895/896 (EPD data) on APW-896
To use the EPD data on the APW-896, read the data into the IP-420.
Insert the relevant medium into the IP-420. Select pattern number xxx from EPD data.
2)
Folder structure of the media
Store each file in the directories below of the media.
APW-896
Media drive
APW××× .EPD
APW××× .EPD
APW××× .EPD
Data that are not stored in the directories above cannot be read. So, be careful.
3)
CompactFlash (TM)
■ Inserting the CompactFlash (TM)
1)
2)
Turn the label side of the CompactFlash(TM) to
this side (place the notch of the edge to the rear.
) and insert the part that has a small hole into
the panel.
After completion of setting of the media, close
the cover. By closing the cover, it is possible
to access. If the media and the cover come in
contact with each other and the cover is not
closed, check the following matters.
・ Check that the media is securely pressed
until it goes no further.
・ Check that the inserting direction of the
Media
media is proper.
1.
2.
3.
4.
When the inserting direction is wrong, panel or media may be damaged.
Do not insert any item other than the CompactFlash (TM).
The media slot in the IP-420 accommodates to the CompactFlash (TM) of 2 GB or less.
The media slot in the IP-420 supports the FAT16 which is the format of the CompactFlash (TM).
FAT32 is not supported.
5. Be sure to use the CompactFlash (TM) which is formatted with IP-420. For the formatting procedure of
the CompactFlash (TM), see "^-17. Performing formatting of the media", p.97.
− 21 −
■ Removing the CompactFlash (TM)
1)
Hold the panel by hand, open the cover, and
press the media 2 removing lever 1. The
media is eject.
When the lever 1 is strongly pressed, the
media 2 may be broken by protruding and
falling.
1
2)
When the media 2 is drawn out as it is,
removing is completed.
2
5) USB port
■ Inserting a device into the USB port
Slide the top cover and insert the USB device into
the USB port. Then, copy data to be used from the
USB device onto the main body.
After completion of copying the data, remove the
USB device.
■ Disconnecting a device from the USB port
Remove the USB device. Put the cover back in
place.
Cautions when using the media
•
•
•
•
•
Do not wet or touch it with wet hands. Fire or electric shock will be caused.
Do not bend, or apply strong force or shock to it.
Never perform disassembling or remodeling of it.
Do not put the metal to the contact part of it. Data may be disappeared.
Avoid storing or using it in the places below.
Place of high temperature or humidity / Place of dew condensation /
Place with much dust / Place where static electricity or electrical noise is likely to occur
− 22 −
1 Precautions to be taken when handling USB devices
• Do not leave the USB device or USB cable connected to the USB port while the sewing machine is in operation. The machine vibration can damage the port section resulting in loss of data stored on the USB device or
breakage of the USB device or sewing machine.
• Do not insert/remove a USB device during reading/writing a program or sewing data.
•
•
•
•
• It may cause data breakage or malfunction.
When the storage space of a USB device is partitioned, only one partition is accessible.
Some type of the USB device may not be properly recognized by this sewing machine.
JUKI does not compensate for loss of data stored on the USB device caused by using it with this sewing machine.
When the panel displays the communication screen or pattern data list, the USB drive is not recognized even
if you insert a medium into the slot.
For USB devices and media such as CF cards, only one device/medium should be basically connected/inserted to/into the sewing machine. When two or more devices/media are connected/inserted, the machine will
only recognize one of them. Refer to the USB specifications.
Insert the USB connector into the USB terminal on the IP panel until it will go no further.
•
• Do not turn the power OFF while the data on the USB flash drive is being accessed.
2 USB specifications
• Conform to USB 1.1 standard
• Applicable devices *1_____ Storage devices such as USB memory, USB hub, FDD and card reader
• Not-applicable devices___CD drive, DVD drive, MO drive, tape drive, etc.
• Format supported ______FD (floppy disk) FAT 12
Others (USB memory, etc.), FAT 12, FAT 16, FAT 32
• Applicable medium size__FD (floppy disk) 1.44MB, 720kB
Others (USB memory, etc.), 4.1MB ~ (2TB)
• Recognition of drives _ __For external devices such as a USB device, the device which is recognized first
is accessed. However, when a medium is connected to the built-in media slot, the
access to that medium will be given the highest priority. (Example: If a medium is inserted into the media slot even when the USB memory has already been connected
to the USB port, the medium will be accessed.)
• Restriction on connection_ _ Max. 10 devices (When the number of storage devices connected to the sewing
machine has exceeded the maximum number, the 11th storage device and beyond
will not be recognized unless they are once disconnected and re-connected. )
• Consumption current ____The rated consumption current of the applicable USB devices is 500 mA at the maximum.
*1: JUKI does not guarantee operation of all applicable devices. Some device may not operate due to a compatibility problem.
− 23 −
2. BASIC OPERATION OF THE OPERATION PANEL (IP-420)
(1) Configuration of IP-420
[ Front ]
[ Right side ]
6
7
8
9
1
!0
!1
!2
2
3
5
Name
Symbol
1
4
Description
TOUCH PANEL, LCD display section
2
READY key
Change-over of the data input screen and the sewing screen is
performed.
3
INFORMATION key
Change-over of the data input screen and the information screen is
performed.
4
COMMUNICATION key
Change-over of the data input screen and the communication
screen is performed.
5
MODE CHANGEOVER key
Change-over of the data input screen and the mode change-over
screen which performs various details setting.
6
Contrast control
7
Brightness control
8
CompactFlash (TM) eject button
9
CompactFlash (TM) slot
!0
Cover detection switch
!1
Connector for external switch
!2
Connector for control-box connection
1. Lightly press the target key on the touch panel with a fingertip to operate the IP-420. If you operate with any means other than your fingertip, the IP-420 can malfunction or the glass surface of
the touch panel can be scratched or break.
2. When READY key is pressed first after turning ON the power, origin retrieval of the clamp foot is
performed. At this time, the clamp foot moves. So, be careful.
− 24 −
(2) Buttons used in common
Buttons that perform common operation in the respective screens of IP-410 are as described below.
Pictograph
Name
Description
CANCEL button
Pop-up screen is closed. In case of the data change screen, the data during
changing can be cancelled.
ENTER button
Data changed are determined.
UP SCROLL button
This button scrolls button or display upward.
DOWN SCROLL button
This button scrolls button or display downward.
RESET button
This button releases error and the like.
NUMBER INPUT button
Ten keys are displayed and input of number can be performed.
CHARACTER INPUT button
Character input screen is displayed.
(3) Basic operation
1 Turn ON the power switch.
First, turn ON the power switch.
Reset pop-up screen is displayed after displaying WELCOME
screen. Press RESET button
A.
When RESET button is pressed, the binder goes up. So, be
careful.
A
Next, language selection pop-up screen is displayed. After
selecting the language you desire to display, press ENTER button
B. Then the independent sewing input screen (screen A) of
the figure below is displayed.
When ending the selection screen with CANCEL button
or ENTER button
B
without performing the language se-
lection, the language selection screen is displayed whenever
the power is turned ON.
− 25 −
2 Select pattern No. you desire to sew.
C
When PATTERN NO. button
C is pressed, the pattern No.
can be selected. For the selecting procedure of pattern No., see
“^-7. (1) Performing the selection of pattern”p.42.
At the time of your purchase, pattern Nos. 1 to 10 have been
registered. Change the sewing data in accordance with the
sewing types for use. (The number to which the pattern has not
been registered is not displayed.)
For the detailed explanation of input screen, see “^-3. EX
PLANATION OF THE BASIC SCREEN” p.28.
D
The independent sewing
input screen (screen A)
3 Start sewing
When READY key
D is pressed in the independent sewing
input screen (screen A), the green sewing screen (screen B)
is displayed and the sewing operation is started by the pedal
operation.
For the details of the sewing screen, see “^-3. EX
PLANATION OF THE BASIC SCREEN” p.28.
Sewing screen (screen B)
4 To stop the device during operation
When temporary stop switch E is pressed during sewing, the
device can be stopped.
E
At this time, the error screen is displayed to inform that stop
switch is pressed. When RESET button
F is pressed, the
error is released and the screen returns to the input screen.
F
− 26 −
H
5 Depress back the pedal at the time of mounting the breast
box device.
G
At the time of mounting
the breast box device, when
depressing back the pedal in the green sewing screen (screen B),
the confirmation screen as shown on the left side is displayed.
When the clamp foot moves to the back by depressing back the
pedal, it retreats with the flap presser closed. This screen is to
confirm whether material is put on the clamp foot.
Confirming message saying that "Clamp foot moves to the back
with flap presser closed. Remove material on the clamp foot" is
displayed.
When there is no material on the clamp foot, press CLAMP FOOT
BACK button
G and the clamp foot moves to the back with
the flap presser closed. At the same time, the confirming screen is
released and the screen returns to the sewing screen.
When canceling clamp foot back, press CANCEL button
H, and the flap presser is opened. Then the clamp foot does
not move to the back. At the same time, the confirming screen is
released and the screen returns to the sewing screen.
When there is material on the clamp foot, be sure to press
CANCEL button
H and remove the material.
Then depress back the pedal again to move the clamp foot to
the back.
− 27 −
3. EXPLANATION OF THE BASIC SCREEN
(1) Input screen (Independent sewing mode)
A
B
C
D
E
F
I
G
O
P V
J
Q
K
L
M
N
R W
H
S
T
U
Symbol
Name of button
Description
A
NEW CREATION button
Independent sewing pattern new creation screen is displayed and new register of the pattern
data can be performed.
B
COPY button
Independent sewing copy source pattern list screen is displayed and the pattern can be copied.
C
CHARACTER INPUT button
Character input screen is displayed and the name can be inputted to the pattern data.
D
TYPE OF WELT CHANGE-OVER button
Type of welt change-over screen is displayed, and change-over of type of welt and
adjustment of parallelism of the binder can be performed.
E
CLAMP UP PROHIBITION AT SEWING END
button
When this button is pressed, the clamp is returned in the lowered state at sewing end.
It is convenient to use this button at the time of adjusting the marking light or trial sewing.
F
NEEDLE THREAD TRIMMING button
When this button is pressed, needle thread trimming knife comes down and the needle
thread trimming operating screen is displayed.
G
BOBBIN THREAD TRIMMING button
Bobbin thread trimming knife opens while this button is pressed.
H
PATTERN NO. LIST button
Pattern No. list screen is displayed and the pattern data can be selected.
I
SEWING MODE SETTING button
Sewing mode
J
L SIZE LENGTH SETTING button
In case of L size sewing, sewing length
K
DEFLECTION AMOUNT SETTING button
In case of slant sewing, deflection amount at the start of sewing
is selected.
amount at the end of sewing
is set.
or deflection
is set.
L
MOTION MODE SETTING button
With/without
M
STACKER MOTION/STOP CHANGE-OVER button
This button selects motion/stop
N
SEWING DATA DISPLAY button
Sewing pattern edit screen is displayed. Detailed sewing data that are not displayed in the
input screen can be selected and edited.
O
PATTERN NAME display
Names that are inputted in pattern Nos. are displayed.
P
CORNER KNIFE MOTION POSITION AT
SEWING START SETTING button
Cutting position
Q
CENTER KNIFE SETTING button
Center knife data edit screen is displayed, and center knife cutting position of sewing start
of motion of sewing machine motor, center knife and corner knife.
and sewing end
and
of stacker.
of corner knife at sewing start is set.
is set.
R
CORNER KNIFE MOTION POSITION AT
SEWING END SETTING button
Cutting position
S
MARKING LIGHT SETTING button
Marking light setting screen is displayed, and changeover of marking light irradiation position
of corner knife at sewing end is set.
and setting of change of marking light set value
,
and
are performed.
T
CLAMP FOOT MOVE button
Clamp foot is moved to the front or to the back.
U
SEWING DATA SHORTCUT button
Shortcut buttons (max. 4 items) of the sewing data that are set in customizing in the sewing
screen are displayed.
V
FLAP DROP DATA AT SEWING START
SETTING button
Flap concealed stitching data at sewing start
or
is set.
W
FLAP DROP DATA AT SEWING END
SETTING button
Flap concealed stitching data at sewing end
or
is set.
* It is possible to customize display/non-display of the respective buttons.
For the details, refer to “^-13. CUSTOMIZING THE DATA INPUT SCREEN” p.80.
− 28 −
(2) Sewing screen (Independent sewing mode)
A
B
C
D
G
H
E
F
Symbol
A
I
Name of button
INTERLINING SUPPLY button
Description
When this button is pressed, interlining is supplied.
*This is displayed when “With” of
, automatic interlining supplying device is set
with the optional setting.
B
TYPE OF WELT CHANGE-OVER button
Type of welt change-over screen is displayed and change-over of type of welt and adjustment
of parallelism of the binder can be performed.
C
CLAMP UP PROHIBITION AT SEWING END
button
When this button is held pressed, the clamp is returned in the lowered state at sewing end.
It is convenient to use this button at the time of adjustment of marking light or trial sewing.
D
DIRECT PATTERN LIST button
Direct pattern list screen is displayed and selection of the sewing data can be performed.
E
COUNTER CHANGE-OVER button
When this button is pressed, the display of sewing counter and number of pcs. counter is
changed over.
*This button is displayed only when both sewing counter and number of pcs. counter are
ON.
F
COUNTER VALUE CHANGE button
This button changes the counter value which is displayed at present.
G
BOBBIN THREAD (RIGHT) REMAINING
AMOUNT VALUE
This button detects reflecting light from bobbin and informs that bobbin thread remaining
amount is running out. When one stitching completes, the counter value is subtracted, and
the count-up screen is displayed when “0” is reached.
*This button is displayed only when the reflecting light from bobbin is detected.
H
BOBBIN THREAD (LEFT) REMAINING
AMOUNT VALUE
This button detects reflecting light from bobbin and informs that bobbin thread remaining
amount is running out. When one stitching completes, the counter value is subtracted and the
count-up screen is displayed when “0” is reached.
*This button is displayed only when the reflecting light from bobbin is detected.
I
MARKING LIGHT SETTING button
Marking light setting screen is displayed, and changeover of marking light irradiation position
and setting of change of marking light set value
are performed.
* It is possible to customize display/non-display of the respective buttons.
For the details, refer to “^-13. CUSTOMIZING THE DATA INPUT SCREEN” p.80.
− 29 −
,
and
(3) Input screen (Alternate sewing mode)
A
B
C
D
E
F
H
G
P
I
Q U
J
R
K
S V
W
N
X
O
T
M
L
Symbol
Name of button
Description
A
NEW CREATION button
Alternate sewing data new creation screen is displayed and new register of data can be
performed.
B
COPY button
Alternate sewing data copy source No. list is displayed and alternate sewing data can be
copied.
C
CHARACTER INPUT button
Character input screen is displayed and name input can be performed n the alternate sewing
data.
D
TYPE OF WELT CHANGE-OVER button
Type of welt change-over screen is displayed ,and change-over of type of welt and
adjustment of parallelism of the binder can be performed.
E
CLAMP UP PROHIBITION AT SEWING END
button
When this button is held pressed, clamp is returned in the lowered state at the time of
sewing end.
It is convenient to use this button at the time of adjusting marking light or trial sewing.
F
NEEDLE THREAD TRIMMING button
When this button is pressed, needle thread trimming knife comes down and needle thread
trimming in motion screen is displayed.
G
BOBBIN THREAD TRIMMING button
Bobbin thread trimming knife opens while this button is pressed.
H
PATTERN NO. LIST button
Pattern No. list screen is displayed and alternate sewing data can be selected.
I
SEWING MODE CHANGE-OVER button
Sewing mode
J
L SIZE LENGTH SETTING button
In case of L size sewing, sewing length
K
DEFLECTION AMOUNT SETTING button
In case of slant sewing, deflection amount at the start of sewing
L
SEWING DATA DISPLAY button
Sewing pattern edit screen is displayed. This button selects detailed sewing data that are not
displayed in the input screen and can edit the data.
M
STACKER MOTION/STOP CHANGE-OVER
button
This button selects motion/stop
N
MOTION MODE SETTING button
With/without motion
O
MARKING LIGHT SETTING button
Marking light setting screen is displayed, and changeover of marking light irradiation position
is selected.
amount at the end of sewing
is set.
or deflection
is set.
and
of stacker.
of sewing machine motor, center knife and corner knife.
and setting of change of marking light set value
,
and
are performed.
P
NEXT SEWING DATA CHANGE-OVER button
Sewing pattern to be sewn next which is enclosed with yellow frame is changed over.
Q
CORNER KNIFE MOTION POSITION AT
SEWING START SETTING button
Cutting position
R
CENTER KNIFE SETTING button
Center knife data edit screen is displayed and center knife cutting position of sewing start
*This is not displayed when flap priority sewing selection
and sewing end
is ON.
of corner knife at sewing start is set.
.
S
CORNER KNIFE MOTION POSITION AT
SEWING END SETTING button
Cutting position
T
CLAMP FOOT MOVE button
Clamp foot is moved to the front or to the back.
U、V
FLAP CONCEALED STITCHING DATA AT
SEWING START SETTING button
Flap concealed stitching data at sewing start
or
is set.
W、X
FLAP CONCEALED STITCHING DATA AT
SEWING END SETTING button
Flap concealed stitching data at sewing end
or
is set.
of corner knife at sewing end is set.
* It is possible to customize display/non-display of the respective buttons.
For the details, refer to “^-13. CUSTOMIZING THE DATA INPUT SCREEN” p.80.
− 30 −
(4) Sewing screen (Alternate sewing mode)
A
B
C
D
G
H
I
E
F
Symbol
A
J
Name of button
INTERLINING SUPPLYING button
Description
When this button is pressed, interlining is supplied.
*This is displayed when “With” of
, automatic interlining supplying device is set
with the optional setting.
B
TYPE OF WELT CHANGE-OVER button
Type of welt change-over screen is displayed, and change-over of type of welt and
adjustment of parallelism of the binder can be performed.
C
CLAMP UP PROHIBITION AT SEWING END
button
When this button is held pressed, the clamp is returned in the lowered state at the time of
sewing end.
It is convenient to use this button at the time of adjustment of marking light and trial sewing.
D
DIRECT PATTERN LIST button
Direct pattern list screen is displayed and selection of the sewing data can be performed.
E
COUNTER CHANGE-OVER button
When this button is pressed, display of sewing counter and number of pcs. counter is
changed over. This button is displayed only when both sewing counter and number of pcs.
counter are ON.
F
COUNTER VALUE CHANGE button
Counter value which is displayed at present is changed.
G
NEXT SEWING DATA CHANGE-OVER button
Sewing pattern to be sewn next which is enclosed with yellow frame is changed over.
H
BOBBIN THREAD (RIGHT) REMAINING
AMOUNT VALUE
This button detects reflecting light from bobbin and informs that bobbin thread remaining
amount is running out. When one stitching completes, the counter value is subtracted, and
the count-up screen is displayed when “0” is reached.
*This button is displayed only when the reflecting light from bobbin is detected.
I
BOBBIN THREAD (LEFT) REMAINING
AMOU’NT VALUE
This button detects reflecting light from bobbin and informs that bobbin thread remaining
amount is running out. When one stitching completes, the counter value is subtracted, and
the count-up screen is displayed when “0” is reached.
*This button is displayed only when the reflecting light from bobbin is detected.
J
MARKING LIGHT SETTING button
Marking light setting screen is displayed, and changeover of marking light irradiation position
is ON.
*This is not displayed when flap priority sewing selection
and setting of change of marking light set value
are performed.
* It is possible to customize display/non-display of the respective buttons.
For the details, refer to “^-13. CUSTOMIZING THE DATA INPUT SCREEN” p.80.
− 31 −
,
and
(5) Input screen (Cycle sewing mode)
A
B
C
D
E
F
G
H
I
K
J
L
M
N
Symbol
Name of button
Description
A
NEW CREATION button
Cycle sewing data No. new creation screen is displayed and new register of cycle sewing
data can be performed.
B
COPY button
Cycle sewing data copy source No. list screen is displayed and cycle sewing data can be
copied.
C
CHARACTER INPUT button
Character input screen is displayed and name can be inputted to the cycle sewing data.
D
TYPE OF WELT CHANGE-OVER button
Type of welt change-over screen is displayed and change-over of type of welt, and
adjustment of parallelism of the binder can be performed.
E
CLAMP UP PROHIBITION AT SEWING END
button
When this button is held pressed, the clamp is returned in the lowered state at the time of
sewing end.
It is convenient to use at the time of adjustment of marking light and trial sewing.
F
NEEDLE THREAD TRIMMING button
Needle thread trimming knife comes down and the needle thread trimming in motion screen
is displayed.
G
BOBBIN THREAD TRIMMING button
While this button is held pressed, bobbin thread trimming knife opens.
H
CYCLE SEWING DATA NO. LIST button
Cycle sewing data No. list screen is displayed and the cycle sewing data can be selected.
I
PATTERN DATA EDIT button
Edit of pattern data which have been registered to cycle sewing data can be performed.
J
PATTERN DATA EDIT button (blank)
When this blank button is pressed, the pattern list screen to register the pattern data to the
cycle sewing data is displayed, and it is possible to select and register the pattern data.
K
CYCLE RETURN button
Pattern data to be sewn next which is displayed with white emphasis is moved forward by
one. In case of first pattern, it moves to the last pattern.
L
CYCLE FEED button
Pattern data to be sewn next which is displayed with white emphasis is moved backward by
one. In case of the last pattern, it moves to the first pattern.
M
PATTERN DATA DELETION button
Pattern data which is displayed with white emphasis is deleted from register.
N
CLAMP FOOT MOVE button
Clamp foot is moved to the front or to the back.
*For the editing procedure, refer to “3-(1) Input screen (Independent sewing mode)” p.28.
* It is possible to customize display/non-display of the respective buttons.
For the details, refer to “^-13. CUSTOMIZING THE DATA INPUT SCREEN” p.80.
− 32 −
(6) Sewing screen (Cycle sewing mode)
A
B
C
D
I
H
E
J
K
F
G
Symbol
A
L
Name of button
INTERLINING SUPPLYING button
Description
When this button is pressed, interlining is supplied.
*This is displayed when “With” of
, automatic interlining supplying device is set
with optional setting.
B
TYPE OF WELT CHANGE-OVER button
Type of welt change-over screen is displayed, and change-over of type of welt and
adjustment of parallelism of the binder can be performed.
C
CLAMP UP PROHIBITION AT SEWING END
button
When this button is held pressed, the clamp is returned in the lowered state at the time of
sewing end.
It is convenient to use this button at the time of adjustment of marking light and trial sewing.
D
DIRECT PATTERN LIST button
Direct pattern list screen is displayed and selection of the sewing data can be performed.
E
CYCLE DATA display
All pattern data that have been registered to the cycle sewing data are displayed.
F
COUNTER CHANGE-OVER button
When this button is pressed, display of sewing counter and number of pcs. counter is
changed over. This button is displayed only when both sewing counter and number of pcs.
counter are ON.
G
COUNTER VALUE CHANGE button
Counter value which is displayed at present is changed.
H
BOBBIN THREAD (RIGHT) REMAINING
AMOUNT
This button detects light from bobbin and informs that bobbing thread remaining amount is
running out. When one stitching completes, the counter value is subtracted, and the counterup screen is displayed when “0” is reached.
*This button is displayed only when the reflecting light from bobbin is detected.
I
BOBBIN THREAD (LEFT) REMAINING
AMOUNT
This button detects reflecting light from bobbin and informs that bobbin thread remaining
amount is running out. When one stitching completes, the counter value is subtracted, and
the counter-up screen is displayed when “0” is reached.
*This button is displayed only when the reflecting light from bobbin is detected.
J
LEFT SCROLL button
Pattern data to be sewn next is moved forward by one. In case of the first pattern, it moves
to the last pattern.
K
RIGHT SCROLL button
Pattern data to be sewn next is moved backward by one. In case of the last pattern, it moves
to the first pattern.
L
MARKING LIGHT SETTING button
Marking light setting screen is displayed, and changeover of marking light irradiation position
and setting of change of marking light set value
are performed.
* It is possible to customize display/non-display of the respective buttons.
For the details, refer to “^-13. CUSTOMIZING THE DATA INPUT SCREEN” p.80.
− 33 −
,
and
4. USING THE COUNTER
(1) Setting procedure of the counter
1 Display the counter setting screen.
from the input screen and
Press MODE CHANGEOVER key
COUNTER SETTING button
A is displayed on the screen.
Press this button and “COUNTER SETTING screen (screen A)” is
displayed.
A
2 Select the kind of counter.
There are three kinds of counters with this sewing machine,
sewing counter, number of pcs. counter and bobbin thread
remaining amount adjustment counter.
B
Press sewing counter button
B in “counter setting screen
(screen A)”, and “sewing counter setting screen (screen B)” is
displayed. Then the kind of counter can be set.
Counter setting screen
(Screen A)
[ Sewing counter ]
UP counter
Every time one sewing is performed, the existing value is counter
up. When the existing value is equal to the set value, the countup screen is displayed.
DOWN counter
Every time one sewing is performed, the existing value is counted
down. When the existing value is reached to “0”, the count-up
screen is displayed.
Counter unused
Sewing counter is set to the prohibition.
Sewing counter setting
screen (Screen B)
− 34 −
Press NUMBER OF PCS. COUNTER button
C In “Counter
setting screen (screen A)”, and “number of pcs. setting screen
(screen C)” is displayed. Then the kind of counter can be set.
C
Counter setting screen
(Screen A)
[ Number of pcs. counter ]
UP counter
Every time one of finished products is sewn, the existing value is
counted up.
* In case of independent sewing : 1 time of sewing
In case of alternate sewing : 2 times of sewing
In case of cycle sewing : 1 time of cycle sewing
The number given in each case above is regarded as one of
finished products.
When the existing value is equal to the set value, the count-up
screen is displayed.
Number of pcs. counter
(Screen C)
DOWN counter
Every time one of finished products is sewn, the existing value
is counted down. When the existing value is reached to “0”, the
count-up screen is displayed.
Counter unused
Number of pcs. counter is set to the prohibition.
− 35 −
3 Changing the target value of the counter
In case of the sewing counter, press button
D, and in
D
case of the number of pcs. counter, press button
E
E, and “
Numerical setting pop-up screen (screen D)” Is displayed. Then
the target value of counter can be set.
Here, input the target value of counter. When “0” is inputted to the
target value of counter, only the existing value is displayed during
sewing and the count-up screen is not displayed.
Numerical setting pop-up screen
(screen D)
4 Change the existing value of counter
F
G
In case of the sewing counter, press button
of the number of pcs. counter, press
F and in case
G, and “ Numerical
setting pop-up screen (screen E)” is displayed. Then the existing
value of counter can be set.
Numerical setting pop-up screen
(screen E)
Here, input the existing value of counter.
− 36 −
(2) Releasing procedure of count-up
During the sewing work, the count-up condition is reached the
count-up screen is displayed and the buzzer sounds. Press CLEAR
button
A to reset the counter, and the screen returns to the
sewing screen. And, counting starts again.
A
(3) Counter value changing procedure during sewing
1 Display the counter value change screen
When you desire to change the counter value during the sewing
work, press COUNTER VALUE CHANGE button
A on the
sewing screen. Counter value change screen is displayed.
A
2 Change the counter value
Change the counter value with TEN keys
button
C (
to
B or ▼▲
D ).
F
3 Determine the counter value
B
Press ENTER button
E and the data is determined. When
you desire to clear the counter value, press CLEAR button
E
C
D
− 37 −
F.
5. USING THE BOBBIN THREAD AMOUNT ADJUSTMENT COUNTER
(1) Setting procedure of the bobbin thread remaining amount adjustment counter
1 Display the counter setting screen
Press MODE CHANGEOVER key
COUNTER SETTING button
from the input screen,
A is displayed on the screen..
Press this button and “Counter setting screen (screen A)” is
displayed.
A
2 Set the bobbin thread remaining amount adjustment counter
to ON.
Press BOBBIN THREAD REMAINING AMOUNT
ADJUSTMENTCOUNTER MOTION SETTING button
B,
and “Bobbin thread remaining amount adjustment counter setting
pop-up screen (screen B)” is displayed. Then the bobbin thread
remaining amount adjustment counter motion (ON/OFF) can be
set.
B
Counter setting screen
(Screen A)
[ Bobbin thread remaining amount detection ]
Bobbin thread remaining amount adjustment counter ON :
The counter detects the reflecting light from bobbin and informs
that bobbin thread remaining amount is running out. Every time
one sewing is performed, the counter value is subtracted and the
count-up screen is displayed when the existing value is reached to
“0”.
Bobbin thread remaining amount adjustment counter OFF :
Bobbin thread remaining amount detection is set to the prohibition.
Bobbin thread remaining amount
adjustment value setting screen
(Screen B)
− 38 −
3 Set the bobbin thread remaining amount adjustment value
Press BOBBIN THREAD REMAINING AMOUNT ADJUSTMENT
VALUE SETTING button
C and the bobbin thread remaining
amount adjustment value setting screen (screen B) is displayed.
C
Counter setting screen
(Screen A)
Here, input the bobbin thread remaining amount adjustment value
(0 to 9).
Set the number of times of sewing from detecting run-out of
bobbin thread by the sensor to performing the count-up display.
When you desire to lengthen the remaining length bobbin
thread :
→ Decrease the number (toward “0”).
When you desire to shorten the remaining length of
bobbin thread :
→ Increase the number (toward 9).
Bobbin thread remaining amount
adjustment value setting screen
(Screen B)
− 39 −
* Setting of the bobbin thread remaining amount adjustment counter *
1) Set the bobbin thread remaining amount adjustment counter to the value shown in the table below.
2) Start the sewing to perform regular sewing. In case of test sewing, adjust the sewing length to that to be
sewn in the actual process.
3) As you continue sewing, the bobbin thread is gradually reduced and the run-out of bobbin thread is
displayed in the screen when the bobbin sensor detects the reflecting light.
4) At this time, check the length of bobbin thread remaining on the bobbin and properly modify the value on
the counter.
5) Increasing the counter value by 1 will shorten the remaining length of bobbin thread by the amount that
is consumed for one time of sewing.
6) The remaining length of bobbin thread at the time when the indication of run-out of bobbin thread varies
by a certain extent. This variation depends on the type of thread, sewing length and the winding way of
thread.
The remaining length of bobbin thread is shown, as a guide, in the table below. Correct the counter value
in accordance with sewing conditions and the like so that the bobbin thread does not completely run out
during sewing.
[ The table shows the counter value when the sewing length is set to 150 mm ]
Thread count
Counter value
Bobbin thread remaining length for reference (m)
#40
1
0.4 to 2.6
#50
2
0.2 to 2.6
#60
2
0.4 to 2.8
#80
3
0.1 to 3.0
• The bobbin thread remaining length has to be re-adjusted in the case described below.
1. When the sewing length for the sewing product has been changed.
2. When the thread count of bobbin thread has been changed.
• The value of bobbin thread remaining amount counter is cleared by inputting the value of the
bobbin thread remaining amount adjustment counter.
7) If the bobbin has run out of thread, the bobbin thread remaining amount detecting device is incapable of
performing “bobbin thread remaining amount detection”. So, it is very important to specify a value on the
bobbin thread remaining amount adjustment counter to allow the device to give the indication of “run-out
of bobbin thread” when the sufficient amount of bobbin thread remains.
(2) Releasing procedure of the bobbin thread remaining amount detection count-up
When the bobbin thread remaining amount counter value becomes
“0” at the sewing end, the count-up screen is displayed and the
buzzer sounds. Replace the bobbin thread of the bobbin where the
bobbin thread remains few.
When CLEAR button
A
A is pressed, the bobbin thread
remaining amount counter value is reset and the screen returns to
the sewing screen.
− 40 −
6. CHANGING THE SEWING MODE
1 Display the sewing mode selection screen
Press SEWING MODE CHANGEOVER key
A and the
mode change-over screen is displayed.
B
A
2 Select the sewing mode
Press MODE SELECTION button B and the indication of button is changed.
When the independent
sew is selected
When the alternate sewing
is selected
When the cycle sewing is
selected
3 Determine the sewing mode.
Press MODE CHANGEOVER key
A and the data input screen of the selected sewing mode is
displayed.
Independent sewing input
screen
Alternate sewing input
screen
− 41 −
Cycle sewing input screen
7. USING THE SEWING PATTERN
(1) Performing the selection of pattern
1 Display the input screen
When the input screen of independent sewing mode, alternate sewing mode and cycle sewing mode is
displayed, the selection of pattern can be selected.
By customizing the sewing screen, the selection of pattern can be performed from the sewing screen as
well.
2 Call the pattern list screen
,
Press PATTERN LIST button
A
or
A and the pattern list screen is displayed.
A
A
3 Select the pattern
Press pattern data you desire to select B.
C
B
C
B
C
B
4 Determine the pattern
When ENTER button
C is pressed, the pattern is selected and the screen returns to the input
screen.
− 42 −
(2) Performing the new creation of pattern
1 Display the input screen
When the input screen of independent sewing mode, alternate sewing mode and cycle sewing mode is
displayed, the new creation of pattern can be performed.
2 Call the sewing pattern new creation screen
,
Press NEW CREATION button
A , and the pattern new creation screen is
or
displayed.
A
A
A
3 Input the pattern No.
to
Input pattern No. you desire to newly create with ten keys
pattern No. which has not been registered yet with ▲▼ button
E
B
D
D.
E
B
C
C and
B. It is possible to retrieve
E
B
C
D
C
D
4 Determine the pattern No.
When ENTER button
E is pressed, the pattern No. to newly create is determined and the screen
returns to the input screen.
− 43 −
(3) Copying the pattern
The pattern which has been already registered can be copied to the sewing pattern which has not
registered yet. Copying of overwriting of pattern is prohibited. So, when you desire to overwrite, perform
it after erasing the pattern once.
→ For the erasing procedure, see “^-7. (4) Erasing the pattern” p.46.
When performing copying the pattern No. which has been already registered, copy disapproved
error (E401) is displayed.
1 Display the input screen
When the input screen of independent sewing mode, alternate sewing mode and the cycle sewing mode
is displayed, it is possible to copy.
A
A
A
2 Call the pattern No. list screen of the copy source
Press PATTERN COPY button
,
or
displayed.
− 44 −
A , and the copy source pattern list screen is
3 Select the pattern of copy source
Select the pattern of copy source from PATTERN LIST button B.
Next, press COPY DESTINATION NO. INPUT button
C and the copy destination input screen
(screen B) is displayed.
C
B
C
B
C
B
Copy destination No. input screen (screen B)
4 Input the pattern No. of copy destination
Input the pattern No. of copy destination with ten keys
to
C and
pat6tern No. which has not been used yet with ▼▲ buttons (
B
B
D
D ).
B
E
C
B. It is possible to retrieve the
E
C
D
E
C
D
Copy destination No. input screen (screen B)
5 Start copying
When ENTER button
E is pressed, copying starts. The pattern No. which has been copied is in
the selection state and returns to the copy source pattern list screen (screen A).
− 45 −
(4) Erasing the pattern
1 Display the input screen
When the input screen of independent sewing mode, alternate sewing mode and cycle sewing mode is
displayed, it is possible to erase the pattern.
2 Call the pattern list screen
,
Press PATTERN LIST button
or
A and the pattern No. list screen (screen A) is
displayed.
A
A
A
3 Select the pattern to be erased
Select the pattern to be erased from pattern list button B.
C and the pattern erase confirmation screen is displayed.
Next, press ERASE button
B
B
B
C
C
C
Pattern No. list screen (screen A)
4 Determine the pattern to be erased
Press ENTER button
When CANCEL button
in the pattern erase confirmation screen and the pattern is erased.
is pressed, the screen returns to the original screen A without erasing the
pattern.
− 46 −
(5) Naming the pattern
1 Display the input screen
When the input screen of independent sewing mode, alternate sewing mode and cycle sewing mode is
displayed, it is possible to input the name to the pattern data.
2 Call the character input screen
Press CHARACTER INPUT button
A and the character input screen (screen B) is displayed.
A
A
A
Data input screen (screen A)
F
B
F
B
B
E
C
F
E
D
C
E
D
C
D
Character input screen (screen B)
3 Input the character
It is possible to input the character by pressing CHARACTER button B you desire to input. As many as
14 characters of characters (
to
and
to
) and symbols (
,
) can be inputted. Cursor can be moved with CURSOR LEFT MOVE button
RIGHT MOVE button
,
,
,
and
C and CURSOR
D. When you desire to erase the inputted character adjust the cursor to the
position of the character you desire to erase and press ERASE button
E.
4 End the character input
Press ENTER button
F to end the character input. After the end, the inputted character is
displayed at the upper part of the input screen.
− 47 −
(6) Editing procedure of the cycle sewing data
1 Display the cycle sewing input screen
When the input screen of cycle sewing ode is displayed, it is
possible to edit the cycle sewing data.
A
Cycle sewing input screen
(Screen C)
2 Register the pattern data
C
Press BLANK button
A and the pattern list screen (screen
B) is displayed.
Select the pattern data you desire to register from PATTERN LIST
button B and press ENTER button
C. Then the selected
pattern data is registered to the blank section.
B
Pattern list screen
(Screen B)
When the first pattern data is registered, BLANK button
D is displayed in the second place. Repeat the operation of 2 in
case of need.
As many as 6 pattern data can be registered to the cycle
sewing data.
− 48 −
3 Erase the registered pattern data
Press ERASE button
E and the pattern data which is
displayed with white emphasis is erased. Select the pattern data
you desire to erase with UP/DOWN SCROLL buttons
and
F and erase it.
D
F
E
The pattern data which is displayed with white emphasis
is the pattern data to be sewn next. So, move it in
accordance with the sewing work.
Cycle sewing input screen
(Screen C)
4 Edit the registered pattern data
Press PATTERN DATA button
G you desire to edit and
the pattern data edit screen (screen D) is displayed in pop-up.
Refer to “^-3-(1) Input screen (Independent sewing mode)”
p.28.
G
Pattern data edit screen
(Screen D)
− 49 −
8. CHANGING THE SEWING DATA
(1) Changing procedure of the sewing data
1 Display the input screen
When the input screen of independent sewing mode, alternate sewing mode and cycle sewing mode is
displayed it is possible to change the swing data.
The sewing data which are frequently used can be registered to SEWING DATA SHORTCUT button B
in the input screen and be set directly. In addition, the detailed sewing data can be set by pressing
A.
C
A
B
A
A
B
1. When changing the sewing data of cycle sewing mode, press PATTERN DATA EDIT button C
and it is possible to change.
2. In case of alternate sewing mode, SEWING DATA SHORTCUT button B is not displayed.
3. For SEWING DATA SHORTCUT button B, refer to “^-13. CUSTOMIZING THE DATA INPUT
SCREEN” p.80.
4. For the details of sewing data, refer to “1 Items displayed in the data input screen of ^-8-(2)
Sewing data list” p.51.
2 Select the sewing data to be changed
Press
A and the sewing data list screen (screen A) is
displayed. Then select the data you desire to change.
Data items which are not used due to the shape are not
displayed. So, be careful.
Sewing data list screen (Screen A)
− 50 −
(2) Sewing data list
1 Items that are displayed in the data input screen
No.
Item
Motion mode change-over
With/without of motion of sewing machine motor, center knife and corner
knife is selected.
Cloth feed mode
Cloth feed, sewing
machine thread trimming
and center knife mode
Cloth feed, sewing
machine thread trimming
Cloth feed, sewing
machine thread trimming,
center knife and corner
knife mode
Sewing mode change-over
Sewing mode is selected.
* In case of alternate sewing, flap priority sewing is set with
.
Left flap sewing
Right flap sewing
Flap priority sewing
.
Marking light irradiation position change-over
Sewing start irradiation/sewing end irradiation/center irradiation is
selected.
Sewing start irradiation
---
---
L size sewing
L size setting
In case of L size sewing, the sewing length is set.
* It is possible to set only when setting L size sewing
Setting range
/
Initial value
Edit unit
18.0 to
220.0
/
0.1mm
150.0mm
---
Sewing end irradiation
Center irradiation
Flap concealed stitching data (Left sewing start)
Position of sewing start of left-hand flap is adjusted.
is set to flap sewing.
* It is possible to set only when
–9.9 to 9.9
/
0.1mm
0.0mm
Flap concealed stitching data (Left sewing end)
Position of sewing end of left-hand flap is adjusted.
is set to flap sewing.
* It is possible to set only when
–9.9 to 9.9
/
0.1mm
0.0mm
Flap concealed stitching data (Right sewing start)
Position of sewing start of right-hand flap is adjusted.
is set to flap sewing.
* It is possible to set only when
–9.9 to 9.9
/
0.1mm
0.0mm
. . . Item that is not displayed due to other setting state
− 51 −
No.
Item
Flap concealed stitching data (Right sewing end)
Position of sewing end of right-hand flap is adjusted.
is set to flap sewing.
* It is possible to set only when
Changeover of deflection direction at the start of sewing
Changeover of deflection direction at the start of sewing is performed.
–9.9 to 9.9
/
0.1mm
0.0mm
---
Deflection amount at the start of sewing
In case the start of sewing is the slant sewing setting, deflection amount
is compensated. In case the start of sewing is the parallel sewing setting,
deflection amount cannot be compensated.
Changeover of deflection direction at the end of sewing
Changeover of deflection direction at the end of sewing is performed.
Setting range
/
Initial value
Edit unit
0.5 to 10.0
/
0.1mm
0.0mm
---
Deflection amount at the end of sewing
In case the end of sewing is the slant sewing setting, deflection amount
is compensated. In case the end of sewing is the parallel sewing setting,
deflection amount cannot be compensated.
0.5 to 10.0
/
0.1mm
0.0mm
Center knife actuating position setting
Cutting position of center knife at sewing start/sewing end is set.
* Be sure to adjust with every gauge so that the position meets the top of
letter V of corner knife.
0.0 to 25.0
/
0.1mm
7.0mm
Corner knife actuating position at sewing start
Cutting position of corner knife at sewing start is set.
–9.9 to 9.9
/
0.1mm
0.0mm
Corner knife actuating position at sewing end
Cutting position of corner knife at sewing end is set.
–9.9 to 9.9
/
0.1mm
0.0mm
Sewing start center knife
position
Sewing end center knife
position
. . . Item that is not displayed due to other setting state
− 52 −
No.
Item
Setting of right width of corner knife at the start of sewing
Right width of corner knife at the start of sewing is set.
Setting range
/
Initial value
Edit unit
–1.0 to
1.5mm
/
0.1mm
0.5mm
Setting of left width of corner knife at the start of sewing
Left width of corner knife at the start of sewing is set.
–1.0 to
1.5mm
/
0.1mm
0.5mm
Setting of right width of corner knife at the end of sewing
Right width of corner knife at the end of sewing is set.
–1.0 to
1.5mm
/
0.1mm
0.5mm
Setting of left width of corner knife at the end of sewing
Left width of corner knife at the end of sewing is set.
–1.0 to
1.5mm
/
0.1mm
0.5mm
− 53 −
No.
Item
Setting of (left) corner knife motion position at the start of sewing
Motion (longitudinal) position of left corner knife at the start of sewing is
set.
Setting range
/
Initial value
Edit unit
–9.9 to
9.9mm
/
0.1mm
0.0mm
Setting of (right) corner knife motion position at the start of sewing
Motion (longitudinal) position of right corner knife at the start of sewing is
set.
–9.9 to
9.9mm
/
0.1mm
0.0mm
Setting of (left) corner knife motion position at the end of sewing
Motion (longitudinal) position of left corner knife at the end of sewing is
set.
–9.9 to
9.9mm
/
0.1mm
0.0mm
Setting of (right) corner knife motion position at the end of sewing
Motion (longitudinal) position of right corner knife at the end of sewing is
set.
–9.9 to
9.9mm
/
0.1mm
0.0mm
Marking light setting
Marking light irradiation position in each case of sewing start irradiation/
sewing end irradiation/center irradiation is set. When set value 0.0mm,
the sewing position is the same as the marking light irradiation position.
Use this function when irradiating the marking light to the position that is
different from the sewing position.
–100.0 to
100.0
0.0mm
Sewing start irradiation
Sewing end irradiation
Center irradiation
− 54 −
* Sewing start
irradiation :
–80.0 to 100.0
/
0.1mm
No.
Item
Automatic detection function of deflection at the start of sewing
Flap is read at the start of sewing using two flap sensors and deflection is
automatically set.
* When
Setting range
/
Initial value
Edit unit
---
Right flap angle detection device is not mounted, left flap
(double welt and single welt with one side flap) only can be used.
Automatic detection function of deflection at the end of sewing
Flap is read at the end of sewing using two flap sensors and deflection is
automatically set.
* When
---
Right flap angle detection device is not mounted, left flap
(double welt and single welt with one side flap) only can be used.
Roller stacker stop/motion change-over
Stop/motion of roller stacker is selected.
is set to roller stacker mounting.
* It is displayed only when
Stop
---
Motion
Clamp bar stacker stop/motion change-over
Stop/motion of clamp bar stacker is selected.
is set to clamp bar stacker mounting.
* It is displayed only when
Stop
Motion
. . . Item that is not displayed due to other setting state
− 55 −
---
2 Items that are displayed in the sewing data list screen
No.
Item
Flap priority sewing selection
Flap priority sewing mode is selected.
* It is possible to set only when alternate sewing mode is set.
Flap priority sewing
prohibited
Setting range
/
Initial value
Edit unit
---
Flap priority sewing mode
Selection of automatic changeover of marking light irradiation position
When
is sewing start irradiation or sewing end irradiation, the marking
irradiation position is automatically changed over after end of sewing.
* This function does not move at the time of alternate sewing mode and
cycle sewing mode.
Stop
---
Motion
Flap forced stop data
When flap sewing end is not detected, the machine stops after sewing as
long as the set length from rear reference position.
is set to flap sewing.
* It is possible to set only when
0.0 to 10.0
/
0.1mm
5.0mm
Compensation value of deflection detection at the start of sewing
Further compensation is performed to the deflection automatically
detected at the start of sewing.
–9.9 to
9.9mm
/
0.1mm
0.0mm
Compensation value of deflection detection at the end of sewing
Further compensation is performed to the deflection automatically
detected at the end of sewing.
–9.9 to
9.9mm
/
0.1mm
0.0mm
2.0 to 3.4
/
0.1mm
2.5mm
Lockstitch pitch
Sewing pitch of lockstitch section is set.
Selection of condensation/back tack at sewing start
Condensation/back tack at sewing start is selected.
Condensation
Back tack
. . . Item that is not displayed due to other setting state
− 56 −
---
No.
Item
Number of condensation stitches at sewing start
Number of condensation stitches at sewing start is set.
is set to selection of condensation.
* It is possible to set only when
Setting range
/
Initial value
Edit unit
3 to 19
/
1 stitch
5 stitches
Condensation pitch at sewing start
Condensation sewing pitch at sewing start is set.
is set to selection of condensation.
* It is possible to set only when
0.5 to 1.5
/
0.1mm
1.0mm
First stitch pitch of condensation sewing at sewing start
First stitch pitch of condensation sewing at sewing start is set.
is set to selection of condensation.
* It is possible to set only when
is set to selection of
* It is possible to set only when
condensation/back tack detailed setting.
* It is possible to set only when the start of sewing is parallel.
0.1 to 1.5
/
0.1mm
1.0mm
Second stitch pitch of condensation sewing at sewing start
Second stitch pitch of condensation sewing at sewing start is set.
is set to selection of condensation.
* It is possible to set only when
is set to selection of
* It is possible to set only when
condensation/back tack detailed setting.
* It is possible to set only when the start of sewing is parallel.
0.1 to 1.5
/
0.1mm
1.0mm
Third stitch pitch of condensation sewing at sewing start
Third stitch pitch of condensation sewing at sewing start is set.
is set to selection of condensation.
* It is possible to set only when
It
is
possible
to
set
only
when
is set to selection of
*
condensation/back tack detailed setting.
* It is possible to set only when the start of sewing is parallel.
0.1 to 1.5
/
0.1mm
1.0mm
Number of back tack stitches at sewing start
Number of back tack stitches at sewing start is set.
is se to selection of back tack.
* It is possible to set only when
1 to 12
/
1 stitch
3 stitches
Back tack pitch at sewing start
Back tack sewing pitch at sewing start is set.
is se to selection of back tack.
* It is possible to set only when
0.5 to 3.0
/
0.1mm
2.0mm
. . . Item that is not displayed due to other setting state
− 57 −
No.
Item
Back tack tie stitch pitch at sewing start
Back tack tie stitch at sewing start is set.
is se to selection of back tack.
* It is possible to set only when
Setting range
/
Initial value
Edit unit
–2.0 to 2.0
/
0.1mm
–1.5mm
First stitch pitch of return of back tack at sewing start
First stitch pitch of return section of back tack sewing at sewing start is set.
is se to selection of back tack.
* It is possible to set only when
is set to selection of
* It is possible to set only when
condensation/back tack detailed setting.
* It is possible to set only when the start of sewing is parallel.
0.1 to 3.0
/
0.1mm
2.0mm
Second stitch pitch of return of back tack at sewing start
Second stitch pitch of return section of back tack sewing at sewing start is set.
is se to selection of back tack.
* It is possible to set only when
is set to selection of
* It is possible to set only when
condensation/back tack detailed setting.
* It is possible to set only when the start of sewing is parallel.
0.1 to 3.0
/
0.1mm
2.0mm
Third stitch pitch of return of back tack at sewing start
Third stitch pitch of return section of back tack sewing at sewing start is set.
is se to selection of back tack.
* It is possible to set only when
is set to selection of
* It is possible to set only when
condensation/back tack detailed setting.
* It is possible to set only when the start of sewing is parallel.
0.1 to 3.0
/
0.1mm
2.0mm
Selection of condensation/back tack at sewing end
Selection of condensation/back tack at sewing end is performed.
Condensation
---
Back tack
Back tack pitch at sewing start
Back tack sewing pitch at sewing start is set.
is se to selection of back tack.
* It is possible to set only when
Condensation pitch at sewing end
Condensation sewing pitch at sewing end is set.
is set to selection of condensation.
* It is possible to set only when
. . . Item that is not displayed due to other setting state
− 58 −
3 to 19
/
1 stitch
5 stitches
0.5 to 1.5
/
0.1mm
1.0mm
No.
Item
The last stitch pitch of condensation
The last stitch pitch of condensation sewing at sewing end is set.
is set to selection of condensation.
* It is possible to set only when
is set to selection of condensation/
* It is possible to set only when
back tack detailed setting.
* It is possible to set only when the start of sewing is parallel.
Setting range
/
Initial value
Edit unit
0.1 to 1.5
/
0.1mm
1.0mm
Pitch of one stitch before the last stitch of condensation
Pitch of one stitch before the last stitch of condensation sewing at sewing
end is set.
is set to selection of condensation.
* It is possible to set only when
is set to selection of condensation/
* It is possible to set only when
back tack detailed setting.
* It is possible to set only when the start of sewing is parallel.
0.1 to 1.5
/
0.1mm
1.0mm
Pitch of two stitches before the last stitch of condensation
Pitch of two stitches before the last stitch of condensation sewing at
sewing end is set.
is set to selection of condensation.
* It is possible to set only when
is set to selection of condensation/
* It is possible to set only when
back tack detailed setting.
* It is possible to set only when the start of sewing is parallel.
0.1 to 1.5
/
0.1mm
1.0mm
Number of back tack stitches at sewing end
Number of back tack stitches at sewing end is set.
is set to selection of back tack.
*It is possible to set only when
1 to 12
/
1 stitch
3 stitches
Back tack pitch at sewing end
Back tack sewing pitch at sewing end is set.
is set to selection of back tack.
*It is possible to set only when
0.5 to 3.0
/
0.1mm
2.0mm
First stitch pitch of return of back tack at sewing end
First stitch pitch of return section of back tack sewing at sewing end is set.
is set to selection of back tack.
*It is possible to set only when
is set to selection of
* It is possible to set only when
condensation/back tack detailed setting.
* It is possible to set only when the start of sewing is parallel.
0.1 to 3.0
/
0.1mm
2.0mm
. . . Item that is not displayed due to other setting state
− 59 −
No.
Item
Second stitch pitch of return of back tack sewing at sewing end
Second stitch pitch of return section of back tack sewing at sewing end is set.
is set to selection of back tack.
*It is possible to set only when
is set to selection of
* It is possible to set only when
condensation/back tack detailed setting.
* It is possible to set only when the start of sewing is parallel.
Setting range
/
Initial value
Edit unit
0.1 to 3.0
/
0.1mm
2.0mm
Third stitch pitch of return of back tack sewing at sewing end
Third stitch pitch of return section of back tack sewing at sewing end is set.
is set to selection of back tack.
*It is possible to set only when
is set to selection of
* It is possible to set only when
condensation/back tack detailed setting.
* It is possible to set only when the start of sewing is parallel.
0.1 to 3.0
/
0.1mm
2.0mm
The last stitch pitch of back tack at sewing end
The last stitch pitch of back tack at sewing end is set.
is set to selection of back tack.
*It is possible to set only when
–2.0 to 2.0
/
0.1mm
–1.5mm
Compensation of back tack return at sewing end
Compensation value of back tack return at sewing end is set.
is set to selection of back tack.
*It is possible to set only when
compensates with pattern data.
*It is possible to set only when
–2.0 to 2.0
/
0.1mm
1.0mm
Stacking position
After moving clamp foot as far as the set distance from the position of
corner knife, stacker is actuated. (+ : rear side, - : front side)
*Range of actuating amount is limited by the position of clamp foot at
the time of sewing end.
clamp bar stacker or
roller stacker. In addition,
*Use
roller stacker motion setting or
it is possible to set only when
clamp bar stacker motion setting is performed.
–500 to
500mm
/
1mm
0mm
0.0 to 9.9
/
0.1 sec.
0.5 sec.
3 to 10
/
1
5
Stacker timer 1
Roller rotation time is set. When material sensor has detected without
material before setting time, rotation stops.
roller stacker option is used and it is possible to set only when
*
roller stacker motion is set.
Jump feed speed up to the position of sewing start
Jump feed speed up to the position of sewing start is set.
. . . Item that is not displayed due to other setting state
− 60 −
No.
Item
Jump feed speed up to the position of corner knife
Jump feed speed up to the position of corner knife is set.
Dart stretcher device stop/motion change-over
Stop/motion of dart stretcher device is selected.
dart stretcher option is used.
*It is possible to set only when
Stop
Setting range
/
Initial value
Edit unit
3 to 10
/
1
5
---
Motion
Automatic interlining supplying device stop/motion change-over
Stop/motion of automatic interlining supplying device is selected.
automatic interlining supplying
*It is possible to set only when
option is used.
*Regarding the interlining supplying, when the pattern is not used, be
careful not to make the interlining come out from the top surface of the
table. When using next, press once the feeding button on the panel
and perform the feeding motion to cut.
Stop
---
Motion
Flap length
Length of flap is set.
It is possible to set only when
automatic interlining supplying
device is selected to motion and
sewing mode changeover is
selected to flap sewing.
*This setting is set to determine the interlining feeding length of
automatic interlining supplying device. Sewing length is determined by
the detection of flap sensor.
37.0 to
220.0
/
0.1mm
150.0mm
Sewing speed under the high-speed mode
Number of revolutions at lockstitch section is set.
sewing speed setting selection is
*It is possible to set only when
set to pattern data selection.
1000 to
3000
/
100sti/min
2500sti/min
Sewing speed under the low-speed mode
Number of revolutions at condensation and back tack sewing sections is
set.
sewing speed under the high-speed mode.
*It is limited by
sewing speed setting selection is
*It is possible to set only when
set to the selection of pattern data.
1000 to
2500
/
100sti/min
1500sti/min
. . . Item that is not displayed due to other setting state
− 61 −
(3) Copying function of the upper and lower alternate sewing data
1 Display the alternate sewing input screen.
When the input screen of the alternate sewing mode is displayed,
it is possible to copy the upper and lower data.
A
B
2 Call the sewing mode changeover screen.
Press SEWING MODE SETTING button to display the sewing
mode changeover screen. When you desire to copy the upper
sewing data to the lower sewing data, press button B on the
lower side and you desire to copy the lower sewing data to the
upper sewing data, press button A on the upper side.
3 Copy the alternate sewing data.
Press UPPER/LOWER SEWING DATA COPY button
the sewing mode changeover screen.
C
− 62 −
C in
4 Start copying.
When ENTER button
is pressed in the copy confirmation
screen, the left and right sewing data are inversely copied. When
CANCEL button
is pressed, the screen returns to the original
sewing mode changeover screen without copying.
* The sewin data below are inversed from the left to the right at the time of copying. (Other sewing data are
copied without inversion.)
No.
Item
S003
Sewing mode changeover
S008
Flap concealed stitching data (Left sewing start)
S009
Flap concealed stitching data (Left sewing end)
S010
Flap concealed stitching data (Right sewing start)
S011
Flap concealed stitching data (Right sewing end)
S013
Changeover of deflection direction at the start of sewing
S015
Changeover of deflection direction at the end of sewing
S021
Setting of right width of corner knife at the start of sewing
S022
Setting of left width of corner knife at the start of sewing
S023
Setting of right width of corner knife at the end of sewing
S024
Setting of left width of corner knife at the end of sewing
S025
Setting of (left) corner knife motion position at the start of sewing
S026
Setting of (right) corner knife motion position at the start of sewing
S027
Setting of (left) corner knife motion position at the end of sewing
S028
Setting of (right) corner knife motion position at the end of sewing
− 63 −
9. CHANGING THE MEMORY SWITCH DATA
(1) Changing procedure of the memory switch data
1 Display the memory switch data list screen
Press MODE CHANGE-OVER key
button
A
and the memory switch
A is displayed. When this button is pressed, the
memory switch data list (screen A) is displayed.
2 Select the memory switch button you desire to change
Press UP/DOWN SCROLL button
or
DATA ITEM button C you desire to change.
C
B
Memory switch data list screen
(Screen A)
− 64 −
B and select
(2) Memory switch data list
1 Level 1
Memory switch data (level 1) are the motion data that the sewing machine has in common and the data
that operate on all sewing patterns in common.
No.
Item
Change-over of the position of clamp foot after sewing end
Position of clamp foot after sewing end is selected from Stop at front
end/Return to medium/Clamp return/Stop at rear end.
Stop at front end
Return to medium
Clamp return
Stop at rear end
Setting range
/
Edit unit
Initial value
---
Front end motion start waiting time
Waiting time up to the start of front end motion of clamp foot is set.
is set to the stop at front end.
* It is possible to set only when
0.50 to
9.99
/
0.01 sec.
3.00 sec.
Number of times of feeding of automatic interlining supplying at
sewing start
Number of times of feeding of automatic interlining supplying device at
sewing start is set.
automatic interlining
* It is possible to set only when
supplying option is used.
2 to 9
/
1
3
Feeding length of automatic interlining supplying at sewing end
Feeding length of automatic interlining supplying device at sewing end
is set.
automatic interlining supplying
*It is possible to set only when
device is used.
0 to 99.9
/
0.1mm
0mm
Thread trimming timing
Thread trimming timing after sewing is selected from Standard/
Medium/Longest and length of thread at sewing end is adjusted.
Standard 0
---
Medium 1
Longest 2
Ready-made zipper device is mounted and the setting is set
to standard value "0", needle thread may not be cut.
*When
Stacker timer 2
Waiting time from the start of clamp motion to hold material on the
stacker base to release the material presser is set.
clamp bar stacker option is
*It is possible to set only when
used.
. . . Item that is not displayed due to other setting state.
− 65 −
0.00 to
9.99
/
0.01 sec.
0.70 sec.
No.
Item
Stacker timer 3
Motion time of material sweeping bar is set.
clamp bar stacker option is
*It is possible to set only when
used.
Setting range
/
Edit unit
Initial value
0.00 to
9.99
/
0.01 sec.
0.70 sec.
Stacker timer 4
Time to advance timing to release the sewing product by lifting clamp
foot is set.
When clamping a short sewing product, the amount to drop by tare is
adjusted.
clamp bar stacker option is
*It is possible to set only when
used.
0.00 to
9.99
/
0.01 sec.
0.00 sec.
2500sti/min
Sewing speed under the low-speed mode
Number of revolutions of condensation and back tack sewing sections
is set.
sewing speed under the high-speed mode.
* It is limited by
sewing speed setting
* It is possible to set only when
selection is set to memory switch.
1000 to
3000
/
100
sti/min
1000 to
2500
/
100
sti/min
1500sti/min
500 to
2500
/
100
sti/min
500sti/min
500 to
2500
/
100
sti/min
1000sti/min
Sewing speed under the high-speed mode
Number of revolutions of lockstitch section is set.
sewing speed setting
*It is possible to set only when
selection is set to memory switch.
Soft start, first stitch
Number of revolutions of first stitch at sewing start is limited.
Soft start, second stitch
Number of revolutions of second stitch at sewing start is limited.
Soft start, third stitch
Number of revolutions of third stitch at sewing start is limited.
Return speed of clamp foot
Return speed of clamp foot is set.
500 to
2500
/
100
sti/min
3 to 9
/
1
Thread breakage detection
With/without thread breakage detection is selected.
With thread
breakage detection
--Without thread
breakage detection
Flap presser motion mode
Motion order of flap presser is selected.
From right
From left
Right/Left at the
same time
Side where flap is
put
*When right and left are simultaneously actuated with customizing of
pedal setting, this parameter is neglected and the right and left are
simultaneously actuated.
. . . Item that is not displayed due to other setting state.
− 66 −
700sti/min
7
No.
Setting range
/
Edit unit
Item
Clamp foot down order change-over
Lowering order of clamp foot is selected.
Initial value
---
From right
From left
Right/left at the
same time
*When right and left are simultaneously actuated with customizing of
pedal setting, this parameter is neglected and the right and left are
simultaneously actuated.
Folding plate motion mode
“Return/No return” of folding plate when corner knife projects is
selected.
Return
---
No return
Binder pressure reduction rise prohibition
Pressure reduction rise of the binder at the time of jump feed is
prohibited.
Pressure reduction
rise is prohibited.
---
Pressure
reduction rise
Standing pedal continuous depressing timer effective/ineffective
change-over
---
Effective/ineffective of
standing pedal continuous depressing
timer is selected.
one-shot pedal is set.
*It is possible to set only when
Ineffective
Effective
Standing pedal continuous depressing timer
When performing sewing product setting work with the standing pedal
depressed, the time interval when the respective devices operate in order is
set.
one-shot pedal is set.
*It is possible to set only when
0.1 to 2.0
/
0.1 sec.
Condensation/back tack detailed setting
Detailed setting “Perform/Not perform” of pitch of condensation/back
tack section is selected.
---
Perform
0.5 sec.
Not perform
Flap stopper position
In case of flap sewing, sewing start irradiation position of marking light
(distance from needle)is set
*Setting is only the irradiation position of marking light. Actual sewing
position is the flap end position detected by the flap sensor.
. . . Item that is not displayed due to other setting state.
− 67 −
80.0 to
280.0
/
0.1mm
80.0mm
No.
Item
Changeover of compensation of flap concealed stitching position
using deflection detection
When the automatic deflection detection of left flap is not set, compensation of
flap concealed stitching is automatically performed using the second flap sensor.
*When the automatic deflection detection is set, compensation of
flap concealed stitching is automatically performed regardless of
with/without this setting.
Used
Setting range
/
Edit unit
Initial value
---
Not used
Changeover of right/wrong side of material in the corner knife
setting screen
Material displayed in the corner knife setting screen is selected to right
side display or wrong side display.
Right side display
---
Wrong side display
Stacker timer 5
Sets the waiting time of the stacker from the start of material grasping
operation to the release of the material
This setting is available when
"Grasping stacker (optional)" is used.
0.00 9.99/
0.01 sec
1.00 sec
Stacker timer 6
Sets the duration of operating the oscillating arm
0.00 9.99/
0.01 sec
1.50 sec
Number of stitches of grease-up
Number of stitches of sewing machine motion after replenishing
grease is indicated.
*When pressing CLEAR button, number of stitches is cleared to “0”.
Be sure to clear after replenishing grease.
---
---
Language selection
Language to be indicated in the panel is selected.
---
No selection
This setting is available when
"Grasping stacker (optional)" is used.
Japanese
English
Chinese
(traditional)
Chinese
(simplified)
Spanish
Italian
French
German
Portuguese
Portuguese
Vietnamese
Korean
Indonesian
Russian
. . . Item that is not displayed due to other setting state.
− 68 −
2 Level 2
Memory switch data (level 1) are the motion data that the sewing machine has in common and the data
that operate on all sewing patterns in common. The data are for the maintenance personnel and possible
to edit by pressing the mode switch as long as 6 seconds.
No.
Item
Marking light mounting
Mounting/Non-mounting of marking light is selected. When “Non
mounting” is selected, marking light does not work.
Non mounting
Setting range
/
Edit unit
Initial value
---
Mounting
Sewing position selection
Mode that surely ends sewing at rear reference position, mode that
surely starts sewing from front reference position or the conventional
motion mode that changes sewing position according to the setting of
is selected.
*Front reference position : 80 mm from needle
Rear reference position : 300 mm from needle
---
Sewing position
fixed mode (Rear
reference)
Conventional
motion mode
Sewing position
fixed mode (Front
reference)
Pedal operation mode change-over
Mode to be used for foot pedal is set.
---
7-step pedal mode
1-shot pedal mode
Excess rate of center knife cutting
Excess rate in terms of the speed of revolution of center knife can be
set.
Setting of intermittent feed prohibition
Perform/not perform intermittent feed sewing is selected.
*When performing intermittent sewing, the max. sewing speed of
sewing machine is limited 1,500 sti/min.
Perform
intermittent feed
sewing
Not perform
intermittent feed
sewing
− 69 −
300 to
500
/
1%
---
350%
No.
Item
Change-over of flap concealed stitching data edit reference
Making the flap concealed stitching data that is set from panel the
compensation value from the flap detecting end or the distance from
detecting sensor to sewing start is selected.
Flap detecting end
compensation
Setting range
/
Edit unit
Initial value
---
Sensor
compensation
L size data range enlargement
Enlarging/not enlarging L size data range to max. 220 mm + 15 mm is set.
Not enlarging
---
Enlarging
Selection of sewing speed of sewing machine setting
It is selected that either memory switch or pattern data performs
setting of sewing speed of sewing machine.
Memory switch
---
Pattern data
Selection of reflecting tape check mode
ON/OFF of reflecting tape check mode is set.
When ON is set, the clamp foot is automatically comes lowered with
the first clamp foot advance motion after turning ON the power and
deterioration check of reflecting tape is performed.
*Clamp foot is automatically lowered. Be sure to use this function
only in case of shim type.
OFF
---
ON
Selection of back tack return at sewing end compensation setting
It is selected that either memory switch or pattern data performs
setting of back tack return at sewing end compensation.
Memory switch
---
Pattern data
Back tack return at sewing end compensation
Back tack return at sewing end compensation is set.
is set to the memory switch
*It is possible to set only when
selection.
Selection of mode change-over button display in the pattern list
screen
Mode change-over button is displayed in the pattern list screen and
data of different mode can be selected.
Non-display
Display
− 70 −
−2.0 to
2.0
/
0.1mm
---
1.0mm
No.
Setting range
/
Edit unit
Item
Back tack control method selection
Sewing pattern of back tack can be selected.
Initial value
---
1st mode (standard)
Sewing first the longer seams (Emphasis is put on sewing quality.)
2nd mode
Sewing first the shorter seams (Emphasis is put on productivity.)
3rd mode
1st mode and 2nd mode are changed over according to the
deflection amount.
4th mode
Same specifications as those of APW-196 (Emphasis is put
on speed.)
*2nd mode and 4th mode do not correspond with the standard welting patch
scale.
Cycle sewing coupling function
Odd-numbered pattern can be coupled to even-numbered pattern and
as many as 12 steps can be sewn.
Only combination of 1 and 2, 3 and 4, 5 and 6, 7 and 8, 9 and 10, 11 and
12, 13 and 14, 15 and 16, 17 and 18, and 19 and 20 can be coupled.
Coupling function
OFF
---
Coupling function
ON
Corner knife index constant motion
Normally, the long corner knife is not used unless the value is more
than the specified value. However, by turning this function ON, the
long corner knife is always used at the time of deflection.
Constant index OFF
---
Constant index ON
Condensation control method selection
Sewing pattern of condensation can be selected.
---
1st mode (standard)
Sewing first the longer seams
2nd mode
Sewing first the shorter seams
*2nd mode does not correspond with the standard welting patch scale.
Center knife lowering time
Center knife lowering time is set.
10 to 100
/
1
Center knife one-shot motion prohibition setting
With/without one-shot motion to properly cut the cutting position of
center knife on the side of the end of sewing is selected.
With one-shot
motion
40
---
One-shot motion
prohibited
Clamp foot motor origin compensation
Origin of clamp foot motor is compensated.
− 71 −
−10.0 to
10.0
/
0.1mm
0.0mm
No.
Item
Corner knife motor origin compensation
Origin of corner knife motor is compensated.
Setting range
/
Edit unit
Initial value
−5.0 to
5.0
/
0.1mm
0.0mm
Marking light origin compensation (just under)
Origin of marking light motor is compensated. Origin is in the state that
it irradiates light just under and located at the position of 230 mm from
needle.
−500 to
500
/
1pulse
0pulse
Marking light origin compensation (needle side)
Position of needle side from origin of marking light motor is
compensated. Light irradiation position is 80 mm from needle.
−500 to
500
/
1pulse
0pulse
Marking light origin compensation (operator side)
Position of operator side from origin of marking light motor is
compensated. Light irradiation position is 380 mm from needle.
−500 to
500
/
1pulse
0pulse
−30 to 30
/
1pulse
0pulse
Back tack motor origin compensation
Origin of back tack motor is compensated.
− 72 −
10. PERFORMING OPTIONAL SETTING
(1) Changing procedure of the optional setting
1 Displaying the 2nd screen of the operation-mode changeover
screen.
A
When you keep operation-mode changeover key
pressed for six seconds, right-scroll button
held
A is displayed
on the screen.
When you press this button, the 2nd screen (screen A) of the
operation-mode changeover screen is displayed.
2 Displaying the option setting list screen
Option setting button
When you press this button, option setting list screen (screen B)
is displayed.
B is displayed on the screen.
B
Second screen of the
mode changeover screen
(Screen A)
3 Selecting the option setting you want to change
Press up/down scroll buttons
button D you want to change.
C
D
Optional setting list screen
(Screen B)
− 73 −
C to select the data item
(2) Optional setting list
By setting the optional mounted state, it is possible to perform the respective optional operations.
No.
Setting range
/
Edit unit
Item
Clamp bar stacker mounting/not mounting is set
Not mounting
--Not mounting
Mounting
Roller stacker mounting/not mounting is set.
Not mounting
--Not mounting
Mounting
Sets mount/unmount of the grasping stacker device mount/
unmount
Unmount
--Unmount
Mount
Dart stretcher mounting/not mounting is set.
---
* However, in case of dart stretcher mounting,
setting is limited to 8 to 12 mm.
Not mounting
Initial value
Gauge size
Not mounting
Mounting
Vacuum device mounting/not mounting is set.
Not mounting
--Not mounting
Mounting
Automatic interlining supplying device mounting/not mounting is
set.
--Not mounting
Not mounting
Mounting
Zipper attachment mounting/not mounting is set.
* However, in case of dart stretcher mounting,
setting is limited to 8 to 12 mm.
Not mounting
--Gauge size
Not mounting
Mounting
Breast pocket device mounting/not mounting is set.
* However, in case of dart stretcher mounting,
setting is limited to 16 to 20 mm.
Not mounting
---
Gauge size
Not mounting
Mounting
Right flap angle detection device mounting/not mounting is set.
Not mounting
Mounting
− 74 −
--Not mounting
11. CHANGING THE DEVICE SETTING
(1) Changing procedure of the device setting
1 Displaying the 2nd screen of the operation-mode changeover
screen.
A
When you keep operation-mode changeover key
pressed for six seconds, right-scroll button
held
A is displayed
on the screen.
When you press this button, the 2nd screen (screen A) of the
operation-mode changeover screen is displayed.
2 Displaying the device setting list screen
B
Device setting button
When you press this button, the device setting list screen (screen
B) is displayed.
B is displayed on the screen.
Second screen of the
mode changeover screen
(Screen A)
3 Selecting the device setting you want to change
Select the data item button C you want to change.
B
Device setting list screen
(Screen B)
− 75 −
(2) Device setting list
By setting the type of device, it is possible to operate according to the type.
No.
Item
Gauge size
Gauge size of sewing machine is set.
* Corner knife motion is changed according to the set value of gauge
size.
Dart stretcher is mounted, the range is limited to 8 to
* When
12 mm.
When
Breast pocket device is mounted, the range is limited
to 8 to 12 mm.
When
Zipper attachment is mounted, the gauge size is
limited to the range of 16 mm and 20 mm.
Setting range
/
Edit unit
Initial value
8 to 20
/
2mm
10mm
Excess cut length of index on the fixing side
Excess cut length of index on the fixing side is set.
0.0 to
16.0mm
/
0.1mm
4.0mm
Excess cut length of index on the traveling side
Excess cut length of index on the traveling side is set.
0.0 to
16.0mm
/
0.1mm
4.0mm
− 76 −
12. CUSTOMIZING THE PEDAL OPERATION
Operation functions of “Binder down”, “Flap presser down”, etc. in terms of the number of the respective
depressing steps of the pedal can be optionally registered in accordance with the using conditions.
In addition, the customized pedal operation data can have as many as 5 kinds. Select and use them.
(1) Method to select and use the customized data
1 Display the pedal customizing screen
Press MODE CHANGEOVER key
CUSTOMIZING button
A
D
B
and PEDAL
A is displayed on the screen.
Press this button and the pedal customizing screen (screen A) is
displayed.
2 Select from button B 5 kinds of pedal operation that are
registered as customized. At this time, the contents of selected
pedal operation data are displayed at C.
3 When SCREEN END button
D is pressed, the selected
pedal operation data is determined and the screen returns to the
original screen.
C
Pedal customizing screen
(Screen A)
− 77 −
(2) Customizing the pedal operation data
A B
1 Press button
A, and set whether to make the clamp foot
recede or not with the pedal depressed to the reverse step.
Display
Description
To make clamp foot recede
Not to make clamp foot recede
C
D
2 Press button
B , and set whether or not the interlining
presser actuate with the pedal depressed to the reverse step.
Display
Description
To actuate
Not to actuate
3 Press button
C and set whether or not to lock the respective
pedal operations of first to seventh steps.
In case of “lock”, even when the pedal is released, the motion
state by pedal operation is held unless the pedal is depressed to
the reverse step or reset of pedal is performed.
Display
Description
To lock
Not to lock
4 Press button
D , and the pedal motion function setting
screen (screen A) is displayed. Then the motion function to be
registered to the number of the respective pedal steps can be set.
Pedal motion function setting screen
(Screen A)
− 78 −
5 Functions below can be registered from first step in order.
Functions that can be registered are in the state of button as
, and displayed in order. When the button is pressed, the
color changes and the function is registered. The number of pedal
F
E
steps is advanced with ▲▼ button
pedal steps is returned with
E. When the number of
F, it becomes the state before
one.
When functions are registered up to the last, ENTER button
G is displayed. Press it to determine the registered data.
G
* It is possible to clear and register the number of pedal steps.
* When the function is determined without registering MACHINE START
, knee switch start is
applied.
clamp foot lowering
* Whether or not the clamp foot comes down from right or left is determined by
order change-over. When right and left are set to the same time, even if the independent motion is set in
this screen, the right and the left actuate at the same time.
* Whether or not the flap presser comes down from right or left is determined by
lowering order change-over.
flap presser
When right and left are set to the same time, even If the independent motion is set in this screen, the
right and the left actuate at the same time.
Display
Description
Display
Description
Dart stretcher (optional)
Binder down
Vacuum suction
Flap presser one side down
Clamp foot one side down
Flap presser remaining side down
Clamp foot remaining side down
Machine start
− 79 −
13. CUSTOMIZING THE DATA INPUT SCREEN
Buttons displayed in the data input screen can be customized in accordance with the customers’ using
conditions.
(1) Customizing procedure
1 Display the customizing screen of the input screen
Keep pressing MODE CHANGEOVER key
seconds, and CUSTOMIZE button
A
for three
A is displayed on the
screen.
When this button is pressed, the customizing screen of the input
screen is displayed.
2 Select the conditions of buttons
Every time the buttons from B to M are pressed, display/non
display of the buttons can be changed over. Customize and use
B
the buttons in accordance with the customers’ using conditions.
F
G
C
H
Symbol
D
I
B
Pattern list button
Display
E
J
K
L
M
C
Flap concealed stitching data
(Left sewing start)
Display
D
Center knife motion position setting
Display
E
Flap concealed stitching data
(Left sewing end)
Display
F
Sewing mode change-over
Display
G
L size setting
Display
H
Corner knife motion position at sewing
start
Display
I
Deflection amount setting
Display
J
Corner knife motion position at sewing
end
Display
K
Stacker stop/motion change-over
Display
L
Motion mode change-over
Display
M
Marking light setting
Display
Display
Non
display
− 80 −
Description
Initial state
3 Register the sewing data to SEWING DATA CUSTOMIZING
button
Up to 4 sewing data can be registered to SEWING DATA
Register and use the sewing data that are frequently used.
CUSTOMIZE buttons N.
When pressing CUSTOMIZING button N you desire to register,
the sewing data list (screen A) is displayed.
4 Select the sewing data to be registered
Select the sewing data you desire to register with SEWING DATA
N
button O.
When the selected button is pressed twice, the selection is
released.
5 Register the data to the customizing button
When ENTER button
P is pressed, register to the
customizing button ends, and the screen returns to the
customizing screen of the input screen. The registered sewing
data is displayed on CUSTOMIZING button N.
O
P
Sewing data list screen
(Screen A)
The data below have been registered in order from the left at the time of your purchase.
a.
Lockstitch pitch
b.
Condensation/back tack at sewing start selection
c.
Condensation/back tack at sewing end selection
d.
Dart stretcher stop/motion change-over
− 81 −
14. PERFORMING THE CUSTOMIZING SETTING OF THE SEWING SCREEN
Buttons displayed in the data input screen can be customized in accordance with the customers’ using
conditions.
(1) Customizing procedure
1 Display the customizing screen of the sewing screen
Keep pressing MODE CHANGEOVER key
for three
seconds and SEWING SCREEN CUSTOMIZING button
A
A
is displayed on the screen.
Press this button and the customizing screen of sewing screen is
displayed.
2 Set the conditions of buttons
Every time the buttons from B to M are pressed, button display/
non display can be changed over. Customize and use the buttons
B
F
C
G
D
I
E
J
L
K
M
H
in accordance with the customers’ using conditions.
Symbol
Display
Non
display
Description
Initial state
B
Pattern list button
Non
display
C
Flap concealed stitching data
(Left sewing start)
Non
display
D
Center knife motion position setting
Non
display
E
Flap concealed stitching data (Left
sewing end)
Non
display
F
Sewing mode change-over
Non
display
G
L size setting
Non
display
H
Corner knife motion position at sewing
start
Non
display
I
Deflection amount setting
Non
display
J
Corner knife motion position at sewing
end
Non
display
K
Stacker stop/motion change-over
Non
display
L
Motion mode change-over
Non
display
M
Marking light setting
Display
− 82 −
3 Register the direct pattern.
When DIRECT PATTERN REGISTER button N is pressed, the
direct pattern register list screen (screen A) is displayed.
N
In the direct pattern list screen, the pattern data of independent
sewing/alternate sewing/cycle sewing can be freely registered up
to 30.
Register and use the pattern data that are frequently used. Press
PATTERN LIST button O and the direct pattern selection screen
(screen B) is displayed.
Select the pattern you desire to register with PATTERN
In addition, the ten keys are displayed by pressing NO. INPUT
button S and the pattern you desire to register can be selected
by inputting the ten keys.
O
Direct pattern list screen (Screen A)
R
Q
SELECTION button P.
S
When the selected button is pressed again, the selection is
released.
P
Direct pattern selection screen
(Screen B)
When ENTER button Q is pressed, register to the direct button is
completed and the screen returns to the direct pattern list screen
(screen A).
When MODE CHANGEOVER button R is pressed, the sewing
mode is changed over to independent sewing → alternate sewing
→ cycle sewing.
The direct buttons have not been registered at the time of your purchase.
− 83 −
15. USING THE INFORMATION
There are three functions below, in the information function.
1 Display the information screen
Press INFORMATION key
A of the switch seat section
in the input screen and the information screen (screen A) is
displayed.
A
A Maintenance inspection information
Oil replacement (grease-up) time, needle replacement time,
B
A
C
Information screen
(screen A)
cleaning time, etc. are specified, and when the specified
time has passed, the warning notice can be performed.
See “^-15-(1) Observing the maintenance inspection
information” p.85.
B Production control information
By means of function to display target production and
actual production, the target achieving consciousness of a
line or a group is enhanced and also the progress can be
confirmed in one glance.
See “^-15-(3) Observing the production control
information” p.87 and “^-15-(4) Performing setting of
the production control information” p.89.
C Operation measurement information
Information on machine operating situation, machine
operating rate, pitch time, machine time, and machine
speed can be displayed.
See “^-15-(5) Observing the operation measurement
information” p.91.
− 84 −
(1) Observing the maintenance inspection information
1 Display the maintenance information screen
Press MAINTENANCE INSPECTION INFORMATION SCREEN
DISPLAY button
A of the information screen.
A
Three items of the information below are displayed in the
maintenance inspection information screen.
• Needle replacement
(1,000 stitches) :
B
D
• Cleaning time (hour) :
C
• Oil replacement time
(hour) :
Interval C to inform the inspection and remaining time D up to
Also, the remaining time up to the replacement can be cleared.
replacement are displayed in the respective item buttons B.
2 Perform CLEAR of the remaining time up to the replacement
Press ITEM button B you desire to clear and the replacement
time clear screen is displayed.
E
Press CLEAR button
replacement is cleared.
− 85 −
E, and the remaining time up to the
3 Display the threading diagram
Press THREADING button
E displayed in the maintenance
inspection information screen and the needle thread threading
screen is displayed.
See when performing threading.
E
(2) Releasing procedure of the warning
B
When the specified inspection time is reached, the warning screen
is displayed. In case of clearing the inspection time, press CLEAR
button
A
A. The inspection time is cleared and the pop-up is
closed. If not, press CANCEL button
B and close the pop-
up. Every time one sewing is completed, the warning screen is
displayed until the inspection time is cleared.
Warning Nos. of the respective items are as follows.
• Needle replacement : A201
• Cleaning time
: A202
• Oil replacement time : A203
− 86 −
(3) Observing the production control information
It is possible to designate the start,, display the number of pieces of production from the start to the
existing time, display the number of pieces of production target, etc. in the production control screen.
There are two kinds of display ways for the production control screen.
[ In case of displaying from the information screen ]
1 Display the production control screen
A
Press PRODUCTION CONTROL SCREEN DISPLAY button
A in the information screen. The production control screen is
displayed.
A
C
B
D
E
The production control screen is displayed.
A : Existing target value
Number of pieces of the target of sewn products at the
present time is automatically displayed.
B : Actual results value
Number of pieces of the sewn products is automatically
displayed.
C : Final target value
Number of pieces of the final target of sewn products is
displayed.
D : Pitch time
Time (second) required for one process is displayed.
E : Number of times of thread trimming
Number of times of thread trimming per process is displayed.
Refer to “^-15-(4) Performing setting of the production control information” p.89, and input C
number of pieces, D time (unit : second) and E number of times.
− 87 −
[ In case of displaying from the sewing screen ]
1 Display the sewing screen
Press READY key
A in the input screen and the sewing
screen is displayed.
A
2 Display the production control screen
Press INFORMATION key
B in the sewing screen and the
production control screen is displayed.
B
The contents of display and the functions are common to “In case
of displaying from the information screen”.
− 88 −
(4) Performing setting of the production control information
1 Display the production control screen
Refer to “^-15-(3) Observing the production control
information” p.87 and display the production control screen.
A
B
C
2 Input the final target value
First, input the number of pieces of the target of production in the
process to which sewing is performed from now on.
When FINAL TARGET VALUE button
A of item 1 is
pressed, the final target value input screen is displayed.
Input the value you desire with ten keys or UP/DOWN buttons.
After the input, press ENTER button
D.
D
3 Input the pitch time
Next, input the pitch time required for one process.
When PITCH TIME button
B of item 1 is pressed, the
pitch time input screen is displayed.
Input the value you desire with ten keys or UP/DOWN buttons.
After the input, press ENTER button
E.
E
4 Input the number of times of thread trimming
Next, input the number of times of thread trimming per process.
When NUMBER OF TIMES OF THREAD TRIMMING button
C of item 1 is pressed, the number of times of thread
trimming input screen is displayed.
Input the value you desire with ten keys or UP/DOWN buttons.
After the input, press ENTER button
F
F.
* When the input value is “0”, count of the number of times of
thread trimming is not performed. Use this function by connecting
the external switch.
− 89 −
5 Start the count of number of pieces of production
Press START button
I and the count of number of pieces
of production is started.
K
I
6 Stop the count
Display the production control screen referring to “^-15-(3)
Observing the production control information” p.87.
When the count is being performed, STOP button
displayed. When STOP button
J is
J is pressed, the count is
stopped.
I is displayed at the position
After the stop, START button
of STOP button. When continuing the count, press START button
I again. The counted value is not cleared until CLEAR
J
button
K is pressed.
7 Clear the counted value
When clearing the counted value, set the count to the stop state
and press CLEAR button
M
N
L.
The value to be cleared is the present target value M and actual
results value N.
* CLEAR button is displayed only in case of stop state.
When CLEAR button
L
L is pressed, the clear confirmation
screen is displayed.
When CLEAR button
O is pressed in the clear confirmation
screen, the counted value is cleared.
O
− 90 −
(5) Observing the operation measurement information
1 Display the operation measurement screen
Press OPERATION MEASUREMENT SCREEN DISPLAY button
A in the information screen. The operation measurement
A
screen (screen A) is displayed.
A
B
C
D
Information on the following 5 items is displayed in the operation
measurement screen.
A : This item automatically displays the operation rate from the
time of starting the measurement.
B : This item automatically displays the mean machine speed
from the time of starting the measurement.
C : This item automatically displays the mean pitch time from the
time of starting the measurement.
E
D : This item automatically displays the mean machine time from
the time of starting the measurement.
E : This item displays the number of times of thread trimming per
process.
Operation measurement screen
(Screen A)
Input the number of times referring to item 2 below.
2 Input the number of times of thread trimming
Next, input the number of times of thread trimming per process.
Press NUMBER OF TIMES OF THREAD TRIMMING button
E and the number of times of thread trimming input
B
screen is displayed.
Input the value you desire with ten keys or UP/DOWN buttons.
After the input, press ENTER button
B.
* When the input value is “0”, count of the number of times
of thread trimming is not performed. Use this function by
connecting the external switch.
− 91 −
3 Start the measurement
C, and the measurement of each data
Press START button
is started.
E
C
4 Stop the count
Display the operation measurement screen referring to Items 1
and 2 of “^-15-(5) Observing the operation measurement
information” p.91.
When the measurement is being performed, STOP button
D is displayed. When STOP button
measurement is stopped.
D is pressed, the
C is displayed at the position of
STOP button. In case of continuing the measurement, press again
D
START button
C. The measured value is not cleared until
CLEAR button
E is pressed.
5 Clear the counted value
When clearing the counted value, set the count to the stop state
and press CLEAR button
F
F.
* CLEAR button is displayed only in case of stop state.
When CLEAR button
F is pressed, the clear confirmation
screen is displayed.
When CLEAR button
G is pressed in the clear confirmation
screen, the counted value is cleared.
G
− 92 −
16. USING THE COMMUNICATION FUNCTION
Communication function can download the sewing data created with other sewing machine . In addition,
the function can upload the aforementioned data to the media or personal computer.
As the means of communication, a media slot and USB are prepared.
(1) Handling possible data
××× : File No.
Data name
Sewing data
Extension
Description of data
APW ××× .EPD
Sewing data created by the sewing
machine exclusive for APW
(2) Performing communication by using the media
For handling way of the media, read "^-1. PREFACE" p.21.
(3) Performing communication by using USB
Data can be sent/received to/from a personal computer or the like, by means of a USB cable.
If the contact part becomes dirty, failure
of contact will be caused. Do not touch by
hand, and control so that dust, oil or other
foreign material does not adhere to it. In
addition, the inside element is damaged
by static electricity or the like. So, be very
careful when handling.
− 93 −
(4) Take-in of the data
1 Display the communication screen
G
When COMMUNICATION key
of switch seat section is
pressed in the input screen, the communication screen (screen A)
is displayed.
E
A
B
2 Select the communication procedure
There are four communication procedures as described below.
C
D
Communication screen
(screen A)
A Writing data from media to panel
B Writing data from personal computer (server) to panel
C Writing data from panel to media
D Writing data from panel to personal computer (server)
Select the button of communication procedure you desire.
3 Select the data No.
When
E is pressed, the writing file selection screen is
displayed.
Input the file No. of the data you desire to write. For the file No.,
input APW×××. of the file name and the numerals of the part ×××
of EPD. Designation of the pattern No. of writing destination can
be performed in the same way. When the writing destination is the
panel, pattern Nos. which have not been registered are displayed.
F
4 Determine the data No.
When ENTER button
F is pressed, the data No. selection
screen is closed and the screen returns to the communication
screen (screen A).
5 Start communication
When COMMUNICATION START button
G is pressed, the
data communication starts.
The during communication is displayed during communication
and the screen returns to the communication screen after the end
of communication.
Do not open the cover during reading the data. Data may not
be read in.
− 94 −
(5) Take-in of plural data together
It is possible for the sewing data to select plural data to be written and write all together. Pattern No. of
writing destination is the same No. of the selected data No.
No.99 and after of the media cannot perform the plural selection.
1 Display the writing file selection screen
Press PLURAL SELECTION button
A and the data No.
plural selection screen is displayed.
A
2 Perform the selection of data No.
List of the file No. of the existing data is displayed. Press FILE
No. buttons B you desire to write. It is possible to reverse the
selection state of the button with REVERSE button
C
B
C.
3 Determine the data No.
When ENTER button
D is pressed, the data No. plural
selection screen is closed and the selection of data ends.
D
4 Start the communication
E
Press COMMUNICATION START button
communication starts.
− 95 −
E and the data
Data No. during communication, total number of writing data and
number of data that have finished the data communication are
displayed in the during communication screen.
* When performing writing to the pattern No. that already exists,
the overwriting confirmation screen is displayed before writing.
When performing overwriting, press ENTER button
When performing overwriting to all without displaying the
overwriting confirmation screen, press OVERWRITING button
G in all cases.
G
F.
F
− 96 −
17. PERFORMING FORMATTING OF THE MEDIA
When re-formatting the media, be sure to perform it with IP-420. The media that have been formatted
with the personal computer cannot be read with IP-420.
1 Display the media format screen
Keep pressing MODE CHANGEOVER key
seconds and MEDIA FORMAT button
for three
A is displayed on the
screen. When this button is pressed, the media format screen is
displayed.
A
2 Start formatting of the media
Set the media you desire to format to the media slot, press
ENTER button
starts.
B after closing the cover and formatting
Store the necessary data in the media to other media before
formatting. When formatting is performed, the inside data are
erased.
B
− 97 −
&. MAINTENANCE
1. INSPECTION
Be sure to periodically execute the maintenance and inspection to keep the performance of this
machine.
Be sure to periodically execute the work since machine trouble may be caused unless the maintenance
and inspection are performed.
(1) Maintenance and inspection of the pneumatic device
CAUTION :
To prevent accidents caused by abrupt start of the sewing machine, do not place hand(s), foot, face
or tools on the machine moving part.
• Discharge the drain of filter every day.
Press the drain exhaust button located at the
bottom of filter to exhaust the drain.
Drain exhaust button
(2) Maintenance and inspection related to the sewing machine
CAUTION :
To prevent accidents caused by abrupt start of the sewing machine, start the work after turning OFF
the power.
• When dust adheres to the small places of the machine such as clamp foot or the like, normal operation is
disturbed. Be sure to perform cleaning before the work. In addition, be sure to clean the thread waste in
the hook cover once a week.
• Check the sharpness of center knife and corner knife before the work, and try to replace it in good time.
• For the lubrication of the sewing machine, be sure to use the designated oil JUKI MACHINE OIL No. 1
(MDFRX1600C0).
• Periodically replace the thread guide felt. (Refer to “%-1-(3) How to pass the needle thread” p.14).
− 98 −
(3) With regard to the waste oil of the hook oil
CAUTION :
To prevent accidents caused by abrupt start of the sewing machine, start the work after turning OFF
the power.
Turn and remove the oil can, and drain the waste
oil when the waste oil gathered in approximately
half of oil can 1 located on the machine bed
cover.
1
(4) With regard to the cleaning of the hook shaft base
CAUTION :
To prevent accidents caused by abrupt start of the sewing machine, start the work after turning OFF
the power.
Periodically clean the waste cloth or the like gathered in the hook oil cover.
• Raise the machine head and remove oil cover 2
after loosening setscrews 3 (5 places).
2
3
• Clean the inside of hook oil cover 4.
4
− 99 −
2. MARKING LIGHT
WARNING :
1. If the laser light directly enters the eye, eyesight trouble may be caused.
Do not look into the laser inlet/outlet.
2.Never perform installing/removing of the marking lamp with the power turning ON.
In addition, do not use the light other than marking.
(1) Marking light for sewing reference setting
The light of marking light on the front side observed from the
operator side is used for longitudinal line reference setting
(fixed) A and that in the rear side is used for lateral line
reference setting (moving according to the sewing type) B.
B
• Use installing hole D on the
bottom side up to gauge size 8
to 16 mm. In case of 18 mm or
more, use installing hole C on
the top side.
D • After changing the top or the
bottom installing position, be
sure to perform the adjustment
of marking light motor origin.
C
A
Needle
B
80
Laser specifications
m
m
Lateral line reference laser
0
22
m
m
le
ab
ov
M
Class 2 laser product
Maximum output: 1.0mW
A
e
ng
ra
Wave length: 650nm
JIS C 6802:2011
IEC60825-1+A2:2007
Longitudinal line reference laser
Class 2M laser product
Maximum output: 3.5mW
Wave length: 650nm
Safety standard
(2) Adjusting the marking light irradiation position
Press button A in the input screen and the marking light setting
screen is displayed. Then the irradiation position of marking light
can be adjusted.
A
Lateral line irradiation position of marking light is determined by the
sewing type, and the irradiation position is automatically moved
by B
change-over of sewing start irradiation/sewing end
irradiation/center irradiation” and “
L size setting”.
When the compensation value of C is 0.0 mm, the marking light
irradiates the sewing position.
When you desire to move the marking light irradiation position in
terms of the sewing position, set each compensation value of C for
use.
B
C
: Sewing start irradiation position compensation
: Center irradiation position compensation
: Sewing end irradiation position compensation
− 100 −
3. REPLENISHING GREASE TO THE DESIGNATED PLACE
* When “Grease-up warning E220” or “Grease-up error E221” is displayed, or when the machine has
been used for one year, be sure to perform replenishing of grease.
When turning ON the power after the sewing machine has operated up to 40 million stitches, “grease-up
warning E220” informing of the time of grease replenishment is displayed on the panel. When pressing
RESET button
to leave the error screen, the machine can continue operating. However, the error
has not been released and the error is displayed every time the power is turned ON. After performing
replenishment of grease which is explained later, call “Memory switch U245” and set the number of
stitches of operation to “0” with CLEAR button
.
When the machine has been continuously used up to 48 million stitches, “grease-up error E221” is
displayed on the panel. In this case, even when RESET button
is pressed and the error screen is
released, the sewing after that cannot be performed. Be sure to call “Memory switch U245” and set the
number of stitches of to “0” with CLEAR button
after performing replenishment of grease which is
explained later.
1. “Grease-up warning E220” and “Grease-up error E221” are displayed again unless memory
switch U245 is cleared to “0” after replenishing grease.
2. Be sure to use the grease tube (Part No. : 40006323) supplied with the machine as accessories
for replenishing grease to the designated place which is explained later. If any grease other than
the designated one is replenished, Component breakage will be caused.
3. Keep the used grease tube in a safe place.
CAUTION :
To prevent accidents caused by abrupt start of the sewing machine, start the work after turning OFF
the power.
− 101 −
(1) Grease-up procedure
1 Loosen two screws 1 (SM6040602TP) and
move wiper cylinder 2 to the right side.
2
1
2 Loosen two screws 3 (SM4050655SP) and
move face plate cover 4 to the left side. At
this time, be careful of moving the cover along
escape A of the cover so that it does not come
in contact with plate spring 5.
5
3
4
A
3 Replenishment of grease to the center knife
section
9
• Apply grease to both planes of guides 8, knife
bar metal, upper 9, and knife bar metal, lower 6.
• Knife bar !0 moves up and down by moving
7
cylinder joint 7 up and down in the state that air
is not supplied. Apply grease to the metal so as
to infiltrate the inside.
!0
8
6
− 102 −
4 Replenishment of grease to the needle bar
section
!4
!5
!2
!3
Apply grease to thread take-up lever !4, felt !5,
needle bar bracket !1, needle bar !2 and square
block !3.
5 After applying grease in the face plate, install
the face plate cover by reversing the removing
procedure.
!1
6 Fix the screws to be symmetrical to the
center of slot !6 so as to keep the clearance
(approximately 1 mm) between wiper !7 and
arm !8 open.
!8
1mm
!6
!7
Operator's side
B
4 Remove the rubber cap and apply new grease
to the inside of the hole after removing old
grease adhered to the inside of hole B. Then
cover the hole with the rubber cap.
− 103 −
4. CONSUMABLE REPLACEMENT COMPONENTS
The components below are the consumable ones.
Periodically replace them.
• Thread guide felt (Part No. : 40034444)
Thread guide
felt
The part where thread passes is worn out and
rough motion of thread is apt to occur unless it is
periodically replaced.
• Center knife (Part No. : 40026155)
Center knife
• Corner knife A
(Part Nos. : 16607301 and 16607400)
(Part Nos. : 16607509 and 16607608)
(Part Nos. : 16607707 and 16607806)
• Corner knife B
Corner knife
• Corner knife C
Sharpness is deteriorated and sewing quality is
influenced unless it is periodically replaced.
• Reflecting tape (Part No. : 40039942)
Reflecting tape
• Reflecting tape B (Part No. : 40064403)
Accuracy of detection of flap is deteriorated and
sewing quality is influenced unless it is periodically
replaced.
• Garment body clamp rubber
Reflecting tape B
Garment body
clamp rubber
Flap presser
rubber
(Part No. : 40034825)
• Flap presser rubber (Part No. : 40034826)
Pressing of material is deteriorated and sewing
quality is influenced unless it is periodically
replaced.
• Dart stretcher presser rubber
(Part No. : 40034733)
Pressing of material is deteriorated and sewing
quality is influenced unless it is periodically
replaced.
Dart stretcher
presser rubber
− 104 −
5. TILTING THE MACHINE
CAUTION :
• Turn OFF the power before starting the work so as to prevent accidents caused by abrupt start of
the sewing machine.
• When tilting/raising the machine, be careful not to allow your hands, fingers or any other part of
your body to be caught in the related parts.
1 Remove sewing tables 1 and 2.
Pin, rear
1
Pin hole, front
2
Plate spring
2 Turn the binder unit.
Lift binder 3 in the direction A, support section
B by hand and turn the whole binder in the
direction C.
B
Binder is locked with ball plunger. Turn
it rather strongly in the direction of C to
release the lock.
A
C
3
3 Release machine fixing hinge.
Pressing section A, release machine fixing
hinge 4, and remove hinge hook 5.
5
A
4
− 105 −
A
A
B
1
CAUTION :
1. For turning the sewing machine head, be sure to perform with two persons or more.
2. To avoid personal injuries, when returning the machine head from the raised state to the home position,
return it to the home position after confirming that there is no tool or component under the gas spring.
3. To avoid personal injuries and damage of sewing machine, do not damage with tools or parts the
rod section of the gas spring located under the machine head.
4. To avoid personal injuries, immediately replace the gas spring with a new one when the rod section
of gas spring does not function properly with a flaw or the like, or it is judged as a defective one.
[Do not use anything other than JUKI genuine gas spring (Part No. : 40023177).]
5. To avoid personal injuries, do not use with the gas spring removed.
4 Turn the sewing machine.
• Hold the bottom side of the machine arm and lift the whole sewing machine in the direction A.
• Lift the sewing machine fixing plate 1 in the direction B, put the point of the sewing machine fixing plate
1 to the hole of the machine bed, and fix the sewing machine. (Refer to A.)
5 When returning the sewing machine, set the sewing machine by reversing the procedure.
6. STANDARD OF REPLACING TIME OF THE GAS SPRING
CAUTION :
• Turn OFF the power before starting the work so as to prevent accidents caused by abrupt start of
the sewing machine.
• When tilting/raising the machine, be careful not to allow your hands, fingers or any other part of
your body to be caught in the related parts.
1) Gas spring is one of the consumables. Gas
inside the gas spring will be gone naturally even
when the frequency of use is low and the spring
cannot display the thrust to secure the safety.
In case a force of 130N or more is necessary
when passing strings through the front end of
machine bed and lifting the sewing machine as
shown in the left-hand figure, quickly replace the
spring with JUKI genuine gas spring (Part No. :
40023177).
Gas spring is a component that can
be used with ease. However, there is
a flaw on the rod section or a section
that is weak in the side load when the
gas spring is fully stretched. Be very
careful when performing maintenance or
cleaning of the sewing machine.
− 106 −
7. REPLACING PROCEDURE BETWEEN DOUBLE-WELT AND SINGLE-WELT
CAUTION :
To prevent accidents caused by abrupt start of the sewing machine, start the work after turning OFF
the power.
(1) Replacing procedure between double-welt and single-welt
1 Turn ON the power and advance the clamp foot.
A
2 Press button
B
C
A to display the type of welt setting screen.
3 When button B is pressed, the left garment body clamp operates
between inside and outside alternately. When button C is
pressed, the right garment body clamp operates between inside
and outside alternately.
Select the position of left and right garment body clamps In
In addition, press buttons B and C to operate the garment body
accordance with the sewing type.
clamp between inside and outside at the time of fine adjustment
of the position of garment body clamps which is explained later.
(2) Fine adjustment of the position of garment body clamp
• Fine adjustment of double-welt type
1, 3
1 Move the position of garment body clamp to
outside (direction B) on the panel.
Garment body
clamp (left)
Garment body
clamp (right)
2 It is possible to perform the fine adjustment of
the position of garment body with adjustment
knob for double-welt A.
B
A
B
Move it clockwise to outside (direction B) and
counterclockwise to inside (direction A).
3 Move the position of garment body clamp to
inside (direction A) on the panel and confirm the
position.
2
A
− 107 −
• Fine adjustment of single-welt type
1, 3
1 Move the position of garment body clamp to
inside (direction A) on the panel.
Garment body
clamp (left)
Garment body
clamp (right)
2 It is possible to perform the fine adjustment of
the position with adjustment knob for single-welt
B.
B
A
B
Move it clockwise to inside (direction A) and
counterclockwise to outside.
3 Move the position of garment body clamp to
outside (direction B) on the panel and confirm
the position.
2
B
(3) Replacing the binder
1 Turn lever A counterclockwise with the binder
lifted as shown in Fig. 1, and remove welting
patch scale for double-welt (single-welt) (asm.).
Fig. 1
A
A
2 Set welting patch scale for double-welt (singlewelt) (asm.) and fix it with lever A.
When fixing the welting patch scale for
double-welt (single-welt) (asm.), perform
fixing in the state that plane B comes in
contact with plane C.
B
C
− 108 −
8. CORNER KNIFE
CAUTION :
1. Turn OFF the power before starting the work so as to prevent accidents caused by abrupt start of
the sewing machine.
2.Do not touch your fingers or hands to the blade section of knife. so as to prevent fatal accidents.
3.Perform the adjustment work by the maintenance engineers who are familiar with the sewing machine
and trained for the safety so as to prevent accidents caused by unfamiliarity or wrong adjustment.
(1) Corner knife unit
1 Release toggle clamp 1.
Adjusting angle of the corner knife of
this model has been factory-adjusted to
approximately 50° for the parallel sewing
(one side 25° each) or approximately 43
° (25° and 18°) for deflection amount of 4
mm or more at the time of delivery.
1
50°
4
25°
18°
2 Hold section A and draw out the drawer in the
direction of the arrow.
Draw it out. until it goes no further.
A
3 After the adjustment, return the drawer to its home position and fix it with toggle clamp 1.
When returning the drawer, return corner knife on the moving side 4 to the initial position.
− 109 −
(2) Adjusting the corner knife
CAUTION :
Be careful not to slip your hand since the adjustment work is performed with a screwdriver.
Fig.1
Knife base C
Knife base A
2
Knife base B
2
X
2
X
Y
2
X
X
Y
3
Knife base D
Y
Y
3
3
3
Knife fixing plate
[ Adjusting the open angle of knife ]
1) Loosen angle adjustment screws 2, adjust knife bases A and B, C,
D and fix the screws.
Direction of rotation to loosen left/right knives is different from
each other.
[ Adjusting the cutting length of knife ]
1) Turn eccentric pin 3 in the direction of the arrow mark Y with a flatblade screwdriver or the like and loosen the knife.
2) Tilt the knife and adjust the cutting length.
3) Turn eccentric pin 3 in the direction of the arrow mark X with a flatblade screwdriver or the like and fix the knife.
[ Adjusting place ]
4mm or less
Parallel sewing
Slant sewing
(Deflection amount 4 mm or
less)
4.1mm or
more
Slant sewing
(Deflection amount 4.1 mm or
more)
4mm
State of delivery
1) Adjusting place of the knife at the time of parallel sewing and slant deflection amount 4 mm or less
Adjust the knife of the center (knife base A or B) of Fig. 1.
* Adjust the knife with the parallel sewing.
2) Adjusting place of the knife at the time of deflection amount 4.1 mm or more
For the adjustment of knife that seams appear on the outside, perform the adjustment of outside (knife
base C or D) of Fig. 1.
For the adjustment of knife that seams enter on the inside, perform the adjustment of center (knife base
A or B of Fig. 1.
* The difference of length in the longitudinal direction between the center knife and the outside knife is 4
mm in the state of delivery.
− 110 −
(3) Corner knife adjustment function screen
This mode is the mode to adjust the installation of the corner knife.
For the actual adjustment procedure of the knife, refer to "(2) Adjusting the corner knife" of
"Instruction Manual (this manual) for APW-896", p.110.
In the state of the delivery from the factory, the corner knives have been adjusted to ±0.5 mm
longitudinally and 0.0 mm laterally at the setting of size L = 150 mm using a piece of the trial sewing
cloth attached to the sewing machine.
Use the machine after adjusting the knives in accordance with your sewing products.
1 Display the pattern selection screen for corner knife adjustment
Press MODE CHANGEOVER key
to display the pattern
selection screen for corner knife adjustment and press PATTERN
SELECTION button
A
A for corner knife adjustment that is
displayed on the screen.
B
A
C
Three adjustment patterns below are displayed in the pattern
selection screen for corner knife adjustment.
A Corner knife - Parallel
B Corner knife - Left deflection
When MODE CHANGEOVER key
C Corner knife - Right deflection
Pattern selection screen for corner
knife adjustment
screen is displayed.
Input screen
− 111 −
is pressed, the input
2 Display the corner knife adjustment sewing screen.
When pressing the pattern button you desire to adjust, the corner
knife adjustment sewing screen (A) is displayed.
B
Corner knife adjustment sewing screen
(A)
When READY key
is pressed, the corner knife adjustment
sewing screen (B) is displayed.
B
Press PATTERN SELECTION button
B for corner knife
adjustment and the screen returns to the pattern selection screen
for corner knife adjustment.
Corner knife adjustment sewing screen
(B)
When MODE CHANGEOVER key
is pressed, the input
screen is displayed.
Input screen
When performing the adjustment of corner knife using this mode at the time of replacement of
corner knife, be sure to confirm again the compensation value of each data of the corner knife.
− 112 −
(4) Corner knife actuating position setting procedure
By pressing corner knife actuating position setting button (A or B), it is possible to set the corner knife
actuating position.
A
A
B
B
A
B
Independent sewing mode
/ cycle sewing mode
Alternate sewing mode
1 Setting of corner knife actuating position at the start of
sewing
D
E
For the setting of corner knife actuating position at the start of
It is possible to set by pressing + button and “-“ button
respectively.
C
F
sewing, there are 4 kinds of right width C, left width D, left side
front and rear E and right side front and rear F, and it is possible
to separately set.
See
,
data list" p.51.
,
and
of "^-8. (2) Sewing
Corner knife actuating position at the
start of sewing setting screen
(Screen A)
2 Setting of corner knife actuating position at the end of
sewing
I
H
For the setting of corner knife actuating position at the end of
It is possible to set by pressing + button and “-“ button
respectively.
J
G
sewing, there are 4 kinds of right width G, left width H, left side
front and rear I and right side front and rear J, and it is possible
to separately set.
See
,
data list" p.51.
Corner knife actuating position at the
end of sewing setting screen (Screen B)
− 113 −
,
and
of "^-8. (2) Sewing
(5) Feature of the corner knife actuating position setting
Corner knife of APW-896 has the features below.
• Left and right corner knives are independent and the corner knife actuating positions of left and right
corner knives can be separately adjusted.
• Two kinds of long and short corner knives are provided to comply with the slant sewing of large deflection
amount.
Corner knife when performing slant sewing shows the cutting edge as shown in Fig. 1.
In the state of parallel sewing that the relation of position of left and right knives (deflection of knife) is “0”,
left and right knives simultaneously push up. However, when there is deflection between the knives, left
or right knife separately goes up and comes down, and the material is cut.
[Deflection of corner knife]
Fig. 1
0mm
Short
0.1mm
0.2mm
0.3mm
0.4mm
4.0mm
Short
Parallel sewing
As shown in Fig. 2, the deflection of knife exceeds 4.0 mm, the knife on the outside does not cut.
Thereby, cutting is performed by combination of a short knife and a long knife.
(Refer to ! ) of “Caution” below.)
[Deflection of corner knife]
Fig. 2
4.1mm
Short
4.2mm
4.3mm
4.4mm
4.5mm
8.0mm
Long
Parallel sewing
There are two conditions that the corner knife does not cut normally.
!)When the offset amount of left and right knives exceeds 4.0 mm (4.1 mm or more) (Fig. A)
@)When the long knife enters the inside of the short knife (Fig. B)
Fig. A
Fig. B
Offset amount 4.1 mm or more
Long knife enters the inside
of short knife.
In case of any condition described above, the corner knife does not cut, and error message (E480/E481) of
“Setting that corner knife does not cut” is displayed on the panel.
− 114 −
In the standard state of delivery, the deflection of corner knife can be used only up to 8.0 mm.
When desiring to perform the deflection setting of more than 8.0 mm, change the setting of deflection
following the procedure next. The following is an example of deflection setting of 10.0 mm.
1) Adjust the long corner knife so that the cutting length of the outside knife becomes from 4.0 mm to 6.0 mm.
For the actual adjustment procedure of the knife, refer to "(2) Adjusting the corner knife" of "Instruction
Manual (this manual) for APW-896", p.110.
2) After the adjustment of the knife, it is necessary to change the setting of excess cut length according to
the adjustment amount of corner knife since the initial values of the excess cut length of index (
/
) are 4.0 mm respectively
Add 2.0 mm to the excess cut length and set the initial value 4.0 mm to 6.0 mm since the knife has been
adjusted so that the cutting length of the long corner knife becomes longer by 2.0 mm.
(Caution) When the setting exceeds 8.0 mm, the range that the corner knife cannot cut comes out.
The range is 4.1 mm to 5.9 mm as shown in (Fig. C).
This range corresponds to conditions !) and @) and error message (E480/E481) of “Setting that
corner knife does not cut” is displayed on the panel as well. Please understand.
Fig. C
Relation of positions of left/right corner knives (Deflection setting of 10.0 mm is taken as an example.)
Range that corner knife cannot cut
0mm to 4.0mm
Short
Short
4.1mm to 5.9mm
6.0mm to 10.0mm
Corner knife cannot cut properly.
The range corresponds to
conditions !) and @).
Short
Condition !)
When the range exceeds 4.0 mm, the corner
knife cannot cut.
Short
Long
Long
Condition @)
When the long knife enters the inside of the
short knife, the corner knife cannot cut.
(Caution) When the sewing type is changed, be sure to use the machine after confirming the positions of
corner knife and center knife with trial sewing.
− 115 −
(6) Deflection amount setting
1. Automatic deflection detection function
By pressing the button of automatic deflection detection function, the flap is read using two flap sensors
However, when
Right flap angle detection device is not mounted, left flap (double welt and single
welt with one side flap) only can be used.
and the deflection can be automatically set.
1 When the input screen of independent sewing mode, alternate sewing mode or cycle sewing mode,
DEFLECTION AMOUNT SETTING button A is displayed.
When this button is pressed, “DEFLECTION AMOUNT SETTING SCREEN (SCREEN A)” is displayed.
A
A
A
Independent sewing mode
/ cycle sewing mode
Alternate sewing mode
2 Setting of automatic deflection detection function
When using the automatic deflection detection function, it
is possible to set by pressing AUTOMATIC DEFLECTION
DETECTION AT THE START OF SEWING button B or
AUTOMATIC DEFLECTION DETECTION AT THE END OF
SEWING button C.
B
Only when setting the left flap sewing, it is effective to press down
the button.
C
In case of the flap of deflection of 2 mm or less, select the deflection manual input mode since the
automatic deflection reading mode may judge the flap as the parallel flap.
When setting this function or setting the changeover of compensation of flap concealed stitching
position using the deflection detection of
automatically set.
(Refer to
and
, the flap concealed stitching position is
of "^-8. (2) Sewing data list" p.51
− 116 −
9. CENTER KNIFE
(1) Center knife actuating position setting procedure
It is possible to set the center knife actuating position by pressing CENTER KNIFE MOTION POSITION
SETTING button A.
A
A
A
Independent sewing mode
/ cycle sewing mode
Alternate sewing mode
1 Setting of the center knife actuating position
There are two kinds of the center knife actuating positions,
SEWING START B and SEWING END C and it is possible to
separately set.
B
It is possible to set by pressing + button and “-“ button
respectively.
C
See
− 117 −
and
of "^-8. (2) Sewing data list" p.51.
(2) Feature of the center knife actuating position setting
•
In case of the slant sewing setting, whether the corner knife performs indexing or not makes the setting of
center knife actuating position as follows.
Center knife actuating position at the start of
sewing :
Index : With
Index : Without
Center knife actuating position :
Index : With
+
Index : Without
+
When the corner knife performs indexing, parameter of index
excess cut length (
/
) is automatically added in
addition to parameter (
/
) of center knife actuating
position setting.
When the deflection of left/right corner knives is 4.1 mm or
more, the corner knife performs indexing (short corner knife
is changed over to long corner knife).
Whether the corner knife performs indexing or not is decided
by the deflection setting and the set value of corner knife
actuating position setting as shown below.
For the details, see the corner knife actuating position setting
procedure.
[Setting of center knife actuating at the start of sewing]
In case of normal setting (corner knife does not perform indexing), screen A is displayed.
When the corner knife performs indexing, screen B instead of screen A is displayed. As shown in screen B,
(parameter of index excess cut length on the moving side/initial value 4.0 mm) is automatically
added.
A
B
C
Center knife actuating
position setting screen
(Screen A)
A
Center knife actuating
position setting screen
(Screen B)
Center knife actuating position at the start of sewing is displayed. (B + C)
B
Center knife actuating position at the start of sewing before compensation is displayed.
C
Index excess cut length on the moving side (initial value 4.0 mm) is displayed.
When the sewing type is changed, be sure to use the machine after confirming the positions of
corner knife and center knife with trial sewing.
− 118 −
[Setting of center knife actuating position at the end of sewing]
In case of normal setting (corner knife does not perform indexing), screen C is displayed.
When the corner knife performs indexing the same as the center knife actuating position at the start of
sewing setting, screen D instead of screen C is displayed. As shown in screen D,
Index excess
cut length on the fixing side (initial value 4.0 mm) is automatically added.
E
F
D
Center knife actuating
position setting screen
(Screen D)
Center knife actuating
position setting screen
(Screen C)
D
Center knife actuating position at the end of sewing is displayed. (E + F)
E
Center knife actuating position at the end of sewing before compensation is displayed.
F
Index excess cut length on the fixing side (initial value 4.0 mm) is displayed.
Two kinds of corner knives, long and short, are provided to comply with the slant sewing
(For the details, refer to the function of corner knife.)
For APW-896, center knife cuts at the setting position where the index excess cut length on the
traveling side (initial value 4.0 mm) is automatically added to the center knife actuating position at
the start of sewing setting. (Fig. A)
Fig. A
Corner knife
deflection 0.1mm to
4.0mm
Short
Short
Corner knife
deflection 4.1mm to
8.0mm
Long
Short
Setting of center knife actuating position at the
start of sewing
Index excess cut length on the moving side (initial
value 4.0 mm) that is automatically added when the
corner knife performs indexing.
Actuating position of the center knife changes in accordance with long and short corner knives as
follows. When changing over from the combination of each short corner knife to the combination of
long corner knife and short one, the cutting position of center knife slips if the center knife stays at
the same position. (Fig. B)
Therefore, it is necessary to change the cutting position of center knife.
Fig. B
Corner knife
deflection 0.1mm to
4.0mm
Short
Short
Corner knife
deflection 4.1mm to
8.0mm
Long
Short
Center knife cuts excessively.
− 119 −
10. ADJUSTING THE POSITION OF THE SENSOR FOR DETECTING FLAPS
1 Adjust the positions of both right and left
sensors for detecting flaps to outside of 4.5 to
5 mm from the needle entry and the sewing
direction (longitudinal direction) of both right and
left sensors to the position of 37 mm from the
needle entry on the operator side.
37
Needle entry
mm
Adjust the position of sensor for detecting flap
angle to 0.5mm on the needle center side from
the center of the reflecting tape on the flap base
and the sewing direction (longitudinal direction)
to the position of 37 mm on the operator side.
m
5m
Right flap
sensor light
m
5m
Left flap sensor light
Angle detection sensor light
2 Adjust the lateral direction of sensor for
detecting left flap and flap angle detection
sensor 1 by loosening setscrews 2 and
moving the sensors together with sheet metal in
the lateral direction.
7
2
3
1
7
3 Adjust the sewing direction of sensor for
detecting left flap and flap angle detection
sensor 1 by loosening setscrews 3 and
moving the sensors in the longitudinal direction.
It is not necessary to loosen setscrews 7
when adjusting the position of sensors.
4 Adjust the lateral direction of sensor for
detecting right flap 4 by loosening setscrews 5
and moving the sensor in the lateral direction.
5 Adjust the sewing direction of sensor for
detecting right flap 4 by loosening screws
6 and moving the sensor in the longitudinal
direction.
After the adjustment, be sure to perform
trial sewing and adjust the flap sewing
position with the panel.
6
5
4
− 120 −
11. CAUSES AND CORRECTIVE MEASURES AGAINST TROUBLES WITH
THE BOBBIN THREAD REMAINING AMOUNT DETECTING DEVICE
Phenomenon
1)
The bobbin thread
remaining amount
detecting function
fails to work even
when the bobbin
thread has run
out.
Cause
Corrective measure
1 The bobbin thread remaining
amount adjusting counter has been
improperly set.
2 The start position of bobbin wining
is defective.
3 The sensor amplifier fails to turn
ON/OFF because of the stained
lens.
○
○
○
○
4 Sensor unit installing position.
○
5 The bobbin used is not the
exclusive one for the bobbin
thread remaining amount detecting
device.
6 The bobbin case used is not
the exclusive one for the bobbin
thread remaining amount detecting
device.
7 The bobbin winder fails to wind the
bobbin uniformly.
8 The sensor cable connection
failure.
○
− 121 −
Check the specified data on the bobbin
thread remaining adjusting counter “B008”.
If the value of “B008” is excessive, bobbin
thread will run out before bobbin thread
remaining amount detection count-up occurs.
Refer to “^-5. USING THE BOBBIN
THREAD AMOUNT ADJUSTMENT
COUNTER” p.38.
Start winding a bobbin from the recess
designated.
Check whether the solenoid valve for the
bobbin thread remaining amount detecting
device operates normally.
wipe clean the lens surface of the optical
fiber unit.
Check that the spot of sensor light irradiates
the position of reflecting tape of bobbin.
Use the exclusive bobbin for the bobbin
thread remaining amount detecting device.
○
Use the exclusive bobbin case for the bobbin
thread remaining amount detecting device.
○
Properly adjust the bobbin winder.
○
Check how the sensor scale and MAIN circuit
board are connected.
12. HOW TO ADJUST THE FOOT PEDAL
The foot pedal of this device is so designed that an analog type pedal sensor detects the depressing
depth of the foot pedal and the detected voltage value is taken as the operation step of the pedal.
However, the voltage value of the pedal sensor changes with a lapse of time. As a result, the depressing
depth of the foot pedal can fail to match the operation step of the pedal. In this case, adjust the foot
pedal as described below.
In addition, the adjustment value of the pedal is stored in memory of EEP-ROM of MAIN circuit board. If
the circuit board is replaced, adjust the foot pedal taking the same procedure.
The pedal has 7 steps in the direction A and one
step in the direction B.
Perform the panel setting in the respective steps.
A
B
1 Display the pedal customizing screen
A
Keep pressing MODE CHANGE-OVER key
for three
seconds and PEDAL CUSTOMIZING button
A displayed
on the screen changes the color from green to light blue.
Press this button and the pedal customizing screen of
maintenance personnel level is displayed.
− 122 −
B
2 When FOOT PEDAL ADJUSTMENT button
B is pressed,
the foot pedal adjustment screen is displayed and the number of
steps in terms of the depressing depth of the foot pedal is set.
E
D G
F
C
3 Pedal sensor voltage value in the present pedal depressing state
is displayed in the range of 0 to 99 in the volume bar indication C.
First, press PEDAL DEPRESSED TO REVERSE STEP INPUT
button D with the foot pedal depressed to the reverse step.
Voltage value of this time is inputted to E. Next, press FREE
INPUT button F with the foot pedal free. Voltage value of this
time is inputted to G. Using the same procedure, perform setting
of first to seventh steps of the foot pedal, and input the voltage
value of the respective pedal positions to buttons E, G and H.
H
Set the voltage value so as to increase as the number of steps of the foot pedal increases.
In addition, when directly pressing button E, G or H, the ten key input screen is displayed, and it
is possible to directly input numerals.
− 123 −
13. ERROR CODE LIST
Error code
Description of error
How to recover
E001
Initialization of EEP-ROM of MAIN CPU
Turn OFF the
power.
E007
Machine-lock
Main shaft of the sewing machine does not rotate due to some
trouble.
Turn OFF the
power.
E010
Pattern No. error
Pattern No. designated with ten-key is not registered when
pattern No. is selected.
Possible to
re-start after
reset.
E011
External media not inserted
Media is not inserted.
Possible to
re-start after
reset.
E012
Read error
Data read from media cannot be performed.
Possible to
re-start after
reset.
E013
Write error
Data write from media cannot be performed.
Possible to
re-start after
reset.
E015
Format error
Formatting of media cannot be performed.
Possible to
re-start after
reset.
E016
External media capacity over
Capacity of media is short.
Possible to
re-start after
reset.
E022
File No. error
Designated file is not in server or media.
Possible to
re-start after
reset.
E024
Pattern data size over
Memory size is over.
Possible to
re-start after
reset.
− 124 −
Error code
Description of error
How to recover
E027
Read error
Data read from server cannot be performed.
Possible to
re-start after
reset.
E028
Write error
Data write from server cannot be performed.
Possible to
re-start after
reset.
E029
Lid of media slot is open.
Possible to
re-start after
reset.
E030
Needle bar upper position failure
Needle bar is out of needle UP position.
Possible to
re-start after
reset.
E031
Air pressure drop
Air pressure is low.
Possible to
re-start after
reset.
E032
File interchanging error
File cannot be read.
Possible to
re-start after
reset.
E045
Pattern data error
Pattern data is corrupted.
Possible to
re-start after
reset.
E050
Stop switch
When stop switch is pressed.
Possible to
re-start after
reset.
E052
Thread breakage detection error
When thread breakage is detected.
Possible to
re-start after
reset.
A201
Needle replacing time warning
When number of stitches of operation is reached to number of
stitches of needle replacement that is set from the panel.
Possible to
re-start after
reset.
A202
Cleaning time warning
When operation time of the sewing machine is reached to the
cleaning time that is set from the panel.
Possible to
re-start after
reset.
− 125 −
Error code
Description of error
How to recover
A203
Oil replacement time warning
When operation time of the sewing machine is reached to the oil
replacement time that is set from the panel.
Possible to
re-start after
reset.
E220
Grease-up warning
When number of stitches of operation is reached to 40 million
stitches.
Possible to
re-start after
reset.
E221
Grease-up error
When number of stitches of operation is reached to 48 million
stitches, a sewing impossible state occurs.
*After applying grease, it is possible to release when clearing
memory switch
Number of stitches of grease-up.
Possible to
re-start after
reset.
E303
Semilunar plate sensor error
Detection of upper dead point of the sewing machine cannot be
performed.
Turn OFF the
power.
E349
Step-out detection sensor does not react.
For the emergency procedure, it is possible to continually use by
re-starting with the reset button.
However, check the sensor and be sure to replace it when it is
defective.
Possible to restart after rest.
E351
Reflecting tape for detecting angle has been deteriorated.
Possible to
re-start after
reset.
E353
Angle detection sensor fails to detect.
* Clean dust on the reflecting tape of the flap base with an air
gun.
Possible to
re-start after
reset.
E354
Angle detection sensor forced stop
Possible to
re-start after
reset.
E355
Angle detection sensor dust detection
* Clean dust on the reflecting tape of the flap base with an air
gun.
Possible to
re-start after
reset.
E356
Angle detection sensor front end fails to detect.
Possible to
re-start after
reset.
E357
Corner knife on the moving side, left is held lifted.
Possible to
re-start after
reset.
− 126 −
Error code
Description of error
How to recover
E358
Corner knife on the moving side, right is held lifted.
Possible to
re-start after
reset.
E359
Corner knife on the fixing side, left is held lifted.
Possible to
re-start after
reset.
E360
Corner knife on the fixing side, right is held lifted.
Possible to
re-start after
reset.
E361
Corner knife on the moving side, left fails to lift.
Possible to
re-start after
reset.
E362
Corner knife on the moving side, right fails to lift.
Possible to
re-start after
reset.
E363
Corner knife on the fixing side, left fails to lift.
Possible to
re-start after
reset.
E364
Corner knife on the fixing side fails to lift.
Possible to
re-start after
reset.
E366
Center knife does not lower.
Possible to
re-start after
reset.
E367
Corner knife cannot be entered.
Possible to
re-start after
reset.
E368
Zipper has run out.
Possible to
re-start after
reset.
E369
Roller stacker lower end sensor does not detect.
Possible to
re-start after
reset.
− 127 −
Error code
Description of error
How to recover
E370
Roller stacker lower end sensor is gone past.
Possible to
re-start after
reset.
E371
Clamp bar stacker material presser sensor is gone past.
Possible to
re-start after
reset.
E372
Clamp bar stacker material sweeper origin sensor is gone
past.
Possible to
re-start after
reset.
E373
Reflecting tape on right-hand side is deteriorated.
Possible to
re-start after
reset.
E374
Reflecting tape on leftt-hand side is deteriorated.
Possible to
re-start after
reset.
E376
Pedal continuous depressing error
Possible to
re-start after
reset.
E377
Center knife upper detection sensor cannot detect.
Possible to
re-start after
reset.
E378
Clamp bar stacker open detection
Possible to
re-start after
reset.
E379
Roller stacker lift sensor cannot detect.
Possible to
re-start after
reset.
E380
Flap sensor cannot receive light
Possible to
re-start after
reset.
E381
Flap rear end cannot be detected (forced stop).
Error is displayed after end of sewing.
Possible to
re-start after
reset.
− 128 −
Error code
Description of error
How to recover
E382
Flap dust detection error
Possible to
re-start after
reset.
E383
Flap front end cannot be detected.
Possible to
re-start after
reset.
E386
Corner knife fixing side bottom detection error
Possible to
re-start after
reset.
E387
Corner knife fixing side top detection error
Possible to
re-start after
reset.
E388
Corner knife moving side bottom detection error
Possible to
re-start after
reset.
E389
Corner knife moving side top detection error
Possible to
re-start after
reset.
E390
Material sensor error
Material remains after end of stacker operation.
Automatic
recovery by
sensor input
E391
ST material presser lift detection error
Automatic
recovery by
sensor input
E392
ST material sweeper origin detection error
Automatic
recovery by
sensor input
E393
Binder bottom detection error
Automatic
recovery by
sensor input
E394
Binder top detection error
Automatic
recovery by
sensor input
− 129 −
Error code
Description of error
How to recover
E398
Corner knife drawer detection error
Possible to
re-start after
reset.
E399
Binder open detection error
Possible to
re-start after
reset.
E401
Copy disapproved
When trying to perform overwriting copy on the pattern No. which
has been already registered
Possible to
recover with
CANCEL
button
E402
Erasing disapproved
When trying to delete the pattern used in the cycle sewing
Possible to
recover with
CANCEL
button
E403
New creation disapproved
When the registered pattern is selected to the new creation
Possible to
recover with
CANCEL
button
E404
Data of designated No. does not exist.
When data of designated No. does not exist in media or server
Possible to
recover with
CANCEL
button
E435
Erasing disapproved
When trying to erase pattern registered to direct pattern.
Possible to
re-start after
reseat.
It cannot be used with single welt setting.
Possible to
re-start after
reseat.
pattern No.
---
E474
Sewing cannot be performed with the single-welt
setting when the automatic deflection detecting function is being
used.
E475
Flap priority sewing mode selection at the time of slant flap
sewing is disapproved.
At the time of independent sewing or cycle sewing, when flap
priority sewing is selected with slant flap, error occurs.
Possible to
re-start after
reseat.
E476
Clearance length between corner knives on the moving side
error
Possible to
re-start after
reseat.
E477
Clearance length between corner knives on the fixing side
error
Possible to
re-start after
reseat.
− 130 −
Error code
Description of error
How to recover
E478
Deflection direction of corner knives on the moving side
error
Possible to
re-start after
reseat.
E479
Deflection direction of corner knives on the fixing side error
Possible to
re-start after
reseat.
E480
Max. value of clearance between corner knives on the
moving side error
Possible to
re-start after
reseat.
E481
Max. value of clearance between corner knives on the fixing
side error
Possible to
re-start after
reseat.
E482
Range of flap angle detection is exceeded.
Possible to
re-start after
reseat.
E483
Input deflection amount exceeds the limit.
Possible to
re-start after
reseat.
E484
Zipper attaching data cannot be sewn.
Possible to
re-start after
reset.
E485
Data other than zipper attaching data cannot be sewn.
Possible to
re-start after
reset.
E486
Flap sewing data cannot be sewn.
Possible to
re-start after
reset.
E487
Both long presser and endless zipper are simultaneously
selected.
Possible to
re-start after
reset.
E488
The gauge size exceeds the input range.
Possible to
re-start after
reset.
---
− 131 −
Error code
Description of error
How to recover
E489
Combination data other than right/left flap sewing is set at
the time of flap priority setting of alternate sewing mode.
Possible to
re-start after
reset.
E490
It is not possible to feed up to corner knife position.
When flap is put on this side in case of the long type
Possible to
re-start after
reset.
E491
Corner knife length is too short.
When knife cannot be entered since the interval of corner knife is
short.
Possible to
re-start after
reset.
E492
L size length is too short.
When sewing cannot be performed since the inputted L size
length is too short
Possible to
re-start after
reset.
E493
L size length is too long.
When sewing cannot be performed since the inputted L size
length is too long.
Possible to
re-start after
reset.
E494
Center knife length error
When center knife length is smaller than knife size of 6.7 mm
Possible to
re-start after
reset.
E495
Length at sewing start/sewing end over
When sewing length is shorter than the total of length of each
condensation (back tack) at sewing start and sewing end
Possible to
re-start after
reset.
E496
Condensation at sewing end length over
When condensation pitch X number of stitches exceeds 15.0 mm
Possible to
re-start after
reset.
E497
Back tack at sewing end length over
When back tack pitch X number of stitches exceeds 6.0 mm
Possible to
re-start after
reset.
E498
Condensation at sewing start length over
When condensation pitch X number of stitches exceeds 15.0 mm
Possible to
re-start after
reset.
E499
Back tack at sewing end length over
When back tack pitch X number of stitches exceeds 6.0 mm
Possible to
re-start after
reset.
− 132 −
Error code
Description of error
How to recover
E702
CPU runaway detection
When program abnormality has occurred in CPU
Turn OFF the
power.
E703
Panel is connected to the sewing machine which is not
supposed (Machine type error)
When the machine type between panel and sewing machine is
Possible to
re-start after
reset.
E704
Inconsistency of system version
When system software version is inconsistent in the initial
communication
Turn OFF the
power.
E730
Main shaft motor is defective or lacking for phases.
When encoder of sewing machine motor is abnormal
Turn OFF the
power.
E731
Main motor hole sensor is defective or position sensor is
defective.
When hole sensor of sewing machine motor or position sensor is
defective
Turn OFF the
power.
E733
Reverse rotation of main shaft motor
When the sewing machine motor rotates in the reverse direction
Turn OFF the
power.
E802
Power momentary cut detection
When input power is momentarily cut
Turn OFF the
power.
E811
Overvoltage of power error
When input power is more than the specified value
Turn OFF the
power.
E813
Low voltage of power error
When input power is less than the specified value
Turn OFF the
power.
E901
Main shaft motor IPM abnormality
When SERVO CONTTROL circuit board is abnormal
Turn OFF the
power.
E903
Stepping motor power (50V) abnormality
When stepping motor power of SERVO CONTROL circuit board
fluctuates more than ± 15%
Turn OFF the
power.
different in the initial communication
− 133 −
Error code
Description of error
How to recover
E904
Solenoid power (33V) abnormality
When solenoid power of SERVO CONTROL circuit board
fluctuates more than ± 15%
Turn OFF the
power.
E905
Heat sink temperature for SERVO CONTROL circuit board
abnormality
Turn ON the power again after taking time.
Turn OFF the
power.
E915
Communication abnormality between operation panel and
MAIN CPU
When abnormality occurs in data communication
Turn OFF the
power.
E916
Communication abnormality between MAIN CPU and main
shaft CPU
When abnormality occurs in data communication
Turn OFF the
power.
E917
Communication abnormality between operation panel and
personal computer
When abnormality occurs in data communication
Possible to
re-start after
reset.
E918
MAIN circuit board heat sink temperature abnormality
Turn ON the power again after taking time.
Turn OFF the
power.
E943
Defective EEP-ROM of MAIN CPU
When data writing to EEP-ROM cannot be performed
Turn OFF the
power.
E983
Center knife motor lock detection
Turn OFF the
power.
E984
Center knife motor abnormality
Turn OFF the
power.
E985
Clamp foot motor step-out error
Possible to
re-start after
reset.
E986
Clamp foot stepping motor origin retrieval error
Possible to
re-start after
reset.
− 134 −
Error code
Description of error
How to recover
E987
Back tack motor origin retrieval error
Possible to
re-start after
reset.
E988
Pocket bag flap detecting motor origin-retrieval error
Possible to
re-start after
reset.
E992
Corner knife motor origin-retrieval error
Possible to
re-start after
reset.
E996
Corner knife index on the moving side motor origin retrieval
error
Possible to
re-start after
reset.
E997
Corner knife index on the fixing side motor origin retrieval
error
Possible to
re-start after
reset.
E998
Corner knife stepping motor origin retrieval error
Possible to
re-start after
reset.
E999
Marking light motor origin retrieval error
Possible to
re-start after
reset.
− 135 −
14. INPUT NUMBER TABLE
Name
Connecting connector No.
Air pressure detection
MAIN CN-30
Origin sensor on marking light fine adjustment side
MAIN CN-36-6
Corner knife motor origin sensor
MAIN CN-37-6
Back tack motor origin sensor
MAIN CN-38-6
Thread breakage detection (left)
INTA CN62A-2
Thread breakage detection (right)
INTA CN63A-2
Material sensor
INTA CN65A-3
Clamp foot step-out detection
INTA CN66A-3
Binder open detection
INTA CN68A-1
Binder up detection
INTA CN71A-3
Marking light origin sensor
INTA CN75A-2
Clamp foot origin detection
INTA CN77A-2
Center knife lift detection
INTA CN79A-1
Flap sensor (left)
INTB CN60B-2
Flap sensor (right)
INTB CN61B-2
Corner knife drawer detection switch
INTB CN62B-2
Bobbin thread remaining amount detection (left)
INTB CN64B-2
Bobbin thread remaining amount detection (right)
INTB CN64B-5
Start switch
INTB CN65B-3
Temporary stop switch
INTB CN69B-1
Pedal volume sensor
INTB CN75B-2
Roller lift detection
INTB CN83A-19
Stacker open detection
INTB CN83B-13
Stacker origin
INTB CN83B-15
Corner knife fixing side, right lifting detection
INTB CN79B
Corner knife fixing side, right lowering detection
INTB CN80B
Corner knife fixing side, left lifting detection
INTB CN81B
Corner knife fixing side , left lowering detection
INTB CN82B
Corner knife moving side, left lowering detection
MAIN CN125-2
Corner knife moving side, left lifting detection
MAIN CN125-5
Corner knife moving side, right lowering detection
MAIN CN126-2
Corner knife moving side, right lifting detection
MAIN CN126-5
Fixing side index motor origin
MAIN CN127
Moving side index motor origin
MAIN CN128
Flap angle detection sensor
INTB CN63B-2
− 136 −


![User Manual [UK]](http://vs1.manualzilla.com/store/data/005991569_1-3b3b29e023250702c09408f0279394a4-150x150.png)