1
Roller AC Servo System
HMI-43C User Manual
Safely
Instruction · Please read this manual carefully, also with related manual for the machinery before use the controller.
· For installing and operating the controller properly and safely, qualified personnel are required.
· Please try to stay away from arc welding equipment, in order to avoid electromagnetic interference and
malfunction of the controller.
· Keep in room bellow 45° and above 0°
· Do not humidity below 30% or above 95% or dew and mist of places.
· Install the control box and other components, turn off the power and unplug the power cord.
· To prevent interference or leakage accidents, please do the ground work, the power cord ground wire
must be securely connected to an effective way to earth.
· All parts for the repair provided by the Company or approved before use.
· Performing any maintenance action, you must turn off the power and unplug the power cord. There are
dangerous high voltage control box, you must turn the power off after one minute before opening the
control box.
· This manual marked with the symbol of the Department of Safety Precautions must be aware of and
strictly adhered to, so as not to cause unnecessary damage.
1 Installation Instructions
1.1 Product specifications
Product Type
ASD58-75
Supply Voltage
AC 220 ± 44 V
Power frequency
50Hz/60Hz
Maximum output power
550/750W
1.2 Interface plug connections
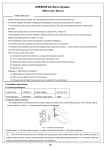
The pedals and the machine head of the connector plug are mounted to the corresponding position in the
controller back of socket, as shown in Figure 1-1. Please check if the plug
is inserted firmly.
Fig.1-1 Controller Socket Diagram
Fig.1-2 Controller Interface Definition
1/8 ①:the motor power supply socket; ②: the pedal socket; ③:the motor encoder socket; ④the operation panel switch
socket socket;⑤ the turn table;⑥:the automatic electromagnet socket; ⑦:the presser foot lifting electromagnet
socket; ⑧:the head lamp socket (black); ⑨:the external synchronizer socket.
: The use of the normal force are not inserted into the plug and socket, please check whether the matching,
direction or needle insertion direction is correct! Lighting interface and presser foot lifting electromagnet
interface is a 1*2 interface, head lamp interface using black interface, please pay attention to the distinction .
1.3 Wiring and Grounding We must prepare the system grounding project, please a qualified electrical engineer to be construction.
Product is energized and ready for use; you must ensure that the power outlet the AC input is securely grounded.
The grounding wire is yellow and green lines, it must be connected to the grid and reliable security protection on the
ground to ensure safe use, and prevent abnormal situation.
:All power lines, signal lines, ground lines, wiring not to be pressed into other objects or excessive distortion,
to ensure safe use!
2 Operation Panel Instructions
2.1 Operation Panel Display Instruction
P
Fig.2-1 Operation Panel
Icon
Index
①
Fig.2-2 LCD Display
Description
Index
One-shot sewing
⑨
Icon
Multi-section constant-stitch sewing
Description
four-constant-stitch sewing
②
Soft start
⑩
③
Presser foot lifting after trimming
⑪
Thread clamp
④
Presser foot lifting at seam end
⑫
Automatic trimming
⑤
Start back tacking
⑬
Position up
⑥
End back tacking
⑭
Automatic test
⑦
W sewing
⑮
Sewing segments index
⑧
Free sewing
⑯
Number display
2.2 Key Functions
Key
Name
P
Description
Use the key to switch to the program mode.
Parameter
The key is parameters confirm key, and back to the previous menu until the operator sewing mode
setting key
state. In addition, work with other key to set a higher level of the parameter.
modification
Parameter to modify the confirmation key, press the
again to return to the standby interface.
setting key
W sewing
The system enter to W sewing mode when press the
key is lit. Show
w sewing interface,default range 1~F corresponds to the 1~15 pin.
2/8 is
Key
Name
Description
In constant-stitch sewing:a. One shot to the pedal, automatic performed number of stitches of every
One-shot-sewin
section.
g selection
b. Toe down the pedal again and again to finish rest the sections until it finish pattern.
1). As the pedal is toed down, machine will start sewing. Once the treadle returned to neutral,
Free sewing
machine will stop immediately.
2). As the pedal heeled back, the trimming cycle will be finished
automatically.
Also known as fixed length seam, press this key, the system is to enter a multi section seam work
Multi-section
mode. The LCD screen
is lit and displayed on the n X yy, where X is the current segment, the
constant-stitch
sewing
maximum 15 segment can be set, YY is the current number of pins, the maximum 99 pin can be set.
If the current number of X is set to 00, the total number of valid segments is (X-1).
Switch during all presser foot lifting mode when pressing the key. (No lifting, lifting after trimming
Presser foot
cycle
only,
cycle
both).
lifting at machine stop
only, lifting at machine stop
and after trimming
lifting Mode
Trimming cycle
Enable or disable the trimming cycle.
selection
Start back
Switch during all start tacking type when pressing. (No tacking, once tacking , double tacking
,4
tacking setting
repeat tacking
). Tacking stitches A、B can be set using the
key and the
key.
key End back
Switch during all end tacking type when pressing. (No tacking, once tacking , double tacking
,4
tacking setting
repeat tacking
). Tacking stitches C、D can be set using the
key and the
key.
key When sewing midway stop, system upper / lower needle stop position by pressing the key,
Stop position
key
that is up needle stop position, then press the key,
is lit, show down needle stop. the sewing
complete trimming, the system will stop up needle position. Note: the H-43 panel without the key,
the key
+
combination to achieve the function.
Custom function
Special function according to the custom requirement.
key
Increasing and
decreasing
is lit,
The maximum motor speed can be adjusted using the keys.
motor speed
Up and down
Adjust the values in plus and minus state.
keys
Soft start setting
Soft start at the first seam is enabled (icon on) or disabled.
key
3/8 3 System Parameters Setting List
3.1 Parameter table Mode
NO.
Range
Default
Description
P
1、Long press
2、Press
key , the digital tube display P100;
key to display the value of the current parameter
3、Press the corresponding
key and
key to change the parameter value or selection parameter number, Press
key to save;
4、At last press
key to exit parameter setting mode,return to sewing work mode.
100
100~800
200
Minimum speed
101
200~5000
3500
Maximum speed
102
200~5000
3000
Constant-stitch sewing speed
105
100~500
250
Trimming speed
107
1~9
2
108
100~800
200
110
200~2200
1800
Start back tacking speed
111
200~2200
1800
End back tacking speed
112
200~2200
1800
Bar tacking speed
113
1~70
24
Stitch balance for start back tacking No.1
114
1~70
20
Stitch balance for start back tacking No.1
115
1~70
24
Stitch balance for end back tacking No.3
116
1~70
20
Stitch balance for end back tacking No.4
130
0/1/2
/3
2
Stitch numbers for soft start
Soft start speed
Speed curve adjustments:
0:ramp curve
1:polygonal curve.
2:quadric curve
3:S-type curve
131
200~4000
3000
132
0~1024
800
133
1/2
1
134
0~1024
90
Trimming point of pedal
135
0~1024
300
Footer lifting point of pedal
136
0~1024
460
Neutral point of pedal
Figure 4-1 shows the
Motor running point of pedal in low
specific setting method
The turning point speed of two segment curve.
The turning point sampling voltage of the pedal when two segment curve
(Between parameter 138 and 139)
The type of polygonal curve:
1: square
2:rooting
137
0~1024
480
138
0~1024
580
Accelerated point of pedal
139
0~1024
962
Max speed point of pedal
13A
0~800
100
The running delay time of footer lifting
142
0/1
0
speed.
Bar tacking mode selection:
0:Juki mode. Active when motor stop or running.
1:Brother mode. Active only when motor running.
4/8 Special mode:
0: normal Mode
143
0/1/2
/3
0
1: simply sewing mode
2: motor initial angle measurement (Do not remove the belt)
3: Automatically setting the pulley ratio by the CPU. (synchronizer is necessary
and the belt not removed)
Feedforward torque of motor:
144
0~31
0
153
1~100
1
154
1~9999
1
0: normal functions
1-31: feedforward torque level
The proportion coefficient of the pieces counter
Maximum pieces of the counter
Count mode selection (For Sewing Piece)
0: The counter is invalid
1: Count up by pieces. When count over, counter will be auto- reset.
155
0~4
0
2: Count down by pieces. When count over, counter will be auto- reset.
3: Count up by pieces. When count over, motor stops and the counter must be
reset by the external switch or the P key on the panel.
4: Count down by pieces. When count over, motor stops and the counter must
be reset by the external switch or the P key on the panel.
Direction of parameter transfer:
161
0/1/2
0: no action
1: from operation panel to controller
2: from controller to
operation panel.
162
1, 2
163
1, 2
164
-
203
5-359
Restore factory setting
Save current parameters as user-defined default parameters.
Password
10
204
10-359
120
20A
10-60
20
211
5-359
25
212
10-359
350
Trimming output start angle TS (down needle position angle as the reference
point)
Trimming output end angle TE (Down needle position angle is the reference
and this value should be bigger than TS)
Motor torque improvement coefficient during trimming
Thread release output start angle LS (down needle position angle as the
reference point)
Thread release output end angle LE (Down needle position angle is the
reference and this value should be bigger than LS)
213
1-999
1
Thread release output start delay time T1 (ms)
214
1~999
10
Thread release output end delay time T2 (ms) after up needle position
215
0/1
1
Wiper function
216
1~999
10
Wiper output delay time (ms)
217
1~9999
70
Wiper output time (ms)
219
0/1
0
Thread clamp function
21A
10-359
120
Thread clamp start angle
21B
11-359
318
Thread clamp end angle
220
200~360
360
Stop position after trimming (motor can stop with a reverse angle)
231
0/1
0
Auto test mode:
0: disable
1: enable
0: disable
0: stitches mode
5/8 1: enable
1: time mode
234
0/1
0
240
0~9999
1000
242
0~359
0
243
0~359
175
Down needle stop angle
244
0~800
200
Running delay time when presser footer comes down (ms)
247
0~2000
0
Oil refill time alarm (hour. 0: function deactivated)
248
0~4000
0
Oil alarm, stop operation time (hour. 0: function deactivated)
274
1~500
70
No.2 electromagnet fully output time ms
275
1~100
1
No.2 electromagnet chopping on time ms(Reserved)
276
1~100
1
No.2 electromagnet chopping off time ms(Reserved)
278
1~500
150
279
1~100
1
No.3 electromagnet chopping on time ms(Reserved)
27A
1~100
1
No.3 electromagnet chopping off time ms(Reserved)
Motor direction: 1: CCW
0: CW
The ratio between motor and machine (1000 stands for 1:1)
Up needle stop angle (After detecting the synchronizer signal)
No.3 electromagnet fully output time ms
3.3 Monitor mode
P
+
1. Pressing
2. Press
3. Press
and
ke to enter monitor mode.
key to adjust the parameter number, press
key and the para value is shown at the same time.
key then return to normal sewing mode.
No.
Description
No.
Description
010
Counter for stitches
024
Machine angle
011
Counter for sewing pieces
025
The sampling voltage of pedal
013
State of encoder
026
The ratio between motor and machine
020
DC voltage
027
The total used time(hours) of motor
021
Machine speed
028
The sampling voltage of interaction
022
The phase current
029
Software version
023
Initial electrical angle
030-037
The history record of error codes
3.3 The Warning Message
Alarm code
Description
Fuel filling warning
Count over for stitches
Count over for sewing
pieces
Emergency stop
Lift needle locking
Power is off
Safety switch alarm
Corrective
Fuel filling. Press P key to clear.
The counter reaches the limit. Press P key to reset the counter.
The counter reaches the limit. Press P key to reset the counter.
Press the key of emergency stop to clear.
Then press the needle lifting locking button, can eliminate the
needle lifting locking state.
Please wait for 30 seconds, then turn on the power switch.
Adjust the machine to the correct position.
6/8 3.4 Error Mode
If the error code appears, please check the following items first:
1.Make sure the machine has been connected correctly;
Error
2.
Reload the factory setting and try again.
Description
Solution
Err-01
Hardware overcurrent
Turn off the power switch, and restart after 30 seconds. If the controller still
Err-02
Software overcurrent
does not work, please replace it and inform the manufacturer.
Code
Err-03
Err-04
Err-05
Err-06
Err-07
Err-08
Under-voltage
machine is off
(higher than 264V). If yes, please restart the controller when the normal
voltage is resumed. If the controller still does not work when the voltage is
operation
at normal level, please replace the controller and inform the manufacturer.
Short circuit of solenoid
voltage 24V
Motor current
measuring failure
Sewing motor blocked
Brake circuit failure
Err-10
Communication failure
Err-12
- Stabilize mains voltage
Over-voltage in
Err-09
E r r - 11
- Check mains voltage
Over-voltage when the Disconnect the controller power and check if the input voltage is too high
Machine head needle
positioning failure
Initial motor electrical
angle failure
- Take plug out, if error continues, replace control box
- Test inputs/
outputs for 24V short circuit
Turn off the system power, restart after 30 seconds to see if it works well. If
such failure happens frequently, seek technical support.
- Eliminate sluggish movement in the sewing machine
- Replace encoder
- Replace sewing motor
Check the brake resistor plug on the electric board.
Replace the control
box
Check the connection and if necessary plug in.
Replace the control box.
Check if the connection line between machine head synchronizer and
controller is loose or not, restore it and restart the system. If it still does not
work, please replace the controller and inform the manufacturer.
-Try 2 to 3 more times after power down
- if it still does not work, please replace the controller and inform the
manufacturer.
Turn off the system power, check if the motor sensor plug is loose or
Err-13
Motor HALL failure
dropped off, restore it and restart the system. If it still does not work, please
replace the controller and inform the manufacturer.
Err-14
Err-15
Err-16
Err-17
Err-18
DSP Read/Write
EEPROM failure
Motor over-speed
protection
Motor reversion
not work, please replace the controller and inform the manufacturer.
HMI Read/Write
EEPROM failure
Motor overload
Sewing motor blocked
Err-23
Turn off the system power, restart the system after 30 seconds, if it still does
Sector error
- Eliminate sluggish movement in the sewing machine
- Replace encoder
4 Special Functions
4.1 The Adjustment of Up Needle Stop Position
7/8 - Replace sewing motor
P024
The control system in the restoration of the factory, can be reset up needle
2
.0124
.0000
Step 1: Press
+
key, then enter the monitor mode. Parameter 024 is
shown, which means the default up needle stop position in angle(0°).
Step 2: Turn the hand wheel and adjust to the right position as up needle stop,
and the needle position angle is shown simultaneously.
P
3
.0000
P
stop position.
1
Step 3: Long press
+
key, the new up needle position is preserved and
the parameter is set to zero.Press
key to exit.
4.2 The Recovery of Default Factory Setting
P024
2
----
3
8888
P
1
Step 1: Press
+
Step 2: Press key
key, then enter the monitor mode.
for about 5 seconds, then Default Factory Setting is
recovered displaying as left LCD.
When the LCD is displayed as 8888888, the recovery is accomplished. The
machine is recovered back to the initial state in delivery.
4.3 Pedal Sensitivity Adjustment
Pedal starts moving from the initial position (p.136) where the motor stops, slowing forward to the low speed
point (p.137) where the motor run as the minimum speed (p.100), continuing to the accelerated point (p.138) where
the motor start to speed up, until the max speed point (p.139) where the motor run up to the maximum speed
(p.101). And when the pedal steps back to the foot lifter position (p.135), the presser foot lift. Continuing back to the
auto trimming position (p.134), the line is cut. Adjusting the corresponding parameters, user can acquire the proper
pedal response to fit the personal habit.
Fig. 4-1 pedal movement of each position parameter
386P0197A
2015-10-19
8/8