1
Medical–Biological
Research & Technologies
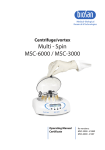
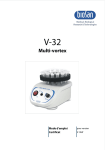
Combispin FVL-2400N
Mini-Centrifuge/Vortex
Operating Manual
Certificate
for versions:
V.1AB
V.1A3
V.1A12
V.1AA
V.1AC
Contents
1. Safety Precautions
2. General Information
3. Getting Started
4. Operation
5. Specifications
6. Maintenance
7. Warranty and Claims
8. Declaration of Conformity
Page 2
1. Safety Precautions
The following symbol means:
Caution!
Make sure you have fully read and understood the present
Manual before using the equipment. Please pay special
attention to sections marked by this symbol.
GENERAL SAFETY
·
Use only as specified in the Operating Manual provided.
·
The unit should be saved from shocks or falling.
·
After transportation or storage keep the unit under room temperature for 2-3hrs
before connecting it to the electric circuit.
·
Use only cleaning and decontamination methods recommended by the
manufacturer.
·
Do not make modifications to the design of the unit.
ELECTRICAL SAFETY
·
Connect only to electric circuit with voltage corresponding to that on the serial
number label.
·
Do not plug the unit into an ungrounded power socket, and do not use an
ungrounded extension lead.
·
Ensure that the plug is easily accessible during use.
·
Disconnect the unit from the electric circuit before moving.
·
Disconnect the power cord plug from power socket to turn off the unit.
·
If liquid penetrates into the unit, disconnect it from the electric circuit and have it
checked by a repair and maintenance technician.
·
Do not operate the unit in premises where condensation can form. Operating
conditions of the unit are defined in section 5. Specifications.
DURING OPERATION
·
Do not open the lid during work, run-up or run-down of the rotor.
·
Do not operate the unit in environments with aggressive or explosive chemical
mixtures. Please contact manufacturer for possible operation of the unit in
specific atmospheres.
·
Do not use rotors with visible signs of corrosion, wear or mechanical damage.
·
Do not operate the unit if it is faulty or has been installed incorrectly.
·
Do not use outside laboratory rooms.
BIOLOGICAL SAFETY
·
It is the user's responsibility to carry out appropriate decontamination if
hazardous material is spilt on or penetrates into the equipment.
Page 3
2. General Information
Combispin FVL-2400N, Mini-Centrifuge/Vortex is specially designed for the
genetic engineering researches (especially for PCR-diagnostics experiments). It can
be used also in biochemical clinical laboratories, microbiological and industrial
biotechnology laboratories.
Combi-Spin FVL-2400N ensures possibility for the simultaneous mixing and
separation of samples, using centrifuge and mixing modules, located on the common
spin module. Combi-Spin (the previous name Micro-Spin) was invented and for the first
time described (published) by Biol. Dr. V.Bankovskis in 1989 and after the successful
approbation and improvement was patented in 1994 (V.K.Bankovskis et al., Riga,
Latvia, Pat. No. P94-74).
Combi-spin FV-2400N is designed for handling small quantities of liquid (micro
quantity enzyme reactions mixture assembling/mixing inside the microtest tubes
before the thermoincubation in dry block cooler/heater thermostats, thermal cycler,
etc.). It helps to save working space in laminar or PCR boxes.
MIX AND SPIN IN ONE COMBI-SPIN.
Page 4
3. Getting started
3.1. Unpacking.
Remove packing materials carefully and retain them for future shipment or
storage of the unit. Examine the unit carefully for any damage incurred during
transit. The warranty does not cover in-transit damage.
3.2. Complete set. Package contents:
Standard set:
Combispin FVL-2400N, Mini-Centrifuge/Vortex . . . . . . . . . . . . . . . . . . . . . 1 pce
spare fuse . . . . . . . . . . . . . . . . . . . . . . . . . . . . . . . . . . . . . . . . . . . . . . . . . 1 pce
R-0.5/0.2 rotor u
. . . . . . . . . . . . . . . . . . . . . . . . . . . . . . . . . . . . . . . . . . . . 1 pce
R-1.5 rotor v
. . . . . . . . . . . . . . . . . . . . . . . . . . . . . . . . . . . . . . . . . . . . . . . 1 pce
vortex head with 2 mm eccentric z
. . . . . . . . . . . . . . . . . . . . . . . . . . . . . . . 1 pce
Operating manual, Certificate . . . . . . . . . . . . . . . . . . . . . . . . . . . . . . . . . 1 copy
Optional accessories:
R-2/0.5 rotor w
. . . . . . . . . . . . . . . . . . . . . . . . . . . . . . . . . . . . . . . . . . on request
R-2/0.5/0.2 rotor x
. . . . . . . . . . . . . . . . . . . . . . . . . . . . . . . . . . . . . . . on request
SR-16 rotor y
. . . . . . . . . . . . . . . . . . . . . . . . . . . . . . . . . . . . . . . . . . . on request
3.3. Set up:
-
place the unit on horizontally even working surface;
-
position the unit so that there is easy access to the plug;
-
according to EN 61010-2-20 people and hazardous materials must not be within a
300 mm area around the device during the centrifuge operation.
3.4. Rotor replacement:
The unit is provided with the fixation mechanism for all the types of the abovementioned rotors; operator can easily change rotor for the desired type of tubes in
3-5 s. To change a rotor (fig.1/2) hold it with one hand and turn the vortex head
(fig.1/1) counterclockwise to set rotor free. Change the rotor and turn in the vortex
head back.
Page 5
4. Operation
Recommendation during operation
Check the rotor for any signs of wear and replace if necessary. Insert EVEN
number of tubes in rotor one opposite another. The opposite tubes must be
filled equally.
2 TUBE
ARRANGEMENT
4 TUBE
ARRANGEMENT
6 TUBE
ARRANGEMENT
4.1.
Connect unit to a properly grounded power socket.
4.2.
Operation in the quick centrifugation mode:
FULL
ARRANGEMENT
4.2.1. Turn the switch (Fig.1/4) into position I (QS, Quick Spin).
4.2.2. Open the lid and place EVEN number of tubes to the rotor sockets (Fig.1/2)
opposite one another. Close the lid.
4.2.3. Press the QS (Fig.1/3) button for quick mixing / sedimentation and hold it pressed
for the desired time. The unit will automatically when the QS button is released.
Note!
Do not open the lid during work, run-up or shutoff of the rotor. The
unit stops automatically when the lid is open.
4.2.4 Turn the switch (Fig. 1/4) into position O (OFF).
4.3.
Operation in the vortex mode:
4.3.1. Turn the switch (Fig. 1/4) into position I (QS).
1
2
3
4
Fig.1 General view
Page 6
4.3.2. Gently holding a tube with fingers at its upper part press the tube's lower part to
the vortex head cavity bottom (Fig.1/1).
4.3.3. Press QS button for mixing and hold it pressed till full sediment dissolution.
Caution!
Remember that the angle of hydrodynamic shift as well as the force
of tubes pressing to the vortex head are decisive factors of
sediment dissolution effectiveness.
To avoid fast erase of vortex head and plastic tube's surfaces don't press tubes to
the vortex head too strong.
4.3.4. Turn the switch (Fig. 1/4) into position O (OFF).
4.4.
Operation in the long centrifugation mode:
Operation in the long centrifugation mode (for more than 1 min) is used for blood
and eucariotics cells sedimentation (including micro-organism cells), dissolving
of hardly soluble components or salts dense sediments in analytical research,
etc.
4.4.1. Open the lid and place EVEN number of tubes to rotor sockets (Fig.1/2) opposite
one another. Close the lid.
4.4.2. Turn the switch (Fig. 1/4) into position II (LS, Lon Spin) to start centrifugation.
4.4.3. Turn the switch into position O (OFF) to stop centrifugation.
4.5.
Disconnect unit from electric circuit.
Page 7
5. Specifications
The unit is designed for operation in cold rooms, incubators and closed laboratory
rooms at ambient temperature from +4°C to +40°C in a non-condensing atmosphere
and maximum relative humidity 80% for temperatures up to 31°C decreasing linearly to
50% relative humidity at 40°C.
5.1. Fixed rotation speed . . . . . . . . . . . . . . . . . 2800 rpm (50 Hz); 3500 rpm (60 Hz)
5.2. Acceleration time to max. speed . . . . . . . . . . . . . . . . . . . . . . . . . . . . . . . . . . 5 s
5.3. Maximum continuous operation time. . . . . . . . . . . . . . . . . . . . . . . . . . . . 60 min
5.4. Dimensions . . . . . . . . . . . . . . . . . . . . . . . . . . . . . . . . . . . . . . 190х235х125 mm
5.5. Operating voltage / power consumption . . . . . . . . 230 V; 50 Hz; 30 W (0.13 A),
230 V; 60 Hz; 25 W (0.1 A) or 120 V; 50/60 Hz; 30 W (0.27 A)
5.6. Weight* . . . . . . . . . . . . . . . . . . . . . . . . . . . . . . . . . . . . . . . . . . . . . . . . . . . 1.7 kg
* Accurate within ±10%.
Optional
accessories
Description
Catalogue number
R-2/0.5 rotor
for 8х2 ml and 8х0.5 ml
microtest tubes
BS-010205-CK
R-2/0.5/0.2 rotor
for 6х2 ml, 6х0.5 ml and 6х0.2 мл
microtest tubes
BS-010205-DK
SR-16 rotor
for 2 strips of 8х0.2 ml
microtest tubes
BS-010202-AK
Replacement parts
Description
Catalogue number
R-1.5 rotor
for 12х1.5 ml microtest tubes
BS-010205-AK
R-0.5/0.2 rotor
for 12х0.2 ml and 12х0.5 ml
microtest tubes
BS-010205-BK
Vortex head
Vortex head with 2 mm eccentric
BS-010202-S13
Biosan is committed to a continuous programme of improvement and reserves the
right to alter design and specifications of the equipment without additional notice.
Page 8
6. Maintenance
6.1. If the unit requires maintenance, disconnect the unit from the electric circuit and
contact Biosan or your local Biosan representative.
6.2. All maintenance and repair operations must be performed only by qualified and
specially trained personnel.
6.3. Standard ethanol (75%) or other cleaning agents recommended for cleaning of
laboratory equipment can be used for cleaning and disinfection of the unit.
6.4. Fuse replacement. Disconnect the unit from electric circuit. Open the fuse holder
located on rear side of the device by turning its cover counter-clockwise. Replace
with the correct fuse (250 mA for 230 V or 500 mA for 120 V).
Page 9
7. Warranty and Claims
7.1. The Manufacturer guarantees the compliance of the unit with the requirements of
Specifications, provided the Customer follows the operation, storage and
transportation instructions.
7.2. The warranted service life of the unit from the date of its delivery to the Customer is
24 months. Contact your local distributor to check availability of extended
warranty.
7.3. If any manufacturing defects are discovered by the Customer, an unsatisfactory
equipment claim shall be compiled, certified and sent to the local distributor
address. Please visit www.biosan.lv, Technical support section to obtain the claim
form.
7.4. The following information will be required in the event that warranty or postwarranty service comes necessary. Complete the table below and retain for your
records.
Model
Serial number
Date of sale
Page 10
Combispin FVL-2400N Mini-Centrifuge/Vortex
8. Declaration of Conformity
Biosan SIA
Ratsupites 7, build.2, Riga, LV-1067, Latvia
Phone: +371 67426137 Fax: +371 67428101
http://www.biosan.lv
Version 1.05 – December 2013