1
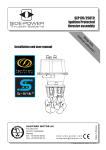
® Hydraulic system is rd th a p bo ee n K al o u an m ! Installation, start-up, user and service manual SLEIPNER MOTOR AS P.O. Box 519 N-1612 Fredrikstad Norway Tel: +47 69 30 00 60 Fax: +47 69 30 00 70 w w w. s i d e - p o w e r. c o m [email protected] Made in Norway SIDEPOWER © Sleipner Motor AS 2006 TECHNICAL SPECIFICATIONS SYSTEM OVERVIEW Contents System overview Hydraulic system components................................................... 3 Oil tank assembly....................................................................... 4 Technical specifications Oil tank assembly ...................................................................... 5 Control panels............................................................................ 6 Installation Installation planning.................................................................... 7 Pump installation........................................................................ 7 Tank assembly installation.......................................................... 8 Hose connections....................................................................... 8 Cooling water..............................................................................9 Pump hose connections..............................................................9 Valve connections........................................................................9 Electrical wiring.........................................................................10 Check list...................................................................................10 Start up System fill up............................................................................ 11 Start up and testing.................................................................. 11 User Manual Operating the thruster system...................................................12 Service......................................................................................14 Troubleshooting .................................................................... 15 Service centres ...................................................................... 16 DECLARATION OF CONFORMITY We, Sleipner Motor AS P.O. Box 519 N-1612 Fredrikstad, Norway declare that this product with accompanying standard remote control systems complies with the essential health and safety requirements according to the Directive 89/336/EEC of 23 May 1989 amended by 92/31/EEC and 93/68/EEC. IMPORTANT! This manual is only a guide for the installation, functional testing and servicing of the Sidepower hydraulic system, performed by qualified personell. USER MANUAL START UP INSTALLATION Warranty statement 1.The equipment manufactured by Sleipner Motor AS (The “Warrantor”) is warranted to be free from defects in workmanship and materials under normal use and service. 2.This Warranty is in effect for of two years from the date of purchase by the user. Proof of purchase must be included, to establish that it is inside the warranty period. 3.This Warranty is transferrable and covers the product for the specified time period. 4.In case any part of the equipment proves to be defective, other than those parts excluded in paragraph 5 below, the owner should do the following: (a) prepare a detailed written statement of the nature and circumstances of the defect, to the best of the Owner's knowledge, including the date of purchase, the place of purchase, the name and address of the installer, and the Purchaser’s name, adress and telephone number; (b) the Owner should return the defective part or unit along with the statement referenced in the preceding paragraph to the warrantor, Sleipner Motor AS or an authorized Service Centre, postage/shipping prepaid and at the expense of the Purchaser; (c) if upon the Warrantor’s or Authorized Service Centre’s examination, the defect is determined to result from defective material or workmanship, the equipment will be repaired or replaced at the Warrantor’s option without charge, and returned to the Purchaser at the Warrantor’s expense; (d) no refund of the purchase price will be granted to the Purchaser, unless the Warrantor is unable to remedy the defect after having a reasonable number of opportunities to do so. Prior to refund of the purchase price, Purchaser must submit a statement in writing from a professional boating equipment supplier that the installation instructions of the Installation and Operation Manual have been complied with and that the defect remains; (e) warranty service shall be performed only by the Warrantor, or an authorized Service Centre, and any attempt to remedy the defect by anyone else shall render this warranty void. 5.There shall be no warranty for defects or damages caused by faulty installation or hook-up, abuse or misuse of the equipment including exposure to excessive heat, salt or fresh water spray, or water immersion except for equipment specifically designed as waterproof. 6.No other express warranty is hereby given and there are no warranties which extend beyond those described in section 4 above. This Warranty is expressly in lieu of any other expressed or implied warranties, including any implied warranty of merchantability, fitness for the ordinary purposes for which such goods are used, or fitness for a particular purpose, and any other obligations on the part of the Warrantor or its employees and representatives. 7.There shall be no responsibility or liability whatsoever on the part of the Warrantor or its employees and representatives for injury to any person or persons, or damage to property, loss of income or profit, or any other consequential or resulting damage or cost which may be claimed to have been incurred through the use or sale of the equipment, including any possible failure or malfunction of the equipment, or part thereof. 8.The Warrantor assumes no liability for incidental or consequential damages of any kind including damages arising from collision with other vessels or objects. 9.This warranty gives you specific legal rights, and you may also have other rights which vary from country to country. General planning and important precautions Prior to installation, it is important that the installer reads this guide to ensure necessary acquaintance with this product. This manual is intended to support educated / experienced staff and is therefore not sufficient in all details for the correct installation. Before installing the hydraulic system, you must ensure that you are in posession of, and have read the following additional manuals: • Thruster installation and user manual • The unique hydraulic system manual with complete system drawings • Relevant control panel installation guides and user manuals SERVICE Prior to starting the installation procedure, make sure that no parts are missing or damaged during transportation. When installed in boats approved or classified according to international or special national rules, the installer is responsible for following the demands in accordance with these regulations / classification rules. The instructions in this guide can not be guaranteed to comply with all different regulations / classification rules. NB ! Faulty installation of any part of the hydraulic system, tunnel, thruster or control panel will render all warranty given by Sleipner Motor AS void. Tank assembly with prefitted components TECHNICAL SPECIFICATIONS SYSTEM OVERVIEW Hydraulic system components Sternthruster INSTALLATION Variable Load sense pump Sidepower Hydraulic System 2.3 - 2006 3 SERVICE A complete Sidepower hydraulic thruster system consists of one or more hydraulic pumps, one or two thrusters and an oil tank with pre-fitted load sense controlvalve, oil cooler, high-pressure and return filter, oil filling filter, level and temp indictors and internal hoses. Valves and pumps are pre-adjusted at our factory before delivery. USER MANUAL START UP Bowthruster TECHNICAL SPECIFICATIONS SYSTEM OVERVIEW Sidepower hydraulic tank and components Return filter Oil filling and breathing filter Seawater oilcooler (optional) Electrical oil temp/level indicator INSTALLATION Visual oil temp/level indicator Prewired electrical junction box Load sense control valve START UP Pressure gauge Feed to pumps SERVICE USER MANUAL Flexible rubber mounting feets 2x Internal oil cooler Drain return High pressure filter Sidepower Hydraulic System 2.3 - 2006 4 Hydraulic tanks TECHNICAL SPECIFICATIONS SYSTEM OVERVIEW Floor mounted ! & % $ # Tank kit Tank volume (ltr · usg) Oil volume (ltr · usg) Dry weight* (kg · lbs) A Build height (mm · in) B Build length (mm · in) C Build depth (mm · in) D Tank length (mm · in) E Tank depth (mm · in) F Filter change (mm · in) 40 ltr 52.8 · 13.9 40 · 10.6 46 · 101 690 · 27.2 785 · 30.9 400 · 15.7 615 · 24.2 340 · 13.4 100 · 4.0 60 ltr 90 ltr 93.9 · 24.8 122.3 · 32.3 60 · 15.9 90 · 23.8 60 · 132 68 · 154 690 · 27.2 800 · 31.5 800 · 31.5 800 · 35.1 550 · 21.7 550 · 21.7 683 · 26.9 683 · 26.9 479 · 18.9 479 · 18.9 100 · 4.0 100 · 4.0 120 ltr 160 · 42.3 120 · 31.7 77 · 170 800 · 31.5 1000 · 39.4 550 · 21.7 883 · 34.8 479 · 18.9 100 · 4.0 INSTALLATION " * with valve block for single thruster only Connections on tank 1 Tank to pump 2” BSP 2 Pump to valve 1” BSP 3 Bleed returns (3x) 1/2” BSP 4 Valve ports to users 1/2” BSP 5 Water to/from oil cooler 3/4” Nipple JIC thread kit available START UP Bulkhead mounted $ USER MANUAL % # " Tank kit Tank volume (ltr · usg) Oil volume (ltr · usg) Dry weight* (kg · lbs) A Build height (mm · in) B Build length (mm · in) C Build depth (mm · in) D Tank length (mm · in) E Filter change (mm · in) 40 ltr 52.7 · 13.9 40 · 10.6 45 · 99 705 · 27.8 870 · 34.3 330 · 13.0 600 · 23.6 100 · 4.0 60 ltr 80 · 21.2 60 · 15.9 59 · 130 860 · 33.6 890 · 35.0 330 · 13.0 600 · 23.6 100 · 4.0 Connections on tank 1 Tank to pump 2” BSP 2 Pump to valve 1” BSP 3 Bleed returns (3x) 1/2” BSP 4 Valve ports to users 1/2” BSP 5 Water to/from oil cooler 3/4” Nipple JIC thread kit available * with valve block for single thruster only Sidepower Hydraulic System 2.3 - 2006 5 SERVICE ! Yacht Single Yacht Dual Pro Single Pro Dual Height (mm•in) 71•2.80 122•4.80 125•4.92 206•8.11 Width (mm•in) 71•2.80 71•2.80 106•4.17 106•4.17 Depth (mm•in) A/B 60•2.36/42•1.65 60•2.36/42•1.65 115•4.43/100•3.94 115•4.43/100•3.94 Item code (12 V) 895112-S 895112-D 896112-S 896112-D Item code (24 V) 895124-S 895124-D 896124-S 896124-D Depth INSTALLATION START UP TECHNICAL INSTALLATION SPECIFICATIONS SYSTEM OVERVIEW Control panels START USER MANUAL UP Info panel H (mm • in) 70 • 2.76 W (mm • in) 70 • 2.76 Item code (12V/ 24V)8980-12V/8980-24V SERVICE SERVICE MANUAL TECHNICAL SPECIFICATIONS USER H (mm • in) W (mm • in) Item code (12 & 24V) Touch panel 70 • 2.76 70 • 2.76 8950 H (mm • in) W (mm • in) Round touch panel Ø86.5 8909 A Dual Joystick panel H (mm • in) 120 • 4.72 W (mm • in) 70 • 2.76 Item code (12 & 24V) 8940 Docking panel 120 • 4.72 70 • 2.76 8909 A H (mm • in) W (mm • in) Item code (12 & 24V) Boat switch panel Ø86.5 8955 Joystick panel 70 • 2.76 70 • 2.76 8950 Radio remotes 95 • 3.74 (transmitter) 48 • 1.89 (transmitter) Sidepower Hydraulic System 2.3 - 2006 6 Observe safety precautions (wear protective goggles, gloves and other appropriate safety equipment when installing the hydraulic system and working with hydraulic oil). The thrusters should already be installed (please see the mechanical thruster installation manual). Hydraulic components can be damaged by dust and dirt, keep these away from the boat until you have finished the «dirty» part of the installation (grinding, drilling etc.) and cleaned up. All hydraulic components must be assembled in a clean environment. Make sure that all parts are handled with care. Find a good location for the hydraulic tank installation, in terms for maintenance accessabilities, height of oil level in hydraulic tank in relation to hydraulic pumps ( for details, refer to "Installing tank assembly") Check that the power source direction is in accordance to the pump directions ( see "Hydraulic pump installation") The hydraulic system is delivered without hoses, make sure to contact professionals that can assist with the planning of the installation, supplying neccessary hoses and fittings, and installing these parts Hydraulic pump installation Warning ! • Check that the power source direction is in accordance with pump direction ! Pump direction is decided as seen on picture, facing the pump shaft, i.e the pump direction will be the opposite of engine / PTO / generator. NB ! Please see pump nameplate L=CCW and R=CW TECHNICAL SPECIFICATIONS SYSTEM OVERVIEW Installation planning and important precautions • Ensure that the power source and connection point can handle the torque and load from the hydraulic pump. The pump can with a great advantage be connected to a generator. The advantage with this type of installation is that the pump will be driven at a higher and more stabile speed than installed to the main engine.You can thereby use a smaller pump in such an installation. Due to our experience with hydraulic thrusters, we know there are usually three methods of connecting a hydraulic pump to the engine or generator: • Power Take Off (PTO) at the gearbox or the engine • Front mounted to the engine crankshaft with use of a bracket and a flexible coupling • AC power pack INSTALLATION • As soon as the pump is connected to the power source, it is very important NOT to start the power source before the installation is complete and the pump is prefilled with hydraulic oil. It is important that the hydraulic pump is fixed to the bracket, and the bracket itself is locked to the engine. The pump has to move with the engine. AC Power pack A 3-phase AC motor is designed to run both directions. It's important to to match the drive direction of the AC motor and the pump. A trained professional should be responsible for the electrical installation of the motor. If high start-up current is a problem, please contact your Side-Power distributor for a sotfstarter solution or star/delta switch. USER MANUAL Front mounted pump A very reliable way to install the pump is to connect the pump to the crankshaft in front of the engine with use of a bracket and a flexible coupling. Even when using a flexible coupling, it's very important to get the best possible alignment of the pump shaft and crankshaft to reduce stress on the engine/pump shaft bearings. Engine Front mounted pump PTO mounted pump Sidepower Hydraulic System AC Power pack 2.3 - 2006 7 SERVICE PTO mounted pump SIde-Power standard pumps comes with SAE flange and spline to fit directly to a wide range of live ore clutched PTOs. Our pumps comes standard with one of the following SAE standards: • SAE-B (2 bolt, 13 teeth) • SAE-C (4 bolt, 14 teeth) • SAE-CC (4 bolt, 17 teeth) For other shaft and flange options or special adapters, contact your local Side-Power distributor. When fitted to a wet or pressurised PTO, make sure that sealing is maintained to avoid draining the PTO START UP Belt drive installations is not recommended due to the high stress and torque requirements. Please concact your Side-Power distributor if belt drive installation is the only option TECHNICAL SPECIFICATIONS SYSTEM OVERVIEW Tank assembly installation •Place the tank in a position where you have access to connection and inspection points. Ensure that there is enough space to lift out and replace the filters. Keep in mind to make room for access to the oil filling point. •NB: Place the tank high enough to get the oil level above the hydraulic pump. The system requires overpressure in the pumps suction line. •Fasten the tank assembly properly. •Ground the tank electrically to the boats bonding system. •Ensure that the tank and other components are thoroughly clean before you start installation of fittings and hoses. Also, make sure that the fittings and hoses are thoroughly clean (avoid ingress of dirt, water and other contamination). Hose connections Each thruster system is calculated and set up individually by Sidepower. Please see the enclosed system drawings in the enclosed unique system manual for the actual installation to get the right hoses and fittings. We advice that you let professionals make the hoses and fittings. Make sure to clean the hoses internally before assembly. To ensure easy and trouble free connection, apply a small amount of oil to threads and mating faces before joining. Different kinds of fittings will require different tightening torque to avoid leakage. If in doubt, please contact a skilled professional to get the best results. NB: Using sharp 90° elbows, T-connections and smaller hoses than recommended in the hydraulic schematic will increase the resistance in the system and reduce the efficiency/performance. INSTALLATION Using plumbing tape, hemp, similar products or excessive amounts of tread sealant can contaminate the hydraulic oil and cause blockage inside valves and pumps. Cooling water IN (3/4" hose nipple) Output to consumers START UP Cooling water OUT (3/4" hose nipple) Pressure from pump (1" BSP) 2x cooling water IN (3/4" hose nipple) 2x feed to pump (2" BSP) USER MANUAL 3x drain inlet (1/2" BSP) 2x cooling water OUT (3/4" hose nipple) PREFITTED JIC ADAPTORS ARE AVAILABLE AS AN OPTION 2x cooling water IN (3/4" hose nipple) 2x cooling water OUT (3/4" hose nipple) Output to consumers 3x drain inlet (1/2" BSP) SERVICE 2x feed to pump (2" BSP) Pressure from pump (1" BSP) Sidepower Hydraulic System 2.3 - 2006 8 The hydraulic tank comes prefitted with two internal oil coolers that will need cooling water (approx. 15 l/min seawater at max 30°C) For maximum cooling efficiency, we advice to install a separate seawater intake to supply the cooling water. This solution will require a separate water circulation pump. If an electrical pump is choosen, the electrical temperature/level indicatior on the tank has a separarate 50°C switch that can control the function of the water circulation pump, in relation to the oil temperature. See electrical schematics for more detailed information. If a separate water intake is used, the coolers can be connected in series/loop. If a separate water intake is not an option, the cooling water can bee bleed from the engine seawater cooling system. Please verify with the engine manufacturer that this is accepted. If two engines is used, make sure to connect one oil cooler to each of the engine cooling system. It is important to keep the engine cooling systems separate. If only one engine is installed, the oil coolers can be connected in series/loop. For extra cooling requirements, an optional external oil cooler can be installed. To achieve maximum cooling effect in this cooler, the direction of the oil flow in a oil cooler has to be opposite to the waterflow direction. This oil cooler can be connected in series with the internal oil coolers. Optional external oil cooler Pump hose connections • Fit the LS-hose from the «LS»-port at the valve to the «X»-port on the pump. Using too long/deep threads (e.g. JIC threads) will jam the pump pressure regulator spring, causing the pump to malfunction. Drain • The drain hose should be connected to the highest position of port «L1» and «L2» at the pump (please see pump drawings) to ensure best priming of the pump. Use one of the three drains (1/2" BSP-connections) at the tank. Oil in TECHNICAL SPECIFICATIONS SYSTEM OVERVIEW Cooling water • Suction hose can be mounted with nipples and hose clamps at pump inlet (2" SAE 3000 PSI). Use a reinforced hose that will not collapse due to suction in the hose. To avoid pump damaging cavitation in the suction line, try to avoid using sharp 90° elbows or T-connections close to the pump. INSTALLATION LS Oil out • Pressure hose has to be mounted at pump outlet (1" SAE 3000 PSI) and at the free 1" BSP port at the high-pressure filter on the oil tank. Valve connections and connections for additional consumers START UP Sidepower hydraulic thruster systems can be delivered with various numbers of modules and set-ups. Please see enclosed system drawings and valve documentation for Flow/Pressure settings at the actual valve module. Be sure to connect your consumers to the correct modules (correct set-up for correct consumer). Attach each consumer to the A and B consumer ports. Please see the consumers installation manual for how to install additional consumers that are not Side-Power products. If resetting or fine tuning of the valves is neccessary, please contact your Side-Power distributor. Sidepower Hydraulic System 2.3 - 2006 9 SERVICE USER MANUAL Connect drain from consumers to drain port at tank. START UP INSTALLATION TECHNICAL SPECIFICATIONS SYSTEM OVERVIEW Electrical wiring Before you start to install the electric wiring and connections, it’s important to remove the positive battery terminal. Side-Power hydraulic systems comes with a prewired electrical control/junction box. Cables to be installed are: • 12V or 24V DC power feed to control/junction box. Use 1.5 mm2 wire size. • From the junction box to each of the control and info panels. Use 1 mm2 wire size (3-9 lead multi cable, depending on type of control panel). • Non-Thruster consumers are not prewired by Side-Power. Use 1 mm2 multi cable. More detailed information is found in the unique electrical wiring schematic. CHECK LIST Before startup: Hoses and fittings are in accordance to the hose list in the unique hydraulic system drawing. (Sizes and pressure ratings) All connections are tight and secure. Oil level is ok. The oil tank is properly fastened and grounded. There is enough space arond the oil tank to change filters, fill oil and inspect the gauges and indicators. The oil tank is placed high enough to pressurize the pump feed port. (oil level above the pump) Cooling water is connected to the oil coolers. (approx 15 l/min, max ����� 30°C) Pump drive direction will correspond with the power source drive direction Front mounted pump is alligned to the power source crank shaft, and fixed to move with the power source. The pump is prefilled with oil. The drain line is connected to the upper drain port at the pump. The LS line is connected to the pump. Correct adaptor/fittings is used (NOT JIC threads). A drain line is connected to the thruster(s). After startup: Standby pressure is 10-30 bar. (seen at the pressure gauge at the control valve on the oil tank) No leakages. Oil level/temp is ok. The thrust direction is in accordance to the joystick movement. All control stations are connected and working properly. The oil pressure when running each of the hydraulic consumers is in accordance to the setup in the system manual. The filter indicators are ok when running a large consumer (high oil flow). Hydraulic system serial no.: .................................... USER MANUAL Standby pressure: ............... bar System work pressure (bowthruster): ............... bar System work pressure (sternthruster): ............... bar System work pressure (extra consumer #1): ............... bar (..#2): ............... bar (..#3): ............... bar The hydraulic thruster system has been installed as per the instructions in this manual and all points in checklist above have been controlled. Signed: ................................................................................................ SERVICE Date: .................................................................................................... Sidepower Hydraulic System 2.3 - 2006 10 System fill-up TECHNICAL SPECIFICATIONS SYSTEM OVERVIEW Prior to filling the tank, prime the pump(s) through their upper drain port. Fill the oil tank with correct hydraulic oil through the oil filling filter. Use new and clean mineral based hydraulic oil with anti-wear additives, viscosity ISO VG 32.00 (by ISO 3448) The oil level in the tank should be approximately 3/4 full, or at the middle of the upper indicator of the sight glass. Because vessels heels and the fact that we have an air breathing filter in the oil filler cap, avoid higher oil level than what the sight glass can indicate. Pump damages caused by running pumps without oil is not covered by warranty. Starting up and functional testing of the hydraulic system Ensure that the hydraulic system and components are installed in accordance with the provided system manual. Ensure that the vessel is secured. (In the event of undesired directional movement of the thruster(s)) Observe safety precautions (wear protective goggles and gloves). Disconnect all electrical plugs from the valve block. Check that the valve block manual lever(s) are in their central position (no load). Start the engine(s) / hydraulic pump(s) at idle while observing the pressure gauge installed at the control valve. As soon as the pump is running, you should read a standby pressure at 10-30 bar. If no pressure is present, the pump is probably running in the wrong direction. Stop the engines immediately to minimize potential pump damage. If pump pressure is ok, keep running for approximately 30 sec. Stop the engine(s). INSTALLATION Ensure that the oil tank is filled with oil in accordance with system manual. Check oil level in the tank and refill if necessary. Check system for leakage and adjust if necessary. Restart the engine(s) / hydraulic pump(s). Check the oil level in the tank and refill if necessary and re-check system for leakage. Repeat the above procedure on additional thruster or other hydraulic consumers as required. Run each hydraulic consumer separately at full power manually (e.g. additional thruster, windlass etc.) Ensure their individual pressure indications are in accordance with their system manuals. Monitor the filter indicators making sure the filters working properly and not in need of replacement. START UP Run the thruster to approximately 30% effect in both directions, using the manual lever at the valve block. Be aware that there can be a delayed response from the hydraulic consumer until all air is purged from the system. Manual air bleeding should not be necessary. Continuously monitor the system oil temperature and filter bypass indicators during the first hours of running. Especially when initially throttling the engines to full power. The oil temperature should not increase to more than 60° C. WARNING: Overheating over 60° C will reduce the lifetime of your oil. Overheating over 90° C can seriously damage your hydraulic system components. Sidepower Hydraulic System 2.3 - 2006 11 SERVICE Ensure that the standby pressure is less than 40 bar at the valve block pressure gauge when thruster and other consumers are not in use (system in standby mode). USER MANUAL Re-connect all electrical plugs on the valve block and ensure correct functionality. TECHNICAL INSTALLATION SPECIFICATIONS SYSTEM OVERVIEW Operating the thruster system Yacht control panel, Pro control panel, proportional H H F F G F F G E E A B C D START USER MANUAL UP INSTALLATION START UP A B C D SERVICE SERVICE MANUAL TECHNICAL SPECIFICATIONS USER On/Off control panel / info panel proportional PROPORTIONAL CONTROL PANELS A: Emergency stop button B: Oil temperature alarm C: Oil level alarm D: On/Off button E: Active station indicator F: Proportional joystick G: Emergency stop indicator H: Joystick lock knob 6 1 2 3 4 7 8 9 5 ON/OFF CONTROL PANELS 1: Joystick 2: On button 3: Active station indicator 4: On button 5: Off button 6: Oil temperature alarm 7: Emergency stop indicator 8: Oil level alarm 9: Emergency stop button PROPORTIONAL CONTROL PANELS 1. To activate the control station, press the on/off button (D). The active station indicator (E) will turn on to indicate that the control station is active. 2. To run the truster(s), you can now move the joystick(s) (F) in the choosen direction. The joysticks will return to center position when released. 3. For PRO panels only, you can also run the thruster(s) by twisting the knob (H) on the top of the joystick(s). The joystick will engage more according to how much you twist the knob. The joystick will stay in this position until the knob is twisted back or the joystick is forced back to center position. This feature will allow you to lock the thruster(s) in running position at any speed setting for continous thrust. 4. Proportional control panels will allow you to regulate the speed of the thruster by how much the joystick(s) are engaged, the more engagement the more thrust will be delivered by the thruster(s), 5. To stop the thruster(s) immediately in an emergency situation, press the red emergency stop button (A). The emergency stop indicator (G) will turn on to confirm that the emergency stop button is enganged. When this emergency button is engaged, the hydraulic system will go to safe mode. To deactive the emergency stop function, press the emergency stop button (A) on any control station. The active emergency stop indicator (G) will turn off. 6. The hydraulic oil temperature indicator (B) and an audiable alarm will engage in a situation where the hydraulic oil temperature is above 70°C. High oil temperature will reduce the lifetime of the oil and in worst case scenario damage hydraulic components. It is therefore important to find and eliminate the reason for the alarm. The alarm will stay active as long as the temperature is above 70°C. Pressing the red emergency stop button will stop the audible alarm, but the indicator (G) will stay active. 7. The hydraulic oil level indicator (C) and an audiable alarm will engage when the oil level is below recommended minimum level. Running the hydraulic pump(s) dry, or with limited available oil flow, can damage the pump(s). It is therefore important to find and eliminate the reason for the alarm. The alarm will stay active as long as the oil level is low. Pressing the red emergency stop button will stop the audible alarm, but the indicator (G) will stay active. 8. When using more than one control station, you will deactive all other control stations when activating a new control station, by pressing the on/off button (D). The active station indicator (E) will turn on at the activated station, and turn off at all other stations. 9. To deactive a active control station, press the on/off button (D). The active station indicator (E) will turn off to indicate that the control station is not active. Sidepower Hydraulic System 2.3 - 2006 12 ON/OFF CONTROL PANELS/INFO PANEL 1. To activate the control station, press both on buttons (2 and 4). The active station indicator (3) will turn on to indicate that the control station is active. 2. To run the truster(s), you can now move the joystick(s) (1) in the choosen direction. The joysticks will return to center position when released. 3. To stop the thruster(s) immediately in an emergency situation, press the red emergency stop button (9) on the info panel. The active emergency stop indicator (7) will turn on to confirm that the emergency stop button is enganged. When this emergency button is engaged, the hydraulic system will go to safe mode. If more than one info panel are installed, the active emergency stop indicator (7) at the info panel that was engaged will have a continous red light. The active emergency stop indicator (7) on the other info panel(s) will have a flashing red light, to indicate that the emergency stop button (9) is engaged somewhere else in the hydraulic system. To deactive the emergency stop function, make sure to press the emergency stop button (9) on the info panel that has a continous red light on the acitve emergency stop indicator (7), this would be the same info panel that was originally engaged. 5. The hydraulic oil temperature indicator (6) and an audiable alarm will engage in a situation where the hydraulic oil temperature is above 70°C. High oil temperature will reduce the lifetime of the oil and in worst case scenario damage hydraulic components. It is therefore important to find and eliminate the reason for the alarm. The alarm will stay active as long as the temperature is above 70°C. Pressing the red emergency stop button will stop the audible alarm, but the indicator will stay active. 6. The hydraulic oil level indicator (8) and an audiable alarm will engage when the oil level is below recommended minimum level. Running the hydraulic pump(s) dry, or with limited available oil flow, can damage the pump(s). It is therefore important to find and eliminate the reason for the alarm. The alarm will stay active as long as the oil level is low. Pressing the red emergency stop button will stop the audible alarm, but the indicator will stay active. 8. To deactive a active control station, press the off button (5). The active station indicator (3) will turn off to indicate that the control station is not active. How to use a bowthruster 1. Please take some time to exercise thruster usage in open water to avoid damages to your boat. 3. Acivate the control panel 4. Move the joystick in the direction you wish the bow to move. Other controls like footswitches or toggle-switches on the throttle can be used. These are normally logically installed, so by engaging the port control, the bow goes port etc. In case of any doubts, try in open waters first. 5. Depending on the sideways speed of the bow, you must disengage the control device shortly before the bow is in the desired direction, as the boat will continue to move after stopping the bowthruster. How to use a single stern thruster Some boats might however have installed a single stern thruster because of space limitation in the bow. In this case the stern thruster is used in the same way as a single bow thruster (see above) for moving the boat’s stern. How to use a bow and stern thruster combined The combination of a bow and stern thruster offers total manoeuvrability to the boat and the opportunity to move the bow and the stern separately from each other. This enables you to move the boat sideways in both directions and to turn the boat around its own axis staying at the same place. • Again, if in doubt, try in open water first! Sidepower Hydraulic System 2.3 - 2006 13 USER MANUAL Turn boat to starboard START UP INSTALLATION Bow+Stern Thruster SERVICE Turn boat to port TECHNICAL SPECIFICATIONS SYSTEM OVERVIEW Operating the thruster system TECHNICAL SPECIFICATIONS SYSTEM OVERVIEW Servicing the hydraulic system - Check filter indicators (A and G) periodically. A large hydraulic consumer must run at full speed for the dirt indication gauges to work. - Check oil level (E) periodically. - We recommend to replace hydraulic oil and filters (B and H) after the initial start up and test period. This is to eliminate all debris and dirt from installation and start up, to ensure a trouble free and long service life. After this first service, oil and filters should be replaced every 2000 engine hours / every 3 year. - Between service intervals, make sure to replace the oil and filters (B and H) if misscolouring or a distinctive smell is present. - Check that all electrical connections are clean and fastened firmly. - We advice to drain a little bit of oil out of the drain plug (C) of the tank once a year to let any possible sedimentation and water out. - Minimum once a year, the hoses and hose fittings must be checked for wear and leakages. Make sure that all fittings are tight and secure. This must be done more often on a commercial vessel with lots of usage of the hydraulic system. - For high pressure filter element replacement, please unscrew filter element bowl (B) to get access to the element. Make sure to use clean tools and avoid getting dirt in the system. Use a bucket, or similar, to collect the oil spill when dissasembling and assembling the filter. Proceed to replace the old element with the new one. After replacement, make sure to tighten the filter element bowl (B) properly. - For return filter element replacement, please open the top cover (H) on the return filter to get access to the filter element. Make sure to use clean tools and avoid getting dirt in the system. Use a CLEAN towel, or similar, to collect the oil spill when dissasembling and assembling the filter. Proceed to replace the old element with the new one. After replacement, make sure to secure the top cover (H) and tighten the three bolts properly. H G F INSTALLATION (A) High pressure filter dirt indicator (B) High pressure filter (C) Drain port (D) Visual oil level sight glass (E) Visual oil temperature sight glass (F) Oil filling point (G) Return filter dirt indicator (H) Return filter D START UP E H G F C USER MANUAL D E SERVICE A B A Sidepower Hydraulic System 2.3 - 2006 B C 14 No standby pressure on the system when pump(s) are running • The pumps drive direction is incorrect. Stop the pump(s) immediately to minimize potential pump damage. Contact Sidepower for further assistance / new pumps. Max pressure on the system is 20-30 bar when running a consumer • The LS hose is not installed / connected to wrong port. See illustration below: LS port on pump 'X' LS port on controlvalve 'LS' • TECHNICAL SPECIFICATIONS SYSTEM OVERVIEW Trouble shooting The red emergency stop button on the hydraulic info panel is activated. • Repress the red STOP button to deactivate the emergency stop function. • INSTALLATION The pump is not connected to the power source (PTO) • Check if clutchable PTO is engaged • Check if that pump drive shaft is correct size and engaging the spline sleeve inside the PTO. Standby pressure too high (above 40 bar) • The LS hose connector is jamming the spring inside the pump pressure regulator. • Use shorter connector (JIC threads can NOT be used) Oil level is too low • Check for leakages. After initial startup and test period, the oil level should not change. • Fix the leakage, and refill. Oil temperature is too high • • • • START UP Oil coolers are not working properly • Avoid using the system until the problem is fixed or the oil temperature is beck below 60ºC. • Check that you have 15-20 l/min cooling water at max 30ºC. If not ok, check that strainers are clean and valves are in full open position. If strainers and valves are ok, reroute your cooling water supply. The system is generating more heat than normal • Check that no consumers are running unintentionally • Check that no safety relief valves are open. Open relief valves will make a howling / whining sound. If open, the system pressure settings must be adjusted. Contact Sidepower for more detailed instructions. If both of the two checkpoints above is ok, please contact Sidepower for additional cooling. The thruster is running in wrong direction. • • If on/off electrical control, swap the blue and grey wires from the control panel, or swap the hydraulic hoses between the valve and the thruster. If proportional control, turn the joystick 180 degrees or swap the hydraulic hoses between the valve and the thruster. USER MANUAL • • Reduced thruster performance. • • Grids in the tunnel opening, sharp tunnel openings deep tunnel installation or barnickels on propeller / gear leg / inside tunnel will reduce the thrust and increase the pressure. Check that no filters are blocked (dirt indicator show green area). Do not adjust performance settings without first contacting Sidepower for more detailed instructions. Sidepower Hydraulic System 2.3 - 2006 15 SERVICE • Service Centres Argentina Trimer SA Buenos Aires Tel: +54 11 4580 0444 Fax: +54 11 4580 0440 www.trimer.com.ar [email protected] Denmark Gertsen & Olufsen AS Hørsholm Tel: +45 4576 3600 Fax: +45 4576 1772 www.gertsen-olufsen.dk [email protected] Australia AMI Sales Freemantle, WA Tel: +61 89 331 0000 Fax: +61 89 314 2929 [email protected] Finland Nautikulma OY Turku Tel: +358 2 2503 444 Fax: +358 2 2518 470 www.nautikulma.fi [email protected] Austria G. Ascherl GmbH Hard, Bregenz Tel: +43 5574 899000 Fax: +43 5574 89900-10 www.ascherl.at [email protected] France Kent Marine Equipment Nantes Tel: +33 240 921 584 Fax: +33 240 921 316 www.kent-marine.com [email protected] Benelux ASA Boot Electro Watergang Tel: +31 20 436 9100 Fax: +31 20 436 9109 [email protected] [email protected] Germany Jabsco GmbH Norderstedt Tel: +49 40 535 373-0 Fax: +49 40 535 373-11 Brazil Electra Service Ltda. Guaruja Tel: +55 13 3354 3599 Fax: +55 13 3354 3471 www.electraservice.br.com [email protected] Bulgaria Yachting BG Burgas tel: +359 56 919090 fax: +359 56 919091 www.yachting.bg [email protected] Greece Amaltheia Marine Athens Tel: +30 210 2588 985 Fax: +30 210 2588 986 www.amaltheiamarine.com [email protected] Iceland Maras EHF Reykjavik Tel: +354 555 6444 Fax: +354 565 7230 www.merkur.is [email protected] India Indo Marine Engineering Co. Pvt. Ltd Pune, Maharashtra Tel: +91 20 2712 3003 Fax: +91 20 2712 2295 [email protected] Canada Imtra Corporation New Bedford, MA Tel: +1 508 995 7000 Fax: +1 508 998 5359 www.imtra.com [email protected] China/Hong Kong Storm Force Marine Ltd. Wanchai, Hong Kong Tel: +852 2866 0114 Fax: +852 2866 9260 www.stormforcemarine.com [email protected] Croatia AC Yacht & nautical support Icici Tel: +385 51 704 500 Fax: +385 51 704 600 [email protected] Ireland Sleipner Motor Ltd. South Brent Tel: +44 1364 649 400 Fax: +44 1364 649 399 [email protected] Israel Atlantis Marine Ltd. Tel Aviv Tel: +972 3 522 7978 Fax: +972 3 523 5150 www.atlantis-marine.com [email protected] Italy Saim S.P.A. Assago-Milan Tel: +39 02 488 531 Fax: +39 02 488 254 5 www.saim-group.com Sweden Sleipner AB Strömstad Tel: +46 526 629 50 Fax: +46 526 152 95 www.sleipnerab.se Japan Turtle Marine Inc. Nagasaki Tel: +81 95 840 7977 Fax: +81 95 840 7978 www.turtle-marine.com [email protected] Switzerland Marine Parts Technics AG Volketswil Tel: +41 1 997 40 90 Fax: +41 1 997 40 94 www.marineparts.ch [email protected] Malta S & D Yachts Ltd. Cali Tel: +356 21 339 908 Fax: +356 21 332 259 www.sdyachts.com [email protected] Singapore Alquest Marketing Singapore Tel: +65 6749 9359 Fax: +65 6749 9360 www.alquest.com.sg [email protected] New Zealand Advance Trident Ltd. Auckland Tel: +64 9 845 5347 Fax: +64 9 415 5348 www.advancetrident.com [email protected] Norway Sleipner Motor AS Fredrikstad Tel: +47 69 30 00 60 Fax: +47 69 30 00 70 www.side-power.com [email protected] Poland Taurus Sea Power SP. Z.O.O Gdansk Tel: +48 58 344 30 50 Fax: +48 58 341 67 62 Portugal Krautli Portugal Lda. Lisboa Tel: +351 21 953 56 00 Fax: +351 21 953 56 01 www.krautli.com [email protected] Russia Standarte Starbeyevo Tel: +7 095 575 67 23 Fax: +7 095 575 39 77 www.standarte.ru [email protected] Spain Imnasa Marine Products Girona Tel: +34 972 820210 Fax: +34 972 325116 www.imnasa.com [email protected] Singapore/Malaysia/ Indonesia/Vietnam/Phillipines OK-Maritime Pte Ltd Singapore Tel: +65 9669 8051 Fax: +65 6769 0507 www.ok-maritime.com [email protected] Taiwan Mercury Marine Supply Kaohsiung Tel: +886 7 3317 293 Fax: +886 7 3314 232 Turkey Denpar Ltd. Istanbul Tel: +90 212 285 0334 Fax: +90 212 285 0311 [email protected] UK Sleipner Motor Ltd. South Brent Tel: +44 1364 649 400 Fax: +44 1364 649 399 [email protected] United Arab Emirates Teignbridge Propellers & Marine Equipment Co. Ltd. Dubai Tel: +971 4 324 0084 Fax: +971 4 324 0153 [email protected] USA Imtra Corporation New Bedford, MA Tel: +1 508 995 7000 Fax: +1 508 998 5359 www.imtra.com [email protected] All other: Sleipner Motor AS Sleipner Motor AS • P. O. Box 519, N-1612 Fredrikstad • Norway Tel: +47 69 30 00 60 • Fax: +47 69 30 00 70 • [email protected] • www.side-power.com