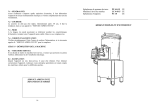
1
N°29516 E
Eplucheuse 5Kg
05/2010
Vegetable peeler
Gemüseschäl maschinen
Manuel d’utilisation - Notice originale
User manual - Translation of the original instructions
Bedienerhandbuch - Übersetzung der Originalanleitung
Manuale di utilizzo - Traduzione delle avvertenze originali
Gebruikshandleiding - Vertaling van de originele handleiding
Användningsmanual - Översättning av den originala bruksanvisningen
Brugervejledning - Oversættelse af de oprindelige brugsanvisninger
Brukerhåndbok - Oversettelse av den originale bruksanvisningen
Käyttöohjekirja - Alkuperäisen ohjeen käännös
Manual de utilización - Traducción del manual original
FR
GB
DE
IT
NL
SE
DK
NO
FI
ES
T5S FR 05 09
T5S 08- 05/2009
T5S 07- 05/2009
T5S 06- 05/2009
T5S 05- 05/2009
T5S 04- 05/2009
T5S 03- 05/2009
T5S 02- 05/2009
T5S 01- 05/2009
This document is to be used in conjunction with the original manufacturer’s manual.
The symbols correspond with the numbered drawings of the original manual
GB
09/2009
Contents
Introduction
Installation
Use, safety
Cleaning, hygiene
Fault finding
Maintenance
Conformity with regulations
1
1
3
4
5
5
7
Introduction
The User Manual contains useful information for the user on
how to work correctly and in complete safety, and is designed
to make it easier to use the machine (called «machine» or
«appliance» below).
What follows is in no case intended to be a long list of warnings
and constraints, but rather a series of instructions meant to
improve the service provided by the machine in every respect,
and particularly to avoid a series of injuries or damage to equipment that might result from inappropriate procedures for use
and management.
It is essential that all the people responsible for transporting,
installing, commissioning, using, maintaining, repairing or dismantling the machine should consult this manual and read it carefully
before proceeding with the various operations, in order to avoid
any incorrect or inappropriate handling that might be result in
damage to the machine or put people’s safety at risk.
It is just as important that the Manual should always be available
to the operator and it should be kept carefully where the machine
is used ready for easy and immediate consultation in case of any
doubt, or in any case, whenever the need arises.
If after reading the Manual, there are still any doubts concerning
how to use the machine, please do not hesitate to contact the
Manufacturer or approved After Sales Service provider, who
is constantly available to ensure quick and careful service for
improved machine operation and optimum efficiency.
Note that the safety, hygiene and environmental protection standards currently applicable in the country where the machine is
installed must always be applied during all phases of machine
operation. Consequently it is the user’s responsibility to ensure
that the machine is operated and used solely under the optimum
safety conditions laid down for people, animals and property.
Introduction
1.1 DESCRIPTION
• The vegetable peeler is mainly used for peeling, scrubbing
and washing vegetables by adapting the equipment to the task
to be performed.
A Water inlet
1.1
B Removable cover
C Electrical control housing
D Adjustable drain
E Stainless steel cylinder
F
G
H
I
J
K
L
Stand
Tray for collecting the water
Feet
Removable filter basket (9 litre capacity)
Hinged door and handle
Outlet chute for vegetables
Lid locking handle
Installation
ATTENTION!!
Machine storage: -25°C to +50°C
Ambient temperature during operation: +4°C to +40°C
This machine is for professional use and must be used by staff trained to use, clean and maintain it, in terms or reliability and
safety.
Use the machine in adequately lit premises (See applicable technical standard for the country of use. In Europe, refer to standard
EN 12464-1)
When handling the machine, always check that the parts taken hold of are not mobile elements: risk of dropping and injury to the
lower limbs.
The machine is not designed for use in explosive atmospheres.
2.1 DIMENSIONS - WEIGHT (for information only)
2.1a - Gross weight packed, excluding equipment : 20Kg
- Net weight excluding equipment
2.1b - Gross weight of stand + filter
- Net weight of stand + filter
: 17Kg
: 18Kg
: 16,5Kg
1
- Dimensions of packaging
- Overall dimensions of T5S
- Overall dimensions of stand
: 520 x 410 x 480 mm
: 500 x 320 x 450 mm
: 590 x 454 x 670 mm
T5S GB 10 07
2.2 LOCATION
•
•
-
• Install as follows :
- Connect the elbow A, and the plastic tube to the outlet pipe B,
of the vegetable peeler, and clamp them using the collar C.
- Place the machine on the stand, introducing the equipped
outlet pipe into the hole provided.
- Attach the machine to the stand (4 screws and washers D).
The vegetable peeler needs :
connecting to the cold water system near a stop cock (see § 2.3).
an adequate evacuation to the drains (see § 2.4).
an electrical power supply (see § 2.5).
The vegetable peeler may be fitted either :
On a support that is fully stable, horizontal and not resonant (table, unit, sink top, etc.) of between 500 and 900 mm
in height.
2.2c
Note : Ensure that sufficient space is available above the machine
so that the lid may be opened, and in front of the stand so that
the basket may be removed.
2.2a
Note :In this case, the machine may be moved easily after removing
the plug and the flexible water inlet hose.
- If necessary, pack and level the stand by unscrewing the
retaining screw of the feet (10 mm socket spanner).
- Adjust the foot then lock in position.
- Check that the machine is completely stable.
- The feet may be anchored by counter drilling their retention
holes (dia. 5 x 40 screws and rawl plugs not supplied).
Never place the T5S in a sink (water may enter the motor)
- On a standard filter stand (optional)
or a special pivoting stand (upon request)
Choice of vegetables discharge on left G.
2.1b
2.2b
2.2d
2.3 CONNECTION TO THE WATER MAINS SYSTEM
• The vegetabla peeler uses the mains pressure and reduced
flow rate.
• In conformity with the sanitary regulations, the machine’s
water inlet is located above the overflow level, at a standardised
distance (overflow device).
• Connect the machine to a stop cock with a reinforced pipe of
15 mm internal diameter and clamped by means of a collar.
Note : If the machine is to be moved around regularly, use a
connection pipe that is fitted with quick release connectors.
2.4 DRAIN USED WATER AND SEPARATION OF WASTE
- Vegetable peeler on filter stand : Attach the outlet pipe
(B), internal diameter 88 mm to the under side of the tank for
collecting the used water , using the collar to fasten to the
drain.
• The waste must be separated according to their size (peelings,
skins, starch, moss, earth, etc.) depending on the different equipment that is used (see § 3.2).
• Some installations have starch decantation tanks that may be
directly connected. For other installations, we recommend installing the machine on a filter stand in order to avoid blockages
and bad smells.
• Possible installations :
- Vegetable peeler without stand (near to a sink) : Place a filter
basket or a strainer next to the peeler.
2.2a
2.2C
• Tips :
To drain used water correctly, avoid :
- vertical drops onto inspection chambers (formation of
foam),
- sharp angles,
- flattened, deformed or narrow pipes,
- counter slopes, or slopes which are not steep enough.
2.5 ELECTRICAL CONNECTION
ATTENTION!!
Connection to the electrical power supply must be done according to proper professional practice by a qualified and authorised
person (see current standards and legislation in the country of installation).
If an adapter is used on the socket, a check must be made that the electrical characteristics of this adapter are not lower than
those of the machine.
Do not use multiple plugs
The AC power supply to the machine must comply with the following conditions;
- Maximum voltage variation: ±5%
- Maximum frequency variation: ±1% on a continuous basis, ± 2% over short periods
ATTENTION: the electrical installation must comply (for design, creation and maintenance) with the legal and standard
requirements in the country where used.
- Check that the electric mains voltage, the value shown on the specification plate and the label on the power cable are the
same.
- The machine’s electrical power supply must be protected against voltage surges (short-circuits and excess voltages) by using
fuses or thermal relays of the appropriate gauge relative to the place of installation and machine specifications
ATTENTION: Concerning protection against indirect contact (depending on the type of power supply provided and
connection of the exposed conductive parts to the equipotential protection circuit), refer to point 6.3.3 of EN 60204-1
(IEC 60204-1) with the use of protection devices for automatic shut-off of power in the event of an insulation fault with
a TN or TT, system, or for the IT system, with the use of a permanent insulation or differentials controller for automatic
shut-off. The requirements of IEC 60364-4-41, 413.1 must apply for this protection.
For example: in a TT system, a differential circuit breaker must be installed upline of the power supply, with a suitable
power cut-off (e.g.: 30 mA) on the earthing installation for the place where it is planned to install the machine.
ATTENTION: Failure to comply with these instructions means the customer runs the risk of machine failure and/or accidents due to direct or indirect contacts.
T5S GB 09 09
2
• The machine is connected to a single phase supply by means
of a moulded 2 pin + earth plug.
• Before connecting the machine to the electrical power supply,
check that the voltage of the electrical system is the same as that
marked on the rating plate and the label on the power cable.
• The machine must be protected by a differential circuit breaker
and a 16 A fuse.
To PAT test the Electrolux Range of Food Preparation Equipment,
the PCB board needs to be disconnected before any test is done.
This is due to the fact that the boards are fitted with a grounding
diode that can give incorrect result during such a test. Also on a
standard appliance a flash test of 25 amps and up to 3000v is
used but, as you would expect, to use this on equipment, which
has a printed circuit, board would be quite destructive to that
board. We would recommend the use of a PAT tester approved
for computer systems which use a lower rate of amps.
The machine must be earthed.
• Motor characteristics :
Supply Nominal
Frequency Current
voltage (V)
power (W)
(Hz)
The appliance is perfectly safe and is CE certificated. There are
two ways to get overcome this problem.
Electrical
(A)
115
120
60
2,5
0,15
230
120
50
1,3
0,15
Consu. (kWh)
· Disconnect the board as instructed and test using test for
PC’s,
· Or install the mixer on a fused spur (no plug) as this takes it
away from being a portable appliance and the PAT test is then
not needed.
Use, safety
ATTENTION !!
Clean the machine properly prior to its first use
This machine is for professional use and must be used by staff trained to use, clean and maintain it, in terms or reliability and
safety.
Use the machine in adequately lit premises (See applicable technical standard for the country of use. In Europe, refer to standard
EN 12464-1)
When handling the machine, always check that the parts taken hold of are not mobile elements: risk of dropping and injury to
the lower limbs.
Uncontrolled closure of the lid or ram press involves a risk of crushing the fingers.
It is strictly forbidden to put the safety systems out of action or modify them: Risk of permanent injury!!!!
Check that the safety devices operate correctly each time before using (see paragraph3.1).
Never put a hand, a hard or frozen object in the appliance
For health and safety reasons, always use a washable or disposable strong head covering that covers the hair completely.
The machine is not designed for use in explosive atmospheres.
3.1 OPERATION - SAFETY
• Normal operation of the machine is obtained if :
- The door and the lid are closed.
- The timer is set to continuous or timed operation.
a) Starting up :
- Turn the timer switch in an anti-clockwise direction
to the
continuous operation position.
- Press the START button.
b) Timed operation :
- Turn the timer switch in a clockwise direction
, graduated
from 0 to 5.
- Stops automatically when the timer reaches 0.
c) Operation by pressing the START button :
- When the door is opened to remove the products.
d) Stopping
- The STOP button should be used prior to opening the door or
lid.
The safety devices have priority over the ‘On’ order.
• The safety of the user is ensured by :
- A control system using constant pressure when the door is
opened to evacuate the vegetables.
- The stoppage of the motor when the lid is opened.
- The START button needing to be pressed after stoppage («no
voltage» device).
- The design of the waste outlet zone, which avoids any blockage.
- The design of the knife plate : protective edge and automatic
emptying of the peelings.
- Respecting the instructions of this manual for the use, cleaning
and maintenance of the machine.
• Control housing
A Timer
3.1
C START button
D STOP button
E Continuous operation button
F Timed operation button
3
T5S GB 10 07
3.2 DIFFERENT EQUIPMENT
3.2a
• ABRASIVE PLATE
- Smooth cutting of the skin into small faces, identical to peeling
by hand.
- Improves the presentation, conservation and cookability
(economises cooking oil).
- No production of starch or foam, a filter must be used.
- For peeling vegetables with fine skins (new potatoes, carrots,
salsifies, etc.).
- The skin is rubbed off through contact with the abrasive surface.
- The use of a filter is recommended for intensive use or small
section drains.
3.2c
• WASHING PLATE
- For cleaning and washing tubers, fruits, new vegetables, etc.
and any items that do not require peeling.
- A filter may be required depending on the products to be
processed.
3.2b
• KNIFE PLATE
- For peeling «thick» or «soft» skinned potatoes, carrots,
celery, etc.
3.3 CAPACITIES (for information only)
• Nominal loads per operation :
Peeling potatoes (kg) : 5
3.4 USE OF EQUIPMENT
Scrubbing tubers (kg : 5
3.4
- Turn the plate until the drive pin D drops into its housing B.
This should drop in by its own weight.
Note : Ensure that sufficient space is available above the machine
so that the lid may be opened, and in front of the stand so that
the basket may be removed.
- Open the lid by turning the locking handle a quarter of a
turn.
- Hold the plate by the handle A and lower it, slightly tilted on
the deflector side, until the hub B, connects with the drive
shaft C.
3.5 PROCEDURE FOR PEELING, SCRUBBING AND WASHING
• Loading
- Open the lid.
- Fit the selected plate onto the drive shaft and check that it has
slotted into place (see § 3.4).
- Check that the door is locked correctly and that the filter basket
is in place.
- Load the products and close the lid.
•
-
Unloading
Place a tray under the outlet chute.
Close the water inlet stop cock..
When the door is opened, the vegetable peeler safety mechanism is operated.
- With your right hand, press the START button (operation by
keeping the button pressed down).
- With your left hand, lift the door handle in order to channel the
products out.
- Programme the following operation by turning the timer switch
until the cursor reaches the stop (see § 3.1).
Note : The products must not be loaded above the edge of the
cylinder.
3.5
Do not overload - Do not pack the products in - Overloading
will damage the quality and speed of work.
Note : Carefully monitor the peeling when the timer is in the
continuous operation position.
Do not forget to empty the filter basket when it is full or after
peeling.
- Partially open the water stop cock (see § 3.6)
- Select the cycle time (see § 3.1). At the end of the cycle, the
machine will stop automatically.
3.6 RECOMMENDATIONS FOR USE
Do not use the abrasive plate for shellfish.
• For peeling vegetables :
with the abrasive or knife plates (see § 3.2);
- The vegetables do not need to be washed before peeling.
- Avoid peeling small quantities.
- Peel vegetables of the same size.
- Cut long vegetables (salsifies), tips, tops of carrots.
- Peeling times : 1 to 2 minutes for new vegetables (potatoes,
carrots), 3 to 5 minutes for the rest.
• For scrubbing - washing vegetables and fruits :
with the washing plate (see § 3.2)
- Adjust the flow rate of the water to suit the dirtiness of the
products.
- Scrubbing time: from 1 to 3 minutes.
Cleaning, Hygiene
ATTENTION !!
Before dismantling any part, disconnect the appliance from the power supply.
Before using any cleaning product, be sure to read the instruction and safety instructions accompanying the product and use
appropriate protective equipment.
Do not clean the machine with a pressure cleaner
T5S GB 10 07
4
4.1 AFTER USE
- Close the lid and open the water stop cock as far as possible.
- Operate the machine for a few seconds to get rid of the remaining waste and to rinse the inside of the machine.
- Open the lid, move it away to the left to remove it and rinse
under the tap.
- Remove the equipment and clean it with a brush if it is dirty.
- Check that the bottom of the peeling chamber, the hub and the
drive shaft of the equipment have been cleaned correctly.
- The filter basket must be emptied then cleaned under the tap,
along with the tray.
- Clean the outside of the machine using a damp sponge.
- Leave the lid open and the door ajar in order to ventilate the
peeling chamber and avoid squashing the seals.
Note : Do not use abrasive detergents which scratch the surfaces,
or chlorine based products which can dull the aluminium or cause
the plastic to crack.
Fault finding
5.1 THE MACHINE WILL NOT START, CHECK THAT :
• The machine is plugged in.
• The electrical power supply to the socket is correct.
• The lid and the door are both closed.
5.2 ABNORMAL NOISES
• Stop the machine.
• Check that the rotating parts are fitted correctly (see § 3.4).
• Verify that there are no stones or foreign bodies in the peeling
chamber (risk of jamming and damaging the plate).
• If the noise persists and the machine operates abnormally
when empty, check if :
- The belt is worn (see § 6.1).
- The plate turns freely by hand.
5.3 JAMMING OF A PLATE
- Disconnect the machine.
- Unscrew the central screw of the plate using 13 mm spanner.
- Remove the handle washer.
- Retighten the screw to lift the plated and remove it.
- Refit the plate and screw to the plate.
Note : Clean and grease regularly the drive shaft of the machine
with tallow or an animal grease.
5.4 WORK QUALITY
•
-
Inadequate or irregular peeling, with flats may be caused by :
Insufficient peeling time (see § 3.6).
Overloading of the products (see § 3.3).
Vegetables which are too long, too soft or of unequal thickness.
- An abrasive plate which is worn or dirty or a knife plate with
damaged blades (see § 6.2).
If the problem persists, contact the service department of your local dealer
Maintenance
ATTENTION!!
Unplug the machine before carrying out any operation.
All access to the electrical parts requires the use of a tool.
Maintenance may only be carried out by a qualified, trained and authorised person.
6.1 MECHANISM
• The vegetable peeler only requires a minimum amount of
maintenance (the bearings of the motor and mechanism are
greased for life).
• It is recommended that the following be checked at least once
a year :
- The condition of the flexible water inlet pipe and its attachment.
- He wear of the belt.
• To access the mechanism, motor and electrical components :
- Disconnect the machine.
- Detach the machine from the stand, if fitted (4 attachment
screws).
- Turn the machine over and remove the 4 screws which attach
the base.
• The capacitors may retain an electrical charge. To avoid
taking any risks when carrying out work, we recommend
discharging them by connecting their terminals with an insulated
conductor (e.g. a screwdriver).
• Changing the toothed belt :
- Unscrew by 2 turns the 2 motor attachment screws (10 mm
hexagonal spanner).
- Bring the motor closer and slide onto the drive pulley to remove
the belt.
- Fit a new belt.
- Lightly tension the belt, using a screwdriver as a lever between
the motor and the bearing.
- Retighten the 2 motor attachment screws.
Residual voltage at the capacitor terminals.
5
T5S GB 10 07
6.2 MAINTENANCE OF THE EQUIPMENT
• ABRASIVE PLATE : Inefficient
- Used ramps or worn abrasive layer which has revealed the
base of the plate (poor peeling of the vegetables and formation
of flats): change the plate.
- dirty plate (calcium, starch or soil deposits): brush the plate.
- Use a water cooled grinding wheel , taking care to keep the
same cutting angle
After sharpening several times, the thickness of the
cut will increase. Replace worn blades.
• KNIFE PLATE : resharpening of the blades
- Remove the attachment screws.
• WASHING PLATE : Damaged or worn edges
- Change the brush.
- Unscrew the two attachment screws underneath the plate and
remove the brush.
6.3 ADJUSTMENT OF THE SAFETY DEVICES
• Check that the safety devices are operating correctly on a
regular basis. The motor should stop :
- when the lid is opened.
- when the door is opened.
• If either of the two safety devices do not work :
- do not use the machine.
- Have it adjusted by the service department of your local
dealer.
6.4 ELECTRICAL COMPONENTS
6.4 See electrical diagrams.
• Identification of the colours of the wires :
- Power circuit : black
- Control circuit : red or colour wire cable :
(D) brown / (E) grey / (F) white
- Motor
: A : blue / B : red / C : black / D : brown
- Phase
: L1
- Neutral
: N
- Earth
: B/C green /yellow
S1
S2
M
CPu
Mi
CD
CP
MA
:
:
:
:
:
:
:
:
Door safety device
Lid safety device
Motor
Power card
Timer
Start-up condenser
Permanent condenser
Start-up relay
• Identification of the components :
O
: Stop button
I
: Start button
Fu
: Fuse
6.5 ADDRESS FOR SERVICE REQUIREMENTS
We advise you to contact the dealer who sold you the
machine.
Dealer’s stamp
For any information or orders for spare parts, specify the type of machine, its serial number and the
electrical characteristics.
- The manufacturer reserves the right to modify and make improvements to the products without giving prior warning.
T5S GB 10 07
Date of purchase: .................................
6
Conformity with regulation
The machine has been designed and manufactured in
conformity with :
- The machine directive 2006/42 EEC,
- The CEM directive 2004/108EEC,
- 2006/95/EEC: Low Voltage Directive
- 2002/95/EC: Equipment recycling directive
2002/96/CEE « WEEE »
The symbol «
» on the product indicates that this product
may not be treated as household waste. Instead it shall be
handed over to the applicable collection point for the recycling
of electrical and electronic equipment. By ensuring this product
is disposed of correctly, you will help prevent potential negative
consequences for the environment and human health, which
could otherwise be caused by inappropriate waste handling
of this product. For more detailed information about recycling
of this product, please contact the sales agent or dealer for
your product, your after-sales service, or the appropriate waste
disposal service.
2006/12/CEE“Waste”
The machine is designed so that it does not contribute, or as
little as possible, to increasing the quantity or harmfulness of the
waste and the risks of pollution.
Make sure to observe the recycling conditions.
94/62/CEE“Packaging and packaging waste”
The packaging for the machine is designed so that it does not
contribute, or as little as possible to increasing the quantity or
harmfulness of the waste and the risks of pollution.
Make sure to eliminate the various parts of the packaging in
appropriate recycling centres.
- To the European standards :
EN 13208-2000: Vegetable-peeling machines, hygiene and
safety.
This conformity is certified by:
- The CE conformity mark, attached to the machine.
- The corresponding CE declaration of conformity, associated
with the warranty.
- This instruction manual, which must be given to the
operator.
Acoustic characteristics:
- The acoustic pressure level measured in accordance with the
test code EN ISO 3743.1-EN ISO 3744.
Protection indices as per the EN 60529-2000 standard:
- IP55 electrical controls.
- IP34 overall machine.
Integrated safety devices
- The machine has been designed and manufactured in compliance with the relevant standards and regulations, mentioned
above.
- Before using the machine, the operator must be trained to use the
machine and informed of any possible residual risks (personnel
training obligation)
Food hygiene:
The machine is made from materials that conform to the following
regulations and standards:
- 1935/2004 EEC materials and objects in contact with
foodstuffs
- EN 601-2004: cast aluminium objects in contact with
foodstuffs
- Directive EN 1672-2-2005 : Prescriptions relating to hygiene
The surfaces of the food area (excluding the abrasive parts) are
smooth and easy to clean. Use detergents that are approved for
food hygiene and respect the instructions for their use.
7
T5S GB 10 07
Schéma électrique / Electrical wiring diagram
BRANCHEMENT MONOPHASÉ / SINGLE PHASE CONNECTION
6.4
Machine semaine 47/00 - Machine week 47/00
T5S FR 12 07
M
• Repérage des couleurs des fils :
- Circuit de puissance : noir
- Circuit de commande : rouge ou cable fils couleur :
(D) marron - (E) gris - (F) blanc
- Moteur : (A) bleu - (B) rouge - (C) noir - (D) marron
- Phases
: L1
- Neutre
:
N
- Terre
: B/C vert / jaune .
• Repérage des composants :
O
: Bouton poussoir ARRET
I
: Bouton poussoir MARCHE
S1 : Sécurité porte
S2 : Sécurité couvercle
M : Moteur
CPu : Carte puissance
Mi : Minuterie
CD : Condensateur de démarrage
CP : Condensateur permanent
MA : Relais de démarrage
Fu : Fusible
• Identification of the colours of the wires :
- Power circuit : black
- Control circuit : red or colour wire cable :
(D) brown / (E) grey / (F) white
- Motor
: A : blue / B : red / C : black / D : brown
- Phase
: L1
- Neutral
: N
- Earth
: B/C green /yellow
• Identification of the components :
O
: Stop button
I
: Start button
S1
: Door safety device
S2
: Lid safety device
M
: Motor
CPu : Power card
Mi
: Timer
CD : Start-up condenser
CP : Permanent condenser
MA : Start-up relay
Fu
: Fuse