1
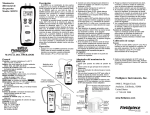
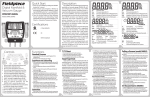
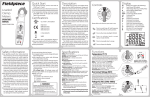
Pressure Switch Test
N.O.
COM
NEG
P1
11
PUMP
P2
WARNING: Read "Pressure Switch Testing Safety
Info" section below prior to testing.
1. Connect leads (interchangeable) from the
SDMN6 to the N.O. (normally open) and COM
(common) terminals of the pressure switch.
2.Connect the 2 yellow hoses of the Y-splitter
to the P1 and PUMP ports of your SDMN6.
12
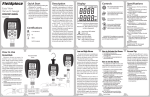
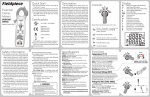
Transducer Test
Pump Bleed AccessorY
Most pressure switches have
a bleed port to help regulate the
pressure required to close and open
the switch.
Pressure switches rated around
-0.10inWC often don't have a bleed
port. You can insert the Pump Bleed
Accessory directly onto the PUMP
port to give the pump better control
of these low negative pressures.
17
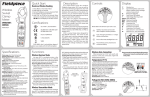
The pressure switch is a safety device that
prevents the furnace from running in an unsafe
condition. An unsafe condition can result in
injury, loss of property or even loss of life.
1. Before every use, check the SDMN6 and the
tubing for breaks or blockage. Check the tubing for any moisture as well.
2. It is critical that the hoses going to P1 and the
switch are the same length.
3. Check for the presence of moisture in the
pressure switch before using the SDMN6. Do
not use the SDMN6 on a pressure switch that
has moisture in it. Moisture can damage the
SDMN6 and VOID the warranty. Check the
tubing for moisture build-up as well.
4. The SDMN6 is designed to produce a precise
amount of negative pressure. Always zero the
SDMN6 before testing a switch.
5.Fieldpiece is not responsible for incorrect
readings by faulty test equipment or untrained personnel.
6. In the interest of safety, the SDMN6 should
only be used by trained, competent professionals who understand the hazards and
If you have difficulty maintaining the correct
pressure to open and close the switch the
diaphragm could be cracked.
Pressure readings are greatly affected when
the hose to the pressure switch is pinched. If the
pressure does not change when you pinch the
hose on a pressure switch with a bleed port, the
bleed port could be blocked.
Examine the bleed port for signs of corrosion
or debris. Corrosion is a sign that the switch
has been exposed to excessive moisture and
diaphragm could be coated with debris.
Checking the Inducer
To Pump
Port
If the pressure created by the inducer
measures more than enough to close the
pressure switch, but the SDMN6 proves the
pressure switch to be good, the inducer may not
be providing enough airflow to close the switch.
Indications a pressure switch is out of
calibration, has a weak/bad diaphragm, or
a bad micro switch in the pressure switch:
• Closing/opening outside the manufacturer's
tolerance rating.
• CLOSED LED blinks rapidly.
• Dramatic fluctuations of pressure readings.
14
!
WARNINGS
15
For Service
Limited Warranty
consider the risks of working on and with
tools and equipment.
7. The pressure rating for the pressure switch is
either stamped on the pressure switch or on
a sticker attached to the pressure switch. Otherwise, contact the vendor or manufacturer of
the furnace to get that information.
8. An adjustable pressure switch must open at
the desired negative pressure to match the
one it is replacing.
9. Fieldpiece is not liable for any damages, injuries, or loss of life incurred by the misuse of
the SDMN6.
NOTE: Pressure switch ratings are noted by
“[pressure] PF”. This means that the circuit
opens when the switch senses its rated Pressure Fall. Example: A -0.40" WC PF rated
switch should open at a negative 0.40 inches
of water column. The pressure switch should
close and more importantly “open” within the
manufacturer’s tolerance rating.
WARNING: Read "Pressure Switch Testing Safety
Info" section below prior to testing.
1.Follow steps 1-6 of "Pressure Switch Test".
7.Press / to adjust the pump speed until
displayed negative pressure is stable, within
±0.02 inWC of your target pressure.
8.Start with the switch closed. If the switch is
open, slowly loosen the adjustment screw
until the CLOSED LED turns on.
9.Open the switch by slowly tightening the
adjustment screw on the adjustable pressure
switch until the CLOSED LED turns off. The
adjustable pressure switch is now calibrated
to your target pressure.
NOTE: Stabilized pressures may slightly fluctuate after an adjustment. Be sure to adjust the
pump speed ( / ) as needed to maintain
the desired induced negative pressure.
NOTE: Dual-pressure switches only have one
spring and one diaphragm so it's only necessary to test the negative side.
Checking the Bleed Port
To Yellow
Pump Hose
13
Adjustable Pressure
Switch Calibration
Checking the Diaphragm
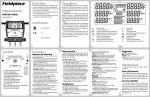
AUTO CAPTURE MODE
Press HOLD to automatically HOLD a closing
or opening pressure of a switch as you change
the speed of the pump. "HOLD" blinks until a
change in continuity is detected. Press HOLD
again to exit AUTO CAPTURE mode.
Pressure Switch
Testing Safety Info
1. Connect the 2 yellow hoses of the Y-splitter
to the P1 and PUMP ports of your SDMN6.
2.Connect a volt meter to the transducer's
terminals.
3. ZERO your SDMN6 while at ambient pressure
with yellow hoses attached. For measurements less than 2 inWC, take reading within
1 minute after zeroing for best accuracy.
4.Press TEST to start the pump. A brief warm
up period ensues.
5.Now connect the white hose to the low side
of the transducer. (Incorrect setup will cause
incorrect pressure measurements.)
6.Press / to increase/decrease the pump
speed and resulting negative pressure. For
higher rated transducers, you can hold down
the button to get the pump up to speed
faster.
7. As you increase the negative pressure, the
voltage across the terminals will change
based on the transducer's rating. Compare
observed voltage to rated voltage to determine the health of the transducer.
16
3. ZERO your SDMN6 while at ambient pressure
with yellow hoses attached. For measurements less than 2 inWC, take reading within
1 minute after zeroing for best accuracy.
4. Press TEST to start the pump. A brief warm up
period ensues.
5. Now connect the white hose to the negative
side of the pressure switch. (Incorrect setup
will cause incorrect pressure measurements.)
6. Make sure the pressure switch is vertically
oriented, the same as it is on the equipment.
7.If the CLOSED LED is OFF, press to increase
the pump speed and induce a negative pressure on the switch. The CLOSED LED will light
when the pressure switch closes. Note the
closing pressure.
If the CLOSED LED is ON, press to slow the
pump and decrease the negative pressure on
the switch. The CLOSED LED turns off when
the switch opens. Note the opening pressure.
NOTE: For higher rated switches, you can hold
or
to accelerate/decelerate the
down
pump faster. Slow your acceleration as you
approach the switch's rated pressure.
NOTE: A pressure switch should open and close
within the manufacturer's tolerance rating of
the switch (typically ±10%).
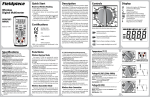
This meter is warranted against defects in
material or workmanship for one year from
date of purchase. Fieldpiece will replace or
repair the defective unit, at its option, subject to
verification of the defect. This warranty does not
apply to defects resulting from abuse, neglect,
accident, unauthorized repair, alteration, or
unreasonable use of the instrument.
Any implied warranties arising from the sale of
a Fieldpiece product, including but not limited
to implied warranties of merchantability and
fitness for a particular purpose, are limited to
the above. Fieldpiece shall not be liable for loss
of use of the instrument or other incidental or
consequential damages, expenses, or economic
loss, or for any claim of such damage, expenses,
or economic loss. State laws vary. The above
limitations or exclusions may not apply to you.
In the USA, call Fieldpiece Instruments for
one-price-fix-all out of warranty service pricing.
Send check or money order for the amount
quoted. Send the meter freight prepaid to
Fieldpiece Instruments. Send proof of date and
location of purchase for in-warranty service.
The meter will be repaired or replaced, at the
option of Fieldpiece, and returned via least
cost transportation. Outside of the USA, please
visit www.fieldpiece.com for service contact
information.
For international customers, warranty for
products purchased outside of the U.S. should
be handled through local distributors.
www.fieldpiece.com
©Fieldpiece Instruments, Inc 2014; v14
!
Turn off power to furnace prior to testing
to avoid low voltage shorting.
18
19
20