1
SAFE USE GUIDELINES
CARE AND MAINTENANCE
WARNING
• Read and follow all instructions concerning Heart Rate sensor setup and installation.
• Keep this device away from children. It contains batteries, which can be harmful or fatal if
swallowed.
• Do not attempt to modify your JetBlack Heart Rate sensor.
• Before you start any exercise program you should consult a physician. Should you become ill,
feel dizzy, light-headed or nauseous, stop riding immediately and seek medical attention.
CAUTION
• Use of detergents with optical brightening agents, moisturizing soaps or fabric softener may
cause damage.
• Do not soak, iron, dry clean the strap or bend the electrode areas sharply.
Hold the plastic sensor to detach the sensor from the strap, don’t pull the strap as it may cause
damage.
Please store the strap and heart rate sensor separately when not in use.
Keep both in a cool and dry place.
Store the strap lying flat or hanging loosely and do not fold from electrode areas of the strap for
extended periods.
After every use, please detach the heart rate sensor from the strap and dry the heart rate sensor
with a soft towel.
The strap may be rinsed under running water or washed in a washing machine inside a laundry
pouch. Please clean the strap gently and carefully.
Dry the strap with a soft towel after every wash and then hang to dry in a cool place. Do not
expose the strap to direct sunlight.
COMPATIBILITY (Dual Bluetooth Smart & ANT+)
TROUBLE SHOOTING
The Heart Rate Sensor enables wireless tracking of pedalling cadence and overall speed in real
time and sends data to the compatible display devices via ANT+/ Bluetooth Smart (Bluetooth 4.0)
with dual mode wireless technology.
If connection cannot be made or becomes intermittent please follow the below steps:
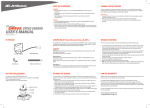
HEART RATE SENSOR
USER’S MANUAL
CODE: JBT-101
IN THE BOX
Compatibility
iOS devices:
iPhone 4s and above, iPod touch (5th gen and above),iPad (3rd gen and above),iPad mini, iPod
nano (7th gen and above)
Ensure Bluetooth services are enabled.
JBT-101 Sensor
Android devices:
Most devices with Bluetooth Smart Ready technology or ANT+TM enabled Androids with OS
version 4.3 or newer.
Please check your phones manufacturing details for compatibility with either ANT+ or Bluetooth
Smart.
Other devices:
Compatible with most cycle apps, smartphones, watches and cycle computers, however please
check the devices compatibility with Bluetooth Smart or ANT+TM Speed profiles
Fabric Chest Belt
• As with most electronic receiving devices, there can sometimes be interference that causes
inaccurate display readouts. Avoid using your sensor near common sources of interference.
These include high voltage power lines, air conditioning motor units, fluorescent lights,
wristwatches, mobiles and computers.
• If some interference remains or your sensor is in a power conservation mode, pairing may
take up to 2 minutes for the first connection to occur. Keep pedalling and allow up to 2 minutes
for connection (subsequent connections are typically quicker).
• Check the receiving device (smartphone, tablet, watch or cycle computer) has more than 10%
battery remaining.
• Check the receiving device has Bluetooth Smart or ANT+ enabled.
• Check that the battery is installed correctly
• Replace the battery in the sensor and retry pairing process
• Note: The signal does not travel well through material objects or bodies. Where possible, try
to keep clear line of sight between the receiving device and transmitting Speed & Cadence
sensor.
BATTERY REPLACEMENT
PAIRING THE SENSOR
LIMITED WARRANTY
To replace the battery, unscrew the back cover.
Gently remove the battery and replace it with a new battery model CR2032.
The (+) side should be facing up.
*NOTE: Losing O-ring may cause water leakage.
The below steps are to be followed after installation is complete (see installation step over the
page). To connect your device (smartphone, tablet, watch or cycle computer) to the sensor follow
the below steps:
1. Make sure you remove any wireless sensors from the surrounding area as these may cause
interference and could cause pairing to fail.
2. Make sure your device (smartphone, tablet, watch or cycle computer) has either Bluetooth
smart or ANT+ and ensure that it is enabled.
3. Begin pedalling the bicycle or rotating the cranks backwards so that the magnets activate the
sensors. The sensor will wake up and then begin to send out a search signal for a compatible
device to connect with (smartphone, tablet, watch or cycle computer).
4. Go to the device you wish to pair and while continuing to pedal or back pedal, search for
Speed & Cadence sensors.
5. The sensor typically pairs to an active device within about 5~20 seconds. Initial pairing may
take up to two minutes.
6. If pairing fails, try the process again and then see the trouble shooting section.
JetBlack aims to provide the highest possible quality at all times. However, should you have any
issues with your product please notify us immediately.
$
O-ring
The JetBlack Heart Rate Speed Sensor comes with a limited lifetime warranty.
This warranty is not applicable to damage caused by, misuse, abuse, neglect, accident or
comercial use. It does not cover general wear and tear, unauthorised modification or failure to
follow instructions or warnings in owner’s manual. Units which use batteries or computer display
units come with a one year warranty.
It is the responsibility of the purchaser to retain receipts for proof of purchase in the event that
warranty is required.
www.jetblackcycling.com
[email protected]
WEARING THE HEART RATE STRAP
3. Buckle the sensor into place.
NOTE:
• The transmitter should be positioned right below the breast/pectoral muscles. The strap
should be comfortable but secure.
• If the device doesn’t receive signal from the sensor, ensure the electrode areas are wet.
• The transmitter should automatically start reading as soon as the user has it in place.
1. Adjust the strap length to a suitable personal length, making
sure it is tight enough stay in place during your workout.
4. Wrap the strap just below your chest and then clip together.
2. Wet down both the electrode areas on the back of the strap.
5. To ensure correct left right orientation, make sure the logo is
in upright position when you are wearing the strap.
www.jetblackcycling.com
[email protected]