1
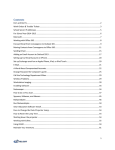
UTORecruit: On-line Academic Recruitment System Training Document Part 2 Candidate Management This document and other resources can be found at http://www.jobs.utoronto.ca/faculty/ resources.htm August 2011 1 2 Table of Contents Academic Candidate Selection Workflow (CSW) ................................... 5 Navigating the Candidate File Toolbar................................................. 7 Folder 1: Department Review......................................................9 1.1. Enter the UTORecruit System:.................................................................... 10 1.2. Review applications in a requisition (posting): .................................... 10 1.3. Job-Specific Capture - Faculty Candidate OPTIONAL STEP ............. 10 Upload Materials submitted by the candidate ................................................ 11 1.4. Move applications to Search Committee Review ................................. 12 Folder 2: Search Committee Review..........................................13 .................................................................................................13 2.1. Adding Attachments to candidate profiles OPTIONAL STEP ............ 14 2.2. Identify Canadian Candidates ..................................................................... 15 .......................................................................................................................................... 15 2.3. Move short-listed applications to Interview Folder ............................. 15 2.4. Send Correspondence to shortlisted candidates: OPTIONAL STEP .......................................................................................................................................... 16 2.5. Reject Candidates and Send Correspondence: OPTIONAL STEP... 17 Folder 3: Interview ...................................................................19 3.1. Move the top applicant after the interviews to the Offer Folder.... 20 Folder 4: Offer...........................................................................21 4.1. Prepare the Draft Letter of Offer (Optional Step) ............................... 22 The system is capable of generating a draft letter of offer. By entering in all the information regarding the academic appointment the draft letter and terms of appointment are populated. Since this step requires a fair amount of data entry we leave it at the user’s discretion if they wish to use it................................................................................................. 22 Skip to Step 4.4 if you are not creating the draft package online. ....... 22 4.2. 4.3. 4.4. 4.5. 4.6. 4.7. Email the Draft Letter of Offer to Recruiter ........................................... 23 Request Approvals ........................................................................................... 24 Generate Compilation of Statistics for Academic Appointment ..... 25 Record Provostial Approval........................................................................... 26 Extend Offer (this will be sent to the Chair’s Assistant)................... 26 Record the candidate’s response to the offer. ...................................... 26 3 4.8. Generate Completion of Offer Form.......................................................... 27 Folder 5: Hire ............................................................................29 5.1. Move Candidate to Hired Folder ................................................................. 30 5.2. Correspondence for FOREIGN WORKERS ............................................... 30 5.3. Change Candidate’s status to “HIRED”.................................................... 31 5.4. Send Correspondence: OPTIONAL FEATURE ......................................... 33 Appendix: Other Processes .......................................................35 1. Reverting a candidate action ........................................................................... 35 2. Sending Correspondence................................................................................... 35 3. Adding Attachment to Candidate File ........................................................... 37 4. Adding Comments to Candidate File............................................................. 37 4 Academic Candidate Selection Workflow (CSW) 5 Getting to know the Candidate File Toolbar Attach a file such as a reference letter to file, this will appear in the tracking tab The comment button will allow you to make a note on the file which will show on the tracking tab. Click the single green check lets the system know that this candidate is ready to be moved forward Changes the status of the candidate to “Under Consideration” Moves candidate over to the next tab – Only if you have marked the candidate as ready to be moved forward Print Application Reject this Candidate Information regarding eligibility to work in Canada as well as answers to prescreening questions (if applicable) Main Tab Contains job attachments, candidate personal information as well as educational information Source Tracking information and email preferences Contains a detailed history of the candidate’s application process The More Actions drop down menu contains many of the functions you will be using. The menu will change depending on the available options. 6 Navigating the Candidate File Toolbar Icon Description Comments Candidates The number below this icon is a hyperlink. It indicates the number of candidates who applied to the specific position. Click on the number to take you to the list of candidates for the position. Click on the applicant’s name to review his/her application Candidate List of applicants who applied for the position Move from one applicant file to another by using the arrows Close the candidate file Brings you back to your requisition list from the candidate list page Alert flag This is a fast way to review the applications. Closing the candidate file will return you to the full candidate list Indicates that an applicant file has not been viewed since some changes have been made to it (either by the applicant or another Taleo user) Saves the candidate file. Prints the candidate file Attaches a file to the candidate file. Adds comments to a candidate file. Sign out of Taleo Found at the top right hand corner. This is the proper way to sign out. If you click the from the browser menu bar, you will not be able to log in again for a half hour. Stores a candidate into a personal folder 7 Navigating the Candidate Selection Workflow The Routing icons below are activated and configured based on the Academic Candidate Selection Workflow Change the candidate’s status to the "completion" status (this will allow the applicant to be moved to another step in the CSW). Move all candidates who are at the completion status to the next sequential step of the CSW. Move the candidate to “Under consideration” status. Comments Change the candidate’s status to Rejected. (i.e. Not short-listed) Contains a list of actions that can be performed on candidates. Candidate Management - Staffing WebTop NOTE: These instructions are for Tenure Stream, Teaching Stream and Limited-Term Appointments only. What Taleo User name and Password Requisition Number and Title of the Position Candidate Selection Workflow Contact / Resource [email protected] UTORecruit Resources http://www.jobs.utoronto.ca/faculty /resources.htm Questions regarding Academic Recruitment Jason Phillips [email protected] Department Chair / Chair’s Assistant Copy in the user manual Comments The requisition number is the reference number for the specific position Refer to this document to understand the different steps and statuses that you can move an applicant through For Internal Use Only. This website is intended to provide support and resources to staff and faculty using the UTORecruit System. 8 Folder 1: Department Review Applicant materials can be viewed in the Department review tab and a number of actions can be performed. The most common will be the moving of applications to Search Committee Review. Processes for Department Review: Review all applications to ensure they are complete and if necessary, request additional information Attach additional information to candidate files as needed Capture candidates who did not apply through the online system and attach additional information Move candidates to Search Committee Review folder 9 Hint: Forgot your password or user name? Click on the Forgot Password link to be emailed a new password 1.1. Enter the UTORecruit System: Go to: https://stgutoronto.taleo.net (training) Click on Staffing WebTop Enter user name and password 1.2. Review applications in a requisition (posting): Click on tab Find the requisition number and title Click on the number hyperlink for that requisition (found under ) These activities may be done by the Recruiter or Hiring Manager (Chair/Dean) Click on Candidate name to review the application. To review applicant materials, click on To review answers to prescreening questions (including answers to eligibility to work in and tabs. Canada question) click on 1.3. Job-Specific Capture - Faculty Candidate OPTIONAL STEP If candidates have applied by email/mail you can manually added to the Online Academic Recruitment System. Best practice: contact candidates who do not apply on line and ask them to use UTORecruit to submit their materials Click on Click Click Job-specific Capture - Faculty Click Scroll down the Select Requisitions Pop-up box to find the Requisition (number and title) Check the box beside the requisition number. to locate the appropriate requisition 10 Click Click Click ***IMPORTANT!! Perform a Duplicate Check to ensure the candidate is NOT in the system.*** Email addresses are unique (unlike names) Type the Email address ONLY. Click If possible duplicates match your criteria: Review the list of results. If you find the candidate’s record select it Click to upload materials submitted by the candidate. (see below) If there is no candidate record: Captured candidates automatically receive an email indicating they have Click been added to the system. In the Personal Information screen add the first and last name and email address of the candidate Click to upload materials submitted by the candidate. (see below) Upload Materials submitted by the candidate In the attachments screen, only attach files that the candidate would upload. ***DO NOT UPLOAD REFERENCE LETTERS HERE USE THE PROCEDURES IN SECTION 2.1 ATTACHMENTS*** Click to locate the file on your computer. Type in comments (e.g. CV & Cover Letter) Click Click Candidates can see any materials uploaded here. For confidential materials (reference letters) use the attachment procedures in 2.1. 11 1.4. Move applications to Search Committee Review Search Committee members will not have access to applications until they are moved to the “Search Committee Review“ folder. Moving Multiple Candidates In Candidate List View: Click the box above the candidate names. (This will automatically check all boxes on the page). Click Click (this will change applicants’ status to the completion status for this step) (moves ALL checked candidates with the completion status to the next step) Moving Individual Candidates: Click on Candidate name to review the application. Click on down arrow of Select Change status… Select appropriate Proceed to Search Committee Review Click Select Hint: Made a mistake? Candidate files can be moved back to previous folders. See Reverting instructions on page 28 to move candidate to Search Committee Review folder. 12 Folder 2: Search Committee Review Search committee members can view candidate application in this folder. They can make notes about candidates and short listed candidates are moved to the Interview folder. Contact utorecruit.support @utoronto.ca to request search committee access to the requisition Processes for Department Review: Ensure all applications are moved to Search Committee Review folder Ensure search committee members have access to the requisition Search committee views applicants (ensure they look at Canadians first) Upload requested reference letters and other attachments Move shortlisted candidates to Interview folder 13 2.1. Adding Attachments to candidate profiles OPTIONAL STEP Additional documents can be attached to a candidate’s file. Search committee members can view any of these documents (e.g. reference letters). Consult with the Search Committee Chair about what materials should be loaded and at what stage of the search. Best Practice: Search Committee reviews applications and then determines which reference letters to upload. ***REFERENCES LETTERS MUST BE UPLOADED USING THIS PROCESS*** Click on tab Find the requisition number and title Click on the number hyperlink for that requisition (found under Click on Candidate name to open their file. Click In the Action Dialog, ensure Action says Attach File to locate the file on your computer. Click Type in comments (e.g. References for Professor xxx) Click Click on Find the File Attached event and the attached file. Click on .doc or .htm file to view the attachment. Click ) Hint: Scan all reference letters at a lower resolution so you can fit all letters into one PDF file. Maximum file size is 1048 kilobytes or 1 megabyte. Some files, (e.g. image and compressed files .zip) will not be indexed in the database and are not searchable. 14 2.2. Identify Canadian Candidates Candidate who apply online are required to indicate if they are a Canadian citizen or permanent resident. Those who are not Canadians or permanent residents have this symbol beside their name. Click to sort candidates by Citizenship/permanent resident status. HRSDC regulations state that applications from Canadians and permanent residents are viewed first. 2.3. Move short-listed applications to Interview Folder Once the Search Committee has reviewed the applications and decided on the short list of applicants to invite for an interview, the recruiter can move those applicants to the Interview tab and send appropriate correspondence. Click on Candidate name to review the application. Click on down arrow of Select Change status… Select Proceed to Interview Click Select Hint: Made a mistake? Candidate files can be moved back to previous folders. See Reverting instructions on page 28 to move candidate to Interview folder. 15 2.4. Send Correspondence to shortlisted candidates: OPTIONAL STEP Click on the box beside the appropriate candidate’s name Click on down arrow of Select Send Correspondence… Type comments (e.g. spoke to Professor xx. Now confirming details of interview) Click Select delivery method as Email Click Click Type in the details required Click Click to accept default paragraphs for the correspondence if you wish to edit the correspondence 16 Click Edit the correspondence as required Click Click Check Click Go to Click If required, repeat steps to send correspondence to remaining shortlisted candidates. to enlarge the window for easy editing and to return to smaller size. and note the history – correspondence sent to return to candidate list 2.5. Reject Candidates and Send Correspondence: OPTIONAL STEP Once the interview details for shortlisted candidates are finalized, you may wish to send letters to rejected applicants. Letters can also be sent after the search is finalized (see Section 5.4.). Click on the box(es) beside the names of applicants to be rejected Click on Check the box Send Correspondence Select the reason for rejection in the Additional Information section in the toolbar; this opens an action dialogue box 17 Click Select Select delivery method as Email Click Click Click Click If the pop up box appears, click YES to continue to accept default paragraphs for the correspondence if you wish to edit the correspondence . Edit the correspondence as required Click Click Check identified in this step Click Go to Click HELPFUL HINT Click to enlarge the window for easy editing and to return to smaller size. This will send the message to all rejected candidates and note the history – correspondence sent to return to candidate list 18 Folder 3: Interview Only short listed candidates selected for an interview should appear in this folder. Draft correspondence can be generated within the system, but should be edited to better reflect the search and the hiring department/faculty. Process for Interview: If required, ensure Decanal approval of the short-list Move short-listed applicants to the Interview folder If required, schedule interviews Move top candidate to Offer folder 19 3.1. Move the top applicant after the interviews to the Offer Folder Go into the tab Click on the candidate’s name who will be made an offer Click on Candidate name to review the application. Click on down arrow of Select Change status… Select Proceed to Offer Click Select to move candidate to Offer Folder. 20 Folder 4: Offer The top candidate after the interviews should appear in this folder. In this folder the offer process is managed included the generation of the appointment dossier materials. Processes for Offer: Ensure the top candidate is moved to the Offer folder Prepare draft letter of offer Compile the Appointments Dossier materials Ensure approvals are obtained from the Dean and Provost Office After approvals, extend the offer to the candidate Generate Completion of Offer Form If required, move the 2nd choice candidate to the Offer folder to make a new offer. 21 4.1. Prepare the Draft Letter of Offer (Optional Step) The system is capable of generating a draft letter of offer. By entering in all the information regarding the academic appointment the draft letter and terms of appointment are populated. Since this step requires a fair amount of data entry we leave it at the user’s discretion if they wish to use it. Skip to Step 4.4 if you are not creating the draft package online. The details of the offer are entered into the system to facilitate the generation of the offer letter. tab, Click on the candidate’s name who is to be made an offer. In the Click Click on Select Enter comments (optional) Click Fill in the details of the offer: This information will be used to create the draft letter of offer, enter N/A if it does not apply to the specific offer (e.g. Spousal App’t ). Calculate salary: Enter Annualized Salary amount (e.g. 80000) Select currency as Canadian dollars Select Monthly as the Pay Basis Click on Click Click The Salary (Pay Basis) is pulled from the calculator Click SAVE to calculate the monthly amount. in the Salary Calculator pop up box to save your Offer fields prior to selecting an Offer Letter. 22 4.2. Email the Draft Letter of Offer to Recruiter Generate the draft letter of offer which is emailed to the Recruiter for final editing and inclusion in the appointments dossier. Click on the tab Click on Select: Send Correspondence Type in comments (e.g. Preparing letter of offer for Provost Office) Select the appropriate Letter of Offer from the Offer Letter Wizard pop up box Check boxes for paragraphs required for the letter. Unchecked boxes are NOT included. Scroll down the list of paragraphs to include in the letter. Check beside the paragraphs if they apply to the candidate. For example: Click Type in the required information in the Correspondence Wizard pop up box. Enter n/a if it does not apply to the specific offer. To edit the details of the offer after it has been created click on the toolbar in the Click Review the letter Click folder if you want to modify or personalize the letter. 23 Click to enlarge the window for easy editing and to return to smaller size. Edit the correspondence as required Check that the Recruiter’s email address is in the To: Field Click Click Check Click Open email Cut and paste the Offer letter into Word document and edit if necessary Print on Chair’s letterhead to include as part of the package for Provost Office approval. 4.3. Request Approvals This step is for maintenance of the candidate record. It is also a reminder for the Recruiter to ensure the proper approvals are sought before the offer is extended to the candidate In the tab Click (located above the tab) If the recruiters name does not appear in the approval path, Click on 24 Click on box beside your name (i.e. Recruiter’s name) Click Click Type in comments (e.g. To include with rest of package for the Provost Office and subject to Provost Office approval). Click Offer Status now shows as Approval in Progress in the Click tab 4.4. Generate Compilation of Statistics for Academic Appointment The system generates a complication of statistics form which is emailed to the Recruiter for final editing and inclusion in the appointments dossier In the appropriate Candidate File Click on tab Click on Select Send correspondence… Type in comments (e.g. “Preparing package for Provost Office”) Click Select U of T FAC – Compilation of Statistics for Academic Appointment Ensure delivery method is set to E-MAIL Click to accept the default paragraphs of the letter Click to accept the default paragraph Click Click Ensure Sending Options is set to Click 25 Open email Cut and paste Compilation of Statistics for Academic Appointment details into Word document and complete form Print on Chair’s letterhead to include as part of the package for Provost Office approval. Department is required to complete the Statistics on Applicants and Statistics on the Candidate to the best of their knowledge 4.5. Record Provostial Approval To be completed after appointment file is approved by the Provost Office In Staffing WebTop In the Click on Select Approve Type in comment (e.g. Provost Office approved on dd/mm/yyyyy) Click section click . 4.6. Extend Offer (this will be sent to the Chair’s Assistant) This step is for maintenance of the candidate record. The APPROVED offer letter generated from the Word document is considered the formal letter of offer that must be sent to the candidate. in the offer tab of the candidate record Click on Select VERBAL for how offer is to be extended Enter comments (if required) Click 4.7. Record the candidate’s response to the offer. Click Select how the candidate responded to offer Optional: Scan the letter of approval and attach the file in the offer tab of the candidate record 26 Click Candidate accepts the offer: Using the calendar enter the date when candidate accepted offer. Enter the date when candidate will start working. Click ***Remove the check mark beside tentative (If not, you won’t be able to close the requisition later)*** Enter comments (if required) Candidate refuses the offer: Enter comments about why the candidate refused Click 4.8. Generate Completion of Offer Form The candidate’s response to the offer (accepted or declined) must be noted and forwarded to the Provost Office. If the candidate accepts the offer, a signed back copy of the letter is also included. Click on the box beside the appropriate candidate’s name Click Click Send correspondence… Enter comments Click Select U of T FAC – Completion of offer for Academic Appointment in the Correspondence Wizard pop-up box. Make sure delivery method is Email (this email will be sent to the Recruiter) 27 Click Click Enter the date letter was signed back Click If the pop up box appears, click Click on the candidate’s name to see the corresponding message Click Click Make changes to the correspondence as required Click Click Check Click to accept the default paragraphs of the letter to edit the content of the letter to enlarge the window for easy editing and to return to smaller size 28 Folder 5: Hire After the successful candidate has returned the signed letter of offer, the requisition can be closed, correspondence is sent to unsuccessful candidates and remaining documentation can be generated and completed. Processes for Hire: Ensure the hired candidate is moved to the Hire folder If the candidate is a foreign worker, generate correspondence Change the candidate’s status to hired in the system Send correspondence to unsuccessful candidates Prepare the completion of offer documentation 29 5.1. Move Candidate to Hired Folder Click on the box beside the appropriate candidate’s name Click Select Move Select status: To be Hired Click 5.2. Correspondence for FOREIGN WORKERS Creates an email sent to Rachel Kasimer (copied to Patricia Rafferty) about the hired candidate. Click on the box beside the appropriate candidate’s name Click Select Send Correspondence… Type comments (e.g. foreign worker forms) Click Select the appropriate correspondence (UoT FAC – Foreign Worker Information) Select delivery method as Email Click Click Enter required information in the Correspondence Wizard pop-up box to accept all the default paragraphs for the correspondence 30 Click To edit the letter (e.g. if you want to personalize/modify the letter): to edit the content of the letter and/or to remove highlighted sections Click of the letter to enlarge the window for easy editing and Click Make changes to the correspondence as required Click If no editing required, click Check Click Go to Click to return to smaller size and note the history – correspondence sent to return to candidate list 5.3. Change Candidate’s status to “HIRED” In tab Check on box beside successful candidate’s name Click on Enter actual start date. Use the calendar Enter comments Click to change status to “hired” If you receive an error pop-up window, check that the start date is not marked as tentative in the Offers tab. If it is, click , Update Start Date,and unclick the box 31 The warning pop-up appears. Read and confirm that you want to hire the selected candidate. Click Candidate is now marked as HIRED and the posting is now marked as FILLED. 32 5.4. Send Correspondence: OPTIONAL FEATURE If the requisition is marked filled follow these steps to send correspondence to rejected candidates. For some candidates (i.e. those known to the department and those who were interviewed) it is recommended that personalized letters from the Chair be composed and sent OUTSIDE the system. Click on tab Select Show Requisitions for Recruiter’s name Check boxes Click On the right hand panel, change Click Find the Filled requisition from the list of results Click on the number hyperlink below Check beside the name of the candidate(s) that require(s) correspondence Click on down arrow of Select Send Correspondence… Type comments to 33 Click Select the appropriate correspondence Select delivery method as Email Click NOTE: This email will be sent directly to the applicants. Click Click Edit the correspondence as required Click Click This email will be sent For multiple recipients check directly to applicants with a checked box beside their name. If there is one name checked then only available for selection. Click Go to Click If requires, repeat steps to send correspondence to other candidates to accept all the default paragraphs for the correspondence if you want to modify / personalize the letter to enlarge the window for easy editing and to return to smaller size will be and note the history – correspondence sent to return to candidate list 34 Appendix: Other Processes 1. Reverting a candidate action To undo the last action regarding a candidate’s step or status step Check the box beside candidate that you want to move back a step or status Click on down arrow of Select Revert… The Action Dialog window opens. Revert is automatically selected in the Action list. Enter text in the Comments field (mandatory with the Revert action). Click 2. Sending Correspondence An optional feature within Staffing WebTop is the ability to send correspondence to candidates. The Provost Office has developed some template letters in the system and these correspondence are available so that Recruiters can send various correspondence to candidates depending on their status or step in the system. Check beside the name of the candidate who you want to send correspondence OR click on the candidate’s name to go into the candidate record Click on down arrow of Select Send Correspondence… Type comments (as required) Click Select the appropriate correspondence from the list Select delivery method as Email. This email will be sent directly to the applicants. You can see the applicant’s email in the “to” line Click 35 Click to accept all the default paragraphs for the correspondence If the pop up box above appears, click OK Click on the recipient’s name to see the corresponding message Click Edit to change the letter (if required) (eg. To remove the sections highlighted in yellow). Click If there is no pop up box but you want to modify / personalize the letter Click Edit the correspondence as required Click Click Check . This email will be sent directly to the applicants Click Click Go to Click Repeat these steps to send correspondence to other candidates and note the history – correspondence sent to return to candidate list 36 3. Adding Attachment to Candidate File ***REFERENCES LETTERS MUST BE UPLOADED USING THIS PROCESS*** Log into Staffing WebTop Click Find the requisition for which you want to attach a file to the candidate’s file ) for that requisition. Click on the candidates number hyperlink (eg. Click on the candidate name Click In the Action Dialog, ensure Action says Attach File Click to select a file (maximum size is 1084 kilobytes). – Locate the file from your computer. Type in comments (e.g. References for Professor xxx) Click Click on Find the File Attached event and the attached file. UTorRecruit Click on the link to view the attachment. NOTE: Search Committee members will have access to view the documents that you attach to the candidate’s file. Click 4. Adding Comments to Candidate File Log into Staffing WebTop Click 37 Find the requisition for which you want to attach a file to the candidate’s file ) for that requisition. Click on the candidates number hyperlink (eg. Click on the candidate name Click In the Action Dialog, ensure Action says Add Comments Type in comments (e.g. Shortlist candidate for interview). NOTE all comments are tracked and cannot be deleted. Click Click on Find the Comments Added Review the comments added. You can read comments, who added the comment and when the comment was added. NOTE: Search Committee members will have access to add their own comments and read the comments made by other Search Committee members. Click 38