1
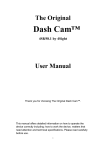
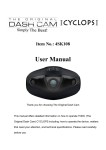
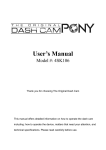
Item No.: 4SK909 User’s Manual Thank you for purchasing The Original Dash Cam Twister. Please review this guide fully before use. For any questions not answered in this guide, please visit www.GetDashCam.com Contents About this Guide ................................................................. 3 WARNING .......................................................................... 4 Notice… ............................................................................. 4 Canada............................................................................... 4 Battery warning................................................................... 4 Notes on Installation ........................................................... 5 Caution ............................................................................... 5 1 Introduction ................................................................. 6 1.1 Features .................................................................. 6 1.2 Package Contents .................................................... 7 1.3 Product Overview..................................................... 8 2 Getting Started .......................................................... 10 2.1 2.2 Inserting the Memory Card ..................................... 10 Installing in Vehicle................................................. 11 2.2.1 Connecting to Power .............................................. 12 2.4 LED Indicator ......................................................... 14 2.5 Powering the Device On / Off ................................. 14 2.5.1 2.5.2 2.5.2.1 2.5.2.2 2.5.2.3 2.5.3 1 Mount to Windshield .............................. 11 2.3 Auto Power On/Off ................................ 14 Manual Power On/Off and Reset ......... 15 Manual Power On.................................... 15 Manual Power Off ................................... 15 Resetting the device ................................. 16 Formatting the microSD Card ................ 16 2.5.4 2.6 2.6.1 3 Set the Date / Time.................................. 18 Using TODC Twister .................................................. 20 3.1 Recording Videos ................................................... 20 3.1.1 3.1.2 3.1.3 3.1.4 3.1.5 3.2 4 Record videos while driving .................. 20 Emergency Recording ............................. 20 The Recording Screen .............................. 21 Motion Detection ..................................... 23 G-Sensor .................................................... 24 Playback Videos .................................................... 26 3.2.1 3.2.2 3.2.3 Playing Videos ......................................... 26 The Playback Screen ................................ 28 Deleting Files ............................................ 29 Adjusting the Settings .............................................. 31 4.1 Using the Menu ...................................................... 31 4.2 Menu Items ............................................................ 32 5 Transferring Videos to PC ........................................ 36 5.1 2 Connecting as a Bluetooth Speaker ....... 17 Basic Setup............................................................ 18 Using included USB Cable ..................................... 36 About this Guide The content in this manual is for informational purposes only and is subject to change without prior notice. FCC declaration of conformity Responsible party: 4Sight, Inc. 12285 Colony Ave. Chino, CA 91710 (714) 988-5838 Fax: (714) 285-5828 This device complies with Part 15 of the FCC Rules. Operation is subject to the following two conditions: (1) This device may not cause harmful interference, and (2) This device must accept any interference received, including interference that may cause undesired operation. Note: This equipment has been tested and found to comply with the limits for Class B digital devices, pursuant to Part 15 of the FCC rules. These limits are designed to provide reasonable protection against harmful interference in a residential installation. This equipment generates, uses and can radiate radio frequency energy and, if not installed and used in accordance with the instructions, may cause harmful interference to radio communications. However, there is no guarantee that interference will not occur in a particular installation. If this equipment does cause harmful interference to radio or television reception, which can be determined by turning the equipment off and on, the user is encouraged to try to correct the interference by one or more of the following measures: Reorient or relocate the receiving antenna Increase the separation between the equipment and receiver Connect the equipment into an outlet on a circuit different from that to which the receiver is connected Consult the dealer or an experienced radio/TV technician for help Use of shielded cable is required to comply with Class B limits in Subpart B of Part 15 of the FCC rules. Do not make any changes or modifications to the equipment unless otherwise specified in the manual. If such changes or modifications should be made, you could be required to stop operation of the equipment. Contains FCC ID: 2ACFIWM7911B 3 WARNING THIS DEVICE SHOULD NOT BE ADJUSTED BY THE DRIVER WHILE DRIVING. IN THE EVENT OF AN ACCIDENT, DEVICE MAY DISLODGE AND BECOME UNSAFE FOR PASSENGERS. Notice 1) 2) 3) 4) Memory card comes pre-inserted. Please be sure memory card is in unit before recording. TODC Twister supports microSD cards up to 32GB When the battery is depleted, TODC Twister will display, “Out of Battery Power” and power off. For questions or technical support, visit www.GetDashCam.com Canada Industry Canada (IC) Unintentional emitter per ICES-003/NMB-003 This digital apparatus does not exceed the Class B limits for radio noise emissions from digital apparatus as set out in the radio interference regulations of Industry Canada. Le present appareil numerique n’emet pas de bruits radioelectriques depassant les limites applicables aux appareils numeriques de Classe B prescrites dans le reglement sur le brouillage radioelectrique edicte par Industrie Canada. Battery warning 4 It is recommended to always charge using the included chargers. Improper handling of the battery may result in a voided warranty. Never dismantle or pierce the battery or allow the battery to short-circuit. Keep out of reach of children. Never expose the battery to fire. Dispose of used batteries observing local regulations. NEVER attempt to replace the internal battery Notes on Installation 1. This product is best used when installed near the rear view mirror, at the center and top of windshield (must follow all local laws related to mounted devices in vehicle). 2. Do not touch the lenses with your fingers. Finger grease may be left on the lens and will result in unclear videos or snapshots. Clean the lenses on a regular basis. 3. Do not install the device on a tinted window. Doing so may damage the tint film. 4. Make sure that the installation position is not hindered by the tinted window. 5. The operating temperature should be kept between 14˚F and 122˚F (–10˚C and 50˚C). Caution 5 Due to local laws and general vehicle safety, do not operate the device while driving. The system is used only for non-commercial use, within the maximum limits permitted by applicable law. Our company does not accept any responsibility for any data loss during the operation. This product gets warm when in use; this is normal. Improper use or operation of the product may result in damage of the product or its accessories and void the warranty. 1 Introduction Thank you for purchasing The Original Dash Cam Twister. If after reviewing this manual you still have questions, please visit TODC (The Original Dash Cam) website at www.GetDashCam.com 1.1 Features Two wide angle HD lenses Still snapshots for photographic evidence 2.7” LCD G-sensor to lock important files Loop recording, never run out of memory Supports minimum class 6 4GB microSD card. Maximum class 10 32GB Records up to 380/199 total minutes (at QVGA/1080FHD) on a 32GB micro SD (not included) 6 1.2 Package Contents Dash Cam USB Cable 7 Suction Cup Mount User’s manual MicroSD Card 12v Car Charger 1.3 Product Overview 8 No. 9 Item No. Item 1 Up Button / IR sensor On/Off 9 Mic 1 2 Menu / Back Button 10 Mic 2 3 Down / Mute Button 11 MicroSD Slot 4 OK / Record Button 12 Power Button 5 Mode / Emergency Lock Button 13 AV Out 6 Connect Bluetooth 14 320° Rotating Lens 7 Reset Button 15 Micro USB Port 8 Fixed Lens 2 Getting Started 2.1 Inserting the Memory Card Insert memory card with both the pins on the memory card and the screen of TODC Twister facing up, as illustrated below. Push the memory card in until a click sound is heard, indicating the card is locked in position. To remove the memory card Push in the microSD card slightly until you hear a click and release, the card will eject slightly. Once ejected, take hold of and remove the memory card. Note: 1. Do not remove or insert the memory card when the device is turned on. This may damage the memory card and/or corrupt your video files. 10 2. Please use a minimum class 6 4GB microSD card, maximum class 10 32GB. 3. Please format the micro SD card before the initial use. 4. When removing the memory card, be careful that the card does not spring out and get lost. The memory slot has this spring function for easy removal of the card. 2.2 Installing in Vehicle 2.2.1 Mount to Windshield 1. Push the mount tip into mount socket on top of device and slide, until firmly locked into place. 2. With the suction-cup lying flat, position the suction-cup on the windshield. 3. Hold the base firmly on the windshield and press down the clamp to secure the car suction cup mount to the windshield. Make sure the base is securely locked in place. 4. Once TODC Twister is affixed to the windshield, you can choose whether to record the interior of the 11 vehicle, or any other angle simply by rotating the bottom lens. Note: 1. The Seller or Manufacturer of The Original Dash Cam Twister 4SK909 shall not be held responsible for any traffic violations related to the positioning or improper use of this product. 2.3 Connecting to Power Use the included 12v car charger to power on TODC Twister and charge the built-in battery (TODC Twister is made to be plugged in continuously while driving; doing so will not harm TODC Twister’s battery). 1. 2. 12 Connect the micro USB end of the car charger to the USB/Power connector port on TODC Twister. – Depending on where you’ve chosen to mount TODC Twister, run the power cord around the trim of your vehicle so that it will not obstruct your view while driving. 3. Plug the other end of the car charger into the 12v port in your vehicle. Once the vehicle engine is started (depending on your vehicle), the device will automatically power on. Note: 1. Whether or not your vehicle’s 12v outlet remains active while the car is turned off varies from vehicle to vehicle. If your vehicle’s 12v outlet remains active when the vehicle is off, it is recommended to power off or unplug your Dash Cam to power it down before leaving the vehicle. 2. At full charge, TODC Twister’s battery will record for roughly 25 minutes unplugged. This function is designed so that should an incident occur, the driver can remove TODC Twister from the mount and capture evidence from outside the vehicle. Alternatively the battery can be used to playback video instantly on the device. 13 Battery Status Indicator: Icon Description Battery is full. 2/3 battery power. 1/3 battery power. Out of battery power, connect charger. Power cord connected, battery is charging. 2.4 LED Indicator Status LED Indicator Color Power off, battery charging Red light will illuminate Power off, battery full charged The red light will shut off, no lights will illuminate Power on, battery charging Green light will illuminate indicating power is on, red light will illuminate indicating TODC Twister is charging Power on, battery fully charged Green light remains illuminated, red light will shut off 2.5 Powering the Device On / Off 2.5.1 Auto Power On/Off The Original Dash Cam Twister’s default settings are for TODC Twister to automatically power on and begin recording when TODC Twister is connected to a power source. Once the vehicle’s 12v 14 outlet is powered on, and TODC Twister is connected, TODC Twister will automatically turn on and begin recording. When TODC Twister is unplugged, or otherwise disconnected from the power source, TODC Twister will automatically power down and save your footage. 2.5.2 Manual Power On/Off and Reset 2.5.2.1 Manual Power On To manually power on TODC Twister, simply long press the Power Button. Note – when manually powering on TODC Twister, TODC Twister WILL NOT automatically begin to record. To begin recording when TODC Twister is manually powered on, simply press the OK / Record Button, shown below: 2.5.2.2 Manual Power Off To manually power off TODC Twister, simply long press the Power Button – TODC Twister will stop recording and power down. Your 15 footage will be stored on TODC Twister’s microSD card. Caution: removing the microSD card before powering off TODC Twister will corrupt your files and you will lose your footage. 2.5.2.3 Resetting the device If TODC Twister begins to function abnormally for any reason, try resetting TODC Twister. Using a paper clip or safety pin, depress the reset button located on the bottom of TODC Twister next to the bottom lens as illustrated on page 10. Hold the button down for three seconds and release. Resume normal use of TODC Twister. 2.5.3 Formatting the microSD Card To format the microSD card follow these instructions: 1. First be sure TODC Twister is NOT recording. Press the Menu Button to enter the Video Mode Settings Menu and then press the Menu Button a second time to enter the Setup Settings Menu. 2. Use the Up or Down Buttons until Format is highlighted. 16 3. Press the OK Button, choose SD Card. You will be asked to confirm the format – if you are sure you wish to perform the format, use the OK Button to select OK. Note: 1. It is recommended you perform a format before using TODC Twister for the first time. 2. Caution: Formatting the microSD card will delete all files on the card, including locked video files. 2.5.4 Connecting as a Bluetooth Speaker To connect your mobile phone via Bluetooth to TODC Twister, follow these instructions: 1. 2. 3. 17 Press the Bluetooth button on the Dash Cam (see pages 10, 11). This will make the Dash Cam searchable as a Bluetooth device From your mobile phone, enter the Bluetooth settings and locate the Dash Cam enable the connection on your phone. Your Dash Cam can now be used as a hands-free Bluetooth speaker. To adjust the volume, simply use the normal volume adjustment on your mobile phone. 2.6 Basic Setup Before using TODC Twister, we recommend setting up the correct Date and Time. Note: To access setup menus, TODC Twister must NOT be recording. Menus cannot be accessed while TODC Twister is recording. 2.6.1 Set the Date / Time To set the correct date and time, do the following: 1. First be sure TODC Twister is NOT recording. Press the Menu Button to enter the Video Mode Settings Menu. 2. 3. 18 Press the Menu Button a second time to enter TODC Twister’s main Setup Menu. Use the Down Button until, “Date/Time” is highlighted and press the OK / Record Button. 4. Use the Up and Down Buttons to adjust the highlighted number to the correct date or time. 5. Use the OK Button to move on to the next; from Year, to Day, to Month, to Hour, Minute etc. When you are finished setting the current date and time, press the Menu Button to return to the main recording screen. 6. Note: 1. The Original Dash Cam Twister runs on a 24 hour military clock. 1:00pm shows as 13:00 on TODC Twister’s clock. For questions regarding the 24 clock, contact TODC at www.GetDashCam.com 19 3 Using TODC Twister 3.1 Recording Videos 3.1.1 Record videos while driving When TODC Twister is connected to your vehicle’s 12v power outlet and the outlet is powered on, TODC Twister will turn on and automatically begin recording. When your vehicle’s 12v outlet is powered off, TODC Twister will automatically stop recording and power off. Alternatively, you can press the OK Record at any time to manually start or stop recording. Note: 1. Whether or not your vehicle’s 12v outlet stays active when the vehicle is powered off depends on the make and model, each vehicle is different. If your 12v outlet stays active when the vehicle is powered off, it is recommended to power off or unplug TODC Twister manually when exiting the vehicle. 2. TODC Twister features loop recording; when the memory card is full, the oldest video file is deleted and overwritten with the newest. You can choose between 1, 3 or 5 minute video clips. 3.1.2 Emergency Recording The Original Dash Cam Twister has a built in emergency recording function which, when activated, prevents video files from being overwritten by TODC Twisters Loop Recording feature. To manually activate the Emergency Recording function, do the following: 1. While TODC Twister is recording, press the Mode / Emergency Lock Button. A key icon will appear at the top of the screen, and the current file will be protected so it will not be overwritten by TODC Twister’s loop recording feature. 20 2. When the Emergency recording function is activated, one looping cycle will be locked, recording will return to normal when the next loop begins (Caution: formatting the memory card will erase all files, including emergency protected files!). Note: 1. If the G-Sensor function is enabled and a collision is detected, emergency recording will automatically be triggered. For more info, please refer to G-Sensor (3.1.5). 2. It is recommended that you clear locked videos either by deleting them, or transferring them to your computer a minimum of once a month in order to prevent the microSD card from filling up. 3.1.3 The Recording Screen 21 No. Icon Item Description 1 Video Mode Icon When on screen, indicates you are in video mode. 2 Loop Recording Icon Indicates the currently selected video loop length (1, 3, or 5 minute) 3 Exposure Indicates your currently selected Exposure Value (EV). 4 Date Stamp Indicates the current date. 5 Time Stamp Indicates the current time. 6 Battery Indicator Indicates the current status of the battery. 7 SD Card Indicator When on screen, indicates microSD card IS inserted. 8 Resolution Indicator Indicates the currently selected resolution. 9 Video Time Indicator When white, indicates the available space in recording time on the microSD card. When red, indicates the recording time of the current video file. 10 Audio Record Indicator Indicates whether TODC Twister is recording sound. When TODC Twister is muted, a red line will appear through the icon. 22 11 IR Sensor Indicator When this icon appears on screen, the IR sensors are turned on. To turn them off, while recording quick press the UP / IR Sensor Button. 12 Recording Icon When this icon flashes on screen, it indicates that you are currently recording. If this icon does not appear on screen, you are not recording. 3.1.4 Motion Detection When Motion Detection is enabled and TODC Twister is powered on, TODC Twister will detect any motion in front of either lens and TODC Twister will begin to record. TODC Twister will continue to record as long as there is motion detected. Once motion stops, TODC Twister will stop recording after ten seconds. Enabling motion detection overrides TODC Twister’s loop recording and G-Sensor features. To enable Motion Detection, do the following: 1. Be sure TODC Twister is NOT recording. 2. Press the Menu Button to enter the Video Settings Menu. 3. 23 Use the Down Button to highlight Motion Detection and press the OK Button. 4. 5. Use the Up or Down Button to highlight On and press the OK Button. Motion Detection is now enabled, press Menu to return to the home screen. Note: 1. When the battery is fully charged, Motion Detection can record continuously for about 25 minutes. 2. As the device is used, the battery storage capacity will decrease gradually. This is normal for all batteries. 3.1.5 G-Sensor When enabled, the G-Sensor will detect if and when a collision happens and will activate emergency recording, locking your video file so it will not be deleted by the Loop Recording feature. You can adjust the sensitivity of the G-Sensor, or turn it completely off (on very bumpy roads, the G-sensor may trigger frequently, in this case it is recommended to turn the G-Sensor off and lock videos manually). To adjust the G-Sensor settings: 1. Be sure TODC Twister is NOT recording. 2. Press the Menu Button to enter the Video Settings Menu. 24 3. Use the Down Button to highlight G-Sensor and press the OK Button. 4. Use the Up / Down Buttons to highlight your desired sensitivity (2G is most sensitive, 8G is least) and press OK. 5. Your desired G-Sensor settings are now saved, press the Menu Button to return to the recording screen. 25 Note: Caution: formatting the microSD card will delete all videos, including emergency locked videos. 3.2 Playback Videos 3.2.1 Playing Videos To playback video files on TODC Twister’s LCD screen, follow these instructions: 1. Be sure TODC Twister is NOT recording. 2. Press the Mode Button to enter Video Playback Mode. 3. 26 Use the OK Button to begin playing back the currently selected video. Use the Up Button to go to the previous video, or press the Down Button to choose a specific video to playback. 4. When your desired video is highlighted, press the OK Button to playback the video. 5. When video is playing, the Up and Down Buttons control the volume. 6. Once you begin playing back a video, you cannot select a different video until the video playback comes to an end. 27 3.2.2 The Playback Screen No. Icon Description Playbac k Mode Indicator This icon indicates you are in video playback mode, ready to play a video. Embedd ed Time & Date Stamp This is the time & date stamp that is embedded in the actual video file. 3 Playbac k Status Indicator Indicates whether the video is currently being played. 4 Current time in the Video Indicates the time the video you are watching was recorded 1 2 28 Item Time & Date Stamp No. Icon Item Description 5 Date in Video Indicates the date the video you are watching was recorded. 6 Resoluti on Indicates the resolution of the recorded video. 7 Video File Name Indicates the name of the video file being played back. 3.2.3 Deleting Files To delete file(s), do the following: 1. Be sure TODC Twister is NOT recording. 2. Press the Mode Button to enter Video Playback Mode. 3. 29 Press the Menu Button to enter the Playback Settings Menu. 4. 5. 6. 7. Use the Down Button to highlight Delete and press the OK Button. Use the Down Button to highlight Delete Current to delete the currently selected video, or highlight Delete All to delete all footage from TODC Twister. You will asked to confirm your Deletion, if you are sure, use the Down Button to highlight OK and press the OK button. Your file(s) has been deleted, press the Menu Button to return to playback mode. Note: Deleted files cannot be recovered. Ensure files you want to save have been backed up before deletion. 30 4 Adjusting the Settings 4.1 Using the Menu There are two setup menus that you can access; Video Settings Menu, and Setup Settings Menu. To access each settings menu do the following: Accessing the Video Settings Menu 1. 2. Be sure TODC Twister is NOT recording. Press the Menu Button to enter the Video Settings Menu. 3. Use the Up / Down Buttons to highlight different menu options in the Video Settings Menu. Press the OK Button to enter the highlighted settings sub-menu. Accessing the Setup Settings Menu 1. Be sure TODC Twister is NOT recording. 2. Press the Menu Button to enter the Video Settings Menu then press the Menu Button a second time to access the Setup Settings Menu. 31 3. Use the Up / Down Buttons to highlight different menu options in the Setup Settings Menu. Press the OK Button to enter the highlighted settings sub-menu. 4.2 Menu Items Refer to the below table for details of each menu option and its function. Menu Description Available Options Resolution Set your desired resolution. Higher resolution has better image quality, but takes up more storage space on the SD card. HD 1920x720 1080P 1440x1080 720P 1280x720 WVGA 848x480 VGA 640x480 QVGA 320x240 Loop Recording Chose the length of video loops you’d like. Shorter video Off 1 Minute 3 Minutes 5 Minutes Setting Video Menu Settings 32 Menu Setting Description Available Options loops are easier to upload to social media. Setup Settings Menu 33 Exposure. Adjusts the amount of light let in by TODC Twister’s Lens. +2.0, +5/3, +4/3, +1, +2/3, +1/3, 0, -1/3, -2/3, -1.0, -4/3, -5/3, -2.0 Motion Detection Turn on/off. On/Off Record Audio When on, TODC Twister will record sound. When off, TODC Twister will not record sound. On/Off Date Stamp Watermark video files with the time and date. On/Off G-Sensor Adjust the G-Sensor sensitivity or turn the G-Sensor off. Off 2G 4G 8G Beep Sound Turn on or off the beep sound that sounds when you press a button. On/Off Date/Time Set the Date and Time. See 2.6.1 Auto Power Off When on, TODC Twister will power off automatically if it is not recording. Off 1 Minute 3 Minutes section Menu Setting Language 34 Description Change the language of the settings menus. Available Options English French German Italian Spanish Portuguese Simplified Chinese Traditional Chinese Japanese Russian Korean Frequency Choose 60Hz for North America, 50Hz for Europe. 50Hz 60Hz Screensaver When on, TODC Twister’s screen will shut off after the chosen amount of time. TODC will continue to record. To reactivate the screen, simply touch any button. Off 1 Minute 3 Minutes 5 Minutes IR Sensor Power on the IR sensors to assist with night recording Off/On / / / / / / / / / / Menu 35 Setting Description Available Options Format Perform a format when powering on TODC Twister for the first time. If experiencing memory issues, try formatting the card to troubleshoot (Caution: performing a format will erase ALL files on the SD card including locked videos). SD Card OK/Cancel Default Setting Choosing this option will reset all settings to the factory default. OK/Cancel Firm Version View the firmware version #. Multiple. 5 Transferring Videos to PC 5.1 Using included USB Cable Included with TODC Twister is a microUSB cable, this cable will be used to transfer video from the Dash Cam to your PC. Follow these instructions to transfer videos to your PC: 1. 2. Connect the microUSB tip of the USB cable to TODC Twister. Connect the full size USB tip to the USB port on your laptop or desktop (after completing this step, TODC Twister will automatically power on and the below will appear on screen). 3. Press the OK Button to choose Mass Storage and activate TODC Twister’s connection with your PC. If your computer’s Auto Run feature is activated, you will see a pop-up similar to the below. In this case, choose “Open folder to view Files” 4. 36 5. 37 If the Auto Play pop-up box above does not appear on your computer once you have selected, Mass Storage on the camera; launch the My Computer application on your computer. 6. You will see a new disk drive named something similar “Removable Disk (E:)” – the letter following Removable Disk will vary from computer to computer. Double click on this disk to enter TODC Twister’s microSD card and navigate to the screen below. 7. Double click on DCIM and you will see folders which contain all of the videos stored on your microSD card 38 8. From here, you can simply drag and drop, or copy and paste your video files to anywhere on your computer! Note: 1. For additional assistance transferring files from TODC Twister to your computer, contact The Original Dash Cam team at www.GetDashCam.com Copyright © 2015 All rights reserved. All other marks, products or company names mentioned in this guide are trademarks of their respective companies. 39