1
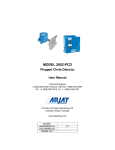
MODEL 9830-PCD PLUG CHUTE DETECTOR User Manual Arjay Engineering Ltd. Oakville (Toronto), Canada, L6H 6C9 Tel . Fax. ++1 (905) 829-2418 ++1 (905) 829-4701 North America 1-800-387-9487 www.arjayeng.com [email protected] 9830-PCD Plugged Chute Detector Non-intrusive monitoring of chutes and hoppers for bulk material detection Over 30 years of Arjay’s field proven HF capacitance technology has been applied to the 9830-PCD plugged chute detectors. The flush mount sensor continuously monitors the change from a normal material chute condition to a plugged condition. • capacitance technology responds to any material type • no moving parts • remote alarm unit mounts safely away from pipe • no intrusion into chute or hopper 9830-PCD The 9830-PCD sensor monitors the capacitance field in front of the sensor plate. The sensing plate forms part of the chute or hopper wall to sense the product within. The increased presence of product in front of the sensor due to a plugging condition increases the capacitance field and initiates an alarm. The sensing plates are embedded into a polyethylene plate which provides monitoring without any intrusion into the product flow Features and Benefits Technical Specifications - Control Unit • flush mount sensor forms part of the chute wall • adjustable time delay and sensitivity to eliminate nuisance alarms • remote electronics via standard twisted pair • available with Intrinsic Safety Barrier for Hazardous Locations • high erosion resistant polyethylene resists wear • capacitance technology responds to all types of bulk materials • non-intrusive sensor design does not restrict product movement All calibration, control relays and power wiring is available at the main control unit. This can be safely mounted up to 1 km away from the chute. Operating Temperature Power Input Alarm Relay Standards Enclosure Optional -20˚C to 60˚C 24 vdc or 110 vac or 220 vac 5 amp, DPDT, dry UL, CSA Type 4X, IP65 Lights and Buzzer Technical Specifications - Sensor Operating Temperature Approval The unique PMC circuit design, exclusive to Arjay, immediately converts the sensor signal to a frequency pulse for furtherance to the controller. 0˚C to 50˚C CSA Class 1, Zone 2, Div 2, Groups A,B,C,D (also available with an Intrinsic Barrier Option) Alternate probe designs are available for specialty applications Arjay SS-06 Arjay Engineering Ltd. 2851 Brighton Road Oakville, Ontario Canada L6H 6C9 tel fax N. America email web ++1 905-829-2418 ++1 905-829-4701 1-800-387-9487 [email protected] www.arjayeng.com Model: 9830PCD 9830PCDum11.DOC Rev: 1.1 TABLE OF CONTENTS 1.0 2.0 3.0 4.0 INSTRUMENT OVERVIEW............................................................................................ 3 1.1 FEATURES ....................................................................................................... 3 1.2 DESCRIPTION .................................................................................................. 3 INSTALLATION .............................................................................................................. 5 2.1 FLUSH MOUNT SENSOR ................................................................................ 5 2.2 ELECTRICAL INSTALLATION.......................................................................... 6 STARTUP AND CALIBRATION ..................................................................................... 7 3.1 POWERUP ........................................................................................................ 7 3.2 CONTROL AND FUNCTION SWITCHES ........................................................ 7 3.2.1 Failsafe ..................................................................................................... 7 3.2.2 Alarm Time Delay ..................................................................................... 7 3.2.3 Sensitivity .................................................................................................. 8 3.2.4 Dielectric ................................................................................................... 8 3.3 CALIBRATION................................................................................................... 8 TROUBLESHOOTING ................................................................................................... 9 -2- Model: 9830PCD 9830PCDum11.DOC 1.0 INSTRUMENT OVERVIEW 1.1 FEATURES 1.2 Rev: 1.1 Push-button calibration RF Technology Double pole Double Throw (DPDT) 5A relay contacts 0 – 20 second time delay Adjustable sensitivity High or Low relay action No moving parts For use with any Arjay Flush mount sensor DESCRIPTION The ARJAY 9830-PCD Level Alarm is specifically designed as a means to monitor the product within a chute for a plugged condition. A sensor is mounted flush with the wall to eliminate intrusion into the chute. The sensor does not use moving components that can cause mechanical maintenance concerns. When a plugged condition occurs in front of the sensing plate, the remote 9830 initiates a relay alarm to interface with motor controls, alarms, etc. The 9830 can be mounted up to 1 km away from the chute using inexpensive 2-conductor shielded wire. Chute sensor locations can often be awkward and are usually accompanied by high vibration equipment. The remote control unit means no calibration or high voltage control wiring is required at the sensor, making the unit safe and easy to maintain. The unit senses presence of liquid using a RF capacitance measurement technique together with microcontroller technology for high resolution measurements. The control relay is always in failsafe mode. The relay action may be set for high or low acting. -3- Model: 9830PCD 9830PCDum11.DOC Rev: 1.1 OPERATION The unit uses an RF Capacitance measurement technique for high resolution measurements. When the presence of material builds up, the plug chute detector senses the change in capacitance and the control unit will indicate an alarm condition and change the state of it’s dry relay contacts. USER INTERFACE Instrument status Alarm Status Time delay Relay action Dielectric switch PERFORMANCE RESOLUTION 2 color indicator: Green for normal operation, Red = instrument error, Red/Green (orange) for calibration confirmation. Red indicator: On when not in alarm, Off when in alarm. 0 – 20 seconds. High or Low relay action. For high action, the relay is energized under normal conditions and de-energizes there is a presence of product buildup. For low action, the relay is de-energized under normal conditions and energizes when there is a presence of product buildup. Primarily used in low dielectric where there is no product buildup at time of calibration. The unit measures capacitance in pF. Capacitance to Level translation depends on the surroundings and the type of material being measured. Capacitance: 0.4% of measured capacitance. Example: at 50pF, the resolution is 0.2pF and at 100pF, the resolution is 0.4pF. SENSOR CONNECTION 2 wire + shielded cable from PMC 2000 to controller. RELAY CONTACTS Failsafe. DPDT 5A (resistive load) /250VAC/30VDC dry contacts. Selectable high or low acting alarm. POWER 115VAC or 220VAC @ 25mA max. 24VDC @ 60mA max. MECHANICAL SPECIFICATIONS Enclosure Standard: Nema 4x Dimensions /Weight 10” (254mm) x 8” (203.2mm) x 4” (101.6mm)depth / 4lbs. (1.81kg) ENVIRONMENTAL SPECIFICATIONS Operating Temp. -20 to 60°C for Controller only. For remote sensor:-40 to 80°C Relative Humidity 90% max. with no condensation. -4- Model: 9830PCD 2.0 9830PCDum11.DOC Rev: 1.1 INSTALLATION NOTE: If any damage to the instrument is found, please notify an Arjay Engineering representative as soon as possible prior to installation. Choose the mounting location in accordance with good instrument practice. 1. The sensing plate is mounted to the chute using ¼-20 bolts and is typically ordered for the thickness of the chute. 2. Check that the circuit card (PMC-2000) is installed into the probe head according to the installation drawing. Both circuit mounting screws are required to insure a good electrical ground. Check that the sensor lead is secured to the PMC circuit terminal marked "P". 3. Wire the circuit card to the main control unit using two-wire shielded instrument cable 16-18awg (EG.BELDON 8760). DO NOT run these wires along side of high voltage wires. Connect the + & - terminals on the pulse card to the probe terminals marked + & - at the controller. Connect the shield of the cable to the ‘S‘ terminal at the controller side only. Make sure that the PMC junction box is electrically grounded. 4. Connect 115 VAC power to the main control unit. The STATUS LED should be green indicating that power is on and unit is getting no fault conditions. If the status led is red then unit is showing fault. Check to make sure unit is properly wired to the pulse card. A wiring fault or pulse card failure will cause the status LED to be red. Check the wiring for continuity and proper polarity. 2.1 FLUSH MOUNT SENSOR The flush mount sensor consists of a sensor potted in a square plastic plate. The material of this plate is normally ultra high molecular polyethenlye(UHPHE) so that it can withstand high abrasion and resist material build up on the plate. Enclosed in a junction box is a pulse module circuit (PMC 2000) which changes the capacitance signal to a pulse signal, thus allowing the control electronics to be mounted up to one kilometre away. . -5- Model: 9830PCD 2.2 9830PCDum11.DOC Rev: 1.1 ELECTRICAL INSTALLATION ALARM STATUS Single DPDT relay with dry contacts rated at 5A @ 250VAC or 30VDC for resistive loads. DPDT RELAY NO C CALIBRATE NC DIELECTRIC LOW HIGH NO C SENSITIVITY GND ALARM DELAY L2 (-) RELAY L1 (+) LOW HIGH PROBE IN + 9830 CIRCUIT BOARD Some components omitted for clarity MODEL 9820/30 DIFFERENTIAL LEVEL SWITCH Shield Probe + Probe - PROBE WIRING To remote Arjay junction box with PMC 2000 card Terminals marked + and - are for DC power units. POWER NC POWER: 115VAC power is standard. For 220VAC, 24VDC units power must be stated at time of order. For DC power units, the L1 terminal is to be connected to the positive supply, and the L2 terminal for the negative supply. ELEC9830.DSF ELECTRICAL INSTALLATION Figure 2.2 NOTE: 115VAC power is standard. Other power supply voltages are supported (220VAC. 24VDC) and must be specified at time of order. APPLYING POWER THAN THAT MEANT FOR THE UNIT MAY CAUSE DAMAGE AND OR INJURY. -6- Model: 9830PCD 3.0 9830PCDum11.DOC Rev: 1.1 STARTUP AND CALIBRATION ALARM STATUS CALIBRATE Calibrate Pushbutton DIELECTRIC Normally Set for Low HIGH 9 0 1 Normally Set for 1 9 0 1 8 7 ALARM DELAY 6 5 4 2 3 8 7 SENSITIVITY 6 5 4 2 3 LOW Sets Failsafe of relay contacts RELAY LOW Alarm delay: 0 - 20sec. Each switch inc. = 2sec except 6=15 and 7=20. 8&9 not used = 0sec. HIGH PROBE IN + MODEL 9820/30 DIFFERENTIAL LEVEL SWITCH USER INTERFACE USERINT.DSF Figure 3.0 3.1 POWERUP After the unit has been installed as per the installation procedure in section 2, power up the unit. The Status indicator should be Green. The red Alarm indicator may be on or off and is not valid until a successful calibration has been done. If the Status indicator is red refer to the troubleshooting procedure in section 4.0 for details. 3.2 CONTROL AND FUNCTION SWITCHES Set up the control and function switches as follows: 3.2.1 Failsafe Put the selector in the "HI FAILSAFE" position. This will keep the relay energized during a normal dry condition. On alarm; the relay will de-energize. A power failure will also cause the relay to deenergize, signalling an alarm condition. 3.2.2 Alarm Time Delay This is set via the Alarm Delay switch. An alarm based on the Relay Action switch must be present for at least the time delay value for the relay to switch to the alarm state. There is no delay when switching off the alarm. The delay range is 0 – 20 seconds. -7- Model: 9830PCD 9830PCDum11.DOC DELAY SWITCH SETTING TIME DELAY 0 0 seconds 1 2 seconds 2 4 seconds 3 6 seconds 4 8 seconds 5 10 seconds 6 15 seconds 7 20 seconds 8&9 Not used and act as 0 seconds. Rev: 1.1 False alarms from disturbances can therefore be ignored. Position 8 & 9 are not used and are the equivalent to 0 seconds. 3.2.3 Sensitivity This selector switch determines the amount of material buildup necessary to cause an alarm. The switch has a "0" to "9" range with "0" being most sensitive. "1" is used for most applications. If false alarms are occurring, make sure there is time delay on . If unit still has false alarms adjust the sensitivity to the next number up. Position 8 & 9 are not used and are the equivalent to 0 sensitivity. **INCREASING THE NUMBER WILL DECREASE SENSITIVITY** 3.2.4 Dielectric The plug chute detector should be calibrated with the process operating(product moving thru the chute). The switch should be set to "LO" for this calibration. 3.3 CALIBRATION With the unit wired as per the drawing #990190, power on the unit. The status LED should be green indicating that power is on and unit is getting no fault conditions. If the status led is red then unit is showing a fault. Check to make sure unit is properly wired to the pulse card. A wiring fault or pulse card failure will cause the status LED to be red. Check the wiring for continuity and proper polarity. To calibrate, verify the following function switch positions: "TIME DELAY Position "6” (15 seconds) "SENS" Position "1" "FAILSAFE" Hi failsafe "DIELECTRIC" low dielectric With the product moving through the chute(normal condition), push the CALIBRATE BUTTON. The status LED will turn red momentarily. Release the button. The status led should be green and flashing on and off showing that it is in calibration mode. Push the calibration button one more time until it goes red. Release the button. Calibration is complete and status LED should be green and alarm status LED red showing that the relay is energized under normal conditions. The unit will alarm when material builds up on the sensing plate. Verify the operation by causing a plugged chute condition. THIS COMPLETES THE SETUP AND CALIBRATION PROCEDURE FOR THE 9830 PCD -8- Model: 9830PCD 4.0 9830PCDum11.DOC Rev: 1.1 TROUBLESHOOTING **Under normal conditions the status light on 9830 electronics (inside enclosure) should be Green and relay light should be Red. ** CONDITION 1. No indicators on at powerup 2. Status indicator is RED (Fault Condition) 3. False alarms DO THIS Check power to unit Make sure power applied is as specified for the unit. (e.g. 120VAC) If power is ok, check the fuse. If the fuse is blown, call an Arjay representative to analyze why the fuse has blown. Make sure there is a PMC 2000 card mounted in the remote junction box. This indicates that the controller is not receiving a signal from pulse card (PMC 2000) and is weak, unstable, out of legal range, or is not present. Verify that the polarity of the two wire shielded connection is correct such that “+” at controller to “+” at pulse card (PMC 2000) and “-“ at controller to “-“ at pulse card (PMC 2000). Measure with DC volt meter across “+” and “-“ at pulse card (PMC 2000), it should read positive 9-10 Volts when plugged in. Make sure there is no break in the wiring between controller and PMC 2000 card. Disconnect probe (sensor) from “p” terminal of pulse card (PMC 2000). Verify if status LED goes to Green. Replace the PMC 2000 card with a spare if available. Add some time delay to unit. If coax cable is used from sensors to pulse card (PMC 2000), make sure it is not coiled (may cause an increase in inductance). Make sure there is no outside interference that may be causing false alarms such as an agitator, high voltage interference, or input flow to the tank affecting the probe. Adjust the sensitivity switch to next setting to decrease the 9830’s sensitivity. Test sensor after the setting has been increased to make sure the sensor can still reliably sense the presence of liquid. Make sure separator or grease trap is filled up with water above the white Teflon (sensing area) of probe. -9-