1
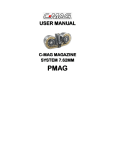
USER MANUAL
C-MAG MAGAZINE
SYSTEM
MINI 14
CONTENTS
Pages
Introduction
2, 3
Technical Data
4
Description
5, 6
Drawing: Exploded View
7
Loading
8, 9
Use of Personal Loader MINI 14
10
Use of Speed Loader MINI 14
11
Precautionary Measures - Sand
12
Disassembly of the C-MAG
13 - 16
Assembly of the C-MAG
17 - 20
Troubleshooting
21, 22
Accessories
23, 24
C-MAG MAGAZINE SYSTEM MINI 14 I
25
List of Part Numbers
26
1
INTRODUCTION
The C-MAG Magazine MINI 14 is a 100
round ammunition magazine, manufactured to the highest production standards. It
meets and exceeds NATO Military Specifications.
The patented design provides for equal distribution of the ammunition in each of the
twin-drums. Rounds are fed alternately
from each drum through the feed clip into
the weapon, resulting in a fixed center of
gravity during firing. Using a unique rotation device and low torsion stress springs,
the C-MAG is the world’s first magazine
with a full 100-round capacity, capable of
being pre-loaded and stored indefinitely.
The compact design allows for better
ground clearance and stability.
2
The C-MAG MINI 14 is installed in the
weapon like the standard issue magazine.
The bolt will be in the closed position
when the magazine is empty.
The C-MAG can be reloaded and reused
repeatedly with an estimated life cycle in
excess of 60,000 rounds.
3
C-MAG 5.56MM
Technical Data
AMMUNITION:
NATO standard 5.56mm, .223 caliber
CAPACITY: Variable, 1 to 100 rounds
FEED RATE:
Variable, up to 1,500 rounds per minute
DIMENSIONS:
9.85 x 4.60 x 3.13 inches
250 x 117 x 79.5mm
WEIGHT: Empty: 2.2 lbs. / 1 kg
STORAGE LOADED: Indefinite
MATERIALS:
Main Components: Filled thermoplastic
Minor Components: Non-corrosive steel; alloy
4
DESCRIPTION
The C-MAG magazine consists of two main
component assemblies:
•
•
Double Drum Housing
Feed Clip Assembly.
Feed Clip Assembly
Double Drum Housing
5
The double drum housing comprises of:
• Double drum,
• Drive gear assemblies with pusher arms,
• Set of covers.
The housing acts as storage facility for the
ammunition.
The Feed Clip is filled with Two Strings of
Linked Spacer Rounds:
• 10RD Linked Spacer Rd String (flat end)
• 10RD Linked Spacer Rd String (tapered end)
which occupy the feed clip when the magazine
is empty. They are an integral part of the
magazine assembly.
The tapered end of the string set is positioned
at the open end of the feed clip when the
magazine is empty and allows the weapon bolt
to close after the last round has been fired.
WARNING: Do not remove the
Linked Spacer Round Strings !!
The bolt will stop in the closed position.
6
C-MAG MINI
14
Assembly Parts
7
LOADING
•
The C-MAG loads and functions like a standard issue magazine.
•
Live cartridges are loaded by pressing them
into the feed clip (on top of the spacer
round assembly). Cartridges will automatically feed alternately into each drum. The
springs are tensioned during the process
without the need for any supplementary
operations.
•
The magazine does not need to be empty to
be loaded and remains completely operational at all times.
• Loading can be done by hand but is recommended with the Speed Loader or Personal Loader.
RECOMMENDATION:
Regularly add graphite (dry lubricant) to
top of spacer rounds prior to loading.
The loading process distributes the graphite through the drum housing.
8
C-MAG Loading Action
Rounds on the left side of the feed clip are
loaded into the left drum.
Rounds on the right side of the feed clip
are loaded into the right drum.
9
Use of the Personal Loader
The Personal Loader uses loose or bulk
ammunition. It consists of two parts:
•
Housing
Fits over the feed clip
of the C-MAG.
•
Plunger
Raise the plunger and
insert 5 rounds into
the side opening of
the housing, de-press
plunger to load the
rounds into the CMAG.
DO NOT FORCE LOADING!
If extra force is required, STOP:
• Unload several rounds, push down to check
rounds for free movement and reload.
• If rounds do not move freely and come up to the
top of the feed clip, disassemble magazine and
inspect.
10
Use of the Speed Loader
The Speed Loader uses 10 round ammunition
clips for rapid loading. It consists of two parts:
•
Housing
Fits over the feed clip of
the C-MAG.
•
Plunger
Remove plunger, insert
10 round clip, use
plunger to load ammunition into the C-MAG.
DO NOT FORCE LOADING!
If extra force is required, STOP:
• Unload several rounds, push down to check
rounds for free movement and reload.
• If rounds do not move freely and come up to the
top of the feed clip, disassemble magazine and inspect.
Keep Loaders clean!
11
CAUTION
PRECAUTIONARY MEASURES
FOR USE IN SAND ENVIRONMENT
•
Keep BOLT CLOSED when C-MAG
is in the weapon.
•
Keep DUST COVER on the feed clip
whenever C-MAG IS NOT in the
weapon.
•
Keep C-MAG in Carrying Pouch
when not in use.
12
DISASSEMBLY OF THE C-MAG
1.
DISASSEMBLY FOR CLEANING
Take the empty C-MAG and
1.1.
Remove Clip Assembly
1.1.a Remove clip screws, first front screw
(drum side), than back screw (cover
side).
1.1.b Turn C-MAG over and remove clip
strap and feed clip assembly.
1.1.c Remove Linked Spacer Round String
Set from feed clip.
1.2.
Remove Cover Set
WARNING:
Do not disassemble any further.
13
1.3.
Cleaning
Clean drum assembly, covers, feed
clip, spacer rounds and linked assembly as recommended below.
CONTAMINATION & ACTION
HARSH SAND, DIRT ETC.:
Use cloth, compressed air or flush with water.
FINE SAND, SILT, MUD ETC.:
Soak in water with detergent (optional) to saturate and dissolve deposits. Flush with clean water.
OILS, GREASE, RESIDUES FROM SOLVENTS
OR FUELS:
Use acetone or alcohol. Do not use oily fuels
such as diesel, mineral spirits or kerosene. Follow up with detergent and water.
SALT DEPOSITS FROM SEAWATER:
Light deposits: Soak in water to dissolve.
Heavy deposits: Return to manufacturer.
14
USE CAUTION
2.
DISASSEMBLY FOR CLEARING OF
BLOCKAGES
2.1.
Remove Clip Assembly
HOLD DOWN clip assembly while
removing screws and clip strap. Remove front screw first (drum side).
CAUTION:
Point C-MAG away from you.
Removing the clip strap may release
blockage. Cartridges may be forced
out of the drum housing through the
clip opening. Point away from you
and control release of rounds by
holding down clip.
2.2.
Remove Cover Set.
CAUTION:
Put C-MAG in container to avoid
uncontrolled release of rounds. Point
away from you!
15
2.2.a Carefully remove screws and
remove cover. Grasp and slowly
rotate drive gear to dislodge
ammunition. Shake drum assembly
if necessary. Do not allow drive
mechanism to snap back into place.
2.2.b Check for damaged parts.
2.3.
Repairs
Magazines with obvious and serious
damage to the drum assembly cannot be
field repaired and must be returned to the
manufacturer for repair.
Removable components are available as
spare parts for field replacement.
C-MAG products can be returned to the
manufacturer for warranty or post warranty
work at any time.
THE BETA COMPANY
2137B Flintstone Drive, Tucker, GA 30084, USA
1-800-669-2382, www.betaco.com
16
ASSEMBLY OF THE C-MAG
1.
Inspection
All parts of the C-MAG should be inspected
for function or damage prior to assembling.
Drive gears in the double drum housing
must rotate freely.
2.
Attach covers
Place covers on drum assembly and attach.
Covers are designed for a tight fit.
17
3.
Attach feed clip assembly
3.1.
Load feed clip
The feed clip holds two Linked
Spacer Round Strings.
CAUTION:
Check string assemblies for correct linking.
LINKS MUST be assembled HORIZONTAL.
HORIZONTAL
√
NOT ALIGNED
X
•
INVERT feed clip, legs pointing up.
•
Align string sets vertically and nest
together.
18
•
Lower assembled string set into feed
clip.
CAUTION:
TAPERED Round (circled) MUST be at
the open end of the feed clip. The
string set assembly must be installed
vertically as shown.
DO NOT place linked string sets on top
of each other. C-MAG will not load.
19
3.2.
Attach feed clip to drum housing
•
Invert double drum housing and
feed clip assembly. Slide feed clip
assembly on to drum housing.
Add clip strap, attach back screw
(over covers) first.
Turn around holding down feed clip
assembly and attach screws. Assembly is complete.
Depress spacer rounds to check for
free movement.
Add graphite to top of string sets for
lubrication.
•
•
•
•
20
TROUBLESHOOTING
Characteristic
Cause
Does not load.
Linked Spacer Round String Set is installed
incorrectly.
Loading is very difficult.
Dirty magazine.
Double feeds in weapon.
Feed Clip may be cracked.
One side of feed clip shows live rounds,
other side spacer round string.
One drum hesitated feeding; sign of dirty
magazine.
Weapon bolt drives spacer round string
into front of feed clip.
Linked Spacer Rounds are installed incorrectly. Tapered round MUST be on top in
the feed clip.
21
TROUBLESHOOTING
Characteristic
Cause
Linked assembly drags in feed clip.
Linked assemblies have become lengthened. May be pushed back together and reused or exchanged.
Magazine falls out of weapon.
Magazine is not fully seated in weapon.
Weapon fires several rounds, then jams.
Magazine feeds well by hand when out of
the weapon.
Check for secure attachment between the
feed clip and drum assembly.
C-MAG rattles when empty or full.
This is normal.
22
ACCESSORIES
1.
ACCESSORIES
1.1.
Personal Loader (see Page 10)
1.2.
Speed Loader (see Page 11)
1.3.
Pouch
1.3.a The pouch is designed to hold
•
•
•
•
1 C-MAG Magazine
1 Loader
2 Graphite Tubes
1 User Manual
1.3.b
The pouch is equipped with keepers.
23
Pouch
USER MANUAL
(inside behind logo panel)
⇩
LOADER
POCKET
⇨
GRAPHITE
TUBE PANEL
⇦
24
C-MAG MAGAZINE SYSTEMS MINI 14
Include the following components:
1 each
1 each
1 each
1 each
2 each
C-MAG Magazine MINI 14
Loader (Personal or Speed Loader)
Pouch (choice of different colors)
User Manual MINI 14
Graphite Tubes
25
LIST OF PART NUMBERS
Part No.
Description
C-MAG SYSTEM MINI 14
(Different configurations available,
see website @ www.betaco.com)
CMI000
C-MAG Magazine MINI 14
(black covers)
CMI000-1
C-MAG Magazine MINI 14
(clear covers)
LCMS10
LCMP05
PCMS10
Speed Loader
Personal Loader
Pouch black
(other colors available)
AMI003
SCM02B
SCM160
XMITEM
XXXGT1
Feed Clip Kit MINI 14
Drum Back Cover Set
Dust Cover
User Manual MINI 14
Graphite Tube
26
For further information contact:
THE BETA COMPANY
2137B Flintstone Drive, Tucker, Georgia 30084, USA
Phone: +770 270 0773 OR 1 800 669 2382
Fax: +770 270 0599
Internet: www.betaco.com
XMITEM, Rev.0