1
NANO 2 Low Power System
7
State: 07.03.2012
Commissioning
For proper operation with the implementation of automatic testing and reporting faulty lights, gradually commissioning
as per the following instructions is mandatory.
Errors that arise due to deficient or incomplete implementation of commissioning are not subject to the warranty.
When commissioning is initiated, connected luminaries without integrated address module are detected and the mode " current
monitoring " will run. The load current is measured and stored. During a test the Nano 2 compares the actual measured load
current with the one stored current. Variations in a specified amount in the system lead to the indicator " error in luminaire
group * "
Luminaries equipped with an address module are detected automatically during the commissioning. The Nano 2 activates
independently the operating mode "lamp monitoring" and applies the detected address.
The process of commissioning is the same for all operating modes
When commissioning an automatic detection of the modes occurs.
The common operation of lamps with and without address modules is not allowed. The NANO 2 switches in the
recognition of address modules during the login automatically to the lamp monitoring mode. Current deviations due to
the failure of lights are not evaluated or shown. A duplicate address in a group of lamps is not allowed to be existent.
Before commissioning starts the correct connection of all cables and consumers must be examined according to the
wiring diagram. Damage caused by connection errors are not subject to the warranty.
7.1
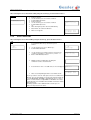
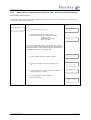
Switching on the mains supply
•
•
•
•
•
7.2
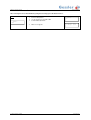
The indicator LED (1) shows permanently or flashing green.
The lamps in a non maintained light group are in standby operation. (No link 4-6 / 5-6).
The lamps in a maintained light group are in continuous operation. (Link 4-6 / 5-6 in).
For setting maintained or non maintained mode please read the chapter 9.
Luminaries with address modules are in standby or continuous operation similar to the setting of the mode switch and
depending on the prior operating.
Calibration and Registration
•
•
•
•
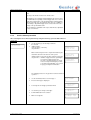
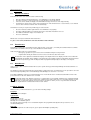
Check the indicated charging voltage - this should be significantly higher than 13V. The charge current should be less
than 0.5 A to ensure that the battery has sufficient capacity for commissioning.
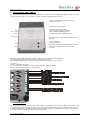
Press the button LM test ( see wiring diagram or chapter 15 housing assembly - detailed View A ).
The device switches from main to emergency operation. The LED “LM-test” will flash red for a short time. Then the
LED changes to permanent red. The application can take up to 5 minutes depending on operating mode.
When current measurement or registration of lamps with address module was successful, the LED “LM-Test” will
switch off.
•
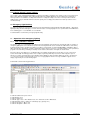
Check the results on the menu “System Info” ( chapter 6.3.7 ). The number of registered lights must match the
number of mounted lights. For lamps without address modules it automatically switches to the mode "current
monitoring". In the operating mode "lamp monitoring" is the possibility to switch between relative and absolute current
monitoring. When using the relative current monitoring, the deviation is calculated as a percentage (-20% / +40%).
When using absolute current monitoring a deviation from 3W ( Bulb ) from the measured current value ( Calibration )
is recognized as an error. At the absolute current measurement it is to ensure that the status of the connected lamps
before the commencement of trial operation corresponds to the state of the plant before the balance ( maintained light
or non maintained light ). After initial manual balance an alignment will be repeated 24 hours later automatically by the
system to realize the definite operating mode ( maintained light or non maintained light ) of the luminaries.
On commissioning you have to pay attention if relative or absolute current monitor is set for the operation mode
"current monitoring" ( see also 6.3.7 System Info ).
The correct display of the current type in the mode "current monitoring" may take up to a minute to change.
•
•
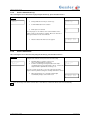
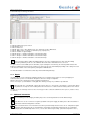
Enter in the "Time / Date" ( see. 6.3.9 service menu clock ) the current date and time.
Program in the menu "test time" ( see 6.3.6 ), the test time of annual duration and functional tests.
•
If the above steps have been carried out successfully, you should check the function of Nano 2 by triggering a manual
test.
If this testing is successful, the device is ready now.
•
The power of the connected lamps can only be determined correctly when all lamps are connected.
In case of adding, removing or replacing lamps to the system the commissioning has to be repeated.
Technical changes excepted
Page 19 of 27