1
GT4 Admin Guide
GT4 Admin Guide
Published November 2005
Table of Contents
1. Introduction .................................................................................................................................... 1
2. Before you begin .............................................................................................................................. 2
3. Software Prerequisites ....................................................................................................................... 3
1. Required software .................................................................................................................... 3
2. Optional software ..................................................................................................................... 4
3. Platform Notes ......................................................................................................................... 4
4. Installing GT 4.0 .............................................................................................................................. 9
5. Pre-WS Authentication & Authorization Admin Guide ........................................................................... 11
1. Configuring .......................................................................................................................... 11
2. Deploying ............................................................................................................................. 16
3. Testing ................................................................................................................................. 16
4. Security Considerations .......................................................................................................... 16
5. Troubleshooting ..................................................................................................................... 17
6. Environment variable interface .................................................................................................. 19
6. Basic Security Configuration ............................................................................................................ 22
1. Set environment variables ......................................................................................................... 22
2. Obtain host certificates ............................................................................................................ 22
3. Make the host credentials accessible by the container .................................................................... 23
4. Add authorization ................................................................................................................... 24
5. Verify Basic Security ............................................................................................................... 24
6. Firewall configuration ............................................................................................................. 25
7. Syslog logging ....................................................................................................................... 25
7. SimpleCA Admin Guide .................................................................................................................. 26
1. Building and Installing ............................................................................................................ 26
2. Configuring .......................................................................................................................... 30
3. Deploying ............................................................................................................................. 31
4. Testing ................................................................................................................................. 31
5. Security Considerations .......................................................................................................... 31
6. Troubleshooting ..................................................................................................................... 31
8. GridFTP Admin Guide .................................................................................................................... 32
1. Building and Installing ............................................................................................................ 32
2. Configuring .......................................................................................................................... 34
3. Deploying the GridFTP Server: globus-gridftp-server ...................................................... 46
4. Testing ................................................................................................................................. 47
5. Security Considerations .......................................................................................................... 47
6. Troubleshooting ..................................................................................................................... 49
7. Usage statistics collection by the Globus Alliance ........................................................................ 51
9. Java WS Core Admin Guide ............................................................................................................. 53
1. Building and Installing ............................................................................................................ 53
2. Configuring ........................................................................................................................... 54
3. Deploying ............................................................................................................................. 61
4. Testing ................................................................................................................................. 66
5. Security Considerations .......................................................................................................... 67
6. Troubleshooting ..................................................................................................................... 67
7. Usage statistics collection by the Globus Alliance ......................................................................... 69
10. RFT Admin Guide ........................................................................................................................ 71
1. Building and Installing ............................................................................................................ 71
2. Configuring .......................................................................................................................... 71
3. Using MySQL ....................................................................................................................... 75
4. Deploying ............................................................................................................................. 75
5. Testing ................................................................................................................................. 76
iii
GT4 Admin Guide
6. Security Considerations .......................................................................................................... 77
7. Troubleshooting ..................................................................................................................... 77
8. Usage statistics collection by the Globus Alliance ........................................................................ 78
11. WS GRAM Admin Guide ............................................................................................................... 79
1. Building and Installing ............................................................................................................ 79
2. Configuring .......................................................................................................................... 80
3. Configuring New Features for 4.0.5+ .......................................................................................... 94
4. Deploying ............................................................................................................................ 94
5. Testing ................................................................................................................................. 95
6. Security Considerations .......................................................................................................... 95
7. Troubleshooting ..................................................................................................................... 95
8. Usage statistics collection by the Globus Alliance ......................................................................... 96
12. GSI-OpenSSH Admin Guide ........................................................................................................... 98
1. Building and Installing ............................................................................................................ 98
2. Configuring ........................................................................................................................... 99
3. Deploying ........................................................................................................................... 100
4. Testing ................................................................................................................................ 101
5. Security Considerations ......................................................................................................... 101
6. Troubleshooting .................................................................................................................... 102
13. MyProxy Admin Guide ................................................................................................................ 103
1. Building and Installing ........................................................................................................... 103
2. Configuring ........................................................................................................................ 103
3. Deploying ........................................................................................................................... 106
4. Testing ................................................................................................................................ 106
5. Security Considerations ......................................................................................................... 106
6. Troubleshooting .................................................................................................................... 107
14. CAS Admin Guide ...................................................................................................................... 108
1. Building and Installing ........................................................................................................... 108
2. Configuring ........................................................................................................................ 108
3. Deploying ........................................................................................................................... 112
4. Testing ................................................................................................................................ 115
5. Example of CAS Server Administration .................................................................................... 117
6. Security Considerations ......................................................................................................... 121
7. Troubleshooting .................................................................................................................... 121
15. RLS Admin Guide ....................................................................................................................... 124
1. Building and Installing ........................................................................................................... 124
2. Configuring ........................................................................................................................ 124
3. Deploying ........................................................................................................................... 130
4. Testing ................................................................................................................................ 130
5. Security Considerations ......................................................................................................... 130
6. Troubleshooting .................................................................................................................... 131
7. Usage statistics collection by the Globus Alliance ....................................................................... 131
A. Building and Installing RLS ........................................................................................................... 133
1. Requirements ....................................................................................................................... 133
2. Setting environment variables .................................................................................................. 133
3. Installing iODBC .................................................................................................................. 134
4. Installing the relational database .............................................................................................. 135
5. Installing the RLS Server ........................................................................................................ 138
6. Configuring the RLS Database ................................................................................................ 138
7. Configuring the RLS Server .................................................................................................... 140
8. Starting the RLS Server ......................................................................................................... 141
9. Stopping the RLS Server ....................................................................................................... 141
10. Configuring the RLS Server for the MDS2 GRIS ...................................................................... 142
11. Configuring the RLS Server for the WS MDS Index Service ........................................................ 142
iv
GT4 Admin Guide
12. RedHat 9 Incompatibility ...................................................................................................... 143
B. Packaging details .......................................................................................................................... 145
1. The makefile ........................................................................................................................ 145
2. The Grid Packaging Toolkit .................................................................................................... 145
3. Picking a flavor for a source installation .................................................................................... 146
4. Using globus-makefile-header with a binary distribution ............................................................... 146
Java WS Core Glossary ..................................................................................................................... 147
Security Glossary ............................................................................................................................. 150
GridFTP Glossary ............................................................................................................................ 153
RLS Glossary .................................................................................................................................. 157
MDS4 Glossary ............................................................................................................................... 158
WS GRAM Glossary ........................................................................................................................ 160
v
List of Tables
5.1. CA files ..................................................................................................................................... 11
5.2. Certificate request configuration files ............................................................................................... 12
5.3. Certificate request files .................................................................................................................. 13
7.1. CA Name components .................................................................................................................. 26
8.1. Informational Options ................................................................................................................... 35
8.2. Modes of Operation ...................................................................................................................... 36
8.3. Authentication, Authorization, and Security Options ........................................................................... 37
8.4. Logging Options .......................................................................................................................... 39
8.5. Single and Striped Remote Data Node Options .................................................................................. 41
8.6. Disk Options ............................................................................................................................... 41
8.7. Network Options .......................................................................................................................... 42
8.8. Timeouts .................................................................................................................................... 42
8.9. User Messages ............................................................................................................................. 43
8.10. Module Options ......................................................................................................................... 43
8.11. Other ....................................................................................................................................... 43
9.1. General configuration parameters .................................................................................................... 55
9.2. Standalone/embedded container-specific configuration parameters ........................................................ 56
9.3. Default container thread pool settings ............................................................................................... 56
9.4. Default container thread pool settings (GT 4.0.3+ only) ....................................................................... 56
9.5. Axis Standard Parameters .............................................................................................................. 57
9.6. Java WS Core Parameters .............................................................................................................. 58
9.7. ResourceHomeImpl parameters ...................................................................................................... 59
11.1. Scheduler-Specific Configuration Files ........................................................................................... 90
12.1. GSI-OpenSSH build arguments ..................................................................................................... 98
13.1. myproxy-server.config lines ........................................................................................................ 105
14.1. Database parameters .................................................................................................................. 110
14.2. Command line options ............................................................................................................... 113
14.3. Test database properties ............................................................................................................. 115
14.4. Test properties .......................................................................................................................... 116
15.1. Settings ................................................................................................................................... 126
A.1. RLS Build Environment Variables ................................................................................................. 133
vi
Chapter 1. Introduction
This guide contains a reference overview of the services contained in the Globus Toolkit. It can be used as an installation
guide, but if you are just interested in starting to use the toolkit, we recommend the Quickstart Guide1 instead. It contains
links back into this document as appropriate if you want more details on a particular section.
Each component includes online reference material, which this guide sometimes links to. The master list of documentation is here2. It includes User's Guides and Developer's Guides. This document is just the guide to administration.
1
2
quickstart.html
http://www.globus.org/toolkit/docs/4.0/toc_all.html
1
Chapter 2. Before you begin
Before you start installing the Globus Toolkit 4.0, there are a few things you should consider. The toolkit contains
many subcomponents, and you may only be interested in some of them.
There are non-web services implementations of Security, GridFTP, Resource Management (GRAM), Replica Location
Service, and Information Services (MDS2). These all run on Unix platforms only.
Additionally, there are WSRF implementations of Security, Resource Management (GRAM), Reliable File Transfer
(RFT), and Information Services (Index). All the Java clients to these services run on both Windows and Unix. The
WSRF GRAM service requires infrastructure that only runs on Unix systems.
Therefore, if you are new to the toolkit and want to experiment with all of the components, you may want to use a
Unix system. If you are interested in the Windows development, you may restrict yourself to the Java-based software.
2
Chapter 3. Software Prerequisites
1. Required software
•
Globus Toolkit installer, from Globus Toolkit 4.0 download page1
•
J2SE 1.4.2+ SDK from Sun2, IBM3, HP4, or BEA5 (do not use GCJ6).
Note
To install using Java 1.6 from a source installer, please apply the Java 1.6 patch7. To apply the patch,
download it into the source installer then run
patch -p0 < java16.patch
You should see the output:
patching file source-trees/wsrf/java/core/source/build.xml
patching file source-trees/wsrf/java/core/source/pkgdata/pkg_data_src.gpt
If you are not comfortable using patches, you may instead just edit the file source-trees/wsrf/java/core/source/build.xml. Edit it so the lines 89-94 read:
<condition property="compiler.jvmarg" value="-source 1.4">
<or>
<equals arg1="${ant.java.version}" arg2="1.5"/>
<equals arg1="${ant.java.version}" arg2="1.6"/>
</or>
You do not need this patch for java 1.4.x or java 1.5.x
•
Ant 1.6+8 (1.6.1+9 if using Java 1.5). Packaged versions (RPM, deb) can have problems with preferring GCJ, so
we recommend installing a clean copy. If you do, you may need to edit /etc/ant.conf or run ant --noconfig to use
your clean version.
•
The above two requirements suffice for the Core-only download. However, the rest of this guide does not apply
to that download. Please see the Java WS Core Admin Guide10 if you are using a core-only source/binary downlaod.
1
http://www.globus.org/toolkit/downloads/4.0/
http://java.sun.com/j2se
3
http://www.ibm.com/developerworks/java/jdk
4
http://www.hp.com/java
5
http://www.bea.com/framework.jsp?CNT=index.htm&FP=/content/products/jrockit
6
http://gcc.gnu.org/java/
7
ftp://ftp.globus.org/pub/gt4/4.0/4.0.4/updates/src/java16.patch
8
http://jakarta.apache.org/ant
9
http://jakarta.apache.org/ant
10
http://www.globus.org/toolkit/docs/4.0/common/javawscore/admin-index.html
2
3
Software Prerequisites
•
C compiler. If gcc11, avoid version 3.2. 3.2.1 and 2.95.x are okay. gcc 4.1 has a bug that will trigger during the
build of WS C (bug 431512). You can recompile the globus_js package from the advisories page13, then run make
again.
•
C++ compiler. Use the version corresponding to your C compiler from the previous bullet.
•
GNU tar14 - required before even extracting the installer.
•
GNU sed15
•
zlib 1.1.4+16
•
GNU Make17
•
Perl18 5.005 or newer. Some linux distributions may require additional perl library packages to be installed. Please
see the prereq section specific to your linux distribution for details. In 4.0.5, XML::Parser is also required.
•
sudo19
•
JDBC compliant database. For instance, PostgreSQL20 7.1+
•
gpt-3.2autotools2004 (shipped with the installers, but required if building standalone GPT bundles/packages)
2. Optional software
•
IODBC21 (compile requirement for RLS)
•
Tomcat22 (required at runtime by WebMDS, optional for other services) - Make sure to download it directly from
the Apache web site. This is a runtime-only requirement, and is not required at compile-time.
•
gLite23 Java VOMS parsing libraries - binary available24 (compile requirement for Workspace Service)
3. Platform Notes
In this section, the word "flavor" refers to a combination of compiler type (gcc or other), 32 or 64 bit libraries, and
debugging enabled or not.
11
http://gcc.gnu.org
http://bugzilla.globus.org/globus/show_bug.cgi?id=4315
http://www.globus.org/toolkit/advisories.html
14
http://www.gnu.org/software/tar/tar.html
15
http://www.gnu.org/software/sed/sed.html
16
http://www.gzip.org/zlib/
17
http://www.gnu.org/software/make/
18
http://www.perl.org/
19
http://www.courtesan.com/sudo/
20
http://www.postgresql.org
21
http://www.iodbc.org/
22
http://jakarta.apache.org/tomcat/
23
http://glite.web.cern.ch/glite/security/
24
http://www.mcs.anl.gov/workspace/glite-security-util-java.jar
12
13
4
Software Prerequisites
3.1. Apple MacOS X
Until GT4.0.4, Intel Macintosh machines have a problem with the "-verify" flag for grid-proxy-init (bug 430225). As
a workaround, you can skip the -verify step. This was fixed in 4.0.4.
Macs may have trouble building RLS as shipped in GT4.0.5. One can either --disable-rls --disable-drs to turn off the
RLS/DRS build, or apply a replica_rls_server_configure.patch26 patch to the RLS configure that should let it build
successfully. Also, you will have to set JAVA_HOME to /System/Library/Frameworks/JavaVM.framework/Versions/CurrentJDK/Home to get RLS to build its jar file.
3.2. Debian/Ubuntu
Some kernel/libc combinations trigger a threading problem. See bug #219427. The workaround is to set LD_ASSUME_KERNEL=2.2.5 in your environment.
There is a more recent glibc/threading problem described in bug #548128. The workaround for libc6-i686 and linuximage-2.6.18-3-686 is to set LD_ASSUME_KERNEL=2.4.19.
Some distros may not include some perl modules we use. "$ apt-get install libpod-\*" should fix it, see bug 438729.
3.3. Fedora Core
gcc 4.1 (the default compiler for FC5) has a bug that will trigger during the build of WS C (bug 431530). You can recompile the globus_js package from the advisories page31, then run make again.
Change your default Java installation using the alternatives command. Here's one example of how to do it if you have
already installed a non-GCJ version of the Java2 SDK into /usr/java/j2sdk1.4.2_08:
root# /usr/sbin/alternatives --install /usr/bin/java java /usr/java/j2sdk1.4.2_08/bin/java
root# /usr/sbin/alternatives --config java
There are 2 programs which provide 'java'.
Selection
Command
----------------------------------------------*+ 1
2
/usr/lib/jvm/jre-1.4.2-gcj/bin/java
/usr/java/j2sdk1.4.2_08/bin/java
Enter to keep the current selection[+], or type selection number:
Choose selection 2 to change your default java version to the non-GCJ version.
3.4. FreeBSD
No known issues.
25
http://bugzilla.globus.org/globus/show_bug.cgi?id=4302
http://www.globus.org/ftppub/gt4/4.0/4.0.5/updates/src/replica_rls_server_configure.patch
27
http://bugzilla.globus.org/globus/show_bug.cgi?id=2194
28
http://bugzilla.globus.org/globus/show_bug.cgi?id=5481
29
http://bugzilla.globus.org/globus/show_bug.cgi?id=4387
30
http://bugzilla.globus.org/globus/show_bug.cgi?id=4315
31
http://www.globus.org/toolkit/advisories.html
26
5
Software Prerequisites
3.5. HP/UX
Specify --with-flavor=vendorcc32 on the configure line. GNU tar, GNU sed, and GNU make are required on the PATH.
HP-UX 11.11 (11iv1) and 11.23 (11iv2) on PA-RISC:
•
HP Ansi-C compiler, version B.11.11.14
•
Java 1.5.0_02
•
Apache Ant 1.6.2
HP-UX 11.23 (11iv2) on IA-64:
•
HP ANSI-C compiler, version A.06.00
•
Java 1.5.0_03
•
Apache Ant 1.6.2
HP-UX 11.11 requires support for IPv6, which is part of the Transport Optional Upgrade Release (TOUR). This product
can be obtained free-of-charge from the HP Software Depot32 (search keyword = "TOUR").
HP also supplies the Globus Toolkit as a pre-built software depot through its HP-UX Internet Express distribution.
This product can be obtained free-of-charge from the HP Software Depot33 (search keyword = "globus").
For complete details about Globus on HP-UX, please consult the HP Globus Support34 page.
3.6. IBM AIX
AIX will have a build failure with 4.0.5 as tagged. One can either --disable-rls to turn off the RLS build, or apply a
replica_rls_server_configure.patch35 patch to the RLS configure that lets it build successfully.
Supported flavors are vendorcc32dbg/vendorcc32 and vendorcc64dbg/vendorcc64 using the Visual Age compilers
(xlc). GSI-OpenSSH will only build in the 32bit flavor, so disable it with --disable-gsiopenssh for the 64bit build. No
gcc flavors are supported. Specify a flavor using --with-flavor=flavor.
GNU sed, tar, and make are required before the IBM ones in the PATH.
The toolkit has been tested on AIX 5.2 with:
•
Visual Age C/C++ 6.0
•
32 bit version of IBM Java 1.4
•
Apache Ant 1.5.4
•
tar-1.14, make-3.80, flex-2.5.4a, perl-5.8.5, bison-1.25, zlib-1.2.2
32
http://www.software.hp.com/
http://www.software.hp.com/
http://www.hp.com/products/globus
35
http://www.globus.org/ftppub/gt4/4.0/4.0.5/updates/src/replica_rls_server_configure.patch
33
34
6
Software Prerequisites
3.7. Red Hat
When building from source on a Red Hat Enterprise line version 3 or 4 based OS, GPT might have a problem retrieving
exit codes from subshells. You might see errors which says they were both successful and failed:
BUILD SUCCESSFUL
Total time: 11 seconds
ERROR: Build has failed
make: *** [globus_wsrf_servicegroup] Error 10
The workaround is to configure with --with-buildopts="-verbose"
Depending on your perl installation, you may also require the XML::Parser module, available in the perl-XML-Parser
RPM.
3.8. SGI Altix (IA64 running Red Hat)
Some extra environment variables are required for building MPI flavors. For the Intel compiler:
export
export
export
export
export
CC=icc
CFLAGS=-no-gcc
CXX=icpc
CXXFLAGS=-no-gcc
LDFLAGS=-lmpi
For the GNU compiler:
export CC=gcc
export CXX=g++
export LDFLAGS=-lmpi
In both cases, configure with --with-flavor=mpicc64
3.9. Sun Solaris
Supported flavors are gcc32, gcc64, vendorcc32 and vendorcc64. The dbg flavors should work as well. For gcc64, a
gcc built to target 64 bit object files is required. The gcc32dbg flavor will be used by default. Specify other flavors
using --with-flavor=flavor.
For Solaris 10, you may need to use an updated GNU binutils, or the provided Sun /usr/ccs/bin/ld to link. See
binutils bug 103136 for details on Solaris 10 symbol versioning errors.
For the GT4.0.7 build on x86 Solaris 10, a patch was applied to fix bug bug 356337, which causes openssl to fail to
seed the PRNG with the symlinked /dev/urandom on Solaris 10.
GPT has problems with the Sun provided perl and tar. Use GNU tar, and if you're using Sun's tar, you must use the
same compiler to build GT as they used to build perl.
36
37
http://sources.redhat.com/bugzilla/show_bug.cgi?id=1031
http://bugzilla.globus.org/bugzilla/show_bug.cgi?id=3563
7
Software Prerequisites
The toolkit has been tested on Solaris 9 with:
•
Sun Workshop 6 update 2 C 5.3
•
gcc 3.4.3
•
Sun Java 1.4.2_02
•
Apache Ant 1.5.4
•
and: tar-1.14, patch-2.5.4, m4-1.4.1, flex-2.5.4a, make-3.80, byacc-1.9, gzip-1.2.4, coreutils-5.2.1, perl-5.8.5
3.10. SuSE Linux
No known issues.
3.11. Tru64 Unix
Specify --with-flavor=vendorcc64 on the configure line. GNU tar, GNU sed, and GNU make are required on the PATH.
The toolkit has been tested on Tru64 UNIX (V5.1A and V5.1B) with:
•
HP C V6.4-009 and V6.5-003 compilers
•
Java 1.4.2_04
•
Apache Ant 1.6.2
For complete details about Globus on Tru64, please consult the HP Globus Support38 page.
3.12. Windows
Only Java-only components will build. Please choose the Java WS Core-only download and follow the instructions in
the Java WS Core System Administrator's Guide39.
38
39
http://www.hp.com/products/globus
http://www.globus.org/toolkit/docs/4.0/common/javawscore/admin-index.html
8
Chapter 4. Installing GT 4.0
1.
Create a user named "globus". This non-privileged user will be used to perform administrative tasks such as
starting and stopping the container, deploying services, etc. Pick an installation directory, and make sure this account
has read and write permissions in the installation directory.
Tip
You might need to create the target directory as root, then chown it to the globus user:
# mkdir /usr/local/globus-4.0.1
# chown globus:globus /usr/local/globus-4.0.1
Important
If for some reason you do not create a user named "globus", be sure to run the installation as a non-root
user. In that case, make sure to pick an install directory that your user account has write access to.
2.
Download the required software noted in Chapter 3, Software Prerequisites.
Tip
Be aware that Apache Ant will use the Java referred to by JAVA_HOME, not necessarily the first Java
executable on your PATH. Be sure to set JAVA_HOME to the top-level directory of your Java installation
before installing.
Also, check the Section 3, “Platform Notes” if your OS includes ant already. Your /etc/ant.conf is
probably configured to use gcj, which will fail to compile the Toolkit.
3.
In this guide we will assume that you are installing to /usr/local/globus-4.0.1, but you may replace
/usr/local/globus-4.0.1 with whatever directory you wish to install to.
As the globus user, run:
globus$ export GLOBUS_LOCATION=/usr/local/globus-4.0.1
globus$ ./configure --prefix=$GLOBUS_LOCATION
You can use command line arguments to ./configure for a more custom install. Here are the lines to enable features
which are disabled by default:
Optional Features:
--enable-prewsmds
--enable-wsgram-condor
--enable-wsgram-lsf
--enable-wsgram-pbs
--enable-i18n
--enable-drs
[...]
Optional Packages:
Build pre-webservices mds. Default is disabled.
Build GRAM Condor scheduler interface. Default is disabled.
Build GRAM LSF scheduler interface. Default is disabled.
Build GRAM PBS scheduler interface. Default is disabled.
Enable internationalization. Default is disabled.
Enable Data Replication Service. Default is disabled.
9
Installing GT 4.0
[...]
--with-iodbc=dir
Use the iodbc library in dir/lib/libiodbc.so.
Required for RLS builds.
--with-gsiopensshargs="args"
Arguments to pass to the build of GSI-OpenSSH, like
--with-tcp-wrappers
For a full list of options, see ./configure --help. For a list of GSI-OpenSSH options, see Table 12.1, “GSI-OpenSSH
build arguments”. For more information about our packaging or about choosing a flavor, see Appendix B, Packaging
details.
4.
Run:
globus$ make
Note that this command can take several hours to complete. If you wish to have a log file of the build, use tee:
globus$ make 2>&1 | tee build.log
The syntax above assumes a Bourne shell. If you are using another shell, redirect stderr to stdout and then pipe
it to tee.
Note
Using make in parallel mode (-j) is not entirely safe, and is not recommended.
5.
Finally, run:
globus$ make install
This completes your installation. Now you may move on to the configuration sections of the following chapters.
We recommend that you install any security advisories available for your installation, which are available from
the Advisories page1. You may also be interested in subscribing to some mailing lists2 for general discussion and
security-related announcements.
Your next step is to setup security, which includes picking a CA to trust, getting host certificates, user certificates, and
creating a grid-mapfile. The next three chapters cover these topics.
With security setup, you may start a GridFTP server, configure a database for RFT, and configure WS-GRAM. You
may also start a GSI-OpenSSH daemon, setup a MyProxy server, run RLS, and use CAS. The following chapters will
explain how to configure these technologies. If you follow the chapters in order, you will make sure of performing
tasks in dependency order.
1
2
http://www.globus.org/toolkit/advisories.html
http://dev.globus.org/wiki/Mailing_Lists
10
Chapter 5. Pre-WS Authentication &
Authorization Admin Guide
1. Configuring
This section describes the configuration steps required to:
•
Determine whether or not to trust certificates issued by a particular Certificate Authority (CA),
•
Provide appropriate default values for use by the grid-cert-request command, which is used to generate certificates,
•
Request service certificates, used by services to authenticate themselves to users, and
•
Specify identity mapping information.
In general, Globus tools will look for a configuration file in a user-specific location first, and in a system-wide location
if no user-specific file was found. The configuration commands described here may be run by administrators to create
system-wide defaults and by individuals to override those defaults.
1.1. Configuring Globus to Trust a Particular Certificate
Authority
The Globus tools will trust certificates issued by a CA if (and only if) it can find information about the CA in the
trusted certificates directory. The trusted certificates directory is located as described in Credentials in Pre-WS A&A
and exists either on a per machine or on a per installation basis. The following two files must exist in the directory for
each trusted CA:
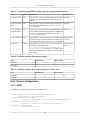
Table 5.1. CA files
cert_hash.0
The trusted CA certificate.
cert_hash.signing_policy
A configuration file defining the distinguished names of certificates signed by the CA.
Pre-WS Globus components will honor a certificate only if:
•
its CA certificate exists (with the appropriate name) in the TRUSTED_CA directory, and
•
the certificate's distinguished name matches the pattern described in the signing policy file.
In GT 4.0.x releases, up to GT 4.0.6 release, Java-based components ignore the signing policy file and will honor all
valid certificates issued by trusted CAs. Since GT 4.0.7 release, Java components enforce signing policy as described
in Java CoG Release Notes.1
The cert_hash that appears in the file names above is the hash of the CA certificate, which can be found by running
the command:
$GLOBUS_LOCATION/bin/openssl x509 -hash -noout < ca_certificate
1
http://www.globus.org/toolkit/docs/4.0/contributions/javacog/JavaCoG_Release_Notes_407.html
11
Pre-WS Authentication & Authorization
Admin Guide
Some CAs provide tools to install their CA certificates and signing policy files into the trusted certificates directory.
You can, however, create a signing policy file by hand; the signing policy file has the following format:
access_id_CA X509 'CA Distinguished Name'
pos_rights globus CA:sign
cond_subjects globus '"Distinguished Name Pattern"'
In the above, the CA Distinguished Name is the subject name of the CA certificate, and the Distinguished Name Pattern
is a string used to match the distinguished names of certificates granted by the CA. Some very simple wildcard
matching is done: if the Distinguished Name Pattern ends with a '*', then any distinguished name that matches the part
of the CA subject name before the '*' is considered a match. Note: the cond_subjects line may contain a space-separated
list of distinguished name patterns.
A repository of CA certificates that are widely used in academic and research settings can be found here2.
1.2. Configuring Globus to Create Appropriate Certificate
Requests
The grid-cert-request command, which is used to create certificates, uses the following configuration files:
Table 5.2. Certificate request configuration files
globus-user-ssl.conf
Defines the distinguished name to use for a user's certificate request.
The format is described here3.
globus-host-ssl.conf
Defines the distinguished name for a host (or service) certificate request.
The format is described here4.
grid-security.conf
A base configuration file that contains the name and email address for
the CA.
directions
An optional file that may contain directions on using the CA.
Many CAs provide tools to install configuration files called globus-user-ssl.conf.cert_hash, globushost-ssl.conf.cert_hash, grid_security.conf.cert_hash, and directions.cert_hash in
the trusted certificates directory. The command:
grid-cert-request -ca cert_hash
will create a certificate request based on the specified CA's configuration files. The command:
grid-cert-request -ca
will list the available CAs and let the user choose which one to create a request for.
You can specify a default CA for certificate requests (i.e., a CA that will be used if grid-cert-request is invoked
without the -ca flag) by making the following symbolic links (where GRID_SECURITY is the grid security directory
and TRUSTED_CA is the trusted CA directory):
ln -s TRUSTED_CA/globus-user-ssl.conf.cert_hash \
GRID_SECURITY/globus-user-ssl.conf
ln -s TRUSTED_CA/globus-host-ssl.conf.cert_hash \
2
https://www.tacar.org/certs.html
http://www.openssl.org/docs/apps/req.html#CONFIGURATION_FILE_FORMAT
4
http://www.openssl.org/docs/apps/req.html#CONFIGURATION_FILE_FORMAT
3
12
Pre-WS Authentication & Authorization
Admin Guide
GRID_SECURITY/globus-host-ssl.conf
ln -s TRUSTED_CA/grid_security.conf.cert_hash \
GRID_SECURITY/grid_security.conf
And optionally, if the CA specific directions file exists:
ln -s TRUSTED_CA/directions.cert_hash \
GRID_SECURITY/directions
This can also be accomplished by invoking the grid-default-ca command.
The directions file may contain specific directions on how to use the CA. There are three types of printed messages:
•
REQUEST HEADER, printed to a certificate request file,
•
USER INSTRUCTIONS, printed on the screen when one requests a user certificate,
•
NONUSER INSTRUCTIONS, printed on the screen when one requests a certificate for a service.
Each message is delimited from others with lines ----- BEGIN message type TEXT ----- and ----- END message type
TEXT -----. For example, the directions file would contain the following lines:
----- BEGIN REQUEST HEADER TEXT ----This is a Certificate Request file
It should be mailed to ${GSI_CA_EMAIL_ADDR}
----- END REQUEST HEADER TEXT ----If this file does not exist, the default messages are printed.
1.3. Requesting Service Certificates
Different CAs use different mechanisms for issuing end-user certificates; some use mechanisms that are entirely webbased, while others require you to generate a certificate request and send it to the CA. If you need to create a certificate
request for a service certificate, you can do so by running:
grid-cert-request -host hostname -service service_name
where hostname is the fully-qualified name of the host on which the service will be running, and service_name is the
name of the service. This will create the following three files:
Table 5.3. Certificate request files
GRID_SECURITY/service_name/ser- An empty file. When you receive your actual service certificate from your CA, you should place it in this file.
vice_namecert.pem
GRID_SECURITY/service_name/ser- The certificate request, which you should send to your CA.
vice_namecert_request.pem
GRID_SECURITY/service_name/ser- The private key associated with your certificate request, encrypted with the pass phrase that you entered when prompted
vice_namekey.pem
by grid-cert-request.
The grid-cert-request command recognizes several other useful options; you can list these with:
grid-cert-request -help
13
Pre-WS Authentication & Authorization
Admin Guide
1.4. Specifying Identity Mapping Information
Several Globus services map distinguished names (found in certificates) to local identities (e.g., unix logins). These
mappings are maintained in the gridmap file. The gridmap file is discovered according to the rules described in
Credentials in Pre-WS A&A. A gridmap line of the form:
"Distinguished Name" local_name
maps the distinguished name Distinguished Name to the local name local_name. A gridmap line of the form:
"Distinguished Name" local_name1,local_name2
maps Distinguished Name to both local_name1 and local_name2; any number of local user names may
occur in the comma-separated local name list.
Several tools exist to manage grid map files. To add an entry to the grid map file, run:
$GLOBUS_LOCATION/sbin/grid-mapfile-add-entry \
-dn "Distinguished Name" \
-ln local_name
To delete an entry from the gridmap file, run:
$GLOBUS_LOCATION/sbin/grid-mapfile-delete-entry \
-dn "Distinguished Name" \
-ln local_name
To check the consistency of the gridmap file, run
$GLOBUS_LOCATION/sbin/grid-mapfile-check-consistency
These commands recognize several useful options, including a -help option, which lists detailed usage information.
The location of the gridmap file is determined as follows:
1.
If the GRIDMAP environment variable is set, the gridmap file location is the value of the environment variable.
2.
Otherwise:
•
If the user is root (uid 0), then the gridmap file is /etc/grid-security/grid-mapfile.
•
Otherwise, the gridmap file is $HOME/.gridmap.
1.5. Configuring Certificate Revocation Lists (CRLs)
The Globus Toolkit supports CRLs on both the client and server side. CRL support is optional, however if a CRL file
is present it must be correctly formatted or it will cause an error to be raised and certificates from CA the CRL is associated with, will not be honored.
1.5.1. CRL Filename
A CRL file should be stored in the trusted certificates directory alongside the file containing the trusted CA certificated
it is associated with (normally this is /etc/grid-security/certificates). The filename of the CRL file should be the same
basename of the associated CA certificate file, but with a ".r0" extension.
14
Pre-WS Authentication & Authorization
Admin Guide
For example if a CA certificate was stored in 42864e48.0 the CRL for that CA should be stored in 42864e48.r0.
1.5.2. CRL Expiration
Globus treats the "Next Update" field of the CRL as an expiration field. If the time in the Next Update field has past
Globus will treat the CRL as invalid and cease to accept certificates issued by the CA associated with the CRL in
question.
1.5.3. CRL Format
The CRL should be stored in base-64 encoded PEM. The file should look like the example below. Note that the BEGIN
and END lines are significant and must appear exactly as shown. Any text before the BEGIN line or after the END
line ignored.
-----BEGIN X509 CRL----MIIDQTCCAikwDQYJKoZIhvcNAQEFBQAwdTETMBEGCgmSJomT8ixkARkWA25ldDESMBAGCgmSJomT
8ixkARkWAmVzMSAwHgYDVQQLExdDZXJ0aWZpY2F0ZSBBdXRob3JpdGllczEZMBcGA1UECxMQRE9F
IFNjaWVuY2UgR3JpZDENMAsGA1UEAxMEcGtpMRcNMDIwNTA5MjAwMjM2WhcNMDIwNjA4MjAwMjM2
WjCCAYEwEgIBXBcNMDIwMzE5MTcyNjI4WjASAgFbFw0wMjAzMTkwMDA0NDJaMBICASUXDTAyMDIx
MjIwMTkzMVowEwICAK8XDTAyMDUwNzIzMzAxNFowEgIBUBcNMDIwMzEyMjAzMjM4WjATAgIArhcN
MDIwNTA3MjMyMjM5WjASAgFPFw0wMjAzMjcxNDQxMTJaMBICAR4XDTAyMDIwNDIxNTc1MVowEgIB
SRcNMDIwMzE0MjI0OTQzWjASAgF2Fw0wMjA0MDgxOTMwMzNaMBMCAgChFw0wMjA0MzAyMDQwMjVa
MBICARMXDTAyMDEyOTIwMTQwOFowEwICAKAXDTAyMDQzMDIwNDAyNVowEgIBEhcNMDIwMTI5MTk1
NDIzWjATAgIAmhcNMDIwNTA5MjAwMjM2WjASAgENFw0wMjAxMjgyMzE0NDZaMBICATwXDTAyMDMw
NTE5NDExM1owEgIBOBcNMDIwMzE5MjMxOTI5WjASAgE3Fw0wMjAzMDgyMDE4NDhaMA0GCSqGSIb3
DQEBBQUAA4IBAQBWt6fD7AsvcmuTsSx9GWPbFIR3CCG7yIQUDiBSOOJi3guKh4tLqiCIQeIkGbMp
7XeEk+5oKRcuwZdMQpseKO6GYVVACEkqDczk2L62kMiE/7cTbXryKJRg87fGF6MC+uXcU0bTCtpC
tByQ82yaKuPw/C+JYOurMzhyc8ZSxzJxz7WKYEiCzig5ZiVBvqO7ksSJGUy08ABWSmPBIL3u3CG6
Lz7aV/GiME20eXQRW++9256NhkT2P2IYETa5c/UFWlwyAFLq23C5u/R5e1sqpK5BcmAPqId957b9
+g7I9/ZsXj1ZRNlEPZ3wu6XHwVpC2TSLG95B+rl0TDNzxEKho1Rc
-----END X509 CRL-----
1.6. GSI File Permissions Requirements
•
•
End Entity (User, Host and Service) Certificates and the GSI Authorization Callout Configuration File:
•
May not be executable
•
May not be writable by group and other
•
Must be either regular files or soft links
Private Keys and Proxy Credentials:
•
Must be owned by the current (effective) user
•
May not be executable
•
May not be readable by group and other
•
May not be writable by group and other
•
Must be either regular files or soft links
15
Pre-WS Authentication & Authorization
Admin Guide
•
CA Certificates, CA Signing Policy Files, the Grid Map File and the GAA Configuration File:
•
•
•
Must be either regular files or soft links
GSI Authorization callout configuration files
•
Must exist
•
Should be world readable
•
Should not be writable by group and other
•
Should be either a regular file or a soft link
GSI GAA configuration files
•
Must exist
•
Should be world readable
•
Should not be writable by group and other
•
Should be either a regular file or a soft link
2. Deploying
This section is not applicable.
3. Testing
There is no content available at this time.
4. Security Considerations
During host authorization, the toolkit treats DNs "hostname-*.edu" as equivalent to "hostname.edu". This means that
if a service was setup to do host authorization and hence accept the certificate "hostname.edu", it would also accept
certificates with DNs "hostname-*.edu".
The feature is in place to allow a multi-homed host following a "hostname-interface" naming convention to have a
single host certificate. For example, host "grid.test.edu" would also accept the likes of "grid-1.test.edu" or "gridfoo.test.edu".
Note
The wildcard character "*" matches only the name of the host and not the domain components. This means
that "hostname.edu" will not match "hostname-foo.sub.edu" but will match "host-foo.edu".
Note
If a host was set up to accept "hostname-1.edu", it will not accept any of "hostname-*.edu".
A bug5 has been opened to see if this feature needs to be modfiied.
5
http://bugzilla.globus.org/bugzilla/show_bug.cgi?id=2969
16
Pre-WS Authentication & Authorization
Admin Guide
5. Troubleshooting
5.1. Credential Errors
The following are some common problems that may cause clients or servers to report that credentials are invalid:
5.1.1. Your proxy credential may have expired
Use grid-proxy-info to check whether the proxy credential has actually expired. If it has, generate a new proxy with
grid-proxy-init.
5.1.2. The system clock on either the local or remote system is wrong
This may cause the server or client to conclude that a credential has expired.
5.1.3. Your end-user certificate may have expired
Use grid-cert-info to check your certificate's expiration date. If it has expired, follow your CA's procedures to get a
new one.
5.1.4. The permissions may be wrong on your proxy file
If the permissions on your proxy file are too lax (for example, if others can read your proxy file), Globus Toolkit clients
will not use that file to authenticate. You can "fix" this problem by changing the permissions on the file or by destroying
it (with grid-proxy-destroy) and creating a new one (with grid-proxy-init). However, it is still possible that someone
else has made a copy of that file during the time that the permissions were wrong. In that case, they will be able to
impersonate you until the proxy file expires or your permissions or end-user certificate are revoked, whichever happens
first.
5.1.5. The permissions may be wrong on your private key file
If the permissions on your end user certificate private key file are too lax (for example, if others can read the file),
grid-proxy-init will refuse to create a proxy certificate. You can "fix" this by changing the permissions on the private
key file; however, you will still have a much more serious problem: it's possible that someone has made a copy of your
private key file. Although this file is encrypted, it is possible that someone will be able to decrypt the private key, at
which point they will be able to impersonate you as long as your end user certificate is valid. You should contact your
CA to have your end-user certificate revoked and get a new one.
5.1.6. The remote system may not trust your CA
Verify that the remote system is configured to trust the CA that issued your end-entity certificate. See the Administrator's
Guide6 for details.
5.1.7. You may not trust the remote system's CA
Verify that your system is configured to trust the remote CA (or that your environment is set up to trust the remote
CA). See the Administrator's Guide7 for details.
6
7
http://www.globus.org/toolkit/docs/4.0/admin/docbook/
http://www.globus.org/toolkit/docs/4.0/admin/docbook/
17
Pre-WS Authentication & Authorization
Admin Guide
5.1.8. There may be something wrong with the remote service's credentials
It is sometimes difficult to distinguish between errors reported by the remote service regarding your credentials and
errors reported by the client interface regarding the remote service's credentials. If you can't find anything wrong with
your credentials, check for the same conditions (or ask a remote administrator to do so) on the remote system.
5.2. Some tools to validate certificate setup
5.2.1. Check that the user certificate is valid
openssl verify -CApath /etc/grid-security/certificates
-purpose sslclient ~/.globus/usercert.pem
5.2.2. Connect to the server using s_clien
openssl s_client -ssl3 -cert ~/.globus/usercert.pem -key ~/.globus/userkey.pem -CApath /etc
Here <host:port> denotes the server and port you connect to.
If it prints an error and puts you back at the command prompt, then it typically means that the server has closed the
connection, i.e. that the server was not happy with the client's certificate and verification. Check the SSL log on the
server.
If the command "hangs" then it has actually opened a telnet style (but secure) socket, and you can "talk" to the server.
You should be able to scroll up and see the subject names of the server's verification chain:
depth=2 /DC=net/DC=ES/O=ESnet/OU=Certificate Authorities/CN=ESnet Root CA 1
verify return:1
depth=1 /DC=org/DC=DOEGrids/OU=Certificate Authorities/CN=DOEGrids CA 1
verify return:1
depth=0 /DC=org/DC=doegrids/OU=Services/CN=wiggum.mcs.anl.gov
verify return:1
In this case there were no errors. Errors would give you an extra line next to the subject name of the certificate that
caused the error
5.2.3. Check that the server certificate is valid
Requires root login on server.
openssl verify -CApath /etc/grid-security/certificates -purpose sslserver /etc/grid-sec
5.3. Grid map errors
The following are some common problems that may cause clients or servers to report that user are not authorized:
18
Pre-WS Authentication & Authorization
Admin Guide
5.3.1.The content of the grid map file does not conform to the expected
format
Use grid-mapfile-check-consistency to make sure that your gridmap conforms to the expected format.
5.3.2. The grid map file does not contain a entry for your DN
Use grid-mapfile-add-entry to add the relevant entry.
6. Environment variable interface
6.1. Credentials
Credentials are looked for in the following order:
1.
service credential
2.
host credential
3.
proxy credential
4.
user credential
X509_USER_PROXY specifies the path to the proxy credential. If X509_USER_PROXY is not set, the proxy credential
is created (by grid-proxy-init) and searched for (by client programs) in an operating-system-dependent local temporary
file.
X509_USER_CERT and X509_USER_KEY specify the path to the end entity (user, service, or host) certificate and
corresponding private key. The paths to the certificate and key files are determined as follows:
For service credentials:
1.
If X509_USER_CERT and X509_USER_KEY exist and contain a valid certificate and key, those files are used.
2.
Otherwise, if the files /etc/grid-security/service/servicecert and /etc/grid-security/service/servicekey exist and contain a valid certificate and key, those files are used.
3.
Otherwise, if the files $GLOBUS_LOCATION/etc/grid-security/service/servicecert and
$GLOBUS_LOCATION/etc/grid-security/service/servicekey exist and contain a valid certificate
and key, those files are used.
4.
Otherwise, if the files service/servicecert and service/servicekey in the user's .globus directory
exist and contain a valid certificate and key, those files are used.
For host credentials:
1.
If X509_USER_CERT and X509_USER_KEY exist and contain a valid certificate and key, those files are used.
2.
Otherwise, if the files /etc/grid-security/hostcert.pem and /etc/grid-security/hostkey.pem exist and contain a valid certificate and key, those files are used.
3.
Otherwise, if the files $GLOBUS_LOCATION/etc/grid-security/hostcert.pem and $GLOBUS_LOCATION/etc/grid-security/hostkey.pem exist and contain a valid certificate and key, those files are
used.
19
Pre-WS Authentication & Authorization
Admin Guide
4.
Otherwise, if the files hostcert.pem and hostkey.pem in the user's .globus directory, exist and contain
a valid certificate and key, those files are used.
For user credentials:
1.
If X509_USER_CERT and X509_USER_KEY exist and contain a valid certificate and key, those files are used.
2.
Otherwise, if the files usercert.pem and userkey.pem exist in the user's .globus directory, those files
are used.
3.
Otherwise, if a PKCS-12 file called usercred.p12 exists in the user's .globus directory, the certificate and
key are read from that file.
6.2. Gridmap file
GRIDMAP specifies the path to the grid map file, which is used to map distinguished names (found in certificates) to
local names (such as login accounts). The location of the grid map file is determined as follows:
1.
If the GRIDMAP environment variable is set, the grid map file location is the value of that environment variable.
2.
Otherwise:
•
If the user is root (uid 0), then the grid map file is /etc/grid-security/grid-mapfile.
•
Otherwise, the grid map file is $HOME/.gridmap.
6.3. Trusted CAs directory
X509_CERT_DIR is used to specify the path to the trusted certificates directory. This directory contains information
about which CAs are trusted (including the CA certificates themselves) and, in some cases, configuration information
used by grid-cert-request to formulate certificate requests. The location of the trusted certificates directory is determined
as follows:
1.
If the X509_CERT_DIR environment variable is set, the trusted certificates directory is the value of that environment variable.
2.
Otherwise, if $HOME/.globus/certificates exists, that directory is the trusted certificates directory.
3.
Otherwise, if /etc/grid-security/certificates exists, that directory is the trusted certificates directory.
4.
Finally, if $GLOBUS_LOCATION/share/certificates exists, then it is the trusted certificates directory.
6.4. GSI authorization callout configuration file
GSI_AUTHZ_CONF is used to specify the path to the GSI authorization callout configuration file. This file is used to
configure authorization callouts used by both the gridmap and the authorization API. The location of the GSI authorization callout configuration file is determined as follows:
1.
If the GSI_AUTHZ_CONF environment variable is set, the authorization callout configuration file location is the
value of this environment variable.
2.
Otherwise, if /etc/grid-security/gsi-authz.conf exists, then this file is used.
3.
Otherwise, if $GLOBUS_LOCATION/etc/gsi-authz.conf exists, then this file is used.
20
Pre-WS Authentication & Authorization
Admin Guide
4.
Finally, if $HOME/.gsi-authz.conf exists, then this file is used.
6.5. GAA (Generic Authorization and Access control)
configuration file
GSI_GAA_CONF is used to specify the path to the GSI GAA (Generic Authorization and Access control) configuration
file. This file is used to configure policy language specific plugins to the GAA-API. The location of the GSI GAA
configuration file is determined as follows:
1.
If the GSI_GAA_CONF environment variable is set, the GAA configuration file location is the value of this environment variable.
2.
Otherwise, if /etc/grid-security/gsi-gaa.conf exists, then this file is used.
3.
Otherwise, if $GLOBUS_LOCATION/etc/gsi-gaa.conf exists, then this file is used.
4.
Finally, if $HOME/.gsi-gaa.conf exists, then this file is used.
6.6. Grid security directory
GRID_SECURITY_DIR specifies a path to a directory containing configuration files that specify default values to be
placed in certificate requests. This environment variable is used only by the grid-cert-request and grid-default-ca
commands.
The location of the grid security directory is determined as follows:
1.
If the GRID_SECURITY_DIR environment variable is set, the grid security directory is the value of that environment variable.
2.
If the configuration files exist in /etc/grid-security, the grid security directory is that directory.
3.
if the configuration files exist in $GLOBUS_LOCATION/etc, the grid security directory is that directory.
21
Chapter 6. Basic Security Configuration
1. Set environment variables
In order for the system to know the location of the Globus Toolkit commands you just installed, you must set an environment variable and source the globus-user-env.sh script.
1.
As globus, set GLOBUS_LOCATION to where you installed the Globus Toolkit. This will be one of the following:
•
Using Bourne shells:
globus$ export GLOBUS_LOCATION=/path/to/install
•
Using csh:
globus$ setenv GLOBUS_LOCATION /path/to/install
2.
Source $GLOBUS_LOCATION/etc/globus-user-env.{sh,csh} depending on your shell.
•
Use .sh for Bourne shell:
globus$ . $GLOBUS_LOCATION/etc/globus-user-env.sh
•
Use .csh for C shell.
globus$ source $GLOBUS_LOCATION/etc/globus-user-env.csh
2. Obtain host certificates
You must have X509 certificates to use the GT 4.0 software securely (referred to in this documentation as host certificates). For an overview of certificates for GSI (security) see GSI Configuration Information and GSI Environmental
Variables.
Host certificates must:
•
consist of the following two files: hostcert.pem and hostkey.pem
•
be in the appropriate directory for secure services: /etc/grid-security/
•
be for a machine which has a consistent name in DNS; you should not run it on a computer using DHCP where a
different name could be assigned to your computer.
You have the following options:
2.1. Request a certificate from an existing CA
Your best option is to use an already existing CA. You may have access to one from the company you work for or an
organization you are affiliated with. Some universities provide certificates for their members and affiliates. Contact
22
Basic Security Configuration
your support organization for details about how to acquire a certificate. You may find your CA listed in the TERENA
Repository1.
If you already have a CA, you will need to follow their configuration directions. If they include a CA setup package,
follow the CAs instruction on how to install the setup package. If they do not, you will need to create an /etc/gridsecurity/certificates directory and include the CA cert and signing policy in that directory. See Configuring
a Trusted CA2 for more details.
This type of certificate is best for service deployment and Grid inter-operation.
2.2. SimpleCA
SimpleCA provides a wrapper around the OpenSSL CA functionality and is sufficient for simple Grid services. Alternatively, you can use OpenSSL's CA.sh command on its own. Instructions on how to use the SimpleCA can be found
in Chapter 7, SimpleCA Admin Guide.
SimpleCA is suitable for testing or when a certificate authority is not available.
2.3. Low-trust certificate
Globus offers a low-trust certificate available at http://gcs.globus.org:8080/gcs. This option should only be used as a
last resort because it does not fulfill some of the duties of a real Certificate Authority.
This type of certificate is best suited for short term testing.
3. Make the host credentials accessible by the
container
The host key (/etc/grid-security/hostkey.pem) is only readable to root. The container (hosting environment)
will be running as a non-root user (probably the globus user) and in order to have a set of host credentials which are
readable by the container, we need to copy the host certificate and key and change the ownership to the container user.
Note
This step assumes you have obtained a signed host certificate from your CA.
As root, run:
root#
root#
root#
root#
cd /etc/grid-security
cp hostkey.pem containerkey.pem
cp hostcert.pem containercert.pem
chown globus.globus containerkey.pem containercert.pem
At this point the certificates in /etc/grid-security should look something like:
root# ls -l *.pem
-rw-r--r-- 1 globus
-r-------- 1 globus
-rw-r--r-- 1 root
-r-------- 1 root
1
2
globus 1785 Oct 14 14:47
globus 887 Oct 14 14:47
root
1785 Oct 14 14:42
root
887 Sep 29 09:59
containercert.pem
containerkey.pem
hostcert.pem
hostkey.pem
http://www.tacar.org/
http://www.globus.org/toolkit/docs/4.0/security/prewsaa/admin-index.html#id2828765
23
Basic Security Configuration
4. Add authorization
Add authorizations for users:
Create /etc/grid-security/grid-mapfile as root.
You need two pieces of information:
•
the subject name of a user
•
the account name it should map to.
The syntax is one line per user, with the certificate subject followed by the user account name.
Run grid-cert-info to get your subject name, and whoami to get the account name:
bacon$ grid-cert-info -subject
/O=Grid/OU=GlobusTest/OU=simpleCA-mayed.mcs.anl.gov/OU=mcs.anl.gov/CN=Charles Bacon
bacon$ whoami
bacon
You may add the line by running the following as root:
root# $GLOBUS_LOCATION/sbin/grid-mapfile-add-entry -dn \
"/O=Grid/OU=GlobusTest/OU=simpleCA-mayed.mcs.anl.gov/OU=mcs.anl.gov/CN=Charles Bacon" \
-ln bacon
The corresponding line in the grid-mapfile should look like:
"/O=Grid/OU=GlobusTest/OU=simpleCA-mayed.mcs.anl.gov/OU=mcs.anl.gov/CN=Charles Bacon" bacon
Important
The quotes around the subject name are important, because it contains spaces.
5. Verify Basic Security
Now that you have installed a trusted CA, acquired a hostcert and acquired a usercert, you may verify that your security
setup is complete. As your user account, run the following command:
bacon$ grid-proxy-init -verify -debug
User Cert File: /home/bacon/.globus/usercert.pem
User Key File: /home/bacon/.globus/userkey.pem
Trusted CA Cert Dir: /etc/grid-security/certificates
Output File: /tmp/x509up_u506
Your identity: /DC=org/DC=doegrids/OU=People/CN=Charles Bacon 332900
Enter GRID pass phrase for this identity:
Creating proxy ...++++++++++++
..................++++++++++++
Done
24
Basic Security Configuration
Proxy Verify OK
Your proxy is valid until: Fri Jan 28 23:13:22 2005
There are a few things you can notice from this command. Your usercert and key are located in $HOME/.globus/.
The proxy certificate is created in /tmp/. The "up" stands for "user proxy", and the _u506 will be your UNIX userid.
It also prints out your distinguished name (DN), and the proxy is valid for 12 hours.
If this command succeeds, your single node is correctly configured.
6. Firewall configuration
For information on configuring services in the presence of a firewall, see the firewall PDF3.
7. Syslog logging
The GT4 webservices container is capable of logging authorization decisions to syslog. This procedure has been documented as a Grid HOWTO4 at NCSA.
3
4
http://www.globus.org/toolkit/security/firewalls/
http://security.ncsa.uiuc.edu/research/grid-howtos/gt4logging.php
25
Chapter 7. SimpleCA Admin Guide
1. Building and Installing
SimpleCA provides a wrapper around the OpenSSL CA functionality and is sufficient for simple Grid services. Alternatively, you can use OpenSSL's CA.sh command on its own. SimpleCA is suitable for testing or when a certificate
authority (CA) is not available. You can find other CA options in Obtaining host certificates1.
1.1. Create users
Make sure you have the following users on your machine:
•
Your user account, which will be used to run the client programs.
•
A generic globus account, which will be used to perform administrative tasks such as starting and stopping the
container, deploying services, etc. This user will also be in charge of managing the SimpleCA. To do this, make
sure this account has read and write permissions in the $GLOBUS_LOCATION directory.
1.2. Run the setup script
A script was installed to set up a new SimpleCA. You only need to run this script once per Grid.
Run the setup script:
$GLOBUS_LOCATION/setup/globus/setup-simple-ca
1.2.1. 2.1 Configure the subject name
This script prompts you for information about the CA you wish to create:
The unique subject name for this CA is:
cn=Globus Simple CA, ou=simpleCA-mayed.mcs.anl.gov, ou=GlobusTest, o=Grid
Do you want to keep this as the CA subject (y/n) [y]:
where:
Table 7.1. CA Name components
cn
Represents "common name". It identifies this particular certificate as the CA certificate within
the "GlobusTest/simpleCA-hostname" domain, which in this case is Globus Simple CA.
ou
Represents "organizational unit". It identifies this CA from other CAs created by SimpleCA by
other people. The second "ou" is specific to your hostname (in this case GlobusTest).
o
Represents "organization". It identifies the Grid.
Press y to keep the default subject name (recommended).
1
http://www.globus.org/toolkit/docs/4.0/admin/docbook/ch06.html#s-basic-host
26
SimpleCA Admin Guide
1.2.2. Configure the CA's email
The next prompt looks like:
Enter the email of the CA (this is the email where certificate
requests will be sent to be signed by the CA):
Enter the email address where you intend to receive certificate requests. It should be your real email address that you
check, not the address of the globus user.
1.2.3. Configure the expiration date
Then you'll see:
The CA certificate has an expiration date. Keep in mind that
once the CA certificate has expired, all the certificates
signed by that CA become invalid. A CA should regenerate
the CA certificate and start re-issuing ca-setup packages
before the actual CA certificate expires. This can be done
by re-running this setup script. Enter the number of DAYS
the CA certificate should last before it expires.
[default: 5 years (1825 days)]:
This is the number of days for which the CA certificate is valid. Once this time expires, the CA certificate will have
to be recreated and all of its certificates regranted.
Accept the default (recommended).
1.2.4. Enter a passphrase
Next you'll see:
Generating a 1024 bit RSA private key
........++++++
................++++++
writing new private key to '/home/globus/.globus/simpleCA//private/cakey.pe
Enter PEM pass phrase:
The passphrase of the CA certificate will be used only when signing certificates (with grid-cert-sign). It should be
hard to guess, as its compromise may compromise all the certificates signed by the CA.
Enter your passphrase.
Important:
Your passphrase must not contain any spaces.
1.2.5. Confirm generated certificate
Finally you'll see the following:
27
SimpleCA Admin Guide
A self-signed certificate has been generated
for the Certificate Authority with the subject:
/O=Grid/OU=GlobusTest/OU=simpleCA-mayed.mcs.anl.gov/CN=Globus Simple CA
If this is invalid, rerun this script
setup/globus/setup-simple-ca
and enter the appropriate fields.
-------------------------------------------------------------------
The private key of the CA is stored in /home/globus/.globus/simpleCA//priva
The public CA certificate is stored in /home/globus/.globus/simpleCA//cacer
The distribution package built for this CA is stored in
/home/globus/.globus/simpleCA//globus_simple_ca_68ea3306_setup-0.17.tar.gz
This information will be important for setting up other machines in your grid. The number 68ea3306 in the last line
is known as your CA hash. It will be an 8 hexadecimal digit string.
Press any key to acknowledge this screen.
Your CA setup package finishes installing and ends the procedure with the following reminder:
***************************************************************************
Note: To complete setup of the GSI software you need to run the
following script as root to configure your security configuration
directory:
/opt/gt4/setup/globus_simple_ca_68ea3306_setup/setup-gsi
For further information on using the setup-gsi script, use the -help
option. The -default option sets this security configuration to be
the default, and -nonroot can be used on systems where root access is
not available.
***************************************************************************
setup-ssl-utils: Complete
We'll run the setup-gsi script in the next section. For now, just notice that it refers to your $GLOBUS_LOCATION and
the CA Hash from the last message.
1.2.6. Complete setup of GSI
To finish the setup of GSI, we'll run the script noted in the previous step.
28
SimpleCA Admin Guide
Run the following as root (or, if no root privileges are available, add the -nonroot option to the command line):
$GLOBUS_LOCATION/setup/globus_simple_ca_CA_Hash_setup/setup-gsi -default
The output should look like:
setup-gsi: Configuring GSI security
Installing /etc/grid-security/certificates//grid-security.conf.CA_Hash...
Running grid-security-config...
Installing Globus CA certificate into trusted CA certificate directory...
Installing Globus CA signing policy into trusted CA certificate directory..
setup-gsi: Complete
1.3. Host certificates
You must request and sign a host certificate and then copy it into the appropriate directory for secure services. The
certificate must be for a machine which has a consistent name in DNS; you should not run it on a computer using
DHCP, where a different name could be assigned to your computer.
1.3.1. 3.1 Request a host certificate
As root, run:
grid-cert-request -host 'hostname'
This creates the following files:
•
/etc/grid-security/hostkey.pem
•
/etc/grid-security/hostcert_request.pem
•
(an empty) /etc/grid-security/hostcert.pem
Note: If you are using your own CA, follow their instructions about creating a hostcert (one which has a commonName
(CN) of your hostname), then place the cert and key in the /etc/grid-security/ location. You may then proceed to Section 1.4, “User certificates”.
1.3.2. Sign the host certificate
1.
As globus, run:
grid-ca-sign -in hostcert_request.pem -out hostsigned.pem
2.
A signed host certificate, named hostsigned.pem, is written to the current directory.
3.
When prompted for a passphrase enter the one you specified in Section 1.2.4, “Enter a passphrase” (for the private
key of the CA certificate).
4.
As root move the signed host certificate to /etc/grid-security/hostcert.pem.
The certificate should be owned by root and be read-only for other users.
The key should be read-only by root.
29
SimpleCA Admin Guide
1.4. User certificates
Users also must request user certificates, which you will sign using the globus user.
1.4.1. Request a user certificate
As your normal user account (not globus), run:
grid-cert-request
After you enter a passphrase, this creates
•
~$USER/.globus/usercert.pem (empty)
•
~$USER/.globus/userkey.pem
•
~$USER/.globus/usercert_request.pem
Email the usercert_request.pem file to the SimpleCA maintainer.
1.4.2. Sign the user certificate
1.
As the SimpleCA owner globus, run:
grid-ca-sign -in usercert_request.pem -out signed.pem
2.
When prompted for a password enter the one you specified in Section 1.2.4, “Enter a passphrase” (for the private
key of the CA certificate).
3.
Now send the signed copy (signed.pem) back to the user who requested the certificate.
4.
As your normal user account (not globus), copy the signed user certificate into >~/.globus/ and rename it as
usercert.pem, thus replacing the empty file.
The certificate should be owned by the user and be read-only for other users.
The key should be read-only by the owner.
2. Configuring
[high-level characterization of the configuration options for the component here]
2.1. Configure SimpleCA for multiple machines
So far, you have a single machine configured with SimpleCA certificates. Recall that in Section 1.2.5, “Confirm generated certificate” a CA setup package was created in .globus/simpleCA/globus_simple_ca_HASH_setup0.17.tar.gz. If you want to use your certificates on another machine, you must install that CA setup package on
that machine.
To install it, copy that package to the second machine and run:
$GLOBUS_LOCATION/sbin/gpt-build globus_simple_ca_HASH_setup-0.17.tar.gz gcc32dbg
$GLOBUS_LOCATION/sbin/gpt-postinstall
30
SimpleCA Admin Guide
Then you will have to perform setup-gsi -default from Section 1.2.6, “Complete setup of GSI”.
If you are going to run services on the second host, it will need its own host certificate (Section 1.3, “Host certificates”)
and grid-mapfile (as described in the basic configuration instructions in Add Authorization2).
You may re-use your user certificates on the new host. You will need to copy the requests to the host where the SimpleCA was first installed in order to sign them.
3. Deploying
[information about deploying the component into various containers/environments]
4. Testing
To verify that the SimpleCA certificate is installed in /etc/grid-security/certificates and that your
certificate is in place with the correct permissions, run:
user$ grid-proxy-init -debug -verify
After entering your passphrase, successful output looks like:
[bacon@mayed schedulers]$ grid-proxy-init -debug -verify
User Cert File: /home/user/.globus/usercert.pem
User Key File: /home/user/.globus/userkey.pem
Trusted CA Cert Dir: /etc/grid-security/certificates
Output File: /tmp/x509up_u1817
Your identity: /O=Grid/OU=GlobusTest/OU=simpleCA-mayed.mcs.anl.gov/OU=mcs.anl.gov/C
Enter GRID pass phrase for this identity:
Creating proxy ..............................++++++++++++
...............++++++++++++
Done
Proxy Verify OK
Your proxy is valid until: Sat Mar 20 03:01:46 2004
5. Security Considerations
[describe security considerations relevant for this component]
6. Troubleshooting
[help for common problems sysadmins may experience]
2
http://www.globus.org/toolkit/docs/4.0/admin/docbook/ch06.html#s-basic-gridmap
31
Chapter 8. GridFTP Admin Guide
1. Building and Installing
GridFTP is built and installed as part of a default GT 4.0 installation. For basic installation instructions, see the GT
4.0 System Administrator's Guide1. No extra installation steps are required for this component.
1.1. Building only GridFTP and Utilities
If you wish to install GridFTP without installing the rest of the Globus Toolkit, refer to the Installing GT 4.0 section
of the GT 4.0 System Administrator's Guide2. Perform steps 1-3, as written (Note that you do not need Ant, a JDK, or
a JDBC database to build only GridFTP). However, instead of running "make" as directed in step 4,
Run:
globus$ make gridftp
If you wish to have a log file of the build, use tee:
globus$ make gridftp 2>&1 | tee build.log
The syntax above assumes a Bourne shell. If you are using another shell, redirect stderr to stdout and then pipe it to
tee.
1.2. Building only the GridFTP server
If you wish to install only the GridFTP server, refer to the Installing GT 4.0 section of the GT 4.0 System Administrator's
Guide3 for prerequisites. Follow steps 1-3 as written. However, instead of running "make" as directed in step 4,
Run:
globus$ make gpt globus_gridftp_server
If you wish to have a log file of the build, use tee:
globus$ make gpt globus_gridftp_server 2>&1 | tee build.log
The syntax above assumes a Bourne shell. If you are using another shell, redirect stderr to stdout and then pipe it to
tee.
1.3. Building only the GridFTP client
If you wish to install only the GridFTP client, refer to the Installing GT 4.0 section of the GT 4.0 System Administrator's
Guide4 for prerequisites. Follow steps 1-3 as written. However, instead of running "make" as directed in step 4,
Run:
globus$ make globus-data-management-client
1
http://www.globus.org/toolkit/docs/4.0/admin/docbook/
http://www.globus.org/toolkit/docs/4.0/admin/docbook/ch04.html
http://www.globus.org/toolkit/docs/4.0/admin/docbook/ch04.html
4
http://www.globus.org/toolkit/docs/4.0/admin/docbook/ch04.html
2
3
32
GridFTP Admin Guide
If you wish to have a log file of the build, use tee:
globus$ make globus-data-management-client 2>&1 | tee build.log
The syntax above assumes a Bourne shell. If you are using another shell, redirect stderr to stdout and then pipe it to
tee.
1.4. Building only the GridFTP SDK
If you wish to install only the GridFTP SDK, refer to the Installing GT 4.0 section of the GT 4.0 System Administrator's
Guide5 for prerequisites. Follow steps 1-3 as written. However, instead of running "make" as directed in step 4,
Run:
globus$ make globus-data-management-sdk
If you wish to have a log file of the build, use tee:
globus$ make globus-data-management-sdk 2>&1 | tee build.log
The syntax above assumes a Bourne shell. If you are using another shell, redirect stderr to stdout and then pipe it to
tee.
1.5. Building a combination of GridFTP elements
If you wish to build a combination of GridFTP elements, refer to the Installing GT 4.0 section of the GT 4.0 System
Administrator's Guide6 for prerequisites. Follow steps 1-3 as written. However, instead of running "make" as directed
in step 4,
Run:
globus$ make [any combination of the above commands, each separated by a space]
For example, if you just want to install the GridFTP server and client, the command would be:
globus$ make gpt globus_gridftp_server globus-data-management-client
If you wish to have a log file of the build, use tee:
globus$ make [any combination of the above commands, each separated by a space] 2>&1 | tee
The syntax above assumes a Bourne shell. If you are using another shell, redirect stderr to stdout and then pipe it to
tee.
1.6. Building and Installing a static GridFTP server
If you wish to build and install a statically linked set of GridFTP binaries, refer to the Installing GT 4.0 section of the
GT 4.0 System Administrator's Guide7 for prerequisites. Follow steps 1-2 as written. In step 3, however, you should
Run:
5
http://www.globus.org/toolkit/docs/4.0/admin/docbook/ch04.html
http://www.globus.org/toolkit/docs/4.0/admin/docbook/ch04.html
7
http://www.globus.org/toolkit/docs/4.0/admin/docbook/ch04.html
6
33
GridFTP Admin Guide
globus$ export GLOBUS_LOCATION=/usr/local/globus-4.0.0
globus$ ./configure --prefix=$GLOBUS_LOCATION --with-buildopts="--static"
globus$ make gpt globus_gridftp_server
If you wish to have a log file of the build, use tee:
globus$ make gpt globus_gridftp_server 2>&1 | tee build.log
The syntax above assumes a Bourne shell. If you are using another shell, redirect stderr to stdout and then pipe it to
tee.
2. Configuring
2.1. GridFTP server configuration overview
Note: Command line options and configuration file options may both be used, but the command line overrides the
config file.
The configuration file for the GridFTP server is read from the following locations, in the given order. Only the first
found will be loaded.
•
Path specified with the -c <configfile> command line option.
•
$GLOBUS_LOCATION/etc/gridftp.conf
•
/etc/grid-security/gridftp.conf
Options are one per line, with the format:
<option> <value>
If the value contains spaces, they should be enclosed in double-quotes ("). Flags or boolean options should only have
a value of 0 or 1. Blank lines and lines beginning with # are ignored.
For example:
port 5000
allow_anonymous 1
anonymous_user bob
banner "Welcome!"
2.2. GridFTP server configuration options
The table below lists config file options, associated command line options (if available) and descriptions. Note that
any boolean option can be negated on the command line by preceding the specified option with '-no-' or '-n'. example:
-no-cas or -nf.
34
GridFTP Admin Guide
Table 8.1. Informational Options
help <0|1>
-h
-help
Show usage information and exit.
longhelp <0|1>
-hh
-longhelp
Show more usage information and exit.
version <0|1>
-v
-version
Show version information for the server and exit.
versions <0|1>
-V
-versions
Show version information for all loaded globus libraries and exit.
Default value: FALSE
Default value: FALSE
Default value: FALSE
Default value: FALSE
35
GridFTP Admin Guide
Table 8.2. Modes of Operation
inetd <0|1>
-i
-inetd
Run under an inetd service.
daemon <0|1>
-s
-daemon
Run as a daemon. All connections will fork off a new process and setuid
if allowed.
Default value: FALSE
Default value: TRUE
detach <0|1>
-S
-detach
Run as a background daemon detached from any controlling terminals.
exec <string>
-exec <string>
For statically compiled or non-GLOBUS_LOCATION standard binary
locations, specify the full path of the server binary here. Only needed when
run in daemon mode.
Default value: FALSE
Default value: not set
chdir <0|1>
-chdir
Change directory when the server starts. This will change directory to the
dir specified by the chdir_to option.
Default value: TRUE
chdir_to <string>
-chdir-to <string>
Directory to chdir to after starting. Will use / if not set.
Default value: not set
fork <0|1>
-f
-fork
Server will fork for each new connection. Disabling this option is only recommended when debugging. Note that non-forked servers running as
'root' will only accept a single connection and then exit.
Default value: TRUE
single <0|1>
-1
-single
Exit after a single connection.
Default value: FALSE
36
GridFTP Admin Guide
Table 8.3. Authentication, Authorization, and Security Options
auth_level <number>
-auth-level <number>
0 = Disables all authorization checks. 1 = Authorize identity only. 2
= Authorize all file/resource accesses. If not set, it uses level 2 for
front ends and level 1 for data nodes.
Default value: not set
allow_from <string>
-allow-from <string>
Only allow connections from these source ip addresses. Specify a
comma separated list of ip address fragments. A match is any ip address that starts with the specified fragment. Example: '192.168.1.'
will match and allow a connection from 192.168.1.45. Note that if
this option is used any address not specifically allowed will be denied.
Default value: not set
deny_from <string>
-deny-from <string>
Deny connections from these source ip addresses. Specify a comma
separated list of ip address fragments. A match is any ip address that
starts with the specified fragment. Example: '192.168.2.' will match
and deny a connection from 192.168.2.45.
Default value: not set
cas <0|1>
-cas
Enable CAS authorization.
Default value: TRUE
secure_ipc <0|1>
-si
-secure-ipc
Use GSI security on the ipc channel.
ipc_auth_mode <string>
-ia <string>
-ipc-auth-mode <string>
Set GSI authorization mode for the ipc connection. Options are: none,
host, self or subject:[subject].
Default value: TRUE
Default value: host
allow_anonymous <0|1>
-aa
-allow-anonymous
Allow cleartext anonymous access. If server is running as root, anonymous_user must also be set. Disables ipc security.
Default value: FALSE
anonymous_names_allowed <string> Comma separated list of names to treat as anonymous users when al-anonymous-names-allowed <string> lowing anonymous access. If not set the default names of 'anonymous'
and 'ftp' will be allowed. Use '*' to allow any username.
Default value: not set
anonymous_user <string>
-anonymous-user <string>
User to setuid to for an anonymous connection. Only applies when
running as root.
Default value: not set
anonymous_group <string>
-anonymous-group <string>
Group to setgid to for an anonymous connection. If not set the default
group of anonymous_user will be used.
Default value: not set
pw_file <string>
-password-file <string>
Enable cleartext access and authenticate users against this /etc/passwd
formatted file.
Default value: not set
37
GridFTP Admin Guide
connections_max <number>
-connections-max <number>
Maximum concurrent connections allowed. Only applies when running
in daemon mode. Unlimited if not set.
Default value: not set
connections_disabled <0|1>
-connections-disabled
Disable all new connections. Does not affect ongoing connections.
This would have to be set in the configuration file and then the server
issued a SIGHUP in order to reload the config.
Default value: FALSE
38
GridFTP Admin Guide
Table 8.4. Logging Options
log_level <string>
-d <string>
-log-level <string>
Log level. A comma separated list of levels from: 'ERROR, WARN, INFO, DUMP, ALL'. Example: error,w
You may also specify a numeric level of 1-255.
Default value: ERROR
log_module <string>
-log-module <string>
globus_logging module that will be loaded. If not set the default 'stdio' module will be used, and the logfile o
Built-in modules are 'stdio' and 'syslog'. Log module options may be set by specifying module:opt1=val1:o
Available options for the built-in modules are 'interval' and 'buffer', for buffer flush interval and buffer size
The default options are a 64k buffer size and a 5 second flush interval. A 0 second flush interval will disabl
flushing, and the buffer will only flush when it is full. A value of 0 for buffer will disable buffering and all m
be written immediately. Example: -log-module stdio:buffer=4096:interval=10
Default value: not set
log_single <string>
-l <string>
-logfile <string>
Path of a single file to log all activity to. If neither this option nor log_unique is set, logs will be written to
the execution mode is detached or inetd, in which case logging will be disabled.
Default value: not set
log_unique <string>
-L <string>
-logdir <string>
Partial path to which 'gridftp.(pid).log' will be appended to construct the log filename. Example: -L /var/log
create a separate log (/var/log/gridftp/gridftp.xxxx.log) for each process (which is normally each new clien
neither this option nor log_single is set, logs will be written to stderr unless the execution mode is detached
which case logging will be disabled.
Default value: not set
39
GridFTP Admin Guide
log_transfer <string>
-Z <string>
-log-transfer <string>
Log netlogger style info for each transfer into this file.
Default value: not set
ex: DATE=20050520163008.306532 HOST=localhost PROG=globus-gridftp-server NL.EVNT=FTP_INF
START=20050520163008.305913 USER=ftp FILE=/etc/group BUFFER=0 BLOCK=262144 NBYTES=542
STREAMS=1 STRIPES=1 DEST=[127.0.0.1] TYPE=RETR CODE=226
Time format is YYYYMMDDHHMMSS.UUUUUU (microsecs).
DATE: time the transfer completed.
START: time the transfer started.
HOST: hostname of the server.
USER: username on the host that transfered the file.
BUFFER: tcp buffer size (if 0 system defaults were used).
BLOCK: the size of the data block read from the disk and posted to the network.
NBYTES: the total number of bytes transfered.
VOLUME: the disk partition where the transfer file is stored.
STREAMS: the number of parallel TCP streams used in the transfer.
STRIPES: the number of stripes used on this end of the transfer.
DEST: the destination host.
TYPE: the transfer type, RETR is a send and STOR is a receive (ftp 959 commands).
CODE: the FTP rfc959 completion code of the transfer. 226 indicates success, 5xx or 4xx are failure codes
log_filemode <string>
-log-filemode <string>
File access permissions of log files. Should be an octal number such as 0644 (the leading 0 is required).
Default value: not set
disable_usage_stats <0|1> Disable transmission of per-transfer usage statistics. See the Usage Statistics8 section in the online docume
-disable-usage-stats
more information.
Default value: FALSE
usage_stats_target <string> Comma separated list of contact strings for usage statistics listeners. The format of <string> is host:por
-usage-stats-target <string>
Default value: usage-stats.globus.org:4810
Example:
-usage-stats-target usage-stats.globus.org:4810,usage-stats.uc.teragrid
In this example, the usage statistics will be transmitted to the default Globus target (usage-stats.globus.
and another target (usage-stats.uc.teragrid.org:5920).
8
../../Usage_Stats.html
40
GridFTP Admin Guide
Table 8.5. Single and Striped Remote Data Node Options
remote_nodes <string>
-r <string>
-remote-nodes <string>
Comma separated list of remote node contact strings.
data_node <0|1>
-dn
-data-node
This server is a back end data node.
stripe_blocksize <number>
-sbs <number>
-stripe-blocksize <number>
Size in bytes of sequential data that each stripe will transfer.
stripe_layout <number>
-sl <number>
-stripe-layout <number>
Stripe layout. 1 = Partitioned, 2 = Blocked.
stripe_blocksize_locked <0|1>
-stripe-blocksize-locked
Do not allow client to override stripe blocksize with the
OPTS RETR command.
Default value: not set
Default value: FALSE
Default value: 1048576
Default value: 2
Default value: FALSE
stripe_layout_locked <0|1>
-stripe-layout-locked
Do not allow client to override stripe layout with the OPTS
RETR command.
Default value: FALSE
Table 8.6. Disk Options
blocksize <number>
-bs <number>
-blocksize <number>
Size in bytes of data blocks to read from disk before posting to the network.
sync_writes <0|1>
-sync-writes
Flush disk writes before sending a restart marker. This attempts to ensure
that the range specified in the restart marker has actually been committed
to disk. This option will probably impact performance and may result in
different behavior on different storage systems. See the man page for sync()
for more information.
Default value: 262144
Default value: FALSE
41
GridFTP Admin Guide
Table 8.7. Network Options
port <number>
-p <number>
-port <number>
Port on which a front end will listen for client control channel connections or on which a data node will listen for connections from a front
end. If not set a random port will be chosen and printed via the logging
mechanism.
Default value: not set
control_interface <string>
-control-interface <string>
Hostname or IP address of the interface to listen for control connections on. If not set will listen on all interfaces.
Default value: not set
data_interface <string>
-data-interface <string>
Hostname or IP address of the interface to use for data connections.
If not set will use the current control interface.
Default value: not set
ipc_interface <string>
-ipc-interface <string>
Hostname or IP address of the interface to use for ipc connections. If
not set will listen on all interfaces.
Default value: not set
hostname <string>
-hostname <string>
Effectively sets the above control_interface, data_interface and
ipc_interface options.
Default value: not set
ipc_port <number>
-ipc-port <number>
Port on which the front end will listen for data node connections.
Default value: not set
Table 8.8. Timeouts
control_preauth_timeout <number>
-control-preauth-timeout <number>
Time in seconds to allow a client to remain connected to the
control channel without activity before authenticating.
Default value: 120 (GT 4.0.6 and prior releases had a default
value of 30. Based on user experience, it has been increased to
120 in GT 4.0.7)
control_idle_timeout <number>
-control-idle-timeout <number>
Time in seconds to allow a client to remain connected to the
control channel without activity.
Default value: 600
ipc_idle_timeout <number>
-ipc-idle-timeout <number>
Idle time in seconds before an unused ipc connection will close.
Default value: 600
ipc_connect_timeout <number>
-ipc-connect-timeout <number>
Time in seconds before cancelling an attempted ipc connection.
Default value: 60
42
GridFTP Admin Guide
Table 8.9. User Messages
banner <string>
-banner <string>
Message to display to the client before authentication.
Default value: not set
banner_file <string>
-banner-file <string>
File to read banner message from.
Default value: not set
banner_terse <0|1>
-banner-terse
When this is set, the minimum allowed banner message will
be displayed to unauthenticated clients.
Default value: FALSE
login_msg <string>
-login-msg <string>
Message to display to the client after authentication.
Default value: not set
login_msg_file <string>
-login-msg-file <string>
File to read login message from.
Default value: not set
Table 8.10. Module Options
load_dsi_module <string>
-dsi <string>
Data Storage Interface module to load. File and remote modules are defined
by the server. If not set the file module is loaded, unless the 'remote' option is
specified, in which case the remote module is loaded. An additional configuration string can be passed to the DSI using the format [module name]:[configuration string]. The format of the configuration string is defined by the DSI
being loaded.
Default value: not set
allowed_modules <string>
-allowed-modules <string>
Comma separated list of ERET/ESTO modules to allow and, optionally, specify
an alias for. Example: module1,alias2:module2,module3 (module2 will be
loaded when a client asks for alias2).
Default value: not set
Table 8.11. Other
configfile <string>
-c <string>
Path to configuration file that should be loaded. Otherwise will attempt to
load $GLOBUS_LOCATION/etc/gridftp.conf and /etc/grid-security/gridftp.conf.
Default value: not set
use_home_dirs <0|1>
-use-home-dirs
Set the startup directory to the authenticated user's home dir.
Default value: TRUE
debug <0|1>
-debug
Set options that make the server easier to debug. Forces no-fork, no-chdir,
and allows core dumps on bad signals instead of exiting cleanly. Not recommended for production servers. Note that non-forked servers running as root
will only accept a single connection and then exit.
Default value: FALSE
43
GridFTP Admin Guide
2.3. Configuring the GridFTP server to run under
xinetd/inetd
Note: The service name used (gsiftp in this case) should be defined in /etc/services with the desired port.
Here is a sample gridftp server xinetd config entry:
service gsiftp
{
instances
socket_type
wait
user
env
env
server
server_args
log_on_success
nice
disable
}
= 100
= stream
= no
= root
+= GLOBUS_LOCATION=(globus_location)
+= LD_LIBRARY_PATH=(globus_location)/lib
= (globus_location)/sbin/globus-gridftp-server
= -i
+= DURATION
= 10
= no
Here is a sample gridftp server inetd config entry (read as a single line):
gsiftp
stream
tcp
nowait
root
/usr/bin/env env
GLOBUS_LOCATION=(globus_location)
LD_LIBRARY_PATH=(globus_location)/lib
(globus_location)/sbin/globus-gridftp-server -i
\
\
\
Note
On Mac OS X, you must set DYLD_LIBRARY_PATH instead of LD_LIBRARY_PATH in the above examples.
On IRIX, you may need to set either LD_LIBRARYN32_PATH or LD_LIBRARY64_PATH. However, on
OS X you could also use launchd, as shown below.
Here is a sample Mac OS X launchd config entry. Create a "/Library/LaunchDaemons/gsiftp.plist" file. An example
is below. Edit it to have the right paths for your installation. Then run "sudo launchctl load /Library/LaunchDaemsons/gsiftp.plist".
<?xml version="1.0" encoding="UTF-8"?>
<!DOCTYPE plist PUBLIC "-//Apple Computer//DTD PLIST 1.0//EN" "http:// www.apple.com/DTDs/P
<plist version="1.0">
<dict>
<key>Debug</key>
<true/>
<key>EnvironmentVariables</key>
<dict>
<key>DYLD_LIBRARY_PATH</key>
<string>/usr/local/gt4/lib</string>
<key>GLOBUS_LOCATION</key>
<string>/usr/local/gt4</string>
44
GridFTP Admin Guide
</dict>
<key>GroupName</key>
<string>admin</string>
<key>Label</key>
<string>org.globus.gridftp</string>
<key>OnDemand</key>
<true/>
<key>ProgramArguments</key>
<array>
<string>/usr/local/gt4/sbin/globus-gridftp-server</
string>
<string>-i</string>
</array>
<key>ServiceDescription</key>
<string>GridFTP</string>
<key>Sockets</key>
<dict>
<key>Listeners</key>
<dict>
<key>SockFamily</key>
<string>IPv4</string>
<key>SockPassive</key>
<true/>
<key>SockServiceName</key>
<string>gsiftp</string>
<key>SockType</key>
<string>stream</string>
</dict>
</dict>
<key>UserName</key>
<string>root</string>
<key>inetdCompatibility</key>
<dict>
<key>Wait</key>
<false/>
</dict>
</dict>
</plist>
2.4. Configuring GridFTP to run with the Community Authorization Service (CAS)
The Community Authorization Service (CAS)9 is used to administer access rights to files and directories and the
GridFTP server can be configured to enforce those rights.
For more information, see How to Set Up CAS to Use with GridFTP10.
9
http://www.globus.org/toolkit/docs/4.0/security/cas/
http://www.globus.org/toolkit/docs/4.0/security/cas/WS_AA_CAS_HOWTO_Setup_GridFTP.html
10
45
GridFTP Admin Guide
3. Deploying the GridFTP Server:
globus-gridftp-server
It is assumed that the toolkit installation was successful and that Globus security is properly configured. For more information, see the Installation Guide11.
3.1. Running in daemon mode
The server should generally be run as root in daemon mode, though it is possible to run it as a user (see below). When
run as root you will need to have a host certificate.
Run the server:
globus-gridftp-server < -s | -S > <args>
where:
-s
Runs in the foreground (this is the default mode).
-S
Detaches from the terminal and runs in the background.
The following additional steps may be required when running as a user other than root:
•
Create a ~/.gridmap file, containing the DNs of any clients you wish to allow, mapped to the current username.
•
Create a proxy with grid-proxy-init.
3.2. Running under inetd or xinetd
The -i command line option enables the server to be run under inetd or xinetd.
See Configuring GridFTP for example xinetd and inetd configuration entries.
3.3. Remote data-nodes and striped operation
The GridFTP server now supports separate front end (client control connection) and back end (data node) processes.
In addition, a single front end process may connect to multiple back end data nodes.
When multiple back end data nodes are available, the server is said to be in a striped configuration, or simply, is a
striped server. In this mode transfers are divided over all available data nodes, thus allowing the combined bandwidth
of all data nodes to be used.
Note: The connection between the front end and data nodes is referred to as the ipc channel.
The ability to use inetd or daemon execution modes applies to both front end servers and data nodes, and the same
certificate and user requirements apply.
To start the front end:
globus-gridftp-server <args> -r <host:port>[,<host:port>,...]
11
http://www.globus.org/toolkit/docs/4.0/admin/docbook/
46
GridFTP Admin Guide
To start the data-node:
globus-gridftp-server -p <port> -dn
The -p <port> option used on the data-node is the port that will be used for ipc connections. This is the port that
you will register with the front end server.
For example:
machineB> globus-gridftp-server -p 6000 -dn
machineC> globus-gridftp-server -p 7000 -dn
machineA> globus-gridftp-server -p 5000 -r machineB:6000,machineC:7000
The client would only connect to the front end at machineA:5000, for example, using globus-url-copy with the stripe option:
globus-url-copy -stripe gsiftp://machineA:5000/file file:///destination
or
globus-url-copy -stripe gsiftp://machineA:5000/file gsiftp://machineX/destination
Where machineX may be another striped server or a standard GridFTP server.
3.4. Separation of Processes
As is illustrated above, the GridFTP server can be separated into front end and data node processes. This is the architecture used to achieve a striped server, but it can also be exploited to achieve a higher level of security.
Running the server as root is often desirable because it allows the server to fork and setuid on a child processes related
to an authenticated user. This allows the server to leverage the operating systems file system permissions and other
security devices. However, it is not at all desirable to have a root running process listening on a port open to the world.
If an attacker were to compromise the process they could obtain root level access to the machine.
To overcome this security risk the gridftp server can be run in a front end/back end manner. The front end can be run
as any user, say user globus, that has very limited access to the machine. The front end is the processes open to the
outside world. If it is compromised an attacker has only gained access to that limited account. The back end is run as
root, but configured to only allow connections from the front end.
To start the front end:
globus-gridftp-server -p 7000 -r localhost:7001
and the back end:
globus-gridftp-server -p 7001 -dn -allow-from 127.0.0.1
4. Testing
If the globus-ftp-client-test package has been installed, our standard test suite may be run to verify functionality on
your platform. Simply set up the globus environment, chdir to $GLOBUS_LOCATION/test/globus_ftp_client_test/ and run ./TESTS.pl.
5. Security Considerations
The following are points to consider relative to security:
47
GridFTP Admin Guide
5.1. Two ways to configure your server
We now provide two ways to configuring your server:
•
The classic installation. This is equivalent to any FTP server you would normally install. It is run as a root setuid
process. Once the user is authenticated, the process does a setuid to the appropriate non-privileged user account.
•
A new split process installation. In this configuration, the server consists of two processes:
•
The control channel (the process the external user connects to) runs as a non-privileged user (typically the
globus user).
•
The data channel (the process that access the file system and moves the data) runs as a root setuid program as
before but is only contacted by the control channel process from a local machine. This means an external user
is never connected to a root running process and thus minimizes the impact of an exploit. This does, however,
require that a copy of the host cert and host key be owned by the non-privileged user. If you use this configuration, the non-privileged user should not have write permission to executables, configuration files, etc.
5.2. New authentication options
There are new authentication options available for the server in GT4.0.0:
•
Anonymous: The server now supports anonymous access. In order for this to work, a configuration switch must
explicitly enable it, a list of acceptable usernames must be defined, and an account under which the anonymous
user should run must be defined. If the necessary configurations are in place, and the client presents a username
that is in the list of acceptable anonymous users, then the session will be accepted and the process will setuid to
the anonymous user account. We do not support chroot in this version of the server.
•
Username / Password: This is standard FTP authentication. It uses a separate password file, used only by the
GridFTP server, *NOT* the system password file.
Warning
WE HIGHLY RECOMMEND YOU NOT USE THIS. YOU WILL BE SENDING YOUR PASSWORD IN
CLEAR TEXT OVER THE NETWORK.
We do, however, have some user communities who run only on internal networks for testing purposes and who do not
wish to deal with obtaining GSI credentials. If you are considering this, we would recommend that you look at Simple
CA and set up your own testbed CA. This can be done in less than an hour and then provides you full GSI security.
5.3. Firewall requirements
If the GridFTP server is behind a firewall:
1.
Contact your network administrator to open up port 2811 (for GridFTP control channel connection) and a range
of ports (for GridFTP data channel connections) for the incoming connections. If the firewall blocks the outgoing
connections, open up a range of ports for outgoing connections as well.
2.
Set the environment variable GLOBUS_TCP_PORT_RANGE:
export GLOBUS_TCP_PORT_RANGE=min,max
48
GridFTP Admin Guide
where min,max specify the port range that you have opened for the incoming connections on the firewall. This
restricts the listening ports of the GridFTP server to this range. Recommended range is 1000 (e.g., 50000-51000)
but it really depends on how much use you expect.
3.
If you have a firewall blocking the outgoing connections and you have opened a range of ports, set the environment
variable GLOBUS_TCP_SOURCE_RANGE:
export GLOBUS_TCP_SOURCE_RANGE=min,max
where min,max specify the port range that you have opened for the outgoing connections on the firewall. This
restricts the outbound ports of the GridFTP server to this range. Recommended range is twice the range used for
GLOBUS_TCP_PORT_RANGE, because if parallel TCP streams are used for transfers, the listening port would
remain the same for each connection but the connecting port would be different for each connection.
Note
If the server is behind NAT, the --data-interface <real ip/hostname> option needs to be used
on the server.
If the GridFTP client is behind a firewall:
1.
Contact your network administrator to open up a range of ports (for GridFTP data channel connections) for the
incoming connections. If the firewall blocks the outgoing connections, open up a range of ports for outgoing
connections as well.
2.
Set the environment variable GLOBUS_TCP_PORT_RANGE
export GLOBUS_TCP_PORT_RANGE=min,max
where min,max specify the port range that you have opened for the incoming connections on the firewall. This
restricts the listening ports of the GridFTP client to this range. Recommended range is 1000 (e.g., 50000-51000)
but it really depends on how much use you expect.
3.
If you have a firewall blocking the outgoing connections and you have opened a range of ports, set the environment
variable GLOBUS_TCP_SOURCE_RANGE:
export GLOBUS_TCP_PORT_RANGE=min,max
where min,max specify the port range that you have opened for the outgoing connections on the firewall. This
restricts the outbound ports of the GridFTP client to this range. Recommended range is twice the range used for
GLOBUS_TCP_PORT_RANGE, because if parallel TCP streams are used for transfers, the listening port would
remain the same for each connection but the connecting port would be different for each connection.
Additional information on Globus Toolkit Firewall Requirements is available here12.
6. Troubleshooting
If you are having problems using the GridFTP server, try the steps listed below. If you have an error, try checking the
server logs if you have access to them. By default, the server logs to stderr, unless it is running from inetd, or its execution mode is detached, in which case logging is disabled by default.
12
http://www.globus.org/toolkit/security/firewalls/
49
GridFTP Admin Guide
The command line options -d , -log-level, -L and -logdir can affect where logs will be written, as can the configuration
file options log_single and log_unique. See the Configuration information for more information on these and other
configuration options.
6.1. Establish control channel connection
Verify that you can establish a control channel connection and that the server has started successfully by telnetting to
the port on which the server is running:
% telnet localhost 2811
Trying 127.0.0.1...
Connected to localhost.
Escape character is '^]'.
220 GridFTP Server mldev.mcs.anl.gov 2.0 (gcc32dbg, 1113865414-1) ready.
If you see anything other than a 220 banner such as the one above, the server has not started correctly.
Verify that there are no configuration files being unexpectedly loaded from /etc/grid-security/gridftp.conf or $GLOBUS_LOCATION/etc/gridftp.conf. If those files exist, and you did not intend for them to be used, rename them to
.save, or specify -c none on the command line and try again.
If you can log into the machine where the server is, try running the server from the command line with only the -s option:
$GLOBUS_LOCATION/sbin/globus-gridftp-server -s
The server will print the port it is listening on:
Server listening at gridftp.mcs.anl.gov:57764
Now try and telnet to that port. If you still do not get the banner listed above, something is preventing the socket connection. Check firewalls, tcp-wrapper, etc.
If you now get a correct banner, add -p 2811 (you will have to disable (x)inetd on port 2811 if you are using them or
you will get port already in use):
$GLOBUS_LOCATION/sbin/globus-gridftp-server -s -p 2811
Now telnet to port 2811. If this does not work, something is blocking port 2811. Check firewalls, tcp-wrapper, etc.
If this works correctly then re-enable your normal server, but remove all options but -i, -s, or -S.
Now telnet to port 2811. If this does not work, something is wrong with your service configuration. Check /etc/services
and (x)inetd config, have (x)inetd restarted, etc.
If this works, begin adding options back one at a time, verifying that you can telnet to the server after each option is
added. Continue this till you find the problem or get all the options you want.
At this point, you can establish a control connection. Now try running globus-url-copy.
6.2. Try running globus-url-copy
Once you've verified that you can establish a control connection, try to make a transfer using globus-url-copy.
If you are doing a client/server transfer (one of your URLs has file: in it) then try:
globus-url-copy -vb -dbg gsiftp://host.server,running.on/dev/zero file:///dev/null
50
GridFTP Admin Guide
This will run until you control-c the transfer. If that works, reverse the direction:
globus-url-copy -vb -dbg file:///dev/zero gsiftp://host.server.running.on/dev/null
Again, this will run until you control-c the transfer.
If you are doing a third party transfer, run this command:
globus-url-copy -vb -dbg gsiftp://host.server1.on/dev/zero gsiftp://host.server2.on/dev/nul
Again, this will run until you control-c the transfer.
If the above transfers work, try your transfer again. If it fails, you likely have some sort of file permissions problem,
typo in a file name, etc.
6.3. If your server starts...
If the server has started correctly, and your problem is with a security failure or gridmap lookup failure, verify that
you have security configured properly here.
If the server is running and your client successfully authenticates but has a problem at some other time during the
session, please ask for help on [email protected]. When you send mail or submit bugs, please always include as
much of the following information as possible:
•
Specs on all hosts involved (OS, processor, RAM, etc).
•
globus-url-copy -version
•
globus-url-copy -versions
•
Output from the telnet test above.
•
The actual command line you ran with -dbg added. Don't worry if the output gets long.
•
Check that you are getting a FQDN and /etc/hosts that is sane.
•
The server configuration and setup (/etc/services entries, (x)inetd configs, etc.).
•
Any relevant lines from the server logs (not the entire log please).
7. Usage statistics collection by the Globus Alliance
The following GridFTP-specific usage statistics are sent in a UDP packet at the end of each transfer, in addition to the
standard header information described in the Usage Stats14 section.
•
Start time of the transfer
•
End time of the transfer
•
Version string of the server
13
14
http://dev.globus.org/wiki/Mailing_Lists
http://www.globus.org/toolkit/docs/4.0/Usage_Stats.html
51
GridFTP Admin Guide
•
TCP buffer size used for the transfer
•
Block size used for the transfer
•
Total number of bytes transferred
•
Number of parallel streams used for the transfer
•
Number of stripes used for the transfer
•
Type of transfer (STOR, RETR, LIST)
•
FTP response code -- Success or failure of the transfer
Note
The client (globus-url-copy) does NOT send any data. It is the servers that send the usage statistics.
We have made a concerted effort to collect only data that is not too intrusive or private and yet still provides us with
information that will help improve and gauge the usage of the GridFTP server. Nevertheless, if you wish to disable
this feature for GridFTP only, see the Logging section of Section 2.2, “GridFTP server configuration options”. Note
that you can disable transmission of usage statistics globally for all C components by setting "GLOBUS_USAGE_OPTOUT=1" in your environment.
Also, please see our policy statement15 on the collection of usage statistics.
15
http://www.globus.org/toolkit/docs/4.0/Usage_Stats.html
52
Chapter 9. Java WS Core Admin Guide
1. Building and Installing
Java WS Core is built and installed as part of a default GT 4.0 installation. For basic installation instructions, see the
GT 4.0 System Administrator's Guide1. No extra installation steps are required for this component.
The following are optional instructions for more advanced types of installations. These are for those advanced users
who want to build the latest code from CVS or are just interested in the Java WS Core.
1.1. Building from source
1.
Obtain the source code for Java WS Core:
From CVS.
a.
To get the latest source from cvs execute:
cvs -d :pserver:[email protected]:/home/globdev/CVS/globus-packages \
checkout wsrf
b.
Change into the wsrf directory.
cd wsrf
From Core-only source distribution.
a.
Untar or unzip the distribution archive.
tar xvfz ws-core-XXX-src.tar.gz
b.
Change into the unpacked distribution directory.
cd ws-core-XXX
2.
Set the GLOBUS_LOCATION environment variable to the absolute path of the target directory of your installation.
On Windows:
set GLOBUS_LOCATION=c:\gt4
On Unix/Linux:
setenv GLOBUS_LOCATION /soft/gt4/
or
export GLOBUS_LOCATION=/soft/gt4/
If GLOBUS_LOCATION is not set, an install directory will be created under the current directory.
1
http://www.globus.org/toolkit/docs/4.0/admin/docbook/
53
Java WS Core Admin Guide
3.
Run:
ant all
Additional arguments can be specified on the ant command line to customize the build:
•
-DwindowsOnly=false - generate launch scripts for standard Globus tools such as grid-proxy-init,
etc. (Unix/Linux only)
•
-Dall.scripts=true - generate Windows and Unix launch scripts
•
-Denable.container.desc=true - create and configure the container with a global security descriptor
1.2. Installing Core-only binary distribution
1.
Untar or unzip the distribution archive.
tar xvfz ws-core-XXX-bin.tar.gz
2.
Change into the unpacked distribution directory.
cd ws-core-XXX
3.
Set the GLOBUS_LOCATION environment variable to the unpacked distribution directory. On Windows:
set GLOBUS_LOCATION=c:\gt4
On Unix/Linux:
setenv GLOBUS_LOCATION /soft/gt4/
or
export GLOBUS_LOCATION=/soft/gt4/
Note: Please make sure to have the JAAS2 library installed if running with J2SE 1.3.1.
2. Configuring
2.1. Configuration overview
Java WS Core provides per- gar configuration and supports configuration profiles. The configuration information of
a service is mainly encapsulated in two separate configuration files:
•
server-config.wsdd (Web Service Deployment Descriptor) - contains information about the web service.
•
jndi-config.xml (JNDI configuration file) - contains information about the resource management.
A service that support security might also have the security-config.xml (security deployment descriptor) file.
Please see the Security Descriptor3 page in the GT4 WS Authorization Framework documentation for details.
2
3
http://java.sun.com/products/jaas/index-10.html
http://www.globus.org/toolkit/docs/4.0/security/authzframe/security_descriptor.html
54
Java WS Core Admin Guide
All these configuration files are dropped into the $GLOBUS_LOCATION/etc/<gar.id>/ directory during the
deployment process.
2.2. Syntax of the interface:
2.2.1. Global Configuration
The global properties are specified in the <globalConfiguration> section of *server-config.wsdd files
in the $GLOBUS_LOCATION/etc/globus_wsrf_core/ directory. The configuration item name corresponds
to the "name" attribute in a <parameter> sub element, and the value is put as a "value" attribute within the same
parameter element.
Table 9.1. General configuration parameters
Name
Value
Description
Comments
logicalHost
<hostname>
This parameter specifies the hostname to use instead of the Optional
default local host. It is equivalent to setting the GLOBUS_HOSTNAME environment property. Can be FQDN or
just hostname.
disableDNS
<boolean>
This parameter specifies whether to perform DNS lookup Optional
on the logicalHost parameter. By default "false" is
assumed (DNS lookup is performed).
domainName
<domain
name>
This parameter specifies the domain name to append to the Optional
host name if the host name is not qualified by a domain.
publishHostName
<boolean>
This parameter specifies whether to publish the hostname Optional
or the ip address. It is only used when DNS lookups are enabled (disableDNS is false).
server.id
<string>
This parameter specifies the server id. The server id is used Optional (since
to uniquely identify each container instance. For example, GT 4.0.1)
each container gets its own persistent directory based on the
server id. By default, the standalone container server id is
"<ip>-<containerPort>". In Tomcat, the server id
will default to "<ip>-<webApplicationName>".
55
Java WS Core Admin Guide
Table 9.2. Standalone/embedded container-specific configuration parameters
Name
Value
Description
Comments
containerThreads
<int>
This parameter controls the initial thread pool size for the Optional
container. If not set, it defaults to 2. In GT 4.0.3+ it defaults to 1.
containerThreads- <int>
Max
This parameter sets the maximum number of threads for Optional
the container. By default it is set to 4 * the containerThread setting.
containerThreadsHighWaterMark
<int>
This parameter controls when the thread pool of the con- Optional
tainer should start shrinking (if the number of idle threads
exceeds this number). By default it is set to 2 * the containerThread setting.
containerTimeout
<int>
This parameter controls the container timeout. That is, the Optional (since
maximum amount of time the container will wait to receive GT 4.0.2)
a message from the client. By default it is set to 3 minutes.
webContext
<name>
This parameter specifies the context name under which Optional (since
GT 4.0.1)
the services are published under: http://<host>:<port>/<webContext>/services/MyService. By default "wsrf" name is used.
In Tomcat, this parameter is always set to the web application's name.
Table 9.3. Default container thread pool settings
Type
Min. threads
Max. threads
standalone
2
8
embedded
2
8
Table 9.4. Default container thread pool settings (GT 4.0.3+ only)
Type
Min. threads
Max. threads
standalone
2
20
embedded
1
3
2.2.2. Service Configuration
2.2.2.1. WSDD
An example of a deployment descriptor for a CounterService:
<service name="CounterService" provider="Handler"
use="literal" style="document">
<parameter name="className"
value="org.globus.wsrf.samples.counter.CounterService"/>
<parameter name="handlerClass"
value="org.globus.axis.providers.RPCProvider"/>
<parameter name="scope"
value="Application"/>
56
Java WS Core Admin Guide
<wsdlFile>share/schema/core/samples/counter/counter_service.wsdl</wsdlFile>
<parameter name="allowedMethodsClass"
value="com.counter.CounterPortType"/>
<parameter name="providers" value="
DestroyProvider SetTerminationTimeProvider GetRPProvider
SubscribeProvider GetCurrentMessageProvider"/>
</service>
Services are defined in a <service> element. The "name" attribute of the <service> element defines the remotely
accessible name of the service. The service handle will have the form of <hosting environment URL>/foo, where:
•
the hosting environment URL typically is http://<host>:<port>/wsrf/services.
•
foo is the name of the service (<service name="foo" ...>).
The use attribute should be set to literal and the style attribute to document for all WSRF/WSN based services. The
configuration information for a service is defined by various <parameter> sub-elements within a <service>
element. The configuration item name corresponds to the "name" attribute in a <parameter> sub element, and the
value is put as a "value" attribute within the same parameter element.
Table 9.5. Axis Standard Parameters
Name
Value
Description
Comments
className <class>
This parameter specifies a class that implements the web ser- Required
vice methods.
handlerClass
<class>
This parameter specifies what dispatcher to use to send a re- Recommended in
quest to a service method. This parameter is required if the our environment
provider attribute of the service is set to Provider. The
default dispatcher we provide is called org.globus.axis.providers.RPCProvider. It enables special features such as operation providers or security support.
scope
<value>
Scope value can be one of: Request (the default), Application, Application scope is
or Session. If Request scope is used, a new service object is recommended
created for each SOAP request that comes in for the service.
If Application scope is used, only a single instance of the
service object is created and used for all SOAP requests that
come in for the service. If Session scope is used, a new service
object is created for each session-enabled client who accesses
the service. Note: Only Request and Application scopes are
supported when used with org.globus.axis.providers.RPCProvider handlerClass.
wsdlFile
<path>
This parameter points to a wsdl file for the service. The wsdl Required in our enfile must contain the wsdl:service entry. The file location can vironment
be relative or absolute. A relative file location is recommended.
allowedMethods
<list of
This parameter specifies a space or comma separated list of Optional. By default
methods> method names that can be called via SOAP. "*" indicates all methods are althat all methods of the service class can be invoked via SOAP. lowed.
57
Java WS Core Admin Guide
Table 9.6. Java WS Core Parameters
Name
Value
Description
Comments
loadOnStar- <boolean>
tup
If set to true this parameter will cause the web service and the cor- Optional
responding ResourceHome (if any) to be initialized (with proper
security settings if configured) at container startup. This is useful
for restarting some tasks, etc. at container startup without having to
call the service. Please check the Lifecycle and activation4 section
for details.
allowedMeth- <class>
odsClass
This parameter is similar to the allowedMethods standard Axis
Optional
property but it specifies a Java class or an interface that is introspected to come up with a list of allowed methods that can be called remotely on the service. It is useful for easily restricting the SOAPaccessible methods of the service. Usually the class specified in this
parameter would be the remote interface class generated for the
service. This parameter only has effect if used with org.globus.axis.providers.RPCProvider handlerClass.
providers
<list of pro- This parameter specifies a space separated list of provider names Optional
viders>
or class names. Please see operation provider support5 section for
details. This parameter only has effect if used with org.globus.axis.providers.RPCProvider handlerClass.
Please see Custom Deployment6 for details on Axis Web Services Deployment Descriptor.
2.2.2.2. JNDI
An example of a JNDI configuration bit for a CounterService:
<service name="CounterService">
<resource
name="home"
type="org.globus.wsrf.samples.counter.CounterHome">
<resourceParams>
<parameter>
<name>factory</name>
<value>org.globus.wsrf.jndi.BeanFactory</value>
</parameter>
<parameter>
<name>resourceClass</name>
<value>org.globus.wsrf.samples.counter.PersistentCounter</value>
</parameter>
<parameter>
<name>resourceKeyName</name>
<value>{http://counter.com}CounterKey</value>
</parameter>
<parameter>
<name>resourceKeyType</name>
<value>java.lang.Integer</value>
4
../../common/javawscore/developer-index.html#Activation
http://www.globus.org/toolkit/docs/4.0/common/javawscore/developer-index.html#s-javawscore-developer-OperationProvider
6
http://ws.apache.org/axis/java/user-guide.html#PublishingServicesWithAxis
5
58
Java WS Core Admin Guide
</parameter>
</resourceParams>
</resource>
</service>
Each service in WSDD should have a matching entry in the JNDI configuration file with the same name. Under each
service entry in JNDI different resource objects or entries might be defined. Please see the JNDI section7 for details.
Each service entry in JNDI should have a resource defined called "home". That resource is the ResourceHome implementation for the service (as specified by the type attribute). Depending on the ResourceHome implementation
different options can be configured for the ResourceHome. Currently we have two main base ResourceHome
implementations: org.globus.wsrf.impl.ResourceHomeImpl and org.globus.wsrf.impl.ServiceResourceHome.
Note: All "home" resources must specify a factory parameter with org.globus.wsrf.jndi.BeanFactory
value.
2.2.2.2.1. ResourceHomeImpl
The ResourceHomeImpl is a generic and reusable ResourceHome implementation. It supports persistent resources,
resource caching, resource sweeper, etc.
Table 9.7. ResourceHomeImpl parameters
Name
Value
Description
Comments
resourceKeyName
<qname>
This parameter specifies a QName of the resource
Required
key. The namespace is specified in the {}. For example, this QName will be used to discover the SOAP
header that contains the key of the resource in the request.
resourceKeyType
<class>
This parameter specifies the type of the resource key Optional. Defaults to
as a Java class. The key XML element is deserialized java.lang.String
into this Java type. The Java type can be for any
simple Java type, Axis generated bean, or a class with
a type mapping.
resourceClass <class>
This parameter specifies the classname of the resource Required
object. This is used to ensure that right type of resource object is added to resource home and to instantiate the right object if the resource supports persistence.
sweeperDelay <long>
This parameter specifies how often the resource
sweeper runs in milliseconds.
Optional. Defaults to 1
minute
cacheLocation <jndi path> This parameter specifies the JNDI location of the re- Optional
source cache for this resource home. Please see Configuring Resource Cache below for details.
2.2.2.2.1.1. Configuring Resource Cache
If ResourceHomeImpl is configured with resource class that implements the PersistenceCallback interface it will store
the resource objects wrapped in Java SoftReference8. That allows the JVM to automatically reclaim these resource
objects, thus reducing the memory usage. Since the JVM can decide to reclaim these objects at any point, sometimes
7
8
../../common/javawscore/developer-index.html#s-javawscore-developer-JNDIDetails
http://java.sun.com/j2se/1.4.2/docs/api/java/lang/ref/SoftReference.html
59
Java WS Core Admin Guide
a resource object can be reclaimed between two subsequent invocations on the same resource. This for example can
cause the state of the resource to be reloaded from disk on each call. To prevent the JVM from reclaiming the resource
objects so quickly a cache can be setup up to hold direct references to these objects. A basic LRU (least recently used)
cache implementation is provided. Other cache implementations can be used as long as they implement the org.globus.wsrf.utils.cache.Cache interface.
To configure a cache for ResourceHomeImpl first define a cache resource entry in JNDI:
<resource name="cache"
type="org.globus.wsrf.utils.cache.LRUCache">
<resourceParams>
<parameter>
<name>factory</name>
<value>org.globus.wsrf.jndi.BeanFactory</value>
</parameter>
<parameter>
<name>timeout</name>
<value>120000</value>
</parameter>
</resourceParams>
</resource>
In this case a LRU cache is configured. The "timeout" parameter (in ms) is used to specify the idle time of the resource
object before it is removed from the cache. The same cache resource can be reused in different services but usually
one cache per service will be configured.
Once the cache resource entry is defined add the "cacheLocation" parameter to the service home resource. The
"cacheLocation" parameter value is the JNDI name of the cache resource:
<service name="CounterService">
<resource name="home" type="...">
<resourceParams>
...
<parameter>
<name>cacheLocation</name>
<value>java:comp/env/services/CounterService/cache</value>
</parameter>
...
</resourceParams>
</resource>
...
<resource name="cache"
type="org.globus.wsrf.utils.cache.LRUCache">
...
</resource>
</service>
Please note that once the object is removed from the cache it is still up to the JVM to actually reclaim the object.
2.2.2.2.2. ServiceResourceHome
This implementation does not accept any special parameters.
60
Java WS Core Admin Guide
2.2.3. Usage Statistics Configuration
Java WS Core container and other GT services are configured to send out usage statistics. Please see the usage statistics
section for more information.
The targets to which the usage statistics are sent to are configured via the usageStatisticsTargets parameter
defined in the <globalConfiguration> section of the $GLOBUS_LOCATION/etc/globus_wsrf_core/server-config.wsdd file. The usageStatisticsTargets parameter specifies a space separated
list of targets to which the usage statistics of various components will be sent to. Each target is of form: host[:port]
(port is optional, if not specified a default port will be assumed). By default usage statistics are sent to usagestats.globus.org:4810.
To disable sending of the usage statistics remove this parameter, comment it out, or remove all of its values.
2.2.4. Configuration Profiles
Configuration profiles allow for the same Java WS Core installation to have multiple configurations. That is, the same
installation can be used to run different containers each with different configuration.
When a .gar file is deployed, a -Dprofile option can be specified to deploy the configuration files under a specific
profile name. If the profile name is specified, the deploy operation will drop the configuration file as $GLOBUS_LOCATION/etc/<gar.id>/<profile.name>-server-config.wsdd and/or $GLOBUS_LOCATION/etc/<gar.id>/<profile.name>-jndi-config.xml. The configuration profiles can also be created
by hand simply by copying and/or renaming the configuration files appropriately. Each configuration profile should
duplicate the contents of $GLOBUS_LOCATION/etc/globus_wsrf_core/server-config.wsdd and
$GLOBUS_LOCATION/etc/globus_wsrf_core/jndir-config.xml in order to have the basic functionality
work properly.
Once a configuration profile is created, the standalone container can be started9 with a -profile option to load
configuration files in a specific profile.
3. Deploying
The Globus services can be run either in the standalone Java WS Core container that is installed with GT, or deployed
into Tomcat.
3.1. Java WS Core container
The standalone Java WS Core container can be started and stopped with the provided globus-start-container and
globus-stop-container programs. There are also helper programs (available only with the full GT installation) to start
and stop the container detached from the controlling terminal (globus-start-container-detached and globus-stopcontainer-detached). These commands are documented in the Java WS Core Command Reference10.
3.1.1. Deploying and undeploying services
To deploy a service into Java WS Core container use the globus-deploy-gar tool. To undeploy a service use globusundeploy-gar. These commands are documented in the Java WS Core Command Reference11.
9
http://www.globus.org/toolkit/docs/4.0/common/javawscore/rn01re01.html
http://www.globus.org/toolkit/docs/4.0/common/javawscore/Java_WS_Core_Commandline_Frag.html
11
http://www.globus.org/toolkit/docs/4.0/common/javawscore/Java_WS_Core_Commandline_Frag.html
10
61
Java WS Core Admin Guide
3.1.2. Recommended JVM settings for the Java WS Core container
It is recommended to increase the maximum heap size of the JVM when running the container. By default on Sun
JVMs a 64MB maximum heap size is used. The maximum heap size can be set using the -Xmx JVM option. Example:
$ setenv GLOBUS_OPTIONS -Xmx512M
$ $GLOBUS_LOCATION/bin/globus-start-container
The above example will make the container start with maximum heap size set to 512MB.
It is also recommended to experiment with other JVM settings to improve performance. For example, the -server
option on Sun JVMs enables a server VM which can deliver better performance for server applications.
3.2. Deploying into Tomcat
To deploy a Java WS Core installation into Tomcat run:
$ cd $GLOBUS_LOCATION
$ ant -f share/globus_wsrf_common/tomcat/tomcat.xml deploySecureTomcat -Dtomcat.dir=<tomcat
Where <tomcat.dir> is an absolute path to the Tomcat installation directory. Also, -Dwebapp.name=<name> can
be specified to set the name of the web application under which the installation will be deployed. By default "wsrf"
web application name is used.
The deploySecureTomcat task will update an existing Tomcat deployment if Java WS Core was already deployed
under the specified web application name. The redeploySecureTomcat task can be used instead to overwrite the
existing deployment.
Note
Please note that during deployment a subset of the files from Java WS Core installation is copied into Tomcat.
Also, the copied files in Tomcat might have different permissions then the originals.
In addition to the above deployment step you will also need to modify the Tomcat <tomcat_root>/conf/server.xml configuration file. In particular you will need to add the following configuration entries:
•
Tomcat 4.1.x
1.
Add a HTTPS Connector in the <Service name="Tomcat-Standalone"> section and update the parameters
appropriately with your local configuration:
<Connector
className="org.apache.catalina.connector.http.HttpConnector"
port="8443" minProcessors="5" maxProcessors="75"
authenticate="true" secure="true" scheme="https"
enableLookups="true" acceptCount="10" debug="0">
<Factory
className="org.globus.tomcat.catalina.net.HTTPSServerSocketFactory"
proxy="/path/to/proxy/file"
cert="/path/to/certificate/file"
key="/path/to/private/key/file"
cacertdir="/path/to/ca/certificates/directory"/>
</Connector>
62
Java WS Core Admin Guide
In the above the proxy, cert, key and cacertdir attributes are optional. Furthermore, the proxy and
the combination of cert and key attributes are mutually exclusive.
Important
The credentials and certificate configuration is used only by the connector and is not used by the rest
of the web services stack in Globus Toolkit. To configure credentials for use in the toolkit, refer Security Descriptor12.
2.
Add a HTTPS Valve in the <Engine name="Standalone" ... > section:
<Valve className="org.globus.tomcat.catalina.valves.HTTPSValve"/>
•
Tomcat 5.0.x
1.
Add a HTTPS Connector in the <Service name="Catalina"> section and update the parameters appropriately
with your local configuration:
<Connector
className="org.globus.tomcat.coyote.net.HTTPSConnector"
port="8443" maxThreads="150" minSpareThreads="25" maxSpareThreads="75"
autoFlush="true"
disableUploadTimeout="true" scheme="https"
enableLookups="true" acceptCount="10" debug="0"
proxy="/path/to/proxy/file"
cert="/path/to/certificate/file"
key="/path/to/private/key/file"
cacertdir="/path/to/ca/certificates/directory"/>
In the above the proxy, cert, key and cacertdir attributes are optional. Furthermore, the proxy and
the combination of cert and key attributes are mutually exclusive.
Important
The credentials and certificate configuration is used only by the connector and is not used by the rest
of the web services stack in Globus Toolkit. To configure credentials for use in the toolkit, refer Security Descriptor13.
2.
Add a HTTPS Valve in the <Engine name="Catalina" ... > section:
<Valve className="org.globus.tomcat.coyote.valves.HTTPSValve"/>
•
Tomcat 5.5.x
1.
Add a HTTPS Connector in the <Service name="Catalina"> section and update the parameters appropriately
with your local configuration:
<Connector
className="org.globus.tomcat.coyote.net.HTTPSConnector"
12
13
http://www.globus.org/toolkit/docs/4.0/security/authzframe/security_descriptor.html
http://www.globus.org/toolkit/docs/4.0/security/authzframe/security_descriptor.html
63
Java WS Core Admin Guide
port="8443" maxThreads="150" minSpareThreads="25" maxSpareThreads="75"
autoFlush="true"
disableUploadTimeout="true" scheme="https"
enableLookups="true" acceptCount="10" debug="0"
protocolHandlerClassName="org.apache.coyote.http11.Http11Protocol"
socketFactory="org.globus.tomcat.catalina.net.BaseHTTPSServerSocketFactory"
proxy="/path/to/proxy/file"
cert="/path/to/certificate/file"
key="/path/to/private/key/file"
cacertdir="/path/to/ca/certificates/directory"/>
In the above the proxy, cert, key and cacertdir attributes are optional. Furthermore, the proxy and
the combination of cert and key attributes are mutually exclusive.
Important
The credentials and certificate configuration is used only by the connector and is not used by the rest
of the web services stack in Globus Toolkit. To configure credentials for use in the toolkit, refer Security Descriptor14.
2.
Add a HTTPS Valve in the <Engine name="Catalina" ... > section:
<Valve className="org.globus.tomcat.coyote.valves.HTTPSValve55"/>
Also, you may have to edit <tomcat.dir>/webapps/wsrf/WEB-INF/web.xml if you are running Tomcat
on a non-default port, i.e. not using port 8443 (HTTPS). For example, if you run Tomcat on port 443 using HTTPS
then the WSRF servlet entry should be modified as follows:
<web-app>
...
<servlet>
<servlet-name>WSRFServlet</servlet-name>
<display-name>WSRF Container Servlet</display-name>
<servlet-class>
org.globus.wsrf.container.AxisServlet
</servlet-class>
<init-param>
<param-name>defaultProtocol</param-name>
<param-value>https</param-value>
</init-param>
<init-param>
<param-name>defaultPort</param-name>
<param-value>443</param-value>
</init-param>
<load-on-startup>true</load-on-startup>
</servlet>
...
</web-app>
14
http://www.globus.org/toolkit/docs/4.0/security/authzframe/security_descriptor.html
64
Java WS Core Admin Guide
Note
We recommend running Tomcat with Java 1.4.2+.
3.2.1. Enabling local invocations
To enable local invocation15 in Tomcat you must add axis-url.jar to the CLASSPATH before starting Tomcat.
For example on Windows:
> cd <tomcat.dir>
> set CLASSPATH=<tomcat.dir>\common\lib\axis-url.jar
> bin\startup
On Unix/Linux (csh/tcsh):
$ cd <tomcat.dir>
$ setenv CLASSPATH <tomcat.dir>/common/lib/axis-url.jar
$ bin/startup
3.2.2. Debugging
3.2.2.1. Tomcat log files
Please always check the Tomcat log files under the <tomcat.dir>/logs directory for any errors or exceptions.
3.2.2.2. Enabling Log4J debugging
•
Tomcat 4.1.x
Copy $GLOBUS_LOCATION/lib/commons-logging.jar files to <tomcat.dir>/common/lib directory. Also, copy <tomcat.dir>/webapps/wsrf/WEB-INF/classes/log4j.properties file to
<tomcat.dir>/common/classes/ directory. Then configure the Log4j configuration file in <tomcat.dir>/common/classes/ directory appropriately. The debugging settings will affect all the code in all
web applications.
•
Tomcat 5.0.x, 5.5.x
Copy $GLOBUS_LOCATION/lib/log4j-1.2.8.jar and $GLOBUS_LOCATION/lib/commons-logging.jar files to <tomcat.dir>/webapps/wsrf/WEB-INF/lib/ directory. Then configure the Log4j
configuration file in <tomcat.dir>/webapps/wsrf/WEB-INF/classes/ directory appropriately. The
debugging settings will only affect the web application code.
3.2.3. Creating WAR file
To create a .war of a Java WS Core installation do:
$ cd $GLOBUS_LOCATION
$ ant -f share/globus_wsrf_common/tomcat/tomcat.xml war -Dwar.file=<war.file>
15
http://www.globus.org/toolkit/docs/4.0/common/javawscore/developer-index.html#s-javawscore-developer-LocalInvocations
65
Java WS Core Admin Guide
Where <war.file> specifies the absolute path of the war file.
Please note that deploying a war file might not be enough to have a working Java WS Core deployment. For example,
in some cases the xalan.jar must be placed in the endorsed directory of the container.
3.2.4. Deploying and undeploying services
To deploy a service into Tomcat, first deploy the service into a regular GT installation using the globus-deploy-gar
tool and then deploy the GT installation into Tomcat (as described in Section 3, “Deploying”). Similarly, to undeploy
a service, first undeploy the service from a regular GT installation using globus-undeploy-gar tool and then deploy
the GT installation into Tomcat.
Note
Some GT services may not work properly in Tomcat.
4. Testing
To execute Java WS Core tests first ensure Ant is configured with JUnit (To install JUnit with Ant copy the junit.jar
found in the JUnit distribution to the $ANT_HOME/lib directory).
To execute the test do the following:
1.
Start the standalone container with -nosec argument:
$ cd $GLOBUS_LOCATION
$ bin/globus-start-container -nosec
2.
Run the interoperability tests:
$ ant -f share/globus_wsrf_test/runtests.xml runServer \
-Dtests.jar=$GLOBUS_LOCATION/lib/wsrf_test_interop.jar
3.
Run the unit tests:
$ ant -f share/globus_wsrf_test/runtests.xml runServer \
-Dtests.jar=$GLOBUS_LOCATION/lib/wsrf_test_unit.jar -DbasicTestsOnly=true
4.
If some tests failed examine the test results in the $GLOBUS_LOCATION/share/globus_wsrf_test/tests/test-reports/ directory.
Please see the developer guide16 for more information on running the tests and the testing infrastructure.
16
http://www.globus.org/toolkit/docs/4.0/common/javawscore/developer-index.html#s-javawscore-developer-runningtests
66
Java WS Core Admin Guide
5. Security Considerations
5.1. Permissions of service configuration files
The service configuration files such as jndi-config.xml or server-config.wsdd (located under $GLOBUS_LOCATION/etc/<gar>/ directory) may contain private information such as database passwords, etc. Ensure that these
configuration files are only readable by the user that is running the container. The deployment process automatically
sets the permissions of the jndi-config.xml and server-config.wsdd files as user readable only. However,
this might not work correctly on all platforms and this does not apply to any other configuration files.
5.2. Permissions of persistent data
The services using subscription persistence API or other basic persistence helper API will store all or part of its persistent
data under the ~/.globus/persisted directory. Ensure that the entire ~/.globus/persisted directory is
only readable by the user running the container.
5.3. Invocation of non-public service functions
A client can potentially invoke a service function that is not formally defined in the WSDL but it is defined in the service
implementation class. There are two ways to prevent this from happening:
1.
Define all service methods in your service class as either private or protected.
2.
Configure appropriate allowedMethods or allowedMethodsClass parameter in the service deployment
descriptor (please see Java WS Core Configuration for details).
6. Troubleshooting
6.1. globus-stop-container fails with an authorization
error
By default globus-stop-container must be executed with the same credentials as the container it is running
with. If the ShutdownService or the container is configured with separate private key and certificate files (usually
/etc/grid-security/containercert.pem and /etc/grid-security/containerkey.pem) do
the following to stop the container:
$ grid-proxy-init -cert /etc/grid-security/containercert.pem \
-key /etc/grid-security/containerkey.pem \
-out containerproxy.pem
$ setenv X509_USER_PROXY containerproxy.pem
$ globus-stop-container
$ unsetenv X509_USER_PROXY
$ rm containerproxy.pem
Alternatively, the ShutdownService can be configured with a separate gridmap file to allow a set of users to stop the
container. Please see the WS Authentication & Authorization17 section for details.
17
../../security/wsaa.html
67
Java WS Core Admin Guide
6.2. globus-start-container hangs during startup
By default Sun 1.4.x+ JVMs are configured to use /dev/random device as an entropy source. Sometimes the machine
can run out of entropy and applications (such as the container) using the /dev/random device will block until more
entropy is available. One workaround for this issue is to configure the JVM to use /dev/urandom (non-blocking)
device instead. For Sun JVMs a java.security.egd system property can be set to configure a different entropy
source. To set the system property and pass it to globus-start-container script do the following:
export GLOBUS_OPTIONS=-Djava.security.egd=file:/dev/urandom
or
setenv GLOBUS_OPTIONS -Djava.security.egd=file:/dev/urandom
The same issue can also affect client programs. If you are running a client program with a GT generated script, you
can set the GLOBUS_OPTIONS environment property as described above. However, if you are using a custom script
or directly launching a program using the java command line, make sure to set the java.security.egd system
property explicitly on the java command line. For example:
java -classpath $CLASSPATH -Djava.security.egd=file:/dev/urandom my.package.FooProgram
Note: This does not apply to Windows machines.
6.3. Programs fail with
java.lang.NoClassDefFoundError: javax/security/...
errors
These errors might occur when running with J2SE 1.3.1 and the JAAS18 library is not installed. Either install the
JAAS19 library or upgrade to J2SE 1.4.x or higher.
6.4. ConcurrentModificationException in Tomcat 5.0.x
If the following exception is visible in the Tomcat logs at startup it might cause the HTTPSValve to fail:
java.util.ConcurrentModificationException
at java.util.HashMap$HashIterator.nextEntry(HashMap.java:782)
at java.util.HashMap$EntryIterator.next(HashMap.java:824)
at java.util.HashMap.putAllForCreate(HashMap.java:424)
at java.util.HashMap.clone(HashMap.java:656)
at mx4j.server.DefaultMBeanRepository.clone(DefaultMBeanRepository.java:56)
The HTTPSValve might fail with the following exception:
java.lang.NullPointerException
at org.apache.coyote.tomcat5.CoyoteRequest.setAttribute(CoyoteRequest.java:1472)
18
19
http://java.sun.com/products/jaas/index-10.html
http://java.sun.com/products/jaas/install_notes.html
68
Java WS Core Admin Guide
at org.apache.coyote.tomcat5.CoyoteRequestFacade.setAttribute(CoyoteRequestFacade.java:351
at org.globus.tomcat.coyote.valves.HTTPSValve.expose(HTTPSValve.java:99)
These exceptions will prevent the transport security to work properly in Tomcat.
This is a Tomcat bug. Keep restarting Tomcat until it starts without the ConcurrentModificationException
or switch to a different version of Tomcat.
6.5j
. ava.net.SocketException: Invalid argument or cannot assign requested address
If you see the "java.net.SocketException: Invalid argument or cannot assign requested
address" error in the container log or on the client side try setting the following property:
$ export GLOBUS_OPTIONS="-Djava.net.preferIPv4Stack=true"
6.6. General troubleshooting information
In general, if you want to investigate a problem on your own please see the Debugging and Logging20 section for details
on how to turn on debugging. Also, please note that most of the command line clients have a -debug option that will
display more detailed error messages, including the error stack traces. Also, searching the mailing lists21 such as [email protected] or [email protected] (before posting a message) can also be very fruitful. Finally, if you think
you have found a bug please report it in our Bugzilla24 system. Please include as much as detail about the problem as
possible.
7. Usage statistics collection by the Globus Alliance
The following usage statistics are sent by Java WS Core by default in a UDP packet (in addition to the Java WS Core
component code, packet version, timestamp, and the source IP address):
•
•
On container startup:
•
container id - random number
•
container type - standalone, servlet, or unknown
•
event type - container startup
•
list of services - service names only
On container shutdown:
•
container id - random number
•
container type - standalone, servlet, or unknown
•
event type - container shutdown
20
http://www.globus.org/toolkit/docs/4.0/common/javawscore/developer-index.html#s-javawscore-developer-debugging
http://www.globus.org/email-archive-search.php
22
http://dev.globus.org/wiki/Mailing_Lists
23
http://dev.globus.org/wiki/Mailing_Lists
24
http://bugzilla.globus.org/bugzilla/
21
69
Java WS Core Admin Guide
•
list of activated services - service names only (4.0.3+)
•
container uptime (4.0.3+)
If you wish to disable this feature, please see the Java WS Core System Administrator's Guide section on Usage Statistics Configuration for instructions.
Also, please see our policy statement25 on the collection of usage statistics.
25
http://www.globus.org/toolkit/docs/4.0/Usage_Stats.html
70
Chapter 10. RFT Admin Guide
1. Building and Installing
RFT is built and installed as part of a default GT 4.0 installation. For basic installation instructions, see the GT 4.0
System Administrator's Guide1. No extra installation steps are required for this component.
The following are specialized instructions for advanced developers who want to deploy latest code from CVS:
Build RFT from CVS:
1.
Configure your CVSROOT to point to the globus CVS location.
2.
Run:
cvs co ws-transfer
3.
Run:
cd ws-transfer/reliable
4.
Set GLOBUS_LOCATION to point to your globus installation.
5.
Run:
ant deploy
2. Configuring
2.1. Configuration overview
RFT has the following prerequisites:
•
Java WS Core2 - This is built and installed in a default GT 4.0 installation3.
•
A host certificate (see Required Configuration4).
•
GridFTP5 Server - GridFTP performs the actual file transfer and is built and installed in a default GT 4.0 installation6.
•
PostgreSQL - PostgreSQL is used to store the state of the transfer to allow for restart after failures. The interface
to PostgreSQL is JDBC, so any DBMS that supports JDBC can be used, although no others have been tested. For
instructions on configuring the PostgreSQL database for RFT, click here7.
1
http://www.globus.org/toolkit/docs/4.0/admin/docbook/
../../common/javawscore/
3
../../admin/docbook/
4
../../admin/docbook/
5
../../data/gridftp/
6
../../admin/docbook/
7
../../data/rft/admin-index.html#s-rft-admin-postgresql
2
71
RFT Admin Guide
2.2. Syntax of the interface
The security of the service can be configured by modifying the security descriptor8. It allows for configuring the credentials that will be used by the service, type of authentication and authorization that needs to be enforced. By default,
the following security configuration is installed:
•
Credentials set for use by the container are used. If they arenot specified, default credentials are used.
•
GSI Secure conversation authentication is enforced for all methods.
Note: Changing the required authentication and authorization method will require suitable changes to the clients that
contact this service.
To alter the security descriptor configuration, refer to Security Descriptors9. The file to be altered is $GLOBUS_LOCATION/etc/globus_wsrf_rft/security-config.xml.
2.3. Required configuration: configuring the PostgreSQL
database
PostgreSQL (version 7.1 or greater) needs to be installed and configured for RFT to work. You can either use the
packages which came with your operating system (RPMs, DEBs, ...) or build from source. We used PostgreSQL version
7.3.2 for our testing and the following instructions are good for the same.
1.
Install PostgreSQL. Instructions on how to install/configure PostgreSQL can be found here10.
2.
Configure the postmaster daemon so that it accepts TCP connections. This can be done by adding the "-o -i"
switch to the postmaster script (This is either the init.d script found in /etc/init.d/postgresql or /var/lib/, depending
on how you installed PostgreSQL). Follow the instructions here11 to start the postmaster with the -i option.
3.
You will now need to create a PostgreSQL user that will connect to the database. This is usually the account under
which the container is running. You can create a PostgreSQL user by running the following command: su
postgres; createuser globus. If you get the following error: psql: could not connect to
server: No such file or directory Is the server running locally and accepting
connections on Unix domain socket "/tmp/.s.PGSQL.5432"? this generally means that
either your postmaster is not started with the -i option or you didn't restart the postmaster after the above mentioned
step.
4.
Now you need to set security on the database you are about to create. You can do it by following the steps below:
sudo vi /var/lib/pgsql/data/pg_hba.conf and append the following line to the file:
host rftDatabase "username" "host-ip" 255.255.255.255 md5 Note: use crypt instead
of md5 if you are using PostgreSQL 7.3 or earlier.
sudo /etc/init.d/postgresql restart
5.
To create the database that is used for RFT run (as user globus): createdb rftDatabase.
8
../../security/authzframe/security_descriptor.html
../../security/authzframe/security_descriptor.html
http://www.postgresql.org/docs/manuals/
11
http://www.postgresql.org/docs/7.4/static/postmaster-start.html
9
10
72
RFT Admin Guide
6.
To populate the RFT database with the appropriate schemas run: psql -d rftDatabase -f $GLOBUS_LOCATION/share/globus_wsrf_rft/rft_schema.sql. Now that you have created a database to store
RFT's state, the following steps configure RFT to find the database:
7.
Open $GLOBUS_LOCATION/etc/globus_wsrf_rft/jndi-config.xml.
8.
Find the dbConfiguration section under the ReliableFileTransferService <service> section.
9.
Change the connectionString to point to the machine on which you installed PostgreSQL and to the name
of the database you used in step 2. If you installed PostgreSQL on the same machine as your Globus install, the
default should work fine for you.
10. Change the userName to the name of the user who owns/created the database and do the same for the password
(it also depends on how you configured your database).
11. Don't worry about the other parameters in the section. The defaults should work fine for now.
12. Edit the configuration section under ReliableFileTransferService. There are two values that can be
edited in this section:
13. •
•
backOff: Time in seconds you want RFT to backoff before a failed transfer is retried by RFT. The default
should work fine for now.
maxActiveAllowed: This is the number of transfers the container can do at given point. The default should
be fine for now.
2.4. RFT auto-registration with default WS MDS Index
Service
With a default GT 4.0.1 installation, the RFT service is automatically registered with the default WS MDS Index Service12 running in the same container for monitoring and discovery purposes.
Note
If you are using GT 4.0.0, we strongly recommend upgrading to 4.0.1 to take advantage of this capability.
However, if must use GT 4.0.0, or if this registration was turned off and you want to turn it back on, this is how it is
configured:
There is a jndi resource defined in $GLOBUS_LOCATION/etc/globus_wsrf_rft/jndi-config.xml as
follows :
<resource name="mdsConfiguration"
type="org.globus.wsrf.impl.servicegroup.client.MDSConfiguration">
<resourceParams>
<parameter>
<name>reg</name>
<value>true</value>
</parameter>
<parameter>
12
http://www.globus.org/toolkit/docs/4.0/info/index/
73
RFT Admin Guide
<name>factory</name>
<value>org.globus.wsrf.jndi.BeanFactory</value>
</parameter>
</resourceParams>
</resource>
To configure the automatic registration of RFT to the default WS MDS Index Service, change the value of the parameter
<reg> as follows:
•
true turns on auto-registration; this is the default in GT 4.0.1.
•
false turns off auto-registration; this is the default in GT 4.0.0.
2.4.1. Configuring resource properties
By default, the following resource properties (from the RFT Factory Resource) are sent to the default Index Service:
•
ActiveResourceInstances: A dynamic resource property of the total number of active RFT resources in
the container at a given point of time.
•
TotalNumberOfTransfers: A dynamic resource property of the total number of transfers/deletes performed
since the RFT service was deployed in this container.
•
TotalNumberOfActiveTransfers: A dynamic resource property of the number of active transfers across
all rft resources in a container at a given point of time.
•
TotalNumberOfBytesTransferred: A dynamic resource property of the total number of bytes transferred
by all RFT resources created since the deployment of the service.
•
RFTFactoryStartTime: Time when the service was deployed in the container. Used to calculate uptime.
•
DelegationServiceEPR: The end point reference of the Delegation resource that holds the delegated credential
used in executing the resource.
You can configure which resource properties are sent in RFT's registration.xml file, $GLOBUS_LOCATION/etc/globus_wsrf_rft/registration.xml. The following is the relevant section of the file:
<Content xsi:type="agg:AggregatorContent"
xmlns:agg="http://mds.globus.org/aggregator/types">
<agg:AggregatorConfig xsi:type="agg:AggregatorConfig">
<agg:GetMultipleResourcePropertiesPollType
xmlns:rft="http://www.globus.org/namespaces/2004/10/rft">
<!-- Specifies that the index should refresh information
every 60000 milliseconds (once per minute) -->
<agg:PollIntervalMillis>60000</agg:PollIntervalMillis>
<!-- specifies that all Resource Properties should be
collected from the RFT factory -->
<agg:ResourcePropertyNames>rft:TotalNumberOfBytesTransferred</agg:ResourcePropert
<agg:ResourcePropertyNames>rft:TotalNumberOfActiveTransfers</agg:ResourceProperty
74
RFT Admin Guide
<agg:ResourcePropertyNames>rft:RFTFactoryStartTime</agg:ResourcePropertyNames>
<agg:ResourcePropertyNames>rft:ActiveResourceInstances</agg:ResourcePropertyNames
<agg:ResourcePropertyNames>rft:TotalNumberOfTransfers</agg:ResourcePropertyNames>
</agg:GetMultipleResourcePropertiesPollType>
</agg:AggregatorConfig>
<agg:AggregatorData/>
</Content>
2.5. Registering RFT manually with default WS MDS Index
Service
If a third party needs to register an RFT service manually, see Registering with mds-servicegroup-add13 in the WS
MDS Aggregator Framework documentation.
3. Using MySQL
RFT in 4.0.1 works with MySQL database. A MySQL schema file is provided at $GLOBUS_LOCATION/share/globus_wsrf_rft/rft_schema_mysql.sql. You will need to download MySQL drivers (MySQL connector/J) from here14
and copy the driver jar to $GLOBUS_LOCATION/lib.You will also need to make following changes :
1.
Create a RFT Database and populate it with mysql schema.
mysqladmin -h hostname create rftDatabase -p
mysql -h hostname -D rftDatabase
source share/globus_wsrf_rft/rft_schema_mysql.sql
Note: If you are using older ( earlier than 4.1 ) versions of mysql you will need to use $GLOBUS_LOCATION/share/globus_wsrf_rft/rft_schema_mysql_pre4.0.sql schema to make RFT work. See Bug 363315 for more
details. Older versions of the connector/J may also cause problems. See Bug 550916 for more details.
2.
Edit $GLOBUS_LOCATION/etc/globus_wsrf_rft/jndi-config.xml and change values of connectionString to jdbc:mysql:///rftDatabase from jdbc:postgresql://host/rftDatabase and driverName to com.mysql.jdbc.Driver from
org.postgresql.Driver and userName and password to whatever was set during creation of users for mysql.
4. Deploying
RFT is deployed as part of a standard toolkit installation. Please refer to the System Administrator's Guide17 for details.
13
http://www.globus.org/toolkit/docs/4.0/info/aggregator/re01.html#mds-servicegroup-add-registering
http://dev.mysql.com/downloads/connector/j/
15
http://bugzilla.globus.org/globus/show_bug.cgi?id=3633
16
http://bugzilla.globus.org/globus/show_bug.cgi?id=5509
17
../../admin/docbook/
14
75
RFT Admin Guide
4.1. Deploying into Tomcat
RFT has been tested to work without any additional setup when deployed into Tomcat. Please follow these basic instructions18 to deploy GT4 services into Tomcat. Note: you need to configure the GT4 install with the needed RFT
configuration (like database configuration, etc) before you deploy into Tomcat.
5. Testing
RFT Testing
1.
Set $GLOBUS_LOCATION to point to your Globus install.
2.
Start a gridftp server on the machine you are running the tests on the default port. This can be done by running:
$GLOBUS_LOCATION/sbin/globus-gridftp-server -p 2811 &
3.
Start the container with RFT deployed in it.
4.
Edit $GLOBUS_LOCATION/share/globus_wsrf_rft_test/test.properties. Put in appropriate values for properties
like authzValue (self or host), HOST (host ip of container), PORT (port on which the container is listening),
sourceHost and destinationsHost (hostnames of gridftp servers). The default values will work fine if you are
running the tests with a standard stand-alone container started with user credentials (self authorization is done in
this case). If the container is started using host credentials, change authzVal to host. If the gridftp servers you are
using for your testing are started as user, you need to supply subject names of the users in sourceSubject and
destinationSubject for authorization with gridftp servers. If both the source and destination servers are started as
one user, you can just fill in the user's subject in the subject field of test.properties. If you are getting Authentication/Authorization Failures because of mismatched subject names then your authzVal and authType (uses transport
security by default) need to be changed, depending on how you start the container. If you started the container
with the -nosec option then you need to change authType to GSI_MESSAGE, PROTOCOL to http and PORT to
8080.
5.
The *.xfr files in $GLOBUS_LOCATION/share/globus_wsrf_rft_test/ are the transfer files that will be used in
the tests. Again, the default values work fine if you followed the instructions so far.
6.
Run the following command, which will run all the RFT unit tests:
ant -Dtests.jar=$GLOBUS_LOCATION/lib/globus_wsrf_rft_test.jar -f share/globus_wsrf_rft_
7.
Run the following command to generate the test reports in html form:
ant -f
18
share/globus_wsrf_rft_test/runtests.xml generateTestReport
http://www.globus.org/toolkit/docs/4.0/common/javawscore/admin-index.html#javawscore-admin-tomcat-deploying
76
RFT Admin Guide
6. Security Considerations
6.1. Permissions of service configuration files
The service configuration files such as jndi-config.xml and server-config.wsdd (located under
etc/<gar>/ directory) contain private information such as database passwords and usernames. Ensure that these
configuration files are only readable by the user that is running the container.
The deployment process automatically sets the permissions of jndi-config.xml and server-config.wsdd
as user readable only. However, this might not work correctly on all platforms and this does not apply to any other
configuration files.
6.2. Access of information stored in the database
RFT stores the transfer requests in a database. Proper security measures need to be taken to protect the access of the
data by granting/revoking appropriate permissions on tables that are created for RFT use and other steps that are appropriate and consistent with site specific security measures.
6.3. Permissions of persistent data
RFT uses the subscription persistence API from the GT4 core to store all of its subscription data under the ~/.globus/persisted directory. Ensure that the entire ~/.globus/persisted directory is only readable by the user
running the container.
7. Troubleshooting
7.1. PostgreSQL not configured
Problem: If RFT is not configured properly to talk to a PostgreSQL database, you will see this message displayed on
the console when you start the container:
"Error creating RFT Home: Failed to connect to database ...
Until this is corrected all RFT request will fail and all GRAM jobs that require staging wi
Solution: The usual cause is that Postmaster is not accepting TCP connections, which means that you must restart
Postmaster with the -i option (see Section 2.3, “Required configuration: configuring the PostgreSQL database”).
7.2. More verbose error messages
Problem: Make RFT print more verbose error messages
Solution: Edit $GLOBUS_LOCATION/container-log4j.properties and add the following line to it: log4j.category.org.globus.transfer=DEBUG. For more verbosity add log4j.category.org.globus.ftp=DEBUG, which will print out Gridftp messages too.
7.3. RFT fault-tolerance and recovery
RFT uses PostgreSQL to check-point transfer state in the form of restart markers and recover from transient transfer
failures, using retry mechanism with exponential backoff, during a transfer. RFT has been tested to recover from source
and/or destination server crashes during a transfer, network failures, container failures (when the machine running the
77
RFT Admin Guide
container goes down), file system failures, etc. RFT Resource is implemented as a PersistentResource, so ReliableFileTransferHome gets initialized every time a container gets restarted. Please find a more detailed description of faulttolerance and recovery in RFT below:
•
Source and/or destination GridFTP failures: In this case RFT retries the transfer for a configurable number of
maximum attempts with exponential backoff for each retry (the backoff time period is configurable also). If a
failure happens in the midst of a transfer, RFT uses the last restart marker that is stored in the database for that
transfer and uses it to resume the transfer from the point where it failed, instead of restarting the whole file. This
failure is treated as a container-wide backoff for the server in question. What this means is that all other transfers
going to/from that server, across all the requests in a container, will be backed off and retried. This is done in order
to prevent further failures of the transfers by using knowledge available in the database.
•
Network failures: Sometimes this happens due to heavy load on a network or for any other reason packets are lost
or connections get timed out. This failure is considered a transient failure and RFT retries the transfer with exponential backoff for that particular transfer (and not the whole container, as with the source and/or destination
GridFTP failures).
•
Container failures: These type of failures occur when the machine running the container goes down or if the container is restarted with active transfers. When the container is restarted, it restarts ReliableTransferHome, which
looks at the database for any active RFT resources and restarts them.
7.3.1. Failure modes that are not addressed:
•
Running out of disk space for the database.
8. Usage statistics collection by the Globus Alliance
The following usage statistics are sent by default in a UDP packet at the end of life time of each RFT Resource (or
when a RFT resource is destroyed).
•
Total number of files transferred by RFT since RFT was installed
•
Total number of bytes transferred by RFT since RFT was installed
•
Total number of files transferred in this RFT Resource
•
Total number of bytes transferred in this RFT Resource
•
Creation time of this RFT Resource
•
Factory Start Time
We have made a concerted effort to collect only data that is not too intrusive or private, and yet still provides us with
information that will help improve the GRAM component. Nevertheless, if you wish to disable this feature, please see
the Java WS Core System Administrator's Guide section on Usage Statistics Configuration19 for instructions.
Also, please see our policy statement 20 on the collection of usage statistics.
19
20
http://www.globus.org/toolkit/docs/4.0/common/javawscore/admin-index.html#s-javawscore-Interface_Config_Frag-usageStatisticsTargets
http://www.globus.org/toolkit/docs/4.0/Usage_Stats.html
78
Chapter 11. WS GRAM Admin Guide
1. Building and Installing
WS GRAM is built and installed as part of a default GT 4.0 installation. For basic installation instructions, see the GT
4.0 System Administrator's Guide1.
As part of the WS GRAM service setup, please review our guide for optimal scalability and performance recommendations.
1.1. Installation Requirements
•
Transport Level Security (TLS)
•
Functioning sudo
•
Local Scheduler
•
Scheduler Adapter
•
GridFTP
•
RFT
1.1.1. Transport Level Security (TLS)
In order to use WS GRAM, the container must be started with Transport Level security (which is the default). The
-nosec option should not be used with globus-start-container.
1.1.2. Functioning sudo
WS GRAM requires that the sudo command is installed and functioning on the service host where WS GRAM software
will execute.
Authorization rules will need to be added to the sudoers file to allow the WS GRAM service account to execute
(without a password) the scheduler adapter in the accounts of authorized GRAM users. For configuration details, see
the Configuring sudo section.
Platform Note: On AIX, sudo is not installed by default, but it is available as source and rpm here: AIX 5L Toolbox
for Linux Applications2.
1.1.3. Local Scheduler
WS GRAM depends on a local mechanism for starting and controlling jobs. Included in the WS GRAM software is a
Fork scheduler, which requires no special software installed to execute jobs on the local host. However, to enable WS
GRAM to execute and manage jobs to a batch scheduler, the scheduler software must be installed and configured prior
to configuring WS GRAM.
1
2
http://www.globus.org/toolkit/docs/4.0/admin/docbook/
http://www-1.ibm.com/servers/aix/products/aixos/linux/download.html
79
WS GRAM Admin Guide
1.1.4. Scheduler Adapter
WS GRAM depends on scheduler adapters to translate the WS GRAM job description document into commands understood by the local scheduler, as well as to monitor the jobs.
Scheduler adapters included in the GT 4.0 release are: PBS3, Condor4, LSF5
Other third party scheduler adapters available for GT 4.0.x releases:
•
Sun Grid Engine6
•
LoadLeveler - as of release 3.3.1 IBM LoadLeveler includes a GRAM Scheduler Adapter. For more information
see "What's new" in the LoadLeveler product documentation7
•
GridWay8 - installation and configuration guide is here9
For configuration details, see the Configuring scheduler adapters section.
1.1.5. GridFTP
Though staging directives are processed by RFT (see next section), RFT uses GridFTP servers underneath to do the
actual data movement. As a result, there must be at least one GridFTP server that shares a file system with the execution
nodes. There is no special process to get staged files onto the execution node before the job executable is run. See the
Non-default GridFTP server section of this admin guide for details on how to configure WS GRAM for your GridFTP
servers used in your execution environment.
1.1.6. Reliable File Transfer Service (RFT)
WS GRAM depends on RFT to perform file staging and cleanup directives in a job description. For configuration details,
see the RFT admin guide10.
Important
Jobs requesting these functions will fail if RFT is not properly setup.
2. Configuring
2.1. Typical Configuration
2.1.1. Configuring sudo
When the credentials of the service account and the job submitter are different (multi user mode), then GRAM will
prepend a call to sudo to the local adapter callout command.
3
http://www.openpbs.org/
http://www.cs.wisc.edu/condor/
5
http://www.platform.com/Products/Platform.LSF.Family/Platform.LSF/
6
http://www.lesc.ic.ac.uk/projects/SGE-GT4.html
7
http://publib.boulder.ibm.com/infocenter/clresctr/index.jsp?topic=/com.ibm.cluster.infocenter.doc/library.html
8
http://www.grid4utility.org/software.php
9
http://www.grid4utility.org/documents.php
10
http://www.globus.org/toolkit/docs/4.0/data/rft/admin-index.html
4
80
WS GRAM Admin Guide
Important
If sudo is not configured properly, the command, and thus job, will fail.
As root, here are the two lines to add to the /etc/sudoers file for each GLOBUS_LOCATION installation, where
/opt/globus/GT4.0.5 should be replaced with the GLOBUS_LOCATION for your installation:
# Globus GRAM entries
globus ALL=(username1,username2) \
NOPASSWD: /opt/globus/GT4.0.5/libexec/globus-gridmap-and-execute \
-g /etc/grid-security/grid-mapfile /opt/globus/GT4.0.5/libexec/globus-job-manager-script
globus ALL=(username1,username2) \
NOPASSWD: /opt/globus/GT4.0.5/libexec/globus-gridmap-and-execute
-g /etc/grid-security/grid-mapfile /opt/globus/GT4.0.5/libexec/globus-gram-local-proxy-to
The globus-gridmap-and-execute program is used to ensure that GRAM only runs programs under accounts that are
in the grid-mapfile. In the sudo configuration, it is the first program called. It looks up the account in the grid-mapfile
and then runs the requested command. It is redundant if sudo is properly locked down. This tool could be replaced
with your own authorization program.
2.1.2. Configuring Scheduler Adapters
The WS GRAM scheduler adapters included in the release tarball are: PBS, Condor and LSF. To install, follow these
steps (using PBS as our example):
% cd $GLOBUS_LOCATION\gt4.0.0-all-source-installer
% make gt4-gram-pbs
% make install
Make sure the scheduler commands are in your path (qsub, qstat, pbsnodes).
For PBS, another setup step is required to configure the remote shell for rsh access:
% cd $GLOBUS_LOCATION/setup/globus
% ./setup-globus-job-manager-pbs --remote-shell=rsh
The last thing is to define the GRAM and GridFTP file system mapping for PBS. A default mapping in this file is
created to allow simple jobs to run. However, the actual file system mappings for your compute resource should be
entered to ensure:
•
files staging is performed correctly
•
jobs with erroneous file path directives are rejected
Done! You have added the PBS scheduler adapters to your GT installation.
81
WS GRAM Admin Guide
Note
For future GT builds with scheduler adapters: scheduler adapters can be enabled by adding --enable-wsgrampbs to the configure line when building the entire toolkit. For example:
% configure --prefix=$GLOBUS_LOCATION --enable-wsgram-pbs ...
% make
% make install
2.2. Non-default Configuration
2.2.1. Non-default Credentials
To run the container using just a user proxy, instead of host creds, edit the $GLOBUS_LOCATION/etc/globus_wsrf_core/global_security_descriptor.xml file, and either comment out the credentials section...
<?xml version="1.0" encoding="UTF-8"?>
<securityConfig xmlns="http://www.globus.org">
<!-<credential>
<key-file value="/etc/grid-security/containerkey.pem"/>
<cert-file value="/etc/grid-security/containercert.pem"/>
<credential>
-->
<gridmap value="/etc/grid-security/grid-mapfile"/>
<securityConfig>
or replace the credentials section with a proxy file location...
<?xml version="1.0" encoding="UTF-8"?>
<securityConfig xmlns="http://www.globus.org">
<proxy-file value="<PATH TO PROXY FILE>"/>
<gridmap value="/etc/grid-security/grid-mapfile"/>
<securityConfig>
Running in personal mode (user proxy), another GRAM configuration setting is required. For GRAM to authorize the
RFT service when performing staging functions, it needs to know the subject DN for verification. Here are the steps:
% cd $GLOBUS_LOCATION/setup/globus
% ./setup-gram-service-common --staging-subject=
"/DC=org/DC=doegrids/OU=People/CN=Stuart Martin 564720"
You can get your subject DN by running this command:
82
WS GRAM Admin Guide
% grid-cert-info -subject
2.2.2. Non-default GridFTP server
By default, the GridFTP server is assumed to run as root on localhost:2811. If this is not true for your site, then
change it by editing the GridFTP host and/or port in the GRAM and GridFTP file system mapping config file:
$GLOBUS_LOCATION/etc/gram-service/globus_gram_fs_map_config.xml
.
2.2.3. Non-default container port
By default, the globus services will assume 8443 is the port the Globus container is using. However the container can
be run under a non-standard port, for example:
% globus-start-container -p 4321
2.2.4. Non-default gridmap
If you wish to specify a non-standard gridmap file in a multi-user installation, two basic configurations need to be
changed:
•
$GLOBUS_LOCATION/etc/globus_wsrf_core/global_security_descriptor.xml
•
•
As specified in the gridmap config11 instructions, add a <gridmap value="..."/> element to the file as
appropriate.
/etc/sudoers
•
Change the file path after all -g options:
-g /path/to/grid-mapfile
Example config for global_security_descriptor.xml:
...
<gridmap value="/opt/grid-mapfile"/>
...
Example config for sudoers:
...
11
http://www.globus.org/toolkit/docs/4.0/security/authzframe/security_descriptor.html#s-authzframe-secdesc-configGridmap
83
WS GRAM Admin Guide
# Globus GRAM entries
globus ALL=(username1,username2)
NOPASSWD: /opt/globus/GT4.0.0/libexec/globus-gridmap-and-execute
-g /opt/grid-mapfile
/opt/globus/GT4.0.0/libexec/globus-job-manager-script.pl *
globus ALL=(username1,username2)
NOPASSWD: /opt/globus/GT4.0.0/libexec/globus-gridmap-and-execute
-g /opt/grid-mapfile
/opt/globus/GT4.0.0/libexec/globus-gram-local-proxy-tool *
...
2.2.5. Non-default RFT deployment
RFT is used by GRAM to stage files in and out of the job execution environment. In the default configuration, RFT
is hosted in the same container as GRAM and is assumed to have the same service path and standard service names.
This need not be the case. For example, the most likely alternative scenario is that RFT would be hosted separately in
a container on a different machine. In any case, both the RFT and the Delegation Service endpoints need to be adjustable
to allow this flexibility. The following options can be passed to the setup-gram-service-common script to affect these
settings:
--staging-protocol=<protocol>
--staging-host=<host>
--staging-port=<port>
--staging-service-path=<RFT and Delegation factory service path>
--staging-factory-name=<RFT factory service name>
--staging-delegation-factory-name=<name of Delegation factory service used by RFT>
For example:
% setup-gram-service-common \
--staging-protocol=https
--staging-host=machine.domain.net
--staging-delegation-factory-name=machine.domain.net
will internally cause the GRAM service code to construct the following EPR addresses.
http://machine.domain.net:8444/wsrf/services/ReliableFileTransferFactoryService
http://machine.fakedomain.net:8444/wsrf/services/DelegationFactoryService
2.3. Locating configuration files
All the GRAM service configuration files are located in subdirectories of the $GLOBUS_LOCATION/etc directory.
The names of the GRAM configuration directories all start with gram-service. For example, with a default GRAM
installation, the command line:
84
WS GRAM Admin Guide
% ls etc | grep gram-service
gives the following output:
gram-service
gram-service-Fork
gram-service-Multi
2.4. Web service deployment configuration
The file $GLOBUS_LOCATION/etc/gram-service/server-config.wsdd contains information necessary
to deploy and instantiate the GRAM services in the Globus container.
Three GRAM services are deployed:
•
ManagedExecutableJobService: service invoked when querying or managing an executable job
•
ManagedMultiJobService: service invoked when querying or managing a multijob
•
ManagedJobFactoryService: service invoked when submitting a job
Each service deployment information includes:
•
name of the Java service implementation class
•
path to the WSDL service file
•
name of the operation providers that the service reuses for its implementation of WSDL-defined operations
•
etc...
More information about the service deployment configuration information can be found here12.
2.5. JNDI application configuration
The configuration of WSRF resources and application-level services not related to service deployment is contained in
JNDI13 files. The JNDI-based GRAM configuration is of two kinds: common job factory and local resource manager.
2.5.1. Common job factory configuration
The file $GLOBUS_LOCATION/etc/gram-service/jndi-config.xml contains configuration information
that is common to every local resource manager.
More precisely, the configuration data it contains pertains to the implementation of the GRAM WSRF resources
(factory resources and job resources), as well as initial values of WSRF resource properties that are always published
by any Managed Job Factory WSRF resource.
The data is categorized by service, because according to WSRF, in spite of the service/resource separation of concern,
a given service will use only one XML Schema type of resource. In practice, it is clearer to categorize the configuration
12
13
http://www.globus.org/toolkit/docs/4.0/common/javawscore/admin-index.html#s-javawscore-admin-configuring
http://java.sun.com/products/jndi/
85
WS GRAM Admin Guide
resource implementation by service, even if, theoretically speaking, a given resource implementation could be used
by several services. For more information, refer to the Java WS Core documentation14.
Here is the breakdown, in JNDI objects, of the common configuration data categorized by service. Each XYZHome
object contains the same Globus Core-defined information for the implementation of the WSRF resource, such as the
Java implementation class for the resource (resourceClass datum), the Java class for the resource key (resourceKeyType datum), etc.
•
ManagedExecutableJobService
•
•
ManagedMultiJobService
•
•
ManagedExecutableJobHome: configures the implementation of resources for the service.
ManagedMultiJobHome: configures the implementation of resources for the service
ManagedJobFactoryService
•
FactoryServiceConfiguration: encapsulates configuration information used by the factory service. Currently
it identifies the service to associate with a newly created job resource in order to create an endpoint reference
and return it.
•
ManagedJobFactoryHome: implementation of resources for the service resourceClass
•
FactoryHomeConfiguration: contains GRAM application-level configuration data, i.e., values for resource
properties common to all factory resources. For example, the path to the Globus installation, host information
(such as CPU type), manufacturer, operating system name and version, etc.
2.5.2. Local resource manager configuration
When a SOAP call is made to a GRAM factory service in order to submit a job, the call is actually made to a GRAM
service-resource pair, where the factory resource represents the local resource manager to be used to execute the job.
There is one directory, gram-service-<manager>/, for each local resource manager supported by the GRAM
installation.
For example, let us assume that the command line:
% ls etc | grep gram-servicegives the following output:
gram-service-Fork
gram-service-LSF
gram-service-Multi
In this example, the Multi, Fork and LSF job factory resources have been installed. Multi is a special kind of local
resource manager which enables the GRAM services to support multijobs15.
14
15
http://www.globus.org/toolkit/docs/4.0/common/javawscore/index.html
http://www.globus.org/toolkit/docs/4.0/execution/wsgram/user-index.html#s-wsgram-user-specifyingmultijob
86
WS GRAM Admin Guide
The JNDI configuration file located under each manager directory contains configuration information for the GRAM
support of the given local resource manager, such as the name that GRAM uses to designate the given resource manager.
This is referred to as the GRAM name of the local resource manager.
For example, $GLOBUS_LOCATION/etc/gram-service-Fork/jndi-config.xml contains the following
XML element structure:
<service name="ManagedJobFactoryService">
<!-- LRM configuration: Fork -->
<resource
name="ForkResourceConfiguration"
type="org.globus.exec.service.factory.FactoryResourceConfiguration">
<resourceParams>
[...]
<parameter>
<name>
localResourceManagerName
</name>
<value>
Fork
</value>
</parameter>
<!-- Site-specific scratchDir
Default: ${GLOBUS_USER_HOME}/.globus/scratch
<parameter>
<name>
scratchDirectory
</name>
<value>
${GLOBUS_USER_HOME}.globus/scratch
</value>
</parameter>
-->
</resourceParams>
</resource>
</service>
In the example above, the name of the local resource manager is Fork. This value can be used with the GRAM command
line client in order to specify which factory resource to use when submitting a job. Similarly, it is used to create an
endpoint reference to the chosen factory WS-Resource when using the GRAM client API.
In the example above, the scratchDirectory is set to ${GLOBUS_USER_HOME}/.globus/scratch. This is the
default setting. It can be configured to point to an alternate file system path that is common to the compute cluster and
is typically less reliable (auto purging), while offering a greater amount of disk space (thus "scratch").
2.6. Security descriptor
The file $GLOBUS_LOCATION/etc/gram-service/managed-job-factory-security-config.xml
contains the Core security configuration for the GRAM ManagedJobFactory service, which includes:
•
default security information for all remote invocations, such as:
•
the authorization method, based on a gridmap file (in order to resolve user credentials to local user names)
87
WS GRAM Admin Guide
•
•
limited proxy credentials will be rejected
security information for the createManagedJob operation
The file $GLOBUS_LOCATION/etc/gram-service/managed-job-security-config.xml contains
the Core security configuration for the GRAM job resources:
•
The default is to only allow the identity that called the createManagedJob operation to access the resource.
Note that, by default, two gridmap checks are done during an invocation of WS-GRAM:
1.
One gridmap check is done by the container as configured by the gridmap element in $GLOBUS_LOCATION/etc/globus_wsrf_core/global_security_descriptor.xml
2.
Another check is done by WS-GRAM when it calls the Perl modules which are used for job submission to the
underlying local resource manager. This is configured by the authz element which is, by default, set to gridmap
in $GLOBUS_LOCATION/etc/gram-service/managed-job-factory-security-config.xml
and $GLOBUS_LOCATION/etc/gram-service/managed-job-security-config.xml. This check
is done for additional security reasons to make sure that a potentially hacked globus user account still can only
act on behalf of the users who are defined in a grid-mapfile.
The second gridmap check can be avoided by removing the authz element from both WS-GRAM security descriptors.
This however does not mean, that no authorization check is done. The container still checks if the client is authorized
as defined in $GLOBUS_LOCATION/etc/globus_wsrf_core/global_security_descriptor.xml
but there's no further authorization check before calling the Perl modules. It's up to the GT4 container administrator
to decide whether or not to have that additional authorization check. Note that a change in the sudo configuration is
required in that case because globus-gridmap-and-execute will not be executed. /opt/globus/GT4.0.5 should
be replaced with the GLOBUS_LOCATION for your installation:
# Globus GRAM entries
globus ALL=(username1,username2)
NOPASSWD: /opt/globus/GT4.0.5/libexec/globus-job-manager-script.pl *
globus ALL=(username1,username2)
NOPASSWD: /opt/globus/GT4.0.5/libexec/globus-gram-local-proxy-tool *
Note
GRAM does not override the container security credentials defined in $GLOBUS_LOCATION/etc/globus_wsrf_core/global_security_descriptor.xml. These are the credentials used to authenticate
all service requests.
2.7. GRAM and GridFTP file system mapping
The file $GLOBUS_LOCATION/etc/gram-service/globus_gram_fs_map_config.xml contains information to associate local resource managers with GridFTP servers. GRAM uses the GridFTP server (via RFT) to perform
all file staging directives. Since the GridFTP server and the Globus service container can be run on separate hosts, a
mapping is needed between the common file system paths of these two hosts. This enables the GRAM services to resolve
file:/// staging directives to the local GridFTP URLs.
Below is the default Fork entry. Mapping a jobPath of / to an ftpPath of / will allow any file staging directive
to be attempted.
<map>
88
WS GRAM Admin Guide
<scheduler>Fork</scheduler>
<ftpServer>
<protocol>gsiftp</protocol>
<host>myhost.org</host>
<port>2811</port>
</ftpServer>
<mapping>
<jobPath>/</jobPath>
<ftpPath>/</ftpPath>
</mapping>
</map>
For a scheduler, where jobs will typically run on a compute node, a default entry is not provided. This means staging
directives will fail until a mapping is entered. Here is an example of a compute cluster with PBS installed that has two
common mount points between the front end host and the GridFTP server host.
<map>
<scheduler>PBS</scheduler>
<ftpServer>
<protocol>gsiftp</protocol>
<host>myhost.org</host>
<port>2811</port>
</ftpServer>
<mapping>
<jobPath>/pvfs/mount1/users</jobPath>
<ftpPath>/pvfs/mount2/users</ftpPath>
</mapping>
<mapping>
<jobPath>/pvfs/jobhome</jobPath>
<ftpPath>/pvfs/ftphome</ftpPath>
</mapping>
</map>
The file system mapping schema doc is here16.
2.8. Scheduler-Specific Configuration Files
In addition to the service configuration described above, there are scheduler-specific configuration files for the
Scheduler Event Generator modules. These files consist of name=value pairs separated by newlines. These files are:
16
http://www.globus.org/toolkit/docs/4.0/execution/wsgram/schemas/gram_fs_map.html
89
WS GRAM Admin Guide
Table 11.1. Scheduler-Specific Configuration Files
$GLOBUS_LOCATION/etc/globusfork.conf
Configuration for the Fork SEG module implementation. The attributes names
for this file are:
log_path
$GLOBUS_LOCATION/etc/globuscondor.conf
Configuration for the Condor SEG module implementation. The attributes names
for this file are:
log_path
$GLOBUS_LOCATION/etc/globuspbs.conf
Path to the SEG Condor log (used by the Globus::GRAM::JobManager::condor perl module and Condor SEG module. The
value of this should be the path to a world-readable and worldwritable file. The default value for this created by the Fork setup
package is $GLOBUS_LOCATION/var/globus-condor.log
Configuration for the PBS SEG module implementation. The attributes names
for this file are:
log_path
$GLOBUS_LOCATION/etc/globuslsf.conf
Path to the SEG Fork log (used by the globus-fork-starter and the
SEG). The value of this should be the path to a world-writable file.
The default value for this created by the Fork setup package is
$GLOBUS_LOCATION/var/globus-fork.log. This file
must be readable by the account that the SEG is running as.
Path to the SEG PBS logs (used by the Globus::GRAM::JobManager::pbs perl module and PBS SEG module. The value
of this should be the path to the directory containing the server
logs generated by PBS. For the SEG to operate, these files must
have file permissions such that the files may be read by the user
the SEG is running as.
Configuration for the LSF SEG module implementation. The attributes names
for this file are:
log_path
Path to the SEG LSF log directory. This is used by the LSF SEG
module. The value of this should be the path to the directory containing the server logs generated by LSF. For the SEG to operate,
these files must have file permissions such that the files may be
read by the user the SEG is running as.
2.9. Disabling an already installed scheduler adapter
When WS-GRAM is initialized during startup of the GT container the JNDI configuration is checked for configured
scheduler adapters. If you want to disable an already installed scheduler adapter you have to make sure that it's removed
from the JNDI configuration. The following explains a way how this could be done:
Say, you installed support for PBS and want to disable PBS now. A listing of the WS-GRAM related directories in
$GLOBUS_LOCATION/etc will look like this:
[martin@osg-test1 ~]$ cd $GLOBUS_LOCATION/etc && ls | grep gram-service
gram-service
gram-service-Fork
gram-service-Multi
gram-service-PBS
90
WS GRAM Admin Guide
All you have to do is to remove gram-service-PBS, or better, create an archive before removing it in case you want to
enable PBS support at a later time again. After doing that the output of the above command could look like this:
[martin@osg-test1 ~]$ cd $GLOBUS_LOCATION/etc && ls | grep gram-service
gram-service
gram-service-Fork
gram-service-Multi
gram-service-PBS.tar.gz
After restarting the GT server users won't be able to submit jobs to PBS anymore.
2.10. WS GRAM auto-registration with default WS MDS Index Service
With a default GT 4.0.1+ installation, the WS GRAM service is automatically registered with the default WS MDS
Index Service17 running in the same container for monitoring and discovery purposes.
Note
If you are still using GT 4.0.0, we strongly recommend upgrading to the latest version18 to take advantage of
this capability.
However, if must use GT 4.0.0, or if this registration was turned off and you want to turn it back on, this is how it is
configured:
There is a JNDI resource defined in $GLOBUS_LOCATION/etc/gram-service/jndi-config.xml as follows
:
<resource name="mdsConfiguration"
type="org.globus.wsrf.impl.servicegroup.client.MDSConfiguration">
<resourceParams>
<parameter>
<name>reg</name>
<value>true</value>
</parameter>
<parameter>
<name>factory</name>
<value>org.globus.wsrf.jndi.BeanFactory</value>
</parameter>
</resourceParams>
</resource>
To configure the automatic registration of WS GRAM to the default WS MDS Index Service, change the value of the
parameter <reg> as follows:
•
true turns on auto-registration; this is the default in GT 4.0.1+.
•
false turns off auto-registration; this is the default in GT 4.0.0.
17
18
http://www.globus.org/toolkit/docs/4.0/info/index/
http://www.globus.org/toolkit/downloads
91
WS GRAM Admin Guide
2.10.1. Configuring resource properties
By default, the GLUECE: resource property (which contains GLUE data) is sent to the default Index Service:
You can configure which resource properties are sent in WS GRAM's registration.xml file, $GLOBUS_LOCATION/etc/gram-service/registration.xml. The following is the relevant section of the file (as it is set
by default):
<Content xsi:type="agg:AggregatorContent"
xmlns:agg="http://mds.globus.org/aggregator/types">
<agg:AggregatorConfig xsi:type="agg:AggregatorConfig">
<agg:GetResourcePropertyPollType
xmlns:glue="http://mds.globus.org/glue/ce/1.1">
<!-- Specifies that the index should refresh information
every 60000 milliseconds (once per minute) -->
<agg:PollIntervalMillis>60000</agg:PollIntervalMillis>
<!-- specifies the resource property that should be
aggregated, which in this case is the GLUE cluster
and scheduler information RP -->
<agg:ResourcePropertyName>glue:GLUECE</agg:ResourcePropertyName>
</agg:GetResourcePropertyPollType>
</agg:AggregatorConfig>
<agg:AggregatorData/>
</Content>
2.11. Registering WS GRAM manually with default WS MDS
Index Service via Third Party
If a third party needs to register an WS GRAM service manually, see Registering with mds-servicegroup-add19 in the
WS MDS Aggregator Framework documentation.
2.12. Job Description Document Substitution Variables
(updates for 4.0.5+)
By default only four variables can be used in the job description document which are resolved to values in the service.
These are
•
GLOBUS_USER_HOME
•
GLOBUS_USER_NAME
•
GLOBUS_SCRATCH_DIR
19
http://www.globus.org/toolkit/docs/4.0/info/aggregator/re01.html#mds-servicegroup-add-registering
92
WS GRAM Admin Guide
•
GLOBUS_LOCATION
2.12.1. Changes in WS GRAM beginning with GT version 4.0.5
To enable communities to define their own system-wide variables and enable their users to use them in their job descriptions, a new generic variable/value config file was added where these variables can be defined. If a job description
document contains one of these variables, that file will be used to resolve any matching variables.
A new service parameter in the JNDI container registry defines the path to the variable mapping file. The mapping is
done for each scheduler. This file is checked periodically (you may configure the frequency) to see if it has changed.
If so, it is reread and the new content replaces the old.
For example, the Fork scheduler has the following entries in $GLOBUS_LOCATION/etc/gram-serviceFork/jndi-config.xml which can be configured to determine the location and the refresh period of the variable
mapping file:
<parameter>
<name>
substitutionDefinitionsFile
</name>
<value>
/root/vdt-stuff/globus/etc/gram-service-Condor/substitution definition.properties
</value>
</parameter>
<parameter>
<name>
substitutionDefinitionsRefreshPeriod
</name>
<value>
<!-- MINUTES -->
480
</value>
</parameter>
Important
If you use variables in the job description document that are not defined in the variable mapping file, the following error occurs during job submission: 'No value found for RSL substitution variable
<variableName>'
2.13. Configuring and submitting jobs to WS-GRAM using
Condor-G
Condor-G provides command-line tools to run large job submissions to WS-GRAM, to monitor and to destroy them.
The following link gives a good introduction on how to configure Condor-G and how to submit jobs to WS-GRAM:
https://bi.offis.de/wisent/tiki-index.php?page=Condor-GT420
20
https://bi.offis.de/wisent/tiki-index.php?page=Condor-GT4
93
WS GRAM Admin Guide
3. Configuring New Features for 4.0.5+
3.1. Audit Logging (4.0.5+ only)
You can find information about Audit Logging in WS GRAM Audit Logging21 section (available only with GT versions
4.0.5+).
3.2. SoftEnv Support (4.0.5+ only)
You can find information about SoftEnv support in WS GRAM SoftEnv Support22 section (available only with GT
versions 4.0.5+).
3.3. Job Description Extensions Support (4.0.5+, update
pkg available)
You can find information about Job Description Extensions Support in WS GRAM Job Description Extensions Support23
section (available with GT versions 4.0.5+, update package available for previous versions).
3.4. Local RFT Invocations (4.0.5+ only)
A new option has been added to WS GRAM to make "local" invocations to RFT instead of Web Service calls. This
has shown to improve performance for the WS GRAM service when calling RFT for all file staging and cleanup directives. The default configuration for WS GRAM remains using Web Service calls to RFT.
To configure local method calls from GRAM to RFT, make the following configuration change to $GLOBUS_LOCATION/etc/gram-service/jndi-config.xml:
<parameter>
<name>
enableLocalInvocations
</name>
<value>
true
</value>
</parameter>
More can be read about local invocations here24.
4. Deploying
WS GRAM is deployed as part of a standard toolkit installation. Please refer to the GT 4.0 System Administrator's
Guide25 for details.
21
http://www.globus.org/toolkit/docs/4.0/execution/wsgram/WS_GRAM_Audit_Logging.html
http://www.globus.org/toolkit/docs/4.0/execution/wsgram/WS_GRAM_SoftEnv_Support.html
23
http://www.globus.org/toolkit/docs/4.0/execution/wsgram/WS_GRAM_Job_Desc_Extensions.html
24
http://www.globus.org/toolkit/docs/4.0/execution/wsgram/LocalInvocations.doc
25
http://www.globus.org/toolkit/docs/4.0/admin/docbook/
22
94
WS GRAM Admin Guide
4.1. Deploying in Tomcat
WS GRAM has been tested to work without any additional setup steps when deployed into Tomcat. Please see the
Java WS Core admin guide section on deploying GT4 services into Tomcat26 for instructions. Also, for details on
tested containers, see the WS GRAM release notes27.
Note
Currently only a single deployment is supported because of a limitation in the execution of the Scheduler Event
Generator. One must set GLOBUS_LOCATION before starting Tomcat.
5. Testing
See the WS GRAM User's Guide28 for information about submitting a test job.
6. Security Considerations
No special security considerations exist at this time.
7. Troubleshooting
When I submit a streaming or staging job, I get the following error: ERROR service.TransferWork Terminal transfer
error: [Caused by: Authentication failed[Caused by: Operation unauthorized(Mechanism level: Authorization failed.
Expected"/CN=host/localhost.localdomain" target but received "/O=Grid/OU=GlobusTest/OU=simpleCA-my.machine.com/CN=host/my.machine.com")
•
Check $GLOBUS_LOCATION/etc/gram-service/globus_gram_fs_map_config.xml to see if it
uses localhost or 127.0.0.1 instead of the public hostname (in the example above, my.machine.com).
Change these uses of the loopback hostname or IP to the public hostname as neccessary.
Fork jobs work fine, but submitting PBS jobs with globusrun-ws hangs at "Current job state: Unsubmitted"
1.
Make sure the log_path in $GLOBUS_LOCATION/etc/globus-pbs.conf points to locally accessible
scheduler logs that are readable by the user running the container. The Scheduler Event Generator (SEG) will not
work without local scheduler logs to monitor. This can also apply to other resource managers, but is most comonly
seen with PBS.
2.
If the SEG configuration looks sane, try running the SEG tests. They are located in $GLOBUS_LOCATION/test/globus_scheduler_event_generator_*_test/. If Fork jobs work, you only need to
run the PBS test. Run each test by going to the associated directory and run ./TESTS.pl. If any tests fail, report
this to the [email protected] mailing list.
3.
If the SEG tests succeed, the next step is to figure out the ID assigned by PBS to the queued job. Enable GRAM
debug logging by uncommenting the appropriate line in the $GLOBUS_LOCATION/containerlog4j.properties configuration file. Restart the container, run a PBS job, and search the container log for
a line that contains "Received local job ID" to obtain the local job ID.
26
http://www.globus.org/toolkit/docs/4.0/common/javawscore/admin-index.html#javawscore-admin-tomcat-deploying
WS_GRAM_Release_Notes.html#s-wsgram-Release_Notes-testedplatforms
http://www.globus.org/toolkit/docs/4.0/execution/wsgram/user-index.html#s-wsgram-user-usagescenarios
29
http://dev.globus.org/wiki/GRAM#Mailing_Lists
27
28
95
WS GRAM Admin Guide
4.
Once you have the local job ID, you can find out if the PBS status is being logged by checking the latest PBS
logs pointed to by the value of "log_path" in $GLOBUS_LOCATION/etc/globus-pbs.conf.
If the status is not being logged, check the documentation for your flavor of PBS to see if there's any futher configuration that needs to be done to enable job status logging. For example, PBS Pro requires a sufficient -e
<bitmask> option added to the pbs_server command line to enable enough logging to satisfy the SEG.
5.
If the correct status is being logged, try running the SEG manually to see if it is reading the log file properly. The
general form of the SEG command line is as follows:
$GLOBUS_LOCATION/libexec/globus-scheduler-event-generator -s pbs -t <timestamp>
The timestamp is in seconds since the epoch and dictates how far back in the log history the SEG should scan for
job status events. The command should hang after dumping some status data to stdout.
If no data appears, change the timestamp to an earlier time.
If nothing ever appears, report this to the [email protected] mailing list.
6.
If running the SEG manually succeeds, try running another job and make sure the job process actually finishes
and PBS has logged the correct status before giving up and cancelling globusrun-ws. If things are still not working,
report your problem and exactly what you have tried to remedy the situtation to the [email protected]
mailing list.
The job manager detected an invalid script response
•
Check for a restrictive umask. When the service writes the native scheduler job description to a file, an overly restrictive umask will cause the permissions on the file to be such that the submission script run through sudo as the
user cannot read the file (bug #265532).
When restarting the container, I get the following error: Error getting delegation resource
•
Most likely this is simply a case of the delegated credential expiring. Either refresh it for the affected job or destroy
the job resource. For more information, see delegation command-line clients33.
The user's home directory has not been determined correctly
•
This occurs when the administrator changed the location of the users' home directory and did not restart the GT4
container afterwards. Beginning with version 4.0.3, WS-GRAM determines a user's home directory only once in
the lifetime of a container (when the user submits the first job). Subsequently, submitted jobs will use the cached
home directory during job execution.
8. Usage statistics collection by the Globus Alliance
The following usage statistics are sent by default in a UDP packet (in addition to the GRAM component code, packet
version, timestamp, and source IP address) at the end of each job (i.e. when Done or Failed state is entered).
30
http://dev.globus.org/wiki/GRAM#Mailing_Lists
http://dev.globus.org/wiki/GRAM#Mailing_Lists
http://bugzilla.globus.org/bugzilla/show_bug.cgi?id=2655
33
../../security/delegation/user-index.html#commandline
31
32
96
WS GRAM Admin Guide
•
job creation timestamp (helps determine the rate at which jobs are submitted)
•
scheduler type (Fork, PBS, LSF, Condor, etc...)
•
jobCredentialEndpoint present in RSL flag (to determine if server-side user proxies are being used)
•
fileStageIn present in RSL flag (to determine if the staging in of files is used)
•
fileStageOut present in RSL flag (to determine if the staging out of files is used)
•
fileCleanUp present in RSL flag (to determine if the cleaning up of files is used)
•
CleanUp-Hold requested flag (to determine if streaming is being used)
•
job type (Single, Multiple, MPI, or Condor)
•
gt2 error code if job failed (to determine common scheduler script errors users experience)
•
fault class name if job failed (to determine general classes of common faults users experience)
If you wish to disable this feature, please see the Java WS Core System Administrator's Guide section on Usage Statistics Configuration34 for instructions.
Also, please see our policy statement35 on the collection of usage statistics.
34
35
http://www.globus.org/toolkit/docs/4.0/common/javawscore/admin-index.html#s-javawscore-Interface_Config_Frag-usageStatisticsTargets
http://www.globus.org/toolkit/docs/4.0/Usage_Stats.html
97
Chapter 12. GSI-OpenSSH Admin Guide
1. Building and Installing
GSI-OpenSSH is built and installed as part of a default GT 4.0 installation. For basic installation instructions, see the
GT 4.0 System Administrator's Guide1. No extra installation steps are required for this component.
1.1. Optional Build-Time Configuration
You can optionally pass build-time configure options to the GSI-OpenSSH package using the --with-gsiopensshargs
option when running configure for your GT 4.0 installation. For example:
./configure --prefix=$HOME/globus
--with-gsiopensshargs="--with-pam"
No options are typically needed for client-only installations, but options are often needed for full server functionality.
The following table lists suggested options for different platforms.
Table 12.1. GSI-OpenSSH build arguments
Platform
Configuration
Linux
--with-pam --with-md5-passwords --with-tcp-wrappers
Solaris
--with-pam --with-md5-passwords --with-tcp-wrappers
Irix
--with-tcp-wrappers
AIX
--with-tcp-wrappers
Note: If you enable PAM support with the --with-pam configuration option, be sure to also set "UsePAM yes" in
$GLOBUS_LOCATION/etc/ssh/sshd_config after installation.
If you have an already configured and installed system-wide SSHD and you would like your build of GSI-OpenSSH
to behave similarly, investigate the configure options available in GSI-OpenSSH and select those options that would
add the functionality that your current SSHD possesses. Be aware that since GSI-OpenSSH is based on OpenSSH, the
standard set of functionality is turned on by default.
Please do not attempt to override the following options:
--prefix
--sysconfdir
--with-globus
--with-globus-flavor
--with-ssl-dir
1
http://www.globus.org/toolkit/docs/4.0/admin/docbook/
98
GSI-OpenSSH Admin Guide
1.2. Building and Installing only GSI-OpenSSH
If you wish to install GSI-OpenSSH without installing the rest of the Globus Toolkit, follow the instructions in the GT
4.0 System Administrator's Guide2 with the following changes. First, you do not need Ant, a JDK, or a JDBC database
to build only GSI-OpenSSH. Second, instead of running "make", run:
globus$ make gsi-openssh
This will install the GSI-OpenSSH client and server programs. For client-only installations, simply do not configure
or use the installed server.
2. Configuring
The GSI-enabled OpenSSH software is installed with a default set of configuration files, described below. You may
want to modify the ssh_config file before using the clients and the sshd_config file before using the server.
If the GSI-enabled OpenSSH install script finds existing SSH key pairs, it will create symbolic links to them rather
than generating new key pairs. The SSH key pairs are not required for GSI authentication. However, if you wish to
support other SSH authentication methods, make sure the sshd (running as root) can read the key pair files (i.e., beware
of NFS mounts with root_squash). If running multiple sshds on a system, we recommend configuring them so they all
use the same key pairs (i.e., use symbolic links) to avoid client-side confusion.
•
$GLOBUS_LOCATION/etc/ssh/moduli
moduli is a crypto parameter for generating keys.
•
$GLOBUS_LOCATION/etc/ssh/ssh_config
ssh_config contains options that are read by ssh, scp, and sftp at run-time. The installed version is
the default provided by OpenSSH, with X11Forwarding enabled. You may need to customize this
file for compatibility with your system SSH installation (i.e., compare it with /etc/ssh/ssh_config).
•
$GLOBUS_LOCATION/etc/ssh/ssh_host_key[.pub]
Your system's RSA public-/private-key pair for SSH protocol 1 communications.
•
$GLOBUS_LOCATION/etc/ssh/ssh_host_dsa[.pub]
Your system's DSA public-/private-key pair for SSH protocol 2 communications.
•
$GLOBUS_LOCATION/etc/ssh/ssh_host_rsa[.pub]
Your system's RSA public-/private-key pair for SSH protocol 2 communications.
•
$GLOBUS_LOCATION/etc/ssh/ssh_prng_cmds
ssh_prng_cmds contains paths to a number of files that ssh-keygen may need to use if your system
does not have a built-in entropy pool (like /dev/random).
2
http://www.globus.org/toolkit/docs/4.0/admin/docbook/
99
GSI-OpenSSH Admin Guide
•
$GLOBUS_LOCATION/etc/ssh/sshd_config
sshd_config contains options that are read by sshd when it starts up. The installed version is the default
provided by OpenSSH, with X11Forwarding enabled. You may need to customize this file for
compatibility with your system SSH installation (i.e., compare it with /etc/ssh/sshd_config). For
example, to enable PAM authentication, you will need to set "UsePAM yes" in this file.
3. Deploying
1.
To install the GSI-Enabled OpenSSH Server on most systems, you must be a privileged user, such as root.
sh$ /bin/su - root
Note: If your system functions like this and you attempt to run these commands as a user other than root, these
commands should fail.
2.
(optional) Start a copy of your system's currently running SSH server on an alternate port by running, eg.
sh# /usr/sbin/sshd -p 2000 &
You may then choose to log in to this server and continue the rest of these steps from that shell. We recommend
doing this since some sshd shutdown scripts do particularly nasty things like killing all of the running SSH servers
on a system, not just the parent server that may be listening on port 22. Roughly translated, this step is about
guaranteeing that an alternate method of access is available should the main SSH server be shutdown and your
connection via that server be terminated.
3.
Locate your server's startup/shutdown script directory. On some systems this directory may be located at
/etc/rc.d/init.d, but since this location is not constant across operating systems, for the purposes of this document
we will refer to this directory as INITDIR. Consult your operating system's documentation for your system's
location.
4.
Run the following command.
sh# mv $INITDIR/sshd $INITDIR/sshd.bak
5.
Either copy or link the new sshd script to your system's startup/shutdown script directory.
sh# cp $GLOBUS_LOCATION/sbin/SXXsshd $INITDIR/sshd
6.
Shutdown the currently running main SSH server.
sh# $INITDIR/sshd.bak stop
7.
Provided you still have a connection to the machine, start the new SSH server.
sh# $INITDIR/sshd start
100
GSI-OpenSSH Admin Guide
8.
Test the new server by connecting to the standard SSH port (22) and authenticating via multiple methods. Especially
test that GSI authentication works correctly.
9.
If you are performing a new install, or if the old server was not configured to be started at run-time and shutdown
automatically at system halt or reboot, either use a system utility such as RedHat's chkconfig to configure the
system for the correct run-levels, or manually link up the correct run-levels.
sh# /sbin/chkconfig sshd reset
The recommended run-levels are listed in a set of comments within the SXXsshd startup script. For example, on
standard Unix systems we recommend running the GSI-Enabled OpenSSH server in run-levels two, three, four,
and five.
10. Finally, if, as a precautionary measure, you started a SSH server on an alternate port in order to complete the install
process, you can now safely stop all instances of that server.
4. Testing
1.
Edit the file $GLOBUS_LOCATION/sbin/SXXsshd so that the GSI-Enabled OpenSSH server starts up on an
alternate port.
2.
Run the command
sh# $GLOBUS_LOCATION/sbin/SXXsshd start
and verify that the server is running by checking that it both shows up in a process listing and creates a file named
$GLOBUS_LOCATION/var/sshd.pid.
3.
From a remote machine attempt to connect to the local server on the modified test port using the standard SSH
authentication methods plus authenticating via your GSI credentials. This may require you to authorize these users
via an appropriate entry in the grid-mapfile.
4.
Stop the SSH server by running the command
sh# $GLOBUS_LOCATION/sbin/SXXsshd stop
and reverse any changes you made that altered the port on which the server resided upon startup. After this step,
running SXXsshd start should start the server on the default port (22).
5. Security Considerations
GSI-OpenSSH is a modified version of OpenSSH3 and includes full OpenSSH functionality. For more information on
OpenSSH security, see the OpenSSH Security4 page.
3
4
http://www.openssh.org/
http://www.openssh.org/security.html
101
GSI-OpenSSH Admin Guide
6. Troubleshooting
GSI authentication is very sensitive to clock skew. You must run a system clock synchronization service of some type
on your system to prevent authentication problems caused by incorrect system clocks. We recommend NTP5. Please
refer to your operating system documentation or the NTP Home Page6 for installation instructions. Please also ensure
your system timezone is set correctly.
5
6
http://www.ntp.org/
http://www.ntp.org/
102
Chapter 13. MyProxy Admin Guide
1. Building and Installing
MyProxy is built and installed as part of a default GT 4.0 installation. For basic installation instructions, see the GT
4.0 System Administrator's Guide1. No extra installation steps are required for this component.
1.1. Building and Installing only MyProxy
If you wish to install MyProxy without installing the rest of the Globus Toolkit, follow the instructions in the GT 4.0
System Administrator's Guide2 with the following changes:
1.
First, you do not need Ant, a JDK, or a JDBC database to build only MyProxy.
2.
Second, instead of running "make", run:
globus$ make gsi-myproxy
then:
globus$ make install
This will install the MyProxy client and server programs. For client-only installations, simply do not configure or use
the installed server.
2. Configuring
A typical MyProxy configuration has one dedicated myproxy-server for the site, with MyProxy clients installed on all
systems where other Globus Toolkit client software is installed.
No additional configuration is required to use MyProxy clients after they are installed, although you may want to set
the MYPROXY_SERVER environment variable to the hostname of your myproxy-server in the default user environment
on your systems.
To configure the myproxy-server you must modify the myproxy-server.config template provided at $GLOBUS_LOCATION/share/myproxy/myproxy-server.config and copy it to /etc/myproxy-server.config
(if you have root access) or $GLOBUS_LOCATION//etc/myproxy-server.config (if you don't have root
access). If you skip this step, your myproxy-server will not start. To enable all myproxy-server features uncomment
the provided sample policy at the top of the myproxy-server.config config file, as follows:
#
# Complete Sample Policy
#
# The following lines define a sample policy that enables all
# myproxy-server features. See below for more examples.
accepted_credentials
"*"
authorized_retrievers
"*"
1
2
http://www.globus.org/toolkit/docs/4.0/admin/docbook/
http://www.globus.org/toolkit/docs/4.0/admin/docbook/
103
MyProxy Admin Guide
default_retrievers
authorized_renewers
default_renewers
authorized_key_retrievers
default_key_retrievers
trusted_retrievers
default_trusted_retrievers
"*"
"*"
"none"
"*"
"none"
"*"
"none"
Please see below for additional documentation on the myproxy-server.config options.
The myproxy-server.config file sets the policy for the myproxy-server(8), specifying what credentials may
be stored in the server's repository and who is authorized to retrieve credentials. By default, the myproxy-server(8)
looks for this file in /etc/myproxy-server.config and if it is not found there, it looks in $GLOBUS_LOCATION/etc/myproxy-server.config. The myproxy-server -c option can be used to specify an alternative
location. The file installed by default does not allow any requests.
The file also supports a passphrase_policy_program command for specifying an external program for evaluating the
quality of users' passphrases. A sample program is installed in $GLOBUS_LOCATION/share/myproxy/myproxypassphrase-policy but is not enabled by default.
Lines in the configuration file use limited regular expressions for matching the distinguished names (DNs) of classes
of users. The limited regular expressions support the shell-style characters '*' and '?', where '*' matches any number of
characters and '?' matches any single character.
The DN limited regexes should be delimited with double quotes ("DN regex").
The configuration file has the following types of lines:
104
MyProxy Admin Guide
Table 13.1. myproxy-server.config lines
accepted_credentials "DNregex"
Each of these lines allows any clients whose DNs match the given limited regex to
connect to the myproxy-server and store credentials with it for future retrieval. Any
number of these lines may appear. For backwards compatibility, these lines can also
start with allowed_clients instead of accepted_credentials.
authorized_retriev- Each of these lines allows the server administrator to set server-wide policies for authorers "DN regex"
ized retrievers. If the client DN does not match the given limited regex, the client is not
allowed to retrieve the credentials previously stored by a client. In addition to the serverwide policy, MyProxy also provides support for per-credential policy. The user can
specify the regex DN of the allowed retrievers of the credential when uploading the
credential (using myproxy-init(1)). The retrieval client DN must also match the user
specified regex. In order to retrieve credentials the client also needs to know the name
and pass phrase provided by the client when the credentials were stored. Any number
of these lines may appear. For backwards compatibility, these lines can also start with
allowed_services instead of authorized_retrievers.
default_retrievers
"DN regex"
Each of these lines allows the server administrator to set server-wide default policies.
The regex specifies the clients who can access the credentials. The default retriever
policy is enforced if a per-credential policy is not specified on upload (using myproxyinit(1)). In other words, the client can override this policy for a credential on upload.
The per-credential policy is enforced in addition to the server-wide policy specified by
the authorized_retrievers line (which clients can not override). Any number
of these lines may be present. For backwards compatibility, if no default_retrievers line is specified, the default policy is "*", which allows any client to pass the percredential policy check. (The client must still pass the authorized_retrievers
check).
authorized_renew- Each of these lines allows the server administrator to set server-wide policies for authorers "DN regex"
ized renewers. If the client DN does not match the given limited regex the client is not
allowed to renew the credentials previously stored by a client. In addition to the serverwide policy, MyProxy also provides support for per-credential policy. The user can
specify the regex DN of the allowed renewers of the credential on upload (using
myproxy-init(1)). The renewal client DN must match both this regex and the user specified regex. In this case, the client must also already have a credential with a DN
matching the DN of the credentials to be retrieved, to be used in a second authorization
step (see the -a option for myproxy-logon(1)).
default_renewers
"DN regex"
Each of these lines allows the server administrator to set server-wide default renewer
policies. The regex specifies the clients who can renew the credentials. The default renewer policy is enforced if a per-credential policy is not specified on upload (using
myproxy-init(1)). This is enforced in addition to the server-wide policy specified by
the authorized_renewers line. Any number of these lines may appear. For
backwards compatibility, if no default_renewers line is specified, the default
policy is "*", which allows any client to pass the per-credential policy check. (The client
must still pass the authorized_renewers check).
passphrase_policy_program full-path-toscript
This line specifies a program to run whenever a passphrase is set or changed for implementing a local password policy. The program is passed the new passphrase via stdin
and is passed the following arguments: username, distinguished name, credential name
(if any), per-credential retriever policy (if any), and per-credential renewal policy (if
any). If the passphrase is acceptable, the program should exit with status 0. Otherwise,
it should exit with non-zero status, causing the operation in progress (credential load,
passphrase change) to fail with the error message provided by the program's stdout.
Note: You must specify the full path to the external program. $GLOBUS_LOCATION
can't be used in the myproxy-server.config file.
105
MyProxy Admin Guide
max_proxy_lifetime This line specifies a server-wide maximum lifetime for retrieved proxy credentials. By
hours
default, no server-wide maximum is enforced. However, if this option is specified, the
server will limit the lifetime of any retrieved proxy credentials to the value given.
3. Deploying
A sample SysV-style boot script for MyProxy is installed at $GLOBUS_LOCATION/share/myproxy/etc.init.d.myproxy.
To install on Linux, copy the file to /etc/rc.d/init.d/myproxy and run 'chkconfig --add myproxy'. You will need to edit
the file to set the GLOBUS_LOCATION environment variable correctly.
Alternatively, to run the myproxy server out of inetd or xinetd, you need to do the following as root:
•
Add the entries in $GLOBUS_LOCATION/share/myproxy/etc.services.modifications to the /etc/services or
/etc/inet/services file.
•
Add the entries in $GLOBUS_LOCATION/share/myproxy/etc.inetd.conf.modifications to /etc/inetd.conf or
/etc/inet/inetd.conf, or copy $GLOBUS_LOCATION/share/myproxy/etc.xinetd.myproxy to /etc/xinetd.d/myproxy.
You'll need to modify the paths in the file according to your installation.
•
Reactivate the inetd (or xinetd). This is typically accomplished by sending the SIGHUP signal to the daemon. Refer
to the inetd or xinetd man page for your system.
4. Testing
To verify your myproxy-server installation and configuration, you can run the myproxy-server directly from your shell.
If using a host certificate, you will need to run the myproxy-server as root. First, make sure your Globus environment
is setup in your shell. Set the GLOBUS_LOCATION environment variable to the location of your MyProxy installation.
Then, depending on your shell, run one of the following commands.
For csh shells:
source $GLOBUS_LOCATION/etc/globus-user-env.csh
For sh shells:
. $GLOBUS_LOCATION/etc/globus-user-env.sh
Then, run $GLOBUS_LOCATION/sbin/myproxy-server -d. The -d argument runs the myproxy-server in debug
mode. It will write debugging messages to the terminal and exit after servicing a single request. You'll need to start it
once for each test request. In another shell, you can run the MyProxy client programs to test the server.
If run without the -d argument, the myproxy-server program will start up and background itself. It accepts connections
on TCP port 7512, forking off a separate child to handle each incoming connection. It logs information via the syslog
service under the daemon facility.
5. Security Considerations
You should choose a well-protected host to run the myproxy-server on. Consult with security-aware personnel at your
site. You want a host that is secured to the level of a Kerberos KDC, that has limited user access, runs limited services,
and is well monitored and maintained in terms of security patches.
106
MyProxy Admin Guide
For a typical myproxy-server installation, the host on which the myproxy-server is running must have /etc/grid-security
created and a host certificate installed. In this case, the myproxy-server will run as root so it can access the host certificate and key.
6. Troubleshooting
Please refer to the MyProxy user manual3.
3
../../security/myproxy/user-index.html#s-myproxy-user-troubleshooting
107
Chapter 14. CAS Admin Guide
1. Building and Installing
The CAS server and client are built and installed as part of a default GT 4.0 installation. For basic installation instructions,
refer to the GT 4.0 System Administrator's Guide1. No extra installation steps are required for this component.
The CAS client can be installed by itself. Please refer to Packaging details2.
2. Configuring
Note
Typically a single CAS server is run per VO and multiple client installations are done. This document contains
information about deploying a CAS server and is not needed for a CAS client installation. Please refer to the
documentation for CAS client install.
2.1. Configuration overview
The CAS service can be configured with a description of the VO the CAS service serves and the maximum lifetime
of the assertions it can issue. Also, the service needs to be configured with information about the back end database it
uses. Any database with a JDBC driver and reasonable SQL support can be used. That said, PostgreSQL was used for
development and testing and we strongly recommend that you use it. The CAS database schema to be used with PostgreSQL has been provided in $GLOBUS_LOCATION/etc/globus_cas_service/casDbSchema/cas_pgsql_database_schema.sql.
Other than that, the security settings of the service can be modified in the security descriptor associated with the CAS
service. It allows for configuring the credentials that will be used by the service, the type of authentication and message
protection required as well as the authorization mechanism. By default, the following security configuration is installed:
•
Credentials are determined by the container level security descriptor. If there is no container level security descriptor
or if it does not specify which credentials to use then default credentials are used.
•
Authentication and message integrity protection is enforced for all methods except queryResourceProperties and
getResourceProperty. This means that you may use any of GSI Transport, GSI Secure Message or GSI Secure
Conversation when interacting with the CAS service.
•
The standard authorization framework is not used for authorization. Instead the the service uses the back end
database to determine if the call is permitted.
Note
Changing required authentication and authorization methods will require matching changes to the clients that
contact this service.
1
2
http://www.globus.org/toolkit/docs/4.0/admin/docbook/
http://www.globus.org/toolkit/docs/4.0/admin/docbook/apb.html
108
CAS Admin Guide
Important
If the service is configured to use GSI Secure Transport, then container credentials are used for the handshake,
irrespective of whether service level credentials are specified.
2.2. Loading the CAS service at start up
By default, the CAS service is not loaded at start up. To change this behavior, uncomment the loadOnStartup property
set in $GLOBUS_LOCATION/etc/globus_cas_service/server-config.wsdd as shown below.
Once the loadOnStartup property is uncommented, the following happens at start up:
1.
The CAS service is loaded.
2.
The database connection pool is initialized.
3.
The service registers itself to the default MDS Index Service.
<service name="CASService" provider="Handler" use="literal"
style="document">
<!-- Uncomment if the service needs to be initialized at startup -->
<parameter name="loadOnStartup" value="true"/>
<parameter name="allowedMethodsClass"
value="org.globus.cas.CASPortType"/>
.
.
.
</service>
2.3. Changing the maximum assertion lifetime
To change the maximum assertion lifetime and VO description, set the parameters maxAssertionLifetime and
voDescription in $GLOBUS_LOCATION/etc/globus_cas_service/jndi-config.xml to the desired
values.
2.4. Configuring database backend
To alter the configuration of the database back end edit the databaseConfiguration section of $GLOBUS_LOCATION/etc/globus_cas_service/jndi-config.xml as follows:
109
CAS Admin Guide
Table 14.1. Database parameters
driver
The JDBC driver to be used
connectionURL
The JDBC connection url to be used when connecting to the database
userName
The user name to connect to the database as
password
The corresponding database password
activeConnections
The maximum number of active connections at any given instance
onExhaustAction
The action to perform when the connection pool is exhausted. If value is 0
then fail, if 1 then block and if 2 then grow the pool (get more connections)
maxWait
The maximum time in milliseconds that the pool will wait for a connection
to be returned
idleConnections
The maximum number of idle connections at any given time
2.5. Configuring security descriptor
To alter the security descriptor configuration refer to Security Descriptors3. The file to be changed is $GLOBUS_LOCATION/etc/globus_cas_service/security-config.xml.
2.6. Configuring with a GridFTP Server
CAS is used to administer access rights to files and directories and the GridFTP server can be configured to enforce
those rights.
For detailed information about configuring CAS for use with a GridFTP server, see http://www.globus.org/toolkit/docs/4.0/security/cas/WS_AA_CAS_HOWTO_Setup_GridFTP.html.
2.7. CAS auto-registration with default WS MDS Index
Service
With a default GT 4.0.1 installation, CAS is automatically registered with the default WS MDS Index Service4 running
in the same container for monitoring and discovery purposes.
Note
If you are using GT 4.0.0, we strongly recommend upgrading to 4.0.1 to take advantage of this capability.
However, if must use GT 4.0.0, or if this registration was turned off and you want to turn it back on, this is how it is
configured:
There is a jndi resource defined in $GLOBUS_LOCATION/etc/globus_cas_service/jndi-config.xml
as follows :
<resource name="mdsConfiguration"
type="org.globus.wsrf.impl.servicegroup.client.MDSConfiguration">
<resourceParams>
3
4
http://www.globus.org/toolkit/docs/4.0/security/authzframe/security_descriptor.html
http://www.globus.org/toolkit/docs/4.0/info/index/
110
CAS Admin Guide
<parameter>
<name>reg</name>
<value>true</value>
</parameter>
<parameter>
<name>factory</name>
<value>org.globus.wsrf.jndi.BeanFactory</value>
</parameter>
</resourceParams>
</resource>
To configure the automatic registration of CAS to the default WS MDS Index Service, change the value of the parameter <reg> as follows:
•
true turns on auto-registration; this is the default in GT 4.0.1.
•
false turns off auto-registration; this is the default in GT 4.0.0.
2.7.1. Configuring resource properties
By default, the VoDescription resource property (which describes the virtual organization relevant to the CAS
Service) is sent to the default Index Service.
You can configure which resource properties are sent in the registration.xml file, $GLOBUS_LOCATION/etc/globus_cas_service/registration.xml. The following is the relevant section of the file:
<Content xsi:type="agg:AggregatorContent"
xmlns:agg="http://mds.globus.org/aggregator/types">
<agg:AggregatorConfig xsi:type="agg:AggregatorConfig">
<agg:GetResourcePropertyPollType
xmlns:cas="http://www.globus.org/07/2004/cas">
<!-- Specifies that the index should refresh information
every 8 hours (28800000ms) -->
<agg:PollIntervalMillis>28800000</agg:PollIntervalMillis>
<!-- specifies that all Resource Properties should be
collected from the RFT factory -->
<agg:ResourcePropertyName>cas:VoDescription</agg:ResourcePropertyName>
</agg:GetResourcePropertyPollType>
</agg:AggregatorConfig>
<agg:AggregatorData/>
</Content>
111
CAS Admin Guide
2.8. Registering CAS manually with default WS MDS Index
Service
If a third party needs to register an CAS service manually, see Registering with mds-servicegroup-add5 in the WS
MDS Aggregator Framework documentation.
3. Deploying
The CAS service is deployed as a part of a standard toolkit installation. Please refer to the System Administrator's
Guide6 for details. Other than the steps described in the above guide, the following are needed to deploy the CAS service.
3.1. Obtaining credentials for the CAS service
The CAS service can run with its own service specific credentials. Instructions for obtaining service credentials may
be found here7.
The standard administrator clients that come with the distribution by default use identity authorization to authorize the
service they are running against (and expect that the CAS service has credentials that have the FQDN of the host the
server is running on and the service name "cas" as part of DN). Command line options can be used to specify the
identity of the CAS service, if the default identity is not used. The command in the above mentioned web page8 may
be altered as follows to get credentials for the CAS server:
casadmin$ grid-cert-request -service cas -host FQDN
The certificate and private key are typically placed in /etc/grid-security/cas-cert.pem and /etc/gridsecurity/cas-key.pem, respectively. In this document the locations of certificate and key files are referred to
as CAS_CERT_FILE and CAS_KEY_FILE, respectively.
If message level security is used, that is http protocol is used, the subject name in these credentials is expected by CAS
clients by default. If https is used, the container credentials are used for securing the socket and hence the container
credentials are expected by the client.
3.2. Database installation and configuration
CAS uses a back end database to store all user data. This section briefly describes the installation of such a database
and the creation of the database using the schema required by the CAS back end.
3.2.1. Installing the database
While any database with a JDBC driver and support for a reasonable set of SQL may be used, PostgreSQL has been
used for development and testing. The driver for the same is included in the distribution. If a different database is used,
the corresponding driver should be added to $GLOBUS_LOCATION/lib.
Brief instructions on how to install a database (specifically PostgreSQL) can be found here9. For more detailed instructions, please refer to documentation for the database you are installing.
5
http://www.globus.org/toolkit/docs/4.0/info/aggregator/re01.html#mds-servicegroup-add-registering
http://www.globus.org/toolkit/docs/4.0/admin/docbook/
7
http://www.globus.org/toolkit/docs/2.4/admin/guide-verify.html#ldapcert
8
http://www.globus.org/toolkit/docs/2.4/admin/guide-verify.html#ldapcert
9
http://www.globus.org/toolkit/3.0/ogsa/docs/admin/installation.html
6
112
CAS Admin Guide
3.2.2. Creating the CAS database
The schema for the database that needs to be created for CAS can be found at $GLOBUS_LOCATION/etc/globus_cas_service/casDbSchema/cas_pgsql_database_schema.sql
To create a database, for example casDatabase, on a PostgreSQL installation on a local machine run the following
commands:
casadmin$ createdb casDatabase
casadmin$ psql -U casadmin -d casDatabase -f
\
$GLOBUS_LOCATION/etc/globus_cas_service/casDbSchema/cas_pgsql_database_schema.sql
You will see a list of notices on the screen. Unless any of them say "ERROR", these are just informational output.
3.2.3. Bootstrapping the CAS database
The CAS database needs to be initialized with data specific to CAS and information about a super user to allow bootstrapping of CAS operations. The command line script cas-server-bootstrap can be used to achieve this.
cas-server-bootstrap [<options>] -d <dbPropFile> [ -implicit | -b <bootstrapFile> ]
Table 14.2. Command line options
-help
Prints the help message.
-debug
Runs the script with debug trace.
-d dbProperties- File name with database properties as follows:
File
dbDriver=database driver name
dbConnectionURL=database connection URL
dbUsername=Username to access database
dbPassword=Password for the above username
-b bootstrapFile This option populates the database with super user data and points to a file with data
to use for bootstrapping the database with a trust anchor and user configuration. A
template file for this can be found at $GLOBUS_LOCATION/share/globus_cas_service/bootstrapTemplate and a sample file can be found at
$GLOBUS_LOCATION/share/globus_cas_service/bootstrapSample.
-implicit
Populates the database with: a) CAS server implicit data—this adds the CAS server
itself as a CAS object and implicit service/actions like enrolling users, objects and
so on; and b) service/action and namespace relevant to FTP like read, write and so
on.
Sample bootstrap command:
To bootstrap the CAS database with both implicit and user data the following command can be used. Prior to running
the command, the following files need to be created with appropriate values filled in.
•
$GLOBUS_LOCATION/share/globus_cas_service/casDbProperties
113
CAS Admin Guide
dbDriver=org.postgresql.Driver
dbConnectionURL=jdbc:postgresql://127.0.0.1/casDatabase
dbUsername=tester
dbPassword=foobar
•
$GLOBUS_LOCATION/share/globus_cas_service/bootstrapProperties. The bootstrap command
adds a trust anchor and user to the database using direct SQL commands. This file is used to store configuration
information about the trust anchor and user to add. Comments in the sample file shown below describe each property.
# A nick name for trust anchor to add. The nickname used only with in the CAS
#database. If X509 certificates are are used, a trust anchor is a CA
ta-name=defaultTrustAnchor
#The authentication method used by this trust anchor. For example, X509
ta-authMethod=X509
# Authentication Data. If X509 is used, it is typically the DN of the CA.
ta-authData=/C=US/O=Globus/CN=Default CA
# A user nickname. This user is given super user priviledges in the CAS
# database
user-name=superUser
# The user subject, if X509 is used it is the DN from the user's credential.
#Please note format of the DN (slashes are used as seprator)
user-subject=/O=Grid/O=Globus/OU=something/CN=someone
# A user group to add this user to go. Any user is this group is given super
# user priviledges.
userGroupname=superUserGroup
•
Command to run:
casadmin$ cd $GLOBUS_LOCATION
casadmin$ bin/cas-server-bootstrap \
-d share/globus_cas_service/casDbProperties \
-implicit -b \ share/globus_cas_service/bootstrapProperties
Once the database has been created the CAS service needs to be configured to use it as described here10.
3.3. Deploying into Tomcat
CAS has been tested to work without any additional setup when deployed into Tomcat. Please follow these basic instructions11 to deploy GT4 services into Tomcat. Note that the Java WS Core module needs to be built and configured
as described in the previous sections.
10
11
../../security/cas/WS_AA_CAS_Public_Interfaces.html#s-cas-public-config
http://www.globus.org/toolkit/docs/4.0/common/javawscore/admin-index.html#javawscore-admin-tomcat-deploying
114
CAS Admin Guide
4. Testing
CAS has two sets of tests, one for the back end database access module and another set to test the service itself. To
install both tests, install the CAS test package (gt4-cas-delegation-test-3.9-src_bundle.tar.gz) using GPT. FILLME:
instructions into GLOBUS_LOCATION.
Assumptions:
•
A back end database has been set up and configured.
•
The CAS service and tests are installed in $GLOBUS_LOCATION.
•
The sample commands assume:
1.
The container is started up on localhost and port 8443.
2.
The database username is tester.
3.
The database name is casDatabase.
4.
The database is on host foo.bar.edu and the default port.
4.1. Testing the back end database module
1.
Run:
cd $GLOBUS_LOCATION
2.
Populate the file etc/globus_cas_unit_test/casTestProperties with the following database
configuration information:
Table 14.3. Test database properties
3.
dbDriver
The JDBC driver to be used
dbConnectionURL
The JDBC connection url to be used to connect to the database
dbUsername
The user name to use when connecting to the database
dbPassword
The password corresponding to the user name
The database needs to be empty for these tests to work and will be deleted by this target. Run:
ant -f share/globus_cas_unit_test/cas-test-build.xml testDatabase
4.
Test reports are placed in $GLOBUS_LOCATION/share/globus_cas_unit_test/cas-test-reports.
Important
The database bootstrap needs to be done again for the server to be ready to receive client requests.
115
CAS Admin Guide
4.2. Testing the CAS service module
These tests can be set up so as to be able to test multiple user scenarios or can be configured to run as just a single
identity. A file with configuration information needs to be setup for the tests to pick up parameters.
There are two test targets in the service tests. The first set of tests should be run with a set of credentials, where the
user is given super user permissions on the CAS server. These tests also set the permissions for another user to run the
second set of tests, without super user permissions. The first user DN is configured as property "user1SubjectDN" and
the second user is configured as property "user2SubjectDN".
The test can be simplified to use same credentials for both tests. In such a scenario, the DN of credential used to run
the tests should be configured as "user1SubjectDN" and the property "user2SubjectDN" can be set to any string.
All the configuration information for the test needs to be configured in the etc/globus_cas_unit_test/casTestProperties file. The database section of the properties file needs to be configured as described here. In addition
the following properties need to be configured to run the tests:
Table 14.4. Test properties
user1SubjectDN
The DN of the user running the first set of tests.
user2SubjectDN
The DN of the user running the second set of tests. This DN has to be different from
the value specified for user1SubjectDN. Note: Both tests can be run as the same user
as long as the DN of the certificate being used to run the tests matches the value
specified in user1SubjectDN. In this case, the value of user2SubjectDN can be set
to a arbitrary string.
maxAssertionLifetime Should match the value set in the service configuration as shown in Configuration
Information12.
host
Host on which the CAS service is running.
port
Port on which the CAS service is running.
securityType
This is an optional parameter indicating the security type to use. Can be set to message for Secure Message or conversation for Secure Conversation or
transport for Secure Transport (the default configuration).
protType
This is an optional parameter indicating the protection type to use. Can be set to
signature for integrity protection (the default configuration) or encryption
for privacy protection.
serverDN
This should be set to the DN of the certificate used by the CAS server if http is used.
If https is used, it should be the DN of the certificate used by the container. Note that
the DN should have "/" as delimiter rather than ","
Steps for testing:
1.
Run:
cd $GLOBUS_LOCATION
2.
12
Source $GLOBUS_LOCATION/etc/globus-devel-env.sh or $GLOBUS_LOCATION/etc/globusdevel-env.csh or $GLOBUS_LOCATION/etc/globus-devel-env.bat as appropriate for your environment.
../../security/cas/WS_AA_CAS_Public_Interfaces.html#s-cas-public-config
116
CAS Admin Guide
3.
In the test properties file, set user2SubjectDN to the subject in your regular proxy. The following returns the
appropriate string:
casadmin$ java org.globus.tools.CertInfo -subject -globus
4.
Generate an independent proxy using the following command:
casadmin$ java org.globus.tools.ProxyInit -independent
5.
Set the identity in the proxy generated from the above step as user1SubjectDN in the test properties file. The following command will return the relevant string:
casadmin$ java org.globus.tools.ProxyInfo -subject -globus
6.
Start the container on the port and host configured in Table 14.4, “Test properties”.
7.
The following command runs the tests for self permissions and sets up the database for a user with subjectDN
user2SubjectDN:
casadmin$ ant -f share/globus_cas_unit_test/cas-test-build.xml user1TestService
8.
To test as the second user, generate a proxy for the subject DN specified for the second user:
casadmin$ java org.globus.tools.ProxyInit
9.
The database needs to be empty for these tests to work and this target deletes all entries in database. Then run the
following:
casadmin$ ant -f share/globus_cas_unit_test/cas-test-build.xml user2TestService
10. Test reports are placed in $GLOBUS_LOCATION/share/globus_cas_unit_test/cas-test-reports.
11. After these tests, the CAS database needs to be reset. The following command will delete all entries from the
database:
casadmin$ psql -U casadmin -d casDatabase -f $GLOBUS_LOCATION/etc/globus_cas_utils/data
Important
The database bootstrap needs to be done again for the server to be ready to receive client requests.
5. Example of CAS Server Administration
The following contains an example of administering the CAS server policies using the CAS administrative clients described. FILLME: add link to admin command line when its done.
Alice, Bob and Carol are three members of a community who have set up a Community Authorization Service:
•
Alice's role is primarily to administer the CAS server.
117
CAS Admin Guide
•
Bob is an analyst who needs read access to much of the community data.
•
Carol is a scientist who needs to be able to both read and write community data.
These examples show how:
1.
Alice adds the users Bob and Carol to the CAS server.
2.
Alice adds a FTP server with some data available to the community.
3.
Alice adds permissions for the users using the CAS administration clients.
These examples assume the following:
•
Alice has installed the CAS server and bootstrapped the database with herself as super user. Please refer to previous
chapters in this guide for details on setting up the server and bootstrapping with data.
•
Alice's nickname on the CAS server is alice and at bootstrap she has created a user group, suGroup, which has
super user permissions on the database.
•
The CAS service URL is http://localhost:8080/wsrf/services/CASService.
•
For all commands listed below the environment variable $GLOBUS_LOCATION has been set to point to the
Globus Toolkit installation and the commands are run from $GLOBUS_LOCATION.
•
The environment variable CAS_SERVER_URL has been set to point to the CAS server URL, http://localhost:8080/wsrf/services/CASService.
5.1. Adding a user group
Since at the time of booting up the CAS server only the user group that has super user permissions on the CAS server
is created, Alice will want to create another user group to which new users can be added and to which permissions on
newly enrolled CAS entities may be given. This also eases the process of giving the same rights to many users. Given
that there are two types of roles in the community she might want to create two groups, analysts and scientists.
Also, all permissions on the newly created group will be given to users of a particular user group. For example, Alice
may want all users of the user group analysts to be able to manipulate the group.
To create a new user group Alice uses the cas-group-admin client. It requires a name for the new group being created,
say analysts.
alice%
cas-group-admin user create analysts analysts
This will create a user group analysts and give all users in that group the permission to manage the group (i.e add users,
remove users and so on). She can similarly create a group called scientists.
5.2. Adding a trust anchor
Prior to adding Bob and Carol to the CAS server, Alice needs to ensure that the trust anchors for both have been added.
If they share the trust anchor with Alice then this step can be skipped, since at bootstrap Alice's trust anchor would
have been added to the database.
In our example Alice and Carol share a trust anchor different from Bob's. Therefore, Alice needs to add Bob's trust
anchor by using the cas-enroll client with the trustAnchor option. She needs to provide details about the trust anchor
such as the authentication method and authentication data used.
118
CAS Admin Guide
alice%
cas-enroll trustAnchor analysts AbcTrust X509 "/C=US/O=some/CN=ABC CA"
The above will enroll a trust anchor with nickname AbcTrust that uses X509 as its authentication method and has the
DN specified in the command. The members of the analysts user group are given all rights on this object. This implies
that any user who has this trust anchor is assumed to present credentials signed by this trust anchor.
5.3. Adding users
Now Alice can add Bob and Carol as users using the cas-enroll command with the user option. She needs to provide
the user's subject DN and a reference to the trust anchor used by the user. As with any entity added to the CAS server,
the admin needs to choose a user group whose members will have all permissions on that entity. In this example, Alice
would like the members of the user group suUser to be able to manipulate the user entity Bob.
alice% cas-enroll user suUser bob "/O=Our Community/CN=Bob Foo" AbcTrust
Alice uses a similar command to add Carol to the CAS database.
5.4. Adding users to a user group
The CAS server allows rights to be assigned only to user groups and not to individual users. Hence, before Alice can
assign rights to Bob or Carol, she needs to add them to some user group. She does this by using the cas-group-addentry client with the user option to indicate she is adding to a user group. This client requires the group name and the
nickname of the user who needs to be added. To add Bob to the analysts group, the command would be:
alice% cas-group-add-entry user analysts bob
If a user group scientists was created, Carol could similarly be added as a member.
5.5. Adding a new FTP server
Alice now has the community users in the database. The next step is to add some resources. Because the community
currently has the FTP server foo.bar.edu available to it she will add it to the CAS database.
Each resource or object in the CAS server has a namespace associated with it that defines certain features. For example,
it can define the comparison algorithm that is to be used when the object's name is compared. It may also define the
base URL that should be prefixed to objects that belong to this namespace. In this case, Alice chooses to use the FTPDirectoryTree namespace that is added to the CAS server at startup. She uses the cas-enroll client with the object option
to add the FTP server to the CAS database:
alice% cas-enroll object suGroup ftp://foo.bar.edu/* FTPDirectoryTree
This command adds the FTP server as an object and gives all members of the suGroup rights to manipulate the object.
To be able to grant/revoke access on an individual directory, add an object for the directory. For example, if Alice
would like to be able to manipulate the data directory on the server as a separate entity, the following command will
add an object for that.
alice% cas-enroll object suGroup ftp://foo.bar.edu/data/* FTPDirectoryTree
5.6. Creating an object group
Alice suspects that the community will end up with more directories containing data on other servers that will have
polices identical with the ones on the /data directory on foo.bar.edu. To manage this she is going to create an object
119
CAS Admin Guide
group called data and assign foo.bar.edu/data to this group. This will allow her to grant rights on this group and easily
add other directories to this group later.
To create a group called data, she uses the cas-group-admin client with the group and create options:
alice% cas-group-admin object create suGroup data
This creates an object group called data and the members of suGroup get all rights on this group and hence should be
able to add/remove members, grant rights to add/delete from this group to others and also delete this group.
5.7. Adding members to an object group
Alice now can add foo.bar.edu/data to the data group. She can do this by using the cas-group-add-entry with the object
option. To add the above object, ftp://foo.bar.edu/data/* in the namespace FooFTPNamespace, to the object group
data Alice uses the following command:
alice% cas-group-add-entry object data object FooFTPNamespace ftp://foo.bar.edu/data/*
In the above command:
•
the first object refers to the group type.
•
data is the name of the object group.
•
the second object refers to the type of CAS entity that is being added as a member.
•
the last two parameters define the namespace and the object that needs to be added.
5.8. Adding service types
Alice now needs to add information about the kinds of rights that can be granted for these objects. These are stored as
service types and relevant actions are mapped to these service types.
In this scenario, the kind of service types that Alice should add would be file, directory and so on. To do so the casenroll client with the serviceType option may be used. To add a service type called file and give members of suGroup
all rights on this service type Alice uses the following command.
alice% cas-enroll serviceType suGroup file
5.9. Adding action mappings
The relevant action mappings to the above mentioned service types would be read, write and so on. Alice needs to add
these mappings to the database so that she can grant rights that allow a user to have file/read or file/write permissions
on some object.
To add action mappings to a service type, she uses the cas-action client with the add option. The following command
adds a mapping of action read to service type file.
alice% cas-action add file add
Similarly, she can add other mappings, like write, to this service type.
120
CAS Admin Guide
5.10. Granting permissions
Alice now has resources in the object group data and users in the user groups analysts and scientists. She now wants
to grant permissions on the data group to the analysts and scientists, namely read permissions to the analysts and read
and write permissions to the scientists.
To grant permissions Alice needs to use the cas-rights-admin with the grant option. To give read permissions to
the analysts group Alice runs:
alice% cas-rights-admin grant analysts objectGroup data serviceAction file read
She similarly grants rights to scientists group.
6. Security Considerations
•
The database username/password is stored in the service configuration file and the test properties file. Ensure correct
permissions to protect the information.
7. Troubleshooting
7.1. Database connectivity errors
If the CAS service fails with following error:
faultCode: {http://schemas.xmlsoap.org/soap/envelope/}Server.userException
faultSubcode:
faultString: org.apache.commons.dbcp.DbcpException: Connection
refused. Check t hat the hostname and port are correct and that the
postmaster is accepting TCP/I P connections.
•
Ensure the database properties (connectionURL, userName, password) in $GLOBUS_LOCATION/globus_cas_service/jndi-config.xml are correct.
•
Ensure that the database is set up with permission to receive TCP/IP connections.
7.2. Credential Errors
The following are some common problems that may cause clients or servers to report that credentials are invalid:
7.2.1. Your proxy credential may have expired
Use grid-proxy-info to check whether the proxy credential has actually expired. If it has, generate a new proxy with
grid-proxy-init.
121
CAS Admin Guide
7.2.2. The system clock on either the local or remote system is wrong
This may cause the server or client to conclude that a credential has expired.
7.2.3. Your end-user certificate may have expired
Use grid-cert-info to check your certificate's expiration date. If it has expired, follow your CA's procedures to get a
new one.
7.2.4. The permissions may be wrong on your proxy file
If the permissions on your proxy file are too lax (for example, if others can read your proxy file), Globus Toolkit clients
will not use that file to authenticate. You can "fix" this problem by changing the permissions on the file or by destroying
it (with grid-proxy-destroy) and creating a new one (with grid-proxy-init). However, it is still possible that someone
else has made a copy of that file during the time that the permissions were wrong. In that case, they will be able to
impersonate you until the proxy file expires or your permissions or end-user certificate are revoked, whichever happens
first.
7.2.5. The permissions may be wrong on your private key file
If the permissions on your end user certificate private key file are too lax (for example, if others can read the file),
grid-proxy-init will refuse to create a proxy certificate. You can "fix" this by changing the permissions on the private
key file; however, you will still have a much more serious problem: it's possible that someone has made a copy of your
private key file. Although this file is encrypted, it is possible that someone will be able to decrypt the private key, at
which point they will be able to impersonate you as long as your end user certificate is valid. You should contact your
CA to have your end-user certificate revoked and get a new one.
7.2.6. The remote system may not trust your CA
Verify that the remote system is configured to trust the CA that issued your end-entity certificate. See the Administrator's
Guide13 for details.
7.2.7. You may not trust the remote system's CA
Verify that your system is configured to trust the remote CA (or that your environment is set up to trust the remote
CA). See the Administrator's Guide14 for details.
7.2.8. There may be something wrong with the remote service's credentials
It is sometimes difficult to distinguish between errors reported by the remote service regarding your credentials and
errors reported by the client interface regarding the remote service's credentials. If you can't find anything wrong with
your credentials, check for the same conditions (or ask a remote administrator to do so) on the remote system.
13
14
http://www.globus.org/toolkit/docs/4.0/admin/docbook/
http://www.globus.org/toolkit/docs/4.0/admin/docbook/
122
CAS Admin Guide
7.3. Some tools to validate certificate setup
7.3.1. Check that the user certificate is valid
openssl verify -CApath /etc/grid-security/certificates
-purpose sslclient ~/.globus/usercert.pem
7.3.2. Connect to the server using s_clien
openssl s_client -ssl3 -cert ~/.globus/usercert.pem -key ~/.globus/userkey.pem -CApath /etc
Here <host:port> denotes the server and port you connect to.
If it prints an error and puts you back at the command prompt, then it typically means that the server has closed the
connection, i.e. that the server was not happy with the client's certificate and verification. Check the SSL log on the
server.
If the command "hangs" then it has actually opened a telnet style (but secure) socket, and you can "talk" to the server.
You should be able to scroll up and see the subject names of the server's verification chain:
depth=2 /DC=net/DC=ES/O=ESnet/OU=Certificate Authorities/CN=ESnet Root CA 1
verify return:1
depth=1 /DC=org/DC=DOEGrids/OU=Certificate Authorities/CN=DOEGrids CA 1
verify return:1
depth=0 /DC=org/DC=doegrids/OU=Services/CN=wiggum.mcs.anl.gov
verify return:1
In this case there were no errors. Errors would give you an extra line next to the subject name of the certificate that
caused the error
7.3.3. Check that the server certificate is valid
Requires root login on server.
openssl verify -CApath /etc/grid-security/certificates -purpose sslserver /etc/grid-sec
123
Chapter 15. RLS Admin Guide
1. Building and Installing
Starting with GT version 4.0.5, the RLS is now built and installed as part of a default GT installation. The only extra
installation step required for this component is to set the LD_LIBRARY_PATH prior to installation. For detailed instructions on building and installing RLS, see Appendix A, Building and Installing RLS.
If you are using a GT release prior to 4.0.5, we highly recommend upgrading your installation1 to the latest version.
Important
The postinstall step of the RLS installation requires that the LD_LIBRARY_PATH include $GLOBUS_LOCATION/lib.
Use the following command for bash shell:
% export LD_LIBRARY_PATH=${LD_LIBRARY_PATH}:$GLOBUS_LOCATION/lib
Use the following command for C shell:
% setenv LD_LIBRARY_PATH ${LD_LIBRARY_PATH}:$GLOBUS_LOCATION/lib
If you installed GT without setting the LD_LIBRARY_PATH you will need to set it and then run the RLS setup script
as follows:
% $GLOBUS_LOCATION/setup/globus/setup-globus-rls-server
2. Configuring
2.1. Configuration overview
Configuration settings for the RLS are specified in the globus-rls-server.conf file.
If the configuration file is not specified on the command line (see the -c2 option) then it is looked for in both:
•
$GLOBUS_LOCATION/etc/globus-rls-server.conf
•
/usr/local/etc/globus-rls-server.conf if GLOBUS_LOCATION is not set
NOTE: command line options always override items found in the configuration file.
The configuration file is a sequence of lines consisting of a keyword, whitespace, and a value. Comments begin with
# and end with a newline.
1
2
/toolkit/downloads/
http://www.globus.org/toolkit/docs/4.0/data/rls/RLS_Public_Interfaces.html#s-rls-Public_Inerfaces-config
124
RLS Admin Guide
2.2. Syntax of the interface
125
RLS Admin Guide
Table 15.1. Settings
acl user: permission [permission]
acl entries may be a combination of DNs and local usernames. If a DN is
not found in the gridmap file then the file is used to search the acl list.
A gridmap file may also be used to map DNs to local usernames, which in turn
are matched against the regular expressions in the acl list to determine the
user's permissions.
user is a regular expression matching distinguished names (or local usernames
if a gridmap file is used) of users allowed to make calls to the server.
There may be multiple acl entries, with the first match found used to determine
a user's privileges.
[permission] is one or more of the following values:
authentication
true|false
•
lrc_read Allows client to read an LRC.
•
lrc_update Allows client to update an LRC.
•
rli_read Allows client to read an RLI.
•
rli_update Allows client to update an RLI.
•
admin Allows client to update an LRC's list of RLIs to send updates to.
•
stats Allows client to read performance statistics.
•
all Allows client to do all of the above.
Enable or disable GSI authentication.
The default value is true.
If authentication is enabled (true), clients should use the URL schema rls:
to connect to the server.
If authentication is not enabled (false), clients should use the URL schema
rlsn:.
db_pwd password
Password to use to connect to the database server.
The default value is changethis.
db_user databaseuser
Username to use to connect to database server.
The default value is dbperson.
idletimeout seconds Seconds after which idle connections close.
The default value is 900.
loglevel N
Sets loglevel to N (default is 0). Higher levels mean more verbosity.
126
RLS Admin Guide
lrc_bloomfilter_num- Number of hash functions to use in Bloom filters.
hash N
The default value is 3.
Possible values are 1 through 8.
This value, in conjunction withlrc_bloomfilter_ratio, will determine
the number of false positives that may be expected when querying an RLI that
is updated via Bloom filters.
Note: The default values of 3 and 10 give a false positive rate of approximately
1%.
lrc_bloomfilter_ra- Sets ratio of bloom filter size (in bits) to number of LFNs in the LRC catalog
(in other words, size of the Bloom filter as a multiple of the number of LFNs
tio N
in the LRC database.) This is only meaningful if Bloom filters are used to update
an RLI. Too small a value will generate too many false positives, while too
large a value wastes memory and network bandwidth.
The default value is 10.
Note: The default values of 3 and 10 give a false positive rate of approximately
1%.
lrc_buffer_time N
LRC to RLI updates are buffered until either the buffer is full or this much time
in seconds has elapsed since the last update.
The default value is 30.
lrc_dbname
Name of LRC database.
The default value is lrcdb.
lrc_server
true|false
If LRC server, the value should be true.
The default value is false.
lrc_update_bf
seconds
Interval in seconds between LRC to RLI updates when the RLI is updated by
Bloom filters. In other words, how often an LRC server does a Bloom filter
soft state update.
This can be much smaller than the interval between updates without using
Bloom filters (lrc_update_ll).
The default value is 300.
lrc_update_factor N If lrc_update_immediate mode is on, and the LRC server is in sync with
an RLI server (an LRC and RLI are synced if there have been no failed updates
since the last full soft state update), then the interval between RLI updates for
this server (lrc_update_ll) is multiplied by the value of this option.
lrc_update_immedi- Turns LRC to RLI immediate mode updates on (true) or off (false).
ate true|false
The default value is false.
lrc_update_ll
seconds
Number of seconds before an LRC server does an LFN list soft state update.
The default value is 86400.
127
RLS Admin Guide
lrc_update_retry
seconds
Seconds to wait before an LRC server will retry to connect to an RLI server
that it needs to update.
The default value is 300.
maxbackoff seconds Maximum seconds to wait before re-trying listen in the event of an I/O error.
The default value is 300.
maxfreethreads N
Maximum number of idle threads. Excess threads are killed.
The default value is 5.
maxconnections N
Maximum number of simultaneous connections.
The default value is 100.
maxthreads N
Maximum number of threads running at one time.
The default value is 30.
myurl URL
URL of server.
The default value is rls://<hostname>:port
odbcini filename
Sets environment variable ODBCINI.
If not specified, and ODBCINI is not already set, then the default value is
$GLOBUS_LOCATION/var/odbc.ini.
pidfile filename
Filename where pid file should be written.
The default value is $GLOBUS_LOCATION/var/<programname>.pid.
port N
Port the server listens on.
The default value is 39281.
result_limit limit Sets the maximum number of results returned by a query.
The default value is 0 (zero), which means no limit.
If a query request includes a limit greater than this value, an error (GLOBUS_RLS_BADARG) is returned.
If the query request has no limit specified, then at most result_limit records are returned by a query.
rli_bloomfilter
true|false
RLI servers must have this set to accept Bloom filter updates.
If true, then only Bloom filter updates are accepted from LRCs.
If false, full LFN lists are accepted.
Note: If Bloom filters are enabled, then the RLI does not support wildcarded
queries.
128
RLS Admin Guide
rli_bloomfilter_dir If an RLI is configured to accept bloom filters (rli_bloomfilter true),
none|default|path- then Bloom filters may be saved to this directory after updates.
name
This directory is scanned when an RLI server starts up and is used to initialize
Bloom filters for each LRC that updated the RLI.
This option is useful when you want the RLI to recover its data immediately
after a restart rather than wait for LRCs to send another update.
If the LRCs are updating frequently, this option is unnecessary and may be
wasteful in that each Bloom filter is written to disk after each update.
•
none
Bloom filters are not saved to disk.
This is the default.
•
default
Bloom filters are saved to the default directory:
•
•
$GLOBUS_LOCATION/var/rls-bloomfilters if GLOBUS_LOCATION is set
•
else, /tmp/rls-bloomfilters
pathname
Bloom filters are saved to the named directory.
Any other string is used as the directory name unchanged.
The Bloom filter files in this directory have the name of the URL of the
LRC that sent the Bloom filter, with slashes(/) changed to percent signs (%)
and ".bf" appended.
rli_dbname database Name of the RLI database.
The default value is rlidb.
rli_expire_int
seconds
Interval (in seconds) between RLI expirations of stale entries. In other words,
how often an RLI server will check for stale entries in its database.
The default value is 28800.
rli_expire_stale
seconds
Interval (in seconds) after which entries in the RLI database are considered stale
(presumably because they were deleted in the LRC).
The default value is 86400.
This value should be no smaller than lrc_update_ll.
Stale RLI entries are not returned in queries.
Note: If the LRC server is responding, this value is not used. Instead the value
of lrc_update_ll or lrc_update_bf is retrieved from the LRC server,
multiplied by 1.2, and used as the value for this option.
129
RLS Admin Guide
rli_server
true|false
If an RLI server, the value should be true.
The default value is false.
rlscertfile filename
Name of the X.509 certificate file identifying the server.
This value is set by setting environment variable X509_USER_CERT.
rlskeyfile filename Name of the X.509 key file for the server.
This value is set by setting environment variable X509_USER_KEY.
startthreads N
Number of threads to start initially.
The default value is 3.
timeout seconds
Timeout (in seconds) for calls to other RLS servers (e.g., for LRC calls to send
an update to an RLI).
3. Deploying
This section does not apply to the RLS.
4. Testing
You can use the programs globus-rls-admin and globus-rls-cli to test functionality. See their respective
man pages for details on their use.
1.
Start the server in debug mode with the command:
$GLOBUS_LOCATION/bin/globus-rls-server -d [-N]
The -N option is helpful: if you do not have a host certificate for the server host, or a user certificate for yourself,
it disables authentication.
2.
Ping the server using globus-rls-admin:
$GLOBUS_LOCATION/bin/globus-rls-admin -p rls://serverhost
If you disabled authentication (by starting the server with the -N option), then use this command:
$GLOBUS_LOCATION/bin/globus-rls-admin -p rlsn://serverhost
5. Security Considerations
Security recommendations include:
•
Dedicated User Account: It is recommended that users create a dedicated user account for installing and running
the RLS service (e.g., globus as recommended in the general GT installation instructions). This account may be
used to install and run other services from the Globus Toolkit.
•
Key and Certificate: It is recommended that users do not use their hostkey and hostcert for use by the RLS service.
Create a containerkey and containercert with permissions 400 and 644 respectively and owned by the globus
user. Change the rlskeyfile and rlscertfile settings in the RLS configuration file ($GLOBUS_LOCATION/etc/globus-rls-server.conf) to reflect the appropriate filenames.
130
RLS Admin Guide
•
LRC and RLI Databases: Users must ensure security of the RLS data as maintained by their chosen database
management system. Appropriate precautions should be made to protect the data and access to the database. Such
precautions may include creating a user account specifically for RLS usage, encrypting database users' passwords,
etc.
•
RLS Configuration: It is recommended that the RLS configuration file ($GLOBUS_LOCATION/etc/globusrls-server.conf) be owned by and accessible only by the dedicated user account for RLS (e.g., globus
account per above recommendations). The file contains the database user account and password used to access the
LRC and RLI databases along with important settings which, if tampered with, could adversely affect the RLS
service.
6. Troubleshooting
Information on troubleshooting can be found in the FAQ3.
7. Usage statistics collection by the Globus Alliance
The following usage statistics are sent by RLS Server by default in a UDP packet:
•
Component identifier
•
Usage data format identifier
•
Time stamp
•
Source IP address
•
Source hostname (to differentiate between hosts with identical private IP addresses)
•
Version number
•
Uptime
•
LRC service indicator
•
RLI service indicator
•
Number of LFNs
•
Number of PFNs
•
Number of Mappings
•
Number of RLI LFNs
•
Number of RLI LRCs
•
Number of RLI Senders
•
Number of RLI Mappings
3
http://www.globus.org/toolkit/data/rls/rls_faq.html
131
RLS Admin Guide
•
Number of threads
•
Number of connections
The RLS sends the usage statistics at server startup, server shutdown, and once every 24 hours when the service is
running.
If you wish to disable this feature, you can set the following environment variable before running the RLS:
export GLOBUS_USAGE_OPTOUT=1
By default, these usage statistics UDP packets are sent to usage-stats.globus.org:4180 but can be redirected
to another host/port or multiple host/ports with the following environment variable:
export GLOBUS_USAGE_TARGETS="myhost.mydomain:12345 myhost2.mydomain:54321"
You can also dump the usage stats packets to stderr as they are sent (although most of the content is non-ascii). Use
the following environment variable for that:
export GLOBUS_USAGE_DEBUG=MESSAGES
Also, please see our policy statement4 on the collection of usage statistics.
4
http://www.globus.org/toolkit/docs/4.0/Usage_Stats.html
132
Appendix A. Building and Installing RLS
The following procedures include the optional steps to set up an RLS server using MySQL or PostgreSQL and ODBC
libraries of your choice. Post setup configuration (tuning the server parameters, etc) are not included in this document.
1. Requirements
You need to download and install the following software (follow the links to download):
•
Installation of GT 4.01
•
A Relational Database Server (RDBMS) that supports ODBC. We provide instructions for PostgreSQL and MySQL.
•
•
If you use PostgreSQL2, you'll also need psqlODBC3 (the ODBC driver for PostgreSQL).
•
If you use MySQL4, you'll also need the MyODBC5 (Connector/ODBC) packages. MySQL's top level installation directory must be specified. By default these are assumed to be in $GLOBUS_LOCATION.
The iODBC6 package is used to interface to the ODBC layer of the RDBMS. The location of iODBC and the
odbc.ini file must be specified before installing the RLS server.
2. Setting environment variables
The following environment variables can be used to override the default locations. These should be set prior to installing
the RLS server.
The location of iODBC and the odbc.ini file must be specified before installing the RLS server. Also, if you're using
MySQL its top level installation directory must be specified. By default, these are assumed to be in $GLOBUS_LOCATION.
In addition, if you're building from source and wish to build the client Java API (included in the server bundles), you
need to set the path to the Java Development Toolkit (JDK), version 1.4 or later.
Table A.1. RLS Build Environment Variables
Variable
Default
GLOBUS_IODBC_PATH
$GLOBUS_LOCATION
ODBCINI
$GLOBUS_LOCATION/var/odbc.ini
JAVA_HOME
none
GLOBUS_MYSQL_PATH
$GLOBUS_LOCATION (if using MySQL)
You can use the following commands to set these variables. You only need to set these variables for RLS installation;
they are not used when running RLS. This document assumes you are using the csh shell or one of its variants. If
you're using sh or something similar (eg bash), you should change the setenv commands to export variable=value.
1
http://www.globus.org/toolkit/docs/4.0/admin/docbook/
http://www.postgresql.org
3
http://gborg.postgresql.org
4
http://www.mysql.com
5
http://www.mysql.com
6
http://www.iodbc.org
2
133
Building and Installing RLS
•
setenv GLOBUS_IODBC_PATH $GLOBUS_LOCATION
•
setenv ODBCINI $GLOBUS_LOCATION/var/odbc.ini
•
setenv JAVA_HOME /usr/jdk/1.4
•
setenv GLOBUS_MYSQL_PATH $GLOBUS_LOCATION # if using MySQL
3. Installing iODBC
Caution
Please note that at the time of the GT 4.0 release, incompatibility issues were identified between iODBC and
MyODBC. Our brief evaluation indicated that iODBC 3.52.2 is incompatible with MyODBC 3.51.11 and
possibly earlier versions as well. We have used iODBC 3.51.1 and 3.51.2 in combination with MyODBC
3.51.06. Installing incompatible iODBC and MyODBC versions from binary packages may not indicate an
error until runtime. Building these libraries from source packages may be the best way to ensure that you have
installed a compatible combination.
Important
Recommended Version: 3.51.2
3.1. Run the install commands
The following commands were used during RLS development to install iODBC.
% cd $IODBCSRC % ./configure --prefix=$GLOBUS_IODBC_PATH --disable-gtktest --with-pthreads
--with-iodbc-inidir=$ODBCINIDIR % gmake % gmake install
where:
•
$IODBCSRC is the directory where you untarred the iODBC sources
•
$ODBCINIDIR is the directory where you plan to install the odbc.ini file (which you will create in the next
step).
3.2. Create the odbc.ini file
Create the odbc.ini file in $ODBCINIDIR:
The contents should include the path to where you intend to install the ODBC driver for your RDBMS (such as
psqlodbc.so or libmyodbc3.so).
The following is an example that should work with psqlODBC. It assumes you will name your LRC and RLI databases
lrc1000 and rli1000:
[ODBC Data Sources]
lrc1000=lrc database
rli1000=rli database
[lrc1000]
134
Building and Installing RLS
Description=LRC database
DSN=lrc1000
Servertype=postgres
Servername=localhost
Database=lrc1000
ReadOnly=no
[rli1000]
Description=RLI database
DSN=rli1000
Servertype=postgres
Servername=localhost
Database=rli1000
ReadOnly=no
[Default]
Driver=/path/to/psqlodbc.so
Port=5432
Note: You do not need an RLI database if you plan to use Bloom filters for LRC to RLI updates (Bloom filters are kept
in memory). In this case you can omit the RLI entries below.
Bug: psqlODBC will not find a Data Source Name (DSN) in the system odbc.ini file $ODBCINIDIR/odbc.ini. It will
find DSNs in the user's odbc.ini file if it exists at $HOME/.odbc.ini.
One work around is to copy or symlink the system odbc.ini file to each user's home directory. psqlODBC does find
system DSNs in a file called odbcinst.ini, which is looked for in the etc subdirectory where iODBC was installed,
$GLOBUS_IODBC_PATH/etc/odbcinst.ini. So another option besides creating user .odbc.ini files is to copy or symlink
the system odbc.ini file to $GLOBUS_IODBC_PATH/etc/odbcinst.ini. Someone who understands this better may have
a better answer.
3.3. Changing how clients connect to the server (for MySQL
only)
If you're using MySQL and have changed how MySQL clients connect to the MySQL server in my.cnf (e.g., the port
number or socket name), then you should set the option to 65536 in odbc.ini for each database. This tells MyODBC
to read the client section of my.cnf to find the changed connection parameters.
[lrc1000] option = 65536
[rli1000] option = 65536
4. Installing the relational database
We include instructions for both PostgreSQL (Section 4.1, “Using PostgreSQL”) and MySQL (Section 4.2, “Using
MySQL ”).
4.1. Using PostgreSQL
If your relational database of choice is PostgreSQL, you need to install and configure both PostgreSQL and psqlODBC
(the ODBC driver for PostgreSQL) as follows:
135
Building and Installing RLS
4.1.1. Installing PostgreSQL
4.1.1.1. Running the install commands
The commands used to install PostgreSQl 7.2.3 on the RLS development system are as follows.
% cd $POSTGRESSRC % ./configure --prefix=$GLOBUS_LOCATION % gmake % gmake install
$POSTGRESSRC is the directory where the PostgreSQL source was untarred.
4.1.1.2. Initializing PostgreSQL
Initialize PostgreSQL and start the server by running:
initdb -D /path/to/postgres-datadir
postmaster -D /path/to/postgres-datadir -i -o -F
The -o -F flags to postmaster disable fsync() calls after transactions (which, although it improves performance,
raises the risk of DB corruption).
4.1.1.3. Creating the user and password
Create the database user (in our example, called dbuser) and password that RLS will use:
createuser -P dbuser
Important: Be sure to do periodic vacuum and analyze commands on all your PostgreSQl databases. The PostgreSQl documentation recommends doing this daily from cron. Failure to do this can seriously degrade performance,
to the point where routine RLS operations (such as LRC to RLI soft state updates) timeout and fail. Please see the
PostgreSQl documentation for further details.
4.1.2. Installing psqlODBC
Install psqlODBC by running the following commands (which were used to install psqlODBC 7.2.5):
%
%
%
%
%
cd $PSQLODBCSRC
setenv CPPFLAGS -I$(IODBC_INSTALLDIR)/include
./configure --prefix=$GLOBUS_LOCATION --enable-pthreads
gmake
gmake install
where $PSQLODBCSRC is the directory where you untarred the psqlODBC source.
Note: The configure script that comes with psqlODBC supports a --with-iodbc option. However, when the RLS
developers used this it resulted in RLS servers with corrupt memory that would dump core while opening the database
connection. It seems to work fine (with iODBC) without this option.
You can now continue to instructions for Installing the RLS Server. See Section 5, “Installing the RLS Server”.
4.2. Using MySQL
If your relational database of choice is MySQL, you'll need to install and configure both MySQL and the MyODBC
(Connector/ODBC) packages as follows:
136
Building and Installing RLS
4.2.1. Installing MySQL
Once you've installed and configured MySQL you must start the database server and create the database user/password
that RLS will use to connect to the database.
4.2.1.1. Starting database server
Start the database server by running:
mysqld_safe [--defaults-file path to your my.cnf file ]
4.2.1.2. Creating the user and password
To create the database user and password that RLS will use you must run the MySQL command line tool mysql, and
specify the following commands:
mysql>
mysql>
mysql>
use mysql;
grant all on lrc1000.* to dbuser@localhost identified by 'dbpassword';
grant all on rli1000.* to dbuser@localhost identified by 'dbpassword';
These commands assume the username you will create for RLS is dbuser with password dbpassword, and the
database(s) you will create for your LRC and/or RLI server are lrc1000 and rli1000.
Creation of the LRC and/or RLI databases is covered below in Section 6, “Configuring the RLS Database”.
4.2.2. Installing MyODBC
Important
Recommended Version: 3.51.06
Please read the note under Section 3, “Installing iODBC”.
If you cannot locate this version on a public site or mirror, you can find it here7.
These instructions assume that iODBC was installed in $GLOBUS_LOCATION. This may be changed by changing
the --with-iodbc-includes and --with-iodbc-libs options or the --with-iodbc option.
4.2.2.1. Running install commands
Install MyODBC in $GLOBUS_LOCATION (you may choose a different directory if you wish, by changing the
--prefix option to configure below):
% cd $MYODBCSRC
% ./configure --prefix=$GLOBUS_LOCATION
--with-mysql-libs=$GLOBUS_MYSQL_PATH/lib/mysql
--with-mysql-includes=$GLOBUS_MYSQL_PATH/include/mysql
--with-iodbc=$GLOBUS_LOCATION
--with-odbc-ini=$ODBCINIDIR
% gmake
% gmake install
where:
7
http://www.isi.edu/~schuler/MyODBC-3.51.06.tar.gz
137
Building and Installing RLS
•
$MYODBCSRC is the directory where you untarred the MyODBC sources.
•
$ODBCINIDIR is the directory where you created the odbc.ini file.
Bug: There is a bug in MyODBC version 3.51.05 and earlier. The debug code is not thread safe, and the RLS server
will get a segmentation violation and die if this code is enabled. In versions 3.51.05 and later the debug code can be
disabled with the configure option --without-debug. In earlier versions it is disabled by defining DBUG_OFF, as
in the following example:
setenv CFLAGS -DBUG_OFF
You can now continue to instructions for installing the RLS Server. See Section 5, “Installing the RLS Server”.
5. Installing the RLS Server
Download the appropriate bundle. RLS is included as part of the Globus Toolkit bundle. See the Globus Toolkit Development Downloads8 for a listing of available software.
RLS is installed as a part of the standard install. For basic installation instructions, see the Installation Guide9.
6. Configuring the RLS Database
RLS server configuration is specified in $GLOBUS_LOCATION/etc/globus-rls-server.conf; please see
the man page for globus-rls-server(8) for complete details. Some of the configuration options (such as database
user/password) are mentioned below.
6.1. Creating a user and password
Create a database user that the RLS server will use to connect to the DBMS.
The database user and password you pick must be specified in the RLS server configuration file, as well as the name
of the database(s) you will create (see below).
db_user dbuser
db_pwd dbpassword
lrc_dbname lrc1000
rli_dbname rli1000
# optional (if LRC server)
# optional (if RLI server)
6.2. Choosing database for RLS server
Decide which database(s) the RLS server will use (and that you will create in Section 6.410):
•
If the RLS server is a Local Replica Catalog (LRC) server you, will need to create the LRC database.
•
If the server is a Replica Location Index (RLI) server, you may need to create a RLI database.
An RLI server can receive updates from LRC servers in one of two forms, as LFN lists (in which case the RLI database
must be created) or as highly compressed Bloom filters. Since Bloom filters are so small, they are kept in memory and
no database is required. An RLS server can be configured as both an LRC and RLI server.
8
http://www.globus.org/toolkit/downloads/development/
http://www.globus.org/toolkit/docs/4.0/admin/docbook/ch04.html
10
#id2846800
9
138
Building and Installing RLS
6.3. Configuring database schema
Configure the schema file(s) for the database(s) you will create.
GT 4.0 installed the schema files for the LRC and RLI databases in $GLOBUS_LOCATION/setup/globus.
For PostgreSQL, use:
•
globus-rls-lrc-postgres.sql
•
globus-rls-rli-postgres.sql
For MySQL , use:
•
globus-rls-lrc-mysql.sql
•
globus-rls-rli-mysql.sql
Edit these files to set the name of the database user you created for RLS and the names of the databases configured in
$GLOBUS_LOCATION/etc/globus-rls-server.conf.
By default the database user is dbuser, the LRC database name is lrc1000 and the RLI database name is rli1000.
6.4. Creating the database(s)
Create the database(s) with the following commands (note once again that you do not need to create an RLI database
if you are configuring an RLI server updated by Bloom filters):
For PostgreSQL, run:
createdb -O dbuser -U dbuser
createdb -O dbuser -U dbuser
psql -W -U dbuser -d lrc1000
psql -W -U dbuser -d rli1000
-W
-W
-f
-f
lrc1000
rli1000
$GLOBUS_LOCATION/setup/globus/globus-rls-lrc-postgres.sql
$GLOBUS_LOCATION/setup/globus/globus-rls-rli-postgres.sql
For MySQL, run:
mysql -p -u dbuser
mysql -p -u dbuser
< $GLOBUS_LOCATION/setup/globus/globus-rls-lrc-mysql.sql
< $GLOBUS_LOCATION/setup/globus/globus-rls-rli-mysql.sql
Important
Before continuing, it is recommended that you first test the database configuration using the iodbctest
utility provided with a typical iODBC installation.
Testing with iODBC, run:
% $GLOBUS_IODBC_PATH/bin/iodbctest "DSN=lrc1000;UID=dbuser;PWD=dbpassword"
iODBC Demonstration program
This program shows an interactive SQL processor
Driver Manager: 03.51.0002.0224
Driver: 03.51.06
SQL>show tables;
139
Building and Installing RLS
Tables_in_lrc1000
----------------t_attribute
t_date_attr
t_flt_attr
t_int_attr
t_lfn
t_map
t_pfn
t_rli
t_rlipartition
t_str_attr
result set 1 returned 10 rows.
SQL>quit
Have a nice day.
Use the show tables command if you are using a MySQL database. Use the postgresql equivalent command if
you are using a Postgresql database. Also the driver version number (03.51.06 above) will vary depending on the
ODBC driver you are using.
Warning
If the the above test fails, then RLS will not run properly. You must have a valid database configuration before
proceeding with RLS installation and configuration.
7. Configuring the RLS Server
Review the server configuration file $GLOBUS_LOCATION/etc/globus-rls-server.conf and change
any options you want. The server man page globus-rls-server(8) has complete details on all the options.
A minimal configuration file for both an LRC and RLI server would be:
# Configure the database connection info
db_user dbuser
db_pwd dbpassword
# If the server is an LRC server
lrc_server true
lrc_dbname lrc1000
# If the server is an RLI server
rli_server true
rli_dbname rli1000 # Not needed if updated by Bloom filters
# Configure who can make requests of the server
acl .*: all
# RE matching grid-mapfile users or DNs from x509 certs
140
Building and Installing RLS
The server uses a host certificate to identify itself to clients. By default this certificate is located in the files /etc/gridsecurity/hostcert.pem and /etc/grid-security/hostkey.pem. Host certificates have a distinguished name of the form
/CN=host/FQDN. If the host you plan to run the RLS server on does not have a host certificate, you must obtain one
from your Certificate Authority. The RLS server must be run as the same user who owns the host certificate files
(typically root). The location of the host certificate files may be specified in $GLOBUS_LOCATION/etc/globus-rlsserver.conf:
rlscertfile path-to-cert-file # default /etc/grid-security/hostcert.pem
rlskeyfile path-to-key-file # default /etc/grid-security/hostkey.pem
It is possible to run the RLS server without authentication, by starting it with the -N option, and using URL's of the
form rlsn://server to connect to it. If authentication is enabled, RLI servers must include acl configuration options
that match the identities of LRC servers that update it and that grant the rli_update permission to the LRCs.
8. Starting the RLS Server
Start the RLS Server by running:
$GLOBUS_LOCATION/sbin/SXXrls start
8.1. Notes on RLS Initialization
Please be advised (and advise other users responsible for bringing up the RLS) that the startup initialization may take
a few minutes before the RLS may be accessible. The initialization involves two key operations that may consume
significant resources causing the server to appear temporarily unresponsive. Users of RLS may mistakenly assume
that RLS failed to startup and may kill the server and start over. Some users may fall into this in a repeated cycle, believing that the RLS is unable to startup properly.
If the RLS is configured to send compressed updates (Bloom filters) to other RLIs, the RLS startup will involve initialization of the Bloom filter representing the current contents of the local replica catalog (LRC). This step is a prerequisite
before any additional operations may be allowed, therefore no client connections are permitted until the initialization
is complete. In our test environment, we have seen over 30 seconds delay due to creation of the Bloom filter corresponding to 1 million LFN names on a system with Dual 1 GHz CPU and 1.5 GB RAM. You may experience greater
delays at larger scales and/or when running RLS with more limited system resources.
If the RLS is configured to send uncompressed updates (LFN lists) to other RLIs, the RLS startup will not involve any
additional initialization delay. However, the RLS will spawn an initial full catalog update to all RLIs it updates. Though
these updates will take place on separate threads of execution after the initialization of the system, they will consume
a great amount of processor activity. Depending on the volume of the local replica catalog (LRC), this processor
activity may initially interfere with a client operation. In our test environment, we have seen our initial "globus-rlsadmin ping..." operation may suffer a delay and timeout in 30 seconds, the second "ping" may delay for a few seconds
but will successfully return, and the third and every subsequent "ping" operation will successfully return immediately
throughout the duration of the update. The system exhibits the same behavior for any other client operation, such as a
"globus-rls-cli query..." operation.
9. Stopping the RLS Server
Stop the RLS Server by running:
$GLOBUS_LOCATION/sbin/SXXrls stop
141
Building and Installing RLS
10. Configuring the RLS Server for the MDS2
GRIS
The server package includes a program called globus-rls-reporter that will report information about an RLS
server to the MDS2 GRIS. Use this procedure to enable this program:
1.
To enable Index Service reporting, add the contents of the file $GLOBUS_LOCATION/setup/globus/rlsldif.conf to the MDS2 GRIS configuration file $GLOBUS_LOCATION/etc/grid-info-resourceldif.conf.
2.
If necessary, set your virtual organization (VO) name in $GLOBUS_LOCATION/setup/globus/rlsldif.conf . The default value is local. The VO name is referenced twice, on the lines beginning dn: and
args:.
3.
You must restart your MDS (GRIS) server after modifying $GLOBUS_LOCATION/etc/grid-info-resoruce-ldif.conf. You can use the following commands to do so:
$GLOBUS_LOCATION/sbin/SXXgris stop
$GLOBUS_LOCATION/sbin/SXXgris start
11. Configuring the RLS Server for the WS MDS
Index Service
The server package includes a script $GLOBUS_LOCATION/libexec/aggrexec/globus-rls-aggregatorsource.pl that may be used as an Execution Aggregator Source by MDS. See GT 4.0 Index Services11 for more
information on setting up and using the Execution Aggregator Source scripts in MDS. The script may be invoked as
follows and will generate output in the format as depicted.
% $GLOBUS_LOCATION/libexec/aggrexec/globus-rls-aggregatorsource.pl rls://mysite
<?xml version="1.0" encoding="UTF-8"?>
<rlsStats>
<site>rls://mysite</site>
<version>4.0</version>
<uptime>03:08:15</uptime>
<serviceList>
<service>lrc</service>
<service>rli</service>
</serviceList>
<lrc>
<updateMethodList>
<updateMethod>lfnlist</updateMethod>
<updateMethod>bloomfilter</updateMethod>
</updateMethodList>
<updatesList>
<updates>
<site>rls://myothersite:39281</site>
<method>bloomfilter</method>
<date>08/01/05</date>
11
http://www.globus.org/toolkit/docs/4.0/info/index/
142
Building and Installing RLS
<time>16:16:38</time>
</updates>
</updatesList>
<numlfn>283902</numlfn>
<numpfn>593022</numpfn>
<nummap>593022</nummap>
</lrc>
<rli>
<updatedViaList>
<updatedVia>bloomfilters</updatedVia>
</updatedViaList>
<updatedByList>
<updatedBy>
<site>rls://myothersite:39281</site>
<date>08/01/05</date>
<time>10:03:21</time>
</updatedBy>
</updatedByList>
</rli>
</rlsStats>
Important
Be sure to configure the security context of the container running the MDS, and be sure that the security configuration on the RLS host recognizes the MDS security context.
When following the instructions provided by the GT 4.0 Index Services12, you will need to consider the security context
used by the MDS to invoke the Execution Aggregator Source script provided by RLS. Most deployments of RLS run
the service with security enabled. Therefore any client connections, including administrative status operations, require
authentication and authorization. In order for MDS to use the provided script to check RLS status, it must invoke the
script with a valid user proxy or user certificate and key. The RLS must recognize the DN from the user certificate
(i.e., the DN should be in the gridmap file).
One way to configure the MDS security context for use with RLS monitoring is to set the environment variables
X509_USER_CERT and X509_USER_KEY to point to the container certificate and key. Run the MDS with these
environment settings. Also, add the DN from the container certificate to the gridmap file on the host running the RLS.
Alternatively, you could modify the provided script so that it sets the environment variables to another user certificate
and key (or proxy) as desired before calling the RLS.
12. RedHat 9 Incompatibility
This note applies to RedHat 9 but could also apply to other Linux distributions.
There have been occurrences of RLS servers hanging on RedHat 9 systems. The external symptoms are:
1.
The server does not accept new connections from clients, with an error message similar to:
connect(rls://XXXXX): globus_rls_client: IO timeout:
globus_io_tcp_register_connect() timed out after 30 seconds
12
http://www.globus.org/toolkit/docs/4.0/info/index/
143
Building and Installing RLS
2.
Often, the server continues to receive and send updates as configured and respond to signals. You can check this
by querying other servers that interact with the one that's hung. Under gdb: All the server threads are waiting to
be signaled on a condition variable. Sometimes, this is in globus_io functions, particularly in globus_io_cancel().
12.1. Probable cause
This seems to be due to a problem in the new kernel and thread libraries of RedHat 9. A problem in
pthread_cond_wait() causes threads not to wake up correctly.
This problem has been seen with the following kernels and glibc packages:
•
•
Kernels:
•
2.4.20-30.9
•
2.4.20-8
glibc:
•
glibc-2.3.2-27.9.7
12.2. Suggested workaround
The problems don't seem to arise when RLS is linked with older pthread libraries. This can be done as by adding a
couple of lines to the RLS startup script in $GLOBUS_LOCATION/sbin/SXXrls, as shown:
<--- START --->
#!/bin/sh
GLOBUS_LOCATION=/opt/gt3.2
MYSQL=/opt/mysql
IODBC=/opt/iodbc
export GLOBUS_LOCATION
#RedHat 9 workaround
LD_ASSUME_KERNEL=2.4.1
export LD_ASSUME_KERNEL
<--- END --->
On i586 systems, set:
LD_ASSUME_KERNEL=2.2.5
144
Appendix B. Packaging details
1. The makefile
You do not have to build every subcomponent of this release. The makefile specifies subtargets for different functional
subpieces. See the component map at GT4 Facts1 for more details.
Makefile targets
•
i18n: Internationalization libraries
•
prewsgram: Pre-webservices GRAM
•
gridftp: GridFTP
•
prewsmds: OpenLDAP-based MDS2 [source installers only]
•
prews: Pre-WS GRAM, MDS2, and GridFTP
•
wsjava: Java WS Core
•
wsc: C WS core
•
wsmds: MDS4
•
wsdel: Delegation Service
•
wsrft: Reliable File Transfer service
•
wsgram: GRAM4
•
wscas: Community Authorization Service
•
wstests: Tests for java webservices
•
wsctests: Tests for C webservices
•
prews-test: Tests for pre-webservices components
•
rls: Replica Location Service
Note that all of these targets require the "install" target also. So, for instance, to build GridFTP alone, you would run:
$ ./configure --prefix=/path/to/install
$ make gridftp install
2. The Grid Packaging Toolkit
The Globus Toolkit is packaged using the Grid Packaging Toolkit (GPT). The GPT provides a way for us to version
packages and express dependencies between packages. The Makefile for the installer is automatically generated based
1
http://www.globus.org/toolkit/docs/4.0/GT4Facts/index.html
145
Packaging details
on the GPT dependencies expressed in CVS. GPT versions also allow us to release update packages for small subsets
of our code.
3. Picking a flavor for a source installation
If you're building on a platform that is not auto-detected by the configure script, you will be prompted to specify a
flavor for the --with-flavor= option. Typically "gcc32dbg" will work as a flavor to build 32-bit binaries using
gcc. If you want to force a 64bit build, "gcc64dbg" should work.
Some platforms have better support from their native compilers, so you can use "vendorcc32dbg" to build using the
native cc. Similarly, "vendorcc64dbg" will force a 64bit build instead.
4. Using globus-makefile-header with a binary
distribution
We use a package called "globus_core" to detect the compiler and platform settings of the computer that the Toolkit
is installed on. This package is excluded from binary distributions, because the compiler settings on your machine are
likely to be different from those used on the machine that built the binaries.
If you need to install a source update into a binary installation, globus_core will automatically be built for you. If you're
building something using "globus-makefile-header", though, you will need to install globus_core yourself. Install it
with the following command:
$ $GLOBUS_LOCATION/sbin/gpt-build -nosrc <flavor>
Where flavor is the flavor you're passing to globus-makefile-header.
146
Java WS Core Glossary
A
Apache Axis
The SOAP engine implementation used within the Globus Toolkit. See the Apache
Axis website2 for details.
C
client-config.wsdd
Axis client-side WSDD configuration file. It contains information about the type
mappings, the transport and other handlers.
See Also Apache Axis, Web Services Deployment Descriptor (WSDD).
J
JNDI
Java Naming and Directory Interface (JNDI) API are used to access a central
transient container registry. The registry is mainly used for discovery of the ResourceHome implementations. However, the registry can also be used store and
retrieve arbitrary information. The jndi-config.xml files are used to populate the
registry. See the JNDI Tutorial3 for details.
See Also jndi-config.xml, ResourceHome.
jndi-config.xml
It is a XML-based configuration file used to populate the container registry accessible via the JNDI API. See the JNDI details4 for more information.
See Also JNDI, ResourceHome, XML.
G
GAR
The GAR (Grid Archive) file is a single file which contains all the files and information that the container needs to deploy a service. See GAR details5 for more information.
O
operation provider
A reusable Java component that implements one or more web service functions.
A web service can be composed of one or more operation providers. See Operation
Provider6 for more information.
R
ResourceHome
The resources are managed and discovered via ResourceHome implementations.
The ResourceHome implementations can also be responsible for creating new re-
2
http://ws.apache.org/axis/
http://java.sun.com/products/jndi/tutorial/
4
../../common/javawscore/developer-index.html#s-javawscore-developer-JNDIDetails
5
../../common/javawscore/developer-index.html#s-javawscore-developer-gardetails
6
../../common/javawscore/developer-index.html#s-javawscore-developer-OperationProvider
3
147
Java WS Core Glossary
sources, performing operations on a set of resources at a time, etc. ResourceHomes
are configured in JNDI and are associated with a particular web service.
See Also JNDI.
S
server-config.wsdd
Axis server-side WSDD configuration file. It contains information about the services, the type mappings and various handlers.
See Also Apache Axis, Web Services Deployment Descriptor (WSDD).
SOAP
SOAP provides a standard, extensible, composable framework for packaging and
exchanging XML messages between a service provider and a service requester.
SOAP is independent of the underlying transport protocol, but is most commonly
carried on HTTP. See the SOAP specifications7 for details.
W
Web Services Deployment
Descriptor (WSDD)
Axis XML-based configuration file.
See Also Apache Axis, client-config.wsdd, server-config.wsdd, XML.
WS Addressing (WSA)
The WS-Addressing specification defines transport-neutral mechanisms to address
Web services and messages. Specifically, this specification defines XML elements
to identify Web service endpoints and to secure end-to-end endpoint identification
in messages. See the W3C WS Addressing Working Group8 for details.
WS Notification (WSN)
The WS-Notification family of specifications define a pattern-based approach to
allowing Web services to disseminate information to one another. This framework
comprises mechanisms for basic notification (WS-Notification), topic-based notification (WS-Topics), and brokered notification (WS-BrokeredNotification). See
the OASIS Web Services Notification (WSN) TC9 for details.
WS Resource Framework (WSRF)
The WS Resource Framework (WSRF) specifications define a generic and open
framework for modeling and accessing stateful resources using Web services. This
framework comprises mechanisms to describe views on the state (WS-ResourceProperties), to support management of the state through properties associated with
the Web service (WS-ResourceLifetime), to describe how these mechanisms are
extensible to groups of Web services (WS-ServiceGroup), and to deal with faults
(WS-BaseFaults). See the OASIS Web Services Notification (WSRF) TC10 for
details.
WSDL
WSDL is an XML document for describing Web services. Standardized binding
conventions define how to use WSDL in conjunction with SOAP and other messaging substrates. WSDL interfaces can be compiled to generate proxy code that
constructs messages and manages communications on behalf of the client application. The proxy automatically maps the XML message structures into native language objects that can be directly manipulated by the application. The proxy frees
the developer from having to understand and manipulate XML. See the WSDL
1.1 specification11 for details.
7
http://www.w3.org/TR/soap/
http://www.w3.org/2002/ws/addr/
9
http://www.oasis-open.org/committees/tc_home.php?wg_abbrev=wsn
10
http://www.oasis-open.org/committees/tc_home.php?wg_abbrev=wsrf
11
http://www.w3.org/TR/wsdl
8
148
Java WS Core Glossary
See Also XML, SOAP.
WS-I Basic Profile
The WS-I Basic Profile12 specification is a set of recommendations on how to use
the different web services specifications such as SOAP, WSDL, etc. to maximize
interoperability.
See Also WSDL, SOAP.
X
XML
Extensible Markup Language (XML) is standard, flexible, and extensible data
format. See the W3C XML site13 for details.
XPath
XPath is a language for finding information in an XML document. XPath is used
to navigate through elements and attributes in an XML document. See the XPath
specification14 for details.
12
http://www.ws-i.org/Profiles/BasicProfile-1.0-2004-04-16.html
http://www.w3.org/XML/
14
http://www.w3.org/TR/xpath
13
149
Security Glossary
C
Certificate Authority ( CA )
An entity that issues certificates.
CA Certificate
The CA's certificate. This certificate is used to verify signature on certificates issued
by the CA. GSI typically stores a given CA certificate in /etc/grid-security/certificates/<hash>.0, where <hash> is the hash code of the CA
identity.
CA Signing Policy
The CA signing policy is used to place constraints on the information you trust a
given CA to bind to public keys. Specifically it constrains the identities a CA is
trusted to assert in a certificate. In GSI the signing policy for a given CA can typically be found in /etc/grid-security/certificates/<hash>.signing_policy, where <hash> is the hash code of the CA identity. For more information see [add link].
certificate
A public key and information about the certificate owner bound together by the
digital signature of a CA. In the case of a CA certificate the certificate is self signed,
i.e. it was signed using its own private key.
Certificate Revocation List
(CRL)
A list of revoked certificates generated by the CA that originally issued them.
When using GSI this list is typically found in /etc/grid-security/certificates/<hash>.r0, where <hash> is the hash code of the CA identity.
certificate subject
A identifier for the certificate owner, e.g.
"/DC=org/DC=doegrids/OU=People/CN=John Doe 123456". The subject is part
of the information the CA binds to a public key when creating a certificate.
credentials
The combination of a certificate and the matching private key.
E
End Entity Certificate (EEC)
A certificate belonging to a non-CA entity, e.g. you, me or the computer on your
desk.
G
GAA Configuration File
A file that configures the Generic Authorization and Access control GAA libraries.
When using GSI this file is typically found in /etc/grid-security/gsigaa.conf.
grid map file
A file containing entries mapping certificate subjects to local user names. This file
can also serve as a access control list for GSI enabled services and is typically
found in /etc/grid-security/grid-mapfile. For more information see
the Gridmap file15.
15
http://www.globus.org/toolkit/docs/4.0/security/prewsaa/Pre_WS_AA_Public_Interfaces.html#prewsaa-env-gridmapfile
150
Security Glossary
grid security directory
The directory containing GSI configuration files such as the GSI authorization
callout configuration and GAA configuration files. Typically this directory is
/etc/grid-security. For more information see Grid security directory16.
GSI authorization callout configuration file
A file that configures authorization callouts to be used for mapping and authorization in GSI enabled services. When using GSI this file is typically found in
/etc/grid-security/gsi-authz.conf.
H
host certificate
An EEC belonging to a host. When using GSI this certificate is typically stored in
/etc/grid-security/hostcert.pem. For more information on possible
host certificate locations see the Credentials17.
host credentials
The combination of a host certificate and its corresponding private key..
P
private key
The private part of a key pair. Depending on the type of certificate the key corresponds to it may typically be found in $HOME/.globus/userkey.pem (for
user certificates), /etc/grid-security/hostkey.pem (for host certificates)
or /etc/grid-security/<service>/<service>key.pem (for service
certificates). For more information on possible private key locations see the Credentials18
proxy certificate
A short lived certificate issued using a EEC. A proxy certificate typically has the
same effective subject as the EEC that issued it and can thus be used in its stead.
GSI uses proxy certificates for single sign on and delegation of rights to other entities.
For more information about types of proxy certificates and their compatibility in
different versions of GT, see http://dev.globus.org/wiki/Security/ProxyCertTypes.
proxy credentials
The combination of a proxy certificate and its corresponding private key. GSI
typically stores proxy credentials in /tmp/x509up_u<uid> , where <uid> is
the user id of the proxy owner.
public key
The public part of a key pair used for cryptographic operations (e.g. signing, encrypting).
S
service certificate
A EEC for a specific service (e.g. FTP or LDAP). When using GSI this certificate
is typically stored in /etc/grid-security/<service>/<service>cert.pem. For more information on possible service certificate locations
see the Credentials19.
service credentials
The combination of a service certificate and its corresponding private key.
16
http://www.globus.org/toolkit/docs/4.0/security/prewsaa/Pre_WS_AA_Public_Interfaces.html#prewsaa-env-gridsecurity
http://www.globus.org/toolkit/docs/4.0/security/prewsaa/Pre_WS_AA_Public_Interfaces.html#prewsaa-env-credentials
http://www.globus.org/toolkit/docs/4.0/security/prewsaa/Pre_WS_AA_Public_Interfaces.html#prewsaa-env-credentials
19
http://www.globus.org/toolkit/docs/4.0/security/prewsaa/Pre_WS_AA_Public_Interfaces.html#prewsaa-env-credentials
17
18
151
Security Glossary
T
transport-level security
Uses transport-level security (TLS) mechanisms.
trusted CAs directory
The directory containing the CA certificates and signing policy files of the CAs
trusted by GSI. Typically this directory is /etc/grid-security/certificates. For more information see Grid security directory20.
U
user certificate
A EEC belonging to a user. When using GSI this certificate is typically stored in
$HOME/.globus/usercert.pem. For more information on possible user
certificate locations see Credentials21.
user credentials
The combination of a user certificate and its corresponding private key.
20
21
http://www.globus.org/toolkit/docs/4.0/security/prewsaa/Pre_WS_AA_Public_Interfaces.html#prewsaa-env-gridsecurity
http://www.globus.org/toolkit/docs/4.0/security/prewsaa/Pre_WS_AA_Public_Interfaces.html#prewsaa-env-credentials
152
GridFTP Glossary
C
client
FTP is a command/response protocol. The defining characteristic of a client is that
it is the process sending the commands and receiving the responses. It may or may
not take part in the actual movement of data.
See Also client/server transfer, third party transfers.
client/server transfer
In a client/server transfer, there are only two entities involved in the transfer, the
client entity and the server entity. We use the term entity here rather than process
because in the implementation provided in GT4, the server entity may actually run
as two or more separate processes.
The client will either move data from or to his local host. The client will decide
whether or not he wishes to connect to the server to establish the data channel or
the server should connect to him (MODE E dictates who must connect).
If the client wishes to connect to the server, he will send the PASV (passive)
command. The server will start listening on an ephemeral (random, non-privileged)
port and will return the IP and port as a response to the command. The client will
then connect to that IP/Port.
If the client wishes to have the server connect to him, the client would start
listening on an ephemeral port, and would then send the PORT command which
includes the IP/Port as part of the command to the server and the server would
initiate the TCP connect. Note that this decision has an impact on traversing firewalls. For instance, the client's host may be behind a firewall and the server may
not be able to connect.
Finally, now that the data channel is established, the client will send either the
RETR “filename” command to transfer a file from the server to the client (GET),
or the STOR “filename” command to transfer a file from the client to the server
(PUT).
See Also extended block mode (MODE E).
command/response
Both FTP and GridFTP are command/response protocols. What this means is that
once a client sends a command to the server, it can only accept responses from the
server until it receives a response indicating that the server is finished with that
command. For most commands this is not a big deal. For instance, setting the type
of the file transfer to binary (called "I" for "image in the protocol"), simply consists
of the client sending TYPE I and the server responding with 220 OK. Type set to
I. However, the SEND and RETR commands (which actually initiate the movement
of data) can run for a long time. Once the command is sent, the client’s only options
are to wait until it receives the completion reply, or kill the transfer.
concurrency
When speaking of GridFTP transfers, concurrency refers to having multiple files
in transit at the same time. They may all be on the same host or across multiple
hosts. This is equivalent to starting up “n” different clients for “n” different files,
and having them all running at the same time. This can be effective if you have
many small files to move. The Reliable File Transfer (RFT)22 service utilizes
concurrency to improve its performance.
22
http://www.globus.org/toolkit/docs/4.0/data/rft/
153
GridFTP Glossary
D
dual channel protocol
GridFTP uses two channels:
•
One of the channels, called the control channel, is used for sending commands
and responses. It is low bandwidth and is encrypted for security reasons.
•
The second channel is known as the data channel. Its sole purpose is to transfer
the data. It is high bandwidth and uses an efficient protocol.
By default, the data channel is authenticated at connection time, but no integrity
checking or encryption is performed due to performance reasons. Integrity checking
and encryption are both available via the client and libraries.
Note that in GridFTP (not FTP) the data channel may actually consist of several
TCP streams from multiple hosts.
See Also parallelism, striping.
E
extended block mode (MODE
E)
MODE E is a critical GridFTP components because it allows for out of order reception of data. This in turn, means we can send the data down multiple paths and
do not need to worry if one of the paths is slower than the others and the data arrives
out of order. This enables parallelism and striping within GridFTP. In MODE E,
a series of “blocks” are sent over the data channel. Each block consists of:
•
an 8 bit flag field,
•
a 64 bit field indicating the offset in the transfer,
•
and a 64 bit field indicating the length of the payload,
•
followed by length bytes of payload.
Note that since the offset and length are included in the block, out of order reception
is possible, as long as the receiving side can handle it, either via something like a
seek on a file, or via some application level buffering and ordering logic that will
wait for the out of order blocks. [TODO: LINK TO GRAPHIC]
See Also parallelism, striping.
I
improved extended block mode
(MODE X)
This protocol is still under development. It is intended to address a number of the
deficiencies found in MODE E. For instance, it will have explicit negotiation for
use of a data channel, thus removing the race condition and the requirement for
the sender to be the connector. This will help with firewall traversal. A method
will be added to allow the filename to be provided prior to the data channel connection being established to help large data farms better allocate resources. Other
additions under consideration include block checksumming, resends of blocks that
fail checksums, and inclusion of a transfer ID to allow pipelining and de-multiplexing of commands.
See Also extended block mode (MODE E).
154
GridFTP Glossary
M
MODE command
In reality, GridFTP is not one protocol, but a collection of several protocols. There
is a protocol used on the control channel, but there is a range of protocols available
for use on the data channel. Which protocol is used is selected by the MODE
command. Four modes are defined: STREAM (S), BLOCK (B), COMPRESSED
(C) in RFC 959 for FTP, and EXTENDED BLOCK (E) in GFD.020 for GridFTP.
There is also a new data channel protocol, or mode, being defined in the GGF
GridFTP Working group which, for lack of a better name at this point, is called
MODE X.
See Also extended block mode (MODE E), improved extended block mode (MODE
X), stream mode (MODE S).
N
network end points
A network endpoint is generally something that has an IP address (a network interface card). It is a point of access to the network for transmission or reception of
data. Note that a single host could have multiple network end points if it haS
multiple NICs installed (multi-homed). This definition is necessary to differentiate
between parallelism and striping.
See Also parallelism, striping.
P
parallelism
When speaking about GridFTP transfers, parallelism refers to having multiple TCP
connections between a single pair of network endpoints. This is used to improve
performance of transfers on connections with light to moderate packet loss.
S
server
The compliment to the client is the server. Its defining characteristic is that it receives commands and sends responses to those commands. Since it is a server or
service, and it receives commands, it must be listening on a port somewhere to
receive the commands. Both FTP and GridFTP have IANA registered ports. For
FTP it is port 21, for GridFTP it is port 2811. This is normally handled via inetd
or xinetd on Unix variants. However, it is also possible to implement a daemon
that listens on the specified port. This is described more fully in http://www.globus.org/toolkit/docs/4.0/data/gridftp/developer-index.htmls-gridftp-developerarchdes in the GridFTP Developer's Guide.
See Also client.
stream mode (MODE S)
The only mode normally implemented for FTP is MODE S. This is simply sending
each byte, one after another over the socket in order, with no application level
framing of any kind. This is the default and is what a standard FTP server will use.
This is also the default for GridFTP.
striping
When speaking about GridFTP transfers, striping refers to having multiple network
endpoints at the source, destination, or both participating in the transfer of the same
file. This is normally accomplished by having a cluster with a parallel shared file
system. Each node in the cluster reads a section of the file and sends it over the
network. This mode of transfer is necessary if you wish to transfer a single file
155
GridFTP Glossary
faster than a single host is capable of. This also tends to only be effective for large
files, though how large depends on how many hosts and how fast the end-to-end
transfer is. Note that while it is theoretically possible to use NFS for the shared
file system, your performance will be poor, and would make using striping pointless.
T
third party transfers
In the simplest terms, a third party transfer moves a file between two GridFTP
servers.
The following is a more detailed, programmatic description.
In a third party transfer, there are three entities involved. The client, who will only
orchestrate, but not actually take place in the data transfer, and two servers one of
which will be sending data to the other. This scenario is common in Grid applications where you may wish to stage data from a data store somewhere to a supercomputer you have reserved. The commands are quite similar to the client/server
transfer. However, now the client must establish two control channels, one to each
server. He will then choose one to listen, and send it the PASV command. When
it responds with the IP/port it is listening on, the client will send that IP/port as
part of the PORT command to the other server. This will cause the second server
to connect to the first server, rather than the client. To initiate the actual movement
of the data, the client then sends the RETR “filename” command to the server that
will read from disk and write to the network (the “sending” server) and will send
the STOR “filename” command to the other server which will read from the network and write to the disk (the “receiving” server).
See Also client/server transfer.
156
RLS Glossary
B
Bloom filter
Compression scheme used by the Replica Location Service (RLS) that is intended
to reduce the size of soft state updates between Local Replica Catalogs (LRCs)
and Replica Location Index (RLI) servers. A Bloom filter is a bit map that summarizes the contents of a Local Replica Catalog (LRC). An LRC constructs the
bit map by applying a series of hash functions to each logical name registered in
the LRC and setting the corresponding bits.
L
Local Replica Catalog (LRC)
Stores mappings between logical names for data items and the target names (often
the physical locations) of replicas of those items. Clients query the LRC to discover
replicas associated with a logical name. Also may associate attributes with logical
or target names. Each LRC periodically sends information about its logical name
mappings to one or more RLIs.
logical file name
A unique identifier for the contents of a file.
logical name
A unique identifier for the contents of a data item.
P
physical file name
The address or the location of a copy of a file on a storage system.
R
Replica Location Index (RLI)
Collects information about the logical name mappings stored in one or more Local
Replica Catalogs (LRCs) and answers queries about those mappings. Each RLI
periodically receives updates from one or more LRCs that summarize their contents.
Replica Location Service (RLS)
A distributed registry that keeps track of where replicas exist on physical storage
systems. The job of the RLS is to maintain associations, or mappings, between
logical names for data objects and one or more target or physical names for replicas.
Users or services register data items in the RLS and query RLS servers to find
replicas. (RLS)
RLS attribute
Descriptive information that may be associated with a logical or target name
mapping registered in a Local Replica Catalog (LRC). Clients can query the LRC
to discover logical names or target names that have specified RLS attributes.
T
target name
The address or location of a copy of a data item on a storage system.
157
MDS4 Glossary
A
Aggregator Framework
A software framework used to build services that collect and aggregate data. MDS4
Services (such as the Index and Trigger services) are built on the Aggregator
Framework, and are sometimes called Aggregator Services.
aggregator services
Services that are built on the Aggregator Framework, such as the MDS4 Index
Service and Trigger Service.
See Also Aggregator Framework, Index Service, Trigger Service.
aggregator source
A Java class that implements an interface (defined as part of the Aggregator
Framework) to collect XML-formatted data. MDS4 contains three aggregator
sources: the query aggregator source, the subscription aggregator source, and the
execution aggregator source.
See Also query aggregator source, subscription aggregator source, execution aggregator source.
E
execution aggregator source
An Aggregator Source (included in MDS4) that executes an administrator-supplied
program to collect information and make it available to an Aggregator Service
such as the Index Service.
See Also aggregator source.
G
Ganglia
A cluster monitoring tool. See http://ganglia.sourceforge.net.
H
Hawkeye
A monitoring service for Condor Pools. See http://www.cs.wisc.edu/condor/hawkeye/.
I
Index Service
An aggregator service that serves as a registry similar to UDDI, but much more
flexible. Indexes collect information and publish that information as WSRF resource
properties.
See Also aggregator services.
information provider
A "helper" software component that collects or formats resource information, for
use by an aggregator source or by a WSRF service when creating resource properties.
158
MDS4 Glossary
Q
query aggregator source
An aggregator source (included in MDS4) that polls a WSRF service for resource
property information.
See Also aggregator source.
S
subscription aggregator source
An aggregator source (included in MDS4) that collects data from a WSRF service
via WSRF subscription/notification.
See Also aggregator source.
T
Trigger Service
An aggregator service that collects information and compares that data against a
set of conditions defined in a configuration file. When a condition is met, or
triggered, an action takes place, such as emailing a system administrator when the
disk space on a server reaches a threshold.
See Also aggregator services.
W
WebMDS
A web-based interface to WS-RF resource property information that can be used
as a user-friendly front-end to the Index Service or other WS-RF services.
159
WS GRAM Glossary
B
batch scheduler
See scheduler.
C
Condor
A job scheduler mechanism supported by GRAM. See http://www.cs.wisc.edu/condor/.
G
globusrun-ws
A command line program used to submit jobs to a WS GRAM service. See the
commandline reference page at: http://www.globus.org/toolkit/docs/4.0/execution/wsgram/rn01re01.html
Grid Resource allocation and
Management (GRAM)
Web Services Grid Resource Allocation and Management (WS GRAM) component
comprises a set of WSRF-compliant Web services to locate, submit, monitor, and
cancel jobs on Grid computing resources. WS GRAM is not a job scheduler, but
rather a set of services and clients for communicating with a range of different
batch/cluster job schedulers using a common protocol. WS GRAM is meant to
address a range of jobs where reliable operation, stateful monitoring, credential
management, and file staging are important.
J
job description
Term used to describe a WS GRAM job for GT4.
job scheduler
See scheduler.
L
LSF
A job scheduler mechanism supported by GRAM.
http://www.platform.com/Products/Platform.LSF.Family/Platform.LSF/
M
meta-scheduler
A program that typically operates at a higher level than a job scheduler (typically,
above the GRAM level). It schedules and submits jobs to GRAM services.
Managed Executable Job Service (MEJS)
[FIXME]
Managed Job Factory Service
(MJFS)
[FIXME]
160
WS GRAM Glossary
Managed Multi Job Service
(MMJS)
[FIXME]
MMJS subjob
One of the executable jobs in a multijob rendezvous.
multijob
A job that is itself composed of several executable jobs; these are processed by
the MMJS subjob.
See Also MMJS subjob.
multijob rendezvous
A mechanism used by GRAM to synchronize between job processes in a multiprocess job and between.
P
Portable Batch System (PBS)
A job scheduler mechanism supported by GRAM. http://www.openpbs.org
R
Resource Specification Language (RSL)
Term used to describe a GRAM job for GT2 and GT3. (Note: This is not the same
as RLS - the Replica Location Service)
S
scheduler
Term used to describe a job scheduler mechanism to which GRAM interfaces. It
is a networked system for submitting, controlling, and monitoring the workload
of batch jobs in one or more computers. The jobs or tasks are scheduled for execution at a time chosen by the subsystem according to an available policy and availability of resources. Popular job schedulers include Portable Batch System (PBS),
Platform LSF, and IBM LoadLeveler.
scheduler adapter
The interface used by GRAM to communicate/interact with a job scheduler
mechanism. In GT4 this is both the perl submission scripts and the SEG program.
See Also scheduler.
Scheduler Event Generator
(SEG)
[FIXME]
superuser do (sudo)
Allows a system administrator to give certain users (or groups of users) the ability
to run some (or all) commands as root or another user while logging the commands
and arguments.
http://www.courtesan.com/sudo/
U
Universally Unique Identifier
(UUID)
Identifier that is immutable and unique across time and space.
161