1
-Patent pending-
User Manual
lndex
l.
Unpack FilmScan3i Professionol
ll.
lnstoll
film into the lilm
lll.
Quick
5tort.........
lV.
Operotion
Sconner.
holder.......
Guide........
...........2
.....................3
..............6
......9
...,.,.'.'..,.24
il.
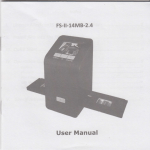
Unpack FS-ll-9M-3. O.HD
lnstoll
lilm into the film holder
lnstall the slide into holder
'
$
FS-il-9M-3.0-HD
Negative/Slide Film Holder
e tl9 tr
USB
power
core
USB/TV/HDMI cable
Roll Film Holder
the
materials are cleaned before inserting into the
scan ner.
+
Please find recommend, processional purger from photo
store to clean the dust on films if any to avoid damaging
the only one copy of old films.
the slide holder
as
m
User Manual
illustrated
3. Close the film holder
2. Put slide into positive slide slot
r#p
Clean brush
Note
We strongly suggest using a clean, dry, non-alcohol cotton
swab to clean the glass surface periodically to produce a
clear image during operation.
Clean dust from FilmScanner back light, to use the clean
brush to wipe the dust.
Dust or dirt from the negative, slide films and cover trays
may affect the scanned image quality, please make sure
7. Open
\l
lnstall the lVegative Film into holder
1. Open the
film holder
2. lnstall film into negative film slot
as
illustrated
3. Close the film holder
lnstoll the Roll Film into holder:
1. Take out the roll
re
2. lnsert roll film into film slot
film holder from oackage
::,:tt l.liatx&
3. Pull out the roll film in another side
Down/Flip button
(Flip hard key)
Press hard key on top of device in live view
Figure 3
Note
*Down
negative film into holder
Figure 7
*
lf the image is upside down [see fig.2], the image can be corrected by Flip function in hard key
of device before capture, or enter playback edit menu after capture [see fig.3 and fig.4]'
4
Playbock mode menu
Figure 4
5
lll.
7. Put Film onto the
Quick Stort
Power status
film cartridge
LED
Up/Mirror button
2. lnsert the film cartridge into FS-ll-9M-3.0-HD
OK button
Down/Flip button
3. Connect power odapter to FS-ll-9M-3.0-HD
SD card Slot
HDMI TV OUT
Turn on Device by power button
TV out jack
5.
Press OK
tV.
button to copture the imoge
Operation Guide
Home: Main menu
Capture
Playback
Film Type
Setting
USB mode
a
o
o
o
a
5. Follow the menu on display for sconning
Capture: coPture mode (default)
Playback: PloYback mode
Film Type: define the film type which looded in cartridge
IJSB mode: MSDC (Mdss Storoge Device Closs) mode
Setting: TV out ond formot oqtion
L. Copture
7. After finished the copture, take out the
SD cord which stored copture imoges
Capture
willffi76li
sec.0G con press up/down button for desired
After welcome poge, above menu
is no action during this 5 second period.
if
there
mode
copture
enter
outo
will
menu. or system
w
8. Or reod picture from
PC
1.1 Copture: <tJp>/<Mirror> (Hord Key)
Up/ Mirror button
by MSDC mode
<OK> Go Back
l.lCapture
button
Down/ Flip button
to
\_
v/
<Down>
Press < Up
s
i
7.i
Down>
pbu,,on
Copture: <Up>/<Mirror> - Brightness/Color (Hord Key)
<O(> Go Back to
l.lcapture
&Down/F,pbu,,one
a
-e*r:''*i*'
<Up>
,
Press < Up > button to enter Brightness
d
-\
<Up>
Press < Up > button to change imoge
button to upside down imoge
button
oPress<Down>buttontoenterBrightness/Colorodjustment(seechapterT.3)
/ Mirror (Hord Key)
Down,F
Press < Down >
I
L.2 Copture: <tJp>/<Mirror> - Flip
&
a
> button to enter Mirror/Flip ddiustment (see Chopter 1'2)
<Down>
lefi to right
Ip."rs .
Oo* n > button to enter Color odiustment (See Chopter 1'5)
1.4 Capture: <1.)p>/<Mitor> - Brightness (Hard
?il
Key)
button to increose red color with
o
p, t t . U pi
"
t
#ffi
utto n
to- i n c r e o se a r i g ht n e-
d
X
{
j-ilGt roo*r,
!!!IY!9X:!*W,
,rIt
&
Down'| F p
j
<OK> Go Back
l.lCapture
button
to
d
,*,
I
o Pr"tt 4h;iutton
Down/ Flip button
L2
Key)
vl
button to decreose Brightness with ronges of -3 to
1-.5 Copture: <lJp>/<Mirror> - Color Red (Hard Key)
button to decrease red color with ronges of -3 to 3
1.5 Capture: <Up>/<Mirror> - Color Green (Hord
<Down>
a Pr"tt .D"*rj
<Down>
bu"on
e::"r:F:"i'--
?ffi
to increose green color with ronges of -3 to 3
tr
r-\
l/
1.8 Capture mode
N
v
<Down>
initt.oo*n,
Live view indicator
(flashing at 0.ssec rate)
button to decreose green color with ranges of -3 to 3
1.7 Capture: <L)p>/<Mirror> - Color Blue (Hord
Key)
<OK> Go Back
l.lCapture
button
to
0
l
it is in live view
once enter copture mode, there will be o red indicotor on let't top corner to indicote
shows the positive
olways
imoge
the
slot,
sconner
the
into
inserted
is
cortridge
mode. when the litm
imogeoccordingtopreviousdefinedFilmType(ofterpoweron.theFilmTypeisdefaulttonegotive
fihj.
press OK button'
Reconfirm the film position through the disploy before
1.9 Capture: Edit Menu
Down/ Flip button
Save
selected image
pq161g +90
Rotatd -90
\)
Cancel
<Up>
Press <tJp>
button to increose blue color viith ronges
r-)
-----v
t\
<Down>
i
pniit roo*n> button to decreose blue color with ronges of -3 to 3
o
o
a
Sove: sove coPtured imoge
Rotote +gO: continue rotote +90 degrees
Rotote -90: continue rotdte -90 degrees
(this
is
o
o
picture)
for odiusting the user who took the portroit
Concel: cancel ony editing with this image
Home: Bock to moin menu
+g0degrees,theyconpresstheoKbutton,theimogewillberotote+g0degreesandcursorwill
rotated image to sD card ond screen will return
romoin ot sove. press oK button ogoin will sove the
1.L0 Live View -> Copture/Edit Menu
m
Live View
l]
W
loliveview.Forcontinuouslyrotote+g0degrees,movecursortorototeogoinandpressoK.
1.13 Copture: Concel
Playback
/captured image
oK
user press OK button ogoin'
view, the edit menu will be oppeored' When
Once
view ogoin'
live
The disploy will return to
the current imoge wilt be soved into SD cdrd'
press OK button
in
live
1.17 CaPture: Save
of the editing step with present selected imoge
select Cancel ond press oK button to cancel ony
(nothing will be soved onto the SD cord)'
mode
view
goes
to
live
ond FS1|-9M-3.0-HD
or
1.14 Copture: Home
'.\
Save
l)
L_---l
OK
previ.ew (live view) imoge wilt be selected ond
once user press oKbutton ontop oyis-t|sM-3.T-HD,
shownontheTFTwhichwitltoke'between3.4secondwith4iconsshownontheteftsideofthe
by oK button' After the obove
user to confirm
screen. save icon will n, niqnlightrilo,
(preview)
mode
view
live
to
goes
bock
step, disploy
the soving
Go
bock
1.15
button when select Home icon'
(Live View)
Edit mode bock to Capture mode
to moin menu,
Exit from
press OK
Next image ln
film cartridge
r)
once lJser presses oK button for
OK
Llser can oPPIY the uq/down button
,rr"Tionut
option, disploy will return to copture modelive view'
Then,userconmovethefilmcortridgetonexttorgetfilmtocopture.
+90/-90). Once user confirm rotote
for further editing (rotate
16
_.-;_
2. Ploybock
Pavb"-fl
d
OK
full once press OK button' User
hostodownloodtheimogestoPCorreploceonothersDcordforcontinuecopture.
Once the
interni rrr"mory or
SD cord is
futt,
user con see o SD cord
1.77 SD cord locked
Press
Down button to Plovbock mode when power on F5-ll'9M-3.0'HD or access the maln menu
bY
Home icon if during operotion. Press OK button to confirm the selection'
2.1. Playback: Auto Slide Show
Slide show mode
Please do
sD wos locked, once press the oK button, a sD cord locked icon disploys on screen.
device'
into
insert
bet'ore
slide the switch of SD cord to unlock
tf
the
1.18
tf
SD
cord error
scanner connot detect sD cord
Ln disptay.
mode by press OK button.
2.2 Ployback: Edit Menu
m;"irff*.'
Rotate +90
Exit
Rotate -90
Delete
Save
Mirror
Home
Flip
in good condition, o warning icon with question mork will be shown
yy to formot the sD cord or replace another proper sD cord for continue further
to Setting section on poge 25.)
please
operotion. (Refer
in
Once user enter ployback mode (defoult to stide show), 3.0 TFT will auto disploy all imoges stored
sD card with 2 seconds intervol from previous coptured imoge. lJser con olso stop the slide show
o
a
o
o
Rotote +gO: captured image rotate +90 degrees
Rotote -90: captured imoge
rotate'90 degrees
Mirror: chonge imoge left to right
Flip: upside down im,oge
19
Rotote +90 degrees by OK button, the imoge will be rotdte +90 degrees ond cursor
will remqins ot Sdve. Press OK button ogoin to sove modified result ond next picture will be shown
(Some for
(N+1). For continuously Rotdte +90 degrees, move cursor to Rotqte ogoin ond press OK.
lf
a
a
a
a
Exit: returns to Slide show
Delete: delete this picture stored in 5D cord
Sove: save the modified imoge onto SD cord
Home: returns to moin menu
user wonts
to
tlotote ,90, Mirror, ond
Flip
function)
2.6 Playbock: Exit
2.3 Ployback: Slide mode -> Edit mode
_\
OK
User cdn interrupt (stop) th" ,lid"
iy ,r"u ox
mode (single picture playbock)
scroll eoch picture by up/down button.
rhofrffifiiliiffif,toybock
button. (pause slide show) Then user is oble
to
()nceuserselectthepicturestoredinSDcordwhichintendedtobemodified,thenuseoKbutton
ogoin to bring out the edit mode for modification
2.4 Slide Show -> Sinsle picture -> ,di,
!l+1urr"
r)
t}
OK
OK
f,
m
Single picture mode
Use Up/Down button to scroll picture to be modified
t
Edit mode
once user select the
EXIT
storting with
function in edit menu, the disploy will go back to slide show
present picture
the current picture in internol memory or sD card without soving ony chonge of
2.7 Ployback: Delete-
t>
*_1/
OK
(N+1)' Cursor goes to
Detete will delete the present selected picture ond next picture will be shown
press oK
Exit icon. lf user intend to process continuously delete, iust move to delete icon ogain ond
to confirm.
2.8 Playbock: Home
r+
OK
-\
OK
Go bock
to moin menu, press
OK
button when select Home icon
27
20
3.2 FilmType: Exomqle
2.9 Ploybock: No Picture
q
,-N
Color Negative
film
OK
ploybock mode, o
lf there's no Picture inside internol memory or SD cord when enter
_
No picture
____N
v)
symbol will show on disPloY
3.
B&W
Negative film
Film TyPe
Loaded
lnto
Film TyPe
Ca
the
when power on-FS-tl-gM-3'0-HD or occess
film type definition by enter Film Type menu
down button lor Fitm Type and press OK to
Press
op",otion'
if
during
moin menu by Home icon
Slide
Change
confirm.
i.1
Film Type: Select Film TYPe
4.
|JSB
Mode
rtridge
E
el
@
Color Negative film
Slide film
B&W Negative
a
a
o
looded with negotive film
Negotive film: setect Negotive film when cortridge
holder
in
slide
lood
when
type
Slide: setect Slide
negotive film
select B&W when cortridge looded with Btock&White
B&W
film:
USB mode
cord to PC
After finished copture, user con downlddd the stored imoges from internol memory or SD
o
becomes
FS-\|-9M-3.0-HD
IJSB
to
PC,
coble
connect
when
button
Press
OK
mode.
L)SB
by selecting
device'
moss storoge device. user con review or edit images once PC detected the externdl storoge
Or just toke out the SD cord from device into PC to reod the imoges directly'
23
4.1
USB
5,2 Setting : I nterqolotion
Mode: Status
storoge device ond then a stdtus icon
once user select lJsB mode, F"s-lt-gM-g.o-HD becomes o moss
device
disk
USB
from my computer and review the
shows on display, then ur", ,in 1i'd an externol
PC'
with
cord
SD
or
memory
imoges in internal
5. Setting Mode.
lnteroolation on
lnterpolation off
picture
user can hove the option to use the interpolotion method to increose the
press oK
ond
selection
interpolation
j600dpi.
to
the
key
tJse
l)p
Down
ond
resolution to
second longer in
button to interpolotion menu. NOTE: the cqpture mode takes a few
imoge processing white the interpolation function is turned on'
ond
tn the interpolation menu, user con turn on ond off the function by using the up
Down key
to the selection ond
press OK
button to proceed'
Settins
option' User can con,nect,thl
lornnt
';;"r;;;;;i;;:,:;";il;;ir:r. mo,"oi"',
the sconned imoses
The setting mode
covers
Tv out ond
d:,yi::t:,ry,:::,!:::^'::
con be ptavbock on
rv
disptov to shore
5.3 Setting:
TV
out
with familY.
tftheSDcordwosformattedbytheotherdevicesondnotreodoblebysconner,userconapplythe
jormot function in scdnner to correct required formot'
5.7 Setting Mode menu
lnterpolation
TV out
Format
Exit
c
C
a
a
resolution
lnterpolation:Turn ON ond OFF interyolotion to 3610dpi
TV out: select NTSC or PAL occording to required interfoce
Format: formot internol niemory or SD card
Exit: rcturns to moin menu
24
tP
con connect device to
when user want to switch the dlspldy from .on device LCD to TV display' user
the
TV display will show
Then,
button.
by
OK
pAL
menu
fV
out
ln
or NTSC os requlred
TV ond select
the some option
imoges on
TV,
for
sconning operotion,
or
dlrectty enter ptoybdck mode to slide show coptured
5.4 Setting: HDMI outPut
connect on end of the HDMI cable to the scanner's HDMI port and the other end of the HDMI
playback, in HD
cable to TV.s HDMI port. The TV now becomes the display for preview and
1080 resolution.
lmase Sensor:
9 mesa CMOS sensor
Lens:
Precision
LCD:
3.0" Color TFT
lnternal memorv:
5.5 Setting: Formot
M?rc
lf the internol memory or sD cord requires format by sconner, user con enter formot mode by press
oK button. The defoult setting will be concel format, user can press oK button ogoin to concel the
formot or
select confirm icon to confirm
formot the memory.
Note
process FormoL
there's no sD card inside device, the internol memory will be t'ormatted once
be
will
SD
cord
device,
formotted
tnsteod, if SD cord is inserted in
tf
Good bye poge
Glass Element Fixed Focus
LCD
Data Conversion:
20MB NAND Flash (for saving images)
Fixed focus
6 levels of control
5 levels of control
2,400 dpi; 3,600 dPi (interPolation)
10 bit per color channel
Scan Method:
Sinsle oass
Lieht Source:
Back light (3 white LEDs)
Focus Ranqe:
will override
Note: when both the HDM: cdble and AV coble connect to TV, the HDMI output signol
the AV output.
*
Exoosure Control:
Color Balance:
Scan Quality:
I
nterface:
USB 2.0, TV-out (video 3.5mm jack),
HDMIffvpe A)
USB
Configuration:
Mass Storase Device Class/MSDC
Power:
5V adapter, or USB Power
Dimensions:
82x86x152mm
0.41ke
SD/SDHC compatible
Weisht:
External memory: