1
12
S.P.E.C. 3 LED Curing LIght
EN
Reassembly & Storage
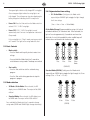
1.After all parts have been allowed to dry completely, gently
insert the metal end of the glass fiber optic light guide
into the circular opening of the handpiece. Make sure the
light guide is completely inserted until it stops. This will
position the light guide properly with the internal LED
light source.
VIII.Technical Details
8.1.Power Supply
A. Input: 100V – 240V AC / 50 ~ 60 Hz
B.Output: S.P.E.C. 3: 6V DC, 2.5A
8.2.Dimensions
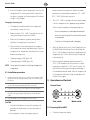
2.Slip the entire assembly into a new undamaged
polyethylene film barrier sleeve. Be careful not to cause
damage to the barrier sleeve film.
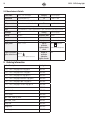
Component
S.P.E.C. 3 Curing Light
Handpiece
174.5 × 24.8 (mm)
Power Adapter
47 × 87 × 32 (mm),
3.Fold the end of the barrier sleeve film over the tip of the
fiber optic light guide making sure the seam in the barrier
sleeve does not pass across the light exit face of the light
guide. This will allow optimum light output.
Charger Base
136 × 86 × 60 (mm),
AC Power Cord
1.3M
4.Insert an elastomer rubber light shield over the end of
the fiber optic light guide. This will hold the polyethylene
barrier sleeve taut over the tip of the light guide and hold
it in place ready for the next use.
5.Verify the polyethylene film barrier sleeve is still intact and
has not suffered damage such as tears or cuts. Store the
reassembled S.P.E.C. 3 LED Curing Light in a clean dry
location, preferably on the S.P.E.C. 3 LED charger base so
that the battery will be completely charged prior to the
next use.
8.3.Environment
A. Operating Conditions
Temperature:
-5°C ~ +40°C (23°F ~ 104°F)
Relative Humidity:
10% ~ 85%
Ambient Pressure:
80 ~ 106 kPa
(23.62 inHg ~ 31.30 inHg)
B. Transportation and Storage Conditions
Temperature:
-10°C ~ +45°C (14°F ~ 113°F)
Relative Humidity:
10% ~ 90%
Ambient Pressure:
60 ~ 106 kPa
(17.72 inHg ~ 31.30 inHg)