1
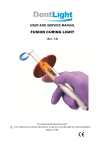
USER AND SERVICE MANUAL
FUSION CURING LIGHT (2008 RELEASE)
For dental use only!
U.S. Federal Law restricts this device to sale by or on the order of a licensed dentist
Made in USA
PARTS LIST
1.
LED Light Head
2.
Main Control Unit
3.
Battery Assembly
4.
Charge Stand
5.
Power Adapter and Adapter Power
Jack (5a)
6.
Barrier Sleeves (100)
7.
9mm Curing Caps(2)*
8.
13mm Curing Caps(2)*
9.
3mm Tacking Tips(2)*
10.
Unit Mount Eyeshield **
* Included in 7500080-08
** Included in 7500080-08-O
DentLight Inc.
1411 E. Campbell Rd # 500
Richardson, TX 75081 USA
Tel: (800) 763 6901
Outside US: 1-972-889-8857
www.dentlight.com
Molenstraat 15
2513 BH The Hague
Netherlands
Tel: +31(0)70 345 8570
Fax: +31(0)70 346 7299
1. Charge BATTERY ASSEMBLY:
2. Assemble handpiece:
Before use, charge Battery Assembly
overnight by either direct plugging the
Power Adapter or through the Charge Stand.
Push down LED Light Head and quick connect
with Main Control Unit.
Turn Battery Assembly clockwise and screw-on
connect with Main Control Unit.
3. Power on handpiece and Select Mode
PRESS AND HOLD the Unit Power Key for 5 seconds until LCD display
turns on.
Press Menu Key to select operation mode . Use smooth side of thumb and
apply normal force (a) (b). Do not point finger nail or use sharp object forcing
the keypads (c) (d).
Digital LCD displays operation mode (1, 2, 3, 4, 5, 10 and 20) when pressing
Menu Key successively. Seven modes are grouped in Sequential and Constant
Power modes. Constant power mode is recommended for sealants and
composite curing. Sequential mode is recommended for full arch veneer tacking
(1 or 2 sec per tooth) and bonding (3 or 4 sec. per tooth), and full arch bracket
bonding (3 or 4 sec. per bracket).
METAL KEYPADS
POWER KEY
MODE DISPLAY
THERMAL STATE
DIGITAL TIMER
BATTERY BAR
Constant On; Count Dow n; 5 second per beep
Menu Key
Mode Display
Timing Sequence
5
10
20
5 sec.
10 sec.
20 sec.
CONSTANT POWER MODE
ON/OFF KEY
Menu Key
MENU KEY
Mode Display
Timing Sequence
Sequential 80 seconds; 5 seond beep period; Count Down
1
1 sec. On
Mode Display
SMARTLIGHT INDICATOR
Timing Sequence
2
4 sec. Off
3
3 sec. On
3 sec. Off
2 sec. On
4
2 sec. Off
4 sec. On
1 sec. Off
SEQUENTIAL POWER MODE
4. Activate Curing
Before activation, make sure LCD display is on. Hold in either pen grip style (e)
or torch grip style (f). Press On/Off Key to activate curing procedure. DIGITAL
TIMER counts down in seconds. Press On/Off Key any time to stop.
BACKLIGHT
5: Cure Times
Average curing time of shade A2 (2mm thick) composites is 3 seconds. Darker shades or thicker composite may require additional times. It is recommended
a timed curing test outside the mouth be performed. Using a 3mm hardness disk, cure from the top for the recommended time, and reverse the disk. Using a
sharp instrument, compare the hardness of the disk to the hardness of the composite - it should feel exactly the same if well cured.
5. Battery Maintenance
BATTERY ASSEMBLY uses a high capacity Lithium-Ion battery with built-in smart
recharging electronics. Keep light charged at all times when not in use by:
I: Drop and push the handpiece to the bottom of the Charge Stand.
II: Direct plug in the power jack from the Power Adapter to the receptor end of the handpiece
III: Drop and push the handpiece into the Dental Unit Charge Holder (optional kit
and accessory), which can be mounted on a standard dental unit bar or cabinet bar (12) via its
two bottom set screws. The Dental Unit Charge Holder connects to Power Adapter through its
outlet power jack 11a and extension cord 11b.
SMARTLIGHT INDICATOR is green while charging and turns off automatically when fully
charged. The battery capacity is indicated in the battery bar on the LCD display and displays
full bars when fully charged. During operation, unit warns at low battery and turns off with audible alarm, flashing backlight and battery bar.
To avoid battery power drain, shut down the unit power during storage or transport by pressing while holding on the Unit Power Key for 3 seconds until
display is turned off indicated with a beep sound.
6. Tips
Cooling - Handpiece shuts down for 15 seconds when overheated accompanied by LCD flashing THERMAL STATE symbol and keypad backlight
together with audible alarm. A simple cooling method is placing a suction tip or compressed air close to the Light Head during or between use or when it
just shuts down. Do not overcure to avoid overheat. Another method is Half Power Mode.
Half Power Mode - Press Unit Power Key during operation to switch to half power mode (800mW/cm2) in procedures for preparation of liners and
bases or to reduce shrinkage. Press Unit Power Key again to switch back to normal power mode. Handpiece works longer time in Half Power mode
generating minimum heat.
Connection - Ensure good mechanical and electrical contact at both junctions of Light Head to Main Control and Battery Assembly to Main Control.
Make sure there is no loose and dirty connection. Clean contact as instructed below if needed.
7. Safety Precautions
Light must be used with barrier sleeves to avoid patient contact. Optional cap and shield are placed outside the sleeve. Replace the barrier sleeve after
each patient use. Handle and dispose of used sleeves in accordance with accepted medical practice and applicable laws and regulations
Do not touch and open any electronics parts and circuit boards. Warranty void if seal broken.
Do not apply excessive force or with sharp object to the keypads to avoid damage.
Do not immerse handpiece in waters or solutions. Warranty void in case of liquid damage.
The very high light intensity of FUSION results in a certain development of heat. Prolonged exposure of the pulp and soft tissues may result in
irreversible or reversible damage. This high-performance polymerization light must only be used by specially trained dental personnel
- Do not place light directly on the same tooth segment for more than 10 seconds.
- Do not place light in direct contact with unprotected gingival, oral mucous membrane or skin. Prevent heat accumulation with a rubber dam in place.
- Follow Cooling Tips to reduce contact heat.
- Adjust curing techniques in accordance with increase in curing energy: e.g., decrease curing time and decrease power (Dual Power Switch).
Do not look directly at light emitted from this curing unit. Do not use this device without suitable shield or protective eyewear for the operator and
assistant. Three levels of protective eye shields are offered by DentLight: curing caps (partial eyeshield at the tip of the curing light), unit mount Eyeshield
(mounts on the chrome section in between the Light Head and Main Control), and eyeshield goggles.
If time intervals between exposures are too short, LED tip may overheat and potentially cause soft tissue injury. Do not continuously use the handpiece
for over 2 minutes. It is recommended to wait for at least 30 seconds after continuous exposure of two minutes or when overheat alarm indicator has
turned on and using the cooling TIPS (section 6) suggested.
Charge batteries while not in use to extend the lifetime of the rechargeable battery.
- Do not short circuit battery.
- Do not store above 60°C (140°F).,
- Dispose of unserviceable batteries and curing lights according to the national rules and regulations. Batteries must not be incinerated.
- Replace the battery assembly after the lifetime of the battery usage by ordering replacement battery assembly from the manufacturer.
8. Cleaning and Disinfecting
a) Thoroughly wipe off handpiece and charge base with cleaning solution or soap and water. Do not spray. Disinfecting agents must not enter openings on unit.
b) Disinfect by thoroughly wiping down with a soft cloth or tissue damped with isopropyl alcohol.
c) Clean curing lens and electrical metal contact using Q-tips slightly damped (do not soak) with isopropyl alcohol.
d) Always safeguard handpiece opening area, metal keypads and LED tip against moisture as this may cause electrical short-circuit or dangerous malfunction.
9. Technical Specifications
10. Reorder and optional Item Codes
Voltage to handpiece
Regulated 5V DC
Protection from Ingress Liquids
None
Lamp
High Power LEDs. 50000 hours.
Wavelength Range
Standard Light Head: 420 – 490 nm
REF
Description
7500080-08
FUSION Curing Light Kit - Silver
7500080-08-P
FUSION Curing Light Kit - Pink
7500080-08-B
FUSION Curing Light Kit – Blue
7500080-08-G
FUSION Curing Light Kit - Gold
7500081
Curing Caps – 9mm (50/pack)
7500081B
Curing Caps – 13mm (50/pack)
7500081C
Tacking Tips – 3mm (20/pack)
7500082
Barrier Sleeves (100/pack)
7500083
Charge Stand
White Light Head: 5000-6500 K
UV Light Head: 390 – 420 nm
Standard Light Head: 1500 mW/cm2 (±10%)
Curing Intensity
UV Light Head: 300 mW/cm2
Battery Lifetime
500 full charge-discharge cycle
Fuse
Shutoff
Internal to handpiece for overheat and overcurrent
protection
Timer auto shutoff; User shut off anytime by pressing
On/Off key; Overheat or low battery auto shutoff.
0 –35 ºC
7500084-08
FUSION’08 Battery Assembly
7500085
Power Adapter
7500088
Eye Goggle
7500092
Unit Mount Eye Shield
7500093
Focus Lens Module
7500094
Expanded Beam Lens
11. Accessories Usage
7500095
Lens Tool
Tip Size and Lens replacement
7500050
Main Control Module
7500060
Standard Light Head Module
Operating Temperature
Storage Temperature
-10 – 40 ºC
Weight
110 grams
Dimension
22 mm diameter; 200 mm full handpiece length;
Standards
Complies to CE 89/336/EEC, EN60601-1-2, EN610003-2, EN61000-3-3, IEC60601-1-2
Note the tip and beam size from the curing light can be adjusted using a
combination of 3mm, 9mm or 13 mm caps and Focus or Expanded Beam
Lens Module. The lens module can be switched using the lens tool by
aligning and locking the tool’s flat edge to the flat edge of the lens mount
and turning counter-clockwise similar to unscrewing a nut. Clean thread
following instruction in 8c. To replace the lens module, reverse the above
step with a replacement Lens Module. Example of obtaining different
optical tips:
13mm tip: use Expanded Beam Lens Module and snap on orange 13mm
curing caps
7500060W
White Light Head Module
7500060U
UV Light Head Module
7500071
Dental Unit Charge Holder
7500072
Chair Power Extension Cord
7500070
FUSION'08 CHAIR SYSTEM
Unscrew
Lens Module
LED Light Head Options
Flat Edge
Le
ns
To
ol
Three optional light heads are offered with standard light head being most
common for LED light curing applications with photoinitiators active to
wavelengths from 420-490nm. UV (Purple) Light Head option cures
composite with photoinitiators active to 390-420nm. White Light Head
option offers diagnostic tools to detect dental caries and diseases.
Dental Unit Charge Holder
This option provides the user a convenient mounting and charging option on
a standard dental unit or cabinet unit. See Section 5 for details.
12. Limited one-year WARRANTY
Register your purchase of FUSION at www.dentlight.com. Your FUSION is warranted to be free from defect in material and workmanship for a period of
one year under normal use after its original purchase date. This warranty extends only to the original retail purchaser and only when purchased from an
Authorized DentLight dealer. Consult with DentLight to purchase extended warranty beyond one year. This warranty does not cover products damaged by
the following:
-Improper operation, accident or neglect, misuse or abuse, such as physical damage (cracks, scratches, etc.);
-Liquid, water, rain, extreme humidity;
-Improper repairs or modifications that have not been carried out by a certified Service Center.
-Use of other spare parts and accessories than from the manufacturer;
-Other acts which are not the faults of DentLight.
DentLight shall under no circumstances be liable for incidental, special, or consequential damages or damage from misuse according to the manual.
In case of a claim under warranty, the complete apparatus (handpiece, charging base, and power adpater) must be returned, carriage paid, to the dealer or
directly to DentLight, together with a receipt of purchase.
13. Troubleshooting
If an error occurs, follow the troubleshooting guides below to determine the cause of problems and corrective action.
Trouble
Causes
Error Indication
Unit Power is not turned on
LCD display blank
Corrective Action
Handpiece
Light cannot be activated
Press and Hold Unit Power Key until the LCD
display turns on. Then Select a mode and press
On/Of f Key.
Light cannot be activated
Light cannot be activated
The battery is low
The handpiece is overheated
LCD Battery Indicator low or
Charge the battery. If LCD blank, charge the battery
LCD is blank and can not be
assembly separately overnight by first unscrewing the
turned on with Unit P ower
battery assembly from the main control unit and then
Key.
plug in the power adapter directly.
The handpiece, in particular the Allow the handpiece to cool down in ambient or with
Light Head is hot
Light cannot be activated
convection air from suction tip or compressed air.
Bad electrical contacts and connection Can see digital count down and Clean metal contacts as instructed. Ensure all
between the Battery Assembly or
hear beeps or light some times
electrical contact pins are not damaged. Ensure the
Light Head and Main Control Unit
work and some times not.
Light Head is completely pressed into the Main
Control adapter. Screw Battery Assembly tight into
Light cannot be activated
Electronic defect
No backlight when pressed or
Main Control Unit.
Contact the manufacturer.
alarm and stop working
excluding above sceneries
B attery Assembly
Battery not being charged
Electronic defect in the Charge Base
Charge Indicator no light;
P lease contact manufacturer or your dealer to replace
Charge Indicator turns green
Charge Base.
while bypassing the base and
directly plugging into the
handpiece
Battery not being charged
Electronic defect in the P ower Adapter Charge Indicator no light while P lease contact manufacturer or your dealer to replace
charging either directly or with P ower Adapter.
Charging Base. Curing Light
cannot turn on by pressing
On/Off key while plugging
adapter directly into the
handpiece.
Battery is not being charged
Electronic defect in the Battery
Charge Indicator no light while P lease contact manufacturer or your dealer to replace
Assembly
charging either directly or via
Charge Base. Curing Light can
turn on by pressing the On/Off
Key while plugging adapter
directly to the handpiece.
P ower Adapter.