1
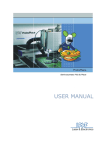
LPKF – ZelPlace BGA
Preliminary user manual
March 2003
LPKF d.o.o.
Zg. Jezersko 32 • 4206 Zg. Jezersko • Slovenia
Tel.: (++386) 4 / 20 13 - 800 • Fax - 820
e-mail: [email protected] • Internet: http://www.lpkf.si
LPKF Laser & Electronics AG
Osteriede 7 • 30827 Garbsen • Germany
Tel.: (++49) 5131/ 7095-0 Fax -90
e-mail: [email protected] • Internet: http://www.lpkf.de
LPKF
ZelPlace BGA
CONTENTS
1. Introduction..................................................................................................... 3
1.1. Technology ............................................................................................................ 3
1.2. Technical data ....................................................................................................... 3
1.3. Technical characteristics ....................................................................................... 4
2. General information ........................................................................................ 5
2.1. Safety precautions................................................................................................. 5
3. Installation ...................................................................................................... 6
4. Operation........................................................................................................ 7
5. Maintenance ................................................................................................... 9
6. Trouble shooting guide ................................................................................... 9
2
ZelPlace BGA
LPKF
1.
Introduction
Pick&Place devices are an integral part of SMD processing technology nowadays. Manual
Pick&Place devices make it possible for you to apply Surface Mount Technology (SMT)
components on the circuit boards without having a great deal of previous knowledge. The
LPKF ZelPlace BGA device is designed for accurate placement of different types of BGA,
CSP and Flip-Chips as well as large fine-pitch and ultra fine-pitch components for
prototyping through to volume production.
1.1. Technology
The placement of components where leads are neither seen from angle nor top requires
special and precise alignment. First the component is picked up by a vacuum nozzle.
Circuit board on an air-cushioned table is set below the component. Special optics projects
an image of the bottom side of the component into an image of the PCB layout. Rotating
the component and fine-positioning the circuit board align both images till respective pad
patterns perfectly overlap.
This system is also an ideal solution for the placement of fine-pitch components with
higher number of terminals. ZelPlace BGA Placer can be combined as an additional
device to all configuration sets.
To enable successful warranty claims, if necessary, it is absolutely necessary to read this
manual carefully before using the device for the first time, and to follow the instructions
exactly! If you have any additional questions to your equipment, please don’t hesitate to
contact us:
LPKF d.o.o. Zg. Jezersko 32, 4206 Zg. Jezersko, Slovenia
Tel.: (++386) 4 / 20 13 800 Fax.: (++386) 4 / 20 13 820
e-mail: [email protected]; http://www.lpkf.si
1.2. Technical data
Dimensions:
Weight:
Power supply:
Compressed air supply
Operating air pressure
Vacuum
Max. circuit board size - placement area
Ambient conditions:
Accuracy
Humidity: 30-95%
600x435x520mm
cca 60kg
220-240V/110-120V 50/60Hz 20VA
Max. 6 bar (6x10 5 Pa)
4 to 6 bar (4x10 5 to 6x10 5 Pa)
0 to -0.8bar ( 0 to –0,8x10 5 Pa )
300 x 250mm (A4 format)
Temperature:
5 –35°C
+- 0.050mm
Altitude: below 1000m above mean sea level
3
ZelPlace BGA
LPKF
Description
Camera VKC-133/1
Monitor CMK-1480
System
CCIR / PAL
NTSC / PAL
CCD
1/3”
Resolution
480 lines
Active pixel
752x582
Power Consumption
3W
60 W
Power Source
DC12V
AC 90 - 260 V, 50/60 Hz
Shutter
1/50-1/10.000
360 lines
Picture Tube
14”, 0.66 mm Stripe Pitch
Horizontal Stability
+ 500 Hz
Vertical Stability
+ 3 Hz
Convergence(Centre)
0.4 mm max.
Video In / Out
4 Video Input /1 Video Output 1.0 Vp-pBNC
Audio In / Out
4 Input / 1 Output
Audio
0.7 W
Auto Switch
Yes
Operating Temp.
0°C - +40°C
Dimensions (WxHxD)
365 x 342 x 391 mm
Weight
12 kg
1.3. Technical characteristics
Components, which can be placed with existing CCD camera and monitor resolution:
PLCC 50 mils (1.27 mm)
SSOP 0.65 mm - 64 leads
TSOP 0.50 mm - 48 leads
QFP 0.8 mm - 120 leads
QFP 0.65 mm – 100; 160leads
QFP 0.5 mm - 176 leads
QFP 0.4 mm - 176 leads
LQFP 0.3 mm - 168 leads
BGA 1.5; 1.27; 1 mm
µBGA 0.75; 0.5 mm
or for QFP:
0.65mm pitch, dimension 28x28mm
0.5mm pitch, dimension 24x24mm
0.4mm pitch, dimension 20x20mm
0.3mm pitch, dimension 14x14mm
4
ZelPlace BGA
LPKF
2.
General information
Caution:
• The original packing should be opened only by screwdriver on marked places
otherwise warranty claim will not be considered.
• Please inspect ZelPlace BGA device for completeness immediately after unpacking it
on hand of the packing list. Also inspect it for transport damage.
• If any transport damage is discovered, the forwarding agent is to be notified
immediately.
Attention:
• Don’t inhale the soldering steams. Avoid contact with your skin. Read the information
and the attentions of the manufacturer of the solder paste. Solder pastes are leaded.
• Use only genuine spare parts. If non genuine spare parts are used we cannot
guarantee warranty claims.
NOTICE:
In case of any reclamation please ask the manufacturer for further instructions
and make sure that you send the equipment back in the original package.
2.1. Safety precautions
1. In order to be able to guarantee the safe operation of the system the user must have
read this manual, before first use.
2. Never reach into the device while picking or placing components.
3. Operator with longer hair must wear a hair net!
4. If you modify equipment yourself, the equipment’s safety can no longer be
guaranteed and no guarantee claims can be accepted!
5. Keep the workplace tidy.
6. The device must work in a dry place.
7. The equipment is designed for room operation only.
5
ZelPlace BGA
LPKF
3.
Installation
1. Please check before unpacking the system if any transportation damage is visible on
the outside of the packing. If any damage is visible, please inform immediately your
forwarding agent.
2. The original packing should be opened only by screwdriver on marked places
otherwise warranty claim will not be considered.
3. Unpack LPKF ZelPlace BGA carefully not to cause any damage on the device and
remove the fixation by the granite base table.
4. Place the basic device on your desired position and monitor on monitor stand. The
equipment must stand on a horizontal flat and firm base in order to work properly!
5. Untie the optic head then unpack the placement table, put it on granite base table
(surfaces must be clear for good operation) and connect the vacuum inlet on fast
connector.
6. Connect the pressured air to a screwed joint of sliding valve 6bar min 10l/5bar with
standard pneumatic hose (6/4mm).
7. Compare the power supply characteristics with your mains network before
connecting and connect main power with power cable for device and monitor.
8. Connect also foot pedal and power for camera and video signal between camera and
monitor.
6
ZelPlace BGA
LPKF
4.
Operation
1. Open compressed air with sliding valve at the rear side for (fast turn ON is in direction to
device). When device is not in use, it is recommended to turn off the air (fast turn OFF is in
opposite direction to device). On manometer you should get 5bar (min 4bar) and vacuum
will be present for fixation of placement table (leaking of air will be heard).
2. Switch on main power and monitor. Machine will be initial positioned and yellow button for
START will light on. (If you have not opened compressed air or the pressure is not at least
4 bar the yellow button for start will flash on and off simultaneously).
3. Adjust the clamping bar for your PCB and tighten it in front side with hexagon threaded
screw (fixation bars must be parallel to provide round PCB against placed components).
4. Clamp your printed PCB with solder paste or already assembled with other non fine pitch
or BGA components. Place your desired component tray on the right side of clamped PCB
and press VACUUM button for pick up nozzle.
5. Choose the nozzle according to the component dimension and adjust the vacuum with the
knob on left front side (vacuum valve for pick up function-sound of air leakage will be
changed). You can check the vacuum with finger (vacuum is normally about -0.05bar).
6. With manual vacuum pipette pick up the desired component and place it in the centre of
pick up feeder. Move it in CW direction under pick&place nozzle (optic part will be opened
in left direction and vacuum will be present).
7. Push gently the feeder up and touch the nozzle with the component, then remove it on
home position. Optic part will be closed between component and PCB for position
adjustment.
8. With foot switch release vacuum fixation for placement table and drive it under pick up
nozzle. When the switch is released the vacuum is present again to clamp the placement
position.
7
LPKF
ZelPlace BGA
9. Now you can adjust focus and shutter on optic part. Focus should be opened as possible
that we could clearly see the solder pads and pins or solder balls according to component
dimension.
10.With brightness adjustment we can increase contrast between images: green for
component side and white for placement side. Brightness and shutter adjustment are
reciprocal dependent. Better results are with shutter adjustment in centre.
11.Next step is position adjustment. Firstly you should adjust rotation with rotation knob on
placement head then X and Y position by fine adjustment on placement table. You can
compare images also with brightness lowering-rising on the component side.
12.Now you can place component down with pressing START button: optic part will be
opened in left direction and pick up head will go down, place the component and will go
up, also optic part will be closed for placement inspection. If you are satisfied with the
placement you can proceed with your next component otherwise you can correct the
position.
13. For correction of the position you need firstly to switch off the main power and switch on
again while you press also VACUUM and START button simultaneously. Start the pick up
procedure with pressing the START button: optic part will be opened in left direction and
pick up nozzle will go down and touch the component (vacuum will be present).
14. Next START button pressing will pick up the component and optic part will be closed
between component and PCB for position readjustment.
15. After fine readjustment place component down with pressing START button and press
VACUUM button to release vacuum for component and START button for placement
inspection.
8
ZelPlace BGA
LPKF
5.
Maintenance
Your ZelPlace device system was designed to be almost maintenance free. Daily the
nozzles should be removed and cleaned normally.
Please make sure that you only use drain, oil free, clean air to prevent any damages on
the pneumatic system inside the device. Air cleaning device is built in pressure regulator.
When working with viscose fluids pay special attention that You don’t suck fluids with the
nozzle because it may cause serious problems on the device. With 200 models first with
blocking the possibility for rotation of the components
6.
Trouble shooting guide
A great deal of care was taken when manufacturing and assembling your appliance.
Nevertheless, it is possible that faults may occur during start up or at a later stage. These
are often caused by transportation.
In the event of a fault, please proceed as follows:
1. No power:
· Check your power supply.
· Check the fuses which are located in the power supply at the back of ZelPlace device.
2. No vacuum on the Pick&Place nozzle:
·Check the nozzle if it is blocked, possible is there some solder cream or dust inside
which blocks the vacuum.
3. START button is periodically blinking:
·Air pressure is under 4 bar or sliding valve is closed;
·Pick up feeder is not at home position;
4. No initialisation:
·Whenever you switch on the power and turn the air pressure on and START light is stop
blinking, you may manually help the optic unit to open to the extreme left (home)
position;
·This is necessary because the air in the cylinders did not reach the equilibrium level.
After that the device will work properly.
9