1
Add a New Patient
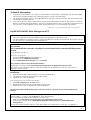
1. Click New Patient in the Main screen.
2. Enter First Name, Last Name and Patient ID. (It is mandatory to
enter a Patient ID [letters and/or numbers] to fully prevent mix-up
of patients with the same first and last name)
3. Enter a new Examiner or choose an existing examiner from the
drop down list.
Optional
4. Enter Sex, Comment and/or Welcome Message (a text displayed
on the NIOX MINO® screen when the Test Card is inserted and
configured as a patient specific card).
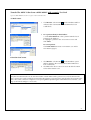
5. Click Expand to:
• Set low and high NIOX® Value limits presented in the
measurements graph, (see page 10; E).
• Select if The NIOX Value should be visible on the NIOX MINO
display. The default setting is that The NIOX Value is displayed.
Uncheck the box if it should not be displayed. (See page 9,
Configure a NIOX MINO Test Card).
.
Receive Data from NIOX MINO
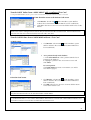
1. Place the NIOX MINO IR port close to the PC IR port.
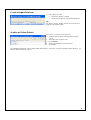
on the Windows tool bar indicates that a
2. The IR icon
NIOX MINO is within range.
Note!
If your PC does not have a built-in IR port, connect and install an IrDA USB Adapter. Refer to the accompanying
product documentation. An external USB Adapter should be used if you intend to use the Visual Incentive (page
13).
6