1
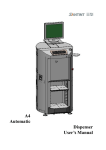
A4 Automatic Dispenser User’s Manual ISO 9001: 2000 CERTIFIED Contents 1. Using Requirements .................................................................................................. 1 2. Specifications ............................................................................................................ 1 3. Safety Instructions..................................................................................................... 2 4. Machine Composition ................................................................................................ 4 5. Installation ................................................................................................................. 4 5.1 Install the machine .................................................................................................... 4 5.2 Install Computer ........................................................................................................ 5 5.3 Install software .......................................................................................................... 6 6. Machine Adjustment .................................................................................................. 6 6.1 Software Adjustment ................................................................................................. 7 6.2 Machine Adjustment .................................................................................................. 9 6.3 Add colorant ............................................................................................................ 10 6.4 Empty pump ............................................................................................................ 10 6.5 Calibration of colorant ..............................................................................................11 7. Operation .................................................................................................................11 7.1 Put base paint can .................................................................................................. 12 7.2 Change water in cleaning box ................................................................................. 12 8. Maintenance ........................................................................................................... 14 8.1 Daily maitenance:.................................................................................................... 14 8.2 Periodical maintenance: .......................................................................................... 14 9. Replace spare parts ................................................................................................ 14 10. Wiring diagram ........................................................................................................ 16 11. Trouble Shooting ..................................................................................................... 17 Warning Labels: Electrical Shock Danger! Cut off power supply before cleaning and maintenance. Important Information! Read carefully. A416 Automatic Dispenser Santint V1.0 1. Using Requirements 1) Check the local voltage/frequency if same as the ones on the nameplate of the motor, For the sake of safety, make sure that all the socket be grounded well; 2) Environment temperature: 5℃-40℃, relative humidity: 15-90; 3) The appropriate atmospheric pressure range of working condition: 86kPa~106kPa 4) Computer Requirements: 1 CPU PIII 2 CD-ROM Driver 3 LCD 15” Screen Resolution: above 800X600 4 COM1 port 5 Windows 2000 XP Vista or higher Operating System(SP2) 2. Specifications Type:A4 Spec:A416/14/12/10 Notes: Stirring time is optional on customers’ requirements. Items Contents Items Contents Number of Canisters 16/14/12/10 Min Dispensing 0.077ml(1Y/384) Max Flow Rate 0. 60ltr/min Canister Size 1.8/2.3/3.8 ltr Pump Size 62mltr Stirring Speed 20 Cycles/min Power ≤200W Power Supply See Nameplate Can Size(D x H) MAX320mmX450mm Stirring Time Stir 10 minutes every 4 hours Weight 182±3 kg MIN80mmX100mm Noise Level <70dBA Machine Size (Height x Width x Depth) A416 Automatic Dispenser 1405X805X945(mm) Santint V1.0 1 3. Safety Instructions 1). Please read this manual carefully before installation and operation. 2). All the operation and maintenance must be carried out by authorized personnel. 3). Prolonging wire is prohibited. 4).The machine is only available for 0.5 liter to 20 liter (40kg) paint cans. 5).The machine should be powered on all the time to make the stirring available. 6).Please closes the side door first before closing the top cover. 7).If it is not used for a long time, the canisters should be cleaned and plugged off. 8).During transportation, the machine should be leveled, preventing from being shocked, pressed, bottomed up or side faced on the ground. The machine should be kept in ventilated and dry room which is moisture-proof, explosive-proof and fire-proof. 9).Press the Emergency Stop Button to turn off the machine will also lead the colorant stirring stopped 10).The equipment is forbidden to use in flammable, easy burst environment. 11). No hot plug of data line. 4. Machine Composition Lifting Canister Turntab Washing Loading Figure 4.1 A416 Automatic Dispenser Figure 4.2 Santint V1.0 2 Canister: Canister is connected with piston pump and valve, on the valve there is a valve handle and a nozzle for colorant dispensing. 1. Maximum capacity of is printed on the canister; 2. The nozzle should be kept cleaning; 3. After refilling canister, the lid should be closed to Max Volume of colorant prevent colorant from drying up. Figure 4.3 Turntable: Canisters are fixed on the turntable, which can be turned to drive the right canisters to dispensing position, stirring inside canisters also carried out while turning. . Stiring to avoid colorant deposition. Washing System: Clean the nozzle after colorant dispensing; the washer container must always be filled with water, check the water level and change water every day. Lifting System: With the assistance of electrical control system, the machine can make the piston up and down to dispense colorant out. Only authorized personnel are allowed to open the front door for service. Loading Plate: Loading plate is used to put base paint can. Put it into different tray according to the size of paint cans. The photoelectric sensor (Figure 4.6) is used to sense the paint cans. Loading plate should not be placed randomly. Photoelectric Sensor Max Volume Of Water Figure 4.4(Pull-out) A416 Automatic Dispenser Max Volume of Water Figure 4.5 (Built-in) Santint V1.0 Figure 4.6 3 5. Installation 5.1 Install the machine Unpack the machine and inner film with necessary tools and production. Take out tool box; check the items inside according to the packing list. Find out the keys of the side doors,and open the door, press the button and eject the door handle. Turn the door handle and open the side doors. Figure 5.1.1 Lock the bolt connecting base and pallet with spanner 8, and loosen the screw cap on the base with spanner 19, remove the four bolts between machine and pallet, and locate the machine at working site. With big spanner, adjust the four feet (as Figure 5.1.3 shows) to make them touch the ground and make the machine leveled. The machine should work unmovable and low noisy. Find the mouse pad in tools box, install Figure 5.1.2 Figure 5.1.2 Figure 5.1.3 the mouse pad on the side of machine. (as Figure 5.1.4 shows) Figure 5.1.4 Inserts the external power equipment line to the socket on the back of equipment. (as Figure 5.1.5 shows) The machine installation is finished. Figure 5.1.5 A416 Automatic Dispenser Santint V1.0 4 5.2 Install Computer Unpack the computer, put the computer on the bottom plate of the machine, the rear of the computer should be put on the left of the machine to connect wires conveniently; Put the keyboard and mouse on the top of machine, the connection is as figure 5.2.6 shows. Pass through the wire hole Infix wires through the hole above and tie it Infix wires through the hole and below Figure 5.2.6 Unpack the monitor, and with the tools, screw down two screws on the monitor support to make it fit into a good position. (See Figure 5.2.7) Tightening Bolt 紧固螺钉 Figure 5.2.7 Fix the monitor: Put the monitor on the monitor support board, and then move the monitor strips close to the monitor support base.(as Figure 5.2.8 shows). A416 Automatic Dispenser Santint V1.0 5 Monitor support board Monitor strips Figure 5.2.8 Connect the power cord of monitor and data line, and pass through the wire hole as right figure, and then connect them to the computer.(as Figure 5.2.9 ① shows) Connect each part of computer correctly,and plug in the power supply wire of computer and monitor into the socket;(as Figure 5.2.9 ② ③ shows). Connect the data line of machine to the computer. (as Figure 5.2.9 ④ shows)The computer installation is finished. ① No hot plug of data line. ② ③ Socket ④ Data line Figure 5.2.9 5.3 Install software 1) Turn on the circuit controller on the back of machine: 2) Turn on monitor and computer, enter operating system; 3) Put the installation CD to CD-ROM; See Software Manual for detail info about installation and using. 6. Machine Adjustment The machine has been tested before leaving factory, normally the professional go to your site to do machine adjustment. If you don’t need, please install and adjust the machine under the A416 Automatic Dispenser Santint V1.0 6 guidance of the professional. Switch 6.1 Software Adjustment 1) Turn on the switch on the back of machine, and ensure that the Emergency Stop button is on (please ensure that the power supply is on.) 2) Open (double-click the icon) the Color Expert 2.0; 3) Machine begins running self-checking program, and pop up the self-check interface (Figure 6.1.1); please promptly press the Emergency Stop button and check the machine if there is abnormal noise coming from the machine. 4) After start-up , enter into the software interface, click the formula management interface and select the formula type, for example, " dispensed" (Figure6.1.2), click "next" to enter the interface of formula information (Figure 6.1.3). if this formula meet the dispensing requirements, Click "dispense" to start dispense, open the “job status” to see the dispensing state (Figure 6.1.4); If not, Click "back" and select another formula. 5) Check the program to find if everything is in normal condition (i.e. text display); if there is any problem, see Software Manual. Figure 6.1.1 A416 Automatic Dispenser Santint V1.0 7 Figure 6.1.2 Figure 6.1.3 A416 Automatic Dispenser Santint V1.0 8 Figure 6.1.4 6.2 Machine Adjustment When the software shows Ready, please start to adjust the machine. Dismantle the cleaning box; fill some water or washing liquid, the cleaning wheel runs normally. Check whether the piston is on the bottom; the initialization of turntable should be in normal condition; Put the paint can on the center of loading plate. If there’s no paint can or take off the paint can suddenly, the software should show E18 “No Paint can, colorant can not be spouted out”. Test the switch of sliding door: the machine can not work when the sliding door is opened. Press the Emergency Stop button under any suddenness. Pressing the Emergency Stop button also can stop stirring. A416 Automatic Dispenser Santint V1.0 9 6.3 Add colorant Before colorant is added into canister, it must be fully mixed by stirring ruler, it is not recommended to be mixed by shaker in case too many bubbles appearing to effect the accuracy; The maximum capacity of canister is 1.8/2.3/3.8L, notice that the colorant must not be filled above the uppermost mark of stirring device; The machine has good distribution before leaving factory, see AllotCansColor.exe of the file “Bin” in the Installation directory; With the instruction of Software Manual, please assign the colorants to respective canisters if necessary to change. The default configuration system is to add colorant from left side. Select Maintenance – Tinting maintenance, select one colorant,press Add, fill colorant into canister, be sure that the colorant is added into corresponding canister; Open the lid of canister, the corresponding colorant marks are stuck on the canisters, the colorant marks are arranged in order and in accordance with the machine’s characteristics; Open the canister lid and insert less part of the stirring ruler into the canister, then add the colorant along the stirring ruler to the canister slowly, cover the lids. The machine can not move when the machine’s top cover plate is opened; Enter the added amount of colorant into the input text box, press Add; Add colorant into corresponding canister one by one; Select stirring to stir colorant. Figure 6.3.1 6.4 Empty pump Air in the pump influences the accuracy, so emptying the air in pumps is a must; The machine has with automatic emptying function; The machine can automatically lift the piston pole and then press it to the bottom and repeat for 3 times. When colorants are filled for the first time, a cup is needed to put under the dispensing nozzle. Tool Manual Dispense input 30ml, then the machine lifts the piston pole automatically, then open the valve and press the pole down to bottom, then repeat this for three times, finally filling A416 Automatic Dispenser Santint V1.0 10 the cup; Please don’t fill he colorants in the cup into the canister and don’t lift the pole at will; Turn the turntable and empty all the pumps in this way; don’t dispense different colorants into the same cup. Please cover the lids promptly to avoid evaporation. 6.5 Calibration of colorant The machine has been calibrated in the factory. Customers can also recalibrate 4-7 hours after colorants have been filled if they need. A scale with minimum accuracy of 0.001g and a form of colorant density are a must for recalibration. Stir for 30 minutes after adding colorants, to remove bubbles. When the dispensing of colorants is not continuous, please re-empty air or check if nozzle is blocked. After 4 hours, the machine can be used to dispense colorant. 7. Operation The operation manual help has detailed explain of the demand, transfer, modify of dispensing formula. Please follow the help when operate. Operator should have systemic training before operation. The machine should be powered on all the time; there will be no action when emergency button is pressed. The colorant level in canister should not be lower than 0.4L. A416 Automatic Dispenser Santint V1.0 11 7.1 Put base paint can Base Paint Can Sensor 1) Select right height of tray rail and put tray inside along with the rail; 2) Don’t put tray on top of rail, in case base paint can overturned; Tray Center Rail 3) Open base paint can cover; 4) Put the can on the center of tray, in case the colorant can’t be poured into the can. Tray 5) The top of can should be higher than can sensor; Base Center 6) Ready for dispensing now. 7.1.1don’t use tray, put it directly 7) ForFigure big can, on bottom base. 7.2 Change water in cleaning box Both pull-out cleaning box and build-in cleaning box are available for customers’ needs. Change water in the cleaning box as follows: 7.2.1 Pull-out cleaning box. A416 Automatic Dispenser Santint V1.0 12 1) Lift lock handle to pull out cleaning box; 2) Hold the box handle, take it out; 3) Clean box, add water (water lever should be lower than wheel axis); 4) Put the cleaning box back, please make sure it is in bottom position, and push down lock handle。 Lock Handle Handle Outer Crown Face Figure 7.2.1 Figure 7.2.2 7.2.2 Built-in cleaning box. 1) Lift lock handle to loose cleaning box; Cleaning 清洗轮Wheel 2) Hold the box handle, take it out; 3) Clean box, add water (water lever should be lower than wheel axis); 4) Put the cleaning box back, please make sure it is in bottom position, and push down lock handle. Cleaning box handle 清洗盒手柄 Cleaning Box 锁紧手柄 Figure 7.2.2 A416 Automatic Dispenser Santint V1.0 13 8. Maintenance In order to keep the machine in optimum condition and reduce accidence ,you should do daily and periodical maintenance(Note: Dismantle the equipment requires trained professional). 8.1 Daily maitenance: Clean and Change water every twice day for cleaning box; Add colorant on time when software shows low colorant warning; it will infect the precision when colorant in the canister is lower than 0.4L. Remember to close the lid after adding colorant. Keep machine power on, even it is not used; the colorant can’t be stirred when it’s power off. Cleaning all the Rubber Pipe Covers once every week following the software manual. Attention that the movable components may lead physical injury. Clean nozzle if colorant is dispensed out not in upright path. Figure 8.1.1 If the machine is not used for more than 3 days, please dispense out 0.3ml colorant for every canister to make sure the dispensing precision. 8.2 Periodical maintenance: Do the following maintenance every 1-6 months as the usage: • Check stirring paddle inside each canister, see whether it works; if not, repair; • Check the valve handle to see if it can be opened and closed well; • Lubricate screw and guiding rod once every six months. • If the machine has not been used for a long time (more than 2 Screw weeks), clean every nozzle first. Figure 8.2.1 9. Replace spare parts 1) Replacing Outer Canister: Loosen the three bolts used to fix the canister with screw driver, remove the canister by turning it anti-clockwise; 2) Replacing Inner Canister: A416 Automatic Dispenser Santint V1.0 14 • Please remove the right outer canister when replacing the inner one. • Unscrew the bolt used to fix the canister on the shelf, and pull the shelf out 10mm slightly, overly pulling will lead the colorant’s leakage. • The canister can be removed from turntable in an anti-clockwise way. 3) Replacing Rubber Pipe Cover: Turn the handle away from the nozzle as shown in the picture, and remove the old cover then install the new one. Rubber pipe cover Figure 9.1 A416 Automatic Dispenser Santint V1.0 15 CN14 A416 Automatic Dispenser CN14 CN12 Data line with 9 pins CN10 AC220V 10 (AC110V 10) 50Hz/60Hz CN11 CN6 24V GND 12V GND 5V GND 5V GND Change-over switch GND 5V GND 5V GND 12V GND 24V 10. Wiring diagram Santint V1.0 16 11. Problem Trouble Shooting Cause Action 1. Machine is not power on. 2. Fuse is broken. 3. Motor is not connected. 4. Motor is broken. 1. Check the power. 2. Change the fuse. 3. Open the side door, reconnect wire. 4. Change the motor. 1. There is air in the pump cylinder. 2. Colorant level is too low. 3. Colorant is dry and blocked. 1. Purge cylinder. 2. Add colorant. 3. Clean canister. Canister is loosed. Fasten screw is loosed. Fasten Screw. Colorant is difficult to be 1. Nozzle is blocked. 2. Valve Motor is broken. 3. Valve handle cannot open. 1. Clean Nozzle. 2. Change valve motor. 3. Adjust the motor and valve position. 1. Colorant is dried inside. 2. Screw, guiding rod is not lubricated. 3. Fastening screw is loosed. 1. Empty colorant, clean canister and pump cylinder. 2. Lubricate screw and guiding rod 3. Fasten screw. 1. Voltage is out of normal range. 2. Screw and guiding rod is not lubricated. 3. Fastening screw is loosed. 1. Check the power supply. 2. Lubricate screw and guiding rod 3. Fasten screw. Sealing washer is damaged. Change sealing washer. 1. Emergency button is pressed. 2. Emergency button is broken or the wire is disconnected. Release emergency button. Change emergency button or connect wire. The door is not closed well. Close the door. Stirring motor doesn’t work. Colorant dispense out not continually. dispensed out. Piston difficult to move. Abnormal noise from step motor. Colorant appeared on the nozzle. LCD shows “Emergency Button Pressed”. LCD shows “Door Open”. A416 Automatic Dispenser Santint V1.0 17 Error Code Cause Action E11 Emergency button is pressed. Release emergency button. E12 Cover is open. Cover micro switch is broken. Close cover. Change micro switch. E18 No base paint can. Base paint can is too far away from sensor Sensor is broken. Put base paint can. Push base paint can close. Adjust or change bas paint can sensor. E31 Valve motor is broken. Vale motor driver is broken. Right valve sensor too far away. Right valve sensor is broken. Change valve motor. Change motor driving board. Close sensor. Change sensor. E32 Stepping motor is broken. Stepping motor driver is broken. Valve sensor too far away. Valve sensor is broke. Change Stepping motor. Change motor driving board. Close sensor. Change sensor. E34 Canister position sensor too far away. Canister position sensor is broken. Adjust the sensor. Change the sensor. E35 Turning table motor broken. Turning Plate doesn’t move. Turing table driver broken. Canister code sensor broken. Change turning table motor. Change driving board. Change code sensor. E36 Counting magnet is in wrong Position. Canister code sensor broken. Put magnet in right position. Change code sensor. E37 Canister position error. Canister position sensor too far away. Canister position sensor broken. Turntable moved. No canister found. Closer sensor. Change the sensor. Adjust distance of driving wheel or change driving motor. E38 Piston rod is lifted. Piston head sensor too far away. Put the piston rod back Closer sensor E39 Turning table move while stepping motor and valve not in home position. Check Valve is in home position. , stepping motor home sensor is lighted. E41 Valve motor is broken. Vale motor driver is broken. Left valve sensor too far away. Left valve sensor is broken. Change valve motor. Change motor driving board. Close sensor. Change sensor. Contact with the supplier when meeting other trouble. Please remember to provide the model and series number of the machine when contact with the supplier. A416 Automatic Dispenser Santint V1.0 18 ZHENGZHOU SANHUA TECHNOLOGY & INDUSTRY CO., LTD. Postal Address: Xushui Industrial & Trading Park, Zhongyuan West Road, Zhengzhou City, Henan Province, P.R.China 450042 Tel.:+86 371 67857220 E -mail: [email protected] A416 Automatic Dispenser Fax:+86 371 67857319 http: //www.santint.com Santint V1.0