1
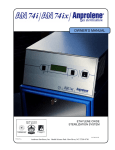
4
KEY OPERATOR STUDY GUIDE
Thank you for using the EOGas 4 sterilization system.
The active ingredient in EOGas 4 is ethylene oxide (EtO or EO). EtO is a powerful anti-microbial agent;
it can also be dangerous if not handled correctly. To help ensure that your sterilizer is operated
safely, all personnel who operate or maintain the equipment need to be properly trained.
The Andersen EOGas 4 Key Operator Certification Program provides instruction in the following
areas:
Environmental considerations
for EOGas 4 sterilization
Preparation of items to be
sterilized
The Andersen EOGas 4 Key Operator Certification
Program is available free of charge for the lifetime
of your sterilizer.
We recommend that all
operators at your facility are trained before they
use the sterilizer for the first time.
Operation of the sterilizer
Sterility Assurance
Operator Exposure Testing and
Emergency Procedures
4
EOGAS 4
STERILZER
S T E R I L I Z E R
The information in this study guide should be
carefully reviewed. The Key Operator test is
conducted over the telephone and requires 20
minutes.
When you are ready, please call
Andersen Customer Service at 01255 428 328 to
schedule your test. Shortly after completing your
test, you will receive a registered training
certificate. We look forward to hearing from you!
Overview of the EOGas 4 sterilization system.
1
The usual EOGas Series 4 sterilization cycle is 3 hours at 50° C, plus a 30-minute bag ventilation
cycle.
2
EOGas 4 also provides a 5 hour cycle at 50° C. This cycle should be used for any items that
contain small, long lumens (over 3 feet in length).
3
EOGas 4 also provides two low temperature sterilization cycles, which operate at 30° C., a 12 hour
cycle and a 24 hour cycle. Ethylene oxide takes longer to sterilize at 30° C. than at 50° C., hence
the 12 hour cycle. The gas takes longer to penetrate small lumens at 30° C., hence the 24 hour
cycle. The bag ventilation time is increased to 2 hours to allow for elution of EtO from a fully
saturated load.
4
The two preset temperatures that EOGas 4 sterilizer cabinets offer are 50ºC (122ºF) and 30ºC (86ºF).
5
The Humidichip and Humiditube ensure that humidity requirements for EOGas 4 sterilization are
maintained in the sterilization bag.
6
The AN1087 Dosimeter provides an immediate indication at the end of a cycle of whether the
conditions for sterilization have been met.
1
4
KEY OPERATOR STUDY GUIDE
Environmental Considerations
1
91º F
68º F
Temperature
Store your EOGas 4 gas refill kits in a cool, secure area. We
recommend storage below 70°F. The sterilizer must be used
in an area where the temperature is not less than 68°F or
more than 91°F . This temperature range must be maintained
during the entire sterilization cycle.
EtO FACTS: At sea level, ethylene oxide is a liquid below
51°F. Above 51°F, EtO begins to boil and converts into a
gas. EtO does not become an effective sterilant until 68°F.
Even though the EOGas 4 cabinet is heated make sure
that the room where your EOGas sterilizer is installed
remains above 68°F.
2
35%
Humidity
Humidity is very important to the EOGas process. Relative
Humidity (RH) must be at least 35% in the room where item
preparation and sterilization take place. Spores that might be
on the instruments may become desiccated and resistant to
EOGas if the RH is below 35%.
The simplest way to humidify items is to wash them. It is
necessary to humidify items which cannot be washed by
enclosing them in a plastic bag with an Andersen Humidichip®
or a damp sponge for four hours prior to sterilization.
Preparing the items for sterilization
Four basic preparation steps must always be followed:
1
Disassemble
Items containing removable parts such as syringes must
be taken apart before washing, drying, and wrapping them to
allow the EOGas an unobstructed path.
WARNING: Instruments which contain batteries should be
taken apart and the batteries removed and wrapped
separately to protect against a spark occurring and
igniting the ethylene oxide gas.
2
2
Wash
Items must be washed surgically clean prior to sterilization
using detergent and water.
4
3
KEY OPERATOR STUDY GUIDE
Dry
Two accepted ways to dry any item prior to sterilization with
EOGas are:
1. Towel drying
2. Drain drying (air drying)
WARNING: Heat or hot air should never be used to dry
an item prior to sterilizing it with EOGas because it will
dehydrate or desiccate bacteria spores making them
more resistant to the ethylene oxide gas.
WARNING: Any water left on items may react with
ethylene oxide. Please air dry instruments thoroughly.
4.2
4
AN86
Wrap
The following types of wrapping material are recommended
for use with EOGas 4:
1. Andersen Seal and Peel® Packaging (which is airtight and
waterproof and greatly extends the shelf life when heat sealed
at both ends).
2. Cloth, like CSR wrap, has an estimated sterile shelf life of
30 days.
3. Paper / plastic and Tyvek® / plastic pouches - follow
manufacturer's guidelines for shelf life.
HINT: Exposure indicators such as the Andersen AN85
or AN86 are used to seal or label items. Indicators will
change color in the presence of EtO, helping to later
identify items that have be sterilized. Exposure indicators
DO NOT indicate sterility.
Selecting Cycle Length
The EOGas 4 sterilizer offers four different sterilization cycles.
ACTIVATE CARTRIDGE
CLOSE DOOR
SELECT CYCLE LENGTH
5 HOUR
3 HOUR
50º C – 3 Hour sterilization exposure, 30 minute bag ventilation
50º C – 5 Hour sterilization exposure, 60 minute bag ventilation
30º C – 12 Hour sterilization exposure, 120 minute bag ventilation
30º C – 24 Hour sterilization exposure, 120 minute bag ventilation
The same sterilization liner bag and cartridge is used for each of
the different sterilization cycles that are available.
For most items, the 3 HOUR cycle will be adequate.
When sterilizing lengths of tubing greater than 90 cm
(3 feet) with lumens smaller than 1 mm, or loads containing
large amounts of gas absorbent materials, the extended
length, 5 HOUR cycle must be used.
3
4
KEY OPERATOR STUDY GUIDE
For temperature sensitive items, use the 12 or 24 hour
room temperature mode.
Starting the Cycle
The EOGas 4 sterilization cycle is described here in correct
sequence for items that have been disassembled, washed,
dried, and wrapped.
1
Prior to loading the sterilizer, turn the power on by pressing the
black power switch located on the back of the sterilizer. The
initial screen will appear.
EOGAS 4
STERILIZER
SETUP
22.0ºC
START
or
ROOM TEMPERATURE
STERILIZATION MODE
SETUP
22.0ºC
START
EOGAS 4
STERILIZER
START
2
Press the button to the right of START on the display screen to
initiate the self test.
3
When the warm up screen appears you can exit or await
temperature reading of 48.0ºC:
SELF TEST
OK
0 PUMP HOURS
EOGAS 4
WARMUP
EXIT
4
31.0ºC
After the sterilizer reaches 48.0ºC, loading instructions are
shown on the screen.
LOAD EOGAS LINER BAG
CLOSE BAG OVER TUBE
PURGE BAG
EXIT
48.0ºC
PURGE
5
Open the sterilizer door, remove a new sterilization liner bag
from the AN1004 Refill Kit, and place it inside the sterilizer
cabinet with the open end facing out.
6
Use only an EOGas 4 sterilization liner bag, and always use a
new liner bag for each sterilization cycle.
7
Place the wrapped items for sterilization inside the sterilization
liner bag.
5
7
4
4
9
KEY OPERATOR STUDY GUIDE
8
Place a Dosimeter and Humiditube with a Humidichip inside
the EOGas sterilization bag. (See picture on page 7.)
9
Insert a biological control (optional but recommended).
10 Remove one AN1004 EOGas cartridge from the Refill Kit.
Remove the trigger safety guard.
10
11 Place it in the liner bag on top of the wrapped items so it can
easily be manipulated through the wall of the bag after the
sterilization liner bag has been closed. Do not activate the
cartridge at this time.
12 Insert the purge probe into the sterilization liner bag with the
plastic ball towards the bottom of the bag and the bobbin
towards the opening.
11
13 Gather the open end of the sterilization liner bag around the
bobbin of the purge tube, taking care to leave no openings.
12
14 Wrap the black Velcro® strap around the outside of the
sterilization liner bag and thread the pointed end of the strap
through the square black loop. Pull the Velcro strap firmly and
cinch it back around the exposed Velcro surface of the strap.
VERY IMPORTANT: Make sure that the Velcro strap is
secure and provides a sound closure between the bobbin
of the purge tube and the sterilization liner bag with no
folds outside of the strap.
QUICK
CONNECT
BOBBIN
If the purge tube has been disconnected from the sterilizer by
means of the quick release connector, re-attach it by pressing
the male and female ends together.
Bobbin
13
TIP: Disconnecting the purge tube is a convenient way to
load and close the sterilization bag away from the sterilizer
cabinet.
Initial Purge
With the cabinet door still open, press the PURGE button.
INITIAL PURGE
00:01:29 REMAINING
EXIT
50.0ºC
The sterilizer will purge air out of the sterilization liner bag for
one minute, 30 seconds. The display will read INITIAL PURGE
and will countdown to 00:00:00.
5
4
KEY OPERATOR STUDY GUIDE
After the initial purge has been completed the display instructs
the Operator to:
ACTIVATE CARTRIDGE
CLOSE DOOR
SELECT CYCLE LENGTH
5 HOUR
3 HOUR
or
ACTIVATE CARTRIDGE
CLOSE DOOR
SELECT CYCLE LENGTH
24 HOUR
12 HOUR
Sterilization
1
Activate the cartridge by pressing the button on the cartridge
through the wall of the closed sterilization liner bag.
2
Close the door and,
3
Select the length of the sterilization cycle. (3 or 5 hours) or (12
or 24 hours). The door will lock automatically.
4
For most items, the 3 HOUR cycle will be adequate.
If a cycle time is not selected within 5 seconds of taking
the third step (above), a continuous alarm will sound to
remind you to choose a cycle length.
3 HOUR CYCLE
STERILIZING
2:59:15 REMAINING
50.0ºC
The display counts down from the cycle time selected and the
door remains locked.
Ventilating Cycle
At the end of the sterilization cycle, the cabinet ventilation
pump and the purge pump will run in 2 minute intervals,
purging the liner bag and ventilating the cabinet. This
alternating cycling of the purge and cabinet ventilation
continues for 30 minutes for the 3 hour cycle, 1 hour for the 5
hour cycle, and 2 hours for the 12 or 24 hour cycle. The
display counts down time until it reaches 00:00:00.
VENTILATING BAG
00:23:55 REMAINING
50.0ºC
6
4
KEY OPERATOR STUDY GUIDE
At the end of the ventilating cycle the screen will display:
UNLOAD STERILIZER
00:03:11
EXIT
50.0ºC
The time display now indicates time elapsed since the cycle end.
Unloading
1
Opening the door stops the count up timer.
2
The ventilation and purge pumps will continue to run until the
door is closed and the Exit option is selected. A count up timer
will keep track of additional aeration time.
3
Exit returns the Start Screen.
1
To unload the sterilizer, open the door and release the velcro
strap from the purge probe. Keep the purge probe and Velcro
strap in place if gas absorbent items in the load require further
aeration. Unload the sterilization bag in the aeration area, or in
an aeration chamber.
2
Check the Dosimeter for a color change from yellow to blue up
to the triangular mark on it’s pink holder to verify the dose of
gas in the bag.
3
If a biological indicator was used, begin culturing BI according
to manufacturer's instructions.
4
The items may now be removed from the AN1004 sterilization
bag. Discard the sterilization bag, Humidichip and empty
cartridge in ordinary rubbish, or in accordance with local
regulations.
5
The Humiditube is reusable. Do not discard.
TM
AN1071
AN1072
7
4
Sterility Assurance
KEY OPERATOR STUDY GUIDE
1
Biological Indicators (BI's) such as the Steritest reliably verify
that sufficient concentration of EtO killed one million B.
Atrophaeus spores. After incubation, color change from bluegreen to yellow would distinctly indicate a positive culture.
2
Chemical Exposure Integrators, such as the Dosimeter
provide immediate visual confirmation that time, temperature,
and EtO concentration were sufficient for sterilization to occur.
3
Chemical Exposure Indicators, such as the AN85 or AN86, do
not prove sterilization. They only change color to show that
the items have been exposed to ethylene oxide.
Please refer to the manufacturer's instructions provided with
any indicator for more information.
Safety Precautions
B
MONITORING
SYSTEM
1
The sterilizer has cabinet and bag ventilation pumps that run
at appropriate times during the sterilization cycle to prevent
personnel from being exposed to more than the OSHA
permitted amount.
2
Personnel exposure to ethylene oxide can be monitored by
using personal exposure badges, such as the Andersen AN93
AirScan® Badge Kits with both STEL (15 min.) and TWA
(8 hour) badges. EtO exposure levels should be checked
upon installation of the sterilizer. We recommend that
exposure testing be performed on an annual basis or
whenever a sterilizer is relocated.
3
Do not allow open flame or sparks near the sterilizer during
the sterilization cycle. Ethylene oxide gas is highly flammable
in concentrations above 3.0% (30,000 ppm).
1
Two items that do not require aeration are metal and glass.
Items made of these materials do not absorb EO.
2
Large, gas absorbing items, especially implants and devices
that will contact blood or living tissue may require additional
aeration time.
A
Important Considerations
Things that CANNOT be sterilized with EOGas 4:
Liquids, food, and drugs should not be sterilized in
ethylene oxide because it may change their chemical
composition in unpredictable ways.
8
4
3
KEY OPERATOR STUDY GUIDE
Two reasons for never activating the EOGas 4 cartridge outside
a properly prepared EOGas bag that has been placed in the
EOGas 4 sterilizer are:
-
To prevent the exposure to EtO in excess of OSHA's
regulations.
To assure the full amount of EtO is available for sterilization.
5
The EOGas 4 cartridge contains the precise amount of EtO
needed to sterilize the contents of the EOGas 4 sterilization bag.
6
Two consequences of opening the EOGas bag before the cycle
is complete are:
-
7
The load might not be sterile.
The sterilization bag might still contain high levels of EtO
and therefore expose the operator to unacceptable levels
of EtO.
Power Failures
If a power outage occurs during any part of the cycle, the
sterilizer is equipped with a battery back up to the circuit board
that will keep track of elapsed cycle time. When power is
restored, the cycle will continue. Do not open the door of the
sterilizer until power is restored and the vent/purge systems
have removed any residual gas from the liner bags.
HINT: In the case of any sterilizer malfunction or power
failure, you can determine whether sterilization was
achieved by examining the sterility indicators (biological
indicator, Steritest with Dosimeter) included in the load.
9
4
KEY OPERATOR STUDY GUIDE
Emergency Procedures
1
If liquid EtO comes into contact with a part of the body you
must wash with water thoroughly for at least 15 minutes.
2
The User’s Manual describes, in Section 1, an “Accidental
Ethylene Oxide Release Measure”. The Zip-Lock Safety Bag
mentioned in this procedure should be kept near the EOGas
Series 4 Sterilizer and gas refills. Please refer to Operator's
Manual for more information on this procedure.
3
If an EOGas cartridge is accidentally activated, it is very
important to get it properly enclosed in an Andersen Zip-Lock
Safety Bag quickly.
4
The Material Safety Data Sheet (MSDS) for EOGas should be
readily available. Do you know where to find your MSDS?
In case of emergency, please contact
Chemtel at 800-255-3924.
Finally, make a list of any questions that you have about the EOGas system. Your Andersen
Representative will be happy to assist you!
Here is what you should know after reading this study guide:
The minimum temperature needed in the room for the entire sterilization cycle
The length (in time) of the standard cycle
Why the ventilation system is running during the entire cycle
Why the sterilization liner bag is purged
The desired relative humidity in the room where the items are prepared
How to prepare items for sterilization
The types of indicators that are used in the EOGas system
Ethylene oxide safety and precautions
Basic operation of your EOGas sterilizer from start to finish
Operater training records should be maintained at your facility.
Key Operator Tests will be kept on file at Andersen Products.
10
the future of gas sterilization
PN1125_040909
When you feel comfortable with answers to these subjects, please give
Andersen Products a call at 01255 428 328 and schedule your Key Operator
Certification exam. The test will take approximately 20 minutes.