1
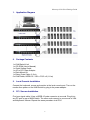
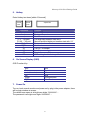
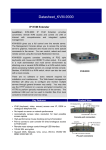
Mercury 8 / 16
PS/2 KVM Switch
Quick Setting Guide
Rev 1.0
Mercury 8/16 Quick Setting Guide
1. Application Diagram
2. Package Contents
1 x KVM Switch Unit
1 x CD-ROM (User’s Manual)
1 x Quick Setting Guide
1 x AC to DC Power Adapter
1 x Rack Mount Kit
1 x Daisy Chain Cable (1.8 m)
2 x KVM Cable; HDDB-15 / VGA + PS/2 x 2 (1.8 m)
3. Local Console Installation
Connect the keyboard, mouse and monitor to the local console port. Turn on the
monitor then power on the KVM Switch by plug in the power adapter.
4. PC / Servers Installation
Find your signal cable. It has a HDDB-15 male connector at one end. Plug it into
any PC port in rear of KVM Switch. The other ends connect to your server in VGA
and Keyboard / Mouse. Repeat the same procedure to all PCs.
1
Mercury 8/16 Quick Setting Guide
5. Hotkey
Enter Hotkey two times [within 2 Seconds]
Scroll
Lock
Scroll
Lock
Command
Space bar
↑
↓
[1,2,…,8] bank,
[01,02,…,16] port
PgUp
PgDn
“B”
“S”
“F”
“R”
Space Bar
Function
Active OSD
Previous Channel
Next Channel
First digit bank number start with 1
Second and third digits port number start with “01”
Previous bank
Next bank
Turn on / off beeper
Auto Scan
Search the same PC name
OSD setting back to factory default value
6. On Screen Display (OSD)
OSD Function Key
Esc :
Enter
→/↑/←/↓
Ins
PgUp
PgDn
Exit
Select
Move
Edit
Previous Bank
Next Bank
7. Power On
Turn on local console monitor and power on by plug in the power adapter, there
will be login window at screen.
The default user name is all eight zero digits “00000000”…
The password is all eight zero digits “00000000”…
2
Mercury 8 / 16
PS/2 KVM Switch