1
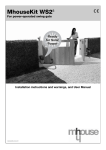
Dragon Train Control System
Copyright October 1994
Hardware Design & Build: J.Bird & O.Broad
Software Design & Build: J.Bird
Copyright 1991-1994 by J.Bird
PAGE 0
Dragon Train Control System
User Manual
Issue 1 : October 1994
1. Introduction
This document details the use of the Dragon Train Control
System which enables a user to run & maintain a sizeable
model train layout via the use of a Dragon computer. The
system provides a number of facilities which include:
*
*
*
*
Manual or automated train control
Fully programmable train & accessory sequences
Updated layout schematic on-screen
Collision detection & prevention
If the system has already been setup and you wish to begin
using the system then turn to section 2. The remainder of
section 1 briefly outlines how to get the system up &
running.
1.1 System Requirements
In order to use the system, a Dragon 32 or 64 computer is
required, with a DragonDOS 3 or later disk system (or a
network running DNOS 1.1 or later). In addition, the train
control hardware will need to be attached. This will provide
up to 8 trains to be controlled, 128 accessories (points,
signals etc. ) and 128 track sensors. The Hardware
Definitions Manual details further how to configure the
train hardware.
A copy of the TRAIN.BAS & TCODE.BIN programs will be
required on disk (or across the network) which provide the
software to control the train system.
1.2 Configuring the Layout
In addition to the train software, the layout binary
definition file & layout description file will be required.
These are created by the LAYOUT.BAS & LAYEXP.BAS programs
and contain details of the layout in question. For example,
if you created a layout named MODEL1, the files generated
would be MODEL1.BIN & MODEL1.DES. The LAYOUT.BAS program is
used to draw the layout schematic on screen, and define the
identification of each accessory on the layout. Once this
process is complete, the LAYEXP.BAS program creates the
necesary output files for the TRAIN program. For further
details see the Dragon Train Layout User Manual & usage
notes on the LAYEXP program. Once this process is complete,
the layout file name should be entered into the TRAIN.BAS
program. Hence, if the layout name was MODEL1, on your
Dragon proceed as follows:
LOAD "TRAIN" <ENTER>
140 FI$="MODEL1" <ENTER>
SAVE "TRAIN" <ENTER>
2 The Train Control Program
In order to use the system, first power up the Dragon &
accessories (monitor, disk drives etc.) then switch on the
PAGE 1
Dragon Train Control System
User Manual
Issue 1 : October 1994
train power supply. Insert the train disk into disk drive 1
& type:
RUN "TRAIN"
If you are running on a network, ensure the file server is
booted up and you have access to the train software on one
of the network drives. Consult the network manager for
details on the specifics of your network.
Initially, the message:
SETTING UP PROGRAM...
is displayed whilst the software loads the layout data &
performs it's initialisation. After a short period, the
title screen is displayed, and you are prompted to press a
key to continue. The following screen informs you that
points are being reset. Whilst this occurs, you may notice
the points on the layout changing position. This process
ensures all the points are in a known position. Finally, all
the accessory lights are switched off (if they were on) and
the main menu is then displayed.
The Main Menu lists all the options which are available
within the program, and are numbered 1 to 6. In turn, some
of these options may activate further menus. Each of these
options are described in the following paragraphs. If you
are using the system for the first time, it is advisable to
follow each paragraph in the order shown, otherwise
unexpected results may occur.
2.1 Option 1: Run Control System
This option invokes the main control system. It allows full
operation of the layout. To select this option, press the 1
key on the keyboard. At this point 1 of 2 things may occur:
1. An error message will be displayed in the form:
STARTUP FAILED
COULD NOT RUN CONTROL SYSTEM
BECAUSE:* SPEED CONTROLS NOT AT ZERO
OR
* UNCOMPILED PROGRAM IN USE
(CODE HAS ERRORS OR HAS
JUST BEEN LOADED)
PRESS <ENTER> TO RESUME
If you get this message directly after starting the train
program, it is because of the first reason stated, namely
speed controls not at zero. This indicates that the control
panel does not have all the controllers set to 0 or off. In
order to rectify the situation, ensure all the speed
controllers are turned fully anti-clockwise with the arrow
pointing upwards. This is part of the automated system,
PAGE 2
Dragon Train Control System
User Manual
Issue 1 : October 1994
which ensures that when you run the system, trains are not
suddenly started up at full speed. Now press the ENTER key.
The main menu will be re-displayed, and you can select
option 1 again.
2. The screen will clear and display a graphic schematic of
the layout. At the top of the screen are 8 rectangles, each
numbered 1 to 8. These indicate the speed of each of the
possible trains 1 to 8. At present they are all clear
indicating all trains are stopped. Ensuring that there are
no trains on the track, slowly turn one of the speed
controllers up. As you turn the knob, one of the rectangles
will fill until it is completely solid, indicating full
speed.
With the speed control at full, press the direction switch
on the control panel for that speed control. A warning panel
will now be displayed indicating:
DIRECTION LOCKOUT
and a message informing you of an attempt to alter the train
direction whilst it was still in motion. This is another
part of the automated system which prevents a train from
being suddenly put into reverse whilst it is going in the
opposite direction. You can only change direction with the
speed control at 0 (ie. when the train is stationary). To
clear the message, simply reset the direction switch.
There is 1 more button, not yet dealt with on the control
panel - the large central red button. Not surprisingly, this
is the panic button. Depressing it displays a warning
message, informing you that all trains have been shutdown,
and all trains on the layout will be halted. Pressing a key,
re-displays the layout screen ready for further operations
to resume.
The bulk of the screen is taken up with a graphic
representation of the train layout. Straights & curves are
depicted with blocks, whilst points have a thicker line
denoting the direction they are currently set to and a
thinner line indicating the other setting. In order to
change a point setting, simply use the light pen. This is
simply a pen attached to the computer with a piece of cable.
Using the pen, point on the screen to the point you wish to
change. You will hear the click as the point changes over,
and the graphic display will alter showing the point set in
the opposite direction.
You now have the basis for controlling trains on the layout.
You can therefore begin to manouvre trains around the
layout. Once you start doing this, the layout schematic on
screen will begin identifying where on the layout trains are
currently located. As trains progress around the layout, a
train icon will be updated on screen as strategic intervals.
PAGE 3
Dragon Train Control System
User Manual
Issue 1 : October 1994
There is more to this than just providing an up to date
picture of the layout, it is also part of the automated
collision detection system. The computer will prevent you
from attempting things which will quite clearly cause a
collision or derailment. As an example, if you attempt to
change a point against a train which is approaching it, a
warning message is displayed and the point will not be
changed:
POINT LOCKOUT
POINT LOCKOUT HAS DETECTED
A TRAIN NEARBY & HAS
PREVENTED YOU FROM CHANGING
THIS POINT
Point Lockout will activate itself every time it sees you
attempting something which may cause a collision or
derailment.
Whilst the system is running, the Dragon's keyboard also
provides certain functions. For example, when warning
messages are displayed (such as the Point Lockout message
above) and you want to get the graphic layout schematic redisplayed, simply press the ENTER key. This will always
revert the screen back to the layout schematic.
The following keys operate when the train system is running:
<ENTER>
<SPACE>
@
<CLEAR>
A-Z
0-9
-
display layout schematic
accessory (lights,signals) list
keyboard help screen
quit to main menu
point 'hot keys'
accessory keys
<SPACE> - this will provide a list of the accessories on the
layout and there current status. Accessories fall into the
category of lights and signals (colour/semaphore). The
screen will provide a list of the key which activates the
accessory (0-9 on the keyboard), it's description (eg. NR
SIDING LIGHTS) and the current status (ON/OFF or RED/GRN).
Pressing the accessory's associated key will toggle it into
the other state. In the case of lights, OFF to ON or ON to
OFF and similarly with signals RED to GREEN or GREEN to RED.
The list will stay on screen, until another control key is
pressed (eg. ENTER to re-display the schematic). The system
will also continue to run, hence changing accessories or the
speed of trains will still be acted upon.
@ - this key provides a help screen, essentially providing
the keyboard summary listed above.
<CLEAR> - quit to main menu. This key exits the control
system and re-displays the main menu. A similar procedure
exists when exiting the control system to when you enter it
ie. you must set all the speed controls to 0, ensuring the
PAGE 4
Dragon Train Control System
User Manual
Issue 1 : October 1994
trains have stopped. If they are still running, a warning
message is displayed and the system continues running.
0-9 - these are the accessory keys which toggle individual
lights or signals on the layout.
A-Z - as well as setting points through use of the lightpen,
each point can be changed via it's 'hot key'. Each point can
be allocated a unique key, from A up to Z, which when
pressed will change that point. This is often quicker than
using the light pen, particularly on points which are
changed regularly. Section 2.2.3 (main menu item 5)
describes how to identify a particular point's hot key.
All of these keys function whilst the system is running, and
even if the layout schematic is not displayed due to a help
screen or warning message it will also continue to run. The
layout schematic will also continue to update even though it
is not displayed.
Summary - Control System
This is the heart of the Dragon train system, and allows you
to perform all the layout operations involved in running a
model railway layout under your control.
2.2 Train Utilities
Menu options 3 to 6 are useful utilities in running the
layout, most of which are available when the Control System
(option 1) is running and are described below. Option 2
which is more complex will be described fully in section
2.3.
2.2.1 Option 3: Hotkey Help List
Pressing key 3 from the main menu gives the summary of
hotkeys available when running the Control System, identical
to that given when pressing the '@' key under the Control
System.
2.2.2 Option 4: Accessory List
Pressing key 4 from the main menu gives the accessory list
summary, identical to that given when pressing the spacebar
under the Control System.
2.2.3 Option 5: Point Hotkey Code
This option provides the ability to identify a particular
point's hot key by pointing to it with the light pen. By
pressing key 5, the screen clears and displays the message:
POINT HOTKEYS
POINT TO THE POINT TO IDENTIFY
PRESS A KEY WHEN READY
PAGE 5
Dragon Train Control System
User Manual
Issue 1 : October 1994
Pressing a key at this point clears the display & shows the
layout schematic. Using the light pen, point at the point
you wish to identify. The screen will return to text mode,
and print out the key code of the point. Pressing this key
when the Control System is running will toggle the state of
the required point. Press a key to return to the main menu.
2.2.4 Option 6: Quit
Selecting this option leaves the train program, and returns
back to BASIC. Press key 6 when you wish to finish using the
system.
2.3 Option 2: Train Program Code
Option 2 has been left until last, because it is probably
the most complex part of the system. With it, you can create
partial or full automation of a train system, enabling
trains to run unattended, slow down reverse and even perform
complex shunting operations. You can then save these
sequences to disk for future use.
When option 2 is selected, a 6 option Train Program Code
menu is displayed. Each of these options in turn are
described below.
2.3.1 Editor & Compiler
This option is the system under which all the automated
sequences are defined. When selected, you are asked to enter
which train channel you wish to define a sequence for (1-8
of the possible train channels). Each channel can have it's
own pre-defined sequence. For the moment, enter 1 and press
ENTER.
The screen will clear and display something similar to the
following:
CODE FOR TRAIN CHANNEL 1
RH ARROW ACTIVATES MENU
1> MANUAL
You define a sequence for a train channel by entering a
sequence of commands in a special train control language. Up
to 25 different lines can be entered in this language per
channel. The screen shows the default setup for all the
channels. Line 1 of the sequence is displayed with the words
'MANUAL'. This indicates that all control for channel 1 is
entered manually (ie. via the speed & direction controller).
Once a MANUAL command is encountered all control is passed
PAGE 6
Dragon Train Control System
User Manual
Issue 1 : October 1994
back to the control panel and no further sequences are
executed.
A simple program can now be entered. Using the delete key
(left arrow) delete the MANUAL command from line 1. Now type
in the following:
SPEED 10,100 <press ENTER>
WAIT 2 <ENTER>
SPEED -10,0 <ENTER>
MANUAL <ENTER>
The screen should look as follows:
CODE FOR TRAIN CHANNEL 1
RH ARROW ACTIVATES MENU
1>
2>
3>
4>
5>
SPEED 10,100
WAIT 2
SPEED -10,0
MANUAL
This program makes use of two of the Train Commands: SPEED
and WAIT. It essentially means SPEED up from stopped (the
sequence will start with all trains stopped) to top speed
(100) in steps of 10. Then WAIT 2 seconds at this speed,
before slowing back down to 0 speed (stopped) again in steps
of 10. Then return control to the manual system.
In order to run this program, press the RH arrow to activate
the editor menu. The following menu is displayed.
C
X
P
S
Q
-
COMPILE
CONTINUE EDITS
POINT TO POINT
POINT TO SENSOR
QUIT
Press 'C' for compile. The screen now clears, and displays
the following:
COMPILING CHANNEL CODE...
1
2
3
4
--->
--->
--->
--->
SPEED 10,100
WAIT 2
SPEED -10,0
MANUAL
COMPLETE WITH NO ERRORS
PRESS <ENTER> TO RESUME
This indicates that the sequence you typed in has been read
and understood correctly by the computer. Press ENTER to
take you back to the editor. Now activate the RH arrow menu
again, and press Q for quit to take you back to the Train
PAGE 7
Dragon Train Control System
User Manual
Issue 1 : October 1994
Program Code menu. Select option 6 to quit back to the main
menu.
Ensuring that there are no trains on channel 1, select
option 1 to run the Control System. You should see the speed
box for channel 1 fill completely, then remain full for
aproximately 2 seconds prior to returning back to 0. Any
changes you make to the speed controller whilst this is
occuring will have no effect. After the speed guage returns
back to empty, the speed control should behave as normal. If
channel 1 is clear, you could try the code with a train on
the track. Exit back to the main menu via the CLEAR key,
place a train on the track and select option 1 again from
the main menu. The train should accelerate to top speed,
remain at that speed for 2 seconds and then slow down to a
full-stop.
In essence, that is all there is to creating automated
control sequences. The Train Control language is composed of
only a few commands, which are as follows:
DIRECTION <FORWARD/REVERSE>
This command changes the train direction to that specified.
You must always specify a direction. The direction command
obeys the same rules as the direction button on the manual
console in that you cannot change direction whilst a train
is moving. When the Control System attempts to execute the
new direction command and the train is still moving it will
display the DIRECTION LOCKOUT warning message (described in
section 2.1) and the command will be ignored. The next line
of your sequence will then be executed.
Example: DIRECTION REVERSE
Description: Change the train direction to reverse.
SPEED <acceleration rate>, <finish speed>
This command changes the speed of a train to the <finish
speed> in steps of the <acceleration rate>. The
<acceleration rate> is from 1 to 10 for speeding up and -1
to -10 for slowing down. The <finish speed> is from 0 to
100. The starting speed of a train is always 0 (stopped),
but the SPEED command can be used to change the speed of an
already moving train.
Example: SPEED 3,40
Description: Accelerate from the current speed to 40 in
steps of 3.
WAIT <seconds>
The WAIT command does nothing for the <seconds> specified.
Typically it is used to maintain the speed of a train for a
required length of time.
Example: WAIT 30
Description: Wait 30 seconds
PAGE 8
Dragon Train Control System
User Manual
Issue 1 : October 1994
ACC <keycode>, <state>
Switch the accessory with <keycode> to the desired <state>.
The keycode refers to the key associated on the keyboard for
the given accessory, and the state is either 0 (off/red) or
1 (on/green).
Example: ACC 2,1
Description: Switch accessory keycode 2 to an ON or GREEN
state.
SENSE <sensor id>
Wait until the train sensor <sensor id> is triggered. This
command does nothing until the sensor identified is
triggered by a train passing over it. Typically it might be
a sensor just outside a station, whereupon the next command
would be a SPEED command to slow the train down & stop in
the station. The sensor does not have to be on the current
channel's track, it could be triggered by another train.
There are 128 sensors number 0-127.
Example: SENSE 14
Description: Wait until sensor 14 is triggered.
POINT <device id>,<state>
Change the point with <device id> to the <state> identified.
The <device id> is between 0-127 and the <state> is either 0
(straight) or 1 <curved>. Point changes made by train
sequence code are still subject to the Point Lockout
collision system detailed in section 2.1, therefore changes
which will obviously cause a collision/derailment will be
ignored and the Point Lockout warning message displayed.
Example: POINT 89,1
Description: Change point 89 to the curved direction.
MANUAL
Revert to manual control. This command will force the system
to obtain all the train speed & direction information from
the manual console.
Example: MANUAL
Description: Revert to manual operation
SECWAIT
This command waits until the current channel number is
called from another channel via a SECTION command. Once
called, it will progress to the next line of the sequence.
Typically, it will be used to synchronize dependencies on
another train.
Example: SECWAIT
PAGE 9
Dragon Train Control System
User Manual
Issue 1 : October 1994
Description: Wait until called by another train sequence.
SECTION <channel no>
This command calls the specified channel number to allow it
to continue processing after a SECWAIT call. For example, if
channel 3 has interpreted a SECWAIT call it will wait until
another channel calls SECTION 3, whereupon it will continue
processing.
Example: SECTION 4
Description: Call train channel 4 to allow its sequence to
continue.
GOTO <line number>
The GOTO command passes control to the line number specified
to perform the operation again.
Example: GOTO 1
Description: Begin executing the sequence again from line 1.
Example Shunting Code:
> @--S--------------------------------- CH 2
24
--------------25
------------------------------- > CH 3
The above sketch is an example situation. A train, marked by
the '@' symbol is on channel 2 heading in the direction
identified. The object is to get the train, through points
24 & 25 and onto channel 3's line. 'S' marks sensor 37.
Channel 2 code:
SPEED 10,100
SENSE 37
POINT 24,1
SPEED -10,0
POINT 24,0
SECTION 3
MANUAL
-
start the train moving
wait till it hits the sensor
change the point
decelerate the train onto the siding
reset the point to the main line
call section 3
back to manual
-
ensure the point is set on the main line
wait to be called
switch to siding
start the train moving
Channel 3 code:
POINT 25,0
SECWAIT
POINT 25,1
SPEED 10,100
The above is an example situation. The chances are it will
not work first time - the train may not stop in time, or may
stop too soon. Only trial and error will give the required
result.
PAGE 10
Dragon Train Control System
User Manual
Issue 1 : October 1994
There are a number of support utilities to assist writing
the train sequence code, particularly with regard to the
POINT and SENSE commands. In the above example, it is highly
unlikely that you will know what sensor number is near the
siding, or even that the point is numbered 24. To aid this,
the editor menu has a number of assist options. When in the
Train Code editor, pressing the right hand arrow opens up
the menu:
A
C
X
P
S
Q
-
ACCESSORY LIST
COMPILE
CONTINUE EDITS
POINT TO POINT
POINT TO SENSOR
QUIT
The 'C' Compile option has already been used, to ensure the
train code is acceptable to the computer, along with Quit to
leave the editor. The 'X' command simply closes down the
menu, and returns back to the editor.
The 'P' & 'S' options are best demonstrated through the
example shown above, in typing in the sequence for channel
2:
1> SPEED 10,100
2>
At this point, it is likely you know which sensor you want
to check for, but not it's id. Press the RH arrow to
activate the menu, and press 'S' for Point to Sensor. The
layout schematic is displayed. Using the lightpen point to
where on the schematic the sensor is. Since they are not
shown, you may need to move the pen along the track until
you hit the sensor required. Once this occurs, the text
screen is re-displayed, and the sensor command line will
have been entered for you:
1> SPEED 10,100
2> SENSE 37
All you need do is press ENTER to accept the command line.
The Point to Point option works in a similar way. Next, you
need to identify point 24. Again, press the RH arrow to open
the menu, and this time select Point to Point by pressing
the P key. The layout schematic is displayed, and you can
simply point to the point required using the lightpen. The
edit screen is re-displayed, with the POINT command entered.
1> SPEED 10,100
2> SENSE 37
3> POINT 24,
This time you need to identify the setting for the point (1
or 0) prior to pressing ENTER to accept the command line.
The remaining option is the Accessory List, which once again
provides the list of accessories & their key codes for help
PAGE 11
Dragon Train Control System
User Manual
Issue 1 : October 1994
with the ACC command.
During compilation, errors may be generated if you have made
a mistake in the code. For example, suppose you enter:
3> POINT 24,2
Where 2 is not a valid state. If you now compile this using
the C option from the menu:
COMPILING CHANNEL CODE...
1 ---> SPEED 10,100
2 ---> SEMSE 37
3 ---> POINT 24,2
ERR:DEVICE STATE INVALID
PRESS <ENTER> TO RESUME
This indicates that an error has been detected, and an
explanation given. A full list of error messages is given
below:
ERR:UNKNOWN KEYWORD - an unrecognized command has been
encountered, this is likely to be due to a mis-spelt command
eg. SPERD 10,100
ERR:NUMERIC PARAMETER EXPECTED - a number was expected on
the command line and was not provided or was not a number
eg. SPEED
ERR:2ND NUMERIC PARAMETER EXPECTED - a second number was
expected, and was not provided eg. SPEED 10
ERR:DIRECTION NOT SPECIFIED - direction was not specified,
or was incorrect for a DIRECTION command
ERR:SECTION OUT OF RANGE - a section numbered was specified
with a SECTION command that was out of range (1-8 train
channels).
ERR:SPEED OUT OF RANGE - the SPEED <finish speed> value was
out of range (0-100).
ERR:ACCELERATION OUT OF RANGE - the SPEED <acceleration>
value was out of range (-10 to -1 and 1 to 10).
ERR:DEV NO. OUT OF RANGE - a POINT <device id> or SENSOR
<sensor id> number was out of range (0-127).
ERR:DEVICE STATE INVALID - a POINT or ACC device state must
be 0 or 1.
ERR:LINE NUMBER OUT OF RANGE - the line number specified
with a GOTO command was out of range or to a non-existent
command line.
ERR:ACC KEYCODE OUT OF RANGE - the accessory keycode
specified was out of range (0-9).
PAGE 12
Dragon Train Control System
User Manual
Issue 1 : October 1994
If compilation errors have occured, then unless they are
corrected you will be unable to run the Train Control
System. The Startup Failed message will be displayed:
STARTUP FAILED
COULD NOT RUN CONTROL SYSTEM
BECAUSE
* SPEED CONTROLS NOT AT ZERO
OR
* UNCOMPILED PROGRAM IN USE
(CODE HAS ERRORS OR HAS
JUST BEEN LOADED)
This time the reason for failure is due to the uncompiled
program in use part of the message.
As has previously been mentioned, there are certain
safeguards built in to the system which prevent you from
damaging the layout, the inability to change the train's
direction whilst in motion, or the point lockout system.
These safeguards are still running even if you are executing
a pre-set sequence of program code. For example, it is
possible to write a piece of code such as:
SPEED 10,100
DIR REVERSE
which would compile correctly. However, when you come to run
it the train will obey the speed command, but will display
the Direction Lockout message when it came to execute the
DIR command and would then progress onto the next
instruction in the sequence effectively ignoring the DIR
command.
2.3.2 List Program Code
This option from the Train Program Code menu enables you to
see the view the train sequence code for any one channel.
Selecting the option, will then prompt you for the required
channel. Enter the channel number (1-8), then you can choose
to print the program code to the screen (by pressing the S
key) or to a printer (by pressing the P key) which would
send the code to a printer attached to the Dragon. If you do
not have a printer attached, do press the P key because the
computer will 'hang' requiring pressing the reset button and
the subsequent loss of any train code you may have created.
If you are on a network, you may be able to use the network
printer. Consult the network manager for details on how to
achieve this.
2.3.3 Save Program Code
Once you have created a train sequence, you can save it to
disk for later use. Select option 3, and enter the channel
PAGE 13
Dragon Train Control System
User Manual
Issue 1 : October 1994
number which contains the sequence you wish to save. Then a
request for a filename is displayed. This is to be the name
of the sequence you wish to save, and can be between 1 and 8
characters (no spaces or punctuation characters), for
example SHUNT1 would be a valid filename. Press the ENTER
key to confirm the filename, and the sequence will be saved
to disk.
2.3.4 Load Program Code
This option allows a previously saved train sequence to be
transferred from disk back into the Dragon. The procedure is
similar to saving the file, in that you enter the train
channel number to load a sequence into and the filename of
the sequence.
Once you have loaded a train sequence from disk, you must go
into the Editor/Compiler and re-compile the train code,
otherwise the Train Control System will not run displaying
the Startup Failed message.
3. Finishing a session
At the end of a session, exit the program by selecting
option 6 from the Main Menu, rather than pressing the BREAK
key. This will ensure the accessory network is correctly
disabled. Switch the train power off first, then the Dragon.
Remember to remove the disk from the disk drive prior to
switching the Dragon off.
PAGE 14