1
Emdeon Vx570 User’s Guide
Emdeon POS™ VeriFone®
Vx570 User’s Guide
11.15.2011
Pub # 61999
Fax-on-Demand Ordering Information:
Call 800.760.2804
For these chapters:
Title Page, Contents, Chapter 1
Chapter 2
Chapter 3
Chapter 4
Chapter 5 through 7
Order:
6995
6996
6997
6998
6999
Emdeon Vx570 User’s Guide
This publication is the proprietary property of Emdeon and is furnished solely for use pursuant to a
license agreement giving the user the right to use the Emdeon product(s) referenced in this document.
All uses of this document are subject to the terms of such license agreement. This document may not
be used except as permitted by such license agreement or changed, copied, photocopied, reproduced,
translated, or reduced to any electronic medium or machine readable form without the prior consent of
Emdeon. Copyright is held by Emdeon Business Services, LLC.
Emdeon is not liable for any losses or damages that result from the use of this material, including loss of
profit or indirect, special, or consequential damages.
Emdeon Vx570 User’s Guide
Contents
Contents
Chapter 1: Install Your Equipment................................................................................................................ 1
Unpack the Box ................................................................................................................................... 1
Connect to the Power Source ................................................................................................................. 1
Insert Paper in the Printer ..................................................................................................................... 2
Connect a Communication Line............................................................................................................... 3
Dial-Up Connection (Phone Line) ....................................................................................................... 3
Network Connection ........................................................................................................................ 3
Connect a Keyboard ............................................................................................................................. 5
Welcome Letter ................................................................................................................................... 5
Documentation .................................................................................................................................... 5
Supplies ............................................................................................................................................. 6
Customer Service ................................................................................................................................. 6
Chapter 2: Get To Know Your Terminal ......................................................................................................... 7
Your Vx570 Terminal ............................................................................................................................ 7
Vx570 Key Quick-Reference ................................................................................................................... 9
Keyboard 100.................................................................................................................................... 10
Terminal Displays............................................................................................................................... 11
Terminal Main Menu ...................................................................................................................... 11
Emdeon Flash Screen .................................................................................................................... 11
Emdeon Welcome Screen ............................................................................................................... 12
Emdeon Menu .............................................................................................................................. 12
Terminal Security ............................................................................................................................... 12
Chapter 3: Customize Your Terminal Setup .................................................................................................. 13
Overview ..........................................................................................................................................
Manage Users....................................................................................................................................
Add a User ..................................................................................................................................
Remove a User.............................................................................................................................
Change a Passcode .......................................................................................................................
Manage Providers...............................................................................................................................
Provider ID Error Messages ............................................................................................................
Add a Provider .............................................................................................................................
Edit or Delete a Provider ................................................................................................................
View the Provider Name List ...........................................................................................................
Manage Hotkeys ................................................................................................................................
Change the Administrator Passcode.......................................................................................................
Change the Date and Time ..................................................................................................................
Set a Card Swipe Default.....................................................................................................................
Set a Default State .............................................................................................................................
State Abbreviations .......................................................................................................................
Print Reports .....................................................................................................................................
Report Samples ............................................................................................................................
13
13
13
14
15
16
16
16
17
18
19
20
21
22
23
25
26
27
Chapter 4: Run Emdeon Transactions ......................................................................................................... 29
Submitting a Transaction.....................................................................................................................
Using Hotkeys ...................................................................................................................................
Using the Card Swipe..........................................................................................................................
Data Entry Tips..................................................................................................................................
Response Printout ..............................................................................................................................
29
30
31
33
34
Chapter 5: Switch to Credit Card................................................................................................................ 37
Chapter 6: Program Updates ..................................................................................................................... 37
© 2011 Emdeon Business Services LLC. All rights reserved.
This material contains confidential, proprietary information. Unauthorized use or disclosure of the information is strictly prohibited.
Page i
Emdeon Vx570 User’s Guide
Contents
Chapter 7: Terminal Error Messages ........................................................................................................... 38
© 2011 Emdeon Business Services LLC. All rights reserved.
This material contains confidential, proprietary information. Unauthorized use or disclosure of the information is strictly prohibited.
Page ii
Emdeon Vx570 User’s Guide
Chapter 1: Install Your Equipment
Chapter 1: Install Your Equipment
Unpack the Box
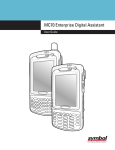
Your VeriFone® Vx570 terminal from Emdeon Business Services will contain the following components 1:
·
·
·
·
·
·
·
·
·
Vx570 terminal and printer (affixed to terminal body)
Roll of thermal printer paper
Power pack
Power cord
Phone cord
Welcome letter
Installation guide
Quick-Reference Guide
CD containing all user documentation
Connect to the Power Source
1. Connect the power pack to the connector at the side of the terminal. For stability, you can
anchor the cord between the retaining slot directly beside the connector.
2. Attach the power pack to the power cord by sliding the female end of the power cord over the
three prongs on the end of the power pack.
3. Plug the power cord into a standard 120-volt electrical outlet.
1
Illustrations courtesy of VeriFone, Inc.
© 2011 Emdeon Business Services LLC. All rights reserved.
This material contains confidential, proprietary information. Unauthorized use or disclosure of the information is strictly prohibited.
Page 1
Emdeon Vx570 User’s Guide
Chapter 1: Install Your Equipment
Warnings!
· The Vx570 should be on an electrical protective device such as a UPS (uninterruptible power supply)
or a surge protection strip. Do not plug a Vx570 into a PoE (Power over Ethernet) switch.
· Refrain from frequently disconnecting and reconnecting the Vx570 from/to the power source.
· Keep the Vx570 away from anything that could damage the device, such as heavy unstable objects,
liquids (plants, coffeemakers, and so on), small children, etc.
· Do not place the Vx570 where it could easily fall, such as near the edge of a desk.
Insert Paper in the Printer
1. To open the printer, press down on the lever located on the side of the terminal to unlatch the
paper roll cover, then lift the cover up and back.
2. If necessary, loosen the glued leading edge of the paper or remove the protective strip from the
new roll of paper. Unwind the paper roll past any glue residue.
3. Drop the paper roll into the printer cavity such that the paper rolls under and up nearest to the
serrated tearing edge. This positioning ensures that the printable side is facing outward.
4. Close the paper cover, allowing a small bit of paper to extend outside of the printer cover.
Notes:
·
·
You can press 3 from the Emdeon Welcome screen (see page 12) to advance the paper.
A pink out-of-paper indicator line appears on the edge of the paper approximately 18 includes
before the end of the roll.
© 2011 Emdeon Business Services LLC. All rights reserved.
This material contains confidential, proprietary information. Unauthorized use or disclosure of the information is strictly prohibited.
Page 2
Emdeon Vx570 User’s Guide
Chapter 1: Install Your Equipment
Connect a Communication Line
Your terminal will send and receive transactions using one of the following methods:
·
·
Dial-up (standard telephone line)
Network (Ethernet)
Your terminal will be pre-configured to use one of these two communication methods, based on the
specifications of your order.
Dial-Up Connection (Phone Line)
1. Connect one end of the phone line to the connector on the back terminal that is identified by a
telephone icon.
2. Connect the other end of the phone line to the phone jack wall outlet
3. Connect the other end of the phone line to the to the phone jack wall outlet.
4. To test the connection, run a transaction (see Submitting a Transaction on page 29). If you
have verified that a dial tone is present on the line, but the transaction fails to process, contact
Emdeon Customer Service at 800.333.0263.
Network Connection
Wall Outlet Network Connection
If you have a wall outlet network connection or router, you will need an RJ45 network cable (not
included with your terminal).
1. Attach one end of the cable to the network outlet in the wall or router.
2. Connect the other end of the cable to the terminal 10BaseT outlet, as illustrated below.
3. Have someone from your IT department make sure that port 443 is open.
© 2011 Emdeon Business Services LLC. All rights reserved.
This material contains confidential, proprietary information. Unauthorized use or disclosure of the information is strictly prohibited.
Page 3
Emdeon Vx570 User’s Guide
Chapter 1: Install Your Equipment
Modem Network Connection
If you use a high-speed modem or router to connect to a network, you will need an RJ45 network cable
(not included with your terminal).
1. Attach one end of the cable to your high-speed modem or router.
2. Connect the other end of the cable to the terminal 10BaseT outlet, as illustrated below.
Testing the Connection
1. Press the asterisk key (*) until the Terminal Main Menu displays:
2. Press <F2> to select CommServer.
3. If Connected indicates YES, press * to return to the Main Menu. Your network connection has
been successfully established.
4. If Connected indicates NO, disconnect and reconnect the power cable, and press <F2> from the
Main Menu to return to CommServer.
5. If Connected still indicates NO, press <Scroll Line h > to select Diag.
6. Press <F2> to select Ping.
7. At the Enter Ping Address prompt, just press
. The PING address is pre-configured.
8. If No Response or other error message is displayed, call Emdeon Customer Service at 800-3330263.
© 2011 Emdeon Business Services LLC. All rights reserved.
This material contains confidential, proprietary information. Unauthorized use or disclosure of the information is strictly prohibited.
Page 4
Emdeon Vx570 User’s Guide
Chapter 1: Install Your Equipment
Connect a Keyboard
You can connect the optional VeriFone Keyboard 100 to the Vx570 terminal. The keyboard makes it
easier to enter alphanumeric characters, such as names.
To connect the Keyboard 100:
1. Unplug the power pack from the connector at the side of the terminal.
2. Plug the keyboard’s connector into the connector labeled RS232 on the back of the terminal.
3. Plug the power pack back into the terminal (see Connect to the Power Source on page 1).
Welcome Letter
The Welcome letter contained in your shipping carton contains a default user ID and passcode for
running transactions and the default Administrator passcode for customizing the terminal setup.
It is recommended, for HIPAA security compliance, that the Administrator change the default
user ID/passcode and the default Administrator passcode. See Chapter 3: Customize Your
Terminal Setup, beginning on page 13, for instructions.
Documentation
Emdeon provides a suite of documentation to assist you. The following documents are available, in
addition to this publication:
·
·
·
·
Vx570 Quick-Reference – this guide ships in the carton with your terminal. It provides quick,
general guidelines for operating the Vx570 terminal.
Emdeon POS Vx570 Transaction Guides – these guides provide specific instructions for
running each transaction and for interpreting transaction responses. A transaction guide exists
for each Emdeon transaction available on your Vx570 terminal.
Error Dictionary – this guide is a compilation of all transaction-related error messages that can
be returned from payers and from the Emdeon switch. Transaction-related error messages are
those which print on the transaction response. They are identified by a code beginning with two
letters, (such as RH, CL, HT) followed by a brief text message.
Codes and Abbreviations – these reference documents provide a listing of the most common
codes and abbreviations used in HIPAA-compliant payer responses, such as service types,
eligibility/benefit descriptions, coverage types, and insurance types.
© 2011 Emdeon Business Services LLC. All rights reserved.
This material contains confidential, proprietary information. Unauthorized use or disclosure of the information is strictly prohibited.
Page 5
Emdeon Vx570 User’s Guide
Chapter 1: Install Your Equipment
Obtaining Documentation
The documentation described above is available in Adobe® Portable Document Format (PDF) on the CD
included in your shipping carton. It is also available over the Web at:
http://www.emdeon.com/resourcelibrary/#84
Look under User Manuals.
To view these documents, you must have access to a personal computer running Adobe® Acrobat®
Reader version 6 or later. The Reader is available free of charge from www.Adobe.com.
Fax-on-Demand
Documentation is also available using Emdeon Business Services’ free Fax-on-Demand service. This
service allows you to request documents over a toll-free automated telephone call. Requested
documents are faxed to your fax machine.
To use Fax-on-Demand:
1. Call 800.760.2804.
2. Follow the prompts to enter the catalog number of the document you wish to receive.
3. You can obtain a catalog from the Fax-on-Demand service. The catalog is also available on your
CD or over the Web at http://www.emdeon.com/resourcelibrary/#84.
4. You will be prompted to enter your fax number, including the area code. Note: If you are in the
615 area code, do not enter your area code.
5. Hang up. The requested document will be faxed to the number you specified.
Supplies
Paper for your Vx570 can be ordered through Control-o-Fax:
http://www.controlofax.com/
800.553.0070
Customer Service
To speak to an Emdeon Business Services customer service representative, please call:
800.333.0263
© 2011 Emdeon Business Services LLC. All rights reserved.
This material contains confidential, proprietary information. Unauthorized use or disclosure of the information is strictly prohibited.
Page 6
Emdeon Vx570 User’s Guide
Chapter 2: Get To Know Your Terminal
Chapter 2: Get To Know Your Terminal
Your Vx570 Terminal
Printer
The Vx570 printer is attached to the terminal. The paper feeds through the slot above the display. The
serrated edge allows you to tear off your printouts.
·
·
To open the printer to add paper, press the lever that displays the printer roll.
To advance the paper, press 3 from the Emdeon Menu.
See The Vx570 should be on an electrical protective device such as a UPS (uninterruptible power
supply) or a surge protection strip. Do not plug a Vx570 into a PoE (Power over Ethernet) switch.
· Refrain from frequently disconnecting and reconnecting the Vx570 from/to the power source.
· Keep the Vx570 away from anything that could damage the device, such as heavy unstable objects,
liquids (plants, coffeemakers, and so on), small children, etc.
· Do not place the Vx570 where it could easily fall, such as near the edge of a desk.
Insert Paper on page 2 for information on installing paper.
Function Keys
The function keys allow you to select menu options, similar to the way in which you select options on
your bank’s ATM. To select a menu option, press the function key to the right of the option you wish to
select.
Function keys also perform these actions:
© 2011 Emdeon Business Services LLC. All rights reserved.
This material contains confidential, proprietary information. Unauthorized use or disclosure of the information is strictly prohibited.
Page 7
Emdeon Vx570 User’s Guide
Chapter 2: Get To Know Your Terminal
·
·
For some input prompts (where indicated on the display), you can choose your input from a
selection list. Press <F2> to display the selection list.
You can press <F1> from any transaction’s input prompt to display help about the information
for which you are prompted.
Scroll Page and Scroll Line Keys
The Scroll Page and Scroll Line keys are used to move the highlight up or down through a list. These
keys are unmarked, but they are identified on your keypad overlay:
To use these keys:
·
·
·
·
Press
Press
Press
Press
<Scroll
<Scroll
<Scroll
<Scroll
Line i > to move the highlight down to the next line.
Line h > to move the highlight up to the previous line.
Page i > to move the highlight down to the next screen (page) of list items.
Page h > to move the highlight up to the previous screen (page) of list items.
The Numeric Keypad and Hotkeys
Unless you have an optional keyboard attachment, you will use the numeric keypad, in combination with
the <Alpha> key, to enter your transaction input data.
Also, each digit on the numeric keypad can be set up as a hotkey, so that you can press the key from
the Emdeon Menu to quickly select the payer assigned to the key.
The Alpha Key
The <Alpha> key allows you to convert the number on a numeric key to one of the letters or characters
displayed on that key. For complete instructions, see Entering Letters and Symbols on page 33.
Cancel, Backspace, and Enter
Red = Stop. The red Cancel key allows you to exit the function you are currently performing, back
out of a menu, or exit an error message.
Yellow = Attention. The yellow Backspace key allows you to erase characters when you are
entering data, similar to the Backspace key on a computer keyboard.
Green = Go. The green Enter key will:
·
·
accept the data you are entering and proceed to the next prompt
select the highlighted item on a list.
Card Swipe Slot
The card swipe slot, to the right of the keypad, is used for healthcare hard cards with a magnetic card
swipe. See
Using the Card Swipe on page 31 for details about using the card swipe.
Gift Card Slot
At the time of this publication, Emdeon transactions do not support use of the gift card slot.
© 2011 Emdeon Business Services LLC. All rights reserved.
This material contains confidential, proprietary information. Unauthorized use or disclosure of the information is strictly prohibited.
Page 8
Emdeon Vx570 User’s Guide
Chapter 2: Get To Know Your Terminal
Vx570 Key Quick-Reference
Key
Action
<Scroll Page
h>
<Scroll Page
i>
<Scroll Line
h>
When a list is displayed, moves the highlight up one screen (page).
<Scroll Line
i>
Numeric
Keys
(0 - 9)
<Alpha>
<F1>
through
<F4>
<F1>
<F2>
<F4>
When a list is displayed, moves the highlight down one screen (page).
When a list is displayed, moves the highlight up one line on a list.
From the Emdeon Menu, and immediately following the first printing of a transaction’s response, reprints
the response.
When a list is displayed, moves the highlight down one line on a list.
From the terminal’s Main Menu, displays a menu of operating system reports. Press
to exit.
When entering data, results in numeric entry.
If a list is displayed, pressing a numeric key jumps to the first item beginning with the letter displayed
on the key. For example, pressing 2 once jumps to the first item on the list beginning with A; pressing
2 again jumps to the first item beginning with B, and so on.
During data entry, converts a numeric entry to one of the characters displayed on the key, depending
on the number of times it is pressed. For example, pressing <Alpha> once after pressing the number
2 enters the letter A; pressing <Alpha> twice enters the letter B, and pressing <Alpha> three times
enters the letter C.
When a menu is displayed, selects the option displayed to the left of the function key.
For a transaction’s input prompts, displays a screen of information about the prompt.
Where indicated for certain input prompts, displays a selection list.
Prints a response or message displayed on the terminal screen.
From lists, selects highlighted item.
During data entry, accepts the entry or proceeds to the next prompt.
Exits the current function or menu; exits error messages; cancels transaction processing.
During data entry, erases numbers or characters you have entered.
* (asterisk)
3
From a menu or the Welcome screen, displays the terminal’s Main Menu.
From the Welcome screen, advances the paper.
© 2011 Emdeon Business Services LLC. All rights reserved.
This material contains confidential, proprietary information. Unauthorized use or disclosure of the information is strictly prohibited.
Page 9
Emdeon Vx570 User’s Guide
Chapter 2: Get To Know Your Terminal
Keyboard 100
If you have attached the optional VeriFone® Keyboard 100, use the following table to determine which
Keyboard 100 keystroke matches that of the terminal keypad:
Vx570
Keyboard
Action
<Scroll Page h >
<Page Up> or
<F5>
When a list is displayed, moves the highlight up one screen (page) of a list.
<Scroll Page i >
<Page Down>
or <F6>
When a list is displayed, moves the highlight down one screen (page) of a list.
<Scroll Line h >
<h> or <F7 >
When a list is displayed, moves the highlight up one line.
<Scroll Line i>
<i> or <F8>
When a list is displayed, moves the highlight down one line.
<F4>
<F4>
Prints a response or message displayed on the terminal screen.
N/A
<Home>
When a list is displayed, moves the highlight to the beginning (first page).
N/A
<End>
When a list is displayed, moves the highlight to the end (last page).
Numeric Keys
(0 – 9)
Numeric Keys
(0 – 9)
N/A
Alphabetic Keys
When entering data, results in numeric entry.
When a list is displayed, pressing a numeric key behaves exactly as it would if
the same terminal key were pressed. For example, pressing <2> once jumps
to the first item beginning with A; pressing <2> again jumps to the first item
beginning with B, and so on.
When entering data, results in the entry of a letter.
When a list is displayed, pressing a letter key jumps to the first list item
beginning with that letter. For example, pressing the A key jumps to the first
item in the list beginning with the letter A.
© 2011 Emdeon Business Services LLC. All rights reserved.
This material contains confidential, proprietary information. Unauthorized use or disclosure of the information is strictly prohibited.
Page 10
Emdeon Vx570 User’s Guide
Chapter 2: Get To Know Your Terminal
Terminal Displays
Terminal Main Menu
From this menu:
·
·
·
·
Press <F2> to test your Ethernet connection, if your terminal is communicating by Ethernet.
See Network Connection on page 3 for details.
Press <F3> to go to the Emdeon Menu.
If you have a Credit Card program on your terminal, it will be listed on this menu. Press <F4>
to start the Credit Card program.
Press * (asterisk) from the Emdeon menu to return to the terminal Main Menu.
Emdeon Flash Screen
The Emdeon Logo and customer message flash screens appear if the terminal sits idle from the Main
Menu. To exit this screen, press any key (except <Scroll Line i>). The terminal Main Menu displays.
Notes:
·
After the device sits idle for a preset amount of time, the message below may display. Do not
press any buttons while database maintenance is in progress.
·
If you press <Scroll Line i> from this screen, the terminal displays a menu of operating system
(VMAC) reports. It is not a problem if you decide to print these reports, but they will not be
meaningful to you. Press
to exit this menu.
© 2011 Emdeon Business Services LLC. All rights reserved.
This material contains confidential, proprietary information. Unauthorized use or disclosure of the information is strictly prohibited.
Page 11
Emdeon Vx570 User’s Guide
Chapter 2: Get To Know Your Terminal
Emdeon Welcome Screen
The EmdeonTM Welcome screen appears when the terminal returns to an idle state from the Emdeon
Menu.
·
·
·
Press any key (except 3) to go to the Emdeon Menu.
Press 3 to advance the paper.
If the system administrator has set up a default card swipe, you can swipe a hard card from this
screen to run an ID Card search for the designated payer.
Emdeon Menu
From this menu.
·
·
·
·
·
Press <F2> to run Medical eligibility, claim status, referral, and other healthcare-related
transactions.
Press <F3> to run the Address Verification transaction through your credit source.
Press <F4> to run Financial transactions (Charity Care, Medicaid Predictor, and Payment
Predictor) through your credit source.
If you are the terminal Administrator, press <Scroll Page i >, then <F1> to display the Setup
Menu.
Press * to display the terminal Main Menu.
Terminal Security
Your terminal has security features that prevent unauthorized individuals from accessing healthcare
transactions.
·
·
·
All users who choose to run Emdeon Medical, Address Verification, or Financial transactions must
enter a User ID and PassCode, set up by the terminal Administrator.
Unsuccessful login attempts will be logged. The Administrator can print a log of unsuccessful
login attempts from the Setup menu. See Print Reports on page 26.
The terminal Administrator has a separate passcode.
Important! Your terminal ships with a default user ID/passcode and Administrator passcode. It is
imperative that you change these defaults, in order to comply with HIPAA security regulations. See
Chapter 3: Customize Your Terminal Setup beginning on page 13 for instructions.
© 2011 Emdeon Business Services LLC. All rights reserved.
This material contains confidential, proprietary information. Unauthorized use or disclosure of the information is strictly prohibited.
Page 12
Emdeon Vx570 User’s Guide
Chapter 3: Customize Your Terminal Setup
Chapter 3: Customize Your Terminal Setup
Overview
The Administrator can maintain terminal security and set defaults using the following options from the
Setup Menu:
·
·
·
·
·
·
·
·
Manage Users – add, change, or remove user IDs and passcodes for terminal users.
Manage Providers – add, change, or remove provider names and their provider IDs and
taxpayer IDs from a Provider QuickCodes list.
Manage Hotkeys – set up as many as 10 hotkeys. The user can press a hotkey from the
Emdeon Application Menu to quickly select the payer associated with the hotkey.
Reports – print system usage logs; hotkey lists; user lists; and Provider QuickCodes lists.
Terminal – reset the Administrator password.
Date/Time – reset the date and time displayed by the terminal.
Swipe Defaults – set the transaction that will read the card swipe from the Emdeon Idle State.
Default State – set the default state for transactions that prompt for a state.
The Communications option, also on the Setup Menu, should not be used except as directed by your
Emdeon Business Services representative.
Manage Users
Your Emdeon™ Vx570 terminal allows the Administrator to maintain user IDs and passcodes for each of
your Vx570 users. A user is anyone who will run transactions. This capability allows you to:
·
·
restrict access to transactions and functions on the Vx570.
track system usage at the individual user level via the Security Log (see Security Log on page
27).
A user ID and its associated passcode can each be from one to four characters.
To print a list of existing user IDs, see User List on page 28.
Add a User
Step
Terminal Display
This procedure begins from the Emdeon idle state If the
11
WELCOME TO EMDEON
1
SWIPE CARD
OR PRESS ANY KEY
MM/DD/YY
HH/MM
Medical
2
Address Verify
i
Financial
h
Setup
3
Action
main menu or screen saver is displayed, see Terminal Displays on page
Press any key (except 3).
Press <Scroll Page i > to page down.
Press <F1> to select Setup.
Config
4
Enter Admin Passcode:
.
Enter your Administrator passcode, and press
Your password will display as asterisks as you type.
Setup
5
i
6
Manage Users
Manage Providers
Communications
Manage Users
Add User
Remove User
Change Passcode
Press <F2> to select Manage Users.
Press <F2> to select Add User.
© 2011 Emdeon Business Services LLC. All rights reserved.
This material contains confidential, proprietary information. Unauthorized use or disclosure of the information is strictly prohibited.
Page 13
Emdeon Vx570 User’s Guide
Chapter 3: Customize Your Terminal Setup
Step
Terminal Display
Add User
7
8
9
Action
Type a unique one- to four-character user ID for the user you wish to add.
Enter User ID:
Press
Add User:
Type the one- to four-character passcode for the user ID.
Enter PassCode:
.
Press
The passcode will display as asterisks as you type.
Add User:
Retype the passcode.
Verify PassCode:
.
Press
The passcode will display as asterisks as you type.
User ID nnnn
Successfully Added
10
Manage Users
Add User
Remove User
Change Passcode
11
.
(displays briefly...)
Do one of the following:
·
Add, change, or remove another user.
·
Press
to exit the Manage Users menu.
Remove a User
Step
Terminal Display
This procedure begins from the Emdeon idle state If the
11
WELCOME TO EMDEON
1
SWIPE CARD
OR PRESS ANY KEY
MM/DD/YY
HH/MM
Medical
2
Address Verify
i
Financial
h
Setup
3
Action
main menu or screen saver is displayed, see Terminal Displays on page
Press any key (except 3).
Press <Scroll Page i > to page down.
Press <F1> to select Setup.
Config
4
Enter Admin Passcode:
.
Enter your Administrator passcode, and press
Your password will display as asterisks as you type.
Setup
5
6
7
8
9
Manage Users
Manage Providers
i
Communications
Manage Users
Add User
Remove User
Change Passcode
Remove User
Enter User ID:
Remove User:
Are You Sure?
Press <F3> to select Remove User.
Type the one- to four-character user ID of the user you wish to remove.
Press
Yes
No
User ID nnnn
Successfully Removed
Manage Users
10
Press <F2> to select Manage Users.
Add User
Remove User
Change Passcode
.
Do one of the following
·
To remove the user, press <F1>.; continue to the next step.
·
To keep the user, press <F2>. You are returned to the Manage
Users menu (step 2).
(displays briefly...)
Do one of the following:
·
Add, change, or remove another user.
·
Press
to exit the Manage Users menu.
© 2011 Emdeon Business Services LLC. All rights reserved.
This material contains confidential, proprietary information. Unauthorized use or disclosure of the information is strictly prohibited.
Page 14
Emdeon Vx570 User’s Guide
Chapter 3: Customize Your Terminal Setup
Change a Passcode
Step
Terminal Display
This procedure begins from the Emdeon idle state If the
11
WELCOME TO EMDEON
1
SWIPE CARD
OR PRESS ANY KEY
MM/DD/YY
HH/MM
Medical
2
Address Verify
i
Financial
h
Setup
3
Action
main menu or screen saver is displayed, see Terminal Displays on page
Press any key (except 3).
Press <Scroll Page i > to page down.
Press <F1> to select Setup.
Config
4
Enter Admin Passcode:
.
Enter your Administrator passcode, and press
Your password will display as asterisks as you type.
Setup
5
6
7
8
9
10
Manage Users
Manage Providers
i
Communications
Manage Users
Add User
Remove User
Change Passcode
Change Passcode
Enter User ID:
Press <F2> to select Manage Users.
Press <F4> to select Change Passcode.
Type the one- to four-character user ID of the user whose passcode you
wish to change.
Press
.
Change Passcode:
Type the user’s current one- to four-character passcode (the passcode you
wish to change).
Enter Current PassCode:
.
Press
The passcode will display as asterisks as you type.
Change Passcode:
Type the new one- to four-character passcode.
Enter New PassCode:
.
Press
The passcode will display as asterisks as you type.
Change Passcode:
Retype the new passcode.
Verify New PassCode:
.
Press
The passcode will display as asterisks as you type.
Change Passcode:
11
(displays briefly...)
PassCode Changed
Manage Users
12
Add User
Remove User
Change Passcode
Do one of the following:
·
Add, change, or remove another user.
·
Press
to exit the Manage Users menu.
© 2011 Emdeon Business Services LLC. All rights reserved.
This material contains confidential, proprietary information. Unauthorized use or disclosure of the information is strictly prohibited.
Page 15
Emdeon Vx570 User’s Guide
Chapter 3: Customize Your Terminal Setup
Manage Providers
Your Emdeon Vx570 terminal allows the Administrator to set up a Provider QuickCodes list for payers
who require that a provider ID and a provider first and last names are sent with their transactions. The
list can include both inquiring (requesting) provider IDs and servicing provider IDs. The Administrator
can add, edit, or delete from one to 99 provider names, their associated provider IDs (including National
Provider Identifiers [NPIs] and taxpayer IDs), and their QuickCode numbers from the list. A list of
provider names that are entered can be viewed. Also, the Provider QuickCodes list with the provider
names, provider IDs, and QuickCodes can be printed.
When entering a transaction, the user can choose to:
·
press <F2> to display a list of provider names, select a provider (you see the provider’s provider
ID), then press
.
·
type the provider’s one- or two-digit QuickCode number and press
·
type the provider’s provider ID, then press
provider ID), press
(you see the provider’s
again.
.
Provider ID Error Messages
You may receive a terminal error message when adding or editing providers on the QuickCode list or
when selecting a provider ID to enter for a transaction. See Chapter 7: Terminal Error Messages on
page 38 for a list of error messages and their explanations.
Add a Provider
Step
Terminal Display
This procedure begins from the Emdeon idle state If the
11
WELCOME TO EMDEON
1
SWIPE CARD
OR PRESS ANY KEY
MM/DD/YY
HH/MM
Medical
2
Address Verify
i
Financial
h
Setup
3
Action
main menu or screen saver is displayed, see Terminal Displays on page
Press any key (except 3).
Press <Scroll Page i > to page down.
Press <F1> to select Setup.
Config
4
Enter Admin Passcode:
.
Enter your Administrator passcode, and press
Your password will display as asterisks as you type.
Setup
5
i
6
Manage Users
Manage Providers
Communications
QuickCode Setup:
Add Provider
Edit Provider
View Providers
Press <F3> to select Manage Providers.
Press <F2> to select Add Provider.
Assign a QuickCode number for the provider from 1 to 99.
7
Add Provider
Press
(If you select a QuickCode number that is already taken, you will receive
Enter
QuickCode ( 0 - 99 ):
the message “QuickCode Assigned”; press
press the Backspace key
another number.)
Add Provider
Type the provider’s last name.
Enter Provider Last Name:
Press
8
to clear the message,
to delete the number[s], then enter
© 2011 Emdeon Business Services LLC. All rights reserved.
This material contains confidential, proprietary information. Unauthorized use or disclosure of the information is strictly prohibited.
Page 16
Emdeon Vx570 User’s Guide
Chapter 3: Customize Your Terminal Setup
Step
Terminal Display
Type the provider’s first name.
Enter Provider First Name:
Add Provider
Press
Enter Provider ID:
Add Provider
Press
9
10
11
Action
Add Provider
Provider QuickCode
Stored Successfully
QuickCode Setup:
Add Provider
Edit Provider
View Providers
12
Setup
Manage Users
Manage Providers
Communications
13
i
Type the provider’s provider ID.
(displays briefly...)
Do one of the following:
·
Return to step 6 to add another provider.
·
Press <F3> to edit or delete provider information.
·
Press <F4> to view a list of provider names.
·
Press
to exit the QuickCode Setup menu.
Do one of the following:
·
Press <Scroll Page i > to navigate the Setup menu
·
Press
to exit the Setup menu.
Edit or Delete a Provider
Step
Terminal Display
This procedure begins from the Emdeon idle state If the
11
WELCOME TO EMDEON
1
SWIPE CARD
OR PRESS ANY KEY
MM/DD/YY
HH/MM
Medical
2
Address Verify
Financial
h
Setup
3
Action
main menu or screen saver is displayed, see Terminal Displays on page
Press any key (except 3).
Press <Scroll Page i > to page down.
Press <F1> to select Setup.
Config
4
Enter Admin PassCode:
.
Enter your Administrator passcode, and press
Your password will display as asterisks as you type.
Setup
Manage Users
Manage Providers
Communications
5
6
7
i
QuickCode Setup:
Add Provider
Edit Provider
View Providers
SELECT PROVIDER:
JOHN SMITH
CARL JONES
THOMAS WILLIAMS
QuickCode #
Edit
8
Delete
Cancel
Edit Provider
9
Enter Provider Last Name:
SMITH
Edit Provider
10
Enter Provider First Name:
JOHN
Press <F3> to select Manage Providers.
Press <F3> to select Edit Provider.
Press <Scroll Line i > or <Scroll Line h > to scroll line by line.
Press
to select the provider name.
Do one of the following:
·
Press <F1> to edit the provider’s information; go to the next
step.
·
Press <F2> to delete the provider’s information. Provider
QuickCode Deleted displays briefly, then you are returned to
the QuickCode Setup menu. Return to step 6.
·
Press <F3> to cancel. You are returned to the QuickCode
Setup menu. Return to step 6.
Do one of the following:
·
Type the new provider last name, then press
step.
; go to the next
·
Press
to skip to the next step.
Do one of the following:
·
Type the new provider first name, then press
next step.
·
Press
; go to the
to skip to the next step.
© 2011 Emdeon Business Services LLC. All rights reserved.
This material contains confidential, proprietary information. Unauthorized use or disclosure of the information is strictly prohibited.
Page 17
Emdeon Vx570 User’s Guide
Chapter 3: Customize Your Terminal Setup
Step
Terminal Display
11
Action
Do one of the following:
Edit Provider
Enter Provider ID:
1234567890
·
Type the new provider ID, then press
·
Press
; go to the next step.
to skip to the next step.
Edit Provider
12
13
Provider QuickCode
Stored Successfully
Do one of the following:
·
Return to step 6 to edit or delete another provider.
·
Press <F2> to add another provider.
·
Press <F4> to view a list of provider names.
QuickCode Setup:
Add Provider
Edit Provider
View Providers
·
Setup
Manage Users
Manage Providers
Communications
14
i
(displays briefly...)
Press
to exit the QuickCode Setup menu.
Do one of the following:
·
Press <Scroll Page i > to navigate the Setup menu
·
Press
to exit the Setup menu.
View the Provider Name List
Step
Terminal Display
This procedure begins from the Emdeon idle state If the
11
WELCOME TO EMDEON
1
SWIPE CARD
OR PRESS ANY KEY
MM/DD/YY
HH/MM
Medical
2
Address Verify
i
Financial
h
Setup
3
Action
main menu or screen saver is displayed, see Terminal Displays on page
Press any key (except 3).
Press <Scroll Page i > to page down.
Press <F1> to select Setup.
Config
4
Enter Admin Passcode:
.
Enter your Administrator passcode, and press
Your password will display as asterisks as you type.
Setup
Manage Users
Manage Providers
Communications
5
6
7
8
i
QuickCode Setup:
Add Provider
Edit Provider
View Providers
PROVIDERS ENTERED:
JOHN SMITH
CARL JONES
THOMAS WILLIAMS
Setup
i
Press <F4> to select View Providers.
Press <Scroll Line i > or <Scroll Line h > to scroll line by line.
Press
. You are returned to the QuickCode Setup menu.
Do one of the following:
·
Press <F2> to add another provider.
·
Press <F3> to edit or delete provider information.
·
Press <F4> to view a list of provider names.
QuickCode Setup:
Add Provider
Edit Provider
View Providers
9
Press <F3> to select Manage Providers.
Manage Users
Manage Providers
Communications
·
Press
to exit the QuickCode Setup menu.
Do one of the following:
·
Press <Scroll Page i > to navigate the Setup menu
·
Press
to exit the Setup menu.
© 2011 Emdeon Business Services LLC. All rights reserved.
This material contains confidential, proprietary information. Unauthorized use or disclosure of the information is strictly prohibited.
Page 18
Emdeon Vx570 User’s Guide
Chapter 3: Customize Your Terminal Setup
Manage Hotkeys
Your Vx570 terminal allows you to set up as many as ten hotkeys, each of which corresponds to a
numeric key on the Vx570 keypad. When pressed from the Emdeon Menu, the hotkey allows the user to
quickly select the payer assigned to the hotkey.
To add or modify a hotkey assignment:
Step
Terminal Display
This procedure begins from the Emdeon idle state If the
11
WELCOME TO EMDEON
1
SWIPE CARD
OR PRESS ANY KEY
MM/DD/YY
HH/MM
Medical
2
Address Verify
i
Financial
h
Setup
3
Action
main menu or screen saver is displayed, see Terminal Displays on page
Press any key (except 3).
Press <Scroll Page i > to page down.
Press <F1> to select Setup.
Config
4
Enter Admin Passcode:
.
Enter your Administrator passcode, and press
Your password will display as asterisks as you type.
Setup
5
i
h
6
7
8
9
Manage Users
Manage Providers
Communications
Manage Hot Keys
Reports
Terminal
i
Date/Time
SELECT HOTKEY:
1 : <UNASSIGNED>
2 : <UNASSIGNED>
3 : <UNASSIGNED>
4 : <UNASSIGNED>
5 : <UNASSIGNED>
i 6 : <UNASSIGNED>
Hot Key #
AMC
AVMED
Acordia National
Aetna
iAetna Long Term Car
Note: your actual payer list may vary.
Hot Key # Payer Yes
Payer Name
No
Please Confirm?
Press <Scroll Page i > to page down.
Press <F1> to select Manage Hot Keys.
The first six existing hotkey assignments display. Highlight the listing for
the key to which you want to assign a payer.
·
Press <Scroll Page i > or <Scroll Page h > to page down to
the next screen or back to this screen.
·
Press <Scroll Line i > or <Scroll Line h > to scroll line by line.
·
Press
to select the hot key.
Highlight the name of the payer you wish to assign to the key:
·
Press <Scroll Page i > or <Scroll Page h > to scroll screen by
screen.
·
Press <Scroll Line i > or <Scroll Line h > to scroll line by line.
·
To move to the first payer beginning with a specific letter, press
the number key which displays the letter. Press one, two, or
three times depending on the letter’s position on the key.
·
Press
to select the payer.
Do one of the following:
·
Press <F1> to save the key assignment; go to the next step.
·
Press <F2> to cancel the key assignment. You are returned to
the Setup menu.
Modify Hot Keys
10
Hot Key Setup
Stored Successfully
If <F1> is pressed, the success message (left) displays briefly.
Hot Key Setup
Yes
11
No
Do you have any more
hot keys to set?
Do one of the following:
·
Press <F1> to select Yes and return to step 7.
·
Press <F2> to select No and go to the next step.
© 2011 Emdeon Business Services LLC. All rights reserved.
This material contains confidential, proprietary information. Unauthorized use or disclosure of the information is strictly prohibited.
Page 19
Emdeon Vx570 User’s Guide
Chapter 3: Customize Your Terminal Setup
Step
Terminal Display
Action
EMDEON
12
DATABASE MAINTENANCE
IN PROGRESS
PLEASE WAIT …
*************
AMTAS
--
The database maintenance message (left) is briefly preceded by the
message “The terminal will restart after processing the current changes.”
After the database is updated, the terminal will automatically restart.
Change the Administrator Passcode
The Administrator password allows access to setup functions. A default Administrator passcode ships
with your terminal. If you do not know this password, refer to the Welcome letter in your shipping
carton, or call Emdeon Customer Service at 800.333.0263. It is recommended that you change the
passcode.
To change the Administrator passcode:
Step
Terminal Display
Action
This procedure begins from the Emdeon idle state. If the main menu or screen saver is displayed, see Terminal Displays on page
11
WELCOME TO EMDEON
1
SWIPE CARD
Press any key (except 3).
OR PRESS ANY KEY
MM/DD/YY
HH/MM
Medical
2
Press <Scroll Page i > to page down.
Address Verify
i
Financial
h
Setup
3
Press <F1> to select Setup.
Config
4
Enter Admin Passcode:
.
Enter your Administrator passcode, and press
Your password will display as asterisks as you type.
Setup
5
6
7
8
9
10
Manage Users
Manage Providers
i
Communications
h
Manage Hot Keys
Reports
Terminal
i
Date/Time
SETUP
Prev
ADMIN PASSWORD
Next
****
Edit
Exit
SETUP
ADMIN PASSWORD
****
New:
SETUP
Prev
ADMIN PASSWORD
Next
****
Edit
Exit
SETUP
Cncl
Save Changes?
OK
h
11
Manage Hot Keys
Reports
Terminal
i
Date/Time
Press <Scroll Page i > to page down.
Press <F3> to select Terminal.
Press <F3> to select Edit.
Type the new one-to six-character passcode, and press
Your password will display as asterisks as you type.
.
Press <F4> to select Exit
Do one of the following:
·
To save the new password, press <F2>.
·
To cancel the change, press <F1>.
Do one of the following:
·
Press <Scroll Page i > or <Scroll Page h > to navigate the
Setup menu
·
Press
to exit the Setup menu.
© 2011 Emdeon Business Services LLC. All rights reserved.
This material contains confidential, proprietary information. Unauthorized use or disclosure of the information is strictly prohibited.
Page 20
Emdeon Vx570 User’s Guide
Chapter 3: Customize Your Terminal Setup
Change the Date and Time
To change the date and time displayed on your terminal:
Step
Terminal Display
Action
This procedure begins from the Emdeon idle state. If the main menu or screen saver is displayed, see Terminal Displays on page
11
WELCOME TO EMDEON
1
SWIPE CARD
Press any key (except 3).
OR PRESS ANY KEY
MM/DD/YY
HH/MM
Medical
2
Press <Scroll Page i > to page down.
Address Verify
i
Financial
h
Setup
3
Press <F1> to select Setup.
Config
4
Enter Admin Passcode:
.
Enter your Administrator passcode, and press
Your password will display as asterisks as you type.
Setup
5
i
h
6
Manage Users
Manage Providers
Communications
Manage Hot Keys
Reports
Terminal
i
Date/Time
Enter Date:
current date setting
Press
or
to accept the displayed date.
Just press
Type the new time, in military time, HH:MM format. (The terminal
provides the colon.)
Date/Time
8
Press <F4> to select Date/Time.
Type the new date, in MMDDCCYY format. (The terminal provides the
dashes.)
Date/Time
7
Press <Scroll Page i > to page down.
Enter Time:
current time setting
Press
or
Just press
to accept the displayed time.
Date/Time
9
Date/Time
Successfully Changed
h
10
Manage Hot Keys
Reports
Terminal
i
Date/Time
(displays briefly...)
Do one of the following:
·
Press <Scroll Page i > or <Scroll Page h > to navigate the
Setup menu
·
Press
to exit the Setup menu.
© 2011 Emdeon Business Services LLC. All rights reserved.
This material contains confidential, proprietary information. Unauthorized use or disclosure of the information is strictly prohibited.
Page 21
Emdeon Vx570 User’s Guide
Chapter 3: Customize Your Terminal Setup
Set a Card Swipe Default
The Administrator can designate a default card swipe transaction. Doing so allows the user to swipe the
card from the Welcome screen to run an ID card swipe search for that transaction. You would want to
designate your most frequently-run card swipe transaction as your card swipe default.
Note: To run an ID card swipe search for a transaction not designated as the default, you will select the
ID Card # search type from the transaction’s Search Type menu, then swipe the card at the ID Card #
prompt. See Card Swipe (not configured for idle swipe) on page 32 for more information.
Only those transactions that support an ID card swipe search can be set as the card swipe default.
To set a card swipe default:
Step
Terminal Display
This procedure begins from the Emdeon idle state If the
11
WELCOME TO EMDEON
1
SWIPE CARD
OR PRESS ANY KEY
MM/DD/YY
HH/MM
Medical
2
Address Verify
i
Financial
h
Setup
3
Action
main menu or screen saver is displayed, see Terminal Displays on page
Press any key (except 3).
Press <Scroll Page i > to page down.
Press <F1> to select Setup.
Config
4
Enter Admin Passcode:
.
Enter your Administrator passcode, and press
Your password will display as asterisks as you type.
Setup
5
i
h
6
h
7
8
Manage Users
Manage Providers
Communications
Manage Hot Keys
Reports
Terminal
i
Date/Time
Swipe Defaults
About
SELECT SWIPE PAYER:
FLORIDA
GEORGIA
ILLINOIS
INDIANA
i IOWA
Note: your actual payer list may vary.
Swipe Defaults
Press <Scroll Page i > to page down.
Press <Scroll Page i > to page down.
Press <F1> to select Swipe Defaults.
The list that displays lists all of the payers that support an ID Card #
search type.
Highlight the name of the payer you wish to set as the card swipe default:
·
Press <Scroll Page i > or <Scroll Page h > to scroll screen by
screen.
·
Press <Scroll Line i > or <Scroll Line h > to scroll line by line.
·
To move to the first payer beginning with a specific letter, press
the number key which displays the letter. Press one, two, or
three times depending on the letter’s position on the key.
·
Press
to select the payer.
9
Setting Swipe Payer
(displays briefly...)
to
payer name
If the payer supports more than one type of transaction, go to step 8; otherwise, go to step 9.
SELECT SWIPE TRANS:
Press <Scroll Line i > or <Scroll Line h > to highlight
ELIGIBILITY
the
name of the transaction which you wish to set for a
CLAIM STATUS
10
Note: your actual transaction list may
vary.
default swipe.
You must select a transaction type that supports an ID
Card # search as a search type; typically, this will be
the Eligibility transaction.
Press
to select the payer.
© 2011 Emdeon Business Services LLC. All rights reserved.
This material contains confidential, proprietary information. Unauthorized use or disclosure of the information is strictly prohibited.
Page 22
Emdeon Vx570 User’s Guide
Chapter 3: Customize Your Terminal Setup
Step
Terminal Display
Action
Swipe Defaults
11
12
13
Setting Swipe Trans
to
transaction name
SELECT SWIPE SEARCH:
ID Card #
Medicaid #
SSN/Date Of Birth
SSN/Name
Name/Date of Birth
Note: your actual search type list may
vary.
Swipe Defaults
(displays briefly...)
Setting Swipe Search
to
ID Card #
Swipe Defaults
(displays briefly...)
About
14
Highlight ID Card #, and press
Do one of the following:
·
Press <Scroll Page h > to navigate the Setup menu
·
Press
to exit the Setup menu.
Set a Default State
Some transactions prompt for a state. You can set a default state that will display in response to the
State prompt. The user can then just press
necessary.
to accept the state, or can type a new state, if
To change the default state:
Step
Terminal Display
Action
This procedure begins from the Emdeon idle state If the main menu or screen saver is displayed, see Terminal Displays on page
11
WELCOME TO EMDEON
1
SWIPE CARD
Press any key (except 3).
OR PRESS ANY KEY
MM/DD/YY
HH/MM
Medical
2
Press <Scroll Page i > to page down.
Address Verify
i
Financial
h
Setup
3
Press <F1> to select Setup.
Config
4
Enter Admin Passcode:
Enter your Administrator passcode, and press
.
Your password will display as asterisks as you type.
Setup
5
6
7
8
Manage Users
Manage Providers
i
Communications
h
Manage Hot Keys
Reports
Terminal
i
Date/Time
SETUP
Prev
ADMIN PASSWORD
Next
****
Edit
Exit
SETUP
Prev
DEFAULT STATE
Next
TN
Edit
Exit
Press <Scroll Page i > to page down.
Press <F3> to select Terminal.
Press <F2> (i.e., Next) four times
Press <F3> to select Edit.
© 2011 Emdeon Business Services LLC. All rights reserved.
This material contains confidential, proprietary information. Unauthorized use or disclosure of the information is strictly prohibited.
Page 23
Emdeon Vx570 User’s Guide
Chapter 3: Customize Your Terminal Setup
Step
9
Terminal Display
SETUP
DEFAULT STATE
New:
10
11
SETUP
DEFAULT STATE
VA
SETUP
Save Changes?
Action
Prev
Next
Edit
Exit
Prev
Next
Edit
Exit
Cncl
OK
Type the two-letter postal code for the desired default state (see table
below), and press
Use the <Alpha> key to convert numbers to letters, as described under
Entering Letters and Symbols on page 33.
Press <F4> to select Exit.
Do one of the following:
·
To save the new default state, press <F2>.
·
To cancel the change, press <F1>.
© 2011 Emdeon Business Services LLC. All rights reserved.
This material contains confidential, proprietary information. Unauthorized use or disclosure of the information is strictly prohibited.
Page 24
Emdeon Vx570 User’s Guide
Chapter 3: Customize Your Terminal Setup
State Abbreviations
State/Possession
Abbreviation
Military "State"
Abbreviation
ALABAMA
ALASKA
AMERICAN SAMOA
ARIZONA
ARKANSAS
CALIFORNIA
COLORADO
CONNECTICUT
DELAWARE
DISTRICT OF COLUMBIA
FEDERATED STATES OF
MICRONESIA
FLORIDA
GEORGIA
GUAM
HAWAII
IDAHO
ILLINOIS
INDIANA
IOWA
KANSAS
KENTUCKY
LOUISIANA
MAINE
MARSHALL ISLANDS
MARYLAND
MASSACHUSETTS
MICHIGAN
MINNESOTA
MISSISSIPPI
MISSOURI
MONTANA
NEBRASKA
NEVADA
NEW HAMPSHIRE
NEW JERSEY
NEW MEXICO
NEW YORK
NORTH CAROLINA
NORTH DAKOTA
NORTHERN MARIANA ISLANDS
OHIO
OKLAHOMA
OREGON
PALAU
PENNSYLVANIA
PUERTO RICO
RHODE ISLAND
SOUTH CAROLINA
SOUTH DAKOTA
TENNESSEE
TEXAS
UTAH
VERMONT
VIRGIN ISLANDS
VIRGINIA
WASHINGTON
WEST VIRGINIA
WISCONSIN
WYOMING
AL
AK
AS
AZ
AR
CA
CO
CT
DE
DC
FM
ARMED FORCES AFRICA
ARMED FORCES AMERICAS
(except CANADA)
ARMED FORCES CANADA
ARMED FORCES EUROPE
ARMED FORCES MIDDLE EAST
ARMED FORCES PACIFIC
table courtesy of the US Postal
Service.
AE
AA
AE
AE
AE
AP
FL
GA
GU
HI
ID
IL
IN
IA
KS
KY
LA
ME
MH
MD
MA
MI
MN
MS
MO
MT
NE
NV
NH
NJ
NM
NY
NC
ND
MP
OH
OK
OR
PW
PA
PR
RI
SC
SD
TN
TX
UT
VT
VI
VA
WA
WV
WI
WY
© 2011 Emdeon Business Services LLC. All rights reserved.
This material contains confidential, proprietary information. Unauthorized use or disclosure of the information is strictly prohibited.
Page 25
Emdeon Vx570 User’s Guide
Chapter 3: Customize Your Terminal Setup
Print Reports
The Administrator can print the following reports:
·
·
·
·
Security Log – a log of all invalid terminal login attempts.
Provider List – lists all of the provider names, provider IDs, and their QuickCodes set up using
the Manage Providers function.
Hot Key list – lists all of the hotkey assignments set up using the Manage Hot Keys function.
User List – a list of all user IDs set up using the Manage Users function.
To print sample reports:
Step
Terminal Display
Action
This procedure begins from the Emdeon idle state If the main menu or screen saver is displayed, see Terminal Displays on page
11
WELCOME TO EMDEON
1
SWIPE CARD
Press any key (except 3).
OR PRESS ANY KEY
MM/DD/YY
HH/MM
Medical
2
Press <Scroll Page i > to page down.
Address Verify
i
Financial
h
Setup
3
Press <F1> to select Setup.
Config
4
Enter your Administrator passcode, and press
.
Your password will display as asterisks as you type.
Enter Admin Passcode:
Setup
5
i
h
6
7
8
9
h
Manage Users
Manage Providers
Communications
Manage Hot Keys
Reports
Terminal
i
Date/Time
Reports
Security Log
Provider List
i
Hot Key List
User List
The Reports menu remains on the
display
Press <Scroll Page i > to page down.
Press <F2> to select Reports.
Do one of the following:
·
To print the Security Log, press <F2>; go to step 9.
·
To print the Provider List, press <F3>; go to step 9.
·
To print the Hot Keys List, press <F4>; go to step 9.
·
To print the User List, press <Scroll Page i >; go to step 8.
To print the user list, press <F1>.
After the report has printed:
·
Press <Scroll Page i > or <Scroll Page h > to navigate the
Reports menu.
·
Press
to exit the Setup menu.
© 2011 Emdeon Business Services LLC. All rights reserved.
This material contains confidential, proprietary information. Unauthorized use or disclosure of the information is strictly prohibited.
Page 26
Emdeon Vx570 User’s Guide
Chapter 3: Customize Your Terminal Setup
Report Samples
Security Log
Security Log
11/15/06
11:59:36
Date
Time
Event
------------------------------------------09/19/2006 12:49 User: 1234 Invalid Logon
10/31/2006 15:48 User: Admn Invalid Logon
11/15/2006 09:15 User: 3213 Invalid Logon
Provider List
Provider QuickCodes
08/15/08
11:59:36
#
Provider Name
Provider ID
------------------------------------------1
SMITH
1234567890
2
JONES
9876543212
3
WILLIAMS
1111111111
Hot Keys
Emdeon Hot Keys
11/15/06
11:59:36
Key Payer
------------------------------------------1: Florida
2: Georgia
3: Aetna
4: Cigna
5: <UNASSIGNED>
6: <UNASSIGNED>
7: <UNASSIGNED>
8: <UNASSIGNED>
9: <UNASSIGNED>
0: <UNASSIGNED>
© 2011 Emdeon Business Services LLC. All rights reserved.
This material contains confidential, proprietary information. Unauthorized use or disclosure of the information is strictly prohibited.
Page 27
Emdeon Vx570 User’s Guide
Chapter 3: Customize Your Terminal Setup
User List
User List
11/15/06
11:59:36
User ID
------------------------------------------12
545
4444
9999
© 2011 Emdeon Business Services LLC. All rights reserved.
This material contains confidential, proprietary information. Unauthorized use or disclosure of the information is strictly prohibited.
Page 28
Emdeon Vx570 User’s Guide
Chapter 4: Run Emdeon Transactions
Chapter 4: Run Emdeon Transactions
Emdeon Business Services offers three types of transactions:
·
·
·
Medical transactions allow you to verify eligibility, inquire on the status of claims, submit
referrals and service authorizations, and perform other functions related to medical care.
Address Verify transactions allow you to verify a patient’s address through your credit source.
Financial transactions allow you to acquire reports through your credit source to check the
patient’s healthcare payment predictability and the guarantor’s or patient’s potential eligibility for
Medicaid and charity programs. Financial transactions include Charity Care, Medicaid Predictor,
and Payment Predictor.
Note: Your Vx570 terminal may also provide a Credit/Debit card program. This program is separate
from your Emdeon programs. To access your Credit Card program, see Chapter 5: Switch to Credit
Card on page 37.
Submitting a Transaction
The following steps describe generally how to run an Emdeon transaction. For instructions specific to
the transaction you are running, see the Transaction Guide for that transaction. See Documentation
on page 5 for instructions on obtaining copies of Transaction Guides.
Step
Terminal Display
Action
You will start from one of these screens:
Emdeon®
1
11/17/06
2
13:30
CommServer
Emdeon
WELCOME TO EMDEON
SWIPE CARD
OR PRESS ANY KEY
The Emdeon Menu appears:
MM/DD/YY
HH/MM
Medical
4
Address Verify
i
Financial
3
If the Logo screen is displayed, press any key except <Scroll Line i >.
The Main Menu displays (see below).
If the Main Menu is displayed, press <F3> to select Emdeon. The
Welcome screen displays (see below).
If the Welcome screen is displayed, press any key except 3.
·
·
·
For Medical transactions, press <F2 > to select Medical.
For Address Verify transactions, press <F3>.
For Financial transactions, press <F4>.
Log on, if prompted:
Emdeon Logon:
5
Enter your User ID, and press
Enter User ID:
Emdeon Logon
6
Enter your passcode, and press
Asterisks will display as you type.
.
Enter PassCode:
For Medical transactions, go to step 9. For Financial transactions, select the transaction type:
FINANCIAL SOLUTION:
Press <Scroll Line i > or <Scroll Line h > to highlight the type of
Emdeon Charity Care
transaction you wish to perform.
7
Medicaid Predictor
Press
to select the transaction. An hourglass and a brief message
Payment Predictor
may display: “LOADING DATABASES. PLEASE WAIT…”
If you selected Payment Predictor, select the search type:
SELECT SEARCH TYPE:
Press <Scroll Line i > or <Scroll Line h > to highlight the search type
Name/Address
you wish to use.
8
SSN/Name/Address
Press
.
SSN/House #
For Address Verify and Financial transactions, go to step 12. For Medical transactions, select the payer to query:
© 2011 Emdeon Business Services LLC. All rights reserved.
This material contains confidential, proprietary information. Unauthorized use or disclosure of the information is strictly prohibited.
Page 29
Emdeon Vx570 User’s Guide
Chapter 4: Run Emdeon Transactions
Step
Terminal Display
SELECT PAYER:
FLORIDA
GEORGIA
ILLINOIS
INDIANA
i IOWA
9
Note: your actual payer list may vary.
Action
Highlight the name of the payer you wish to query:
·
Press <Scroll Page i > or <Scroll Page h > to scroll screen by
screen.
·
Press <Scroll Line i > or <Scroll Line h > to scroll line by line.
·
To move to the first payer beginning with a specific letter, press
the number key which displays the letter. Press one, two, or
three times depending on the letter’s position on the key.
to select the payer. An hourglass and a brief message may
Press
display: “LOADING DATABASES. PLEASE WAIT…”
If your payer supports more than one transaction type:
SELECT TRANSACTION:
Sub Eligibility
Dep Eligibility
Press <Scroll Line i > or <Scroll Line h > to highlight the type of
Sub Claim Status
transaction you wish to perform.
10
Dep Claim Status
Press
.
Note: the transaction types vary per
payer.
If your payer supports more than one search type:
SELECT SEARCH TYPE:
ID Card #
Press <Scroll Line i > or <Scroll Line h > to highlight the search type
Medicaid #
you wish to use.
11
SSN/Date Of Birth
SSN/Name
Name/Date of Birth
Note: search types vary per payer.
Follow the prompts to enter data:
Aetna
Please Enter:
(Press F2 For List)
12
Provider ID
After you have entered data for the last prompt:
RUNNING TRANSACTION
13
CONNECTING
Press
.
You will see prompts similar to the one shown on the left.
Use your keypad or optional keyboard to enter the information for which
you are being prompted.
to save your input and move to the next prompt.
Press
See Data Entry Tips on page 33.
You will see a message that the Vx570 is running the transaction,
connecting, transmitting, and receiving the response. The Vx570 will print
the response once it has been received.
PLEASE WAIT...
Using Hotkeys
To perform a transaction for which a hotkey has been assigned:
Step
Terminal Display
Action
1
Follow steps 1 through 3 under Submitting a Transaction on page 29 to display the Emdeon Menu.
MM/DD/YY
HH/MM
Medical Press the hotkey (keypad or keyboard key 1 through 0) assigned to the
2
Address Verify payer you wish to query.
i
Financial
Log on, if prompted:
Emdeon Logon:
3
Enter your User ID, and press
Enter User ID:
Emdeon Logon
4
Enter your passcode, and press
Asterisks will display as you type.
.
Enter PassCode:
Depending on the transactions the payer supports, you will see one of these:
·
The payer’s TRANSACTION menu.
·
The transaction’s SEARCH TYPE menu.
·
The first input prompt.
© 2011 Emdeon Business Services LLC. All rights reserved.
This material contains confidential, proprietary information. Unauthorized use or disclosure of the information is strictly prohibited.
Page 30
Emdeon Vx570 User’s Guide
Chapter 4: Run Emdeon Transactions
Using the Card Swipe
At the time of this publication, you must use the card swipe slot on the right of the keypad. The one on
the end of the terminal, below the keypad, is designed for gift cards and currently does not support
medical identification cards.
Payer Configured for Idle Swipe
Step
Terminal Display
Emdeon®
1
11/17/06
2
13:30
CommServer
Emdeon
WELCOME TO EMDEON
SWIPE CARD
OR PRESS ANY KEY
-or3
MM/DD/YY
HH/MM
Medical
Address Verify
i
Financial
Log on, if prompted:
Emdeon Logon:
4
Action
If the Logo screen is displayed, press any key except <Scroll Line i >.
The Main Menu displays (see below).
If the Main Menu is displayed, press <F3> to select Emdeon. The
Welcome screen displays (see below).
From either of these screens, swipe the hardcard. The magnetic stripe
should be facing the keypad and at the bottom of the card (see the icon on
the terminal beside the card slot).
Enter your User ID, and press
Enter User ID:
Emdeon Logon:
Enter your passcode, and press
Asterisks will display as you type.
5
.
Enter Passcode:
6
additional data entry prompts, such as
Provider ID and dates of service
Enter the remaining data for which you are prompted.
© 2011 Emdeon Business Services LLC. All rights reserved.
This material contains confidential, proprietary information. Unauthorized use or disclosure of the information is strictly prohibited.
Page 31
Emdeon Vx570 User’s Guide
Chapter 4: Run Emdeon Transactions
Card Swipe (not configured for idle swipe)
Step
Terminal Display
Action
1
Follow steps 1 through 3 under Submitting a Transaction on page 29 to display the Emdeon Menu.
The Emdeon Menu appears:
MM/DD/YY
HH/MM
Medical Press <F2 > to select Medical.
2
Address Verify
i
Financial
Log on, if prompted:
Emdeon Logon:
3
Enter your User ID, and press
.
Enter User ID:
Emdeon Logon
Enter your passcode, and press
Asterisks will display as you type.
4
Enter PassCode:
Select the payer to query:
SELECT PAYER:
FLORIDA
GEORGIA
ILLINOIS
INDIANA
i IOWA
5
Note: your actual payer list may vary.
.
Highlight the name of the payer you wish to query:
·
Press <Scroll Page i > or <Scroll Page h > to scroll
screen by screen.
·
Press <Scroll Line i > or <Scroll Line h > to scroll line by
line.
·
To move to the first payer beginning with a specific letter,
press the number key which displays the letter. Press one,
two, or three times depending on the letter’s position on the
key.
to select the payer. An hourglass and a brief message
Press
may display: “LOADING DATABASES. PLEASE WAIT…”
If your payer supports more than one transaction type:
SELECT TRANSACTION:
Sub Eligibility
Dep Eligibility
Press <Scroll Line i > or <Scroll Line h > to highlight the type of
Sub Claim Status
transaction you wish to perform.
6
Dep Claim Status
Press
.
Note: the transaction types vary per
payer.
SELECT SEARCH TYPE:
ID Card #
Medicaid #
7
SSN/Date Of Birth
.
Highlight ID Card #, and press
SSN/Name
Name/Date of Birth
Note: search types vary per payer.
Enter the data for input prompts that are displayed prior to the ID
8
input prompts, such as Provider ID
Card # search.
Florida
Swipe the hardcard. The magnetic stripe should be facing the keypad
9
Please Enter:
and at the bottom of the card (see the icon on the terminal).
10
ID Card #
additional input prompts, such as dates
of service
Enter the remaining data for which you are prompted.
© 2011 Emdeon Business Services LLC. All rights reserved.
This material contains confidential, proprietary information. Unauthorized use or disclosure of the information is strictly prohibited.
Page 32
Emdeon Vx570 User’s Guide
Chapter 4: Run Emdeon Transactions
Data Entry Tips
Accepting Displayed Values
When an input prompt is displayed, the terminal screen may display a default value (such as a default
provider ID), or it may display the last value you entered in response to the same prompt the last time
you ran the transaction.
If you want to accept that value, just press
.
To enter a different value, just type the new value. The previously-displayed value disappears.
Entering Letters and Symbols
To enter letters on the Vx570 keypad:
1. Press the key that displays the letter or symbol you wish to enter.
2. Press the <Alpha> key once, twice, three, or four times until the desired character displays.
Use the following chart as a quick-reference to entering letters.
Key
Alpha x 1
Alpha x 2
Alpha x 3
1
Q
Z
.
Alpha x 4
\
2
A
B
C
~
3
4
D
G
E
H
F
I
%
@
5
J
K
L
/
6
M
N
O
?
7
P
R
S
[
8
T
U
V
]
9
W
X
Y
{
*
,
’
”
}
0
#
=
SPACE
:
+
$
&
^
Note: For dates of service and Social Security number entries, do not enter the dashes between
numbers. The terminal will supply the dashes for you as you type.
Choosing from a Selection List
Some prompts, such as for service types, allow you to pick a value from a selection list. When a
selection list is available, you will see this message:
(Press F2 For List)
To choose from the list:
1. Press <F2>.
2. Highlight the
○ Press
○ Press
The selection list displays.
desired value:
<Scroll Page i > or <Scroll Page h > to scroll screen by screen.
<Scroll Line i > or <Scroll Line h > to scroll line by line.
3. Press
to select the value. You are returned to the input prompt. Your selected data is
displayed.
4. Press
to accept the chosen value and proceed to the next step.
© 2011 Emdeon Business Services LLC. All rights reserved.
This material contains confidential, proprietary information. Unauthorized use or disclosure of the information is strictly prohibited.
Page 33
Emdeon Vx570 User’s Guide
Chapter 4: Run Emdeon Transactions
Prompts for Optional Data
Some prompts do not require that you make an entry. In this case, just press
to skip to the next
prompt. Make sure the data entry line is blank; if it is displaying a prior value, press
over the existing entry.
to backspace
Note: to determine whether data is required or optional, press F1 at the input prompt to display the
Help screen.
Getting Help
You can display a screen of help on any input prompt, as follows:
Press <F1>.
The User Help screen displays information such as the minimum and maximum field length, the
requirement (required or optional), and any other special information about the field (for example,
Selection List indicates that a choice list is available).
Press any key to return to the input prompt.
Data Entry Error Messages
If your input is invalid (for example, you entered the wrong number of characters or you tried to skip a
prompt for required data), the terminal will beep and display a message below your input line indicating
the nature of your error.
To correct your entry:
1. Press
or
to exit the error message.
to backspace over the existing entry.
2. Press
3. Re-enter the data.
The Cancel Key
Use the Cancel Key (
·
·
·
·
) to:
Exit error messages.
Exit data entry for a transaction.
Cancel processing of the transaction once it has been submitted
Exit to the Emdeon Menu.
Response Printout
Your response displays on your terminal screen. You can scroll through the response using the scroll
keys (press <Scroll Page i > or <Scroll Page h > to scroll screen by screen or press <Scroll Line i
> or <Scroll Line h > to scroll line by line). To print a response, press <F4>. To reprint a response
that just printed, press <Scroll Line h > (before you enter another transaction).
The following illustration shows a sample response printout. Responses vary depending on the payer or
credit source you have queried. For a response description specific to the payer you have queried, see
the Transaction Guide for that payer. See Documentation on page 5 for instructions on obtaining
copies of Transaction Guides.
© 2011 Emdeon Business Services LLC. All rights reserved.
This material contains confidential, proprietary information. Unauthorized use or disclosure of the information is strictly prohibited.
Page 34
Emdeon Vx570 User’s Guide
Chapter 4: Run Emdeon Transactions
Emdeon®
---------- Emdeon Point Of Service --------TEST.800
11/15/06 - 11:59:36
Program ID
Transaction date and time
------------- Input Information ------------
Information you entered in the
request
Provider ID
123456789
Member ID
87654321
Begin DOS
11-15-06
End DOS
11-15-06
---------- ABC Insurance Eligibility -------
Response details
Submit ID
Time
Benefit Ind
Medicare Ind
Other Payer Ind
------------- Information Source ----------Primary ID
12345
Name
Insurance
ABC
----------- Information Receiver ----------Primary ID
123456789
Name
Dr. Smith
---------------- Subscriber ---------------Trce1
123456789
ABCIns
Trce2
555666777889
9EMDEONMFX
Primary ID
87654321
Last
PATIENT
First
JANE
Middle
S
DOB
01/01/1080
Gender
Female
Cnge
N
End of response
Elig:
© 2011 Emdeon Business Services LLC. All rights reserved.
This material contains confidential, proprietary information. Unauthorized use or disclosure of the information is strictly prohibited.
Page 35
Emdeon Vx570 User’s Guide
Chapter 4: Run Emdeon Transactions
05/05/2005
----------------- Actv Covg ---------------Plan Cvg
MS
---------------- Limitations --------------Plan Cvg
MS
---------------- End of Receipt ------------
© 2011 Emdeon Business Services LLC. All rights reserved.
This material contains confidential, proprietary information. Unauthorized use or disclosure of the information is strictly prohibited.
Page 36
Emdeon Vx570 User’s Guide
Chapter 5: Switch to Credit Card
Chapter 5: Switch to Credit Card
Your Vx570 may contain a third party Credit Card payment program.
·
·
To access this program, press the asterisk key (*) to return to the Main Menu.
Press the function key to the right of the Credit Card menu item.
Operation of the Credit Card program is outside of the scope of this manual. Contact your Credit Card
program vendor for details.
Chapter 6: Program Updates
Updates to the programs on your terminal will occur automatically.
When updates are available, the following will occur:
1. You will run a transaction.
2. After the transaction transmits, you will see this message on the terminal display:
Do not unplug your terminal or press any keys while this message displays.
3. Your transaction response will print.
4. You will usually receive a message, either on the terminal display or on your printout, from
Emdeon, describing the nature of the update.
5. If the message is on the screen, press <Scroll Page i > or <Scroll Page h > to scroll through
the message. When you have finished viewing the message, press
.
Large Program Updates
Your Vx570 device is set to dial in to download large program on an as-needed basis, when triggered by
the Emdeon data center. The dial-in will occur after your terminal has been idle for a period of time.
While the terminal is downloading updates, the terminal will display the message “Automatic Download
in Progress…Please Wait.” Dashes, followed by asterisks will advance across the screen as the download
progresses.
Updates may take a few minutes (but usually under five minutes). Pressing a key during the download
will cancel the download. This will not harm your terminal, but it is recommended that you allow the
terminal to continue until the download has been completed.
When the download has completed, your terminal will restart and return to the Main Menu. Changes are
installed when you choose Emdeon from the Main Menu.
If you cancel an update in progress, the terminal will dial in for the program update following the next
idle period.
© 2011 Emdeon Business Services LLC. All rights reserved.
This material contains confidential, proprietary information. Unauthorized use or disclosure of the information is strictly prohibited.
Page 37
Emdeon Vx570 User’s Guide
Chapter 7: Terminal Error Messages
Chapter 7: Terminal Error Messages
This section describes error messages that can be displayed on your terminal during data entry and data
transmission.
Note: You may also see error messages displayed on your response printout. These messages – which
appear in the body of the response and which typically begin with CL, HT, RH, or other letters – are
considered EDI Error Messages, and are returned by the Emdeon data center or the payer to alert you of
certain conditions related to your transactions. They are not generated by the Vx570 terminal. For a
complete description of these error messages, see the document entitled Dictionary of Transaction
Error Messages. Refer to Documentation on page 5 for more information on obtaining this
document.
Message
Description
Database Error
The database is incomplete or corrupt, and the terminal cannot process the
transaction. Call Emdeon Customer Support.
Card Read Error
COMM ERROR
Invalid – description of requirement
Invalid Amount
Invalid Date
Invalid PassCode
Invalid User ID
No Providers Have Stored Provider
IDs That Satisfy The Transaction
Rules
No Response
Only Provider Dr. XXX Has A Stored
Provider ID That Satisfies The
Transaction Rules
Only Providers With Stored Provider
IDs That Satisfy The Transaction
Rules Are Displayed
Passcode Mismatch
Please Try Again
QuickCode Assigned
, then reswipe the
The terminal was unable to read the card swipe data. Press
card. If this message continues to occur, there may be a problem with the card.
The Vx570 could not establish phone or Ethernet connectivity. Check to make sure
your phone or Ethernet cable is securely plugged in. It is also possible that the
terminal is set up with the wrong communication method (for example, modem versus
Ethernet). If you suspect this is the problem, call Emdeon Customer Service.
Your input is invalid; for example, it is not the correct length. The data entry
requirement appears following the message.
You entered a monetary amount in such a way that it does not represent a valid
amount.
You entered a date that was in the wrong format, or that did not represent a real date
(for example, 11-11-1111).
Can appear during modification of a user’s passcode. The passcode you entered does
not match the user’s current passcode.
Can appear during the removal of a user ID or modification of a user’s passcode. You
entered a user ID that does not exist.
None of the stored provider IDs are valid for the current transaction (for example, this
payer requires a nine-character provider ID and there are no nine-character provider
to return to the Provider ID prompt.
IDs in your Provider QuickCodes list). Press
Check to make sure you have the correct provider IDs for the payer.
Displays when you ping the network connection, if there is no response from the
network. This indicates that there is a problem with the network connection.
Only one provider ID in your Provider QuickCodes list is valid according to the payer’s
rules (the provider’s name appears in the message). Press
to clear the message
to
and return to the Provider ID prompt. The valid provider ID displays. Press
accept the provider ID.
Multiple provider IDs in your Provider QuickCodes list are valid for this payer with the
to display only the list of provider names
exception of one provider ID. Press
with valid provider IDs.
Can appear during the addition of a user ID or modification of a user’s passcode. You
were prompted to re-enter the user’s passcode. The passcode you re-entered did not
match the first entry of the user’s new passcode.
Can appear during the addition of a provider to the Provider QuickCodes list. You
entered a QuickCode number that is already assigned to another provider. Press
to clear the message, press the Backspace key
to delete the number(s), then
re-enter another QuickCode number from 1 to 99.
Your terminal may have been tampered with (for example, it was dropped or an object
TAMPER
The Requested Provider ID For Dr.
XXX Does Not Satisfy The
Transaction Rules And Cannot Be
Displayed
UserID Already Exists...
to
fell on it). This message appears when the Vx570 is first turned on. Press
clear the message, then continue normal use of the terminal.
To reset the date and time, see “Change the Date and Time” on page 21.
You entered a one- or two-digit QuickCode in the Provider ID prompt that corresponds
to a provider ID that is not valid according to the payer’s rules (the provider’s name
to return to the Provider ID prompt (the invalid
appears in the message). Press
provider ID is not displayed, but the QuickCode number reappears). Check to make
sure you have the correct provider IDs for the payer.
Can appear during the addition of a user ID. You attempted to add a user ID that
already exists.
© 2011 Emdeon Business Services LLC. All rights reserved.
This material contains confidential, proprietary information. Unauthorized use or disclosure of the information is strictly prohibited.
Page 38
Emdeon is a leading provider of revenue and payment cycle solutions that
connect payers, providers, and patients to improve the healthcare business
processes.
To learn more about our company, our services, and our commitment to
improving healthcare, visit our website at www.emdeon.com.
© 2011 Emdeon Business Services LLC. All rights reserved.
3055 Lebanon Pike, Suite 1000
Nashville, TN 37214-2230
877.EMDEON.6 (877.363.3666)
www.emdeon.com