1
USER MANUAL
Revision September 2008
Fontana Roberto Software
EUMETCAST DVB SYSTEM DESCRIPTION .............................................................................1
HARDWARE INSTALLATION ....................................................................................................2
RECEPTION SOFTWARE INSTALLATION ...............................................................................2
T-SYSTEMS RECEPTION SOFTWARE INSTALLATION ..........................................................3
SYS_DVB SOFTWARE INSTALLATION....................................................................................5
PROGRAM SETUP .....................................................................................................................6
LOAD BMP..................................................................................................................................7
MPEF DATA ................................................................................................................................8
PROJECTIONS ...........................................................................................................................9
LIST IMAGES HRIT................................................................................................................... 10
LIST IMAGES LRIT ................................................................................................................... 10
ANIMATION...............................................................................................................................11
MONITOR RGB ......................................................................................................................... 12
SUM AND DIFFERENCE OF TWO CHANNELS ...................................................................... 12
ZOOM ........................................................................................................................................ 13
MONITORING GRAPH.............................................................................................................. 13
PALETTE EDITOR .................................................................................................................... 13
COLOR MASKS ........................................................................................................................ 14
RECEPTION LOG ..................................................................................................................... 14
MESSAGES...............................................................................................................................14
BACKGROUND COLOR........................................................................................................... 15
SPECIAL AUTOMATIC SAVE .................................................................................................. 15
MANUAL SAVE......................................................................................................................... 15
JPEG SAVE FOR ARCHIVE ..................................................................................................... 15
ANIMATE SAVED JPEG........................................................................................................... 16
LAYOUT SAVE/RESTORE ....................................................................................................... 16
PRINT ........................................................................................................................................ 16
RECEIVING EFFICIENCY CHECK ........................................................................................... 16
NET CLIENT VERSION............................................................................................................. 17
SYS_MSG_DVB
page 1
EumetCast DVB system description
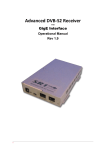
The system is comprising of a parabolic antenna pointed on EuroBird 9 satellite and a digital data decoder linked
by a PC through a USB port.
Received data is standard HRIT and LRIT.
Data is compressed by wavelet and jpeg algorithms and encrypted by 3des algorithm.
Every 6 hours a series of non-encrypted images is transmitted.
Data encryption needs a USB key provided by Eumetsat.
Data reception needs a particular software with licence provided by T-Systems company.
Furthermore, you need UserName and PassWord given by Eumetsat.
Reception, decompression and save
Images are divided in files comprising by 464 lines but this could change at discretion of Eumetsat.
Raw data files are processed and subsequently deleted from the hardisk.
In order to build images our software reads these files, decompresses the data and assemblies the complete images.
The software does these operations automatically and in an invisible way to user’s eye.
Files with complete images are saved in BMP format.
We chose this format for the following reasons:
•
You can find very capable hardisks easily and to own an 80 Gbyte HD is frequent.
•
We think what users want is elaboration speed, when you load an image you want it to appear quickly. If
the image is compressed (GIF, JPG, etc.) elaboration time is much longer because of Windows procedures
(API) must convert it in BMP format.
•
Furthermore, receiving wavelet images means these are compressed and decompressed with any alteration and in a lossless way. We think that converting them in JPG format just to save some space on disk would
be almost sacrilegious.
Display
Images can be displayed both in original gray scale and in addition with color masks to improve their readably.
Furthermore, the software is able to add land-sea borders, national borders and latitude and longitude crosses with
5° interval.
An interesting function is to assign the three primary colors (Red, Green and Blue) to three images of different
spectral channels and to create a ‘sum image’ which allows to observe features hard to find on single images.
Zoom levels are from -32x and +8x. We think these levels are good enough and there’s no reason to extend them.
Moving mouse cursor on images makes latitude, longitude and pixel level values of the pixel appear in three boxes
according to where the cursor is placed.
Monitoring Graph
The software allows to set the co-ordinates of 10 localities in order to make graphs about cloud coverage.
Save in other formats
Saved files can be automatically or manually set choosing their graphic format and by cropping the area.
Print
Any image can be printed choosing the printer, cropping the area, position and print size.
About the software
The software is developed by Roberto Fontana using his experience earned by developing a lot of previous softwares for Meteosat and Polar.
We have tried to make intuitive procedures in order to facilitate users who do not have expertise in using personal
computers.
Furthermore, we have tried to simulate possible mistakes of absent-minded or nervous users trying to keep the
software stable.
Software instability is still possible. If you reach an error situation just redo the same operations you did before and
if the result is the same as before please contact us to inform us of this error. This will allow us to improve the software.
Fontana Roberto Software
SYS_MSG_DVB
Hardware installation
EumetCast DVB system receives data from EuroBird satellite placed at 9° E.
This satellite is the one which disseminates digital television programs.
At this address
http://www.eumetsat.de/cgi-bin/tools/antennaPointing
Eumetsat provides a helpful tool to point the antenna correctly.
The illuminator and converter (LNB) are placed in the antenna focus.
Good-quality coaxial cable (for TV-sat) links the LNB to the digital decoder near the receiving PC.
The decoder must be plugged by the its power plug supplied in its package.
Reception software installation
If the CD-rom is marked T-Systems “Version 02.etc..” follow the T-Systems procedure.
If the CD-rom is marked EUMETSAT “EumetCast Tellique license” follow this procedure.
Decoder SkyStar 2
Insert SkyStar 2 CD-rom.
1) Plug the decoder in and link it to one PC USB port.
2) After some seconds the computer asks to install drivers for this new peripheral.
Search on the CD-rom.
If driver installation does not work it is useless to continue.
3) Select TV/data software Installation.
When the installation has ended remove the CD-rom and start the computer again.
T-Systems Tellique
Insert EumetCast Tellique CD-rom.
1) Open the CD-rom window.
If Eumetsat EKU USB has not been supplied yet, skip points 2, 3 and 4.
2) Select EKU_software directory.
3) Remove all USB keys from the computer (if there are any).
4) Double-click on eToken RTE.msi file to install EKU driver.
5) Select Tellique directory.
6) Double-click on T-Systems-setup.exe file to install raw data reception software.
7) Check the address of this new net connection.
START -> SETTINGS -> NET.
Select the card and select PROPERTIES with the right button.
Configure TCP-IP -> PROPERTIES :
IP Address = 192.168.238.238
Subnet Mask = 255.255.255.0
Leave the other settings the same.
8) Check the address by opening a DOS window.
Write “ipconfig” and press Enter.
If the address is not correct repeat the previous step.
Do not continue if this problem is not solved.
Reception channel tuning
Two new icons appear on the application bar: one round for the decoder and one ‘T’ for Tellique.
Right-click on decoder round icon.
Select T-Systems :: EuroBird 9° E.
Check the settings as follow:
Double-click on round icon.
Click on Status.
Transponder = 11977.
Symbol Rare = 27500.
Fontana Roberto Software
page 2
SYS_MSG_DVB
page 3
FEC = 3/4.
Polarity = Horizontal (HiV)
Orbital Position = 09.0 East
Signal quality with green band.
If the color is not green check antenna pointing at the following website
http://www.eumetsat.de/cgi-bin/tools/antennaPointing
where an helpful tool will help you to point your antenna correctly.
Select DATA SERVICE and insert PID required for the reception.
ESA =
0X0064
0X012C
0X012D
0X012E
0X0200
0X01FD
0X01FE
0X0200
or
Decimals =
100
300
301
302
500
509
510
512
Insert EUMETSAT Token key in one USB port and restart the computer.
After about 10 minutes you should find some files in the reception directory.
\PROGRAMS \ T-SYSTEMS \ BusinessTV-IP \ RECEIVED
If not, try to TURN the computer OFF instead of restarting it.
Turn USB decoder off.
After 30 seconds TURN decoder and computer ON.
T-Systems reception software installation
Follow this procedure only if the CD-rom is marked T-Systems Version 02. etc..
To avoid installing files which are of no use or could create conflict, use only the CD-rom delivered by T-Systems
company.
1) Plug the decoder in and link it to one PC USB port.
2) After some seconds the computer asks to install drivers for this new peripheral.
Search on the CD-rom.
If driver installation does not work it is useless to follow on.
3) Check the correct address to this new net connection.
START -> SETTINGS -> NET.
Select the card and select PROPERTIES with the right button.
Configure TCP-IP -> PROPERTIES :
IP Address = 192.168.238.238
Subnet Mask = 255.255.255.0
Leave the other settings the same.
4) Check the address opening a DOS window.
Write “ipconfig” and press Enter.
If the address is not correct repeat the previous step.
Do not continue if this problem is not solved.
Fontana Roberto Software
SYS_MSG_DVB
page 4
5) CDROM -> select . SkayStar etc… -> Install -> double-click on Setup.exe file.
When the installation has ended you must restart the computer.
After the computer has restarted you will find a new icon on lower-right bar. This icon is round and green
means it is receiving correctly.
Double-click on the icon, click on Status.
Network must be = Deutsche Telekom AG: MMPO
Orbital position = 013.0 East
Signal quality > 60 % with green band
db >= 10 db
If the color is not green check antenna pointing at the following website
http://www.eumetsat.de/cgi-bin/tools/antennaPointing
where an helpful tool will help you to point your antenna correctly.
6) Create a new directory \TELLIQUE on the hard disk.
Copy from CD-rom \Tellique \Win32 ecc.\ Bin the following files:
tqrecv.exe
recv.ini
recv_channels.ini
licennse.ini
and paste them in the new directory on the hard disk.
7) Remove to copied files the “only reading” attribute, right-clicking on Properties.
8) Replace Tqrcv.exe file with the last version.
Do this operation only if Eumetsat OPS or T-Systems have sent an e-mail with these instructions.
9) Double-click on Recv.ini file.
Insert UserName and UserKey transmitted by Eumetsat OPS via e-mail.
Respect capital and small letters.
10) Double-click on receiver round icon (on the right bar).
Select DATA SERVICE and insert the necessary PID for the reception.
ESA =
Decimals =
0x0064
100
0x012C
300
0x012D
301
0x0200
512
11) For more efficiency open double-clicking on \Tellique\Rcv_channels.ini file.
Remove ‘#’ at the beginning of the row
temp_directory=receiving\tmp
In this way temporary files do not create themselves into the reception directory but in this directory.
Save and close the window.
12) To start the reception double-click on \Tellique\Tqrec.exe file.
Subsequently insert this instruction in Automatic Execution in order to load it when the computer starts.
In Windows bar, on the right, appears the program icon with a ‘T’ on white background.
Double-click on the icon to have access to the reception graph and other utility pages.
13) The program will create a subdirectory. TELLIQUE -> RECEIVED.
In this directory will be written the received files.
After 10 minutes you will find some received files into \Tellique\Received directory.
If not try to TURN the computer OFF (DO NOT Restart but Stop the System).
Turn the USB decoder off.
After 30 seconds TURN the decoder and the computer ON.
If you did not insert the program file TQREC.exe into Automatic Execution, repeat step 12.
Fontana Roberto Software
SYS_MSG_DVB
SYS_DVB software installation
Insert SYS_MSG_DVB CD-rom.
After some seconds a presentation form will appear on the screen.
Press INSTALLA SYS_DVB button.
The installation program suggests to install the program on C:\SYS_DVB.
Once finished the installation you can close the form leaving the CD-rom inside the CD-reader.
USB user key driver installation.
Before loading the program you have to install USB user key driver.
Insert the software’s key in a USB port in your computer.
When the driver request appears on the screen, search on the CD-rom at \DRIVE directory.
Once the installation has ended close and restart the computer.
Fontana Roberto Software
page 5
SYS_MSG_DVB
page 6
Program Setup
PROGRAM
Language
Italian and English.
Offset UTC
Difference between Greenwich and computer’s time zone.
For Italy the offset is –1 and in the summertime the legal hour is –2.
As the program starts, a message on the screen warns you if this data is not correct.
It is important that the time zone selected on the Windows Control Panel is correct.
RX latitude and longitude
The coordinates where the station is placed must be inserted in these boxes.
According to the coordinates, a little circle will appear on the images.
To disqualify this function insert Lat=00.00 and Long=000.00.
Delete Images after
Choose between 12, 24, 36 and 48 hours.
Because of the dimension of big images, we advise you to choose 24 hours time for a fast automatic management.
You must remember that 24 hours means about 25 GBytes on disk in addition to any eventual Special Automatic
Saves in different graphic formats.
DVB RECEPTION
Disk and Dir. Reception H(L)RIT
Define where T-SYSTEMS reception program will save the raw data.
If reception program installation has been done following the instructions, data are in:
\PROGRAMMI\T-SYSTEMS\BusinessTV-IP\RECEIVED.
If this data is not correct, you will not receive anything.
ATTENTION: if this parameter refers to a wrong directory you risk deleting the files contained in that directory. However deleted files are recovered in FileError subdirectory.
ACT WITH MAXIMUM CAUTION.
Save BMP HRIT and LRIT
There are the directories where the program saves assembled files in BMP format.
Check these boxes and press Default button which point to program BMP_H and BMP_L subdirectories.
It is possible address the images on another disk or other directories.
Status bar
The file names which are processed and the messages and notices ADMIN and NEWS sent by Eumetsat appear
on status bar.
OPTIONS
Color Mask
Images appear on the screen with a color mask or in original gray scale.
However it is possible to change from one way to the other for each image.
Coastline and latitude and longitude crosses
If checked, images appear on screen automatically loading these functions.
Capitals
European capitals are drawn on images with zoom >= 1.
RAW
Save raw data files of selected channels into RAW subdirectory.
Files can be automatically deleted afterwards according to your ‘Delete Images after’ selection.
Fontana Roberto Software
SYS_MSG_DVB
page 7
Load BMP
Click on FILE menu. Select:
List Images HRIT to load HRIT images.
List Images LRIT to load LRIT images.
Monitor RGB to load HRIT images with possibility to sum three different channels.
Options
Coastline
Coastline is drawn on images.
With zoom >= -2 will appear also Nations’ borders.
Lat/Long
Latitude and longitude lines with a 5° or 10° interval (depending on zoom level) are drawn on the images.
Lines can be full or outlined.
Color can be chosen from the ones available on Windows.
AutoUpdate
When the box is checked, the program automatically replaces the image when a more recent one is available.
Animation
The rectangle which defines the animation zone can be moved with the mouse’s left button – Window 1 and Window 2 define two rectangles of different dimension.
Palette
Choose between 5 color masks and two gray scale palettes.
Pixel level
Moving the mouse cursor on the image you can read latitude, longitude and signal level values.
Fontana Roberto Software
SYS_MSG_DVB
page 8
Capitals
European capitals are drawn on images with zoom >= 1.
To change colors right-click on ‘Capitals’ notice.
Measure distance
Only for Met-8 images.
Clicking on this button the function is enabled and the button turns red.
Use mouse left button on the image.
Click on the measure’s starting point and drag it along to the final point.
Releasing the mouse button the measure in Km appears.
To disable the function press on Measure Distance button again.
Note: The measure is quite well accurate if the starting and final points are not too close to the globe borders.
Gray scale image contrast
Pixel and thermic data levels.
You can read latitude, longitude and signal level values moving the mouse's cursor on the image.
On IR images the values are in Kelvin degrees or Centigrade (click with the mouse to change).
It is necessary to display gray scale image to get maximum accurancy of thermic data.
Thermic value is calculated using calibration data received in the PRO file.
Read IR temperature with 10 bit accuracy.
1) Raw data save must be enabled for IR channels (Setup -> Program Setup)
2) Open an image with 1x zoom or higher
3) Click on the point you want to read keeping Ctrl button pressed.
The writing color is the one set for Capitals cities.
Press F5 button to clear the page.
MPEF data
CTH and CLAI files (images) are in the BMP_L subdirectory and can be loaded from the List Images LRIT.
Data files are available into MPEF subdirectory.
To use these files you will need a external software which manages GRIB2 and BUFR formats.
Fontana Roberto Software
SYS_MSG_DVB
page 9
Projections
Projections are available for HRIT channels from 1 to 11.
Open an image or click on one already opened to select it.
Mercatore
This type of projection has an equal spacing for latitude and longitude both near the equator and image’s margins.
Bracknell
Bracknell gives fax maps on the net. These maps show the weather situation every 6 hours and the 24, 48, 60, and
72 hours forecast of the European zone.
The maps are in stereographic projection with values, curves of pressure and fronts.
The software does a projection conversion of the European zone same as Bracknell’s.
Subsequently, press BRACKNELL MAP button and open fax map file which will lay on the Meteosat image.
Bracknell fax maps are available on different internet sites.
One of these is:
http://64.246.48.81/wz/
Save the map in a directory on your hard disk.
Forecast centre London. Significant weather
FL 100-400 maps are in stereographic projection with jet streams very interesting for people who fly.
You can find 6 hours forecast maps on the net.
Press SIGNIFICANT WEATHER MAP button and open the file with fax map which will lay on the Meteosat image.
Two links where you can find updated maps are:
http://www.ufficiometeo.it/html/uma/briefing.html#swc
http://www.wetterklima.de/flug/swc.htm
Save the map in a directory on your hard disk.
Fontana Roberto Software
SYS_MSG_DVB
page 10
List Images HRIT
Normally images are in the BMP_H subdirectory if not differently
defined in PROGRAM SETUP.
DEFAULT PATH
Default path is the directory defined in PROGRAM SETUP ->
Save BMP HRIT.
SPECTRAL CHANNELS
11 spectral channels with wavelet compression and one (HRV)
with jpeg compression. 10 bit definition.
Update every 15 minutes.
This window shows the list of images of that spectral channel.
The first image of the list is the last one received.
The image preview in original gray scale appears down on the
right.
LOAD
Usually the screen opens with the image zoomed –32.
It is the same to double-click on filename or on the preview.
ERASE FILE
It deletes the selected file from the disk.
It is useful to delete eventual damaged files.
CLOSE
It closes the window.
List Images LRIT
Normally images are in the BMP_L subdirectory if not differently
defined in PROGRAM SETUP.
DEFAULT PATH
Default path is the directory defined in PROGRAM SETUP ->
Save BMP HRIT.
MSG1
5 spectral channels with JPG compression and 8 bit definition.
Update every 30 minutes.
GOES etc..
Images from other satellites and re-transmitted to MSG1.
Update every 3 hours.
MET5
Images of Indian Ocean taken by Met5 at 63°E.
MPEF
CTH and CLAI images.
Update every 3 hours.
Fontana Roberto Software
SYS_MSG_DVB
page 11
SPECTRAL CHANNELS
This window shows the list of images of that spectral channel.
The first image of the list is the last one received.
Down on the right appears the image preview in original gray scale.
LOAD
Usually the screen opens with the image zoomed –32.
It is the same to double-click on filename or on the preview.
ERASE FILE
It deletes the selected file from the disk.
It is useful to delete eventual damaged files.
CLOSE
It closes the window.
Animation
Zoom
The + and - buttons on the screen allow to change the zoom level.
Drag
To center the zone of interest you can use the cursors on the window.
A better way is to use the mouse left button and drag the image.
Speed
You can set the animation speed from 25 ms. to 200 ms.
Full screen
Animation is displayed full screen.
To zoom in, point the mouse’s cursor on the interested point and press the right button.
To display it at normal size again press ESC button.
Colors
Press on Palette button.
Select from 5 color masks and two gray scale palettes.
See also:
Palette Editor
Color Masks
Step-by-step animation
You can forward or rewind from the first image to the last, moving forward or back one image at a time.
It is possible to disable eventual damaged images from the sequence.
Capitals
It draws European capitals with zoom >=1 and with animations created in Window 2.
Save animation in AVI format
Click on floppy icon -> AVI.
Default dimensions are:
720 x 540
640 x 480
320 x 200
It is possible to customize dimensions by insert the values in the boxes.
Fontana Roberto Software
SYS_MSG_DVB
page 12
Select the folder where save the file and modify the filename.
Select the compression type from a Windows list.
A beep sound warns if that compression is not working or if the file has not been saved.
To see the AVI animation you can use Windows Media Player or other similar tools.
The movie speed is almost the same as the one in the program animation.
Monitor RGB
Date - Hour
List of images in order of date, time and minute.
Color assign
Left-clicking on one of the images in preview opens it on the screen in a Load window.
Right-clicking a popup menu appears which allows to assign a primary color to the image (Red, Green, Blue).
Create RGB
Interesting function which creates a sum image from 3 different channels assigned with Red, Green and Blue.
Sum and difference of two channels
This procedure allows to create a new image which is the sum or the difference of images of two different spectral
channels.
Fontana Roberto Software
SYS_MSG_DVB
page 13
Zoom
+ and – buttons in the window, increase or decrease the zoom level.
In Load windows there is a faster mechanism which consists of pointing the mouse cursor on the
point you want to zoom.
Afterwards press right button and choose the zoom level.
To move the image use the left button.
Monitoring Graph
Thermal monitoring means reading the pixels at chosen coordinates.
This data is saved in monthly files which allow to create the graphs.
HRIT image data is saved in 1024 parts, LRIT in 256.
To set the data go to SETUP -> MONITORING SETUP.
Choose the channel which necessarily must be IR (recommended IR 8.7).
Changing the channel opens the corresponding image. It is possible to extract the coordinates (on an opportunely
zoomed image) automatically with a double-click.
If you know the coordinates of the locality you can insert them directly in the boxes using the format in the example
45,24°N
08,05°E
Give a name to the file which will be saved automatically into MONITOR subdirectory.
To display the graphs go to VIEW -> MONITORING GRAPH.
Palette Editor
Before modifying the color palettes we advise to save *.PAL files in the used directory, in order to restore the original color palettes if necessary.
Open a spectral channel image on the screen.
Two color columns at the center of the menu are the present coloration. Above is the land coloration, below is the
sea coloration.
The cursors above and below the columns can be placed in every point of every color scale with a mouse click.
Vertical cursors (RED, GREEN, BLUE) define the color of the marked point from the related horizontal cursor.
Moving the mouse on the vertical cursors you can define new colorations.
The button <from Init to Fin> put the colors marked by the two horizontal cursors in shading scale.
Moving the mouse on the image with a click, you can test the levels of the colors which are put in evidence with a
red bar on the editor.
Now you have all the elements to create new color palettes.
To obtain a good effect it is necessary that both land and sea color columns are equal from the center half way towards the right, otherwise high clouds on the land would have a different color than high clouds on the sea.
SAVING MODIFICATIONS
To keep the changes made you need to press <Save> button.
Fontana Roberto Software
SYS_MSG_DVB
page 14
Without saving, all the changes will remain on the image on the screen only but subsequently it will return to the
original palettes and the changes will be lost.
CANCELLING MODIFICATIONS
To load the palettes before the changes press <Restore> button.
Restore button loads the situation upgraded to the last save made.
Color Masks
WHAT ARE:
Color masks are a software filter which control image colors assigning different tones to the land and to the sea.
WHAT THEY ARE USED FOR:
They improve the visual appearance of images and make some phenomena more comprehensible.
Meteorologists sometimes do not need them and could even bother them for cloud phenomena interpretation. To
eliminate them it is sufficient disable them.
ON WHICH IMAGES:
Color masks are made for every HRIT and LRIT image from MSG-1.
Color masks set by default can be all the same for every channel. It is up to you customize them and create new
ones.
In order not to lose the created palettes save *.pal files so you can restore them in case of software installation on a
new computer.
Because of coloration may change depending on monitor’s quality, it may be necessary to correct them with Palete
Editor.
HOW THEY WORK:
The program uses them automatically.
Any image opened on the screen chooses the right mask automatically. Or better, it chooses the mask used the
time before for an image of the same channel.
If the image does not find the right mask, it opens it in original gray scale.
When an image has found its mask, you can change it by choosing another one available with the mouse.
Reception log
In the log are written the main operations done on files.
Date and hour of every operation are the computer’s.
When RxLog.txt file reaches 1MByte dimension it is renamed OldRxLog.txt and a new log file starts.
Messages
ADMIN
Message about last 24 hours operations.
NEWS
Communications to users about problems in real time.
REG-RPT
Announcements about working plan for the next week.
TIMTABNOM
Schedule.
Fontana Roberto Software
SYS_MSG_DVB
page 15
Background color
Adjust the three cursors (Red, Green and Blue) to obtain the background color desired.
Special Automatic Save
You can enable automatic Special Save going to SETUP menu -> SPECIAL SAVE.
You can program up to 10 automatic saves.
Every save needs to be defined by:
the spectral channel;
the graphic format which can be BMP, JPG, TIF, PNG, TGA, PCX, GIF or BIF;
the compression level of some graphic formats;
the color mask or the gray scale;
the entire image or just a crop of it. This is defined by a utility;
the presence of coastline and latitude and longitude crosses;
the disk and the directory where saving the files;
the time of persistence on disk with automatic erase;
the frequency which can be one every hour, one every 6 hours or one a day per every image.
Every time that an image of that channel is completed in all its segments, this is automatically saved.
Manual save
Any image on the screen can be saved in different graphic formats.
Saving procedure allows to define the rectangle which you want to save and the graphic format which can be BMP,
JPG, TIF, PNG, TGA, PCX, GIF or BIF.
You can also select the compression level if chosen graphic format allows it.
The image can be saved on other disk or other directory.
JPEG save for archive
Normally a series of images of the interested zone per every day is what people want to keep.
Images must be of high quality but it is tolerable if their quality is inferior than original images.
The advice is to use the following strategy:
1) Create a directory for these saves, for example \Archive;
2) Define in SETUP -> SPECIAL SAVE an automatic save of HRIT IR 8.7 channel, in JPG format, 50 or 40 compression, crop the interested zone with a rectangle of about 1000 x 700 pixels, delete after 60 days, save into created directory.
Color masks, coastline and lat. and long. Crosses if you want.
3) Write down the customized values (Width, Height, Left and Top) in order to restore them in case of necessity.
The program set up in this way will create images of about 100 KByte each.
After 60 days you will have about 600 MByte of images on disk.
Before exceeding the 60 days and before the program starts to delete older images you should transfer them. It
can be useful to transfer them to a CD-rom.
After the transfer you can delete all the files into the directory to free space on disk.
To display the images you can use any graphic software. Even PAINT, that you certainly have on Windows, allows
to do it.
To see them in animation it has been made an appropriate procedure you can find in FILE -> JPG ANIMATION
menu.
Fontana Roberto Software
SYS_MSG_DVB
page 16
Animate saved JPEG
It is useful to see the animation of saved images for historical archive.
Enable it through FILE -> JPG ANIMATION menu.
Choose disk and directory where these images are.
Into TOTAL IMAGES box you find the number of available images.
START and END allow to set the period that you want to display.
MAXIMUM RECOMMENDED defines the maximum number of images that is recommended to animate in according to RAM memory available in that moment.
Press ANIMATION button to start the animation construction.
In the movie you can choose the zoom level from 0.5 to 2. Bigger zooms are not recommended with this type of
images.
Color change is not allowed due to archive graphic format.
Layout Save/Restore
Save
It memorizes all the open windows with images and animations.
You can save up to five different situations.
If you select a situation layout which has been activated, it overwrites the old save.
Restore
It restores the saved windows inserting the latest images in every window.
Print
Any image on the screen can be printed.
The procedure allows to define the rectangle to be printed, the printer between the ones installed on Windows, the
sheet position and the dimension.
Receiving efficiency check
If you see too much image segments missing, check the receiving status in the following way:
Double click on Tellique program icon (in the lower-right corner on the desktop).
Select STATISTICS.
The number of Missed Data Packets before FEC must be some about tens for every million of Received Data
Packets.
If the number is higher the cause is probably the receiving card driver.
Eumetsat recommends to use the 4.2.2 driver. The complete installation is available at Eumetsat's ftp.
Eumetsat gives UserName and PassWord to access to all users.
Fontana Roberto Software
SYS_MSG_DVB
page 17
NET CLIENT version
(Not available with amatory license).
Local net Client version has the identical features than Server version, except for reception modules.
The update of images and animations on the screen is almost in real time.
Settings
Share the Server disk or the directory where the reception program is installed (\SYS_DVB).
Assign to this sharing a identification letter of disk following these operations:
Act on Client machine.
• Open Computer Resources.
• Click on Instruments.
• Click on Connect Net Unit.
• Select in UNIT an identification disk letter (for example Z).
• Select in FOLDER, the directory where Server software is installed.
• If the Server disk does not appear try using net ID address. For example: \\169.254.17.195\SYS_DVB.
• There are a lot of ways to know which is the Server machine net ID. The faster one is to open a DOS window in the Server machine and digit IPCONFIG and Return key.
• Enable Reconnect box at the start.
• Click on End.
Now you will find Z disk into disk list.
Install DVB_NET software and start it.
Click on SETUP -> PROGRAM SETUP -> RECEPTION.
In Net Disk and Dir. box insert with Browse the path to find the directory with SYS_DVB.EXE software on the
Server (Z:).
The path to BMP_H and BMP_L subdirectories come automatically out with Default buttons.
Closing PROGRAM SETUP window the system tries a check test. If it does not find the correct paths it shows a error message.
Image Load
The program reaches images and animations through net card which normally works at 100 MBit/second speed
that corresponds of about 10 MByte/second.
Image file is about 13.5 MBytes so you have to wait about 1.5 seconds to load an image even if you are using a
very fast computer.
Animation
Animation creation with 24 hours HRIT images could be longer than you would have expected.
Consider that there must be transferred 96 files of 13.5 MBytes dimension for a total of 1296 MBytes with a theoretical time of 130 seconds. Afterwards the program must crop the zone, add the color mask, coastline, etc.. Therefore the time for the total operation will be about 200 seconds.
The total time is inferior than theoretical time thanks to algorithms which do not transfer every file completely but
only a part of it, just the part that it is needed to crop the zone to animate.
Fontana Roberto Software