1
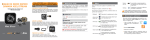
User manual GEOPAD Hunting tablet v1.1 support.spypoint.com [email protected] 1-888-779-7646 Thank you for choosing a SPYPOINT product. This manual will guide you through all the features of your device so that you will get optimal use out of your SPYPOINT product. Our priority is to provide outstanding customer service. If you need support for your product, please contact the SPYPOINT technical support or visit our website. CONTACT 1-888-779-7646 [email protected] www.spypoint.com ABOUT US GG Telecom’s mission is to offer products that are easy to use, innovative, affordable and of exceptional quality. Our SPYPOINT products are mainly used for hunting and residential/commercial surveillance. They are distributed and shipped all over the world and the market never stops growing. Prosperous and respected, GG Telecom is a company that constantly keeps abreast of new technologies and listens to its customers to deliver cutting-edge products with practical solutions that improve hunting and outdoor activities. JOIN THE SPYPOINT COMMUNITY facebook.com/SPYPOINT twitter.com/SPYPOINTcamera youtube.com/SPYPOINTtrailcam Table of contents In the box ................................................................................... 4 Components ............................................................................... 4 Getting started............................................................................ 6 mySPYPOINT app ....................................................................... 8 Uploading new photos ................................................................ 10 Configuring the advanced settings .............................................. 11 Included applications ................................................................. 13 Managing applications ................................................................ 14 Features ..................................................................................... 15 Installing the screen protector.................................................... 16 Troubleshooting.......................................................................... 17 Limited warranty ........................................................................ 18 Repair service ............................................................................. 18 Regulation .................................................................................. 19 3 In the box GEOPAD Screen protector Quick start guide * SD card reader USB Cable *Installation instructions at page 16. Components 1 Front camera 8 SD card reader holder 2 Adjustable strap 9 Speaker 3 USB port/SD card reader 10 Microphone 4 1/8" audio output jack 11 Power button 5 Reset 12 Volume control 6 Back camera 13 MicroSD card slot 7 Tripod mount ** The microSD card is easier to insert using 4 a pointed tool. ** Front Top 2 3 1 Rear 5 4 Bottom 9 10 6 7 8 Sides 11 12 13 5 Getting started 1. Charging the tablet Using the included USB cable, connect the GEOPAD to a USB power source. It is recommended to charge the tablet completely before first use. 2. Turning the tablet On/Off To turn the tablet on: Press the power button logo appears. and hold it until the SPYPOINT When turning the tablet on for the first time, you will be guided through the configuration of the basic settings (Language, Date & Time and Wi-Fi). To lock or unlock the screen: Press the power button and release it immediatlely. Slide the lock icon to enter the home screen. To turn the tablet off: Press the power button "Power off", then OK. 6 until a menu appears. Tap on 3. Home screen 12 1 11 2 10 9 3 8 7 4 6 5 1 App icon - Your favorite hunting apps. Tap on the icon to open 2 Back - Returns to the previous page 3 Home - Returns to the home screen 4 Recent - Displays recently used apps that are still open 5 All apps - Shows all your apps 6 Time 7 Battery level 8 Brightness control 9 Sync- Synchronizes data from the device to Google service’s server. Refer to “Settings / Accounts” for details. 10 Location- Enables/Disables GPS functions 11 Bluetooth connectivity 12 Wi-Fi connectivity 7 mySPYPOINT app 1. Online activation of your mySPYPOINT account (The mySPYPOINT app & online account are for SPYPOINT trail cameras only) Make sure your GEOPAD is connected to a Wi-Fi network to access the mySPYPOINT website and to do a synchronisation. If you are new to mySPYPOINT: 1. Tap on the mySPYPOINT app icon. 2. Tap on “Register”. You will be redirected to the registration form on mySPYPOINT.com. 3. Fill out the information to create a new account, then click on “Subscribe now”. 4.An email from “[email protected]” will automatically be sent to you. In this email, click on “click here to activate your account”. 5. After confirmation, you will be redirected to mySPYPOINT.com. Click on “ADD A NEW DEVICE”. The addition of a new SPYPOINT trail camera must always be done via your mySPYPOINT online account. It cannot be added via the application. 6. Select the “Bronze” free account. At your first connection to the application with your GEOPAD, your account will automatically be upgraded to “Gold”. 7. Then, enter your trail camera’s information and click “Continue to check out” to confirm. No fees will be charged. 8. Your mySPYPOINT account is now active. At your first connection to the app with your GEOPAD, your account will automatically be upgraded to “Gold”. If you already have a mySPYPOINT account: 1. Tap on the mySPYPOINT app icon. 2. 8 At your first connection to the app with your GEOPAD, your account will automatically be upgraded to “Gold”. If you already have a “Silver” or “Gold” account, you will automatically receive a credit in SPYDOLLARS. Your “Gold” account will be valid for one year as of that date. 2. mySPYPOINT App functions Allows you to view photos and manage your trail cameras on the spot. Calendar Assign names and GPS coordinates to your cameras Add new photos Your photos are automatically sorted in the calendar Manage your albums Apply tags to your photos Photos Navigate through your albums Status Gives general information about your cameras and about the last synchronization to your mySPYPOINT online account. Synchronization When a Wi-Fi network is available, tap on this icon to apply the last changes to your mySPYPOINT online account. It is highly recommended that the GEOPAD be fully charged before the first synchronization. 9 Uploading new photos Insert the SD card in the reader, gold contacts facing down. Then, insert the reader in the USB port. Uploading photos into mySPYPOINT(For SPYPOINT cameras only) After inserting an SD card, run the mySPYPOINT application and follow the easy instructions on screen. Your photos will automatically be organized by date and time in the calendar. Uploading photos directly into the GEOPAD 1. After inserting the SD card, tap on “All apps” . 2. Tap on the “Files manager” icon. 3. Tap on “External USB storage”. 4. Tap and hold the selected file until new options appear at the top of the 10 screen. Tap on any other file to copy more than one file. 5. Tap on the “Copy” icon 6. Go back to “Home” to copy the file. in the files manager, and tap on “Internal storage”. 7. Choose the destination folder and tap on the “Paste” file. 8. Photos are now available in the GEOPAD’s gallery. icon to paste the It is important to remove the SD card after copying the files. For more information on how to upload new photos, please refer to the tutorial videos on the GEOPAD web page under the “Documentations” tab. Configuring the advanced settings To open the settings menu, go to “All apps”, then tap on the icon. In the settings menu, you can manage applications, set security options, view storage information, and more. Location (GPS) Under “Personal”, tap on “Location”. Enabling this option activates the GPS and allows the functioning of location-based services, included in mySPYPOINT and maps applications. To maximize battery life, turn off the Location option when it is not needed. 11 Acquiring the GPS signal To allow the GEOPAD to acquire the GPS signal, the sleep delay must be increased. 1. Under “Device”, tap on “Display”. 2. Then, tap on “Sleep”. 3. Finally, choose a sleep delay of at least 5 minutes. 12 Included applications SPYPOINT hunting apps Game Caller Allows to use the GEOPAD as a game caller and to create your own sound sequences. Whitetail, moose and predator sounds are included and more are available to buy. Can be combined with the SPYPOINT Amplified Speaker. XCEL STREAM Compatible with the SPYPOINT XCEL STREAM action camera. Allows to control the camera remotely, view live videos, live stream over the web and much more. Location-Based Apps Backtrack Mark the location of your trail cameras with GPS coordinates and find your way back to them easily. OfflineMaps Allows you to access a wide range of maps; roads, topographic, aerial imagery, google maps, and much more. Once opened, the maps remain available without Wi-Fi access. For more information on the location-based apps, please refer to the documents on the GEOPAD web page under the “Documentations” tab. Games Dear Hunter Challenge A realistic hunting game where you earn experience points, use a wide variety of customisable weapons and GPS maps to track black bears, reindeers, cougars, moose and more. Duck hunting Easy hunting duck game where you aim and shoot the ducks without letting any escape. Forest snipper Hunting mission game where you can hunt lions, rhinos, wolves, zebras and more in safari jungles with sniper shooting guns. 13 Managing applications Adding new apps 1. Go to Google Play Store An active account with Google Play is necessary 2. Shop for games or applications 3. Tap “Install” 4. After the installation, the app icon will appear in “All apps” and will be ready to use , Uninstalling apps 1. In the settings menu, under “Device”, tap on “Apps”. 2. Choose the app to be uninstalled and tap on it. 3. In the new page, tap “Uninstall”. 14 4. To the question “Do you want to uninstall this app?”, tap on “OK”. 5. The app is now uninstalled from the GEOPAD. Features Screen 7” Platform 4.4.2 Android Internal memory 8 GB Resolution 1024 x 600 CPU processor speed 1.3GHz RAM size 512MB Wireless connectivity Wi-Fi, GPS, Bluetooth 4.0 Battery 3,7V/3000 mAh MicroSD card up to 32 GB (sold separately) Front camera resolution 0,3 megapixels Back camera resolution 2 megapixels Camo case Weather resistant but cannot be immersed in water 15 Installing the screen protector A. Thouroughly clean the GEOPAD’s screen with a soft cloth. B. Peel off the protective film #1 to expose the sticky side. 1 C. Align the screen protector to the GEOPAD. As the protector is being applied, use a credit card to push out excess air. D. Peel off the protective film #2. 16 2 Troubleshooting Problems Possible solutions The mySPYPOINT synchronisation never stops downloading •When the GEOPAD is connected with the USB cable during the mySPYPOINT app’s first synchronisation, the down load goes on without completing. •Tap on the "Recent" icon and close the mySPYPOINT app. Open the app again and restart the synchronisation. Issues with mySPYPOINT app, Game Caller, OfflineMaps or Backtrack •Refer to the SPYPOINT Application Guide, available at support.spypoint.com •Contact SPYPOINT’s tecnical support. Issues with any other application •Contact the developer of the application through Google Play Store. 17 Limited warranty and repair Limited warranty This SPYPOINT product designed by GG Telecom, is covered by a one (1) year warranty on material and workmanship starting from the original date of purchase. The sales receipt is the client’s proof of purchase and must be presented if warranty service is needed. This warranty will be honored in the country of purchase only. This GG Telecom warranty does not apply: (a) to consumable parts, including but not limited to batteries, which performance is designed to decrease over the course of time; (b) to damage caused by misuse, use with another product, neglect, accidents, liquid contact, fire, earthquake or any other external cause; (c) to GG Telecom products that have been purchased online from an unauthorized dealer; (d) to products that have had any modification or tampering; (e) to cosmetic damage including but not limited to scratches and broken plastic; (f) to damage caused by operating the GG Telecom product outside of GG Telecom’s recommendations. Instructions for repair service GG Telecom will repair the product without charge or replace it at its discretion with an equivalent product, if it has a manufacturing defect covered by the warranty described previously. GG Telecom will pay the shipping costs only for the return of the products covered by the warranty. The shipping costs for an item sent will be assumed by the customer. Repairs for damages not covered by the warranty will be subject to a reasonable charge. The customer will pay all shipping costs. 1. BEFORE sending a product for repair, the costumer is welcomed to contact GG Telecom technical support team at 1-888-779-7646 or [email protected] and to clearly describe the problem and give a phone number where she or he can be reached. It happens regularly that some problems can be solved over the phone. 2. If a product needs to be sent, an RMA number will be given to the customer (Return Merchandise Authorization). 3. The original receipt or a copy must be sent along with the package. 4. The RMA number must be written on the outside of the package and sent to: 18 CANADA GG Telecom 120 J.Aurèle-Roux Victoriaville, QC G6T 0N5 United States GG Telecom 555 VT route 78 Swanton, Vermont 05488 IMPORTANT: Under no circumstances will GG Telecom accept returned products without a Return Material Authorization number (RMA). It is essential to contact GG Telecom before making a return. The customer is liable for loss or damage to the product that may occur during the transport to GG Telecom. We recommend the use of a traceable method of shipping to ensure protection. WWW.SPYPOINT.COM Regulation FCC Part l5 This equipment has been tested and found to comply with the limitsfor a Class B digital device, pursuant to Part 15 of the Federal Communications Commission (FCC) rules. These limits are designed to provide reasonable protection against harmful interference in a residential installation. This equipment generates, uses and can radiate radio frequency energy and, if not installed and used in accordance with the instructions, may cause harmful interference to radio communications. However, there is no guarantee that interference will not occur in a particular installation. If this equipment does cause harmful interference to radio or television reception, which can be determined by turning the equipment off and on, the user is encouraged to try to correct the interference by one or more of the following measures: • Reorient or relocate the receiving antenna. • Increase the separation between the equipment and receiver. • Connect the equipment into an outlet on a circuit different from that to which the receiver is connected. • Consult the dealer or an experienced radio/TV technician for help. Changes or modifications to this equipment not expressly approved by the party responsible for compliance could void the user’s authority to operate the equipment.This device complies with Part 15 of the FCC rules. Operation is subject to the following two conditions: (1) this device may not cause harmful interference, and (2) this device must accept any interference received, including interference that may cause undesired operation. Hereby, GG Telecom declares that this camera is in compliance with the essential requirements and other relevant provisions of Directive 99/5/ EC. The user can obtain a copy of the Declaration of Conformity by e-mail at [email protected]. 19