1
Introduction
Thank you for choosing this car DVR. The memory of your DVR can be extended to 32GB
and provide the most outstanding performance for you. Firstly please read the user guide.
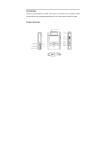
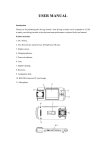
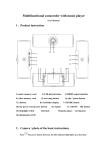
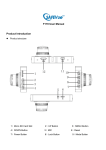
Product Structure
Getting Started with the Car DVR
1. Turn on: Press the power button and the blue indicator is on.
2. Turn off: Press the power button again and the blue indicator is off.
Note: The car DVR in low power state will provide a warning message and then power off
automatically.
Battery Charging
There are three ways to charge the battery. The red indicator is on during the
charging process and the whole process will last for about 180 minutes. After the
charging complete, the red indicator will automatically turn off.
1.Use the power outlet to charge
2.Charge through USB
3.Use the vehicular power to charge
Insert the Memory Card
According to the direction indicated on the product body, insert the Micro SD
memory card forward to the card slot until it clicks into place.
Remove the Memory Card
Push the Micro SD card forward and you can remove it after it ejects.
Note: High speed Micro SD cards (CLASS 4 and above) are required for this
product.
Basic Operations for the Car DVR
1.How to switch between Videos/Photography/System Settings/Replay
Press the MODE key can switch between Videos/Photography/System
Settings/Replay
2. How to take Videos and Set Videos Options
A.
Videos
The car DVR will begin to take videos once it powers on. You can press the OK
key to stop it and repress the key to start again.
B.
Set Videos Options
Under the video mode, press the MENU key to enter the “Menu Settings” option.
The background of the “Menu Settings” field is yellow now.
Resolution: 1080P (FHD)/720P(HD)
Videos Cycle: Off/3 mins/5 mins/10 mins
Motion Detection: On/Off
Date Label: On/Off
3. How to take photos
A. Take Photos
Switch to the Photography mode by pressing the MODE key
Take photos by pressing the OK key
B. Set Photography Options
Under the Photography mode, press the MENU key to enter the “Menu Settings”
option. The background of the “Menu Settings” field is yellow now.
Resolution: 12M(4032*3024)/8M(3264*2448)/5M(2560*1920)/3M(2048*1536)
Image Quality: High definition, Clear, Normal
White Balance: (Automatic, Sunny, Cloudy, Incandescent, Fluorescent)
Digital Special Effects: Normal, Black &White, Soft
Autodyne Time Interval: Off/10 sec/20 sec
Sequence: Single/Sequence
Date Label: On/Off
Exposure Value: (-2.0~+2.0)
4. System Settings
Press the MODE key to switch to the main menu system settings
Enter the "Main Menu Settings" option. The background of the "Main Menu
Settings" field is yellow now.
Key-press Tone: Turn on and off the key-press tone;
Light Source Frequency: 50Hz/60Hz available (the current frequency);
Format: OK/Cancel
Default Settings: Restore to the factory default settings (OK/Cancel);
Language: Set the required language menus;
Time/Date: Set the time and date;
TV Output: Pal/Ntsc
Version: The version number of the software.
5. Replay/Manage Files
Press the MODE key to switch to the replay mode interface and manage video and
photo files
A. Replay Videos
Use the Left and Right keys to select the video to replay.
Then press OK to play or suspend the video. During the replay, you can adjust the
volume by pressing the Up/ Down keys.
Press the Menu key to enter the "Manage Files" option. The background of the
"Manage Files" field is yellow now.
Delete the Current File: OK/Cancel
Delete all: OK/Cancel
Cancel
Press the MENU key to exit the Delete menu.
The file displayed on the screen is the replay of your latest action.
B. Replay Photos
Use the Left and Right keys to select the file to review.
Press the Menu key to enter the "Manage Files" option. The background of the
"Manage Files" field is yellow now.
Delete the Current File: OK/Cancel
Delete all: OK/Cancel
Cancel
Press the MENU key to exit the Delete menu.
The file displayed on the screen is the replay of your latest action.
Connect to the Computer
Download Videos and Photos
1.
When the car DVR is connected to the computer through the USB cable,
press the Power key to turn it on. The red power indicator will light on at the
same time and the computer can automatically recognize the Micro SD card
disk.
Note: Required OS for the computer: Windows 2000/XP/Vista/Windows 7/MAC OS x 10.3.6 or
above.
2.
Use the computer to browse and manage files.
3.
Disconnect the USB cable from the computer to turn off the car DVR.
Note: If the product shut down due to improper operations, you can turn on the product again by
pressing the Reset key, and then the DVR will resume normal function.
Product Characters
-
Super small volume; the perfect design combination of the extra
wide-angle lens with 132 degrees A+ level high resolution and the 2.0
LTPS display, is more suitable for taking high resolution videos and photos
from more angles and on all occasions
-
Built-in 1/3.2 inch sensor component with low noise and high quality can
capture high definition images under dark occasions
-
Built-in Li Battery supports to take videos while charging
-
Built-in microphones and horns
-
Support the high capacity Micro SD card
-
Motion detection video function is available
-
Video cycle function can delete old files and record new files
automatically
-
Support to take videos automatically once the engine starts
-
Support to delay the startup in case the transient pulse current when the
engine starts may damage the device
Technical Specifications
LCD Screen Size
Lens
2.0LTPS(4:3)
Extra wide-angle lens with 132 degrees A+ level high
resolution
English/Germany/French/Spain/Italian/Portuguese/Traditional
Option Language
Chinese/Simplified Chinese/Japanese/Russian
Video
1080p(FHD)/720p(HD)
Video Format
MP4
SD Memory Card Slot
Micro SD
Microphone/Horn
Built-in
Light Source Frequency
50Hz/60Hz
TV Output
NTSC/PAL
USB Interface
USB2.0
Power Interface
5V 500MA
Battery
Built-in Li Battery
System Requirement
Windows 2000/XP/Vista/Windows 7/MAC OS x 10.3.6 or above
Note: The product design and specifications described herein are subject to
change without notice. If anything in this file is in conflict with the real device,
the latter shall prevail.
Accessories
1. Vehicular power; 2. Vehicular bracket;
3. USB cable;
4. Instruction manual.