Download XP95/Series 90 Test Set User Manual
Transcript
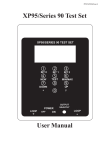
XP95/Series 90 Test Set
User Manual
Contents
Page
1.0
General Description
2
2.0
User Functions
2
3.0
Operating Instructions
3
Appendices
i
ii
Technical Specifications
Other Relevant Documentation
Document Ref: testtool.doc/Rev0
03.03.99
Page 1 of 14 Originator MC Checked by PM Approved by JBJ
14
15
1.0
General Description
The Apollo XP95/Series 90 test set is a self-contained, hand-held test unit capable of
providing a number of useful functions in relation to individual monitors, ancillary devices or
complete circuits of analogue addressable devices in the Apollo XP95 or Series 90 ranges.
The main function of the XP95 test set is to enable an engineer to test and commission a loop
of devices fully before the control panel is installed. It can also be used for on/off-site
maintenance and device performance testing and includes a powerful data log function for
long-term soak testing.
The unit may be powered from an AC power supply unit or from its own internal batteries.
When the test set is used on the mains supply, the batteries are continuously maintained in a
healthy condition by the integral charger circuit. The length of time for which the test set
may be run on batteries varies greatly, depending on the loop load and printer usage, but
approximately 8 hours can be assumed as an average.
Sockets on the membrane allow the engineer to connect the loop or device to the test set (note
that correct polarity must be observed when isolators are fitted).
A printer is available as an optional extra.
For ease of transport the test set is supplied with a carrying case, complete with charger and
leads.
2.0
User Functions
The user functions are displayed in the form of a menu with option numbers and are selected
by pressing the appropriate number on the keypad. Available functions are:
2.1
Function 1 - Single Address Test
This function allows the user to interrogate and control individual devices. The test set
provides a display which shows the device type, returned address and analogue value, as well
as the input and output bit status. The user can set the output (or forward command) bits to
logic high or logic low.
2.2
Function 2 - Device Types
Selecting this function causes the display to show single letter characters which identify the
type of device at each of the first 63 addresses. The second page of information – for devices
64 to 126 – is accessed by pressing the # key.
2.3
Function 3 - Loop Scan Test
When this function is selected, the test set prompts the user to enter an analogue value as a
reference. The unit automatically scans all addresses and provides a list of all devices which
report analogue values equal to or greater than the level selected.
2.4
Function 4 - Identify Device
When 4 is selected, the test set automatically polls all addresses, starting at 1, until it
encounters a device. It then displays the address, type, analogue value and series type of the
device found.
Document Ref: testtool.doc/Rev0
03.03.99
Page 2 of 14Originator MC Checked by PM
2.5
Function 5 - Interrupt/Alarm Test
With this function selected, the test set reports interrupt bits placed on the line by manual call
points or alarm flags placed by XP95 monitors. XP95 interrupt or alarm addresses are also
shown.
2.6
Function 6 - Print Device Types
This function is identical to function 2, with the exception that device types are printed rather
than displayed on the LCD. (The printer is an optional extra).
2.7
Function 7 - Print Loop Report
This allows the engineer to obtain a print-out of the address, analogue value, device type,
device series and input/output bit status of a single device, a group of devices or all devices
connected to the loop under test.
2.8
Function 8 - Loop Data Save
This function allows the engineer to save up to four loops of device data so that a review can
be carried out at a later stage.
2.9
Function 9 – Loop Data Log
By selecting this function the performance of a device or loop of devices can be logged over a
period of time and the results examined or printed at a later stage.
2.10
Function 0 – Help Menu
A full description of the functions of the various keys is available by selecting this option.
3.0
Operating Instructions
When the test set is first powered up it will display and print (if a printer is connected) a
message as follows:
APOLLO FIRE DET
XP95/S90 TEST SET
A1450 SOFTWARE V6.0
1/11/93
After the initialising message, the test set will show the first of three menu options:
1: SINGLE ADDR. TEST
2: DEVICE TYPES
3: LOOP SCAN TEST
* = NEXT PAGE
By selecting *, the next three options are displayed:
4: IDENTIFY DEVICE
5: INT/ALARM TEST
6: PRINT DEV. TYPES
* = NEXT PAGE
The third menu option:
Document Ref: testtool.doc/Rev0
03.03.99
Page 3 of 14Originator MC Checked by PM
7: PRINT LOOP REPORT
8: LOOP DATA SAVE
9: LOOP DATA LOG
* = NEXT PAGE
Finally, the Help option is shown:
0: HELP MENU
* = NEXT PAGE
In the following pages the individual menu operations are described and instructions for use
of the options given. Each option is referred to as it appears in the test set display.
3.1
1. Single Addr. Test
This option allows an engineer to monitor a single device. The information shown is:
•
•
•
•
•
•
the address
the analogue value
the device type
device series (XP95 or Series 90)
output bit status
input bit status
The display format is:
ADDR
VALUE
TYPE OPT
* = EXIT
In this mode, keys under test.
3.1.1
1
24.5
to XP95
BITS
012
O/P
000
I/P
000
can also be selected in order to carry out further tests on the device
Key When key is pressed, output bit 0 changes from logic 0 to 1.
DEV
VALUE
TYPE OPT
* = EXIT
Press key 1
24.5
XP95
BITS
012
O/P
000
I/P
000
and the display changes to:
DEV
VALUE
TYPE OPT
* = EXIT
Document Ref: testtool.doc/Rev0
1
24.5
03.03.99
XP95
BITS
012
O/P
000
I/P
000
Page 4 of 14Originator MC Checked by PM
3.1.2
Key When key is pressed, output bit 1 changes from logic 0 to 1.
DEV
VALUE
TYPE OPT
* = EXIT
Press key BITS
012
O/P
000
I/P
000
1
24.5
XP95
BITS
012
O/P
000
I/P
000
Key When key is pressed, output bit 2 changes from logic 0 to 1.
DEV
VALUE
TYPE OPT
* = EXIT
Press key 1
24.5
XP95
BITS
012
O/P
000
I/P
000
and the display changes to:
DEV
VALUE
TYPE OPT
* = EXIT
3.1.4
XP95
and the display changes to:
DEV
VALUE
TYPE OPT
* = EXIT
3.1.3
1
24.5
1
24.5
XP95
BITS
012
O/P
000
I/P
000
Key This key enables the selection of a new device address:
CURRENT ADDRESS =
1
NEW ADDRESS?
* = REDO # = OK
To select a new address, press the appropriate numeric keys and enter with the # key.
3.1.5
Key This key initiates self test. The device connected will reach an analogue value of 55 or
greater – a pass – or it will not reach 55 or greater within 10 seconds and will fail. In the case
of a pass, the time taken to reach the threshold is displayed.
In the case of a pass, the display is as follows:
*DETECTOR SELF TEST*
A. VALUE = 55.5
XP95
DEV 2
PASS 1.5 SECS
* QUIT # AGAIN
Document Ref: testtool.doc/Rev0
03.03.99
Page 5 of 14Originator MC Checked by PM
In the case of a failure the display is as follows:
*DETECTOR SELF TEST*
A. VALUE =
XP95
**FAILED**
* QUIT # AGAIN
3.1.6
Key This displays the minimum and maximum analogue values reported by the device during the
single device test, as well as the current analogue value. In this menu option, RESET puts
both minimum and maximum values to the current value.
ANALOGUE VALUE
ADDR
2
MIN 26.0
NOW 26.5
MAX 26.5
* = QUIT # = RESET
3.1.7
Key This moves the test to the next lower address, even if no device of that address is connected.
ADDR
VALUE
TYPE OPT
* = EXIT
When key XP95
BITS
012
O/P
000
I/P
000
is pressed, the display changes as follows:
ADDR
VALUE
TYPE OPT
* = EXIT
3.1.8
2
24.5
1
24.5
XP95
BITS
012
O/P
000
I/P
000
Key This moves the test to the next higher address, even if no device of that address is connected.
ADDR
VALUE
TYPE OPT
* = EXIT
When key 1
24.5
XP95
BITS
012
O/P
000
I/P
000
is pressed, the display changes as follows:
DET
VALUE
TYPE OPT
* = EXIT
2
24.5
XP95
BITS
012
O/P
000
I/P
000
NOTE: If the “Device Type” identifying letter pulses, this indicates that two or more
devices have the same address setting.
Document Ref: testtool.doc/Rev0
03.03.99
Page 6 of 14Originator MC Checked by PM
3.2
2. Device Types
All 126 addresses are scanned to determine the type of device connected. The types are
displayed as single letters in two blocks of 63. The # key is used to alternate between the two
blocks. If no device is connected to a particular address, the display at that address is ‘S’ for
SPARE.
Page 1, devices 1 – 63:
00 –DDDDDDDDDDDDD
16 –DDDDDDDDDDDDD
32DDDDDFFFFFFFFFF
48FFFFFFFFFFFFFFFF
When the # key is pressed, the second page of device types is shown:
Page 2, devices 64 – 126
64FFFFFFFFFGGGGGGG
90GGGGGGGGGGGGGGG
96GGGGGGGGGGGGHHH
112HHHHHHHHHHHHSThe number at the start of each line represents the address of the first device in the line and
the significance of the letters is as follows:
S = SPARE
A = S90 SHOP MONITOR UNIT
B = S90 SOUNDER CIRCUIT CONTROLLER
C = S90 INPUT/OUTPUT UNIT
D = S90 IONISATION SMOKE MONITOR
E = S90 ZONE MONITOR UNIT OR CONTROL UNIT MONITOR
F = S90 OPTICAL SMOKE MONITOR
G = S90 TEMPERATURE MONITOR
H = S90 CALL POINT MONITOR
L = XP95 IONISATION SMOKE MONITOR
N =XP95 OPTICAL SMOKE MONITOR
O = XP95 TEMPERATURE MONITOR
P = XP95 MANUAL CALL POINT
Q = XP95 HIGH TEMPERATURE MONITOR
NOTE: If the ‘Device Type’ identifying letter pulses, this indicates that two or more devices
have the same address settings.
To exit the first menu option press *.
Document Ref: testtool.doc/Rev0
03.03.99
Page 7 of 14Originator MC Checked by PM
3.3
3. Loop Scanning Test
This test scans all 126 addresses to check the analogue value against a level pre-set by the
engineer. The number of devices having an analogue value equal to or greater than the set
level is displayed, as is the address of the first such device found. Pressing the # key displays
the address of the next device with an analogue value equal to or greater than the pre-set
level. The set level is changed by pressing the 0 key.
LOOP SCANNING TEST
PRESENT LEVEL =
NEW LEVEL =
* = QUIT
# = ENTER
To set a level of 21, press keys , 16
and then #
No of dets>=21 =
Address =
# for next, * to exit
0 to change level
3.4
4. Identifying Device
When 4 is selected, the test set automatically scans all addresses, starting at 1, until it
encounters a device. It then displays the address, type, analogue value and the series type
(Series 90 or XP95) of the device found.
IDENTIFY DEV. MODE
ADDR. OUT
1 IN
1
TYPE OPT
XP95
VAL
24.5 *END
#NXT
3.5
5. Interrupt/Alarm Test
This test allows the engineer to test either the interrupt generated by manual call points (and,
in the case of XP95, the interrupt address) or the alarm flag and alarm address of XP95
monitors. After selecting 5, the display shows:
INTERRUPT/ALARM TEST
1: INTERRUPT TEST
2: ALARM/ADDR. TEST
* QUIT
3.5.1
Interrupt Test
Press key MCP INTERRUPT TEST
OPERATE MCP TO CONT
* = QUIT
Operate manual call point. correct placement of the interrupt bit is confirmed by the display:
MCP INTERRUPT TEST
MCP S90
INTERRUPT OK
* QUIT
# AGAIN
3.5.2
Alarm Flag/Address Test
Document Ref: testtool.doc/Rev0
03.03.99
Page 8 of 14Originator MC Checked by PM
Press key ALARM/ADDRESS TEST
OPERATE DEV TO CONT
* = QUIT
Operate an XP95 device so that it reaches an analogue value of 55 or greater and the display
will show:
ALARM ADDRESS TEST
DEVICE 3
XP95
ALARM/ADDRESS SEEN
* QUIT
# AGAIN
3.6
6. Print Device Types
This allows the user to obtain a print-out of all the devices on a loop. The print-out is
identical to pages 1 and 2 of test 2 (DEVICE TYPES) and includes the same explanatory
legend.
3.7
7. Print Loop Report
Selection of test 7 causes the test set to print out the analogue value, device type, device series
(XP95 or Series 90) and the input/output bit status of a single device, a group of devices or all
devices connected to the loop under test.
PRINT LOOP REPORT
1: SINGLE DEVICE
2: GROUP DEVICES
3: ALL DEVICES
Press key CURRENT STAT REPORT CMD
3.8
ADDR
VAL
TYPE
OP IP
012012
001
024.0
OPT XP95
000000
8. Loop Data Save
This test allows the engineer to save and subsequently view or print out information on up to
4 loops of devices as in test 1 or test 2. The data is stored in a non-volatile memory and is
therefore secure, even if the test set is switched off.
1: SAVE LOOP DATA
2: VIEW SAVED LOOP
3: PRINT SAVED LOOP
Document Ref: testtool.doc/Rev0
03.03.99
Page 9 of 14Originator MC Checked by PM
Press and the display changes to:
**LOOP DATA SAVE**
PLEASE ENTER LOOP
NUMBER 1 TO 4
* = REDO
# = OK
Enter the loop number required using numeric and the # keys.
*SAVING LOOP DATA*
PLEASE WAIT
When the loop data has been saved, the display reverts ot the initial test 8 display. Press view the saved loop data:
to
VIEW SAVED LOOP
1: SAVED DEV TYPES
2: SAVED SINGLE DEV
* = END
To see the saved device type press .
SAVED LOOP TYPES
PLEASE ENTER LOOP
NUMBER 1 TO 4
* = REDO # = OK
Press any number between and , then #.
In order to view the saved single devices it is necessary to select option 2 from the VIEW
SAVED LOOP menu:
SAVED LOOP TYPES
PLEASE ENTER LOOP
NUMBERS 1 – 4
* = REDO # = OK
Enter any number between and , then #. The display will then show:
ADDR 1
BITS
VALUE
012
TYPE
SPARE O/P 000
* = EXIT
I/P 000
which is always address 1 of the chosen loop.
Once in this mode, it is possible to scan through all the other devices using the UP/DOWN or
NEW address key.
3.9
9. Loop Data Log
The purpose of this test is to monitor the performance of a loop over a chosen period of time.
The test set is connected to a loop and simply left to log data until it is disconnected by the
engineer. For this test to be useful, the engineer must have a thorough understanding of the
theory of the XP95 communications protocol and practical experience of its application.
After selecting , the following display appears:
Document Ref: testtool.doc/Rev0
03.03.99
Page 10 of 14
Originator MC Checked by PM
1: START DEV LOG
2: VIEW DEV LOG
3: PRINT DEV LOG
Press to start the log:
***START LOG***
PREV. STORED DATA
WILL BE ERASED!
* = QUIT # = START
Press #. The display flashes to warn the engineer that the test set is in the process of logging
data.
**LOOP DATA LOG**
LOG IN PROGRESS
* = SAVE LOG
When the data log has been terminated, stored data is viewed by pressing option 2 of the
original menu. The display then shows the following sub-menu:
1: DEVICE MISMATCH
2: INTERRUPT COUNT
3: ALARM/ADDR.COUNT
* = END
3.9.1
Option 1
If option 1 is chosen the screen shows:
ADDR. 1
TYP NON
I/P 000 000
AV 0
MN 0
OK
OK
OK
MX 0
This function compares the returned input, device type and address confirmation bits of all
connected loop devices from the initial scan with all subsequent scans recorded in the data
log. Any single mismatch of bit data will be registered.
3.9.2
Option 2
If option 2 is chosen the screen shows:
**INTERRUPT COUNT**
NO OF INTERRUPTS
SEEN =
* = END
For the duration of the data logging period, the test set is looking for and counting the number
of interrupt bits sent.
Document Ref: testtool.doc/Rev0
03.03.99
Page 11 of 14
Originator MC Checked by PM
3.9.3
Option 3
If option 3 is chosen the display is:
*ALARM/ADDR COUNT*
NO OF ALARM/ADDR.
SEEN =
* = END
Here, any XP95 alarm flag or interrupt/alarm address generated by any loop device will be
counted and logged in the data logging facility. The number of such alarm flags/addresses
can be viewed using this function.
NOTE: Both the interrupt and alarm flag counters terminate at 999 counts without
overflow.
3.9.4
After selecting test 9 the third main option is “PRINT DEV LOG”. Press display will change to:
and the
1: PRINT DEV MISMATCH
2: PRINT INT COUNT
3: PRINT AL/ADD COUNT
* = NEXT PAGE # = END
(i)
Choose PRINT DEV MISMATCH and the display will change to:
PRINT DEVICE LOG
1: SINGLE DEVICE
2: GROUP DEVICES
3: ALL DEVICES
Choose option 1 and the display will change to:
PRINT DEVICE LOG
DEV ADDRESS =
* = BKSPACE
# = ENTER
After an address has been keyed in and entered with the # key, the report is printed.
If option 2 of the PRINT DEV MISMATCH sub-menu is selected, the display shows:
PRINT DEVICE LOG
START ADDRESS =
END ADDRESS =
* = BKSPCE # = ENTER
Enter the range of addresses and press # to run the report.
If option 3 of the PRINT DEV MISMATCH sub-menu is selected, the report is printed. All
126 addresses will be printed regardless of the number of loop devices connected. While any
of the reports on options 1-3 are being printed, the display reads:
PRINTING DEVICE
MISMATCH REPORT
* = EXIT
Document Ref: testtool.doc/Rev0
03.03.99
Page 12 of 14
Originator MC Checked by PM
Should a mismatch of returned bit data occur, the report will display “MIS” instead of “OK”
as shown below:
**** PRINT LOG ****
*DEVICE MISMATCH REPORT*
ADDRESS TYPE INPUT
001
MIS
MIS
OK
Press * to exit from the print routine.
(ii)
Select , PRINT INT COUNT
The number of interrupts seen for the duration of the data log will be printed:
**** PRINT LOG ****
*INTERRUPT COUNT REPORT*
NUMBER OF INTERRUPTS
SEEN = 0
(iii)
Select , PRINT AL/ADD COUNT
The number of alarm flags/alarm addresses (XP95 only) seen for the data logging record
period will be printed:
ALM/ADDR. COUNT REPORT
NUMBER OF ALM/ADDRESSES
SEEN = 0
Option 4 is accessed by entering * (next page).
(iv)
Select , PRINT A. VALUES. This display will change to:
PRINT LOG A. VALUE
1: SINGLE DEVICE
2: GROUP DEVICES
3: ALL DEVICES
Select , SINGLE DEVICE
PRINT LOG A. VALUE
DEV ADDRESS =
* = BKSPCE # = ENTER
Select an address and enter #. The current, minimum and maximum analogue values for the
data logging period are printed:
**** PRINT LOG ****
*ANALOGUE VALUE REPORT*
ADDR.
ANALOGUE VALUE
NOW
MIN MAX
001
023
000
023
Select , GROUP DEVICES
Document Ref: testtool.doc/Rev0
03.03.99
Page 13 of 14
Originator MC Checked by PM
PRINT LOG A. VALUE
START ADDRESS =
END ADDRESS =
* = BKSPCE
# = ENTER
Enter the range of addresses and press # to run the report.
Select , ALL DEVICES
All 126 addresses will be printed, regardless of the number of loop devices connected.
Press * to exit from the print routine.
3.10
0. Help Menu
A Help menu is available by simply pressing 0. The Help menu covers the information given
in this manual.
Appendices
i
Technical Specifications
General
Operating voltage
Input voltage
Mains voltage
Internal batteries
Battery replacement period
User display
User controls
Loop protection
User connection
Enclosure
Dimensions
Weight
Optional accessories
24V DC (regulated)
30V DC @ 300mA (unregulated charger output)
240V/12V AC, 50/60Hz (switchable input to charger)
20 x 500mA AA NiCad cells
5 years
4 lines x 20 character alpha-numeric LCD
12 key numeric keypad
Sensor lines – 1 x 250mA self-resetting thermal fuse
2 x 4mm line sockets
16 pin printer connection
2.5mm power/charger unit input socket
High impact polystyrene moulding
185mm long x 135mm wide x 40mm deep
1kg (including integral batteries)
Leather carrying case
Remote printer
Loop Output
Loop voltage @ 35mA
(external load)
Maximum loop load
Maximum series line resistance
DC 23V
AC modulation 8.5V
200mA (no line resistance)
200 Ω@ 30mA load
400 Ω@ 10mA load
Max. loop parallel capacitance 0-2mA 4 µF
2-11mA 1.5 µF
11+mA 1.0 µF
Current pulse capture sensitivity 12mA minimum (no line resistance)
ii
Other Relevant Documentation
Document Ref: testtool.doc/Rev0
03.03.99
Page 14 of 14
Originator MC Checked by PM


