1
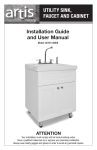
Utility sink and
storage center
ITM. / ART. 480275
Model#: 3OTH111WHI
Installation
Guide and
User Manual
ATTENTION:
1.
Your installation must comply with all local plumbing
building codes. Have a qualified tradesman do or
approve your plumbing installation.
2.
Always wear safety goggles and gloves in order to avoid
personal injury.
3.
Please read and save this guide before using this
product. Store the guide in a safe place so you will know
where it is when you want to refer to it.
IMPORTANT
Carefully check the unit prior to installation to ensure there is no
damage. Do not dispose of any packaging until you are satisfied with
this product.
If you have any problems with this product or there are missing
or damaged parts, please call toll free:
1-800-459-4409
DO NOT RETURN THE UNIT TO THE PLACE OF PURCHASE
BEFORE CALLING THE TOLL FREE NUMBER ABOVE.
BEFORE YOU START
1. Inspect your unit before proceeding. Once you unpack your unit,
check for chips, scratches, cracks, dents or scuff marks. If any
damage is noticed, do not install.
2. Please read instructions carefully and keep for future reference.
3. Protect the entire surface during installation.
4. All holes drilled into the unit must be done from the finished
surface side with extreme care and caulked very carefully to form a
watertight barrier.
5. Your installation must comply with all local plumbing codes. Have a
qualified tradesman do and/or approve your plumbing installation.
6. Materials required (not included): sealant, supply lines (see page 7).
WARNING: Always wear safety goggles and gloves in order to avoid any
personal injuries.
2
CONTENTS:
• Preassembled cabinet x 1 pc
• Utility sink x 1pc
• Faucet assembly x 1 pc
• Strainer x 1 pc
• Drawer handle x 2 pcs
• Screw x 4 pcs
• Washer x 4 pcs
• Allen wrench x 1 pc
TOOLS REQUIRED
• Adjustable wrench
• Pliers
• Pipe wrench
• Phillips screwdriver
• Sealant
• Utility knife
INSTALLATION INSTRUCTIONS
1. The main cabinet is preassembled. The sink is shipped inside the
cabinet. The user or a licensed plumber must install the sink, faucet,
strainer and drain assembly.
2. Remove the sink carefully from inside the cabinet, and inspect for
damage. If any damage found please contact customer service prior to
installation.
3. Test the fit of the sink on the cabinet, and note the final position for
your reference. Remove the sink and place upright on a towel or piece
of cardboard [1].
FAUCET ASSEMBLY
1. Thread the hose [D] through the pipe [O] inserting first the small fitting [G].
2. Thread the hose through the body [M] of the faucet also inserting first the
small fitting [G].
3. Push down the end of the pipe that has the nut [N] onto the body of the faucet.
4. Hand tighten clockwise the nut [N] onto the body of the faucet.
5. Hold with one hand the end of the hose [D] that has the large fitting [P] and
with the other hand hand tighten clockwise the faucet head [Q] onto the
fitting. Push hose in so the head aligns properly with the notches on the
pipe.
6. Unscrew the retaining ring [H] from the bottom of the faucet and ensure the
washer [A] and gasket [B] are also kept with the ring [H].
7. Install the faucet through the hole on the sink, by first threading the flexible
hose [D] through the hole, then place the base of the faucet thru the hole.
A second person may be required to hold this in place until the faucet
installation is complete.
8. From underneath, slide the washer and gasket [A+B] and then the retaining
ring [H] over the free end of the flexible hose [D] and slide it up to the
exposed threaded section of the faucet [E].
9. Tighten the retaining ring [H] by hand until it is snug. Using a wrench or
pliers, tighten the assembly. Do not over tighten. Gently tighten the 2
screws on the retaining ring [H].
3
10.Attach the free end [G] of the
flexible hose onto the faucet
outlet [F].
1
11.Install the counter-weight
[C] on the flexible hose [D]
approximately 30 inches (76.2
cm) down from the underside of
the faucet. This can be adjusted
based on your own requirements,
but this is the normal location.
O
P
3
12.Screw lever [J] into the handle
body [L]. If the handle body
[L] becomes loose over time,
remove the lever [J] and using the
supplied Allen wrench, tighten the
screw [K] that is inside.
N
Q
4
2
5
J
K
M
L
Cartridge
Replacement
If in the future, the ceramic cartridge
needs to be replaced then: TURN
OFF THE WATER SUPPLY TO THE
FAUCET. Remove the lever [J]. With
the Allen wrench, release the screw
[K] and pull out the handle body [L].
The top lever of the cartridge will
be exposed. Unscrew cap [R], and
rings [S], be careful not to damage
the threads. Pull cartridge [U] out
and replace with a new 35mm
ceramic cartridge. Replace rings
[S] then cap [R]. Then place handle
body on the cartridge lever. With the
Allen wrench tighten Allen screw [K]
and then replace lever [J]. Open the
water feed slowly to faucet and test.
4
E
B
A
H
76.2 cm
(30 in)
C
F
G
D
U
S
R
J
M
K
T
L
MOUNT THE UTILITY SINK
1. Carefully place a bead of sealant all around the top of the cabinet. [2]
2. Ease the sink onto the cabinet, and ensure it is placed evenly and
centered on the cabinet. Use masking tape to hold the unit in place
until the sealant dries. [3]
T
AN
AL
SE
2
1
5
3
4
ATTACH DRAWER HANDLES
To attach drawer handles to drawer panel, insert each screw through
a washer, then insert into the four pre-drilled holes. Thread each screw
into the handles. Do not over tighten screws. [4]
STRAINER INSTALLATION
1. Apply a sealing ring of plumber’s putty to the underside of strainer flange.
2. Insert the strainer body in the sink.
3. Assemble the rubber gasket, friction washer and locknut onto the
strainer body from under the sink.
6
4. Hand tighten locknut. Do not over tighten locknut as it may split or
deform the body of the strainer.
SUPPLY LINE ASSEMBLY
The supply lines that attach the faucet to the
household water system, are not supplied
with this unit. They need to be purchased
separately. Follow the supply line manufacturers
instructions for proper installation.
Drawer removal
To remove the drawer, pull out to
its fullest extension. On each of the
drawer slides there is a black lever that
will slide out (only when the drawer is
opened to its fullest position). Push the
lever on the left slide up and the right
lever down. The drawer should now
slide away from the cabinet. Reverse
this procedure to replace the drawer.
Left drawer slide
Right drawer slide
PLACEMENT
Move the assembled unit to the final location. If required, level the unit
by adjusting the 4 leveling feet and ensure no rocking is exhibited. Final
hook up of the supply lines and drain system can now be completed.
CLEANING AND MAINTENANCE
To maintain the smooth, high gloss surface of your sink, follow these tips:
•
Use common household cleaners (non-abrasive) or a mild liquid
dish washing detergent. Rinse well and dry with a clean cloth.
•
Do not allow your acrylic surface to come into contact with
products such as acetone (nail polish remover), nail polish, dry
cleaning solution, lacquer thinners, gasoline, pine oil, etc.
•
Remove dust and dry dirt with a soft, damp cloth.
•
Clean grease, oil, paint and ink stains with isopropyl (rubbing
alcohol). Immediately rinse with water after removal of stain.
•
Avoid using razor blades or other sharp instruments that might fall
and scratch the surface.
7
WAR R AN T Y
Quality Craft warrants to the original retail purchaser that the product
purchased is free from defects in material and workmanship, and agrees
to repair or replace, at Quality Craft’s option, any defective product for a
period of one (1) year from date of purchase. Warranty is not transferable.
Proof of purchase date required. This warranty covers only damage resulting
from defects in material or workmanship; it does not cover conditions or
malfunctions resulting from normal wear, neglect, abuse, accident or repairs.
Call customer service at 1-800-459-4409 (EST). Before you make your call
please make sure you have:
1.
2. 3.
4.
The model number of your product
Proof of sale
Details regarding the problem
Your contact information ready
Imported by:
Costco Wholesale Corporation
P.O. Box 34535
Seattle, WA 98124-1535
1-800-774-2678
www.costco.com
For customer service, contact 1-800-459-4409.
Monday to Friday 9 a.m. to 5 p.m. EST
Rev.10.08.2010