1
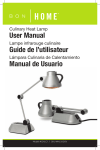
READ THIS
BOOK FIRST
Instruction Manual
The
by Holland
This Is A Revolutionary
Portable Electric Grill!
BH212 EC-1
The only Grill
PN: EC1-MAN 2007
The Holland Grill Co. Inc.
121 Thomas mill Rd. Holly Springs, NC 27540
C22.2 No. 1335.1-93/C22.2 No.1335.2.9-93/UL1026
not to flare up!
BARBECUE INDUSTRY
ASSOCIATION MEMBER
Cutaway Side View
of your patented Holland Grill
No Flare-up System
Vent Stacks
They provide just the right amount of ventilation
to circulate the heat. Your foods cook evenly
on all sides.
Stainless Steel
Cooking Grid
Stainless steel grid cleans
easily and prevents small
foods from falling through.
Stainless Steel
Drip Pan
Catches all the drippings
and prevents them from
catching fire.
Electric
Heating Element
No hassle heat source.
Simply close the lid and cook by time.
It’s guaranteed not to flare-up.
Thank you for purchasing a Holland Grill. This is truly a grill that you, your family and friends
will use and enjoy for many years to come.
Many years of research and new technology have gone into the entire line of Holland grills,
ensuring they are safe, easy to use and grill to perfection. It’s important that you are aware
that the Holland Grill is unlike any other grill on the market today. By design, it
allows you to grill, steam or smoke without the worry of flare-ups associated with competitive
brands. Now you can relax while preparing food without the worry and nuisance of trying to
control flames that will ruin your food.
Not only will you be able to enjoy time with friends and family while you grill worry-free, you’ll
be able to do so for years to come. All Holland grills are made of top quality materials which
give them a sturdiness that will last for years. We use only the best materials to ensure your
new grill will look like new and cook like new well into the future. This grill was designed and
made for trouble-free outdoor cooking.
Please read and follow all the instructions in this manual.
BH212 EC-1
ELECTRIC COMPANION GRILL OWNERS MANUAL
TABLE OF CONTENTS
EC1-1
IMPORTANT SAFEGUARDS
EC1-2
SAFETY INFORMATION
EC1-3
ASSEMBLING YOUR GRILL
EC1-4
PREPARING FOR USE
EC1-5
CARE AND MAINTENANCE
EC1-6
COOKING AND OPERATION
EC1-7
REPLACEMENT PARTS
BH212 EC-1
ELECTRIC COMPANION GRILL OWNERS MANUAL
IMPORTANT SAFEGUARDS
READ ALL INSTRUCTIONS
•
The following basic safety precautions apply when using
electrical appliances:
(a) Read all instructions.
(b) Do not touch surfaces that may be hot. Use handles or knobs provided.
(c) To protect against electrical shock do not immerse cord, plugs, portable appliances (or other
specific part or parts) in water or other liquid.
(d) Close supervision is necessary when any appliance is used by or near children.
(e) Unplug from outlet when the appliance is not in use, before putting on or taking off parts, and
before cleaning. Allow to cool before handling.
(f) Do not operate any appliance with a damaged cord or plug or after the appliance malfunctions or
is dropped or damaged in any manner. Return appliance to the nearest authorized service facility
for examination, repair, or electrical or mechanical adjustment.
(g) The use of accessory attachments not recommended by the appliance manufacturer may
cause injuries.
(h) Do not let cord hang over edge of table or counter or touch hot surfaces.
(i) Do not place on or near a hot gas or electric burner or in a heated oven.
(j) Always attach plug to appliance and check that the control is OFF before plugging cord into wall
outlet. To disconnect, turn the control to OFF, then remove the plug from wall outlet.
(k) Do not use appliance for other than intended use.
(l) Save these instructions.
Also:
“Fuel such as charcoal briquettes is not to be used with appliance.”
“Use on properly grounded outlet.”
EC1-1
BH212 EC-1
ELECTRIC COMPANION GRILL OWNERS MANUAL
SAFETY INFORMATION
DO NOT OPERATE THIS APPLIANCE WITHOUT READING THE OPERATING MANUAL
!
CAUTION - HOT SURFACE
• OPERATION BY ADULTS ONLY. NOT FOR OPERATION BY CHILDREN OR MINORS.
• TO AVOID POSSIBLE INJURY, PLUG INTO 120 VOLT OUTLET ONLY AND READ COMPLETE OPERATING INSTRUCTIONS BEFORE
OPERATING THIS UNIT.
• STACKS MUST BE IN THE UPRIGHT POSITION DURING GRILL USE.
• USE ONLY OUTDOORS, DO NOT EXPOSE TO RAIN.
FOR YOUR SAFETY:
• FUEL SUCH AS CHARCOAL BRIQUETTES, IS NOT TO BE USED WITH THIS APPLIANCE.
• CAUTION - TO ENSURE CONTINUED PROTECTION AGAINST RISK OF ELECTRIC SHOCK, CONNECT TO PROPERLY EARTHED
OUTLETS ONLY.
• CAUTION - TO REDUCE THE RISK OF ELECTRIC SHOCK, KEEP EXTENSION CORD CONNECTION DRY AND OFF THE GROUND.
• NEVER PLUG THIS APPLIANCE INTO ANYTHING OTHER THAN A PROPERLY GROUNDED 120 VOLT ELECTRICAL OUTLET.
FAILURE TO FOLLOW THIS INSTRUCTION MAY RESULT IN A FIRE CAUSING DEATH OR SERIOUS INJURY.
• ALWAYS UNPLUG THE APPLIANCE FROM THE 120 VOLT ELECTRICAL SOURCE OUTLET WHEN NOT IN USE.
• DO NOT USE ON WET SURFACES OR OPERATE APPLIANCE IN THE RAIN OR OTHER WET CONDITIONS.
• DO NOT STORE OR USE GASOLINE OR OTHER FLAMMABLE VAPORS AND LIQUIDS IN THE VICINITY OF THIS OR ANY
OTHER APPLIANCE.
• THIS COOKING APPLIANCE IS FOR OUTDOOR USE ONLY AND SHALL NOT BE USED IN A BUILDING, GARAGE OR ANY OTHER
ENCLOSED AREA.
• THIS GRILL IS NOT FOR COMMERCIAL USE.
• DO NOT USE THIS OUTDOOR APPLIANCE UNDER OVERHEAD COMBUSTIBLE SURFACES.
• TO AVOID POSSIBLE INJURY, READ COMPLETE OPERATING INSTRUCTIONS BEFORE OPERATING THIS UNIT.
• MINIMUM CLEARANCE FROM SIDES AND BACK TO COMBUSTIBLE CONSTRUCTION IS 36 INCHES (100 CM).
• THE VENT STACKS MUST BE IN THE “UP“ POSITION DURING GRILL USE.
• CHECK DRIP PAN PIPE BEFORE EVERY USE. KEEP DRAIN PIPE CLEAR TO ALLOW GREASE TO DRAIN PROPERLY.
• DO NOT ALLOW GREASE TO BUILD UP IN DRIP PAN.
• DO NOT OPERATE GRILL UNDER OVERHEAD COMBUSTIBLE STRUCTURES SUCH AS A PORCH, EAVES, OVERHANGS,
AWNINGS, CANOPIES OR SIMILAR CONSTRUCTION.
• DO NOT OPERATE GRILL WITHIN 36 INCHES (100 CM) OF YOUR HOUSE OR GARAGE OR ANY RESIDENTIAL STRUCTURE.
• CHOOSE ONLY A LEVEL LOCATION FOR GRILL OPERATION. THE HOLLAND GRILL MUST BE SITTING SECURELY ON A LEVEL
SURFACE FOR PROPER OPERATION.
• EXCESSIVELY WINDY OR COLD CONDITIONS MAY AFFECT OR REDUCE GRILL COOKING PERFORMANCE.
• FIRST TIME USE: THE GRILL SHOULD BE ALLOWED TO OPERATE FOR AT LEAST 30 MINUTES BEFORE USING THE FIRST TIME
TO ALLOW MATERIAL PRESERVATIVES TO BURN OFF. AFTER SMOKE STOPS COMING OUT OF THE STACKS, GRILL IS READY
FOR USE. IT IS RECOMMENDED THAT YOU USE A NON-STICK SPRAY ON THE COOK GRID BEFORE ADDING FOOD PRODUCT.
• LONGER DETACHABLE POWER-SUPPLY CORDS OR EXTENSION CORDS ARE AVAILABLE AND MAY BE USED IF CARE IS
EXERCISED IN THEIR USE.
• IF A LONGER DETACHABLE POWER-SUPPLY CORD OR EXTENSION CORD IS USED,
1) The marked electrical rating of the cord set or extension cord should be at least as great as the electrical
rating of the appliance, and
2) The cord should be arranged so that it will not drape over the countertop or table top where it can be pulled
on by children or tripped over unintentionally. The extension cord should be a grounding-type 3-wire cord.
Outdoor extension cords should be used with outdoor use products and surface marked with the suffix letters “W-A” and
with a tag stating “Suitable for Use With Outdoor Appliances.” The connection to an extension cord should be kept dry
and off the ground.
Store product indoors when not in use - out of the reach of children.
Do not clean this product with a water spray or the like.
MOVING INSTRUCTIONS
Caution: Never move grill when it is hot! Risk of serious injury or possible burn may occur.
Transporting grill - Allow 30 minutes for grill to cool completely. Turn electrical controller to “OFF” position. Unplug cord
from 120 volt outlet and remove Electrical Controller from grill. Close lid and secure latch. Place stacks in “DOWN” position. Carefully remove grease pan from underneath the grill and properly dispose of contents.
Fold legs into “UP” position. Carry grill by the front spring handle or the lid handle.
EC1-2
BH212 EC-1
ELECTRIC COMPANION GRILL OWNERS MANUAL
ASSEMBLING YOUR GRILL
The Holland “Electric Companion” model grill requires very little
assembly. The unit is mostly complete right out of the box. The
only items that require assembly are the lid lifting handle and
spring. The controller is installed per grill use and removed
when grill is not in use.
Tools Needed for Assembly:
1. Phillips screwdriver
2. 3/8” nutdriver or wrench
Contents List:
1. Grill Assembly
2. Drip Pan
3. Cooking Grid
4. Adjustable Temperature Controller
5. Handle Bracket
6. Handle Spring
7. Grease Pan
8. Disposable Grease Pan Liner
9. Hardware Bag
10. Manual/Documents
Fig. 1
ASSEMBLY
1. On a clean, flat surface, such as a table top, select the
following parts:
1. Grill assembly
5. Handle bracket
6. Handle spring
(2) #10-24 x 1/2” SS Phillips machine screws
(2) #10-24 SS hex nuts
(2) #10 SS star lockwashers
Fig. 2
Open grill lid. Using the above hardware, attach handle bracket
to lid. Refer to Fig. 2. After bracket is secured to lid, flex spring
handle onto the bracket end pins. Refer to Fig.3.
2. Remove the cooking grid and drip pan. Remove the fiberglass tape from the drip pan and the grill body before using the
grill. Otherwise it will be burned onto each surface and
harder to remove. Now place the drip pan and cooking grid
back into the grill. Make sure drain pipe passes through the
body bottom and the pan mounting flanges are resting on
the inset flange of the grill body.
Fig. 3
3. Insert the controller into element receptacle. NOTE: Make
sure the controller is in the “OFF” position before plugging the
cord into 120 volt outlet.
EC1-3
BH212 EC-1
ELECTRIC COMPANION GRILL OWNERS MANUAL
PREPARING YOUR GRILL FOR USE
4. FOLD DOWN LEGS
Fold all four legs to the down position as shown for operation.
Fold all four legs to the up position as shown for storage.
OPERATING POSITION
STORAGE POSITION
5. RAISE STACKS
FULLY RETRACTED STACKLIFTING RING FOR RAISING
ROTATE SO RIVETS LINE
UP WITH NOTCHES
“UP” POSITION FOR GRILL
OPERATION
GRASP LIFTING RING TO PULL
STACK TO THE UP POSITION
WHILE LIFTING, ROTATE
STACK SO RIVETS LINE UP
WITH CUTOUTS
WHEN RIVETS ARE ABOVE
ROTATE SO RIVETS LINE UP
SURFACE, ROTATE SO 1 RIVET WITH NOTCHES, STACK
IS CENTERED IN FRONT
DROPS INTO LID
6. INSTALL GREASE PAN
Locate the grease pan and liners. Insert grease pan into
slide brackets under LEFT end of grill. You may need to lift
up on grill drip pan slightly to allow grease pan to slide into
position.
You may use the grease pan with disposable liners or
without.
GRILL IS NOW READY FOR USE – PLUG
INTO 120 VOLT OUTLET
EC1-4
LOWERING STACK INTO
LID
BH212 EC-1
ELECTRIC COMPANION GRILL OWNERS MANUAL
CARE AND MAINTENANCE
FIRST TIME USE
It is important that the grill be allowed to operate at least 30 minutes before any food is placed on it for cooking.
Some smoke may appear during the initial operation of the unit. This is normal. These are preservatives used during
the manufacture of some of the materials. After initial heating, the grill is ready for use. After burning off the grill,
open lid and spray the cooking grid with PAM or a similar product, so food does not stick to the grid.
USE ONLY OUTDOORS, DO NOT EXPOSE TO RAIN
CLEANING
CAUTION: UNPLUG UNIT FROM POWER SOURCE BEFORE CLEANING!
Outside of body – this is stainless steel. It can be cleaned with warm soapy water or any grease-cutting cleaner or
stainless steel cleaner. For heavy baked-on deposits, oven cleaner may be used. We highly recommend cleaning
your grill with warm soapy water solution after every use to prevent build up of baked on grease.
Grid and drip pan – the grid is made of high-quality stainless steel. The grid should be brushed with a brass or
stainless steel brush immediately after removing food, while grill is still warm. The drip pan is also stainless steel
and can be cleaned with a flat scraper such as a putty knife.
NOTE: The drip must be kept clean and free of HEAVY buildup for grill to perform properly and prevent flare-ups.
Leaving a minimal amount of cooking residue on the drip pan is recommended and adds to flavoring during cooking.
Do not allow grease to build up on the drip pan.
Drain pipe – the drip pan drain pipe MUST be kept clean and open for grease to properly drain out while cooking.
This is very important. A clogged drain pipe may lead to flare-ups. A condition of the “No-Flare” warranty is that the
unit must be kept clean for the warranty to remain in effect.
Inside grill – use a grease-cutting cleaner inside the body and flush out with water. Wipe with a clean cloth and
allow to dry fully before operating grill.
General – this grill, like all equipment will look better, last longer and perform as intended if kept clean and out of
the weather when not in use. Store grill indoors when not in use to prevent heating element from rusting. Keep out
of the reach of children. Always allow the grill to cool at least 30 minutes before moving or covering. Check to be
sure all openings in body are free of blockages or debris.
MOVING INSTRUCTIONS
CAUTION: NEVER MOVE GRILL WHEN HOT! RISK OF SERIOUS INJURY OR POSSIBLE BURN
MAY OCCUR.
Transporting grill – Allow 30 minutes with the controller in the “OFF” position and the lid open for grill to cool completely. Unplug power cord from 120 volt outlet and remove Electrical Controller from grill. Close lid and secure latch.
Place stacks in “down” position. Carefully remove the grease pan from underneath the grill and properly dispose of
contents. Fold legs into “up” position. Carry grill by front spring handle or lid handle.
EC1-5
BH212 EC-1
ELECTRIC COMPANION GRILL OWNERS MANUAL
COOKING AND OPERATION
COOKING INSTRUCTIONS
Allow grill to warm up with lid closed for 20 to 30 minutes before cooking.
Make sure drain pipe is clear of debris or obstructions before each use.
It is important to realize that cooking on a Holland Grill is a different process than you may be used to. To perform
properly, the lid must remain closed at all times while grilling.
IF YOU’RE LOOKING, YOU’RE NOT COOKING!
Remember, the lid must remain closed. This grill uses a combination of direct and indirect heat and will only perform
properly with the lid closed.
The Holland “Electric Companion” model is equipped with an adjustable “HIGH/MEDIUM/LOW” TEMPERATURE
CONTROLLER. This allows complete flexibility in cooking temperatures.
HIGH setting is approximately 500 degrees F.
MEDIUM setting is approximately 450 degrees F.
LOW setting is approximately 350 degrees F.
The MEDIUM position provides cooking performance that is most similar to other Holland Grill models. The recipes
and cooking times noted in this manual are based on the approximate 400 degree F cooking temperature that the
MEDIUM setting provides. You may use HIGH to quickly pre-heat the grill then select the temperature you wish to
cook at. Remember you will probably want to turn food over at the halfway point in the cooking time on short cook
items (like steaks and hamburgers).
The cooking times we suggest are only that – suggestions. You may want to vary the times as you become familiar with
The Holland Grill.
Remember, if the outdoor temperature is extremely hot or cold, it will decrease or increase your cooking times. Wind
is also a factor. Keep grill out of excessive winds when operating, as it may increase cooking times.
Always remember to turn the controller to the “OFF position” before unplugging cord from 120 volt outlet and when
removing controller from the grill when finished. To unplug the power cord, pull on the plug, not the cord. To unplug
the controller- firmly grasp the controller and pull it straight out away from the grill.
GRILLING
Steak – T-bone or New York Strip, 1” thick: 10 to 12 minutes per side at the MEDIUM setting.
Chicken – Quarters, average size fryer: Cook skin side up for 30 minutes and skin side down for 30 minutes at
MEDIUM setting. Check for doneness. If chicken is completely done, then dip or brush on sauce of your choice.
Put back on grill for 10 minutes longer. Repeat if desired.
Pork ribs and chops, 3/4” thick: Grill 10 to 20 minutes on each side at MEDIUM setting. When done, dip or
brush on sauce. Put back on grill for 5 to 10 minutes. Repeat if desired.
EC1-6
BH212 EC-1
ELECTRIC COMPANION GRILL OWNERS MANUAL
REPLACEMENT PARTS
REPLACEMENTS PARTS LIST
#
Description
Part No.
1
2
3
4
5
6
7
8
9
10
11
12
13
14
15
OPERATING INSTRUCTIONS PLATE
CAUTION PLATE, LID
ELEMENT, 1600 WATTS
ELEMENT CONTROLLER
HANDLE HARDWARE PACK
OWNERS MANUAL
HANDLE BRACKET
SPRING HANDLE
COOKING GRID
FOLDING LEGS, S/S
DRIP PAN
GREASE PAN
GREASE PAN LINERS
COMPANION CAST LOGO
LOGO PUSH CLIP (2 REQ. FOR ITEM #14)
EC1-102
EC1-103
EC1-105
EC1-109
MG2-1014S
EC1-MAN
MG1-202
MG1-250
MG1-300
MG2-550
MG2-600
MG2-1000
MG2-1010
MG1-950
SCP-123
EC1-7
The Holland Grill Company, Inc.
121 Thomas Mill Road Holly Springs, NC 27540
Call 1-800-880-9766 or visit www.hollandgrill.com for a dealer near you.