1
Errors and omissions excepted.
Copyright© 2012. AVSL Group Ltd.
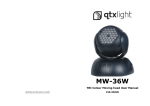
MW-6
QUAD COLOUR LED MINI MOVING HEAD
Order ref: 150.448UK
User Manual
VERSION 1.0
150.448UK User Manual
INTRODUCTION:
MW-6 QUAD COLOUR LED MINI MOVING HEAD
This compact and lightweight mini moving head uses the latest 4-in-1 RGBW Quad
LED technology for the very best in colour mixing. Featuring auto and sound to light
modes, this 8 channel DMX light effect is free standing or can be mounted to trussing
using the supplied brackets. It is ideal for various uses such as small stages, bars,
nightclubs and mobile DJs.
•
•
•
•
•
•
•
•
•
•
•
•
High power 6 x 4-in-1 Quad LED technology
RGBW Colour mixing
Total output 48W
25° beam angle
8 Channel DMX
Master dimmer and individual colour mixing options
Strobe effect with adjustable speed
PAN adjust 0-540° with reverse option
TILT adjust 0-270° with reverse option
Compact and lightweight housing
Auto and sound to light modes
Static stand alone DMX mode
150.448UK User Manual
150.448UK User Manual
PACKAGE CONTENTS:
Please check the contents to ensure that the product has been received in good
condition.
MW-6 Moving head x 1pcs
User’s Guide x 1pcs
Power Cord x 1pcs
2 x Mounting brackets
If you find any accessory is missing or the machine has arrived with any problems,
please contact your local dealer at once. Do not try to fix this item yourself or you
will lose the warranty. Please keep the original package and invoice for any possible
replacement or returned demand.
INSTALLATION:
Every person involved with the installation, operation and maintenance of this device
should be qualified and follow the instructions in this User Guide. We recommend
that this product is not used for audience scanning and should be used within the
guidelines of “HSG95”. When you connect to the main power supply the device will
take around 10 seconds before ready for use.
MOUNTING INSTRUCTIONS:
Attached the supplied mounting brackets to the underside of the fixture using the
supplied bolts. Fix a G-Clamp to the bracket securely ready for mounting. After
finding the desired position tighten the G-Clamp and use a safety wire for extra
security.
When selecting an installation location, take into consideration routine maintenance.
Safety cables must always be used. Never mount in places where the fixture will be
exposed to rain, high humidity, extreme temperatures changes or restricted
ventilation.
150.448UK User Manual
150.448UK User Manual
CAUTION! TO PREVENT MORTAL ELECTRICAL RISK AND LONG LIFE OPERATION:
TECHNICAL SPECIFICATION:
For your safety, please kindly pay attention to all of the warnings listed below:
Always plug in the power plug last and disconnect from the mains, when the
device is not in use or before cleaning.
Do not install and operate the device in rain or extreme heat, moisture or dusty
environments.
This device is for indoor use only and in a dry environment.
Voltage : 230Vac, 50Hz
Power Consumption: 80W
LED Type : 6 x 4-in-1 Quad LED
RGBW
Beam Angle: 25°
Fuse: F3A
Pan Range: 0-540°
Tilt Range: 0-270°
Dimensions : 178 x 173 x 250mm
Weight: 2.8kg
LED Lifespan: 10,000hrs
Do not switch on immediately but wait until it reaches to room temperature, if
the device has been exposed to drastic temperature fluctuations.
Do not shake the device and avoid brute force when installing or operating.
DISPOSAL:
Do not spread the smoke or bubble of effect machine directly to the device.
Do not use the device during thunderstorms and please disconnect the power.
Do not use solvents or aggressive detergent to clean the device. Use a soft and
clean cloth.
Do not modify the device or the connected power cord without authorization.
Please disposal of the unserviceable device according to the current statutory
requirement
Use appropriate safety-rope for safety.
Do not stare to the light.
determines the minimum distance from lighted objects. The
The symbol
minimum distance between light-output and the illuminated surface must be
more than 0.5m.
150.448UK User Manual
150.448UK User Manual
DISPLAY CONTROLS:
CONNECT WITH POWER SUPPLY – THE GROUND WIRE MUST BE CONNECTED:
Use the plug to connect to the main power supply as follows:
LED Display
Action
Addr
Er_L
PAn
tiLt
FLAS
AUTO
REST
Set DMX Address
If displayed there is a brake in the DMX Chain.
Reverse Pan on/off
Reverse tilt on/off
Sound to light mode
Auto mode various options
Reset function
DMX OPERATION:
Wire
Connection
International signal
Brown
Live
L
Blue
Neutral
N
Yellow /Cyan
Earth
QUICK TROUBLE SHOOTING
If the unit is not functioning properly follow the below guidelines
Check
Check
Check
Check
the IEC cable is fitted correctly.
the fuse hasn’t blown in both the IEC cable and unit (see below)
any DMX cables are connected correctly
the DMX address has been set correctly
If the unit still fails to respond then contact your retailer.
DMX
Channel
DMX Value
1
2
3
4
5
6
7
6
000-255
000-255
000-255
000-255
000-255
000-255
000-255
000-255
Function
Master Dimmer 0-100%
Red Colour 0-100% Dimming
Green Colour 0-100% Dimming
Blue Colour 0-100% Dimming
White Colour 0-100% Dimming
Strobe Slow to Fast
Pan: 0° to 540°
Tilt: 0° to 270°
150.448UK User Manual
REPLACING FUSE
Disconnect from the main power supply first then remove the fuse holder above the
IEC Socket to reveal the fuse. Replace with the correct fuse rating as stated on the
product safety label. Then lock the fuse holder cover back into place.
150.448UK User Manual
GENERAL MAINTENANCE
REAR LAYOUT:
To maintain optimum performance and minimize wear, fixtures should be cleaned
frequently. Usage and environment are contributing factors in determining frequency.
As a general rule, fixtures should be cleaned at least twice a month. Dust build-up
reduces light output performance and can cause overheating. This can lead to
reduced life and increased mechanical wear. Be sure to power off the fixture before
conducting maintenance.
Unplug fixture from the mains and use a vacuum or air compressor and a soft brush
to remove dust collected on external vents and internal components. Clean all glass
when fixture is cold with a mild solution to the cloth or tissue, and drag dirt and
grime to the outside of the lens. Gently polish optical surface until they free of haze
and lint.
The cleaning of external optical lenses must be carried out periodically to optimize
light output. Cleaning frequently depends on the environment in which the fixture
operates: damp, smoky or particularly dirty surroundings can require cleaning fluid.
Always dry the parts carefully. Clean the external optics at least every 20 days.
150.448UK User Manual
1.
IEC Power IN and fuse holder
2.
DMX IN
3.
DMX OUT
CONTROL DISPLAY FOR:
1.
MODE\ESC: Menu or withdraw the last menu
2.
UP: Increase one step each time
3.
DOWN: Decrease one set each time
4.
ENTER: Confirms the functions you select
150.448UK User Manual