1
GESBC-9302EX
User’s Manual
Embedded Single Board Computer
GESBC-9302EX User’s Manual
Table of Contents
Chapter 1 – Introducing the GESBC-9302EX Single Board Computer ............................4
GESBC-9302EX Overview .........................................................................................4
Advanced Features ......................................................................................................4
EP9302........................................................................................................................5
SDRAM ......................................................................................................................5
FLASH........................................................................................................................6
USB ............................................................................................................................6
UART 1 ......................................................................................................................6
UART 2 ......................................................................................................................6
Ethernet .......................................................................................................................6
Chapter 2 – Getting Started .............................................................................................6
Assembly and Connections..........................................................................................6
Operation ....................................................................................................................7
Configurations.............................................................................................................8
Chapter 3 – GESBC-9302EX Function Blocks ................................................................9
EP9302........................................................................................................................9
SDRAM ....................................................................................................................10
FLASH......................................................................................................................11
USB ..........................................................................................................................11
UART 1 and 2 ...........................................................................................................11
Ethernet .....................................................................................................................12
SPI bus ......................................................................................................................12
On-chip A/D..............................................................................................................12
GPIO.........................................................................................................................13
External Real Time Clock and Battery Hook up ........................................................14
Expansion Bus...........................................................................................................14
Power Requirement ...................................................................................................15
Chapter 4 – Software Description ..................................................................................16
Overview...................................................................................................................16
GESBC-9302EX Linux Code ....................................................................................16
Download Utility.......................................................................................................16
Redboot.....................................................................................................................17
Loading Linux Kernel and root File System...............................................................17
Chapter 5 – Development Tools ....................................................................................20
Overview...................................................................................................................20
Linux Development Tool Chain.................................................................................20
Native Application Development Over NFS ..............................................................22
Chapter 6 – Troubleshooting .........................................................................................23
Version 0.2
Page 2 of 23
15-May-07
GESBC-9302EX User’s Manual
List of Tables
Table 1 System configuration ..........................................................................................8
Table 2 P1 UART1 connector........................................................................................11
Table 3 JP6 UART2 connector ......................................................................................12
Table 4 J11 SPI connector .............................................................................................12
Table 5 J3 On-chip A/D converter .................................................................................12
Table 6 J1 GPIO 1 connector.........................................................................................13
Table 7 J2 GPIO 2 connector.........................................................................................13
Table 8 J5 Real Time Clock battery back up connector.................................................14
Table 9 J10 Expansion Bus...........................................................................................14
Table 10 J7 Power supply connector..............................................................................15
Version 0.2
Page 3 of 23
15-May-07
GESBC-9302EX User’s Manual
Chapter 1 – Introducing the GESBC-9302EX Single
Board Computer
GESBC-9302EX Overview
The GESBC-9302EX a low cost compact sized single board computer based on Cirrus
Logic EP9302 processor. With a large peripheral set targeted to a variety of applications,
the GESBC-9302EX is well suited for industrial controls, digital media servers, audio
jukeboxes, thin clients, set-top boxes, point-of-sale terminals, biometric security systems,
and GPS devices will benefit from the EP9302's integrated architecture and advanced
features.
Advanced Features
The heart of the GESBC-9302EX is the EP9302 which is the one in a series of
ARM920T-based processors. The ARM920T microprocessor core with separate 16
Kbyte 64-way set-associative instruction and data caches is augmented by the
MaverickCrunch™ co-processor. This enables faster than real-time compression of
audio CDs. The proprietary MaverickKey™ unique hardware programmed IDs provide
an excellent solution to the growing concern over secure Web content and commerce.
MaverickKey IDs can also be used by OEMs and design houses to protect against design
piracy by presetting ranges for unique IDs.
The EP9302 is a high-performance, low-power RISC-based device built around a single
ARM920T microprocessor core. The ARM920T on the EP9302 functions with a
maximum operating clock rate of 200MHz and a power usage between 100mW and
750mW (dependent upon clock speed). The ARM core operates from a 1.8V supply
while the I/O operates at 3.3V. The low power consumption makes it an idea platform
for battery operated applications.
A high performance 1/10/100 Mbps Ethernet Media Access Controller (EMAC) is
included along with external interfaces to SPI and I2S Audio. A two-port USB host and
two UARTs are included as well. The list below summarizes the features of the GESBC9302EX.
•
•
•
•
•
•
•
•
•
200MHz Processor Core – ARM920T with MMU
MaverickCrunch™ Math Engine
MaverickKey™ Security
32M SDRAM, 4~16M NOR FLASH
128 MB – 1GB NAND FLASH
Ethernet Media Access Controller (EMAC)
5 channel 12-bit Analog-to-Digital Converter (ADC
Universal Asynchronous Receiver / Transmitters (UARTs)
2 USB Host Port
Version 0.2
Page 4 of 23
15-May-07
GESBC-9302EX User’s Manual
• External Real-Time Clock with backup battery hook up
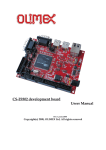
Figure 1 below show a picture of the GESBC-9302EX Single Board Computer.
Figure 1. GESBC-9302EX Single Board Computer
EP9302
The GESBC-9302EX is shipped with the Cirrus Logic EP9302 processor. For more
information regarding the EP9302 processor please see the EP9302 datasheet.
SDRAM
The GESBC-9302EX is shipped with 32MBytes of SDRAM.
Version 0.2
Page 5 of 23
15-May-07
GESBC-9302EX User’s Manual
FLASH
The GESBC-9302EX is shipped with 4MBytes of asynchronous Intel Strata-Flash and
128MB NAND FLASH.
USB
The GESBC-9302EX is shipped with two USB host connections.
UART 1
The GESBC-9302EX is shipped with a 9-pin interface.
UART 2
The GESBC-9302EX is shipped with the 3 wire UART 2 interface.
Ethernet
The GESBC-9302EX is shipped with a complete physical and MAC subsystem that is
compliant with the ISO/TEC 802.3 topology for a single shared medium with several
stations.
Chapter 2 – Getting Started
This chapter describes the GESBC-9302EX working environment and familiarizes the
user with its components and functionality. This chapter contains the following sections:
• Assembly and Connections
o Describes how to assemble and connect components to the GESBC9302EX Single Board Computer
• Operation
o Describes how to operate the GESBC-9302EX Single Board Computer
Assembly and Connections
In order to use the GESBC-9302EX the user must first assemble and connect the
peripherals to the GESBC-9302EX, as described in the following procedure.
1. Place the GESBC-9302EX on a static free surface.
2. Make sure all of the jumpers are in the factory default position. The unit is
shipped in a factory default configuration. If the user is uncertain that the
GESBC-9302EX has the jumpers in the factory default configuration, please see
the next section regarding board configuration.
3. Connect 5V regulated power supply to the board.
4. Connect null modem serial cable between GESBC-9302EX UART 1 and
PC/terminal serial port.
Version 0.2
Page 6 of 23
15-May-07
GESBC-9302EX User’s Manual
5. Launch a terminal emulator, such as HyperTerminal, or minicom, on the PC
configured to connect to the serial port of the GESBC-9302EX. Configure the
serial port with the following parameters: 57600 bits per second, 8 data bits, no
parity, 1 stop bit, no flow control.
6. Connect the board to a local area network (optional)
Operation
The startup procedure for the GESBC-9302EX is straightforward. First, the connection
of the power harness is required. Second, the null modem serial interface cable must be
connected to the UART1 connector. Third, connect the GESBC-9302EX to a network
that has Internet access. It is recommended that all other cables be tested to determine
they are properly seated.
A few seconds after applying power to the GESBC-9302EX, debug information will be
displayed on the terminal program. The following figure shows what this should look
like.
Please see Chapter 4 – Software Description for more details regarding the software
functionality.
Version 0.2
Page 7 of 23
15-May-07
GESBC-9302EX User’s Manual
Configurations
Jumpers are used to configure the GESBC-9302EX to operate in different mode. The
following table lists all the settings for each jumper.
Jumper
2
SW1
LED3
Version 0.2
Table 1 System configuration
Description
Boot mode:
connect pin 1 and 2 - serial boot
connect pin 2 and 3 - flash boot
Reset switch header
Power indicator LED header
Page 8 of 23
15-May-07
GESBC-9302EX User’s Manual
Chapter 3 – GESBC-9302EX Function Blocks
EP9302
The GESBC-9302EX Single Board Computer uses the Cirrus Logic EP9302 as the core
processor on this development board. The top-level features of EP9302 processor are the
following:
• ARM920T RISC Core Processor
• 200 MHz / 200 MIPS Performance
• 16 Kbyte Instruction Cache
• 16 Kbyte Data Cache
• Linux and Windows CE enabled MMU
o Note: Cirrus Logic to supply either a Linux port or a Windows CE port,
including the respective board support package (BSP).
• 100 MHz System Bus
• MaverickCrunchTM Math Engine
• MaverickKeyTM Security Features
• 16 bit SDRAM Interface (Up To 4 Banks)
• 16 bit SRAM / FLASH / ROM Interface
• Serial EEPROM Interface
• 10 / 100 Mbps Ethernet MAC
• Two UARTs
• Two-port USB Host
• 5 channel 12 bit ADC
• SPI Port
• Serial Audio Interface
• JTAG Interface
More detailed information regarding the EP9302 processor can be found at
www.cirrus.com and on the enclosed disk.
Version 0.2
Page 9 of 23
15-May-07
GESBC-9302EX User’s Manual
SDRAM
The EP9302 features a unified memory address model where all memory devices are
accessed over a common address and data bus. The EP9302 can support a minimum of 1
to a maximum of 4 banks of 32-bit 66 or 100 MHz SDRAM. Additionally, the GESBC9302EX supports 32 SDRAM density. The K4S56132 SDRAM manufactured by
Samsung is a part that matches this requirement. The features of the Samsung SDRAM
include the following:
• JEDEC Standard 3.3V Power Supply
• LVTTL Compatible with Multiplexed Address
• 4 Bank Operation
• MRS Cycle with Address Key Programs
• CAS Latency of 2 Or 3
• Burst Length of 1, 2, 4, 8, and Full Page
• Burst Type of Sequential and Interleave
• All Inputs Are Sampled on Rising Edge of Clock
• DQM for Masking
• Auto and Self Refresh
• 64ms Refresh Period
Version 0.2
Page 10 of 23
15-May-07
GESBC-9302EX User’s Manual
FLASH
As previously stated, the EP9302 features an unified memory address architecture. The
EP9302 can support either NAND or NOR types of non-volatile flash memory for
program code storage. The GESBC-9302EX is shipped with 4 Mbytes of NOR FLASH
memory, which is provided by Intel E28F320J3A Strata FLASH memory device, and
128MB NAND type FLASH. The Intel Strata Flash memory device features include the
following:
• 150ns Initial Access Speed
• 25 ns Asynchronous Page-Mode Reads
• 32-Byte Write Buffer
• Program and Erase Suspend Support
• Flash Data Integrator, Common Flash Interface Compatible
• 128-bit Protection Register
• 64-Bit Unique Device Identifier
• 64-Bit User Programmable OTP Cells
• Absolute Protection with VPEN Tied to Ground
• Individual Block Locking
• High Density 32 Kbyte Blocks
USB
The GESBC-9302EX Single Board Computer provides two USB host connections. The
EP9302 USB host controller is configured for two root hub ports and features an
integrated transceiver for each port. The EP9302 integrates two USB 2.0 Full Speed host
ports. These ports are fully compliant to the OHCI USB 2.0 Full Speed specification (12
Mbps). The controller complies with the OHCI specification for USB Revision 1.1. The
USB ports are brought out by a standard double deck USB type A connector.
UART 1 and 2
The GESBC-9302EX Single Board Computer is shipped with 2 3-wire UART interface.
The UART 1 interface is provided via a standard DB-9 connector. The signal
designation is listed in the following tables.
Pin Number
1
3
5
Version 0.2
Table 2 P1 UART1 connector
Signal Name
Pin Number
DC
2
TX
4
GND
6
Page 11 of 23
Signal Name
RX
DTR
DSR
15-May-07
GESBC-9302EX User’s Manual
7
9
RTS
RI
8
10
CTS
N/A
Table 3 JP6 UART2 connector
Pin Number
Signal Name
1
RX
2
TX
3
GND
Ethernet
The GESBC-9302EX Single Board Computer is shipped with support for a complete
Ethernet interface. The EP9302 contains a MAC subsystem that is compliant with the
ISO/TEC 802.3 topology for a single shared medium with several stations. The Media
Access Controller (MAC) within the EP9302 supports 1/10/100 Mbps transfer rates and
interfaces to industry standard physical layer devices.
SPI bus
The GESBC-9302EX Single Board Computer is shipped with a SPI expansion bus header
for peripheral expansion. The signal designation is listed in the following table.
Table 4 J11 SPI connector
Pin Number
Signal Name
1
SFRM
2
SSPRX
3
GND
4
SCLK
5
GND
6
SSPTX
On-chip A/D
The GESBC-9302EX Single Board Computer is shipped with a 5 channel 12 bit on-chip
A/D converter. The signal designation is listed in the following table.
Table 5 J3 On-chip A/D converter
Pin Number
Signal Name
1
GND
2
Channel 1
3
Channel 2
4
GND
5
GND
Version 0.2
Page 12 of 23
15-May-07
GESBC-9302EX User’s Manual
6
7
8
9
10
Channel 3
Channel 4
GND
GND
Channel 5
GPIO
The GESBC-9302EX Single Board Computer provides 20 general purpose I/O signals
for external use. The signal designation is listed in the following tables.
Pin Number
1
3
5
7
9
11
13
15
17
19
Table 6 J1 GPIO 1 connector
Signal Name
Pin Number
EGPIO8
2
EGPIO10
4
EGPIO12
6
EGPIO14
8
GPIO0 (CGPIO[0])
10
GPIO2 (HGPIO[4])
12
GPIO4 (HGPIO[2])
14
GPIO6 (FGPIO[2])
16
GND
18
VDD3.3
20
Signal Name
EGPIO9
EGPIO11
EGPIO13
EGPIO15
GPIO1 (HGPIO[5])
GPIO3 (HGPIO[3])
GPIO5 (FGPIO[1])
GPIO7 (FGPIO[3])
GND
VDD3.3
The GPIO3 and GPIO4 are used for optional A/D and D/A chip select when they are
installed.
Pin Number
1
3
5
Table 7 J2 GPIO 2 connector
Signal Name
Pin Number
EGPIO2
2
EGPIO4
4
GND
6
Signal Name
EGPIO3
EGPIO5
VDD3.3
EGPIO 8 – 15 are connected directly to Port B of EP9302 CPU, EGPIO 2 – 5 are
connected directly to Port A of EP9302 CPU. The GPIO 0 is mapped to Port C of
EP9302 CPU. The GPIO 1 – 4 are mapped to Port H of EP9302 CPU which must be
enabled in the DeviceCFG register at address 0x8093_0080 1 . The GPIO 5 -7 are
mapped to EP9302 port F.
1
The EP9301/02 user guide does not provide clear documentation on the bit for port H.
Please refer to page 145 of EP9315 user guide for Port H configuration bit.
Version 0.2
Page 13 of 23
15-May-07
GESBC-9302EX User’s Manual
External Real Time Clock and Battery Hook up
The GESBC-9302EX Single Board Computer provides an external real time clock with
battery backup hook up. The DS1337/1339 connects to EP9302 via EEDAT and EECLK
pin. The RTC also provides 32.768 KHz square wave for EP9302 RTC circuit. The
square wave output frequency of external RTC should not be altered to ensure proper
system functioning. The signal designation of the battery hook up is listed in the
following tables.
Table 8 J5 Real Time Clock battery back up connector
Pin Number
Signal Name
1
3.3V
2
GND
Expansion Bus
The GESBC-9302EX Single Board Computer provides a memory expansion bus to
connect additional memory mapped devices.
Pin Number
1
3
5
7
9
11
13
15
17
19
21
23
25
27
29
31
33
35
37
39
41
43
45
47
Version 0.2
Table 9 J10 Expansion Bus
Signal Name
Pin Number
D0
2
D2
4
D4
6
D6
8
D8
10
D10
12
D12
14
D14
16
A0
18
A2
20
A4
22
A6
24
A8
26
A10
28
A12
30
A14
32
A16
34
A18
36
A20
38
A22
40
A24
42
RDN
44
WAITN
46
CS0N
48
Page 14 of 23
Signal Name
D1
D3
D5
D7
D9
D11
D13
D15
A1
A3
A5
A7
A9
A11
A13
A15
A17
A19
A21
A23
A25
WRN
RESETN
CS7N
15-May-07
GESBC-9302EX User’s Manual
49
GND
50
GND
Power Requirement
The GESBC-9302EX Single Board Computer requires regulated 5v DC.
Table 10 J7 Power supply connector
Pin Number
Signal Name
1
5V DC
2
GND
Version 0.2
Page 15 of 23
15-May-07
GESBC-9302EX User’s Manual
Chapter 4 – Software Description
Overview
This chapter provides information regarding the software that is shipped with the
GESBC-9302EX Board. The software included with the board is Linux with a few test
applications and network utilities. The Linux software provides the user with the ability
to test some of the subsystems on the GESBC-9302EX board. The download utility
provides a means to program a binary image into the flash memory on the GESBC9302EX.
GESBC-9302EX Linux Code
The pre-programmed software provides the user with the opportunity to test some of the
subsystems on the GESBC-9302EX via Linux. This software is programmed into the
system FLASH located on the board prior to shipment. The binary image of the shipped
code is included on the CD that ships with the board.
Serial Port Interface
The functionality of the serial interface can be demonstrated by looking at the debug
messages while the system boot-ups and operates. The setting for the serial interface is
described in chapter 2.
USB Interface
The functionality of the USB interface can be shown by hooking up a user supplied USB
device.
Ethernet Interface
Ethernet is automatically detected by the Linux kernel and a DHCP client will try to lease
network address from connected DHCP server.
Download Utility
The download utility provides the user with a tool for programming the flash memory on
the GESBC-9302EX with a binary image. The following procedure will allow in-circuit
programming of the flash memory via the EP9302 processor:
1)
2)
3)
4)
Power the board off.
Connect null-modem serial cable to UART1.
Set jumper 2 to connect pin 1 and 2 (JP2 factory default is pin 2 and 3).
Stop any program that might use the serial port that is connected to GESBC9302EX.
5) Run download utility (assuming download_win.exe located in same directory as
binary image)
download_win binary_image_filename.bin
Version 0.2
Page 16 of 23
15-May-07
GESBC-9302EX User’s Manual
6)
7)
8)
9)
“Waiting for board to wake up…” message is displayed.
Power the board on.
Messages displayed regarding erasing, then programming the flash.
“Successfully programmed binary_image_filename.bin” message displayed upon
programming completion.
10) Power the board off.
11) Install jumper on pin 2 and 3 of JP2.
12) Power the board on.
Redboot
RedBoot provides a simple interface for loading operating systems and
applications onto the GESBC-9302EX board. It can also serve as a debug platform
for standalone programs using the GDB stub that is built into RedBoot.
RedBoot uses a serial console for its input and output. The default serial port
setting is 57600,8,N,1. It also supports the built-in Ethernet port
and a flash file system and general flash programming.
The board is shipped with Redboot pre-installed. Please refer to Download Utility
section for instructions to reload Redboot. Please refer to documents at ECOS website
http://ecos.sourceware.org regarding how to rebuild Redboot.
Loading Linux Kernel and root File System
The Redboot boot-loader provides two ways to load Linux kernel and file system into
FLASH memory, by Ethernet network and TFTP server or serial connection. The
network connection method provides fast loading but if not available, serial port
connection method can be used.
After power on the GESBC-9302EX board, the following message should be shown on
the terminal console on the host PC connected to the GESBC-9302EX board2.
+FLASH configuration checksum error or invalid key
EP93xx - no EEPROM, static ESA, or RedBoot config option.
No network interfaces found
RedBoot(tm) bootstrap and debug environment [ROMRAM]
Non-certified release, version v2_0 - built 07:39:29, Dec
18 2004
Platform: Cirrus Logic EDB9301 Board (ARM920T) Rev A
Copyright (C) 2000, 2001, 2002, Red Hat, Inc.
2
A slightly different message will be displayed if the FLASH memory has been initialized and
programmed before.
Version 0.2
Page 17 of 23
15-May-07
GESBC-9302EX User’s Manual
RAM: 0x00000000-0x04000000 available
FLASH: 0x60000000 - 0x60400000, 16 blocks of 0x00040000
bytes each.
RedBoot>
It’s possible to use bootp of Redboot to acquire network address automatically. For
situation it is not available, the following procedure can be used to configure a static IP
address for the SBC.
RedBoot> fconfig
Run script at boot: true
Boot script:
Enter script, terminate with empty line
>> fis load ramdisk
>> fis load zImage
>> exec -r 0x800000 -s 0x300000
>>
Boot script timeout (1000ms resolution): 1
Use BOOTP for network configuration: false
Gateway IP address:
Local IP address: 192.168.0.112
Local IP address mask:
Default server IP address:
DNS server IP address:
Set eth0 network hardware address [MAC]: true
eth0 network hardware address [MAC]: 0x00:0x00:0x00:0x00:0x80:0x21
GDB connection port: 9000
Force console for special debug messages: false
Network debug at boot time: false
Update RedBoot non-volatile configuration - continue (y/n)? y
... Erase from 0x60780000-0x60781000: .
... Program from 0x03fbe000-0x03fbf000 at 0x60780000: .
RedBoot>
The Redboot FLASH file system must be initialized in order to store data in the FLASH
file system. The following procedure is used to initialize the Redboot FIS.
RedBoot> fis init
About to initialize [format] FLASH image system - continue (y/n)? y
*** Initialize FLASH Image System
Warning: device contents not erased, some blocks may not be
usable
... Erase from 0x607c0000-0x60800000: .
... Program from 0x03fbf000-0x03fff000 at 0x607c0000: .
RedBoot>
Version 0.2
Page 18 of 23
15-May-07
GESBC-9302EX User’s Manual
Load Root File System3
The default configuration of GESBC-9302EX is using part of SDRAM as RAM disk for
Linux root file system. The ramdisk image must be stored in the on-board FLASH
memory and loaded by Redboot for the Linux kernel. The image must be loaded into
dynamic memory before it can be stored in the on board FLASH memory. To load the
ramdisk file to SDRAM, enter the following commands at the terminal console,
load –v –r –b 0x800000 –h tftp_host_ip ramdisk_file_name
where
-v : verbose
-r : binary format
-b : base address in memory
for serial port download, the command is,
load –v –r –b 0x800000 –m ymodem
Immediately after entered the above serial download command, start Y-Modem transfer
on the terminal program, the download process should start.
The above commands will load ramdisk file into on board SDRAM. To store the image
into non-volatile FLASH memory, use the following command,
fis create –b 0x800000 –l <ramdisk_file_length> ramdisk_file_name
where
-b : is the memory base address
-l : is the ramdisk size. It can be calculated by subtracting the end address from the base
address from the Redboot response when loading the ramdisk file.
The ramdisk_file_name can be any arbitrary name.
To verify the image has been stored correctly in the FLASH memory, use the following
command,
fis list
Load Linux Kernel
The kernel image must be loaded into dynamic memory before it can be stored in the onboard FLASH memory. To load Linux kernel, issue the following command at the
terminal console connected to the GESBC-9302EX board,
The host computer should have tfpt server running and Linux kernel and file system file
stored in the tftp root directory.
3
Version 0.2
Page 19 of 23
15-May-07
GESBC-9302EX User’s Manual
load –v –r –b 0x80000 –h host_ip_address kernel_image_name
where
-v : verbose
-r : binary format
-b : base address in memory
The above command will load Linux kernel image file into on board SDRAM. To store
the image into non-volatile FLASH memory, use the following command,
fis create –b 0x80000 –l <kernel_image_length> kernel_image_name
where
-b : is the memory base address
-l : is the kernel image size. It can be calculated by subtracting the end address from the
base address from the Redboot response when loading the kernel image file.
The kernel_image_name can be any arbitrary name.
To verify the image has been stored correctly in the FLASH memory, use the following
command,
fis list
Multiple kernel images or root file systems can be stored in the on-board FLASH
memory when memory space permits.
Chapter 5 – Development Tools
Overview
This chapter provides a brief introduction to development tools that are available for the
EP9302 System-on-a-Chip processor. The central processing core on the EP9302 is a
200 MHz ARM920T processor. The ARM920T RISC processing core is supported
through various toolsets available from third party suppliers. The typical toolset required
for the code development is a compiler, assembler, linker and a source-level code
debugger.
Linux Development Tool Chain
The Linux development tool chain is included in the CD ROM come with the GESBC9302EX board. A host PC running Linux operating system is required to run the
development tools. This guide assumes user had basic Linux or Unix application
development knowledge.
Version 0.2
Page 20 of 23
15-May-07
GESBC-9302EX User’s Manual
Host Computer Requirement
The host PC should run Redhead, SuSe, or other Linux distribution, a RS-232 serial port,
at least 500MB free disk space, and a terminal program such as minicom.
Hardware Connection
A null modem cable is required to connect GESBC-9302EX to the host computer.
Install Linux Development Tool Chain
The ARM Linux Development Tool chain can be installed in any directory on the host
system. The following example uses /usr/local/arm as the installing directory for the
ARM Linux Development Tool Chain.
1. Create the tool chain directory and untar the tool chain
cd /usr/local
mkdir arm
cd arm
tar jxvf /cdrom/cross-3.3.tar.bz
Your mounting point of CD-ROM maybe different
2. Set up the directory path variable
export PATH=/usr/local/arm/3.3/bin:$PATH
The above command can be included in the shell resource file so it is executed
every time you login. For bash shell, a good place to put is in .bashrc in your
home directory.
Compile Linux Kernel
The GESBC-9302EX is shipped with Linux kernel version 2.6.18. The pre-patched
kernel source tree is included in the companion CD-ROM.
Prepare Linux Kernel source
Untar the Linux kernel
Configure Linux Kernel
In the Linux kernel directory, executing the following commands,
Version 0.2
Page 21 of 23
15-May-07
GESBC-9302EX User’s Manual
make ARCH=arm CROSS_COMPILE=arm-linux- menuconfig
If problem occurs, make sure the default PATH variable is set to the correct tool chain
directory
Compile Kernel
Once Linux kernel has been configured, it can be compiled using following commands
make
(or make zImage)
The Linux kernel should compile without error and the image file will be created.
Native Application Development Over NFS
The network file system (NFS) can be used to do native kernel/application development.
The include Debian based file system contains native compiler, debugger for ARM
processor and many other utilities for fast application development.
The following steps outline the general procedure of mounting NSF on GESBC-9302EX
board.
1. Create a directory on server computer to house the file system for GESBC9302EX.
2. Unpack the included file system zip file in the newly created directory,
tar jxf <you CD ROM path>/debian-arm-cirrus.tar.bz2
3. Change the NFS server configuration to include the directory.
4. Power up GESBC-9302EX and press CTRL-C at the terminal connected to the
GESBC-9302EX to stop the default redboot boot script. Load the on board kernel
image from FLASH memory,
fis load zImage
5. Start the Linux operating system by typing,
exec –c “root=/dev/nfs nfsroot=<server IP address>:/<NFS directory> ip=dhcp
console=ttyAM0”
The system is now ready to use for application development.
Version 0.2
Page 22 of 23
15-May-07
GESBC-9302EX User’s Manual
Chapter 6 – Troubleshooting
This chapter provides Troubleshooting information. Search the entries in the Problem
column in order to find the item that best describes your situation. Then perform the
corrective action in the same row. If the problem persists, contact Glomation.
Version 0.2
Page 23 of 23
15-May-07