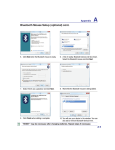
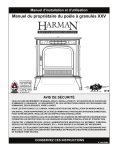
1
® User Guide V1.4 For Soundcraft Si Impact Console ® User Manual INFORMATION INFORMATION IMPORTANT Please read this manual carefully before using your mixer IRUWKH¿UVWWLPH This equipment complies with the EMC directive 2004/108/EC and LVD 2006/95/EC. This product is approved to safety standards: IEC 60065:2005 (Seventh Edition) +A1:2005 EN60065:2006 +A1:2006 +A1:2008 UL60065 2012 7th Edition CAN/CSA-E60065-03 + A1: 2006 And EMC standards EN55103-1: 2009 (E2) EN55103-2: 2009 (E2) :DUQLQJ$Q\PRGL¿FDWLRQRUFKDQJHVPDGHWRWKLVGHYLFHXQOHVVH[SOLFLWO\DSSURYHGE\+DUPDQZLOO LQYDOLGDWHWKHDXWKRULVDWLRQRIWKLVGHYLFH2SHUDWLRQRIDQXQDXWKRULVHGGHYLFHLVSURKLELWHGXQGHU6HFWLRQ RIWKH&RPPXQLFDWLRQVDFWRIDVDPHQGHGDQG6XESDUWRI3DUWRI&KDSWHURIWKH&RGHRI )HGHUDO5HJXODWLRQV NOTE: This equipment has been tested and found to comply with the limits for a Class B digital device, pursuant to Part 15 of the FCC Rules. These limits are designed to provide reasonable protection against harmful interference in a residential installation. This equipment generates, uses and can radiate radio frequency energy and, if not installed and used in accordance with the instructions, may cause harmful interference to radio communications. However, there is no guarantee that interference will not occur in a particular installation. If this equipment does cause harmful interference to radio or television reception, which can be determined by turning the equipment off and on, the user is encouraged to try to correct the interference by one or more of the following measures: * Reorient or relocate the receiving antenna * Increase the separation between the equipment and the receiver * Connect the equipment into an outlet on a circuit different from that to which the receiver is connected. * Consult the dealer or an experienced radio/TV technician for help. For further details contact: Harman International Industries Ltd, Cranbourne House, Cranbourne Road, Potters Bar, Hertfordshire EN6 3JN, UK. Telephone +44 (0)1707 665000 Fax: +44 (0)1707 660742 email: [email protected] © Harman International Industries Ltd. 2014 All rights reserved Parts of the design of this product may be protected by worldwide patents. Part No. 5059376 Rev 1.0 E&OE September 2014 Soundcraft is a trading division of Harman International Industries Ltd. Information in this manual is subject to change without notice and does not represent a commitment on the part of the vendor. Soundcraft shall not be liable for any loss or damage whatsoever arising from the use of information or any error contained in this manual. No part of this manual may be reproduced, stored in a retrieval system, or transmitted, in any form or by any means, electronic, electrical, mechanical, optical, chemical, including photocopying and recording, for any purpose without the express written permission of Soundcraft. Harman International Industries Limited Cranborne House, Cranborne Road, Potters Bar, Hertfordshire, EN6 3JN, UK Tel: +44 (0)1707 665000 Fax: +44 (0)1707 660742 http://www.soundcraft.com INFORMATION CONTENTS 8VHU0DQXDO CONTENTS 1.0 AN INTRODUCTION TO Si IMPACT 1.1: Safety 1.2: arranty 6SHFL¿FDWLRQV 2.0: GETTING STARTED &RQVROH2YHUYLHZ 3DUWV2I7KH&RQVROH )DGHU*ORZ 3.0: ASSIGNABLE CONTROLS )DGHU/D\HUV &RQWURO&KDQQHOV &RQWURO&KDQQHO$VVLJQPHQW 3.3$VVLJQDEOH&KDQQHO6WULS 3.4W27(0)DGHU)ROORZ 4.0: TOUCH SCREEN OPERATION 4.1: Main Menu 5.0: INPUTS & OUTPUTS 3DWFKLQJ 6RXQGZHE3DWFKLQJ&RQWURO 'HIDXOW3DWFKLQJ 9L6L&RQQHFW,22SWLRQ&DUGV 2SWLRQ&DUGV 6WDJHER[HV 0$',86%&DUG 0$',8616HWXS 86%3&'ULYHU 6.0: CHANNELS & BUSSES ,QSXW&KDQQHOV ,QSXW6HWXS 0L[2XWSXWV 0L[2XWSXWV6HWXS 0DWUL[2XWSXWV 0DWUL[2XWSXWV6HWXS 0DLQ0L[2XWSXWV 0DLQ0L[2XWSXWV6HWXS );%XVVHV 7.0: DSP Elements )XQFWLRQ)RFXV $&6&KDQQHO6WULS(OHPHQWV $&6,QSXW $&6*DWH $&6&RPSUHVVRU $&6(TXDOLVHU $&62XWSXW &RQWURO&KDQQHO *UDSKLF(4*(4 8.0: MIX FEATURES 0XWH*URXSV 9&$*URXSV &RS\$QG3DVWH $XGLR,QWHUURJDWH 6ROR6\VWHP 0RQLWRULQJ &/5$/7&/5 9.0: SHOWS, CUELISTS, AND SNAPSHOTS 6KRZV &XHOLVW6QDSVKRWV 9.2.1: Edit Cue 10.0: LEXICON FX 5HYHUEV 5HYHUE3DUDPHWHUV 'HOD\V 'HOD\3DUDPHWHUV 0LVF); 0LVF);3DUDPHWHUV 11.0: PREFERENCES, SYSTEM, SECURITY 3UHIHUHQFHV 6\VWHP6HWWLQJV 6HFXULW\6HWWLQJV $GG(GLW8VHU 3UR¿OHV 6RIWZDUH8SGDWHV 5HVHW&RQVROH 12.0: OSCILLATOR APPENDIX 01: NO SOUND? $7URXEOH6KRRWLQJ*XLGH For clarity, this manual uses section references rather than page numbers. In some instances, one section reference may extend to several pages. CONTENTS 1.0: INTRODUCTION User Manual INTRODUCTION TO IMPACT The Soundcraft Si impact is a compact digital console optimised for live sound. It s powerful, yet simple to use, with intuitive controls, consistent colour-coded feedbac , and rapid parameter access. Features such as analogue, MADI, and USB I/O as standard, motorised faders, the Assignable Channel Strip (ACS), tOTEM fast mix access buttons, and VCAs, mean that any aspect of the performance can be served to the surface in an instant, with analogue-style control of its comprehensive feature-set. assignment of all Mix, Matrix, and F Send busses - create mixes quic ly and easily. Recallable B mic inputs with loc ing connectors and phantom power indicators. 24 LR and 8 Combo LR/Jac inputs, 16 LR analogue line outs, AES out, ordcloc , Headphones out. Hi net Ethernet Port and compatibility (Venue Events, Soundweb Control). 6KLSVZLWK[0$',86%,2FDUG¿WWHGSOXV[ RSWLRQFDUGVORWIXOO\FRPSDWLEOHZLWKDOO ViSi Connect series cards and Soundcraft Stageboxes. 8SWRFKDQQHOVWRPL[0RQRLQSXWFKDQQHOV 4 Stereo input channels). Soundcraft 4-band British E on all inputs and outputs. Assignable Control Strip (ACS) for instant access to all channel parameters. Colour touch screen interface for patching, routing, show set-up and security settings. Comprehensive Show, Snapshot, and Cuelist system with USB storage. 4 user-assignable fader layers. 4 Matrix mixes that can operate in mono or stereo. 14 Aux-style Mix Busses, 6 of which can operate in mono or stereo. Soundcraft Dynamics available on all channels. 8 Mute roups. Delay available on all channels. 8 VCA roups BSS raphic E on all Mix, Matrix, and Main Bus Masters. uad Lexicon Fader low F processors. illumination on all faders for at-a-glance display of current fader function. D.O. .S. (Direct Out ain Stabiliser) technology. tOTEM (The One Touch Easy Mix) system for fast fader Comprehensive input, output, gain reduction and status metering/monitoring. Independent Main Mono/Centre and Left/Right busses. Ultra hard-wearing, polycarbonate-covered control surface resists wear and tear. 12V Lamp Connector. 1.0: ELCOME TO IMPACT 1.1: SAFETY User Manual INTRODUCTION SAFET SAFETY NOTICES )RU\RXURZQVDIHW\DQGWRDYRLGLQYDOLGDWLRQRIWKHZDUUDQW\ SOHDVHUHDGWKLVVHFWLRQFDUHIXOO\ Im t nt S m ls C ti ns Alerts the user to the presence of important operating and maintenance (servicing) instructions in the literature accompanying the appliance. N tes Contain important information and useful tips on the operation of your equipment. :DUQLQJV Alerts the user to the presence of uninsulated dangerous voltage within the product s HQFORVXUHWKDWPD\EHRIVLXI¿HFLHQWPDJQLWXGH to constitute a ris of electric shoc to persons. +HDGSKRQHV6DIHW\:DUQLQJ Contains important information and useful tips on heaphone outputs and monitoring levels. THIS UNIT MUST BE EARTHED Under no circumstances should the mains earth be disconnected from the mains lead. The wires in the mains lead are coloured in accordance with the following code: Earth: reen and ellow ( reen/ ellow - US) Neutral: Blue ( hite - US) Live (Hot): Brown (Blac - US) As the colours of the wires in the mains lead may not correspond with the coloured mar ings identifying the terminals in your plug, proceed as follows: The wire which is coloured reen and ellow must be connected to the terminal in the plug which is mar ed with the letter E or by the earth symbol. The wire which is coloured Blue must be connected to the terminal in the plug which is mar ed with the letter N. The wire which is coloured Brown must be connected to the terminal in the plug which is mar ed with the letter L. Ensure that these colour codings are followed carefully in the event of the plug being changed. This unit is capable of operating over a range of mains voltages as mar ed on the rear panel. 7KHLQWHUQDOSRZHUVXSSO\XQLWFRQWDLQVQRXVHUVHUYLFHDEOHSDUWV5HIHUDOOVHUYLFLQJWRDTXDOL¿HGVHUYLFH HQJLQHHUWKURXJKWKHDSSURSULDWH6RXQGFUDIWGHDOHU 1.1: INTRODUCTION SAFET User Manual INTRODUCTION 1.1: SAFETY SAFET :$51,1*6 5HDG these instructions. ee these instructions. +HHG all warnings. F ll all instructions. Cle n the apparatus only with a dry cloth. D n t install near any heat sources such as radiators, heat resistors, stoves, or other apparatus LQFOXGLQJDPSOL¿HUVWKDWSURGXFHKHDW D n t bloc any ventilation openings. Install in accordance with the manufacturer s instructions. D n t use this apparatus near water. D n t defeat the safety purpose of the polari ed or grounding type plug. A polari ed plug has two blades with one wider than the other. A grounding type plug has two blades and a third grounding prong. The wide blade or the third prong are provided for your safety. hen the provided plug does not ¿WLQWR\RXURXWOHWFRQVXOWDQHOHFWULFLDQIRUUHSODFHPHQWRIWKHREVROHWHRXWOHW P te t the power cord from being wal ed on or pinched particularly at plugs, convenience receptacles and the point where they exit from the apparatus. Onl XVHDWWDFKPHQWVDFFHVVRULHVVSHFL¿HGE\WKHPDQXIDFWXUHU Un l this apparatus during lightning storms or when unused for long periods of time. Re e DOOVHUYLFLQJWRTXDOL¿HGVHUYLFHSHUVRQQHO6HUYLFLQJLVUHTXLUHGZKHQWKHDSSDUDWXVKDVEHHQ damaged in any way such as power-supply cord or plug is damaged, liquid has been spilled or objects have fallen into the apparatus, the apparatus has been exposed to rain or moisture, does not operate normally, or has been dropped. UseRQO\ZLWKWKHFDUWVWDQGWULSRGEUDFNHWRUWDEOHVSHFL¿HGE\WKHPDQXIDFWXUHURUVROGZLWKWKH apparatus. hen the cart is used, use caution when moving the cart/apparatus combination to avoid injury from tip-over. N QDNHGÀDPHVRXUFHVVXFKDVOLJKWHGFDQGOHVRUFLJDUHWWHVHWFVKRXOGEHSODFHGRQWKH apparatus. N se se i e le ts5HIHUDOOVHUYLFLQJWRDTXDOL¿HGVHUYLFHHQJLQHHUWKURXJKWKH appropriate Soundcraft dealer. ,WLVUHFRPPHQGHGWKDWDOOPDLQWHQDQFHDQGVHUYLFHRQWKHSURGXFWVKRXOGEH FDUULHGRXWE\6RXQGFUDIWRULWVDXWKRULVHGDJHQWV6RXQGFUDIWFDQQRWDFFHSWDQ\ OLDELOLW\ZKDWVRHYHUIRUDQ\ORVVRUGDPDJHFDXVHGE\VHUYLFHPDLQWHQDQFHRUUHSDLU E\XQDXWKRULVHGSHUVRQQHO :$51,1*7RUHGXFHWKHULVNRI¿UHRUHOHFWULFVKRFNGRQRWH[SRVHWKLV DSSDUDWXVWRUDLQRUPRLVWXUH'RQRWH[SRVHWKHDSSDUDWXVWRGULSSLQJRUVSODVKLQJ DQGGRQRWSODFHREMHFWV¿OOHGZLWKOLTXLGVVXFKDVYDVHVRQWKHDSSDUDWXV1R QDNHGÀDPHVRXUFHVVXFKDVOLJKWHGFDQGOHVVKRXOGEHSODFHGRQWKHDSSDUDWXV 9HQWLODWLRQVKRXOGQRWEHLPSHGHGE\FRYHULQJWKHYHQWLODWLRQRSHQLQJVZLWKLWHPV s s ne s e s, t le l t s, t ins et . 1.1: INTRODUCTION SAFET User Manual INTRODUCTION 1.1: SAFETY SAFET :$51,1*6 $'9,&()257+26(:+2386+7+(%281'$5,(6 Although your new console will not output any sound until you feed it signals, it has the FDSDELOLW\WRSURGXFHVRXQGVZKLFKZKHQPRQLWRUHGWKURXJKDQDPSOL¿HURUKHDGSKRQHV can damage hearing over time. Please ta e care when wor ing with your audio if you are manipulating controls which you don t understand (which we all do when we are learning), ma e sure your monitors are turned down. Remember that your ears are the most important tool of your trade, loo after them, and they will loo after you. 0RVWLPSRUWDQWO\²GRQ¶WEHDIUDLGWRH[SHULPHQWWR¿QGRXWKRZHDFKSDUDPHWHUDIIHFWVWKHVRXQG² this will extend your creativity and help. NOTE: This equipment has been tested and found to comply with the limits for a Class A digital device, pursuant to Part 15 of the FCC Rules. These limits are designed to provide reasonable protection against harmful interference when the equipment is operated in a commercial environment. This equipment generates, uses and can radiate radio frequency energy and, if not installed and used in accordance with the instruction manual, may cause harmful interference to radio communications. Operation of this equipment in a residential area is li ely to cause harmful interference in which case the user will be required to correct the interference at his own expense. This Class A digital apparatus meets the requirements of the Canadian Interference-Causing Equipment Regulations. Cet appareil num rique de la Classe A respecte toutes les exigences du R glement sur le mat riel brouilleur du Canada. NOTE: The pac aging, in which your console arrived, forms part of the product and must be retained for future use. 1.1: INTRODUCTION SAFET 1.2: WARRANTY User Manual INTRODUCTION ARRANT :$55$17< 1 Soundcraft is a trading division of Harman International Industries Ltd. (QG8VHUPHDQVWKHSHUVRQZKR¿UVWSXWVWKHHTXLSPHQWLQWRUHJXODURSHUDWLRQ Dealer means the person other than Soundcraft (if any) from whom the End User purchased the Equipment, provided such a person is authorised for this purpose by Soundcraft or its accredited Distributor. Equipment means the equipment supplied with this manual. 2 If within the period of twelve months from the date of delivery of the Equipment to the End User it shall prove defective by reason only of faulty materials and/or wor manship to such an extent that the effectiveness and/or usability thereof is materially affected the Equipment or the defective component should be returned to the Dealer or to Soundcraft and subject to the following conditions the Dealer or Soundcraft will repair or replace the defective components. Any components replaced will become the property of Soundcraft. $Q\(TXLSPHQWRUFRPSRQHQWUHWXUQHGZLOOEHDWWKHULVNRIWKH(QG8VHUZKLOVWLQWUDQVLWERWKWRDQGIURPWKH Dealer or Soundcraft) and postage must be prepaid. 4 This warranty shall only be available if: a) The Equipment has been properly installed in accordance with instructions contained in Soundcraft s manual. E7KH(QG8VHUKDVQRWL¿HG6RXQGFUDIWRUWKH'HDOHUZLWKLQGD\VRIWKHGHIHFWDSSHDULQJDQG c) No persons other than authorised representatives of Soundcraft or the Dealer have effected any replacement RISDUWVPDLQWHQDQFHDGMXVWPHQWVRUUHSDLUVWRWKH(TXLSPHQWDQG d) The End User has used the Equipment only for such purposes as Soundcraft recommends, with only such RSHUDWLQJVXSSOLHVDVPHHW6RXQGFUDIW¶VVSHFL¿FDWLRQVDQGRWKHUZLVHLQDOOUHVSHFWVLQDFFRUGDQFH6RXQGFUDIW¶V recommendations. 5 Defects arising as a result of the following are not covered by this arranty: faulty or negligent handling, chemLFDORUHOHFWURFKHPLFDORUHOHFWULFDOLQÀXHQFHVDFFLGHQWDOGDPDJH$FWVRI*RGQHJOHFWGH¿FLHQF\LQHOHFWULFDO power, air-conditioning or humidity control. 7KHEHQH¿WRIWKLV:DUUDQW\PD\QRWEHDVVLJQHGE\WKH(QG8VHU 7. End Users who are consumers should note their rights under this arranty are in addition to and do not affect any other rights to which they may be entitled against the seller of the Equipment. 1.2: INTRODUCTION ARRANT 1.3: SPECIFICATIONS User Manual INTRODUCTION SPECIFICATIONS Si IMPACT TYPICAL SPECIFICATIONS F e en Res nse - Mic / Line In to any Output: +/-1.5dB, 20H -20 H T.H.D. - Mic Sensitivity -30dBu 0.01 @ 1 H N ise - Residual noise -86dBu - Mic Input E.I.N. 22H - 22 H , Unweighted. (max gain) G%XȍVRXUFH - Mix noise, masters at unity -86dBu - 1 input to mix at unity gain -84dBu - CMRR mic @1KH (max gain) -80dBu C sst l 1 H - Channel ON attenuation 120dB - Channel Fader attenuation 120dB - Mic Mic -100dB @ 1KH , -85dB@10 H - Line Line -100dB @ 1KH , -85dB@10 H In t G in - Mic ain -5dB 58dB integrated pad design, 1dB steps - Line Trim -10dB - +16dB G te - Threshold -60dBfs - -6dBfs - Depth -60dB - -3dB - Attac 0.1ms 200ms - Release 20ms 500ms - Side-chain HPF 22H 2.5 H - Side-chain LPF 160H 20 H C m ess - Threshold -52dBfs - -6dBfs - Ratio 1:1 20:1 - Attac 0.1ms 200ms - Release 5ms 900ms - Ma eup ain 0dB 24dB E - All Bands 22H 20 H , +/-15dB 6-0.3 - Shelf (HF) 800H 20 H , +/-15dB - Shelf (LF) 20H 500H , +/-15dB - HPF 40H 1 H Del - User adjustable delay 1sample 500ms GE - 31H 16KH 1/3 octave Di it l I O - External ord Cloc In range 48 H +/-7H (internal systems), +/-3H with stageboxes. - ord cloc out jitter +/- 7ns - Analogue out for 0dBfs +21.5dBu - Converter resolution 24-bit '63UHVROXWLRQELWÀRDWLQJSRLQW L ten - Mic In to Line Out 0.8 ms - Analogue in to AES out 0.6 ms - Stagebox Mic In to Stagebox 0.9mS In t & O t t Le els - Mic Input +22dBu max - Line Input +22dBu max - Mix Output +21.5dBu max +HDGSKRQHV#ȍP:UHFRPPHQGHG LPSHGDQFHWRȍ In t & O t t Im e n es 0LF,QSXWNȍ /LQH,QSXWNȍ 2XWSXWVȍEDODQFHGȍXQEDODQFHG :RUG&ORFNXVHGDV2XWSXWȍ :RUG&ORFNXVHGDV,QSXW.ȍ $(62XWSXWȍ USB - Max current 500mA Power - Consumption (typical) 130w - AC Input voltage range 88-264VAC auto sensing - AC Frequency range 47-63H Operating Conditions - Operating Temperature Range 5 C to 45 C - Humidity 0 -90 , non condensing Ta 40 C (104 F) - Storage Temperature Range -20 C to 60 C (-4 F to 140 F) E & OE. 6RXQGFUDIWUHVHUYHVWKHULJKWWRFKDQJHVSHFL¿FDWLRQVZLWKRXWQRWLFH 1.3: INTRODUCTION SPECIFICATIONS 2.0: GETTING STARTED User Manual STARTIN OFF - AN INTRODUCTION TO THIS MANUAL Anyone with minimal audio experience should be able to operate the Si Impact console without reading too much of this manual, though we do recommend you ta e the time to go through it. An excellent place to start would be the feature list on the introductory page (chapter reference 1.0), which will familiarise you with all of the main possibilities, facilities, and functions. ® User Guide For Soundcraft Si Impact Console PDF If you re reading the PDF version of the manual, you can use the thumbnail view and lin s from the Contents page to navigate quic ly. ® 2.0: ETTIN STARTED 2.1: OVERVIEW User Manual ETTIN STARTED OVERVIE 7KH6L,PSDFWFRQVROHRIIHUVDQLQFUHGLEOHDPRXQWRIÀH[LELOLW\DQGHDVHRIXVHIRULWVUHODWLYHO\ compact si e. To achieve this, there are several assignable features it is advisable you understand before using the console for performance. Assi n ilit Assignability means that one button can assign a function to many other buttons. For example, pressing a Control Channel SEL button assigns that channel s entire channel strip and associated controls to the Assignable Channel Strip (ACS) section. In this way, the ACS can ta e the place of many sets of repeated controls. In addition, the console has 14 Mix busses, four stereo Matrix busses, and four internal F send busses, most conveniently accessed with the tOTEM controls, which assign their respective bus mixes to the console faders. For full detail on the Si Impact s assignable controls, please see section 3. Also note that the MI 1-14 Busses and Bus masters serve the same function as Auxiliary Mix busses and masters. P si l I O, DSP C nnels, C nt l C nnels Because the console has inputs and outputs that can be patched anywhere, and DSP channels that can be controlled by any Control Channel, these elements are considered separate in this manual. Se ti n 5 deals with the console s patching system, which connects physical inputs and outputs to DSP channels. Se ti n 6 deals with DSP channels (Input Channels, Mix busses and masters, DQGVRRQURXWLQJDQGFKDQQHOW\SHVSHFL¿FVHWWLQJVSe ti n 7 deals with the assignable control channels (console surface controls) and the channel processing elements that they control. Se ti n 8 (Mix Features) deals with console performance functions that sit outside the assignable channel structure, such as Mute roups, VCA roups, Copy And Paste, the interrogation function, the Solo system, and so on. T S een The console Touch Screen has a simple, one-layer menu structure. The main menu is the default screen and can always be accessed by pressing the MENU button next to it. The Main Menu options are clearly labelled and lead to simple menus or special functionality, such as a ERT eyboard for text input etc. Please see Chapter 4 for more detail on the Main Menu options. The individual Menus themselves are dealt with in the relevant chapter references (For example, the INPUTS menu is dealt with in the Input Channels reference). P e Use the power switch on the rear of the console to turn the console on and off. To boot into software update mode, hold down the recessed Boot Loader switch when turning on. 2.1: ETTIN STARTED OVERVIE 2.2: PARTS OF THE CONSOLE User Manual ETTIN STARTED PARTS OF THE CONSOLE 2.2: ETTIN STARTED PARTS OF THE CONSOLE 2.2: PARTS OF THE CONSOLE User Manual ETTIN STARTED PARTS OF THE CONSOLE 2.2: ETTIN STARTED PARTS OF THE CONSOLE 2.3: FADERGLOW User Manual ETTIN STARTED FADER LO Soundcraft Fader low is a unique feature that gives the user an additional level of status LQGLFDWLRQDQGFDQVLJQL¿FDQWO\UHGXFHRSHUDWLQJHUURUV Several different functions can be assigned to the console faders, so it can be easy to lose trac of which function is currently being controlled, especially when grabbing a fader in a hurry. The main principle of Fader low is to indicate the current fader function with colour, so more immediate recognition is possible. 6RXQGFUDIW)DGHU*ORZLV¿WWHGWRDOOFRQVROHIDGHUVWKDWFDQFKDQJHWKHLUIXQFWLRQ T e Si Im tF e Gl l s e: YELLOW: MI 1-14 PRE-FADE bus master or contribution. GREEN: MI 1-14 POST FADE bus master or contribution ORANGE: MATRI master or matrix contribution. CYAN: Stereo Input patched as an F return or contribution. MAGENTA: Stereo Input patched as a line source other than F . WHITE: Lin ed Mono Input Channel. RED: E ( raphic Equaliser). BLUE: VCA roup Master. 2.3: ETTIN STARTED FADER LO User Manual 3.0: ASSIGNABLE CONTROLS ASSI NABLE CONTROLS At the heart of the Si Impact is a group of assignable controls that ma e the console easier and faster to navigate and operate. Assignable controls wor by changing the function of sections of the console surface. In this way, a single control can do several jobs, depending on the mode the console is wor ing in. It is important that you understand the assignable controls on the console in order to use it effectively - especially the way in which the FADERS and tOTEM buttons together determine the functionality of the Control Channels and Faders. The main assignable controls on the console are: C nt l C nnels These are the vertical strips containing a Fader, Encoder, Status/Meter screen, plus the SOLO, SEL, and ON switches. They are assigned to control real input and output channels as well as E bands and bus Masters. A group of Control Channels ma es a Fader Layer. F e L e s Sele te it t e FADERS tt n Switch between whole layers of Control Channels. There are four DSP Control Channel Fader Layers and two E ( raphic E ) Fader Layers. Assi n le C nnel St i ACS Used to control nearly all parameters on the active channel. Press a Control Channel SEL button to focus the ACS. tOTEM The One Touch Easy Mix system used to assign Mix, Matrix, and F Send busses to the Control Channel Faders. 3.0: ASSI NABLE CONTROLS 3.1: FADER LAYERS User Manual ASSI NABLE CONTROLS FADER LA ERS The are four main Fader Layers on the Impact console, selected by the FADERS button group (A, B, C, and D) to the right of the Control Channels. The additional buttons in this group assign raphic E bands across the faders for convenient control. Each layer is made up of 24 Control Channels, plus the Left/Right and Mono/Centre main mix Control Channels. By default, Layers A and B are assigned to input channels, with the Stereo input channels on the right hand end of layer %/D\HU&LVDVVLJQHGWR0L[0DVWHUFKDQQHOVDQGWKH¿UVWIRXU&RQWURO&KDQQHOVRI/D\HU'DUHDVVLJQHGWRWKH0DWUL[ Master channels. 7KHVHDVVLJQPHQWVDUHXVHUFRQ¿JXUDEOHLQWKH)$'(56(7837RXFK6FUHHQPHQXVHHWKH&RQWURO&KDQQHO Assignment section 3.2.1). 3.1: ASSI NABLE CONTROLS FADER LA ERS User Manual ASSI NABLE CONTROLS 3.2: CONTROL CHANNELS CONTROL CHANNELS A Control Channel is an assignable Channel Strip for DSP channels, with Fader, indicators, plus ON, SOLO, and SEL buttons. The SEL button is used to focus the Assignable Channel Strip (ACS) on that channel. The DSP channel controlled by a Control Channel is determined by the current Fader Layer (FADERS button group) and assignment (FADER SETUP Touch Screen menu). For more information on the individual controls, see section 7.3. Control Channel assignment is dealt with in 3.2.1. 3.2: ASSI NABLE CONTROLS CONTROL CHANNELS User Manual CONTROL CHANNELS 3.2.1: CONTROL CHANNEL ASSIGNMENT ASSI NMENT Control Channel Assignment is accessed via the FADER SETUP button in the Touch Screen Main Menu. Select the Control channel using the Fader Layer and SEL buttons in the usual way - the current Fader Ban and Slot Number cannot be edited in the FADER SETUP menu. A DSP channel or VCA Master can be assigned to more than one Control channel, though you cannot assign more than one channel or VCA Master to a single Control Channel. F e B n Shows the currently selected Fader Layer. This parameter cannot be edited in the menu - use the FADER button group to switch Fader Layers. Sl t N m e Shows the currently selected Slot Number (Control Channel Number) in current Fader Layer. This parameter cannot be edited in the menu - use the Control Channel SEL buttons to choose a Slot/Control Channel Number. Assi n M n In ts Assign a Mono Input channel to the currently selected Control Channel. Touching the value field will bring up a scrollable list of available Mono Input Channel names. 3.2.1: ASSI NABLE CONTROLS CONTROL CHANNELS ASSI NMENT User Manual CONTROL CHANNELS 3.2.1: CONTROL CHANNEL ASSIGNMENT ASSI NMENT Assi n Ste e In ts Assign a Stereo Input channel to the currently selected Control Channel. Touching the value field will bring up a scrollable list of available Stereo Input Channel names. Assi n Mi es Assign a MI Master channel to the currently selected Control Channel. Touching the value field will bring up a scrollable list of available MIX Master Channel names. Assi n MTX Assign a Matrix Master Channel to the currently selected Control Channel. Touching the value field will bring up a scrollable list of available Matrix Master Channel names. Assi n CA Assign a VCA Master Channel to the currently selected Control Channel. Touching the value field will bring up a scrollable list of available VCA Masters 1 - 8. RESET LAYER Reset the currently selected Fader Layer to its default Control Channel Assignments. You will be asked to confirm this action as it will destroy any custom assignments on the current Fader Layer. 3.2.1: ASSI NABLE CONTROLS CONTROL CHANNELS ASSI NMENT User Manual CONTROL CHANNELS 3.2.1: CONTROL CHANNEL ASSIGNMENT ASSI NMENT INSERT BLAN Insert a blan Control Channel into the currently selected Control Channel Slot and shift the others to the left or right. Choosing INSERT BLANK >> (right), for example, will push all Control Channels to the right of the currently selected slot, one slot to the right. The rightmost control channel will be lost. You will be asked to confirm this action. SHIFT Shift the currently selected channel allocation to the left or the right, as long as there is an unassigned slot available. SHIFT>> and/or SHIFT<< will only be available when an adjacent unassigned Control Channel slot is available in the direction of the Shift. 3.2.1: ASSI NABLE CONTROLS CONTROL CHANNELS ASSI NMENT User SSIG C S 3.3: ASSIGNABLE CHANNEL STRIP anual CS pressin t e S Select utton on an a aila le S c annel ou assi n t at c annel s parameters to t e CS From t e CS ou can control all input d namics and output functions a aila le to t e selected c annel d ustin an CS control ill tri er t e Function Focus feature DQGWKHFRQVROH7RXFK6FUHHQZLOOUHÀHFWDQ\FKDQJHV\RXPDNHLQJUHDWHUGHWDLODV\RXPDNH t em ou cannot select S a Control C annel t at does not control a S c annel C for e ample For more information on t e CS controls and processin elements see section SSIG C S SSIG C S I User Manual ASSI NABLE CONTROLS 3.4: tOTEM tOTEM (FADER FOLLO ) tOTEM (The One Touch Easy Mix) buttons MI 1-14, MT 1-4, F 1-4, situated just below the ACS, ma e up the FADER FOLLO button group and allow rapid access to bus contributions from channels in any current Fader Layer. If your current fader layer is the default A layer (all input channels), then pressing the MI 1 tOTEM button will assign all channel faders to control the Mix 1 sends for those channels and the Mono control channel fader to control of the Mix 1 Master. This allows one-touch access to complete bus mixes. In addition, when a tOTEM button is pressed all existing solos will be cleared, the selected bus will be soloed, and the ACS will be assigned to the selected bus master channel. If a tOTEM button is selected that is not applicable to a channel type, then the fader will have no function (selecting a Matrix (MT ) bus contribution for an input channel, for example). 3.4: ASSI NABLE CONTROLS tOTEM (FADER FOLLO ) User Manual 4.0: TOUCH SCREEN TOUCH SCREEN The console colour Touch Screen can be used through direct touch, or in conjunction with the Scroll Encoder and MENU / APPL buttons. It provides access to System settings and preferences, Copy/Paste and cuelist / Show functionality, as well as settings for inputs, outputs monitoring, the solo system, plus a frequency response-type display of the 4-band E . MENU Access the Touch Screen Main Menu. En e 6FUROORUDGMXVWSDUDPHWHUVDQGVHOHFWYDOXH¿HOGV Turn the Encoder to navigate a menu; press the Encoder to select a value field for adjustment, then turn the encoder again to adjust the value field. APPLY Apply the set value, where applicable. The Apply button will illuminate white when required to confirm values. 4.0: TOUCH SCREEN 4.1: MAIN MENU User Manual TOUCH SCREEN MAIN MENU The Touch Screen Main Menu can be accessed at any time by pressing the MENU button next to the Touch Screen. From here you can navigate to any of the settings menus. SHOW Show File operations and global Isolate settings, console RESET CONFI function. New show, load, reset functions for show files. Isolate settings are used to isolate parameters from show recalls. See section 9.1 - Show Storage and recall - for more detail. The RESET CONFIG function forces the console to re-discover and reset the I/O configuration. COPY PASTE Used to copy and paste settings between channels. Press copy to copy to clipboard, then press and hold PASTE-HOLD and use the SEL buttons to Paste. See Reference 8.2 for more detail. SECURITY Console Admin settings and selective loc -out . See section 11.3 for more detail. 4.1: TOUCH SCREEN MAIN MENU 4.1: MAIN MENU User Manual TOUCH SCREEN MAIN MENU SYSTEM System information, Hi net and IP addressing, selective console reset functions, and the Event Log. Use the system menu to reset channels, busses, patching, and the whole console. See section 11.2 for more detail. PREFS Brightness settings and D.O. .S. system (Direct Out ain Stabiliser) On/Off. When enabled, D.O.G.S. Adjusts the direct output level from each channel inversely to any manual change of a mic gain control. See section 11.1 for more detail. FADER SETUP Assign DSP channels to Control Channel slots. Use FADER SETUP to create custom Fader Layers. See section 3.2.1 for more detail. INSERT Setup and patching of the four available insert sends and returns. See section 5 - Inputs & Outputs - For more information. Remember, an insert interrupts signal flow, so if an insert is assigned to a channel, the signal must have a return path. SOLO Solo system settings. Options include Highlight, Blend, and Solo Trim levels, as well as Solo In Place and Input Priority On/Off. See section 8.4 for more information. 4.1: TOUCH SCREEN MAIN MENU 4.1: MAIN MENU User Manual TOUCH SCREEN MAIN MENU OSC Settings and operations for the built in Oscillator. Routing, waveform, frequency, and output options. See section 13 for more detail. MONITOR Settings for the monitoring systems. Delay, patching, and Mono Check. See section 8.5 for more information. INPUTS & CA ,QSXWFKDQQHORU9&$0DVWHUVSHFL¿FVHWWLQJV The Menu will change depending on whether an Input channel or a VCA Master is selected. For INPUTS, the menu will show Naming, patching, Channel Isolate, Mix contribution routing, and so on. See section 6.1.1 for more information. For VCA, the Menu will show VCA Name. See section 8.7 for more information. OUTPUTS 2XWSXWFKDQQHOVSHFL¿FVHWWLQJV The menu will show Naming, patching, bus routing, and so on. See section 6.2.1 for more detail. E raphic representation of the E for the selected channel. Simply touch the EQ Touch Screen button to see the frequency response graphic - incorporates the HPF and 4-band EQ, but not the Graphic EQ. See section 7.2.4 for more on the ACS EQ section. 4.1: TOUCH SCREEN MAIN MENU User Manual 5.0: INPUTS & OUTPUTS INPUTS AND OUTPUTS The console has an assignable patching system for all inputs and outputs. In other words, any DSP Channel input or output can be assigned a physical input or output. At its simplest, this might PHDQWKDWWKHLQSXWWR&KDQQHOLVSDWFKHGWR0,&WKH¿UVWORFDOPLFOLQH;/5 soc et). 7KHFRQVROHGRHVKDYHDIDFWRU\GHIDXOWSDWFKLQJFRQ¿JXUDWLRQZKLFKLVXVHGZKHQHYHUWKHFRQVROH LVUHVHWWRLWVGHIDXOW6<67(0PHQX!5(6(73$7&+,1*RU5(6(7$// Additionally, the console has two ViSi compatible option card slots - one is preloaded with the 0$',86%LQRXWH[SDQVLRQFDUGWKHRWKHUKDVLQRXWH[SDQVLRQFDSDELOLW\7KH¿UVW XVHV',*,7$/,1',*,7$/287WKHVHFRQGXVHV',*,7$/,1',*,7$/287 %RWKFDQEHXVHGZLWKDZLGHUDQJHRI9L6L,2FDUGVRUD6RXQGFUDIW6WDJHER[ZLWKWKH MADI card). 5.0: INPUTS & OUTPUTS User Manual 5.1: PATCHING ,13876$1'2873876!3$7&+,1* :KHQSDWFKLQJDQLQSXWRURXWSXW\RXZLOOEHSUHVHQWHGZLWKDQ,2VHOHFWLRQVFUHHQ7KHFXUUHQW patch is shown with an orange tic over the relevant patch icon. Scroll left or right through the available options and select from the labelled patch icons. The system will RQO\VKRZRSWLRQFDUGVLIWKH\DUH¿WWHGRULIWKHVKRZZDV a RQDFRQVROHZLWKH[SDQVLRQFDUGV ¿WWHGRULIWKHVKRZZDVFUHDWHGZLWKRSWLRQFDUGVLQWKHRIÀLQHHGLWRU 7KHLQWHUQDO6WHUHR);UHWXUQVDUHVKRZQDVDYDLODEOHLQSXWVWKHVHDUHDVVLJQHGE\GHIDXOWWR6WHUHR Input channels 5-8. <RXFDQXVHFRQVROH6(/EXWWRQVWRFKRRVHRWKHUFKDQQHOVZKLOHWKHSDWFKLQJVFUHHQLVRSHQ Ste e C nnels 7KH,PSDFW¶VIRXUVWHUHRLQSXWVDUHSDWFKHGDVUHWXUQVIURPWKHLQWHUQDO/H[LFRQ);E\GHIDXOW:KHQ VWHUHRFKDQQHOVDUHSDWFKHGWKHV\VWHPZLOODOORZ\RXWRFKRRVHFRQVHFXWLYHRGGHYHQSDLUV,QDQ\ SDWFKLQJPHQXVWKHRGGQXPEHUHGFKDQQHOZLOOEHOLVWHGDVWKHFXUUHQWSDWFK)RUH[DPSOHLIWKH6WHUHR ,QSXWFKDQQHO67VKRZV/,1(,1LQWKH,QSXW3DWFKPHQXLWHPWKHQWKHOHIWFKDQQHOZLOOEHSDWFKHG WR/,1(,1DQGWKHULJKWFKDQQHOZLOOEHSDWFKHGWR/,1(,1,QWKHSDWFKLQJVFUHHQERWK/,1(,1DQG /,1(,1SDWFKLFRQVZLOOEHVKRZQZLWKWLFNV 127(6WHUHRFKDQQHOVFDQRQO\EHOLQHOHYHORUGLJLWDOLQSXWVRU);UHWXUQVQRWPLFURSKRQHLQSXWV A t C m lete 7RKDYHWKHV\VWHPDXWRPDWLFDOO\SDWFKPXOWLSOHFKDQQHOVSUHVVWKH$872&203/(7(EXWWRQWKLVZLOO increment the input by 1 and patch by 1 until a logical group of patches is complete. 7KLVORJLFDOµJURXS¶LGHDH[LVWVWRSUHYHQW$872&203/(7(RYHUZULWLQJWRRPDQ\FKDQQHOVDQGPL[ buses, or physical inputs and outputs. The auto complete boundaries are nominally grouped in eights (e.g. PLFLQSXWVPLFLQSXWVLQSXWFKDQQHOVLQSXWFKDQQHOV +RZHYHU$XWR&RPSOHWHJURXSVPD\EHVPDOOHULIWKHUHDUHIHZHUWKDQHLJKWFKDQQHOVDYDLODEOHLQWKDW W\SH)RUH[DPSOHLI\RXVWDUW0L[%XVSDWFKHGWR/LQH2XWWKHQSUHVV$872&203/(7(WKH SURFHVVZLOOVWRSDW0L[%XVWR/LQH2XW+RZHYHULI\RXVWDUWHGZLWK0L[%XVWR/LQH2XWWKHQ SUHVV$872&203/(7(WKHSURFHVVZLOOVWRSDW0L[%XVWR/LQH2XW ,138762873876!3$7&+,1* 5.1: PATCHING User Manual ,13876$1'2873876!3$7&+,1* Patching for the various inputs and outputs on the console can be accessed as follows: In t P t Source for an Input Channel. Input Channel selected INPUTS & VCA menu. Di e t O t t P t Direct output from an Input Channel. Input Channel selected INPUTS & VCA menu B s M ste O t t 7ZRDYDLODEOHRXWSXWVIURPHDFK0L[0DWUL[/HIW5LJKWRU0RQR0DVWHU&KDQQHO%XV0DVWHUVHOHFWHG! 2873876PHQX,Q/&53DQQLQJ0RGH0RQR0DVWHU&KDQQHOLVWKH&HQWUH&KDQQHO Os ill t P t Physical output for Oscillator signal. OSC menu. M nit P t 3K\VLFDOVWHUHRRXWSXWIRU0RQLWRUOLQHRXWSXW021,725PHQX Inse t P t ,QVHUWVDUHVHWXSLQWKH,16(57PHQX8VHWKH,16(57$66,*1PHQXWRDVVLJQLQVHUWSRLQWVWRFKDQQHOV DQGXVHWKH,16(576(783EXWWRQRQWKHVDPHVFUHHQWRDVVLJQLQVHUWVHQGVDQGUHWXUQVWRSK\VLFDORXWputs. Currently, digital inputs are available for insert return, not the console analogue inputs. NOTE: 3DWFKFKDQJHVDUHVWRUHGSHUFXH+DYLQJPDGHDQ\SDWFKFKDQJHVWKHFXHPXVWEHVWRUHGRU updated to ma e the change permanent. D.O.G.S. Di e t O t t G in St ilise S stem '2*6LVDWRROWRKHOSPDLQWDLQVWRUHGJDLQVWUXFWXUHEHWZHHQFKDQQHOLQSXWDQGGLUHFWRXWSXW when multiple devices are sharing a single source. In other words, it prevents Direct Output levels IURPFKDQJLQJZKHQD0LF*DLQLVFKDQJHGVRDQ\IHHGVWDNHQIURPWKHFRQVROHUHPDLQVWDEOH :KHQHQDEOHG'2*6DGMXVWVWKHGLUHFWRXWSXWOHYHOIURPHDFKFKDQQHOLQYHUVHO\WRDQ\PDQXDO FKDQJHRIDPLFJDLQFRQWURODFURVVDFKDQJHRIG%RQWKDWFKDQQHO <RXFDQHQDEOHRUGLVDEOH'2*6LQWKH3UHIHUHQFHV0HQXYLD35()66HHVHFWLRQ ,138762873876!3$7&+,1* User Manual 5.1.1: SOUNDWEB CONTROL ,13876$1'2873876!3$7&+,1*!6281':(% 7KHFRQVROHFDQFRQWURO%666RXQGZHE/RQGRQGHYLFHV¶SUHDPSFRQWUROVYLD +DUPDQ¶V+L4QHWSURWRFRO:KHQDGLJLWDODXGLRWUDQVSRUWFDUG'DQWH%/8/LQN&REUDQHWHWFLV LQVWDOOHGDQG\RXU6LFRQVROHLVFRQQHFWHGWRDQHWZRUNZLWK6RXQGZHE/RQGRQGHYLFHVYLD WKH+L4QHWSRUWRQWKHEDFNRIWKHFRQVROH\RXFDQQRZEULQJXSWKH6281':(%/21'21 (;7(51$/35($03FRQWURO 6RXQGZHE([WHUQDO3UHDPS&RQWUROGHYLFHVHWXSLVVDYHGLQVKRZ¿OHVDQG0LF*DLQDQG9YDOXHVFDQ EHUHFDOOHGZLWKVQDSVKRWV6QDSVKRWUHFDOORIWKHVHYDOXHVFDQDOVREHGLVDEOHGZLWKWKH,62/$7(IHDWXUH Net Settin s 7KH¿UVWVWHSWRFRQ¿JXULQJ6RXQGZHE/RQGRQGHYLFHVLVVHWWLQJXSWKH,3VHWWLQJVLQWKH6<67(0PHQX RQ\RXU6LFRQVROH7KH6RXQGZHE/RQGRQGHYLFHDQGWKHFRQVROHPXVWEHRQWKHVDPHVXEQHWLQRUGHUWR FRPPXQLFDWH6HHFKDSWHUUHIHUHQFHIRUPRUHGHWDLO C nt l A ess 3UHVVDQGKROGDGLJLWDOLQSXWSDWFKLFRQWRDGG6RXQGZHE/RQGRQH[WHUQDOSUHDPSFRQWUROWRWKDWFKDQQHO 7KLVZLOOEULQJXSWKH6RXQGZHE/RQGRQ&RQWURO0HQXVHHEHORZ N te:6RXQGZHE/RQGRQSUHDPSVDUHFRQWUROOHGLQG%LQFUHPHQWV7ULPFRQWUROFDQEHSHUIRUPHGLQG% increments. ,138762873876!3$7&+,1*!6281':(% User Manual 5.1.1: SOUNDWEB CONTROL ,13876$1'2873876!3$7&+,1*!6281':(% E te n l C nt l St t s. 'LVDEOH(QDEOH6RXQGZHE/RQGRQ3UHDPSFRQWUROIRUWKLVSDWFK If enabled, this will activate MIC GAIN* and 48V control from the console on that input channel for the associated Soundweb London device. If Disabled, it will deactivate the MIC GAIN and 48V control from the console, but will keep all the settings (Node Address, Input Card, Input Channel) and the last set gain value. N eA ess 6HWWKH6RXQGZHE/RQGRQGHYLFHV¶QRGHDGGUHVVWRVHQGDQGUHFHLYH+L4QHWYDOXHVWR\RXU6L console. The node address can be found and adjusted in London Architect and Audio Architect software platforms. It is important to note that the Node Address value in the Si console must be given in decimal format rather than hexadecimal format. In tC 6HOHFWDQLQSXWFDUGRQWKH6RXQGZHE/RQGRQGHYLFH There are four fixed entries: A, B, C, D. Choosing A, for example, will allow you to control one of the input channels on the Soundweb London’s A input card. In tC nnel Select an input channel on the selected card and device. ,138762873876!3$7&+,1*!6281':(% 5.2: DEFAULT PATCHING User Manual ,13876$1'2873876!'()$8/73$7&+,1* 7KHGHIDXOWSDWFKLQJIRUWKH6L,PSDFWFRQVROHDOVRVKRZVGHIDXOW)DGHU/D\HUVLQEUDFNHWV The console patching can be reset to default via the S STEM menu. VCA master assignments are also shown for convenience, though there is no audio patching for these. ;/50LF/LQH,Q!&KDQQHOV)DGHU/D\HU$VORWV ;/5-DFN&RPER0LF/LQH,Q!&KDQQHOV)DGHU/D\HU%VORWV 8QDVVLJQHGLQSXWV[!&KDQQHOV)DGHU/D\HU%VORWV 6WHUHR);5HWXUQV!6WHUHR,QSXW&KDQQHOV)DGHU/D\HU%VORWV 0,;(6!$QDORJXH/LQH2XW)DGHU/D\HU&VORWV );6(1'0$67(56!7R,QWHUQDO);)DGHU/D\HU&VORWV 07;!1RW$VVLJQHG)DGHU/D\HU'VORWV 0DLQ/5!$QDORJXH/LQH2XW0DVWHU/5)DGHU 0212!1RW$VVLJQHG02126(/)DGHU 9&$*URXS0DVWHUV!)DGHU/D\HU&VORWV ,138762873876!'()$8/73$7&+,1* 5.3: ViSi CONNECT User Manual INPUTS AND OUTPUTS ViSi CONNECT 7KHFRQVROHKDVWZR9L6L&211(&7FRPSDWLEOHRSWLRQFDUGVORWVRQHZLWKLQRXWH[SDQVLRQFDSDELOLW\',*,7$/,1',*,7$/287DQGWKHRWKHUZLWKLQRXW',*,7$/ ,1',*,7$/2877KH¿UVWLVSUHORDGHGZLWKWKH0$',86%FDUGZKLFKDOORZVERWK 6RXQGFUDIW6WDJHER[HVDQG86%HTXLSSHGFRPSXWHUVGHYLFHVWREHFRQQHFWHG7KHVHFRQGVORW LVDYDLODEOHIRUXVHZLWKDZLGHUDQJHRI9L6L,2FDUGV&XUUHQWO\DYDLODEOH9L6LPRGXOHVDUHVKRZQ 0RUHGHWDLOHGLQVWUXFWLRQVIRUWKHLQVWDOOHG0$',86%FDUGDUHGHWDLOHGLQ 7KH9L6L&RQQHFW,2LVSDWFKHGLQWKHVDPHZD\DVWKHQRUPDOV\VWHP,2YLDWKH,138769&$ 287387626&,16(57DQG021,725PHQXVGHSHQGLQJRQZKDWW\SHRIVRXUFHRUGHVWLQDWLRQ \RXDUHSDWFKLQJ7KHRSWLRQFDUGLQSXWVDUHODEHOOHG',*,7$/,1FDUG',*,7$/,1 FDUG7KHRSWLRQFDUGRXWSXWVDUHODEHOOHG',*,7$/287FDUGDQG',*,7$/287 FDUG See the n a i i n LQVWDOODWLRQDQGFRQ¿JXUDWLRQ i n a s i for detailed instructions on card ,138762873876!9L6L&211(&7 User Manual 5.3.1: ViSI CONNECT CARDS ,13876$1'2873876!9L6L&211(&7!&$5'6 Single Port CAT5 MADI Dual Port CAT5 MADI (redundant lin ) Dual Port Multi-Mode SC Optical MADI (redundant lin ) $(6;/5FKLQFKRXWRQ;/5V $(6'7\SHFKLQFKRXWZD\'68%FRQQHFWRU 0XOWL'LJLWDO&DUGLQRXW)LUH:LUHIRU0DF86%RU)LUH:LUHIRU3&SOXVLQRXW$'$7RSWLFDO 'DQWH[LQWHUIDFHWR'DQWHGLJLWDODXGLRQHWZRUN 5LHGHO5RFN1HW ,138762873876!9L6L&211(&7!&$5'6 User Manual 5.3.1: ViSI CONNECT CARDS ,13876$1'2873876!9L6L&211(&7!&$5'6 %/8/LQN[LQWHUIDFHWR6RXQGZHE/RQGRQGLJLWDODXGLREXV Aviom A-Net (16 output channels, CAT5 - Pro-16 head) &REUD1HW8SWRLQDQGRXW 0$',86%LQRXW0$',LQRXW86%25LQRXW0$',86%RXWRQO\ &RQQHFW6RXQGFUDIW6WDJHER[SOXVD3&RU0DF6HHVHFWLRQIRUPRUHGHWDLO ,138762873876!9L6L&211(&7!&$5'6 User Manual 5.3.2: STAGEBOXES ,13876$1'2873876!9L6L&211(&7!67$*(%2;(6 8VLQJWKH¿WWHG0$',86%FDUGWKH6L,PSDFWFDQEHFRQQHFWHGWR$YDULHW\RIDGGLWLRQDO,2 LQFOXGLQJWKH6RXQGFUDIW6WDJHER[HV S n t Mini St e 7ZRYDULDWLRQVRIDVPDOOHU6WDJHER[IRUJHQHUDOXVHZKHQPRGXODU,2LVQRWUHTXLUHG 7KH0LQL6WDJHER[8SURYLGHVDQDORJXHLQSXWVDQGDQDORJXHOLQHRXWSXWVZLWKSDLUVRI$(6 RXWSXWVSURYLGLQJDWRWDO,2FDSDFLW\RILQSXWVDQGRXWSXWVZLWKWKH0LQL6WDJHER[8PRGHO SURYLGLQJDQDORJXHLQSXWVDQGOLQHRXWSXWVPDNLQJD[PDWUL[7KH\FRQQHFWWRDQ\RIWKH 6RXQGFUDIW6L6HULHVDQG9L6HULHVFRQVROHVYLDD0$',FDUG¿WWHGWRWKHRSWLRQFDUGVORW S n tC m t St e $KLJKGHQVLW\RI,2FRQQHFWLRQVLQRQO\8RIUDFNVSDFH7KHPRGXODUXQLWLVIXOO\FRQ¿JXUDEOHEXWLV RIIHUHGZLWKDVWDQGDUGFRQ¿JXUDWLRQRIPLFOLQHLQSXWVOLQHRXWSXWVFKDQQHOVRI$(6(%8RXWSXWV DQGH[SDQVLRQVORWVIRUVWDQGDUG6WXGHU'P,2FDUGV7KH'PLVWKH,2DUFKLWHFWXUHIRU6WXGHUDV ZHOODV6RXQGFUDIWGLJLWDOPL[LQJV\VWHPVDQGDOORZVFRQQHFWLRQWRPRVWSRSXODUGLJLWDOIRUPDWVLQFOXGLQJ &REUD1HW$9,20$1HW(WKHUVRXQG$'$7DQG5RFN1HW$0$',UHFRUGLQJLQWHUIDFHFDQDOVREH ¿WWHGWRWKHH[SDQVLRQVORWV ,138762873876!9L6L&211(&7!67$*(%2;(6 User Manual 5.4: MADI-USB CARD ,13876$1'2873876!0$',86%&$5' The Soundcraft MADI-USB Combo card offers digital audio connection between an Si series console and Apple Mac or PC with a USB port, as well as any of the Soundcraft range RI6WDJHER[HVYLD6RXQGFUDIW¶VSURSULHWDU\&DW0$',FRQQHFWLRQ $XGLRFDSDELOLW\DFURVVWKH86%OLQNLVFKDQQHOVLQDQGFKDQQHOVRXWDW.+]VZLWFKDEOH EHWZHHQGLJLWDORXWSXWFKDQQHOVDQG7KH&DW0$',SRUWFDQEHXVHGVLPXOWDQHRXVO\ ZLWKXSWRLQSXWVDQGRXWSXWV'LJLWDORXWSXWFKDQQHOV+RZHYHUPRUH0$',LQSXWVDUH SRVVLEOHDWWKHH[SHQVHRIWKH86%LQSXWVZKLFKZRXOGJLYH0$',LQSXWV0$',RXWSXWVDQG 86%RXWSXWV1286%LQSXWV NOTE: B De lt, t e Si Im t is set t n le 32 USB nnels in n t nnels 33 64 , l s 32 MADI nnels in n 64 MADI nnels t nnels 1 64 . I UHTXLUHDGLIIHUHQWFRQ¿JXUDWLRQ\RXPXVWFKDQJHWKH',36ZLWFKVHWWLQJVRQWKHFDUGLWVHOI Connection and setup of the card to a PC is made simple with the use of the Soundcraft GLJLWDODXGLRGULYHUDQGDVVRFLDWHGFRQWUROSDQHO86%FRQQHFWLRQWRD0DFUHTXLUHVQRH[WUD software or drivers. USB C le The USB port on the MADI-USB combo card is the B type connector. USB host devices normally use the rectangular A type connector. As such, a A type to B W\SH¶86%FDEOHLVUHTXLUHG ,138762873876!0$',86%&$5' 5.4.1: MADI-USB SET-UP User Manual ,13876$1'2873876!0$',86%&$5'!6(783 ',36ZLWFKHV&DUG&RQ¿JXUDWLRQ ',3VZLWFKHVRQWKHFDUGSURYLGHH[WUDÀH[LELOLW\GHSHQGLQJRQWKH application. 7KHVWDQGDUGIDFWRU\FRQ¿JXUDWLRQLVDVIROORZV DIP 1 OFF: Master (Internal) Synchronisation ',32186%2XWFKDQQHOV ',32))',32186%,QFKDQQHOV0$',,Q &KDQQHOV 7KLVDOORZVIRU86%LQSXWVDQGRXWSXWVIRU3&DQG0DFUHFRUGLQJ DQGSOD\EDFNSOXV0$',LQSXWVDQG0$',RXWSXWVIRUFRQQHFWLRQWRD6RXQGFUDIW6WDJHER[IRUH[DPSOH DIP S it 1: S n M ste Sl e 7KLVDOWHUVWKHV\QFLQJLQWHUDFWLRQEHWZHHQWKH0$',86%&RPERFDUGDQGWKHPL[HU$VVWDQGDUGWKH FDUGVKRXOGEHVHWWRV\QFWRWKHPL[HUDQGVRVZLWFKVKRXOGEHVHW2))7RFRQQHFWWZRFRQVROHV WRJHWKHUXVLQJWZR0$',86%&RPERFDUGVIRUDPDVWHUVODYHW\SHRSHUDWLRQWKHFDUGZLWKLQWKHPDVWHU FRQVROHVKRXOGEHVHWWRV\QFWRWKH0L[HUVZLWFK2))DQGWKHVODYHFRQVROHFDUGVHWWRV\QFWRWKH Card (Switch 1 ON). The consoles will then need to be set to INTernal and OPTion cloc ing respectively. DIP S it 2: USB O t R n e This determines what channels (console output paths) the USB is sent out from on the USB portion of the RSWLRQFDUG2))LVFKDQQHOV21GHIDXOWLVFKDQQHOV DIP S it es 3 & 4: USB MADI In R n e Together these switches determine the input range and positions of the MADI and USB streams. ou can also set the card to 64 channels of MADI in using these switches. 2))2)),QSXW&KDQQHOV0$',QR86%LQ 2))21GHIDXOW,QSXW&KDQQHOV86%,QSXW&KDQQHOV0$', 212)),QSXW&KDQQHOV86%,QSXW&KDQQHOV0$', 2121,QSXW&KDQQHOV0$',QR86%LQ 5.4.1: INPUTS & OUTPUTS MADI-USB SETUP User Manual 5.4.2: USB PC DRIVER ,13876$1'2873876!0$',86%&$5'!3&'5,9(5 To use the MADI-USB Combo Card on PCs additional drivers are necessary. Soundcraft s MADI-USB Combo card audio drivers can be found on the Soundcraft website (www.soundcraft. com). The install pac age includes DM and ASIO drivers for low-latency operation with a control SDQHOWRFRQ¿JXUHGULYHUVHWWLQJVIRUEHVWSHUIRUPDQFH<RXGRQRWQHHGDGGLWLRQDOGULYHUVIRU0DF Before you install the PC drivers, insert the MADI-USB Combo Card into the console, connect the PC to the MADI-USB Combo card and boot the console. Once the drivers are installed, shortcuts for the control panel are available on the des top or under DOOSURJUDPV+DUPDQ3UR6RXQGFUDIW0XOWLFKDQQHO86%$XGLR hen the card is connected to the computer, tas -bar icons will indicate a device has been detected and clic ing the icon will open the appropriate control panel. hen the drivers are installed onto your PC, you will need to restart your machine for the install process to be complete. The Soundcraft Audio Driver settings can be found in the Soundcraft USB Control Panel. ithin this menu, WKHUHDUHRSWLRQVWRDGMXVWWKHVWUHDPLQJPRGHRIWKH0$',86%&RPER&DUGDQGWKHEXIIHUVL]HIURP VDPSOHVXSWRVDPSOHV 5HFRPPHQGHGEXIIHUVL]HZLOOYDU\GHSHQGLQJRQDSSOLFDWLRQ KRZHYHUKLJKHUEXIIHUVL]HVVKRXOGEHXVHGZKHQPRQLWRULQJ from the DA is not necessary. For most live recording DSSOLFDWLRQVDVWDQGDUGEXIIHUVL]HRIVDPSOHVLVHQRXJKWR ensure reliable operation and clean audio. The streaming mode settings modify the behaviour of the USB GULYHUIRUPD[LPXPRSWLPLVDWLRQZKHQVHWLQFRQMXQFWLRQZLWKWKH EXIIHUVL]HVHWWLQJ7KHEXIIHUVL]HPRGL¿HVWKHDPRXQWRIDXGLR data that is stored before being released into the application. A ODUJHEXIIHUVL]HUHVXOWVLQKLJKHUODWHQF\WR\RXU'$:$VPDOOEXIIHUVL]HUHGXFHVWKHODWHQF\WR\RXU'$: but can cause audio glitches and errors. 7RDGMXVWWKHEXIIHUVL]HRIWKH0$',86%&RPERFDUGERWKWKHVWUHDPLQJPRGHDQGWKHEXIIHUVL]H settings need to be set correctly corresponding to one another. )RUH[DPSOHE\VHWWLQJWKHVWUHDPLQJPRGHWRµ5HOLDEOH¶DQGWKHQWKHEXIIHUVL]HWRVDPSOHVWKH V\VWHPZLOOWKHQEHUXQQLQJDWVDPSOHVDQGWKHDXGLRZLOOEHFOHDQ)RUORZHUEXIIHUVL]HVWKH VWUHDPLQJPRGHVKRXOGEHVHWWRµ/RZ/DWHQF\¶DQGWKHEXIIHUVL]HWRVDPSOHV $PLVPDWFKEHWZHHQ6WUHDPLQJPRGHDQGEXIIHUVL]HFRXOGFDXVHDUWHIDFWVLQWKHDXGLRDQGFRXOGFRUUXSW WKHDXGLRUHFRUGLQJ$PLVPDWFKHGEXIIHUVHWWLQJVXFKDVVHWWLQJWKHVWUHDPLQJPRGHWRµ5HOLDEOH¶DQGWKH EXIIHUVL]HWRVDPSOHVZRXOGUHVXOWLQGLVWRUWHGDXGLRLQ\RXUUHFRUGLQJ 7RDYRLGDUWHIDFWVDQGWRSURGXFHDUHOLDEOHUHFRUGLQJ\RXVKRXOGVHOHFWWKHDSSURSULDWHEXIIHUVL]HIRUWKH streaming mode. hen a mismatch occurs, a dialogue will appear at the bottom of the control panel menu with instructions of where to go from the current setting to ma e a compatible setup. ,138762873876!9L6L&211(&7!0$',86% User Manual 6.0: CHANNELS & BUSSES CHANNELS & BUSSES The Si Impact console has several basic channels and busses. These are mono and stereo input channels, mono and stereo Mix Busses and MI output master channels (MI 1-14), internal F send mix busses (F 1-4), stereo Matrix mix busses and Matrix output master channels (MT 1-4), and the main Left, Right, and Mono/Centre mix master channels. 6.0: CHANNELS & BUSSES 6.1: INPUT CHANNELS User Manual CHANNELS & BUSSES INPUT CHANNELS Input channels receive either external input from instruments, microphones, and so on, or they receive input from the internal Lexicon F units (F Return - Stereo Input Channels 1-4). Input channels can be mono (64 available: CH 01 - CH 64), stereo (4 available: ST 1 - ST 4 - F Retunrs by default), or mono-lin ed (assigned in odd/even stereo pairs of mono Input Channels), and can be patched to any microphone, line, or digital inputs. Mono inputs do not have a Fader low colour. Mono-lin ed channels use Fader low white, and Stereo F returns from the internal F units use Fader low cyan. If patched externally, stereo input channels use Fader low pin Input channels can contribute to any or all of the MI 1-14 Mix busses (which feed the Mix Bus Master channels), the Main L&R and Mono/Centre mix busses, or to the F send busses - which get routed to the internal Lexicon F . There are three taps for these bus contributions - Pre Dyn (Pre Dynamics), Post E , and Post Fader. The levels of these contributions are accessed via the tOTEM buttons. Please note, Input Channels can not contribute to the Matrix (MT ) busses, so the MT FADER FOLLO not applicable for Control Channels assigned to Input Channels. buttons are 7KHUHDUHYDULRXVLQSXWVSHFL¿FRSWLRQVIRXQGYLDWKH7RXFK6FUHHQ0DLQ0HQX,13876EXWWRQ7KHVHRIIHU channel naming, lin ing, Pre/Post routing options for Mix busses and direct outputs, and physical input and Direct Output patching. See section 6.1.1. NOTE: For LCR Panning, LCR Panning Mode must be set in the INPUTS & VCA Menu. The Mono output patch is the Centre output patch, and Mono routing must be enabled in the ACS (Assignable Channel Strip) OUTPUT section with the MONO button (can be done in Interrogate mode for speed). 6.1: CHANNELS & BUSSES INPUT CHANNELS 6.1: INPUT CHANNELS User Manual CHANNELS & BUSSES INPUT CHANNELS 6.1: CHANNELS & BUSSES INPUT CHANNELS 6.1.1: INPUT SETUP User Manual CHANNELS & BUSSES INPUT CHANNELS SETUP 7KHUHDUHYDULRXVLQSXWVSHFL¿FRSWLRQVIRXQGYLDWKH7RXFK6FUHHQ0DLQ0HQX,13876EXWWRQ7KHVHRIIHU channel naming, lin ing, LR or LCR Panning / routing, Pre/Post routing options for Mix Busses and Direct Outputs, and physical input and Direct Output patching. N me Name the selected input channel. When the Name field is selected, a QWERTY keyboard will appear on the Touch Screen so you can enter the desired name. Is l te Isolate this channel from automation playbac . When a new cue is loaded, this channel will not be affected and its setting will not be changed. However, current channel settings are still stored when a cue is stored. Please note: To prevent conflict, Isolation function does not include 48V and pre-amp gain. T e An input channel can either be Mono, Lin ed, or Stereo. Stereo channels on this console are fixed as ST1 - ST4 and therefore the Type parameter is not editable. Mono Channels can be linked in consecutive Odd/Even pairs. Linked mono channels act in unison though the 48V and phase buttons, and the Delay, Gain, and Pan controls remain independent. P nM e Set Pan mode for this channel to LR (Left Right) or LCR (Left Centre Right). Routing/Panning for the Main Mix Bus. In LCR mode the Main Mono Mix Bus is used as the Centre channel. Mono routing must be enabled in the ACS (Assignable Channel Strip) OUTPUT section for this to work. 6.1.1: CHANNELS & BUSSES INPUT CHANNELS INPUT SETUP 6.1.1: INPUT SETUP User Manual CHANNELS & BUSSES INPUT CHANNELS SETUP LCR P n Wi t Set the proportion of centre channel signal sent to Left And RIght. Adjust the pan law when in LCR mode is active to increase/decrease the contributions to the LR and Mono buses when panning. Di e tO t P e P st Choose whether the Direct Output patch is sourced Pre Filter or Post Filter. Post Filter is immediately after the HPF (High Pass Filter) but before the main EQ and Dynamics processing stages. Pre Filter is immediately after the Analogue To Digital conversion, before the Trim, Phase, and Delay stages. There must be a patched DirectOut for this option to be functional. In tP t Choose an analogue or digital input for this input channel. Touching the value field will bring up the standard Patching setup on the Touch Screen. For more detail, please see section 5 - Inputs & Outputs. Di e tO t P t Choose an analogue or digital output for this channel s Direct Output. Touching the value field will bring up the standard Patching setup on the Touch Screen. For more detail, please see section 5 - Inputs & Outputs. Set Gl l P st P e Set a global routing for all Mix bus contributions from the input channel. You can choose from all three bus ‘taps’: All Post Fader, All Post EQ, or All Pre Dyn. Alternatively, the Pre- or Post-fader routing can be set individually for the each Mix Bus contribution further down the menu. This setting can be overridden by the Output Bus setup. MIX 1 14 P e P st Set individual Pre- or Post-Fade routing to Mix Busses 1-14. Choose from Post Fader, Post EQ, or Pre Dyn. 6.1.1: CHANNELS & BUSSES INPUT CHANNELS INPUT SETUP User Manual CHANNELS & BUSSES 6.2: MIX OUTPUTS MI OUTPUTS All contributions to a Mix Bus are summed into Mix Bus Master DSP Channels (MI 1-14). They have various uses, including feeding auxiliary effects, as monitoring mixes, or creating unique mixes for oned areas, contribution to the main mix, and more. All output channels include a raphic E . Mix Busses can be mono (MI 1-14) or stereo (MI 9 -14) and they receive input from the each of the MI 1-14 busses. In other words, Mix Master 1 s input is the sum of the contributions to the MI 1 Bus (from the Input channels). Mix Master channels can contribute to the Matrix (MT ) 1-4 busses, the Main LR and Mono mix buses (via the Fader) and be patched to a physical output. Contributions to the Matrix busses are accessed via the tOTEM buttons when a Mix Master Control Channel is selected. ou can access Mix Master channels via the Fader Layers (FADERS) button group or by selecting the bus mix via the tOTEM buttons. The Fader Layer C is the default layer for the Mix Masters, though remember that control channels can be assigned to any channel you require. All Mix Master channels include a raphic Equaliser, though do not use the ACS mic/line input controls (48V, trim), and they do not have a ate processing element. Please note, Mix Masters cannot contribute to the F 1-4 busses, or themselves, so the MI , and F FADER FOLLO buttons are not applicable for Control Channels assigned to Mix Masters. 7KHUHDUHYDULRXVRXWSXWVSHFL¿FRSWLRQVIRXQGYLDWKH7RXFK6FUHHQ0DLQ0HQX2873876EXWWRQ7KHVHRIIHU channel naming, isolate, routing options, width (stereo/mono), and physical output patching. See section 6.2.1. NOTE: For LCR Panning, LCR Panning Mode must be set in the OUTPUTS Menu. The Mono output patch is the Centre output patch, and Mono routing must be enabled in the ACS (Assignable Channel Strip) OUTPUT section with the MONO button. 6.2: CHANNELS & BUSSES MI OUTPUTS User Manual CHANNELS & BUSSES 6.2: MIX OUTPUTS MI OUTPUTS 6.2: CHANNELS & BUSSES MI OUTPUTS 6.2.1: MIX OUTPUTS SETUP User Manual CHANNELS & BUSSES MI OUTPUTS SETUP 7KHUHDUHYDULRXV0L[2XWSXWVSHFL¿FRSWLRQVIRXQGYLDWKH7RXFK6FUHHQ0DLQ0HQX2873876EXWWRQ These offer channel naming, isolate, LR / LCR panning and routing Pre/Post routing options, width (stereo/ mono) and physical output patching. N me Name the selected Mix Bus. When the Name field is selected, a QWERTY keyboard will appear on the Touch Screen so you can enter the desired name. Is l te Isolate the Mix Bus Master Channel from automation playbac . When a new cue is loaded, this channel will not be affected and its setting will not be changed. However, current channel settings are still stored when a cue is stored. Mi Wi t Select Mono or Stereo width for this Mix Bus. Note, only Mix busses 7-14 can be switched to stereo. Mix busses 1-8 are mono only. P nM e Set Pan mode for this channel to LR (Left Right) or LCR (Left Centre Right). Routing/Panning for the Main Mix Bus. In LCR mode the Main Mono Mix Bus is used as the Centre channel. Mono routing must be enabled in the ACS (Assignable Channel Strip) OUTPUT section for this to work. 6.2.1: CHANNELS & BUSSES MI OUTPUTS OUTPUTS SETUP 6.2.1: MIX OUTPUTS SETUP User Manual CHANNELS & BUSSES MI OUTPUTS SETUP LCR P n Wi t Set the proportion of centre channel signal sent to Left And RIght. Adjust the pan law when in LCR mode is active to increase/decrease the contributions to the LR and Mono buses when panning. Set Mi Sen s P e P st Set the pre/post routing for all contributions to this Mix Bus. This setting can override settings made in the Input Channel Setup. The options are Post Fade, Post EQ, or Pre Dyn. C nt i ti n P n M e Choose a pan mode for all contributions to this bus. The bus must be set to Stereo Width for this setting to be active. Choose from Independent Pan Control, Bus Follows Channel Pan (contributions to this bus will be panned the same as each input channel’s Pan control), or Bus Inverts Channel Pan (Contributions to this bus will be panned opposite to each channel’s Pan control). O t tP t in &KRRVHVSHFL¿FDQDORJXHRUGLJLWDORXWSXWVIRUWKLV'63&KDQQHO Touching the value fields will bring up the standard Patching setup on the Touch Screen. Two outputs can be allocated, with individually patchable left and right connections. For more detail, please see section 5 - Inputs & Outputs. 6.2.1: CHANNELS & BUSSES MI OUTPUTS OUTPUTS SETUP 6.3: MATRIX OUTPUTS User Manual CHANNELS & BUSSES MATRI OUTPUTS The Matrix busses feed the Matrix Master channels. Matrix Busses can be used for many things, including a convenient way to send the same Mix to several monitor destinations at differing levels or to use as an alternative main mix of mix groups to feed additional front of house ones. Matrix Master channels receive their input from the Matrix (MT ) 1-4 busses, which can be fed by the MI 1-14 Master channels and/or the Left, Right, and Mono main mix outputs. The Matrix busses and masters are stereo, and the Matrix Master channels have two patchable stereo outputs each (Left and Right of both outputs are interdependently patchable). All Matrix channels include a raphic Equaliser, though do not use the ACS mic/line input controls (48V, Phase), and they do not have a ate processing element. ain/Trim, Please note, Matrix Masters can not contribute to the MI 1-14 busses, F 1-4 busses, the Left/Right and Mono/Centre Main Mix busses, or themselves, so the MI , F , and MT FADER FOLLO buttons are not applicable for Control Channels assigned to Matrix Masters. 7KHUHDUHYDULRXV0DWUL[RXWSXWVSHFL¿FRSWLRQVIRXQGYLDWKH7RXFK6FUHHQ0DLQ0HQX2873876EXWWRQ These offer naming, isolate, width, and physical output patching. See section 6.3.1. 6.3: CHANNELS & BUSSES MATRI OUTPUTS 6.3: MATRIX OUTPUTS User Manual CHANNELS & BUSSES MATRI OUTPUTS 6.3: CHANNELS & BUSSES MATRI OUTPUTS 6.3.1: MATRIX OUTPUTS SETUP User Manual CHANNELS & BUSSES MATRI OUTS SETUP 7KHUHDUHYDULRXV0DWUL[RXWSXWVSHFL¿FRSWLRQVIRXQGYLDWKH7RXFK6FUHHQ0DLQ0HQX2873876EXWWRQ These offer naming, isolate, width, and physical output patching. N me Name the selected Matrix Bus. When the Name field is selected, a QWERTY keyboard will appear on the Touch Screen so you can enter the desired name. Is l te Isolate the Matrix Master DSP Channel from automation playbac . When a new cue is loaded, this channel will not be affected and its setting will not be changed. However, current channel settings are still stored when a cue is stored. M t i Wi t Choose Mono or Stereo type for the Matrix Master Output. P t in &KRRVHVSHFL¿FDQDORJXHRUGLJLWDORXWSXWVIRUWKH0DVWHU2XWSXW&KDQQHO Touching the value fields will bring up the standard Patching setup on the Touch Screen. Two outputs can be allocated, with individually patchable left and right connections. For more detail, please see section 5 - Inputs & Outputs. 6.3.1: CHANNELS & BUSSES MATRI OUTPUTS SETUP 6.4: MAIN MIX OUT User Manual CHANNELS & BUSSES MAIN MI OUTPUTS The Main Left, Right, and Mono/Centre Busses and Master Channels are used for the main mix output and receive their inputs from the Input Channels and Mix Bus Master channels. The Mono bus is the Centre bus when the Panning Mode of contributing channels is set to LCR, and Mono routing is enabled. The Left and Right busses feed the main Left/Right stereo output channel, which is permanently assigned to the Left/ Right Control Channel. The Mono bus feeds the main Mono/Centre output channel that, during normal operation, is controlled by the MONO/SEL control channel (though that channel is assigned to Bus Masters when a tOTEM selection is active. The Left/Right and Mono/Centre channels include a raphic Equaliser, though do not use the ACS mic/line input controls (48V, ain/Trim, Phase), and they do not have a ate processing element. 7KHUHDUHYDULRXV0DLQ/HIW5LJKWDQG0RQR&HQWUHVSHFL¿FRSWLRQVIRXQGYLDWKH7RXFK6FUHHQ0DLQ0HQX OUTPUTS button. These offer naming, isolate, and physical output patching. 6.4: CHANNELS & BUSSES MAIN MI OUTPUTS 6.4.1: MAIN MIX OUTPUTS SETUP User Manual CHANNELS & BUSSES MAIN MI OUTS SETUP 7KHUHDUHYDULRXV0DLQ/5DQG0VSHFL¿FRSWLRQVIRXQGYLDWKH7RXFK6FUHHQ0DLQ0HQX2873876EXWWRQ These offer naming, isolate, and physical output patching. N me Name the selected Main Output Bus. When the Name field is selected, a QWERTY keyboard will appear on the Touch Screen so you can enter the desired name. Is l te Isolate the Main Output Master DSP channel from automation playbac . When a new cue is loaded, this DSP channel will not be affected and its setting will not be changed. However, current channel settings are still stored when a cue is stored. P t in &KRRVHVSHFL¿FDQDORJXHDQGGLJLWDORXWSXWVIRUWKLV'63&KDQQHO Touching the value fields will bring up the standard Patching setup on the Touch Screen. Two outputs can be allocated for both the L&R (Left and Right) and the M (Mono) channels. For more detail, please see section 5 - Inputs & Outputs. The Mono output patches are also the Centre output patching when using LCR panning. 6.4.1: CHANNELS & BUSSES MAIN MI OUTPUTS SETUP User Manual CHANNELS & BUSSES 6.5: FX BUSSES F Busses The F Send busses (F 1-4) are used exclusively to feed the internal Lexicon F units. They receive input from the Input Channels. Those contributions are accessed via the F 1-4 tOTEM buttons. Management of the Lexicon F is enabled via the F button (Lexicon F setup) near the touch screen. Please see section 10 for more details. 6.5: CHANNELS & BUSSES F BUSSES User Manual 7.0: DSP ELEMENTS CHANNEL ELEMENTS Input and output (Bus Master) DSP channels share many common DSP processing elements and controls via the Control Channel and Assignable Control Section (ACS). This chapter explains those elements and their controls. Please note, some elements will not be available (will be unlit and inactive) on certain channel types (Master Output Channels have no ate section, for example). 7.0: DSP ELEMENTS User Manual DSP ELEMENTS 7.1: FUNCTION FOCUS FUNCTION FOCUS Function Focus allows pinpoint adjustment of any controls and settings by automatically detailing the value of both the control you are currently adjusting and any other controls in its group, plus the channel name and alternate units for the same control. )RUH[DPSOH'(/$<LVLOOXVWUDWHGLQPVPLOOLVHFRQGVIHHWDQGPHWHUVZKLOH(4¿OWHUµ4¶LVVKRZQ as both and bandwidth (octaves). 7KH)XQFWLRQ)RFXVGLVSOD\FDQEHµSLQQHG¶GLVSOD\HGHYHQZKHQWKHFRQWUROLVLQDFWLYHWRWKH screen by touching it while it is displayed. Touching it again will unpin it. 7.1: DSP ELEMENTS FUNCTION FOCUS User Manual DSP ELEMENTS 7.2: ACS ELEMENTS ACS ELEMENTS The Assignable Channel Strip (ACS) follows the currently selected DSP Channel and provides almost all of the controls relating to that. It is bro en down into logical sections, ma ing it easy to identify control groups and functions at a glance. 7KHUHLVDGHGLFDWHGFRQWUROIRUHDFKIXQFWLRQDQGHDFKFRQWUROKDVDGHGLFDWHGODEHODQGVFDOHMXVWDV\RXZRXOG¿QG on an analogue mixer The exact value of any control will be shown on the Touch Screen using the Function Focus feature (see section 7.1) as you adjust them. 7.5: DSP ELEMENTS ACS 7.2.1: ACS INPUT SECTION User Manual DSP ELEMENTS ACS INPUT The input section mainly provides the features required for input channels such as phantom power and mic/line level. Metering is applicable to all DSP channel types, and HPF (High Pass Filter) is available in Mix Bus Master Channels. Mete in Signal level in channel shown as dBfs Stereo channels use both L and R bargraphs, mono channels use the L/MONO bargraph. The scale is relative to digital 'full scale', so 0dBfs is the maximum before clipping. For input channels, the meter source is 'PRE' (just after the analogue-to-digital conversion but before the rest of the channel processing) so you can adjust for optimum Gain. The output/bus channel metering source is 'POST' (just before the physical output). 48 P nt m P e Turn 48V phantom power supply on or off. This only works for Input Channels patched to mic inputs and supplies the 48V necessary to polarise condenser (capacitor) microphones. Pressing and holding the key will activate Interrogate mode for this function (see the Mix Features section 8.3). 7.2.1: DSP ELEMENTS ACS INPUT 7.2.1: ACS INPUT SECTION User Manual DSP ELEMENTS P ACS INPUT se In e t Invert signal phase (180 degrees). Pressing and holding the key will activate Interrogate mode for this function (see Mix Features 8.3). GAIN TRIM Adjust mic gain or line trim for input channels. The control changes its function depending on the selected input. Mic Gain (-5dB - +58dB) is applied in the analogue domain, before analogue-to-digital conversion. It is only applicable to Microphone inputs. Line input trim is applied after conversion (-10dB/+16dB). HPF F e en Adjust the cut-off (-3dB) frequency of the High Pass Filter. This filter 'cuts' low frequencies according to an 18dB/Oct slope that turns down just before the cut-off frequency. Use it to filter out low frequency 'rumble' and clean up live microphone feeds, for example. HPF On O Switches the High Pass Filter on and off. Pressing and holding the key will activate Interrogate mode for this function (see Mix Features 8.3). 7.2.1: DSP ELEMENTS ACS INPUT 7.2.2: ACS GATE SECTION User Manual DSP ELEMENTS ACS ATE A ate is a threshold-driven gain reduction process normally used to attenuate a signal when its level falls below the Threshold. Setting the Threshold just above a noise ÀRRURUEDFNJURXQGQRLVHIRUH[DPSOH will allow the ate to attenuate the source during periods when the main input (voice, instrument etc) is silent. This gate includes a Sidechain Filter section. This allows you to control what frequency range is compared to the threshold level. For instance, you could OLPLWWKHVLGHFKDLQUDQJHWRRQO\µ(VV¶YRFDO frequencies. In conjunction with a carefully set threshold this would act as an effective µEURDGEDQG¶'H(VVHU ATTAC Adjust the Attac time of the ate The time taken for the limiter to reach full attenuation. RELEASE Adjust the Release time of the ate The time taken for the limiter to return to zero attenuation after limiting. 7.2.2: DSP ELEMENTS ACS ATE 7.2.2: ACS GATE SECTION User Manual DSP ELEMENTS ACS ATE DEPTH Adjust the Depth value of the ate The amount of attenuation applied when the gate is closed. THRESHOLD Adjust the threshold of the ate The signal level of the sidechain at which the gate is activated. S C LPF Adjust the Sidechain Low Pass Filter This filter cuts out high frequencies. S C HPF Adjust the Sidechain High Pass Filter This filter cuts out low frequencies. G te St t s LEDs Indicate the current operating status of the gate OPEN (inactive - the gate is passing signal and audio is above the threshold), HOLD (the gate is passing signal but audio is below the threshold, the gate will close soon), SHUT (audio is below threshold and the gate is closed - the audio is attenuated according to the DEPTH control value). GATE On O Switch the gate process On and Off Pressing and holding the key will activate Interrogate mode for this function (see Mix Features 8.3). 7.2.2: DSP ELEMENTS ACS ATE 7.2.3: ACS COMPRESSOR SECTION User Manual DSP ELEMENTS ACS COMPRESSOR A compressor is a threshold driven process used to reduce the dynamic range of a signal by applying gain reduction when the signal level exceeds the threshold and DSSO\LQJµPDNHXSJDLQ¶WRNHHSWKHRYHUDOO level consistent. ou can use compression to increase the apparent loudness of a signal without increasing the pea level, or to control overly dynamic sources. ATTAC Adjust the Attac time of the Compressor The time it takes for the compression function to reach full attenuation after the threshold has been reached. The slower the attack time, the 'softer' the compression for less audible ‘pumping’ (abrupt, repetitive changes in level). RELEASE Adjust the Release time of the compressor The time it takes for the attenuation (compression) to return to zero after the signal has returned to below the threshold. Longer release times will soften the compression and reduce audible ‘pumping’ (abrupt, repetitive changes in level). 7.2.3: DSP ELEMENTS ACS COMPRESSOR 7.2.3: ACS COMPRESSOR SECTION User Manual DSP ELEMENTS ACS COMPRESSOR GAIN Adjust the ma e-up gain of the Compressor Gain applied after the compressor to account for level lost in compression. THRESHOLD Adjust the Threshold level of the compressor When the signal exceeds the threshold, it will be attenuated according to the ratio setting. RATIO Adjust the Ratio value for the Compressor The ratio between the amount that the normal signal level has exceeded the threshold and the level above threshold it will be attenuated to. For example, if the threshold is set at -10dB and the ratio is set to 2:1, when a signal level of 0dB (10dB above threshold) comes in, it will be attenuated to -5dB (5dB above threshold, which is 10dB divided by 2). In the same instance, if the ratio was 5:1 then the signal would be attenuated to -8dB, which is 2dB above threshold (10dB divided by 5). Essentially, the higher the ratio, the more the signal is ‘squashed’.. G in Re ti n Mete Indicates amount of gain reduction currently being applied by the compression process. COMP On O Switch the compression process on or off. Pressing and holding the key will activate Interrogate mode for this function (see the Mix Features 8.3). 7.2.3: DSP ELEMENTS ACS COMPRESSOR User Manual DSP ELEMENTS ACS 7.2.4: ACS EQUALISER SECTION E UALISER The channel E (Equaliser) section is used for sculpting the tonal (frequency-based) balance of the signal. The Impact E has four fully parametric, full range bands - LF and HF have switchable bell/shelf modes. <RXFDQFKHFNWKH(4µFXUYH¶YLDWKH7RXFK Screen Main Menu E button. HF Le el $GMXVWWKHERRVWDWWHQXDWLRQRIWKH+)VKHOYLQJ¿OWHU HF FRE $GMXVWWKHFHQWUHIUHTXHQF\RIWKH+)VKHOYLQJ¿OWHU The filter will boost or cut the signal at this frequency by the amount set by HF Level. The cut-off frequency will be lower, according to the filter slope. HF $GMXVWWKH4RIWKH+)¿OWHUDQGVZLWFKEHOOVKHOIPRGH The HF band is normally bell-shaped. When Q is turn to maximum, shelf mode is enabled and the shelving LED will light. Q is ‘magnification’ at resonance, and is inversely proportional to bandwidth. For an equaliser it is useful to think of it simply as a bandwidth control (the width of the ‘bell’ in the case of a bell-shaped filter). That is, the higher the Q, the lower the bandwidth - or the more ‘focussed’ the filter. Bandwidth (in octaves) is shown on the Touch Screen with the Function Focus feature. 7.2.4: DSP ELEMENTS ACS E UALISER 7.2.4: ACS EQUALISER SECTION User Manual DSP ELEMENTS ACS E UALISER HI MID Le el $GMXVWWKHERRVWDWWHQXDWLRQRIWKH+,0,'¿OWHU HI MID FRE $GMXVWWKHFHQWUHIUHTXHQF\RIWKH+,0,'¿OWHU Frequencies above and below this, within the bounds of the Q setting will be affected by the HI MID level control. That is, Q effectively sets the ‘width’ (bandwidth) of the filter’s bell shape and FREQ sets the frequency at the centre of the bell shape. HI MID Adjust the of the HI MID Filter Q is ‘magnification’ at resonance, and is inversely proportional to bandwidth. For an equaliser it is useful to think of it simply as a bandwidth control (the width of the ‘bell’ in the case of a bell-shaped filter). That is, the higher the Q, the lower the bandwidth - or the more ‘focussed’ the filter. Bandwidth (in octaves) is shown on the Touch Screen with the Function Focus feature. LO MID Le el $GMXVWWKHERRVWDWWHQXDWLRQRIWKH/20,'¿OWHU LO MID FRE $GMXVWWKHFHQWUHIUHTXHQF\RIWKH+,0,'¿OWHU Frequencies above and below this, within the bounds of the Q setting will be affected by the LO MID level control. That is, Q effectively sets the ‘width’ (bandwidth) of the filter’s bell shape and FREQ sets the frequency at the centre of the bell shape. 7.2.4: DSP ELEMENTS ACS E UALISER 7.2.4: ACS EQUALISER SECTION User Manual DSP ELEMENTS ACS E UALISER LO MID Adjust the of the LO MID Filter Q is ‘magnification’ at resonance, and is inversely proportional to bandwidth. For an equaliser it is useful to think of it simply as a bandwidth control (the width of the ‘bell’ in the case of a bell-shaped filter). That is, the higher the Q, the lower the bandwidth - or the more ‘focussed’ the filter. Bandwidth (in octaves) is shown on the Touch Screen with the Function Focus feature. LF Le el $GMXVWWKHERRVWDWWHQXDWLRQRIWKH/)µEHOO¶¿OWHU LF FRE $GMXVWWKHFXWRIIIUHTXHQF\RIWKH/)µEHOO¶¿OWHU Frequencies above and below this, within the bounds of the Q setting will be affected by the LF level control. That is, Q effectively sets the ‘width’ (bandwidth) of the filter’s bell shape and FREQ sets the frequency at the centre of the bell shape. LF Adjust the of the HI MID Filter and switch bell/shelf mode. The LF band is normally bell-shaped. When Q is turn to maximum, shelf mode is enabled and the shelving LED will light. Q is ‘magnification’ at resonance, and is inversely proportional to bandwidth. For an equaliser it is useful to think of it simply as a bandwidth control (the width of the ‘bell’ in the case of a bell-shaped filter). That is, the higher the Q, the lower the bandwidth - or the more ‘focussed’ the filter. Bandwidth (in octaves) is shown on the Touch Screen with the Function Focus feature. E On O Switch the E process for this channel On and Off. Pressing and holding the key will activate Interrogate mode for this function (see Mix Features 8.3). 7.2.3: DSP ELEMENTS ACS E UALISER 7.2.5: ACS OUTPUT SECTION User Manual DSP ELEMENTS ACS OUTPUT The outputs section contains features VSHFL¿FWRWKHRXWSXWVRIDOOFKDQQHOV Delay and Pan (or balance) are applicable to all channel types, while LR and MONO/ &(175(URXWLQJLVVSHFL¿FWRLQSXWDQG Mix Bus Master output channels (not Matrix master channels). DELAY Adjust the delay applied to this DSP Channel. ACS units are milliseconds, though the Touch Screen will show feet and meters as well, with the Function Focus feature. PAN Adjust the Pan (or balance for stereo channels) of the DSP Channel or Bus routing to the main LR bus. The Pan control operates as a channel-to-Left/Right, Mix Bus-to-Left/Right, or as a balance control when the Left/Right Master Channel is selected. 7.2.4: DSP ELEMENTS ACS OUTPUT 7.2.5: ACS OUTPUT SECTION User Manual DSP ELEMENTS ACS OUTPUT LR M in Le t Ri tB sR tin Route the selected channel to the Main Left/Right Stereo Bus. Any channels routed to LR will be summed into the Main LR Master Output Channel, controlled by the L&R Control Channel. M M in M n Cent e B s R tin Route the selected channel to the Main Mono/Centre Bus. Any channels routed to M will be summed (Mono) into the Main M/C Master Output Channel, controlled by the M Control Channel. 7.2.4: DSP ELEMENTS ACS OUTPUT 7.3: CONTROL CHANNEL User Manual DSP ELEMENTS CONTROL CHANNEL Control channels contain the primary performance controls and indicators. Layers of Control Channels (assigned to YDULRXVµDFWXDO¶FKDQQHOVDUHVHOHFWHGXVLQJ the FADERS (Fader Layers) button group. Control channel positions are assigned to channels using the Touch Screen FADER SETUP menu (see section 3.2.1). C nnel N me F n ti n Text screen, plus status colour The text, and the colour of the LCD change depending on the current function of the control channel or fader. For example, normal audio channels will show the channel name and FaderGlow colour, while a GEQ assigned to the faders will show centre frequencies on a red background. G te Cl se X Indicates the selected channel s gate is closed. 7.3: DSP ELEMENTS CONTROL CHANNEL 7.3: CONTROL CHANNEL User Manual DSP ELEMENTS CONTROL CHANNEL G in Re ti n Mete Indicates gain reduction for the selected channel. These are the three LEDs on the left side labelled 1, 5, 10 (dB of attenuation). Le el Mete Indicates audio level for the selected channel - dBfs ON ON ey function is dependant on the channel type and selected fader layer. A long press of this EXWWRQZLOOXVHµ0RPHQWDU\¶EHKDYLRXU Audio channel/ bus master: Turns channel on (Green) or off (Unlit). When the channel is muted by a Mute group or VCA Group master, the ON button will be red. Follow Mode (tOTEM button selected): Switches the send from that channel to the selected bus on or off. GEQ Mode (GEQ HI or GEQ LO FADERS button selected): Resets the GEQ band to 0dB. ON button will be red when a GEQ band is ‘active’ (non-zero). In Audio Channel or with a tOTEM button active, holding an INACTIVE On button down will make the switch ‘momentary’ (it will turn off again when you release it). This facilitates talkback (input channel) and audition bus (MIX/MTX) functionality. SEL Select this Control Channel. In normal operation this selects the channel or mix master channel, switching the ACS to that channel and focussing the Touch Screen onto that channel. In other modes, the SEL keys are used to select channels for inclusion or functionality, such as Mute Group setup or during an Interrogate operation. 7.3: DSP ELEMENTS CONTROL CHANNEL 7.3: CONTROL CHANNEL User Manual DSP ELEMENTS CONTROL CHANNEL SOLO Press to Solo this DSP Channel (Input Channel, Mix Bus Master, Matrix Master). See section 8.4 for more information of the console’s Solo system. FADER Adjust signal level. Audio channel / VCA level. FOLLOW MODE (tOTEM button selected): Send level form channel to selected bus. GEQ Mode (GEQ HI or GEQ LO FADERS button selected): GEQ band gain. The console uses motorised faders to recall position when switching Fader Layers and so on. If a Control Channel is unassigned, the fader will resist movement. 7.3: DSP ELEMENTS CONTROL CHANNEL User Manual DSP ELEMENTS RAPHIC E 7.4: GRAPHIC EQ (GEQ) ( E ) 28-Band raphic Equalisers ( E s) are available to all Output Masters on the console: Mix Bus, Matrix Bus, and Left/Right and Mono/Centre Bus Masters. All Masters can run E s simultaneously. hen any output channel is selected, the E LO and E HI buttons (FADERS button group) will assign 14 bands to the Control Channel Faders, colour-coded with red Fader low. Faders are centre (0dB position) detented with in use as E bands. The Bands for High and Low E sections are mar ed above the relevant Faders and Function Focus will activate when a band is adjusted. hen a band is moved from its ero position (0dB) the Control Channel ON button will light red to show that EDQGLVDFWLYH<RXFDQSUHVVDUHG21EXWWRQWRµ]HUR¶WKDWEDQG $FKDQQHO¶V*UDSKLF(4VHWWLQJGRHVQRWDIIHFWWKH7RXFK6FUHHQ(4UHVSRQVHJUDSKLF(40DLQ0HQX button). 7.4: DSP ELEMENTS RAPHIC E ( E ) 7.4: GRAPHIC EQ (GEQ) User Manual DSP ELEMENTS RAPHIC E GE ( E ) HI Press to assign the 14 high E bands (800H - 16 H ) to the Control Channel Faders. An output channel (Mix Bus, Matrix Bus, LR / Mono bus masters) must be selected for this button to have any effect. GE LO Press to assign the 14 low E bands (31H - 630H ) to the Control Channel Faders. An output channel (Mix Bus, Matrix Bus, LR / Mono bus masters) must be selected for this button to have any effect. ON e Lighted red to indicate an active (non- ero) E band. Press to ero that band. This ON button mode is only active while GEQ is assigned to the faders. CLR GE ero all bands in the active E . Hold CLR and press either the GEQ HI or GEQ LO buttons to 'zero' (set to 0dB) all bands (both high and low). FADER Adjust the level of the assigned E band. The GEQ scale is shown on the left of the fader - +/-15dB, above and below a centre detented 0dB position. GEQ FaderGlow is Red. The centre frequency of each band is shown in the Channel Name LCD. 7.4: DSP ELEMENTS RAPHIC E ( E ) User Manual 8.0: MIX FEATURES MI FEATURES Si Impact Mix Features include mix functions outside the normal audio signal path: Mute roups, VCA roups, Copy and Paste, Interrogate, the Solo system, Monitoring, and the CLR and ALT + CLR facilities. 8.1: Mute roups Set up groups of channels that can be muted with a single button press. ou can create up to eight mute groups, operated by the Mute/VCA roup Master buttons 1-8. hile not is VCA setup mode, the buttons are Mute roup selectors. Mute groups are cumulative, so activating a second Mute roup Master will add those channels to the number of muted channels. 8.2: VCA roups Set up groups of channels with faders controlled by a VCA Master fader (which is assigned to a Control Channel). ou can create up to eight VCA roups using the VCA SETUP button and the Mute/VCA group Master buttons 1-8. 8.3: Copy & Paste Copy then Paste whole channels, channel sections, F settings, and Mix bus, F send, and Matrix bus mixes. Press the PASTE button in the Touch Screen Main Menu to begin the process. 8.4: Audio Interrogate Interrogate and change the status of ACS button across every channel simply by pressing and holding that button. For example, chec the status of all channels in one go Press and hold the button to enter Interrogate mode. 8.5: Solo System Listen to individual channels on the monitor mix or main mix (Solo In Place). The automatic solo mode function chooses PFL or AFL depending on where one or more channels are soloed. 8.6: Monitoring The Engineer s mix. Solo system integration, delay, mono chec , and patchable outputs, 8.7: CLR & ALT + CLR 6SHFLDOPRGL¿HUEXWWRQVIRUFOHDULQJRUUHVHWWLQJLQGLYLGXDOFKDQQHOVHWWLQJVRUVHWWLQJVDFURVVWKHZKROH console. 8.1: MI FEATURES ROUPS 8.0: MUTE MI FEATURES 8.1: MUTE GROUPS User Manual MI FEATURES MUTE ROUPS Mute roups enable group-muting of selected channels at any time. Create up to eight Mute roups operated from the Mute/VCA roup Masters button group 1-8. Mute roups can be cumulative. hile not in VCA or MUTE setup modes, the buttons are always Mute roup Masters. MUTE M te G Enter Mute Set roup SETUP mode or hold Interrogate Mute roups This mode allows you to configure Mute Group assignments in conjunction with the Mute Group Masters’ buttons 1-8. The button illuminates Red when active. To ‘Interrogate’ Mute Groups, press and hold this button. The Channel Name screens on any Control Channels that are members of a Mute Group will glow red and display the Mute Group Master. M te G M ste Select a Mute roup Press a Mute Group Master button to activate or deactivate a Mute Group either in normal or SETUP mode. In normal operation, Mute Groups can be selected cumulatively. 8.1: MI FEATURES MUTE ROUPS User Manual MI FEATURES MUTE 8.1: MUTE GROUPS ROUPS SEL Select Control Channels. While in Mute Group SETUP mode, with a Mute Group Master active, use the Control Channel SEL buttons to choose which channels should belong to that Mute Group. Orange highlighted SEL buttons indicate members of the currently selected Mute Group. CLR Clear Selection. While in Mute Group Setup mode, holding the CLR button and pressing a Mute Group Master button will clear that Mute Group. ALT CLR Clear all. While in Mute Group Setup mode, holding ALT + CLR and pressing Mute Group Master Button will clear all Mute Groups. ON Mute status indication. Red illuminated ON buttons indicate a channel that has been muted by a Mute Group Master, Green ON buttons indicate an active, un-muted channel, and an unlit ON button indicates an inactive channel, muted via the ON button. 8.1: MI FEATURES MUTE ROUPS User Manual MI FEATURES VCA 8.2: VCA GROUPS ROUPS VCA roups allow you to control groups of Input Channels from a single VCA Master. For example, you could put the whole drum it under the control of a single VCA Master, or if you have a multiple mics on a guitar cabinet you could set the ratios with individual channels and then create a uitar VCA Master - move the VCA Master Channel and all roup Member levels will be offset from current levels by the VCA Master level. 8.1: MIMI FEATURES 8.2: FEATURES MUTE VCA ROUPS 8.2: VCA GROUPS User Manual MI FEATURES VCA ROUPS The Si Impact has eight VCA roups available, setup with the VCA Setup button and the Mute/VCA button roup. Simply press the VCA Setup button, select a VCA Master 1-8, then use the SEL buttons to allocate channels to the group. - Channels can be members of more than one VCA group. <RXFDQFOHDU9&$*URXSVZLWKWKH&/5VLQJOH*URXSDQG$/7&/5$OO*URXSVPRGL¿HUV - ou can name VCA Masters by selecting a VCA Master Control Channel then touching the Touch Screen Main Menu INPUTS & VCA menu. - Active controls on a VCA roup Master are the Fader and the On (Mute) controls. - VCA Masters 1-8 are available for allocation to Control Channels in the same way as other channel types (see section 3.2.1 for more on this) - Fader low colour Blue. - See below for all VCA set-up controls, and VCA roup Master Control Channel controls. NOTE: The VCA master fader wor s as an offset to the current channel faders (does not move the member faders), so it s a good idea to set group members, and the Master to nominal levels. hen assigned, VCA Master Faders start at 0dB. CA CA G Enter VCA Set roup SETUP mode or hold Interrogate VCA roups. This mode allows you to both create and clear (CLR) VCA Groups. The button illuminates Red when active. Choose a VCA Group button 1-8 to set it up. To ‘Interrogate’ VCA Groups, press and hold this button. The Channel Name screens on any Control Channels that are members of a VCA Group will glow blue and display the VCA Group Master numbers. CA G Select a VCA M ste roup. When VCA Setup mode is active, use buttons 1-8 to choose a VCA Group to set up. Use the Control Channel SEL buttons to activate / deactivate VCA group members. SEL Select Control Channels. While in VCA Group SETUP mode, with a VCA Group Master number button selected, use the Control Channel SEL buttons to choose which channels should belong to that VCA Group. Orange highlighted SEL buttons indicate members of the currently selected VCA Group. 8.2: MI FEATURES VCA ROUPS User Manual MI FEATURES VCA 8.2: VCA GROUPS ROUPS CLR Clear Selection. While in VCA Group Setup mode, holding the CLR button and pressing a VCA Group Master button 1-8 will clear that VCA Group. ALT CLR Clear all. While in VCA Group Setup mode, holding ALT + CLR and pressing a VCA Group Master Button 1-8 will clear all VCA Groups. ON VCA roup / Mute status indication. Red illuminated ON buttons indicate a channel that has either been muted by a VCA Master or a Mute Group Master. Green ON buttons indicate an active, un-muted channel, and an unlit ON button indicates an inactive channel, muted via the ON button. CA M ste F e Offset the level of VCA roup Member Channels. The VCA Master Faders, by default, are allocated to Fader Layer C. They can be assigned to another other Control Channel via the FADER LAYERS menu (see section 3.1). A VCA Master offsets the level of all members of the VCA Group. The Member faders will not move. 8.2: MI FEATURES VCA ROUPS 8.3: COPY AND PASTE User Manual MI FEATURES COP AND PASTE This facility allows almost any processing section to be copied easily and quic ly from a channel or bus and pasted to another channel or bus. ou can also copy and paste the internal Lexicon F settings and Aux, F Send, and Matrix mixes. hen you press COP PASTE (Touch Screen Main Menu), or when you reselect a channel or bus while the COP PASTE mode is active, the console s clipboard captures the state of that selection. If you have a channel selected, that channel s processing (except AIN or 48V status ) is copied if you have a bus mix selected via the FADER FOLLO (tOTEM) buttons, that bus mix is copied. COPY PASTE Copies the selected element to the console s clipboard. Select a channel or Mix Bus to copy those to the clipboard. FX settings are selected by pressing the FX button while in Copy-Paste mode. PASTE HOLD Hold and select a destination to paste the clipboard. To paste DSP Channel settings, touch a SEL button, to paste a complete Mix Bus mix, touch a tOTEM (FADER FOLLOW) button, and to paste FX settings, touch the corresponding FX 1-4 tOTEM button (see following examples). 8.3 : MI FEATURES COP AND PASTE 8.3: COPY AND PASTE User Manual MI FEATURES COP AND PASTE DSP C nnel COPY PASTE ith a DSP channel (Input Channel or Mix/Matrix Bus Master) selected, COP PASTE mode will display a version of the ACS (with E for Bus Masters). By touching sections in this Touch Screen display you can remove individual sections from the paste operation. To select a single section only, touch and hold that section in the Touch Screen. To paste channels and channel selections, touch and hold the PASTE-hold Touch Screen button and choose another channel with its Control Channel SEL button. Mi B s COPY PASTE ith a tOTEM button selected you can use COP PASTE mode to copy and paste an entire MI , MT , or F Bus Mix. For example, you could copy the MI 1 contribution levels from all Input Channels and paste those levels as a MI 2 mix). hen you touch COP PASTE, the mix to be copy-pasted will be shown in the Touch Screen display. To paste a Bus mix, touch and hold the PASTE-hold Touch Screen button and choose another Bus mix via with the tOTEM buttons. FX COPY PASTE To copy and paste settings between the four Lexicon processors, start by pressing the round F button while in COP -PASTE mode. This will display the four processors in the Touch Screen. Select the processor you want to COP - it will be highlighted in blue. To paste, press and hold the Touch Screen PASTE-hold button, the select another processor with the four F tOTEM buttons - F 1 - F 4. 8.3: MI FEATURES COP AND PASTE 8.4: AUDIO INTERROGATE User Manual MI FEATURES AUDIO INTERRO ATE Audio Interrogate is a powerful method of chec ing and changing a particular switch status across all channels on the currently selected fader layer. For example, you can chec at a glance which channels are routed to the main LR mix bus and change that status rapidly for all visible channels. Audio Interrogate wor s for all status buttons on the Assignable Channel Strip: 48v ON/OFF Phase Reverse ON/OFF HPF IN/OUT ATE IN/OUT COMPressor IN/OUT E IN/OUT LR routing ON/OFF MONO routing ON/OFF To Interrogate an ACS switch status: 1) Select a Fader Layer (FADERS) relevant to the switch status you wish to interrogate (for example, to interrogate LR routing of input channels, the current Fader Layer must include input channels). 2) Press and hold the ACS button for the chosen function (HPF, ATE, E , LR, and so on). The SEL (Select) buttons of any channels where that function is active will light. 3) hile holding the relevant ACS button, you can use the SEL buttons across that Fader Layer to change the status for each channel. For example, if you select a Fader Layer containing input channels and you hold the 48V button down, the SEL buttons of any channels that have 48V Phantom Power enabled will illuminate. If you continue to hold the 48V button, you can then press the channel SEL buttons across the Fader Layer to toggle 48V on or off for each channel. M te n CA G Inte te: Mute and VCA roups can be interrogated by holding the VCA or MUTE setup buttons. The Channel Name LCD screens will show group members with colour and group numbers. ou cannot change Mute or VCA roup settings via interrogate (see sections 8.1 and 8.2). 8.4: MI FEATURES INTERRO ATE User I F U S S 8.5: SOLO SYSTEM anual S S Solo pro ides a a of monitorin and c ec in indi idual c annels and roups of c annels uic l routin onl t e soloed c annels eit er to t e monitorin s stem normal operation or to t e main mi outputs Solo In lace SI ere are t o main t pes of S F re Fade isten and F fter Fade isten e difference et een t e t o is t e tap ere t e solo source is ta en from in t e selected c annel pre or post fader ou can set et er Solos accumulate pressin a Solo utton does not cancel ot er Solos or uto Cancel pressin an solo cancels an ot er acti e solo in t e Solo Settin s enu e console as an U Input Solo mode default t at uses intelli ent automatic soloin to pro ide t e est source for an i en tas or S e operation If onl a sin le input c annel is soloed t en F routin ill e used If t o or more input c annels or an output c annel are soloed t en F routin ill e used ou can also set t e Input Solo ode as F onl or F onl i li t and lend settin s in t e Solo Settin s menu allo control ac round le els i li t allo s a soloed c annel to stand out attenuatin ot er soloed c annels t e re uired amount It is acti ated pressin and oldin a Solo utton lend sets an attenuation le el for t e ole monitor source so ou can dial in a certain amount of ac round it an soloed c annels Solo In lace SI is a Solo mode t at routes t e soloed si nal to t e main mi outputs is can e useful for H[DPSOHGXULQJVRXQGFKHFNZKHUH\RXZDQWWRTXLFNO\VHOHFWVSHFL¿FVRXUFHVIRUFKHFNLQJ7KH6ROR,Q3ODFHPRGH is acti ated ia t e Solo Settin s enu ouc Screen to pre ent accidental acti ation durin performance WARNING: Solo In Place Mode will interrupt the Main Mix outputs. Do not activate during performance. I F U S S S S User Manual MI FEATURES 8.5: SOLO SYSTEM SOLO S STEM SOLO Press to solo the assigned channel Normal button behaviour is ‘latching’ (press on - press off). Press and hold a SOLO button for momentary (non-latching) behaviour. Press and hold an active SOLO button to use the Highlight feature, which highlights a soloed channel by attenuating other soloed channels. SOLO buttons light up orange when active. SOLO CLR Press to clear any active solos. Button lights up Red to show there are active solos. S l St t s In i t s Indicators light to show Solo mode / status. If only a single input channel is soloed then PFL routing will be used. If two or more input channels or any output channel are soloed then AFL routing will be used. SOLO T S een Access Solo settings menu. S l In Pl e Switch Solo In Place (SIP) mode On or Off. Solo In Place routes soloed signals to the main mix outputs rather than the monitor outputs, so it should not be activated during performance. An SIP logo is shown at the top of the Touch Screen when active. Hi li t Le el The attenuation level of the unhighlighted soloed channels while Highlight is active. With more than one active Solo, press and hold an active SOLO button to use the Highlight feature. 8.5: MI FEATURES SOLO S STEM 8.5: SOLO SYSTEM User Manual MI FEATURES SOLO S STEM Blen Le el The attenuation level of the primary monitor source while a PFL or AFL is active. The default setting is -f (- infinity) resulting in complete mute of the normal monitor source. In tP i it Allow input Solos to temporarily override an output AFL. When active, this allows convenient monitor and control of contributions to a mix. If all active solos are cleared the system reverts to monitoring the active output AFL solos. S l T im 10dB of trim to the level of the Solo bus to the monitor system. This control is independent of the main monitor level control. Sele t F ll sS l Enable or Disable Select Follows Solo Mode. When enabled, pressing a Solo button will also select that DSP channel, as if you had pressed the SEL button. It will, for example, assign the ACS to that channel’s audio parameters. It will always choose the last DSP Channel soloed. In tS l M e Set the Input Solo Mode to Auto, AFL, or PFL. In Auto Mode the console chooses Pre-fade Listen solo (PFL) when only one Input Channel is soloed, or After-Fader Listen (AFL) when more than one Input Channel is soloed. In AFL or PFL mode, only those solo types are used. The PFL bus takes it’s feed from a DSP channel before the Fader and Mute button; the AFL bus takes its feed from a DSP channel after the Fader and Panning stages. S l A t C n el M e Enable or disable the Solo Auto Cancel Mode. When enabled, pressing any Solo button will cancel any other active Solo (exclusive). 8.5: MI FEATURES SOLO S STEM User Manual MI FEATURES 8.6: MONITORING MONITORIN The Si Impact monitoring system is comprehensive, yet simple. The monitoring source (active monitor signal) will normally be the main LR mix, though will switch to any selection made in the Solo system - AFL or PFL busses. The active monitor signal is always available on the headphones output (located below the front of the console near fader 1). Monitoring level is normally controlled by the MON LEVEL encoder, though Main Fader and Mon Level Encoder functionality can be swapped using the LR/Mon Level Swap parameter in the Monitor Settings Menu. There is also a parallel Monitor Output Patch available allowing the engineer to connect control room spea ers or headphone distribution, for example. MON LE EL Adjust the overall monitoring signal level. MONITORS Indicates level in the engineer s monitor system This is normally the LR signal but may be PFL/AFL, or other signal as set in the MONITOR system menus. The scale is dBfs (full scale, digital), so the 0dB level is at clipping. 8.6: MI FEATURES MONITORIN 8.6: MONITORING User Manual MI FEATURES MONITORIN M nit in Settin s Men ou access the Monitor Settings menu by touching the MONITOR Touch Screen button from the Main Menu. L&R M nit S e e Enable / disable the Monitor Output patch. Patching for the monitor output is specified in the separate Monitor L&R OutPatch menu item below. M n C e Outputs a mono sum of the stereo monitor signal. This adds left and right monitor outputs together. A mono check is important when compatibility with mono playback devices is required - some delays and stereo processing can cause mono issues that will not necessarily be obvious when listening in stereo. Del Enable / disable the monitor output delay. The monitor output delay can be used to synchronise the monitor output with, for example, the Front Of House output, which can be subject to system and distance delays, making monitoring in the same environment difficult. Del Time s m les, millise n s Set the Monitor Output delay time. At 96 Samples, the parameter unit changes to milliseconds (ms) M nit L&R O t P t Set the physical patching for the monitor output signal. The Monitor Output patch is additional to the headphones output. LR M n Le el S Enable or disable the LR/Mon Level Swap function. When enabled, this parameter causes the main LR fader to control Monitor level, while the Mon Level Encoder controls the main LR level. 8.6: MI FEATURES MONITORIN 8.7: CLR & ALT+CLR User Manual MI FEATURES CLR & ALT+CLR The CLR (Clear) button located to the right of the Channel Faders area is used in conjunction with individual input channels, output channels, channel parameters, and mutes to clear or reset to default. The ALT button (above-right of LRM Mix faders) can be used in conjunction with the CLR button to clear or reset parameters, channels, and bus mixes across the whole of the console. CLR F n ti ns CLR SEL tt n C nnels Reset all audio parameters within the channel or bus to the factory defaults (does not affect functions such as SOLO, bus type, names patching and mute assignment, or preamp gain). CLR HPF ACS Reset HPF setting for the currently selected channel bac to default. CLR E Reset all E CLR section parameters for the currently selected channel. GATE ACS Reset all CLR ACS ate section parameters for the currently selected channel. COMP ACS Reset all COMPRESSOR parameters for the currently selected channel. 8.7: MI FEATURES CLR & ALT+CLR 8.7: CLR & ALT+CLR User Manual MI FEATURES CLR GE HI LO FADERS Reset all raphic E bus channels). CLR CLR & ALT+CLR levels to 0dB for the currently selected channel. Only wor s where tOTEM FADER FOLLOW E is available (output / tt n Reset all contributions and ON status from channels or buses to the selected bus bac to factory defaults. CLR M te M ste 1 8 hile in MUTE setup mode: Clear channel mute assignments to the selected Mute Master. CLR CA M ste 1 8 hile in VCA setup mode: Clear Fader assignments to the selected VCA Master. ALT ALT CLR F n ti ns CLR SEL Reset all audio parameters in all li e-for-li e channels across the whole console (does not affect functions such as SOLO, bus type, names patching and mute assignment, or preamp gain). ALT CLR Clear all E ALT E section parameters across the whole console (on ALL channels). CLR HPF Reset all High Pass Filters across the whole console to default. ALT CLR COMP Clear all Compressor section parameters across the whole console. ALT CLR Clear all ALT GATE ATE section parameters across the whole console. CLR PHASE Resets the phase to Off across the whole console. ALT CLR LR Resets all LR routing to Off across the whole console. ALT CLR MONO Resets all MONO routing to Off across the whole console. 8.7: MI FEATURES CLR & ALT+CLR 8.7: CLR & ALT+CLR User Manual MI FEATURES ALT CLR CLR & ALT+CLR An MIX tOTEM tt n MIX 1 14 Resets all channels contributions to all 14 Mix busses to ero. It Does not affect the Auxiliary Mix bus master channels or master levels. ALT CLR An FX tOTEM tt n FX 1 14 Resets all channels contributions to all four Lexicon F Send busses to ero. It Does not affect the F Send bus master channels or master levels. ALT CLR An MTX tOTEM tt n MTX 1 14 Resets all channels contributions to all four Matrix busses to ero. It Does not affect the Matrix bus master channels or master levels. ALT CLR An M te M ste B tt n hile in MUTE setup mode: Clear channel mute assignments to all Mute Masters. ALT CLR An CA M ste B tt n hile in VCA setup mode: Clear channel fader assignments to all VCA Masters. Ot e ALT B tt n F n ti ns Though not related to the CLR (Clear) function, the following ALT functions are included for completeness, though they are also included in the relevant sections of this manual. ALT ON Sets the selected mix send (fader) to unity. ALT NEXT Scrolls and activates the previous cue in the cue list. 8.7: MI FEATURES CLR & ALT+CLR User Manual 9.0 SHOWS, CUELIST, SNAPSHOTS SHO S, CUELIST, AND SNAPSHOTS 7KHFRQVROH¿OHV\VWHPXVHVWKH6KRZDVLW¶VEDVLF¿OH7KH6KRZFRQWDLQVDOOFRQVROHVHWWLQJV SOXVWKH&XHOLVW7KH&XHOLVWFRQWDLQVUHFDOODEOH&XHVWKDWFRQWDLQ6QDSVKRWVRIFRQVROHVHWWLQJV SOXVDXWRPDWLRQIXQFWLRQDOLW\+L4QHWHYHQWV 9.0 SHO S, CUELIST, AND SNAPSHOTS User Manual SHO S, CUELIST, SNAPSHOTS 9.1 SHOWS SHO S $6KRZLVDQHQWLUHFRQVROHVHWXSLQFOXGLQJ&XHOLVWDQGDVVRFLDWHG6QDSVKRWV6KRZVFDQEH VDYHGORDGHGDQGFUHDWHGLQWKH(',76+2:7RXFK6FUHHQ0HQX<RXFDQDOVRUHVHWWKH,2 FRQ¿JXUDWLRQRIWKHFRQVROHWKURXJKWKH(',76+2:7RXFK6FUHHQ0HQX7KHFRQVROH¶V86%SRUW DOORZVH[WHUQDOVWRUDJHRI6KRZVDVZHOODVWUDQVIHUEHWZHHQV\VWHPVDQGWKH2IÀLQH(GLWRU VRIWZDUH 7KH(',76+2:PHQXDOVRSURYLGHVDFFHVVWRWKH*OREDO,VRODWH¿OWHUVHWWLQJV7KH,VRODWHV\VWHP DOORZV\RXWRLVRODWHSDUDPHWHUVIURPFRQVROHDXWRPDWLRQVQDSVKRWUHFDOOUDWKHUWKDQ6KRZ ORDGLQJ NEW SHOW &UHDWHDQHZ6KRZ A new show deletes all cues and their associated events but retains names, audio settings, patches, and similar since there is a high probability these will be re-used in the ‘new show’. The system will provide a warning the action will overwrite the current show and allows the action to be aborted. DELETE ,QLWLDWHVWKHGHOHWLRQRID6KRZ)LOHRU)ROGHU This button brings up the file navigation screen so you can navigate to the file or folder you wish to delete. Pressing the APPLY button will confirm the deletion. The system will require an additional confirmation of the action before any delete action is invoked and allows the action to be aborted. It is not possible to delete a folder containing files. 9.1: SHO S, CUELIST SHO S 9.1 SHOWS User Manual SHO S, CUELIST, SNAPSHOTS SHO S LOAD ,QLWLDWHWKH/RDG6KRZSURFHVV You can navigate the internal file system (MMC) or USB key (if present) and select a Show File to load by pressing the APPLY button. The system will provide a warning that the action will overwrite the current show and allows the action to be aborted. SA E AS ,QLWLDWHWKHSURFHVVRIVDYLQJWKHFXUUHQWVKRZ When you press SAVE, the QWERTY keyboard is shown with the current show name. You can continue the save action with the current name (and overwrite) or change the name to create a new show file. Press APPLY to confirm the name and navigate the file system to confirm the save location. RESET CONFIG 5HHVWDEOLVKWKHV\VWHPFRQ¿JXUDWLRQ Clears the console database of any option cards or external I/O systems that may have been attached to the console then forces a ‘re-discovery’ of any installed option cards or connected I/O system, such as a Soundcraft Stagebox. The system will provide a warning that the action will overwrite the current configuration database and allow the action to be aborted. S N me 1DPHWKHFXUUHQWVKRZ Touching the value field will bring up a QWERTY keyboard for editing the name of the show. Press the APPLY button to confirm. Gl l Is l te Filte s 6HOHFWDQG,VRODWHSDUDPHWHUVIURPUHFDOOE\WKHDXWRPDWLRQV\VWHP If a parameter or group of parameters are set to 'Isolate', they will not be changed from the current setting when a new snapshot is recalled, even if the snapshot has a different setting. Isolate settings for individual channels are available via the INPUTS and OUTPUTS menus. NOTE: All parameters are saved with a snapshot, regardless of the any Isolate settings. Please note: There are also per-channel Isolates in the INPUTS & VCA and OUTPUTS menus. 9.1: SHO S, CUELIST SHO S 9.2: CUELIST & SNAPSHOTS User Manual SHO S, CUELIST CUELIST & SNAPSHOTS 7KH6L,PSDFWLQFRUSRUDWHVDFRPSUHKHQVLYH&XHOLVWDQG6QDSVKRWDXWRPDWLRQV\VWHPIRUIDVW DFFHVVWRSUHVHWFRQVROHVWDWHVDQGIRUZRUNLQJZLWKRWKHUSHUIRUPDQFHV\VWHPVYLD+DUPDQ¶V +L4QHW $VQDSVKRWLVDµSLFWXUH¶RIWKHHQWLUHFRQVROHVWDWHDOOVHWWLQJVSDWFKLQJURXWLQJDQGVRRQ$FXH LVHVVHQWLDOO\DVQDSVKRWRIWKHFRQVROH¶VVWDWHSOXVD+L4QHW7UDQVPLWVHQGD+L4QHWYHQXHSUHVHW HYHQW :KHQ\RXVWRUHDFXH\RXDOVRWDNHDVQDSVKRWWREHVWRUHGZLWKWKDWFXH7KHFRQVROH¶V&XHOLVWLV DOLVWRIFXHVWKDWFDQEHUHFDOOHGZKHQUHTXLUHG7KH&XHOLVWLVVWRUHGZLWKLQD6KRZVHH 7KHSULPDU\VQDSVKRWFXHFRQWUROVDUHWKH&XHOLVWEXWWRQJURXS&8(/,676725(1(;7DQG5(&$//7KHVHDUHORFDWHGMXVWDERYHWKHPDLQ/HIW5LJKWDQG0RQR0DVWHU&RQWURO&KDQQHOV 7KH&8(/,67EXWWRQJLYHVDFFHVVWRWKHGHWDLOHG&XHOLVWHGLWLQJDQGIXQFWLRQDOLW\RQWKH7RXFK Screen. 3OHDVH1RWH,VRODWH¿OWHUVLVRODWLQJSDUDPHWHUVDQGFKDQQHOVIURPDXWRPDWLRQ&XHUHFDOODUHVHW HOVHZKHUH7KH*OREDO,VRODWHVDUHDYDLODEOHLQWKH6+2:PHQXDQGFKDQQHOLVRODWHVDUHVHWLQWKH ,138762873876PHQXV 9.2: SHO S, CUELIST CUELIST & SNAPSHOTS 9.2: CUELIST & SNAPSHOTS User Manual SHO S, CUELIST CUELIST & SNAPSHOTS CUE LIST %ULQJXSWKH&XHOLVWVFUHHQLQWKHFRQVROH7RXFK6FUHHQ This gives access to Cuelist editorial, and Cue editing functionality. There are four columns in the main Cuelist: Cue Number, Snapshot Name, and HiQnet Status. Cues are colour-coded according to: Green text: Currently loaded / Current Cue; White text: NEXT Cue (will be loaded with NEXT button); Grey Text: Inactive Cue; Grey Highlight/ Cursor: RECALL Cue (will be loaded with the RECALL button or by pressing the Touch Screen Encoder). STORE 6WRUHWKHFXUUHQWVQDSVKRWLQWKH&XHOLVW The Snapshot will be added to the end of the Cuelist and named automatically "Unnamed Snapshot n" where 'n' is the snapshot's numbered position in the Cuelist. Remember that the number in the snapshot name and the order of snapshots can change, so the number in the snapshot name and the Cue number will not necessarily correlate after re-ordering and re-naming. RECALL /RDGWKHFXUUHQWO\KLJKOLJKWHG&XH Pressing the Touch Screen Encoder will also load the currently highlighted Cue. NEXT /RDGWKH1H[W&XH The Next Cue will be shown in white text in the Cuelist. ALT NEXT /RDGWKHSUHYLRXV&XH The previous cue will be the one numerically previous to the currently selected one. That is, if Cue Number 5 is active, the 'previous' Cue will be Cue Number 4 - not the previously loaded Cue, if that is different. 9.2: SHO S, CUELIST CUELIST & SNAPSHOTS 9.2: CUELIST & SNAPSHOTS User Manual SHO S, CUELIST CUELIST & SNAPSHOTS UPDATE 8SGDWHWKHFXUUHQWO\DFWLYH&XHZLWKWKHFXUUHQW6QDSVKRW Useful for editing Cues as they are used. When you press UPDATE confirmation will be required in the Touch Screen as the action will overwrite the current Cue. EDIT CUE (GLWWKH&XHGHWDLOVLQWKH7RXFK6FUHHQ Includes Snapshot Name and HiQnet settings. See section 9.2.1 for more detail. MO E UP 0RYHWKHFXUUHQWO\KLJKOLJKWHG&XHXSRQHLQWKH&XH/LVW This action affects the currently highlighted Cue, which is not necessarily the currently active Cue. 'Up' means 'to the next lower numbered Cue Number'. MO E DOWN 0RYHWKHFXUUHQWO\KLJKOLJKWHG&XHGRZQRQHLQWKH&XH/LVW This action affects the currently highlighted Cue, which is not necessarily the currently active Cue. 'Down' means 'to the next higher numbered Cue Number'. DELETE 'HOHWHWKHFXUUHQWO\KLJKOLJKWHG&XH This action affects the currently highlighted Cue, which is not necessarily the currently active Cue. Confirmation will be required in the Touch Screen. 9.2: SHO S, CUELIST CUELIST & SNAPSHOTS 9.2: CUELIST & SNAPSHOTS User Manual SHO S, CUELIST CUELIST & SNAPSHOTS Hi net St t s +LJKOLJKWHGRUDQJHLIWKHUHLVDQDFWLYH+L4QHWWUDQVPLWDFWLYHLQWKH&XH 9.2: SHO S, CUELIST CUELIST & SNAPSHOTS 9.2.1: EDIT CUE User Manual SHO S, CUELIST CUELIST EDIT CUE %\WRXFKLQJWKH(',7&8(7RXFK6FUHHQEXWWRQLQWKH&XH/LVWGLVSOD\\RXDFFHVVPRUHGHWDLOLQFOXGLQJWKH&XH1DPHDQG+L4QHWDXWRPDWLRQSDUDPHWHUV+L4QHWLVDQHWZRUNSURWRFROGHYHORSHG E\+DUPDQ3URIRUFRPPXQLFDWLRQVDQGFRQWUROEHWZHHQDXGLRV\VWHPFRPSRQHQWV 7KHFRQVROHFDQVHQG+L4QHWYHQXHSUHVHWVZKHQ&XHVDUHUHFDOOHG C e N me (GLWWKHQDPHRIWKHFXUUHQW6QDSVKRW&XH Brings up the Touch Screen QWERTY keyboard for entering / editing the Cue Name. Hi net en e Re ll 6HW9HQXH5HFDOO2QRU2IIIRUWKH&XHConsole network settings, including IP settings and HiQnet Enable and Address options can be found in the Touch Screen SYSTEM menu - reference chapter 11. Hi net en e N m e 6HWWKHWUDQVPLWWHG9HQXHQXPEHUIRUWKLV&XH 9.2.1: SHO S, CUELIST CUELIST EDIT CUE User Manual 10: LEXICON FX LE ICON F The console comes with four Lexicon F processors, each with 29 available algorithms. Each F unit has its own dedicated F Send Bus, and stereo return path. Sen R tin Every input channel can contribute to the F 1-4 send busses, which correspond to the F unit 1-4 inputs. Contributions are controlled in the same way as Mix bus contributions, via the F 1 - 4 tOTEM buttons, which assigns each channel s contribution to the selected bus to its fader. The Stereo Return channel is assigned to the MONO/SEL Control Channel on the right hand end of the console. Ret nR tin The Stereo Input channels, ST 1 - ST 4 are, by default, patched to the Lexicon F unit 1-4 returns (as per the console s default set-up). For example, Stereo Input ST 1 is patched to LE -RT1 (F Processor 1, Lexicon Return Channels 1 and 2) Stereo Input ST 2 is patched to LE -RT3 (F Processor 2, Lexicon Return Channels 3 and 4), and so on. Patching for the Stereo Input channels is via the OUTPUTS Touch Screen menu. 10: LE ICON F 10: LEXICON FX User Manual LE ICON F St e All Parameters from the four F Units and for all F Types are stored with console Snapshots. See chapter reference 9.2 for more on the Cuelist and Snapshots. C P ste Settings can be copied and pasted between processors using the console COP PASTE function. Touch COP PASTE in the Touch Screen Main Menu, then press the F button in the Lexicon control group. The Touch Screen will show the four processors - touch one to copy, then press and hold PASTE-HOLD and touch another processor to Paste. C nt l Pages and parameters are selected direclty on the Touch Screen. To adjust a parameter simply select it on the Touch Screen and turn the SCROLL/ADJUST encoder. FX Access F Screen Access the Lexicon FX menus in the Touch Screen or, while in COPY PASTE mode, select processors for Copy / Paste function. AD UST SCROLL T S een C nt l Can be used instead of touch to select an F processor, or adjust a selected parameter. Parameter adjustment: Touch the parameter on the screen, then adjust with the ADJUST/SCROLL encoder. TAP Tap delay/tempo setting. Used for processors 1-4 to tap the tempo / delay time for relevant algorithms 1-4. The keys light blue when the function is available, and flash in time with the set tempo. NOTE: The resulting tempo is based on an average interval between all taps, up to five seconds apart. In order to restart the measurement you need to wait five seconds without tapping. 10: LE ICON F User Manual LE ICON F 10.1: REVERBS REVERBS Reverberation (or reverb for short) is the complex effect created by the way we perceive sound in an enclosed space. hen sound waves encounter an object or boundary, they don t just stop. Some of the sound LVDEVRUEHGE\WKHREMHFWEXWPRVWRIWKHVRXQGLVUHÀHFWHGRULVGLIIXVHG,QDQHQFORVHGVSDFHUHYHUELV dependent on many features of that space, including the si e, shape and the type of materials that line the walls. Even with closed eyes, a listener can easily tell the difference between a cupboard, a loc er room and a large auditorium. Reverb is a natural component of the acoustic experience, and most people feel that something is missing without it. H lls A Hall reverb is designed to emulate the acoustics of a concert hall a space large enough to contain an orchestra and an audience. Because of the si e and characteristics,Halls are the most natural-sounding reverbs, designed to remain behind the direct sound adding ambience and space, but leaving the source unchanged. This effect has a relatively low initial echo density which builds up gradually over time. 9RFDO+DOODQG'UXP+DOOUHYHUEVDUHVSHFL¿FDOO\WDLORUHGIRUWKRVHXVHV9RFDO+DOOKDVDVORZHURYHUDOOGLIIXVLRQ which wor s well with program material that has softer initial transients li e a voice. Drum Hall has a higher diffusion setting which is necessary to smooth out faster transient signals found in drums and percussion instruments. In addition to general instrumental and vocal applications, the Hall program is a good choice for giving separate trac s in a mix the sense of belonging to the same performance. Pl te Re e s A Plate reverb is a large, thin sheet of metal suspended upright under tension on springs. Transducers attached to the plate transmit a signal that ma es the plate vibrate, causing sounds to appear to be occurring in a large, open space. The Plates in the Vi4 F units model the sound of metal plates with high initial diffusion and a relatively bright, coloured sound. Plate reverbs are designed to be heard as part of the music, mellowing and thic ening the initial sound. Plate reverbs are often used to enhance popular music, particularly percussion. C m e Re e Historically, recording studio chambers were oddly shaped rooms with a loudspea er and set of microphones to collect ambience in various parts of the room. Chamber programs produce even, relatively dimensionless reverberation with little colour change as sound decays. The initial diffusion is similar to the Hall programs. However, the sense of si e and space is much less obvious. This characteristic, coupled with the low colour of the decay tail, ma es these programs useful on a wide range of material - especially the spo en voice, to which Chamber programs add a noticeable increase in loudness with low colour. 10.1: LE ICON F REVERBS User Manual LE ICON F R 10.1: REVERBS REVERBS m Re e Room produces an excellent simulation of a very small room which is useful for dialogue and speech applications. Room is also practical when used judiciously for fattening up high energy signals li e electric guitar amp recordings. Am ien e Re e Ambience is used to simulate the effect of a small or medium si ed room without noticeable decay. It is often used for voice, guitar or percussion. S in Re e A Spring reverb is created by a pair of pie oelectric crystals one acting as a spea er and the other acting as a microphone connected by a simple set of springs. The characteristic boing of a spring is an important component of many classic roc and roc abilly guitar sounds. Re e se Re e Reverse reverb wor s in the opposite fashion from normal reverb. hereas a normal reverb has the loudest series of UHÀHFWLRQVKHDUG¿UVWWKDWWKHQEHFRPHTXLHWHURYHUWLPHWKH5HYHUVHUHYHUEKDVWKHVRIWHVWUHÀHFWLRQVHVVHQWLDOO\ WKHWDLORIWKHUHYHUEKHDUG¿UVWDQGWKHQJURZVORXGHURYHUWLPHXQWLOWKH\DEUXSWO\FXWRII S in Re e A Spring reverb is created by a pair of pie oelectric crystals one acting as a spea er and the other acting as a microphone connected by a simple set of springs. The characteristic boing of a spring is an important component of many classic roc and roc abilly guitar sounds. 10.1: LE ICON F REVERBS 10.1.1: REVERB PARAMETERS User Manual LE ICON F REVERBS REVERB PARAMETERS PRE DLY P e Del Adjust time delay between the source signal and the onset of reverberation. This control is not intended to precisely mimic the time delays in natural spaces, as the build-up of reverberation is gradual, and the initial time gap is usually relatively short. For the most natural effect, the Pre Delay values should be set in the range of 10-25 milliseconds. However, if a mix is very busy or overly cluttered, increasing the Pre Delay time may help clarify it, and set each instrument apart from each other. Mi RT Mi R n e Re e Time Adjust the amount of time the mid-range reverb can be heard. Higher settings increase reverberation times which are usually associated with larger acoustical environments, but can decrease intelligibility. Lower settings shorten reverb times and should be used when a smaller apparent space or a more subtle effect is desired. (5/HYHO(DUO\5HÀHFWLRQV/HYHO $GMXVWWKHOHYHORIHDUO\UHÀHFWLRQVZLWKLQWKHUHYHUE (57LPH(DUO\5HÀHFWLRQV7LPH $GMXVWWKHDPRXQWRIWLPHEHIRUHUHYHUEHDUO\UHÀHFWLRQVRFFXU Si e Build-up rate of diffusion after the initial period (which is controlled by Diffusion). The Size control changes reverb sound from very large to very small. Generally, set this control to the approximate size of the acoustic space being created, before adjusting anything else. The size in meters is roughly equal to the longest dimension of the space. Audio is temporarily muted when Size is changed. RT Hi C t 5W+&VHWVWKHIUHTXHQF\DERYHZKLFKDG%RFWDYHORZSDVV¿OWHUDWWHQXDWHVWKHUHYHUEHUDWHG signal. It does not attenuate the reflections. High frequencies are often rolled off with this parameter, resulting in more natural-sounding reverberation. Setting a low frequency for this parameter can actually shorten the reverb time, as it damps the audio as it recirculates 10.1.1: LE ICON F REVERBS REVERB PARAMETERS 10.1.1: REVERB PARAMETERS User Manual LE ICON F REVERBS S REVERB PARAMETERS e Adjust the contour of the reverberation envelope. With Shape all the way down, reverberation builds explosively, and decays quickly. As Shape is advanced, reverberation builds up more slowly and sustains for the time set by Spread. With Shape in the middle, the build-up and sustain of the reverberation envelope emulates a large concert hall (assuming that Spread is at least halfway up, and that Size is 30 meters or larger). S e Adjust reverb onset and sustain. Low Spread settings result in a rapid onset of reverberation at the beginning of the envelope, with little or no sustain. Higher settings spread out both the build-up and sustain. Di Di si n Initial echo density. High settings of Diffusion result in high initial echo density, and low settings cause low initial density. In a real-world situation, irregular walls cause high diffusion, while large flat walls cause low diffusion. For drums and percussion, try using higher Diffusion settings. B ss Bst B ss B st %RRVWRUFXWIUHTXHQFLHVEHORZWKH%DVV%RRVW)UHTXHQF\WKHWUDQVLWLRQSRLQWIURP0LG5W to Low Rt). The amount of boost or cut required is highly dependent on the material being processed. RT Hi C t Re e Time Hi C t 6HWWKHIUHTXHQF\RIDG%RFWDYHORZSDVV¿OWHURQWKHUHYHUEHUDWHGVLJQDO It does not attenuate the reflections. High frequencies are often rolled off with this parameter, resulting in more natural-sounding reverberation. Setting a low frequency for this parameter can actually shorten the reverb time, as it damps the audio as it recirculates. Hi C t $GMXVWWKHDPRXQWRIKLJKIUHTXHQF\FRQWHQWLQWKHUHYHUEHUDWLRQWDLOV Higher frequency settings increase high frequency response, creating brighter reverbs; lower frequency settings create darker reverbs with more bass frequency emphasis. Hi C t $GMXVWWKHDPRXQWRIKLJKIUHTXHQF\FRQWHQWLQWKHUHYHUEHUDWLRQWDLOV Higher frequency settings increase high frequency response, creating brighter reverbs; lower frequency settings create darker reverbs with more bass frequency emphasis. 10.1.1: LE ICON F REVERBS REVERB PARAMETERS User Manual LE ICON F 10.2: DELAYS DELA S 'HOD\VUHSHDWDVRXQGDVKRUWWLPHDIWHULW¿UVWRFFXUV'HOD\EHFRPHVHFKRZKHQWKHRXWSXWLVIHGEDFNLQWR the input (feedbac ). This turns a single repeat into a series of repeats, each a little softer than the last. St i Del The Studio Delay features up to 1 second of stereo delay and offers a built-in duc er that attenuates the delay output whenever signal is present at the input. This can be used to eep the original signal from being muddied up by delay repeats. 2T Del The 2-Tap Delay is probably best described as an adjustable pong delay where each tap can be individually set in relation to the delay time. The 2 taps are a calculated percentage of the actual delay time from 1-100 (for example, if the delay time is 500ms and Tap 1 is set to 50 and Tap 2 is set to 100 , Tap 1 time would be 250ms and Tap 2 time would be 500ms). Narrow spacing of the tap percentages can widen the stereo image of the delay while wider tap spacing can create rhythmic delay lines. M l te Del 7KH0RGXODWHG'HOD\LVHQKDQFHGE\DQ/)2ORZIUHTXHQF\RVFLOODWRUWKDWSURGXFHVDFKRUXVLQJHIIHFWRQWKHGHOD\ repeats. This is a great delay for guitar and instrument passages that need that special something. M n Del The Mono Delay is the cleanest, most accurate of the delay programs, with up to 1 second of mono delay with panned output, and the built-in duc ing feature. P n Del This delay effect pans the delay repeats from left to right, while the input signal remains at its original(centre) position. T e Del In the days before digital, delays were created using a special tape recorder in which the magnetic recording tape was looped, with closely-spaced recording and playbac heads. The delay effect was created by the tape moving in the space between the record and playbac heads while delay time was adjusted by changing the speed of the tape ORRS$OWKRXJKYHU\PXVLFDOVRXQGLQJZRZDQGÀXWWHUFRPELQHGZLWKDVLJQL¿FDQWORVVRIKLJKIUHTXHQFLHVDQGWR VRPHH[WHQWDOVRORZIUHTXHQFLHVDUHDOOHOHPHQWVFRPPRQO\DVVRFLDWHGZLWKWDSHUHFRUGLQJV Re e se Del 7KLVGHOD\HIIHFWHPXODWHVWKHROGVWXGLRWULFNRIÀLSSLQJDWDSHRYHUSOD\LQJLWEDFNZDUGVWKURXJKDWDSHGHOD\DQG recording the effect. The delays build up from softer to louder creating the sensation that the delays come before the signal. 10.2: LE ICON F DELA S 10.2.1: DELAY PARAMETERS User Manual LE ICON F DELA S DELA PARAMETERS Dl Time Del Time Controls the length of the delay time relative to Tempo. At the middle of its range, delay repeats are synchronous with the Tempo button; lower values create faster repeats, while higher values increase the time between repeats. Fee Controls the number of delay repeats by feeding the delay output signal bac into the delay input. This creates a series of delay repeats, each slightly attenuated until they become inaudible. Higher settings create more repeats; lower settings reduce the number of repeats. When this knob is turned fully clockwise, it engages Repeat Hold – delay repeats play back in an infinite loop, but no further input signal is introduced into the delay effect. Repeat Hold is available only on Studio, Mono and Pong Delay. Hi P ss )UHTXHQFLHVEHORZWKLVDUH¿OWHUHGUHPRYHG L P ss )UHTXHQFLHVDERYHWKLVDUH¿OWHUHGUHPRYHG D L l D Le el Set the input signal level at which duc ing occurs. Studio, Mono and Pong delays only. Ducking causes delay repeats to be attenuated by a variable amount when an input signal is present. As the performance pauses, the delay signal level returns to its normal setting. This allows the delay to remain as an effect, but not clash with the original signal. For example whilst a vocalist is singing, the level of delay is kept down, but in the pauses the level of the repeats is brought up to provide a smooth tail to the vocal phrases. The Ducker Threshold sets the level at which the input signal has to be at for ducking to cut in – the higher the threshold, the louder the signal has to be for ducking to occur. D T D T es l Duc ing attenuation amount. Ducker Level sets the amount of attenuation once the signal has exceeded the threshold. 0dB is no ducking, 18dB is the maximum amount of ducking to the delayed signal. 10.2.1: LE ICON F DELA S DELA PARAMETERS 10.2.1: DELAY PARAMETERS User Manual LE ICON F DELA S DELA PARAMETERS Sme Duc ing attenuation amount. Available only for Tape and Reverse Delays, this parameter controls the amount of “smear,” or signal degradation and frequency loss. The higher the setting, the more each delay repeat loses intelligibility compared to the original signal. R ti T R ti Controls the Tap ratio of left and right outputs relative to the Delay time. Specific to the Pong Delay effect, this controls the delay time offset between left and right taps, expressed as a ratio of left to right time difference. In the centre the taps have the same time (1:1). S T S Swaps the delay time tap offset set by the Tap Ratio. Specific to the Pong Delay effect - reverses the offset set by the Tap Ratio control. De t M l ti n De t Control the intensity of modulation, or depth in the Modulated Delay. Lower settings produce a more subtle chorus effect, while higher values give a more lush chorusing of the delay repeats. P n T P n $GMXVWWKHSDQSRVLWLRQVLQWKHVWHUHR¿HOGRI7DSDQG7DS Mi Ratio of et to Dry signal. 100% is fully wet (effect) signal; 0% is fully dry (original) signal. 10.2.1: LE ICON F DELA S DELA PARAMETERS 10.3: MISC FX User Manual LE ICON F MISC F The MISC category provides primarily modulated and pitch-varying effects. C s Chorus creates a lush, full sound by combining two or more signals together where one is unaffected and the other signals vary in pitch very slightly over time. Chorus is commonly used to fatten up trac s and to add body to guitars without colouring the original tone. Chorus can also be used with discretion to thic en a vocal trac . Fl n e This effect was originally created by simultaneously recording and playing bac two identical programs on two tape reFRUGHUVWKHQXVLQJKDQGSUHVVXUHDJDLQVWWKHÀDQJHRIWKHWDSHUHHOVWRVORZGRZQ¿UVWRQHPDFKLQHWKHQWKHRWKHU P se 7KH3KDVHUDXWRPDWLFDOO\PRYHVIUHTXHQF\QRWFKHVXSDQGGRZQWKHVSHFWUXPRIWKHVLJQDOE\PHDQVRIDORZIUHTXHQF\RVFLOODWRU/)2FUHDWLQJDQRVFLOODWLQJ³FRPE¿OWHU´W\SHHIIHFW7KLVHIIHFWLVYHU\XVHIXORQNH\ERDUGVHVSHcially pad presets) and guitars. T em l Tremolo/Pan creates rhythmic changes in signal amplitude. Tremolo is obtained by setting Phase to 0 degrees, and affects both channels amplitude simultaneously. If the Phase is set to 180 degrees, an AutoPanner effect is generated, with the amplitude of one channel being raised whilst that of the other channel is lowered. i t 9LEUDWRLVREWDLQHGE\VPRRWKO\YDU\LQJWKHSLWFKRIWKHVLJQDOMXVWVKDUSDQGÀDWRIWKHRULJLQDODWDGHWHUPLQHGUDWH Phase controls whether the pitch of both channels is modulated together, or in an opposite direction. R t Rotary spea er cabinets were designed to provide a majestic vibrato/choir effect for electronic theatre and church organs. The most well nown rotary spea er is the Leslie Model 122, which has two counter-rotating elements: a KLJKIUHTXHQF\KRUQDQGDORZIUHTXHQF\URWRUZLWKVORZDQGIDVWVSHHGV Pit S it 7KLVHIIHFWVKLIWVWKHIUHTXHQF\VSHFWUXPRIWKHLQSXWVLJQDO$OWHULQJWKHSLWFKRIDVRXQGSURGXFHVDZLGHUDQJH effects - from subtle detunes to full interval shifts up or down a two octave range. The Pitch Shift effect is a chromatic shifter, meaning all notes of the scale are shifted by the same interval. Pitch Shift is very useful with guitar trac s, monophonic synth lines, or where special vocal effects are needed. Det ne Detune adds a slightly pitch-shifted version of the original source, thic ening the sound. This creates a particularly effective simulation of double-trac ing. Also a great alternative to the Chorus effect, adding the richness of a chorus without the audible sweep caused by the chorus rate. 10.3: LE ICON F MISC F 10.3.1: MISC FX PARAMETERS User Manual LE ICON F DELA S DELA PARAMETERS S ee Sets the speed at which the modulated effect cycles. De t LFO De t Scales the intensity of the effect. This control affects the output of the LFO only. It has no effect on the outputs of the individual waveforms. i es N m e O i es Controls the number of additional Chorus voices. Higher amounts add more richness to the Chorus effect. Re ene ti n Controls the amount of modulated signal being fed bac into the input, creating feedbac . Higher amounts add more resonance to the signal. Di Di si n Creates a time-smoothing effect similar to diffusion in reverb. Diffusion can be a subtle effect to add a little warmth to the chorus. P e Dl P e Del 'HWHUPLQHVWKHDPRXQWRIRIIVHWEHWZHHQWKHWZRVLJQDOVWKDWFUHDWHWKHÀDQJHHIIHFW Lower values create a tighter effect, higher values result in a more extreme “whooshing” sound. 10.3.1: LE ICON F DELA S MISC F PARAMETERS 10.3.1: MISC FX PARAMETERS User Manual LE ICON F DELA S W e DELA PARAMETERS m Selects the wave pattern used by the modulated effect. Select from sine wave, triangle wave, Stepped Triangle, and random. P se Controls whether amplitude or depth change occurs in both left and right outputs simultaneously or alternates between left and right outputs. This control affects the output of the LFO only. It has no effect on the outputs of the individual waveforms. P s St s P se St es Selects between a 4-, 8-, or 12-state phase shifter. S e Ste e S e Increases or decreases the stereo imaging of the Rotary effect. Di e O e i e G in Adjust overdrive gain to the preamp section of the rotary spea er effect. Diffusion can be a subtle effect to add a little warmth to the chorus. R t Min Sets the minimum speed at which the LF Spea er will rotate. Rotary effect only: The speed limits are used when the speed parameter is changed from Slow to Fast. 10.3.1: LE ICON F DELA S MISC F PARAMETERS User Manual LE ICON F DELA S 10.3.1: MISC FX PARAMETERS DELA PARAMETERS R tM Sets the maximum speed at which the LF Spea er will rotate. Rotary effect only: The speed limits are used when the speed parameter is changed from Slow to Fast. H n Min Rotary effect only: Minimum speed of the HF rotary horn. The speed limits are used when the speed parameter is changed from Slow to Fast. H nM Rotary effect only: Maximum speed of the HF rotary horn. The speed limits are used when the speed parameter is changed from Slow to Fast. D le Increases or decreases the Doppler pitch effect. The Doppler effect is a rise and fall in pitch experienced by an observer when a sound source is moving towards or away from them, due to a compressed or expanded wavefront. S it n Determines the amount of pitch shift or detune shift from the original signal source. Diffusion can be a subtle effect to add a little warmth to the chorus. Del n S i t Del Sets the delay time before the pitch shift or detune effect is heard in the Pitch Shift and Detune effects. Rotary effect only: The speed limits are used when the speed parameter is changed from Slow to Fast. 10.3.1: LE ICON F DELA S MISC F PARAMETERS User Manual LE ICON F DELA S F n 10.3.1: MISC FX PARAMETERS DELA PARAMETERS Fee Adjusts how much of the shifted signal is sent bac through the delay line in Pitch Shift and Detune. For creating cascading arpeggio-type effects. P n n 6HWVWKHSDQSRVLWLRQLQWKHVWHUHR¿HOGIRUHDFKWDSLQWKH7DS'HOD\RUHDFKFKDQQHORIWKH pitch shift/detune effects. Allows the stereo width to be increased by panning versions of the original signal that have been shifted slightly up and down, to left and right channels respectively. Mi Ratio of et to Dry signal. 100% is fully wet (effect) signal; 0% is fully dry (original) signal. 10.3.1: LE ICON F DELA S MISC F PARAMETERS User Manual 11.0: SETTINGS, SOFTWARE, RESET S STEM SETTIN S System Settings are accessed via the Touch Screen Main Menu and appear under the Menus PREFERENCES, S STEM, and SECURIT . 11.1: P e e en es PREFS The PREFS Menu is mainly concerned with LED and LCD (display, buttons etc) brightness and adjustments. This is also where you enable or disable the D.O. .S. (Direct Output ain Stabiliser) mode so gain changes at mix pre-amps don t affect the Direct Outputs levels. 11.2: SYSTEM The System menu provides information about the console itself, as well as offering settings for the console name, date, time, wordcloc , and networ settings (for Hi net and Soundweb functionality). The System Menu also provides reset functions for channels, busses, patching, and all , as well as the Event Log. 11.3: SECURITY 7KLVFRQVROHFDQEHVHWWRDOORZVSHFL¿FDFFHVVSULYLOHJHV to a number of users. ou can loc -out a variety of FRQVROHIXQFWLRQVDVGH¿QHGLQ8VHU3UR¿OHV hen LOCK is set in the Security menu, a user selection and valid password are required to operate the console. 11.4: SOFTWARE UPDATE Update from a USB Memory Stic . 11.5: RESET CONSOLE 11.0: SETTIN S, SOFT ARE, RESET 11.1: PREFERENCES User Manual SETTIN S PREFERENCES Preferences include console brightness settings and the D.O. .S. (Direct Out system enable. LED B i ain Stabiliser) tness Adjust the brightness of LEDs across the console. This includes all Encoder level indicators, metering, and status LEDs. F e Gl Bi tness Adjust the Fader low brightness across the console. This includes all colour fader lighting. S een B i tness Adjust the Touch Screen brightness. C nnel LCD B i tness Adjust the Brightness of the Channel LCD Screens 11.1: SETTIN S PREFERENCES 11.1: PREFERENCES User Manual S STEM SETTIN S C PREFERENCES nnel LCD C nt st Adjust the contrast of the Control Channel LCD screens. D.O.G.S. Enable / Disable Direct Out ain Stabiliser system. D.O.G.S. is a tool that prevents Direct Output levels from changing when a Mic Gain is changed - so any feeds taken from the console remain stable. That is, it maintains stored gain structure between channel input and direct output when multiple devices are sharing a single source. When enabled, D.O.G.S. adjusts the direct output level from each channel inversely to any manual change of a mic gain control (across a change of +16/-10dB) on that channel. A t B s M ste Sele t Disable to prevent the Assignable Channel Strip switching to Bus Master control when a tOTEM button is selected. Default is On. 11.1: SETTIN S PREFERENCES 11.2: SYSTEM MENU User Manual S STEM SETTIN S S STEM MENU The System menu provides information about the console itself, as well as offering settings for the console name, date, time, wordcloc , and networ settings (for Hi net and Soundweb functionality). The System Menu also provides reset functions for channels, busses, patching, and all , as well as the Event Log. RESET CHANNELS Reset all Input audio channels to factory default. Includes all Input Channel audio parameters, channel name and channel type(Mono/Linked). It does not include patching. You will be asked to confirm this action in the Touch Screen. RESET BUSES Reset all Output audio channels (Bus Masters) to factory default. Includes all Bus Master audio parameters, bus name and bus type(Mono/Stereo). It does not include patching. You will be asked to confirm this action in the Touch Screen. RESET PATCHING Reset all system patching to factory default. You will be asked to confirm this action in the Touch Screen. 11.2: SETTIN S S STEM MENU 11.2: SYSTEM MENU User Manual S STEM SETTIN S S STEM MENU RESET ALL Reset all parameters including names and patches to factory default. You will be asked to confirm this action in the Touch Screen. E ENT LOG $ORJRIVSHFL¿FV\VWHPHYHQWV Can be useful for trouble shooting and for technical support staff. C ns le N me Name the console Touch / select the value field to bring up a QWERTY keyboard to edit the Name. C ns le T e Console Model - Read Only S t e e si n Current software version - Read only. D te System Date. Touch or select to bring up a date editor in the Touch Screen. 11.2: SETTIN S S STEM MENU 11.2: SYSTEM MENU User Manual S STEM SETTIN S S STEM MENU Time System Time. Touch or select to bring up a time editor in the Touch Screen. W l Choose an Internal, External, or Option card wordcloc reference. The console can be set as Word Clock Slave (EXTernal or OPTION) or Master (INTernal). When set to EXTernal the console will attempt to clock from an incoming word clock to the rear panel Word Clock connection. If successful, a CLOCK icon displayed on the title bar. If there is no valid signal the icon is shown with an exclamation mark and the console will run from its internal clock until external clock returns. When set to OPTION, the console will use an installed option card as its reference. The console has a single word clock connector, which operates as an output when set to INTernal and as an input when set to EXTernal. MAC A ess The Media Access Control address. Read Only. IP A ess Res l ti n Set IP resolution to DHCP (Dynamic) or Manual. When you set the IP resolution to manual, you will have to enter a valid IP address in the IP Address field. IP A ess The IP Address of this console on the networ . If IP Resolution is set to DHCP (Dynamic) then this value is read-only. Up to software version 1.6 the console is limited to IPv4 Private Network address ranges: 10.0.0.0–10.255.255.255, 172.16.0.0–172.31.255.255, or 192.168.0.0– 192.168.255.255. IP address changes require a console reboot to take effect. S net M s Used to specify the subnet for this device. If IP Resolution is set to DHCP (Dynamic) then this value is read-only. 11.2: SETTIN S S STEM MENU User Manual S STEM SETTIN S 11.2: SYSTEM MENU S STEM MENU Hi net En le Dis le Turn HI net capability On of Off. This console can transmit HiQnet Venue Events on the network along with cue recalls. Please see chapter reference 9.2 for more detail. The console can also control Soundweb London Device Pre amp devices directly via HiQnet - see chapter reference 5.1.1 for more detail. Hi net A ess The Hi net address of this device. 11.2: SETTIN S S STEM MENU User Manual S STEM SETTIN S 11.3: SECURITY MENU SECURIT MENU 7KLVFRQVROHFDQEHVHWWRDOORZVSHFL¿FDFFHVVSULYLOHJHVWRDQXPEHURIXVHUV<RXFDQORFNRXWD YDULHW\RIFRQVROHIXQFWLRQVDVGH¿QHGLQ8VHU3UR¿OHV:KHQ/2&.LVVHWLQWKH6HFXULW\PHQXD user selection and valid password are required to operate the console. $FFHVVSULYLOHJHVDUHGH¿QHGLQWKH352),/(6PHQX(DFKXVHULVDVVLJQHGD3UR¿OHZKHQWKH\ DUHFUHDWHG(GLWLQJRIXVHUVDQGSUR¿OHVLVRQO\DYDLODEOHZKHQORJJHGRQDVWKHDGPLQLVWUDWRU Ple se n te: P ss A minist t se s s nn t e e sil e ss ss e e i l st tten. T e l e se . t e lt ADD USER Add a User to the Administrator list. A ‘User’ is a person / administrator account (a ‘profile’ is a set of access privileges assigned to a User). When selected, the Touch Screen will display the Add User menu. See chapter reference 11.3.1 for more detail. EDIT USER Edit the selected User. When selected, the Touch Screen will display the Edit User menu. See chapter reference 11.3.1 for more detail. 11.3: SETTIN S SECURIT MENU User Manual S STEM SETTIN S 11.3: SECURITY MENU SECURIT MENU DELETE USER Delete the selected User. The system will ask for confirmation in the Touch Screen to confirm this action. PROFILES $FFHVVWKH3UR¿OHV0HQX Use the Profiles Menu to add and edit profiles that can be assigned to users. LOC Loc the console. After locking, the console will require a User selection and associated password for operation. NOTE: Passwords cannot be easily recovered if lost or forgotten. Use Sele t Select A User from the current list. You can or select a User to log-in as that user. The Touch Screen will display a User / Password entry screen for that purpose. 11.3: SETTIN S SECURIT MENU User Manual S STEM SETTIN S SECURIT 11.3.1: ADD / EDIT USER ADD / EDIT USER 7KH$GGDQG(GLW8VHUPHQXVUHTXLUHVLPLODULQIRUPDWLRQ8VHU1DPH3UR¿OHDQG3DVVZRUG 3UR¿OHVFDQEHFUHDWHGDQGRUHGLWHGLQWKH(GLW3UR¿OHPHQXVHHFKDSWHUUHIHUHQFHIRU more detail). Use N me Name the User. Touching or selecting the value field brings up a QWERTY keyboard in the Touch Screen. 3UR¿OH 3UR¿OH1DPH Use the Profiles Menu to add and edit profiles that can be assigned to users. A ‘profile’ is a set of access privileges assigned to a User (a ‘User’ is a person / administrator account). P ss Choose a password for this user. Touching or selecting the value field brings up a QWERTY keyboard in the Touch Screen. 11.3.1: SETTIN S SECURIT ADD / EDIT USER User Manual S STEM SETTIN S SECURIT 11.3.1: ADD / EDIT USER ADD / EDIT USER CANCEL Cancel the current User creation or edit without saving any altered values. SA E Save the current User. 11.3.1: SETTIN S SECURIT ADD / EDIT USER 11.3.2: PROFILES User Manual S STEM SETTIN S SECURIT PROFILES $SUR¿OHGH¿QHVWKHDFFHVVSULYLOHJHVRIDFRQVROH8VHU0DQ\IXQFWLRQDODVSHFWVRIWKHFRQVROH FDQEHGHQLHGWRXVHUVDFFRUGLQJWRWKH3UR¿OH7KHDFFHVVFDWHJRULHVDUH,QSXW3URFHVVLQJ%XV Sends, Bus Processing, Matrix Sends, Matrix Processing, Main Output Processing, Main Output Matrix Sends, Main Output On Faders, E , Fader Layer A, Fader Layer B, Fader Layer C, Fader Layer D, F , Touch Screen, and Cue List. NOTE: If a Cue recall will change an aspect of console functionality that is loc ed, but Cue List functionality is not loc ed, the Cue will still be recalled as normal. DELETE PROFILE 'HOHWHWKHFXUUHQWO\VHOHFWHG3UR¿OH The system will ask for confirmation in the Touch Screen. NEW PROFILE &UHDWHDQHZDFFHVV3UR¿OH Touching this option will bring up a QWERTY keyboard in the Touch Screen to name the new Profile. When you press the APPLY button, the screen will change to the Profile options menu. 11.3.1: SETTIN S SECURIT PROFILES 11.3.2: PROFILES User Manual S STEM SETTIN S SECURIT PROFILES CANCEL &DQFHOWKHFXUUHQW3UR¿OHFUHDWLRQRUHGLWZLWKRXWVDYLQJDQ\DOWHUHGYDOXHV SA E 6DYHWKHFXUUHQW3UR¿OH 3UR¿OH 6HOHFWDSUR¿OHWRYLHZRUHGLW Touch or select the value field to select a Profile. You can only edit profiles when logged on as the Administrator. 11.3.1: SETTIN S SECURIT PROFILES 11.4: SOFTWARE UPDATE User Manual S STEM SETTIN S SOFT ARE UPDATE The Si Impact software is updated via the USB data port on the front panel. Details and special instructions for any release will be included with the software release pac age however, the normal procedure is listed below for reference: 1.8Q]LSWKH¿OHVWRD86%NH\LQWKHURRWGLUHFWRU\\RXVKRXOGKDYHWZRRUWKUHH¿OHVLPSDFWELQ info.xml impactFader.hex (optional, see release notes). 2. Switch the console off using the Power switch on the rear of the console. Remove any USB eys. 3. Press and hold the recessed BOOT LOADER button on the rear of the console (use a thin, blunt tool to access it) while you turn the console on using the power switch. A Software Loader screen will appear. 4. Insert the USB stic and then press the MENU ey. 5.6HOHFWWKHLQIR[PO¿OHXVLQJWKHDGMXVWHQFRGHU7KH/2$'EXWWRQDWWKHERWWRPULJKWRIWKHWRXFK screen window will appear when a valid selection is made. 6. Press the LOAD button. Software will begin loading. 7. ait until both progress bars have reached 100 , and the tic symbol has appeared to the right of each progress bar, before removing the USB stic . 127($OZD\VIROORZRQVFUHHQLQVWUXFWLRQVDQGUHOHDVHQRWHVDVXSGDWHVWRIDGHU¿UPZDUH simil m e ie iti n l se in t. 11.4: SETTIN S SOFT ARE UPDATE 11.5: RESET CONSOLE User Manual S STEM SETTIN S RESET CONSOLE T e ll in e e ill est e t e e lts n e m t t e inte n l SD t ee s e t S s. ns le . DO NOT t t e t t is is is ou can use the RESET options in the S STEM menu to set parameters and settings bac to factory default without destroying data. 5HPHPEHU$OOVHWWLQJVFXHVXVHUVSUR¿OHVDQGVKRZVZLOOEHORVW 1. Starting with the console off, hold the PO ER ey for 5 seconds until the console starts. 2. Press the MENU ey once the loader screen appears. 3. Press the LR, MONO and F 1 eys together, this opens the update page. 4. Press the CLEAR SD CARD button on the touch screen. 5. Restart the console. 11.5: SETTIN S RESET CONSOLE User Manual 12: OSCILLATOR OSCILLATOR The console s internal Oscillator is a signal generator provided for various test purposes. It can generate either a sine wave or pin noise (equal power per octave) and has various routing options to Mix and Matrix busses, as well as a patchable physical output. It is not possible to route directly to the console s LR and MONO buses, though you can route the Oscillator signal to a Mix bus master then use the LR and MONO routing eys. Oscillator patching is stored in Snapshots Oscillator settings default to Off following a power cycle. R te T MIX MTX Route the oscillator signal to individual Mix and Matrix busses. Oscillator routing to each bus has to be enabled using the SOLO button on that Bus Master. R te T All Route the oscillator to all Mix and Matrix busses. Le el Set the Oscillator signal level. 12: OSCILLATOR User Manual 12: OSCILLATOR OSCILLATOR Fe en Set the frequency for the Oscillator s Sine output. T e Set the signal type for the Oscillator output. Either Sine Wave or Pink Noise (Full spectrum, equal power per octave). Os ill t O tP t Set a physical output for the Oscillator signal Touching or selecting the value field will bring up a normal patching screen in the Touch Screen. See Section 5.0 for more details. 12: OSCILLATOR APPENDIX 01: NO SOUND? User Manual NO SOUND AT les tin G i e. 2QHRIWKHPRVWFRPPRQSUREOHPVH[SHULHQFHGZLWKPL[LQJFRQVROHVLV¿QGLQJWKDWDQLQSXWLVQ¶WDSpearing at an output. There are many possible reasons for this, but the best way to troubleshoot it is to ¿UVWPDNHVXUHWKH&RQWURO&KDQQHOLVVHWXSFRUUHFWO\WKHQWRJRWKURXJKWKHVLJQDOSDWKDQGZRUNRXW ZKHUHWKHµEUHDN¶LV <RXFDQFKHFNWKHH[DFWDXGLRSDWKRIDQ\VLJQDOE\UHIHUULQJWRWKHVLJQDOSDWKGLDJUDPVLQ&KDSWHU A e S l s in ti e? ,IWKH62/2&/5EXWWRQLVOLWUHGWKHQWKHUHDFKDQQHOLVVRORHGDQGDOORWKHUFKDQQHOVPD\EHPXWHG 7KLVVKRXOGQ¶WDIIHFWDPDLQ/HIW5LJKWRU0RQRRXWSXWXQOHVV6ROR,Q3ODFHLVHQDEOHGLQWKH62/2PHQX$OVRLI 6RORPRGHLVµ$XWR¶WKHV\VWHPPD\EHVZLWFKLQJWR$)/ZLWKIDGHUVGRZQ\RXZLOOORVHVLJQDO6ZLWFK6ROR0RGH in the SOLO menu. &OHDUDOODFWLYH6RORVE\SUHVVLQJWKH62/2&/5EXWWRQ A e t e C nt lC nnel, In tC nnel, n In tP t e t? 7KHSK\VLFDOLQSXWVKRXOGEHSDWFKHGWRDQ,QSXW&KDQQHODQGWKDW,QSXW&KDQQHOVKRXOGEHFRQWUROOHGE\D&RQWURO &KDQQHO )RUH[DPSOHE\GHIDXOWIDFWRU\VHWWLQJV0LF/LQH,QSXWLVSDWFKHGWRPRQR,QSXW&KDQQHO&+ZKLFKLVFRQWUROOHGE\WKH&RQWURO&KDQQHOLQ6ORW)DGHU/D\HU$7KHRWKHUGHIDXOWSDWFKHVDUHOLVWHGDW You can check which Control Channel is controlling which Input Channel in the FADER SETUP menu (See 3.2.1). You can check which physical input is patched to an Input Channel by selecting the relevant Control Channel. The Input Patch menu item (INPUTS from main Touch Screen Menu) will show the currently patched physical input. See reference 5.1 for more patching detail. Is t e e n t in n t e mete s? %\FKHFNLQJWKH,QSXWDQG2XWSXWSDWKPHWHUV\RXVKRXOGEHDEOHWRORFDOLVHDSUREOHPWRDODUJHH[WHQW The Input channel metering comes after the Mic/Line input but before the rest of the Input Channel. Therefore, if the input signal is valid, the input is patched correctly, you have selected the correct Control Channel (SEL button), and you have applied enough Gain, you should see a level indication on the meters in the IN section of the Assignable Channel Strip (7.2.1). Output Channel metering is tapped just before the physical output patch. A et e in se ? 3KDVHLVRQO\OLNHO\WRFDXVHDQLVVXHLIFRKHUHQWVLJQDOVDUHDSSOLHGWRPRUHWKDQRQHFKDQQHODQGWKH\DUHERWK URXWHGWKHVDPHZD\)RUH[DPSOH\RXPLJKWEHXVLQJDWHVWVLJQDORUXVLQJWZRFKDQQHOVIRUWKHVDPHVLJQDO You can check if phase is an issue by switching the Phase by 180 degrees on ONE of those channels (use the PHASE button for that audio channel in the IN section of the ACS - 7.2.1). If the audio comes back, then look for the cause of the phase issue - it may be that a balanced connection has been wired incorrectly, for example. APPENDI 01: NO SOUND APPENDIX 01: NO SOUND? User Manual NO SOUND Is t e G te s t? It is possible for an incorrectly set ate process to stop all signal. This happens most often when the threshold is set too high and the signal never gets loud enough to 'open' the Gate. You can easily check this by turning the Gate process off with the GATE button in the GATE section of the ACS (7.2.2). I t e e is n Inse t P int ssi ne , is t e si n l et ne ? $QLQVHUWSRLQWLQWHUUXSWVWKHVLJQDOÀRZE\SDWFKLQJLQDSK\VLFDORXWSXWDQGDSK\VLFDOLQSXW,IWKHVLJQDOLVQRW EHLQJUHWXUQHGDWWKH,QVHUW5HWXUQRUWKHUHLVQR,QVHUW5HWXUQSDWFKWKHQVLJQDOZLOOVWRSWKHUH The easiest way to check is to check the INSERT page from the Touch Screen Main menu. If the problem channel has an Insert Point assigned, check that both the Insert Send and Return for that Insert Point have valid patches and that the signal is being returned (from an external processor, for example). Reference section 5.1 has specific information on Insert patching. Is t e C nnel n n nm te ? ,ID&RQWURO&KDQQHO21EXWWRQLVHLWKHUQRWOLWRULVLOOXPLQDWHGUHGSDUWRIDQDFWLYH0XWH*URXSWKHQWKLVZLOO PXWHWKHVLJQDO7XUQRIIWKHUHOHYDQW0XWHJURXSRUSUHVVWKH21EXWWRQWRFRUUHFWWKHSUREOHP The basic ON button operation is described in section 7.3, while Mute Groups are covered in section 8.1. Is t e F e ? 7KH)DGHUQHHGWREHVHWKLJKHQRXJKZKHQURXWLQJWRDQ\SRVWIDGHGHVWLQDWLRQ,I\RXUSUREOHPRXWSXWURXWHLVVHW pre-fader, then this will not affect anything. You can check the Pre/Post routing of any Mix Bus from an Input Channel in the INPUTS menu - Per Mix Post/Pre (6.1.1). Is t e nnel nne t li t t? If a signal is panned to the right and no right output exists - either because it isn t patched, or because there is another problem with the right-hand path - then no signal will be heard. Set Pan to the middle to make sure this isn't a problem. APPENDI 01: NO SOUND APPENDIX 01: NO SOUND? User Manual NO SOUND Is t e Si n l R te t li t t s nnel? 5RXWLQJFDQFRYHU/5DQG0RQRURXWLQJDVZHOODV0L[EXVURXWLQJ This will depend on the particular instance. If the issue is no output at the main LR or mono outputs for example, then check than the signal is routed using the LR and/or MONO buttons in the ACS OUT section (7.2.5). If the issue is with a Mix Bus or Matrix output, then check contribution to that bus is turned up (see the tOTEM section 3.5). Is t e O t t M ste C nnel P t li ? $OPRVWH[DFWO\WKHVDPHFKHFNVDVDERYHFDQEHGRQHRQWKH2XWSXW0DVWHU&KDQQHOZKHWKHULW VD0,;0$75,; RU/500DVWHU For detailed path troubleshooting check the signal path diagrams in section 6, as the path order may be slightly different, otherwise run through the same checks as above but for the Output channel. Is t e O t tP t li ? 7RFKHFNWKHSK\VLFDORXWSXWSDWFKVHOHFWWKHUHOHYDQW%XV0DVWHU&KDQQHODQGWKHQJRWRWKH2873876PHQXLQ the Touch Screen. There are two ways to access an Output Master Channel: Either press the relevant tOTEM button (the MONO/SEL Control channel becomes the Master and is selected automatically) or choose the correct Fader Layer and Select (SEL button) the channel. APPENDI 01: NO SOUND