1
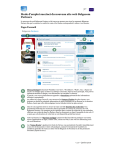
Getting Started Manual
IAMMS
_____________________________________________________________________________________
Page: 1
Getting Started Manual
IAMMS
_____________________________________________________________________________________
Table of Contents
TABLE OF CONTENTS ..............................................................................................................................2
CHAPTER 1
INTRODUCTION.............................................................................................................3
SYSTEM OVERVIEW AND FEATURES .............................................................................................................3
BASIC SYSTEM MAP .....................................................................................................................................4
IAMMS System Map 1 .............................................................................................................................4
CHAPTER 2...................................................................................................................................................5
IAMMS LOGIN WINDOW .........................................................................................................................5
CHAPTER 3
ENTERING NEW EQUIPMENT INTO IAMMS .........................................................7
IAMMS New Equipment Entry Process Map...........................................................................................8
PROCESS FOR ENTERING NEW EQUIPMENT INTO THE IAMMS SYSTEM .......................................................8
BIRTH RECORD FIELDS:..............................................................................................................................10
CHAPTER 4
ENTERING MAINTENANCE LOG INFORMATION INTO IAMMS ...................12
IAMMS Data Entry Process Map ..........................................................................................................12
METHOD ONE – QUICK LOG .......................................................................................................................13
QUICK LOG FIELDS: ...................................................................................................................................14
METHOD TWO – MAINTENANCE LOG .........................................................................................................14
Create a New Maintenance Log Record................................................................................................15
Change a Maintenance Log Record ......................................................................................................15
Delete a Maintenance Log Record ........................................................................................................15
MAINTENANCE LOG FIELDS: ......................................................................................................................16
CHAPTER 5
GETTING MORE DETAILED IAMMS INFORMATION .......................................18
Page: 2
Getting Started Manual
IAMMS
_____________________________________________________________________________________
Chapter 1
Introduction
This manual provides a general guide to help new users understand the basic structure of the IAMMS System
and provides step-by-step instructions on how the enter new equipment and how to enter maintenance
information into the IAMMS system. Also a high-level overview is provided to briefly expose new users to
many of the IAMMS features, benefits, and requirements. For detailed information on all of IAMMS features,
see the IAMMS Users Manual.
In addition to the information presented in this manual, an on-line help feature is provided.
System Overview and Features
IAMMS was designed and developed (by maintenance people for maintenance people) to be user friendly for
technicians and provide reports to effectively plan and schedule maintenance. IAMMS can also provide
information needed by Process and Environmental Engineers. IAMMS can help your organization move from
reactive to predictive maintenance by providing detailed failure information that can enable you to focus
resources on the “bad actors” and to assist in finding and eliminating the “root cause of failure. IAMMS was
created with the premise that information and data must be easy to input and easy to extract. Every screen,
report, and graph was designed with this key premise in mind.
IAMMS can generate reports on equipment availability by plant, unit or an individual piece of equipment.
The ability to share maintenance experience on similar equipment can facilitate the identification and
elimination of “root causes” of equipment failure in a timely manner, identify potential problems, avoid
duplication of effort and provide opportunities for cost saving.
To use IAMMS effectively, you must first know how to use Microsoft Windows. This manual does not explain
how to use Microsoft Windows. Refer to your Microsoft Windows user manual for those instructions.
IAMMS includes custom screens to document emissions associated with maintenance activities and includes
user programmable alarms for all scheduled activities, cylinder certification expiration, and alarms to indicate
reportable quantities have been exceeded.
IAMMS Features:
Meets Documentation Requirements
ISO 9001:2000 Quality Management Standard
ISO 14001 Environmental Management System Standards
OSHA 1910 Process Safety Management
Easily captures and reports on emissions associated with routine maintenance activities
Can be set-up to Alarm when reportable quantities are exceeded
Users can program Alarms associated with scheduled activities
IAMMS can automatically capture and document EPA daily drift test results
Facilitates communication across plant and between locations
Builds large shared database to facilitate predictive maintenance
Easy to use windows environment
Easy to convert existing data
Page: 3
Getting Started Manual
IAMMS
_____________________________________________________________________________________
Basic System Map
The following graphic depicts the basic mapping of the IAMMS System and some of IAMMS’ key features.
This “map” does not cover all of IAMMS’ features. For a complete list and description of all IAMMS’ features,
see the IAMMS Users Manual.
IAMMS System Map 1
Page: 4
Getting Started Manual
IAMMS
_____________________________________________________________________________________
Chapter 2
IAMMS Login Window
Startup from Windows
The IAMMS system is started from the IAMMS application window in the Microsoft Windows Program
Manager window or from an ICON on your desktop.
Start the IAMMS system as follows:
Double-click on the IAMMS icon in the IAMMS application window.
IAMMS
The IAMMS Login window appears.
IAMMS requires a valid User ID and Password to logon. This information is entered in the IAMMS
Login window.
If you do not have a valid User ID or have trouble accessing the IAMMS system, contact your IAMMS System
Administrator. The IAMMS System Administrator issues valid User IDs and passwords.
Page: 5
Getting Started Manual
IAMMS
_____________________________________________________________________________________
Complete the Login window as follows:
1) Type your user ID in the User ID field, then press the tab key of click on the Password field.
2) Type your password in the Password field.
Note: For security reasons, asterisks appear in place of the characters typed in the Password field.
3) Click on OK or press the “Enter” key.
IAMMS will startup in the same screen that you were viewing when you last logged out. Note: The primary
starting screen is the Equipment Information Screen.
Page: 6
Getting Started Manual
IAMMS
_____________________________________________________________________________________
Chapter 3
Entering New Equipment into IAMMS
Most information within the IAMMS system is referenced to the equipment tag number. Therefore users must
enter the new equipment tag number first. Once the equipment tag number is entered, users now have access to
a number of screens specifically associated with the newly entered equipment tag number. These screens
include the following:
1.
2.
3.
4.
5.
6.
7.
8.
9.
10.
11.
12.
13.
14.
15.
16.
Maintenance Log
Quick Log
Equipment Specific Procedures
Equipment Specific Images and Drawings
Maintenance Schedules
Process Information
Column Description
Sample and Return Points
Pressure Settings
Components
Time / Count
Factors
Emissions
Flow Set-up
EPA Log
Daily Drift Log
Note: None of these screens can be accessed until the new equipment tag number has been entered into the
Birth Record Screen.
Once the new equipment number has been entered, Maintenance Log information and other data associated with
this equipment tag number can be entered. After entering information associated with this new equipment tag
number, several screens for extracting information concerning this new equipment can be extracted from the
following screens:
1.
2.
3.
Reports (Twenty One (21) standard Reports are Available)
Graphs (Three (3) Standard Graphs are Available)
Find
The step-by-step process for entering new equipment into IAMMS will be described on the following page.
These instructions will reference the IAMMS New Equipment Entry Process Map.
Page: 7
Getting Started Manual
IAMMS
_____________________________________________________________________________________
IAMMS New Equipment Entry Process Map
Process for Entering New Equipment into the IAMMS System
1.
2.
Login to the IAMMS system. (See Chapter 2)
Click on “Spec” as illustrated in the graphic below:
This will bring up the Specification Screen for the last piece of equipment that was accessed. (See
Specification Screen below:
Page: 8
Getting Started Manual
IAMMS
_____________________________________________________________________________________
3.
To add a new equipment tag number, click on the “New” button on the toolbar.
4.
This will clear the contents of the Birth Record, Maintenance Schedules, Procedures, and Image /
Drawing Screens.
Enter the new equipment Tag number into the “Tag Number Field”.
Page: 9
Getting Started Manual
IAMMS
_____________________________________________________________________________________
5.
After entering the new equipment tag number, enter appropriate information into each of the applicable
fields on the Birth record. The following is a list and description of each of the fields on the Birth
Record:
Birth Record Fields:
Field Name
Description
Drop
Down List
from
Codes
No
Required
None
Required
Optional
Non-Editable
Default Value
Tag Number
The tag number of equipment.
Description
Category / Unit
What is the equipment used for?
The unit the equipment is
located in or assigned to.
No
Yes
Required
Required
None
None
Equipment Category
Equipment Type
Safety Critical
Basic equipment category.
What kind of equipment is it?
Select this box if the equipment
has been identified as being
safety critical per OSHA 1910
PSM.
Select this box if the equipment
has been identified as being
quality critical to process
operation per ISO 9000.
Select this box if the equipment
has been identified as being
environmentally critical to
process operation per ISO
14001.
Date equipment Entered Into
Database.
Global Positioning Satellite
coordinates of the equipment.
This allows equipment to be
assigned specific secondary
grouping criteria to allow for
sorting by these criteria.
The number of days selected for
the daily drift calculation. (The
entry should be 5 or 7).
Yes
Yes
No
Required
Required
Optional
None
None
None
No
Optional
None
No
Optional
None
No
Required
None
No
Optional
None
Yes
Optional
None
No
Optional
None
No
No
Optional
Optional
None
None
No
Optional
None
No
Optional
None
No
Optional
None
ISO
EPA
Service Date
GPS Location
Secondary Grouping
Daily Drift (Days)
Daily Drift Period
Corrective Action
Limit
Serial Number
Value Type
Valve Number
If the daily drift test result is
outside of this limit IAMMS
will require users to enter a
comment in the comment field.
The serial number of the
equipment.
For Gas Chromatographs, the
type of chromatographic valve.
For Gas Chromatographs, the
number of chromatographic
valves.
Page: 10
Getting Started Manual
IAMMS
_____________________________________________________________________________________
Detector
Factory Name
Project Engineer
Purchase Order
Number
Model:
Quick Log Setting
Daily Drift Cylinder
Validation
- Low Cylinder
- High Cylinder
- Low & High Cylinder
Replicate
The type of detector used on the
analyzers.
The name of the factory that
manufactured the equipment.
The name of the primary project
engineer.
The original project purchase
order number.
The model number for the
equipment.
Selects group of 10 quick log
settings for quick access when
updating maintenance activities
for this equipment.
Checking one of these boxes
determines which cylinder(s) are
used for Daily Drift Cylinder
Validation
No
Optional
None
No
Optional
None
No
Optional
None
No
Optional
None
No
Optional
None
No
Optional
None
No
Optional
Unchecked
Used for duplicating equipment.
This box is used with the
replicate function to identify
what will be duplicated. A
check in this box indicates the
desire for duplication of this
equipment.
No
Optional
Unchecked
6.
After entering information into all applicable fields on the Birth Record, click on the “Save” button on
the toolbar.
7.
This completes the steps necessary to add a new piece of equipment into the IAMMS system. Users
can now make Maintenance Log entries and enter information associated with this equipment into any
of the sixteen (16) specific equipment associated screens listed at the beginning of this chapter.
Page: 11
Getting Started Manual
IAMMS
_____________________________________________________________________________________
Chapter 4
Entering Maintenance Log Information into IAMMS
There are two methods for entering maintenance history into the IAMMS system. Both methods update the
IAMMS database. However, one method provides for quicker user entry of data into the IAMMS database. This
method, using the Quick Log, is used for most routine recordings of maintenance history. The Maintenance Log
allows users more flexibility to customize and expand on the maintenance history entry. The Maintenance Log
is typically used for entering unusual maintenance activities. This chapter will review both methods for entering
maintenance history information into the IAMMS system.
The following process map provides a system level look at the data entry process.
IAMMS Data Entry Process Map
Note that both entry methods require users to complete the following steps to prepare for data entry.
1. Log into the IAMMS system. (See Chapter 2)
2. Click on the “Equipment” button on the main toolbar.
Page: 12
Getting Started Manual
IAMMS
_____________________________________________________________________________________
3.
4.
5.
This will bring up the Equipment Information” screen.
Expand the desired Unit and Equipment Category folders.
Click on the appropriate Equipment Type. (IE: Gas Chromatograph) This will display a list of all “Gas
Chromatographs” associated with the selected unit.
6. Click on an individual equipment tag number. By clicking on a specific equipment tag number, users
can now access all screens that are associated with this specific piece of equipment.
7. Users are now ready to use one or both of the methods for entering data into the IAMMS database.
Note: Double clicking on the equipment tag number will take users directly to the Specification screen.
Method One – Quick Log
The first method covered will be the Quick Log method. This is the most frequently used method for entering
data into IAMMS.
Quick Log provides users a rapid method of making routine maintenance log entries. This screen contains 100
available quick maintenance log entry options with pre-selected symptom, action, and fault codes for routine
activities associated with the selected equipment. When the Quick Log ICON is selected, the ten most used
maintenance log scenarios, for the specific equipment tag selected by the user, are displayed. (The ten
maintenance log scenarios for this equipment are selected in the birth record.) The user then clicks on the
button for the scenario that matches the completed maintenance activity, enters down time, repair time, and
comments. The user can then click on Save and the Maintenance Log entry will successfully complete.
The pre-selected symptom, action, and fault codes are setup in the “CODE” Screen. See the chapter on
“Codes” in the user’s manual for more information on how to setup these pre-selected quick log settings.
When this screen is saved it will create a record in the Maintenance Log Table. The saved information can be
viewed in the Maintenance Log screen.
Page: 13
Getting Started Manual
IAMMS
_____________________________________________________________________________________
Quick Log Fields:
Field Name
Description
Drop Down
List from
Codes
Required
Optional
NonEditable
Default Value
Down Time
The time interval between the time
maintenance was started and the
equipment was returned to operations.
This time is used by the equipment
availability report.
No
Required
None
Repair Time
This is a subset of Down Time. It
identifies the actual amount of time
required to repair the equipment.
The serial number of the calibration
standard.
No
Required
None
Yes – This
drop down
list is
generated
based on
unit(s)
assigned to
cylinders in
the cylinder
inventory
screen
Yes – This
drop down
list is
generated
based on
unit(s)
assigned to
cylinders in
the cylinder
inventory
screen
No
Optional
None
Optional
None
Optional
None
Cal Cylinder 1
Cal Cylinder 2
If applicable, the serial number of the
second calibration standard.
Comments
This field is used to type or paste detailed
information concerning the maintenance
activity. This could include
troubleshooting information, key
learnings, or other pertinent information.
Method Two – Maintenance Log
Again, this method is usually used when unusual maintenance has been performed and users need to select nonroutine Symptom, Action, or Fault Codes and / or wish to paste additional information into the comments
section of the Maintenance Log.
Page: 14
Getting Started Manual
IAMMS
_____________________________________________________________________________________
Create a New Maintenance Log Record
Create a new Log record as follows:
1) Select NEW from the FILE drop-down menu or tool bar.
2) Type the pertinent information into the Maintenance Log fields.
3) Select SAVE from the FILE drop-down menu or tool bar.
Change a Maintenance Log Record
Change Log information as follows:
1) Locate the information you want to edit, and re-type or select a new item from the drop down box.
2) Select SAVE from the FILE drop-down menu or tool bar.
3) Repeat step 1 and 2 to edit more information.
Delete a Maintenance Log Record
Delete a Log as follows:
1) Select the line or lines by clicking in the square box to the left of the row or rows you want to
delete; a “check” will appear in the delete box(s).
2) Select REMOVE from the FILE drop-down menu or tool bar.
Page: 15
Getting Started Manual
IAMMS
_____________________________________________________________________________________
Maintenance Log Fields:
Field Name
Description
The “delete box”, marks a row for delete
when checked.
Drop
Down List
from
Codes
NO
Optional
Un-checked
Required
Optional
Non-Editable
Default
Value
Service Date
The date that the maintenance / calibration
was performed
No
Required
None
Down Time
The time interval between the time
maintenance was started and the equipment
was returned to operations. This time is used
by the equipment availability report.
No
Required
None
Repair Time
This is a subset of Down Time. It identifies
the actual amount of time required to repair
the equipment.
The initials of the technician that performed
the maintenance.
The serial number of the calibration standard.
No
Required
None
No
Optional
None
Yes – This
drop down
list is
Optional
None
Tech ID
Cal Cylinder 1
Page: 16
Getting Started Manual
IAMMS
_____________________________________________________________________________________
Cal Cylinder 2
If applicable, the serial number of the second
calibration standard.
Symptom
The symptom code identifies the behavior of
the equipment prior to the maintenance
activity.
The maintenance fault code identifies the
actual part or assembly that caused the
failure.
The maintenance action code identifies the
action taken on the piece of equipment. Note:
The action code is used to increment the
scheduling report and to populate the
maintenance log with the emissions
associated with the maintenance action.
This field is used to type or paste detailed
information concerning the maintenance
activity. This could include troubleshooting
information, key learnings, or other pertinent
information.
When an action code is entered that has
associated emissions documented in
IAMMS, these fields are automatically
populated. If no emissions have been
documented for this action code, and
emissions do occur during this maintenance
activity, the emissions can be entered
manually using the drop down field boxes.
Fault
Action
Comments
Action Emissions
Log
generated
based on
unit(s)
assigned to
cylinders in
the cylinder
inventory
screen
Yes – This
drop down
list is
generated
based on
unit(s)
assigned to
cylinders in
the cylinder
inventory
screen
Yes
Optional
None
Required
None
Yes
Required
None
Yes
Required
None
No
Optional
None
Yes
Optional
Depends on
which action
code is
entered.
Page: 17
Getting Started Manual
IAMMS
_____________________________________________________________________________________
Chapter 5
Getting More Detailed IAMMS Information
The intent of the “Getting Started Manual” is to provide users with basic quick start information on how to enter
new equipment and how to make maintenance log data entries into the IAMMS System. This manual was not
intended to cover all of the features available in the IAMMS System. For more detailed information covering all
available features of IAMMS, reference the IAMMS Users Manual. To obtain copies of the IAMMS Users
Manual, contact your CryVon sales representative.
Contact:
MTI Analytical Technology
P.O. Box 571866
Houston, TX 77257-1866 USA
Tel: +1 (713) 978-7765 Fax: +1 (713) 978-6230
www.mertechinc.com
E-mail: [email protected]
Page: 18