1
Preface
The document, A Journey (1997), first introduced the general concept of integrating technology into the curriculum at the elementary level in Prince Edward Island. As stated in
this earlier document, using information technology in the schools was considered new and
largely uncharted territory. We continue a journey into an interesting world of communication and information tools for teaching and learning. Journey On Grades 1-3 (1999) provided a framework and lesson plans for teachers at the primary level to integrate communication and information technology in their classrooms. Journey On Grades 4-6 (September
2000) and the document, Journey On Grades 7-9 (September 2000), continued with the
same framework and specific grade level lesson plans intended for teachers in elementary
and intermediate schools.
Journey On (2005), provides grade specific curriculum outcomes that have been assigned to
core curriculum subjects. This grade 4 document contains specific technology outcomes,
instructional considerations, teaching suggestions - activities and assessment strategies,
lesson plans, and links to other curriculum areas.
These documents will serve as a guide for teachers. Lesson plans suggest specific exercises
for classroom use and will serve as a starting point from which teachers may develop and
enhance their own ideas and competencies in the area of communication and information
technology (CIT).
i
Journey On - P.E.I. Department of Education, 2005
Acknowledgements
The Department of Education, Technology In Learning, gratefully acknowledges the
suggestions, lesson plans, and other contributions made by Prince Edward Island students
and educators. A special thank you is extended to the teachers who field tested the lesson
plans and accompanying materials. This input was invaluable in making Journey On (2005)
a useful teaching resource. The authors would also like to extend their appreciation to
those individuals who provided feedback and editorial comments during the development
of this document.
The communication and information technology committees were instrumental in providing input for the curriculum outcomes grades 1-12 framework on which Journey On
(2005) is based. Past and present members of the committees are listed below:
Department of Education
Guy Albert
Gordon Bernard
Bruce Brine
Robert Bourgeois
Greg Bungay
Pauline Coady
Clayton Coe
Joan Connell
Don Craig
Judy Davis
Peter Grisebauer
Frank Hennessey
Linda Lowther
Doug MacDougall
Percy MacGougan Kim McBurney
Lana MacIsaac
Edward MacLean
Ted Nabuurs
Danielle Plante-Bourgeois
Jeanette Scott
Elizabeth Tumblin
Laurie King
Anne Ives
Lori Lavers
Debbie MacLean
Dr. Kevin MacLeod
Pam McIntosh-Whalen
Joe Murphy
Tim Murphy
Linda Shaw-Packard
Marg Stewart
Joanne Stubbs
Susan Westphal
Kevin Whitrow
B. J. Willis
Laura Brake
Laurie Callbeck
Ralph Carruthers
Nancy DesRosiers
Kent England
Mario Fiset
Marjorie Hunter
Sally MacDonald
Connie McCabe
Donald Mulligan
Sergine Ouellet
Gordon Ramsay
Mark Ronahan
Keith Tompkins
Kristin Trace
French School Board
University of Prince Edward Island
Sylvain Gagné
Dr. Martha Gabriel
Eastern School District
Tami Jo Auld
Anne Campbell
Jason Campbell
Bethany Doiron
Lianne Garland
Robert Gaudet
Bob Gray
Marg Gray
Western School Board
Journey On - P.E.I. Department of Education, 2005
ii
Contents
Introduction
Purpose of Document..................................................................................................................
Definitions: Technology, Technological Competence and Technological Literacy........
Philosophy
Technology Integration ..................................................................................................................
Advantages of Technology Integration.....................................................................................
ABC’s of Curriculum
An Outcome-based Curriculum: Essential Graduations Learnings, and Specific and General
Outcomes......................................................................
Other Features of the Curriculum...............................................................................................
Overview of APEF Outcomes in Core Curriculum Areas.................................................
Effective Use of Communication and Information Technology within the
Curriculum.............................................................................................................................
General Outcomes for Communication and Information Technology...........................
Specific Outcomes for Communication and Information Technology...........................
How to Use this Document, Paper vs. On-line...................................................................................
1
2
4
5
6
7
8
10
12
14
25
Integration of Communication and Information Technology in Grade 4
iii
Computer Systems ..........................................................................................................................
Social, Ethical and Health ..............................................................................................................
Internet ................................................................................................................................................
Concept Maps ..................................................................................................................................
Graphics .............................................................................................................................................
Word Processing ..............................................................................................................................
Multimedia ........................................................................................................................................
Database ............................................................................................................................................
Telecommunications .......................................................................................................................
Web Authoring .................................................................................................................................
28
32
36
38
40
42
44
46
48
50
Lesson Plans ..................................................................................................................................................
52
Appendix ........................................................................................................................................................
70
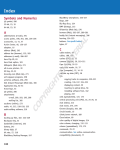
Glossary ..........................................................................................................................................................
72
Journey On - P.E.I. Department of Education, 2005
Vision
Technology education for Atlantic Canada fosters the development of all learners as
technologically literate and capable citizens who can develop, implement, and communicate practical, innovative, and responsible technological solutions to problems.
Foundation for the Atlantic Canada Technology Education Curriulum, APEF, Pg. 5
Journey On - P.E.I. Department of Education, 2005
iv
Introduction
Purpose of Document
Journey On is a practical working guide which
will provide educators and administrators
at all levels, including schools, school
boards/districts, and provincial departments, with a reference point for integrating communication and information technologies (CIT) into the Prince Edward Island school curriculum.
Journey On will be the basis for future decisions pertaining to human and physical CIT
resources. These decisions will focus on
personnel, professional development, instructional techniques, course development,
student and teacher access to technology,
and hardware and software purchases.
It is recognized that many disciplines have
their own specialized technologies and technological processes. Students will have the
opportunity to develop skills required to use
these specialized technologies within the
context of courses such as Computer Science, Science, Career Exploration, Visual
Communication, Industrial Arts, and Home
Economics. CIT differs from other technologies because of its vast and far reaching applications in all disciplines.
The purpose of Journey On is to focus on
how CIT can be used from grade 1-12 and
across all areas of the curriculum as part
of a more global strategy that will contribute to the development of technologically competent and literate individuals
graduating from our school system.
Journey On:
• provides strategies and concrete
suggestions for effective integration
of communication and information
technologies into the Prince Edward
Island curriculum in a way that enhances learning
• identifies the communication and
information technologies that we wish
our students to use
• identifies the knowledge and skills
that students need to develop to be
considered technologically competent
in communication and information
technologies
Journey On - P.E.I. Department of Education, 2005
1
Terminology
Technology
Technological Literacy
The broad definition of technology includes
the tools and processes we use to alter our
surroundings, perform a task, discover more
about ourselves, and communicate. For the
purpose of this document technology refers
to the tools used to access, gather, process, and share information. These communication and information technologies
(CIT) pertain to computers and their peripherals such as scanners, printers, digital
cameras, projection devices, and videoconferencing equipment.
Technological literacy encompasses technological competence but refers to a higher
level of understanding of technology. Individuals literate in the area of CIT think critically about information gained through the
use of technology, the application of specific technologies, and the impact of technology on individuals and society when formulating decisions, opinions and courses of
action. These individuals apply problem
solving strategies and creative thinking
skills to independently learn how to use new
technologies, or circumvent problems associated with older technologies. CIT literate individuals demonstrate confidence and
a positive attitude as they adapt and use
technologies for a beneficial purpose.
Technological Competence
The Atlantic Provinces Educational Foundation (APEF) defines technological competence as “the ability to use a variety of
technologies, demonstrate an understanding of technological applications and apply appropriate technologies for solving
problems independently.” Individuals competent in information and communication
technologies have specialized knowledge
and skills that enable them to use technology to access, gather, process, and share
information.
2
Journey On - P.E.I. Department of Education, 2005
Philosophy
The use of technology in our educational system is based upon a number of underlying
beliefs:
• as educators in Prince Edward Island we are committed to provide for the development of children so that each may take a meaningful place in society
• literacy extends beyond the traditional concept of the ability to read and write print
materials to encompass media and information literacy
• technological competence is a requirement for literacy and lifelong learning in today’s
world
• students today require knowledge, skills and attitudes for dealing with the rapid pace
of change and growth of our knowledge base
• technology, when used appropriately, enhances student-centred learning and the
teacher’s role as a facilitator
Journey On - P.E.I. Department of Education, 2005
3
Technology Integration
Integrating communication and information technologies into the curriculum is a preferred strategy for developing technologically literate learners. Integration occurs when
the technology is used as a tool to achieve existing curricular learning outcomes within
the context of a theme or subject. Technology skills are not acquired separately in an
integrated approach but in the context of learning activities intended to address various
outcomes across the curriculum. Integration means that the use of technology as a teaching
tool should not be limited to specialist teachers but applies to teachers in all curricular
areas.
4
Journey On - P.E.I. Department of Education, 2005
Advantages of Technology Integration
Integration of technology into the curriculum
• ensures that curriculum is the principle focus, rather than technology
• promotes the development of creative thinking, critical thinking, research, communication, and problem solving skills
• provides access to rich resources and learning experiences that can extend far beyond those offered in traditional classrooms
• motivates students to complete learning tasks and become more readily engaged in
their own learning
• supports current research which suggests that people learn in a holistic fashion
rather than in a compartmentalized manner
• supports contemporary approaches to education such as cooperative learning,
constructivism, resource-based learning and individualized learning
• provides teachers with an additional means to address multiple learning styles
• provides students with the opportunity throughout their school career to expand and
reinforce their repertoire of technology skills
• enables the students to acquire a better understanding of how to use technology in
meaningful ways
• ensures that all students have the opportunity to develop technological competencies
• prepares students to select appropriate technologies to complete tasks
• provides teachers with an opportunity to model lifelong learning as students witness
teachers learning and using new skills for a purpose
Journey On - P.E.I. Department of Education, 2005
5
ABCs of curriculum
An Outcome-based
Curriculum
General and Specific
Curriculum Outcomes
An outcome-based curriculum is a studentcentred design which focuses on expectations of the student as a result of learning.
It ensures that each student is provided with
the time and assistance to meet his/her potential.
General curriculum outcomes are statements that describe what students are expected to know in a curriculum area upon
graduation. Specific outcomes are statements describing steps along the way to
achieving general outcomes. Specific outcomes are expectations of a student by the
end of each grade level and are used to
guide the teacher in planning day to day
activities. Students demonstrate the essential graduation learnings through accomplishing the outcomes.
A learning outcome is the result
of learning for the student,
something that the student will
know, be able to do, or be like.
Essential Graduation
Learnings (EGLs)
“The essential graduation learnings are
statements that describe the knowledge,
skills, and attitudes expected of all students
who graduate from high school.” (APEF/
CAMET) These statements are the framework upon which curriculum for all subject areas is based. The six Essential Graduation Learnings include:
•
•
•
•
•
•
6
Aesthetic Expression
Citizenship
Communication
Personal Development
Problem Solving
Technological Competence
Journey On - P.E.I. Department of Education, 2005
Other Features of the
Curricula
In addition to the six essential graduation
learnings, there are a number of underlying
concepts and strategies which are interwoven into the 1-12 curricula of Prince
Edward Island, and which influence methods of delivery and instruction.
Diversity/Equity Education
Diversity education encourages the understanding of diversity within our society and
promotes a commitment to equity by fostering an awareness and critical analysis of
individual and systemic discrimination.
Cooperative Learning and Group Work
Small and large group work provide students
with the opportunity to develop language
(communication skills) and social skills.
Creative Thinking
“Creative thinking deals with combining elements of reality in novel ways to formulate new perceptions, enriched concepts and
new understandings”(Nature of Thinking)
Critical Thinking
Critical thinking involves the analysis of
statements or arguments and an evaluation
of their worth or validity. Critical thinking
skills include identifying and validating
sources; determining what is being said, relevancy, and point of view or perspective;
detecting bias; recognizing persuasive techniques; and drawing logical, well-supported
conclusions.
Resource-based learning
Resource-based learning is an educational
approach that actively engages the students
in carefully structured learning activities
that use a wide range of resources, and emphasizes skills and strategies needed to
achieve information literacy.
Learning Styles
The Theory of Multiple Intelligences suggests that all people learn differently, with
eight identfied intelligences. It is essential
that educators make students aware of their
learning styles and teach using a variety of
methods to provide students the opportunity to learn in a number of ways.
Journey On - P.E.I. Department of Education, 2005
7
Essential Grad
Aesthetic Expression
Citizenship
Personal Development
General Curri
Language Arts
Speaking and Listening
Students will be expected to
• speak and listen to explore, extend, clarify, and reflect on
their thoughts, ideas, feelings, and experiences
• communicate information and ideas effectively and
clearly, and respond personally and critically
• interact with sensitivity and respect, considering the
situation, audience, and purpose
Reading and Viewing
Students will be expected to
• select, read, and view with understanding a range of
literature, information, media, and visual texts
• interpret, select, and combine information using a
variety of strategies, resources, and technologies
• respond personally to a range of texts
• respond critically to a range of texts, applying their
understanding of language, form, and genre
Writing and Other Ways of Representing
Students will be expected to
• use writing and other forms of representation to
explore, clarify, and reflect on their thoughts, feelings,
experiences and learnings; and use their imaginations
• create texts collaboratively and independently, using a
variety of forms for a range of audiences and purposes
• use a range of strategies to develop effective writing and
media products and to enhance their clarity, precision
and effectiveness
Mathematics
Number Concepts/Number and Relationship Operations
• Students will demonstrate number sense and apply
number theory concepts
• Students will demonstrate operation sense and apply
operation principles and procedures in both numeric
and algebraic situations
Patterns and Relationships
• Students will explore, recognize, represent and apply
patterns and relationships, both informally and
formally
Shape and Space
• Students will demonstrate an understanding of and
apply concepts and skills associated with measurement
• Students will demonstrate spatial sense and apply
geometric concepts, properties, and relationships
Data Management and Probability
• Students will solve problems involving the collection,
display and analysis of data
•
Students will represent and solve problems
involving uncertainty
Ot
Health, Music, Physical Education and Visual Arts
These guides contain general curriculum outcomes
8
Journey On - P.E.I. Department of Education, 2005
uation Learnings
Technological Competence
Communication
Problem Solving
culum Outcomes
Social Studies
Citizenship, Power, and Governance
Science
Science, technology, society, and the environment (STSE)
• Students will develop an understanding of the nature
of science and technology, the relationships between
science and technology, and the social and environmental contexts of science and technology
Skills
• Students will develop the skills required for scientific
and technological inquiry, for solving problems, for
communicating scientific ideas and results, for working
collaboratively, and for making informed decisions
Knowledge
• Students will be expected to demonstrate an understanding of the rights and responsibilities of citizenship; and the origins, functions, and sources of power,
authority, and governance
Culture and Diversity
• Students will be expected to demonstrate an understanding of culture, diversity, and world view, recognizing the similarities and differences reflected in
various personal, cultural, racial, and ethnic perspectives
Individuals, Societies, and Economic Decisions
• Students will be expected to demonstrate the ability to
make responsible economic decisions as individuals
and as members of society
Interdependence
• Students will construct knowledge and understanding
of concepts in life science, physical science, and Earth
and space science, and apply these understandings to
interpret, integrate, and extend their knowledge
• Students will be expected to demonstrate an understanding of the interdependent relationship among
individuals, societies, and the environment - locally,
nationally, and globally, and the implications for a
sustainable future
Attitudes
People, Place, and Environment
• Students will be encouraged to develop attitudes that
support the responsible acquisition and application of
scientific and technological knowledge to the mutual
benefit of self, society, and the environment
• Students will be expected to demonstrate an understanding of the interactions among people, places, and
the environment
Time, Continuity, and Change
• Students will be expected to demonstrate an understanding of the past and how it affects the present and
the future
her
curriculum guides exist on Prince Edward Island.
and specific curriculum outcomes.
Journey On - P.E.I. Department of Education, 2005
9
Effective Use of Technology with
Language Arts
Mathematics
The Foundation for the Atlantic Canada English Language Arts Curriculum (1996) identifies technological
advances in our society as a contributing factor to the
revision of the concept of literacy. Literacy now encompasses print literacy, visual literacy, media literacy,
and other literacies required to use technology in our
culture. This APEF foundation guide suggests that
students use a range of information retrieval, and information processing technologies to meet their own
information needs. Specific examples of student experiences should include
The Foundation for the Atlantic Canada Mathematics Curriculum guide (1996) supports the recommendations of National Council of Teachers of Mathematics (NCTM) curriculum standards to use technology i) to enhance the teaching and learning of mathematics and ii) to relate school mathematics to the
world in which students live through developing and
interpreting mathematical models. APEF suggests that
technology has altered the nature of what mathematics is important to learn and has made possible the
development of new problems and innovative ways
of investigating these problems. Specifically, it is recommended that technology should be used to
• using a word processor to develop a piece of
writing
• constructing simple databases and
spreadsheets to organize information
• exploring the applications of interactive
CD-ROM software
• using graphic communication software
• producing a variety of desk top publishing
texts
• using multimedia
• using e-mail
• using listservs and web browsers
• using appropriate technologies to organize and
create complex information with multiple textual
and graphic sources
• distinguishing sources which are central,
reliable and relevant among the vast
number of choices offered by technologies
Adapted from APEF Foundation Guide for
English Language Arts Curriculum (1996)
page 40
10
Journey On - P.E.I. Department of Education, 2005
•
•
•
•
•
•
•
•
explore situations with complicated numbers
which previously would have been beyond their
capabilities
quickly and easily explore individual or groups of
related computations or functions
create and explore numeric and geometric situations for the purpose of developing conjectures
perform simulations of situations which would
otherwise be impossible to examine
easily link different representations of the same
information
model situations mathematically
observe the effects of simple changes in
parameters or coefficients
analyze, organize, and display data
Adapted from APEF Foundation Guide for
Mathematics Curriculum (1996) page 39
in the Core Curriculum Areas
Science
Social Studies
The Foundation for the Atlantic Canada Science Curriculum guide (1998) states that technology can be used
to facilitate the learning of science and recommends
that technology should have a major role in the teaching and learning of science. APEF proposes the following guidelines for the implementation of technologies in the teaching and learning of science
The Foundation for the Atlantic Canada Social Studies (1998) recommends that technology have a major
role in the teaching and learning of social studies but,
that it enhance, not replace, essential social studies learning. APEF recognizes that Communication and Information Technologies have become important tools
for the acquisition, analysis, presentation, and communication of data in ways that allow students to
become more active participants in research and learning
• tutorial software should engage students in meaningful interactive dialogue and creatively employ
graphs, sound, and simulations to promote acquisition of facts and skills, promote concept learning and enhance understanding
• simulation software should provide opportunities to explore concepts and models that are not
readily accessible in the laboratory ( e.g., those that
require hazardous materials, unavailable equipment,
or more time than is possible in real-time classroom. )
• analog-digital interface technology should be used
to permit students to collect and analyse data as
scientists do, and perform observations over long
periods of time, enabling experiments that otherwise would be impractical
• databases and spreadsheets should be used to facilitate the analysis of data by organizing and visually displaying information
• networking among students and teachers should
be encouraged to permit students to emulate the
way scientists work and to reduce teacher isolation
• using tools such as the World Wide Web should
be encouraged as it provides instant access to an
incredible wealth of information on any imaginable topic
Adapted from APEF Foundation Guide for Science Curriculum (1998) page 44
•
•
•
•
CD-ROMs and the Internet provide teachers and
students with quicker and easier access to extensive
and current information. Students and teachers
should critically analyse such information to determine its validity, accuracy, bias, and interpretation
students are enabled to directly employ inquiry skills
by exposure to first hand information through
direct e-mail conversations, student created Web
sites, and listservs. These modes of communication provide connections to students and cultures
from around the world.
students can present their learnings to peers within
their classroom and beyond in a wide variety of
forms (graphics, maps, text, graphic organizers,
Web sites, multimedia presentations, etc.) that fit
their learning styles.
technology can provide opportunity for students
to become more actively involved in their learning
by allowing students control of information gathering, processing, and presentation.
Adapted from APEF Foundation Guide for
Social Studies(1998) page 40
Journey On - P.E.I. Department of Education, 2005
11
Technology Curriculum Outcomes
GENERAL TECHNOLOGY OUTCOMES
(as per APEF Technology Foundation Document)
GTO A- Technology Problem Solving
Students will be expected to design, develop, evaluate, and articulate technological solutions.
GTO B- Technology Systems
Students will be expected to operate and manage technological systems.
GTO C- History and Evolution of Technology
Students will be expected to demonstrate an understanding of the history and evolution of technology and of its social and cultural implications.
GTO D- Technology and Careers
Students will be expected to demonstrate and understanding of current and evolving careers and of
the influence of technology on the nature of work.
GTO E- Technological Responsibility
Students will be expected to demonstrate an understanding of the consequences of their technological choices.
12
Journey On - P.E.I. Department of Education, 2005
Areas
Computer Systems - In general, a complete, working computer. The computer system includes not only the computer, but also any software, networking, and peripheral devices that
are necessary to make the computer function. Every computer system, for example, requires
an operating system such as Windows.
Social, Ethical and Health - General user guidelines for the responsible use of technology .
Internet - A global network connecting millions of computers. This network carries various
information and services such as email, online chat, video, audio, web sites and other documents of the World Wide Web.
Concept Maps - Visual representations of relationships between ideas. Methods for grouping and organizing information. Visual learning allows new concepts to be more thoroughly
and easily understood.
Graphics - Refers to display and manipulation of images (text, pictures and drawings)
Spreadsheets - A table of values (text, numeric, dates) or information arranged in rows and
columns. Spreadsheets allow the computation of data with formulas and the creation of
charts and graphs.
Word Processing - Using a computer to create, edit, and print documents. A word processor
enables you to create a document, store it electronically, display it on a screen, modify it by
entering commands and characters from the keyboard, and print it.
Multimedia -The use of computers to create and present several different media such as text,
graphics, video, animation, and sound in an integrated way.
Database - A collection of data organized in such a way that a computer program can quickly
select desired pieces of information from a search request. You can think of a database as an
electronic filing system.
Telecommunications - Refers to all types of data transmission, from voice to video using a
variety of media such as copper cable, fibre optics, satellites, wireless technology, etc.
Web Authoring - The act of developing a web site. Software is available that will generate
the required HTML coding for the layout of the particular Web page.
Each skill area of the outcome continuum is identified by grade level and progress as follows:
Awareness - the student is exposed to the technology as it is being used by others.
Guided - the student begins to use the technology with the help of others.
Independent - the student uses the technology without assistance.
Journey On - P.E.I. Department of Education, 2005
13
demonstrate proper use of login numbers and names, set-up and change passwords, and be
aware of implications of multiple logins
begin to work with more than one file open at once (multi-task)
differentiate between “Save” and “Save as...”
be able to identify the common windows components of a given software screen (eg. menu bar,
button bar, cursor, insertion point)
have an understanding of file management (drives and folders, rename, select, move, copy,
paste, delete, display format, backup, etc.)
understand how to display file properties
understand the difference between software and hardware
identify system specifications and be aware of compatibility issues between the hardware and
the software (processor speed and type, RAM, hard drive size, optical drive, connection types,
video card, sound card, monitor, network cards)
understand how and when to re-boot (warm boot vs cold boot)
describe networks, file servers, connections (wireless, line types and speeds)
demonstrate proper use of network printing, choose proper printer, recognizes process and
purpose of Print Queues
identify computer viruses, how they are transmitted and how anti-virus software is used to
protect or clean a computer
identify SPAM, pop-up ads, spyware and other invasive software coding
modify and utilize master pages/templates
import and export files to other formats (.html, .pdf)
identify technologies that are found in everyday life
B1.2
B1.3
B1.4
B1.5
B1.6
B1.7
B1.8
B1.9
B1.10
B1.11
B1.12
B1.13
B1.14
B1.15
B1.16
C1.1
14
login, open and close a program, open, save and close a file with mouse
B1.1
Journey On - P.E.I. Department of Education, 2005
make use of help features to independently find solutions to problems
Awareness
A1.1
Students will be expected to:
Computer Systems
1
2
3
4
Guided Instruction
5
6
7
8
9
Independent
1
0
1
1
1
2
examine current Canadian law governing the use of technology
determine the technological requirements for specific career goals
respect equipment and other student’s work
work co-operatively at work station
adhere to acceptable use agreement for work station/network/Internet
use electronic communication etiquette
adhere to rules of freeware, shareware and commercial ware
adhere to copyright and privacy laws, give credit to sources of information (MLA, APA)
identify ethical issues involved with Internet content, awareness of inappropriate use of technology
demonstrate caution before sending personal information over the internet
follow publishing etiquette (suitable language, no discrimination, etc.). Adhere to the guidelines for
school web pages as outlined by PEI Department of Education.
C2.1
D2.1
E2.1
E2.2
E2.3
E2.4
E2.5
E2.6
E2.7
E2.8
E2.9
15
demonstrate proper touch keyboarding techniques (ie: home row, quick key strokes, proper reaches)
B2.1
Journey On - P.E.I. Department of Education, 2005
identify aspects of an ergonomic workstation (lighting, monitor angle, work placement, keyboard
height, seat height, posture, etc.)
Awareness
A2.1
Students will be expected to:
Social, Ethical, and Health
1
2
3
4
5
6
Guided Instruction
7
8
9
1
0
1
1
Independent
1
2
obtain/download material (text, graphics, files) from Internet
Use the various browser navigation tools (back, forward, history)
manage bookmarks/favorites
distinguish among various file formats (file extensions), required plugins, file
compression/decompression utilities
discuss ways in which the Internet is evolving
critically evaluate information and its source based on pre-determined criteria
A3.3
B3.1
B3.2
B3.3
C3.1
E3.1
16
use various tools (search engines and directories) and strategies necessary to carry out research
A3.2
Journey On - P.E.I. Department of Education, 2005
demonstrate awareness of the Internet as a source of information
Students will be expected to:
Awareness
A3.1
Internet
1
2
3
4
5
6
Guided Instruction
7
8
9
1
0
1
1
Independent
1
2
categorize ideas graphically
create links between ideas, re-link or delete links between ideas
elaborate on ideas (i.e. adding notes, annotations, etc.)
add fonts, graphics, sound, and colours to enhance ideas
create hyperlinks to files, web sites, or multimedia content
A4.3
A4.4
A4.5
B4.1
B4.2
17
create a web (i.e.: literary, concept, character, word, Venn Diagrams, and timelines)
A4.2
Journey On - P.E.I. Department of Education, 2005
use brainstorming techniques to generate ideas
A4.1
Students will be expected to:
Concept Maps
Awareness
1
2
3
4
5
6
Guided Instruction
7
8
9
1
0
1
1
Independent
1
2
demonstrate various object editing features (ie. select, unselect, resize, crop, area fill, add colour
and pattern, size adjustment using the mouse or scale, various erasing techniques, object
orientation, changing font and text size, colour or appearance, creating text blocks, change text
wrap selection and other text manipulation functions)
carry out various object manipulations (ie. object alignment, creation of graphics in layers,
grouping/un-grouping components of an image)
use other graphic creation tools (i.e. clone brush, colour replacements, effects and filters,
hexidecimal (RGB and CMYK colour values)
convert various graphic formats between vector ( ie: .png, .psp, .cdr) and bitmap images (ie: .wmf,
.tif, .bmp, .gif, jpeg, .jpg), import a graphic file from another source
B5.1
B5.2
B5.3
B5.4
18
apply principles of design
A5.2
Journey On - P.E.I. Department of Education, 2005
create illustrations or graphics by using the various drawing tools
Students will be expected to:
Awareness
A5.1
Graphics
1
2
3
4
5
6
Guided Instruction
7
8
9
1
0
1
1
1
2
Independent
design own formulas incorporating functions {if SUM(B1..D1)>0, @SUM(B1..D1), 0} and absolute /
relative cell references
use different types of graphs / charts (line, pie, bar) to visually represent data; label graph
components (legend, title, x-y axis, colour, fill pattern)
identify spreadsheet components and terminology (rows and columns, cell addresses, data entry
bar)
identify different types of cell data (text, numeric, function, date)
enter data into simple preexisting spreadsheets, auto fill data, data entry bar, sort data
edit spreadsheet layout (insert and delete rows or columns, select a range of cells, alter column
widths and row heights, locking row and column headings, lock and unlock cell(s), fixed titles )
enter formulas to perform calculations across columns, rows, cells, move/copy data or formulas
from one area of spreadsheet to another
format numbers (decimal places, currency, etc.), format text (font, colour, size)
create links [between notebooks (tabs or sheets), external files, graphs, charts, website]
A6.3
A6.4
B6.1
B6.2
B6.3
B6.4
B6.5
B6.6
B6.7
19
correct errors, modify or delete data in a cell
A6.2
Journey On - P.E.I. Department of Education, 2005
plan / design a spreadsheet to organize and tabulate data from various sources (to make a
schedule, tally/score sheet, solve a mathematical word problem)
Awareness
A6.1
Students will be expected to:
Spreadsheets
1
2
3
4
5
6
Guided Instruction
7
8
9
1
0
1
1
Independent
1
2
use a grade level appropriate wordprocessor to create and edit written work
locate characters on a keyboard and identify functions of word processing (ie. cursor, insertion
point, enter key, space bar, upper case, backspace, shortcut key)
use editing tools to revise work (i.e. spell check, thesaurus, find and replace)
change font, size, colour, style (ie. bold, italics, underline, insert special characters, drop capitals)
format text (ie. justification, line spacing, outlines and bullets, text wrap)
format documents (ie. using margins, tab rulers, indents, page center, border, watermark)
insert a graphic and manipulate, (ie. resize, add borders and fill, create text art)
insert and format tables and text boxes (ie. lines, fill, columns, rows, borders, alignment)
format multi-page documents with headers, footers, page numbers, page breaks and keep text
together function, change page orientation/size (ie. text presentation features)
insert automated features (ie. date and file stamp)
B7.1
B7.2
B7.3
B7.4
B7.5
B7.6
B7.7
B7.8
B7.9
B7.10
20
identify examples of desktop publishing (i.e. newspaper, catalogue, ads, brochure)
A7.2
Journey On - P.E.I. Department of Education, 2005
create and edit data files and form documents to perform a merge
Awareness
A7.1
Students will be expected to:
Word Processing
1
2
3
4
5
6
Guided Instruction
7
8
9
1
0
1
1
Independent
1
2
describe situations where streaming video and audio is appropriate
create graphics, audio and video special effects (animation, virtual reality, panorama)
select appropriate medium to convey a message (be conscious of file size, formats and storage
location)
navigate multimedia resources such as slide shows, online resources or CD rom interactive
educational activities
use multimedia creation and editing tools (screen captures, scanner, sound recording, digital image
editing software: still and video)
convert file formats for a particular application (.jpg, gif, .bmp, mp3, wav, avi, mpeg, mov, etc.)
use proper tools and procedures to enhance product quality. (Microphones, lighting, camera
movement, instrumentation, teleprompters, assign various responsibilities to a production team.)
A8.3
A8.4
A8.5
B8.1
B8.2
B8.3
B8.4
21
create an age/grade appropriate slide show presentation that may contain one or more of the
following objects (text, graphics, images, animations, audio and video)
A8.2
Journey On - P.E.I. Department of Education, 2005
apply planning strategies, (storyboards, scripts, graphic organizing, brainstorming)
Awareness
A8.1
Students are expected to:
Multimedia
1 2
3 4 5 6 7 8
Guided Instruction
9 1 1 1
0 1 2
Independent
design/plan a database to use as a method of organizing information
create and modify a form (add graphics, and error checking routines)
use databases to analyze data and look for trends
enter data into a pre-existing database, edit data, and use automated text
create fields and with variable field types (numeric, text, date) and properties (color, width, font,
etc.)
restructure database (add / delete fields, change field width)
sort records alphabetically, numerically and by multiple fields
create a report from the entire database or selected records
create a report with automated summaries and calculations (understand logic, date and summary
field types)
bring database information into a word processing environment ie: (Mail Merges)
distinguish between the two general types of database management systems (flat and relational)
examine functions and implications of database driven websites (ie: online purchasing, searching,
and password secured sites)
A9.3
A9.4
A9.5
B9.1
B9.2
B9.3
B9.4
B9.5
B9.6
B9.7
B9.8
E9.1
22
perform searches on a database file using logical and Boolean operators (understands commands,
scope, filters, and conditions)
A9.2
Journey On - P.E.I. Department of Education, 2005
use an existing database (CD ROM, Microcat, Dynex, Internet search engine) to find information
(sign up for Provincial Library Card - Abbycat)
Students will be expected to:
Awareness
A9.1
Database
1
2
3 4
5
6
Guided Instruction
7
8
9
1
0
1
1
1
2
Independent
open messages
manage mail/folders
manage address books
use distribution lists
send and open attachments
create signatures
apply filters and rules
use calendar features such as appointments, tasks, reminder notes/memos
B10.2
B10.3
B10.4
B10.5
B10.6
B10.7
B10.8
B10.9
23
use the organizational features of collaborative tools such as scheduling, calendaring, and
interactive syllabus
B10.10
Journey On - P.E.I. Department of Education, 2005
collaborate using software: (ie. whiteboard, slideshow, application sharing, chat, messaging, send
and receive files, photos, group file sharing, resource sharing (links), online content creation and
sharing, assignment drop box, video and audio, discussion forums, journal.)
Awareness
A10.1
Students will be expected to:
E-Learning/Collaborative tools:
send messages
B10.1
Email:
Students will be expected to:
Telecommunications
1
2
3
4
5
6
Guided Instruction
7
8
9
1
0
1
1
Independent
1
2
create an interactive webpage. (online surveys, forms, interactive database, polls)
examine html tags
create a basic web page (may include backgrounds, images, hyperlinks, tables)
indicate where file or page is hosted (server, web server, hosting service)
apply website file management and transfer files to and from web servers (ftp), edit pages online
use special features (image maps, cascading style sheets, frames, rollovers, layers)
embed objects (audio, video, pdfs, animation, Flash, Java Script Applet,)
describe standards which guide web based publication (W3C accessibility guidelines)
A11.3
B11.1
B11.2
B11.3
B11.4
B11.5
B11.6
E11.1
24
create appropriate text and image file formats
A11.2
Journey On - P.E.I. Department of Education, 2005
identify web page creation possibilities
Awareness
A11.1
Students will be expected to:
Web Authoring
1
2
3
4
5
6
Guided Instruction
7
8
9
1
0
1
1
1
2
Independent
How to Use this Document
Paper Document
On-line Document
The first section of the document includes
background material, definitions, philosophy, advantages of technology integration,
an overview of the APEF curriculum, and
grade 1-12 general outcomes for information and communication technologies.
An on-line version of this document will
be developed. Having a document on-line
has a number of advantages. It enables
teachers to easily cross-reference material in the document with on-line help
manuals and curriculum documents. It
can encourage a greater level of collaboration among all educational partners. An
on-line document can be easily revised
and updated without having to copy and
redistribute. It is our intent to revise,
modify, and add new materials in the future only to the on-line version of Journey
On.
The remainder of the document addresses
the level and defines specific knowledge and
CIT skills expected of students as they work
toward technology competency. Practical
considerations are given for incorporating
CIT into the curriculum and accompanying
lesson plans. The information is presented
in a two-page layout as outlined on the following pages.
Journey On - P.E.I. Department of Education, 2005
25
Two Page-Layout
Four major sections are found on these pages as you go from left to right: 1) specific
CIT outcomes, 2) instructional considerations, 3) teaching suggestions or names of
grade specific lesson plans, and 4) links to curriculum outcomes. The applicable
technology curriculum outcome area is found in a box at the top of each page along
with the grade level.
Technology
Curriculum
Outcome Area
Specific
CIT
Outcomes
26
Instructional
Considerations
Journey On - P.E.I. Department of Education, 2005
Teaching
Suggestions,
Activities
and
Assessment
Grade
Level
Links to
Curriculum
Outcomes
Two Page-Layout
in Detail
Specific Outcomes
• are steps towards accomplishing
the general technology outcomes
and lettered as subdivisions of
GTOs
letter designation of
general
technology outcome
A5.1
indicates first skill in
subdivision
refers to fifth area for this grade
level under technology general
outcome A
Instructional Considerations
• useful information for teachers
on terminology and/or purpose
and background of specific
technologies
Teaching Suggestions, Activities
and Assessment
• readiness considerations
• may be suggestions for activities
or name of lesson plan
Links to Curriculum Outcomes
• letters and numbers representing
curriculum outcomes as defined in
other APEF (CAMET) documents
Journey On - P.E.I. Department of Education, 2005
27
Grade 4
Computer Systems
Instructional Considerations
Students will be expected to:
A1.1 make use of help features to
independently find solutions to
problems (Awareness)
A1.1 Using the drop-down help menu will provide access to searchable help
materials, tutorials, and technical support. Encourage “the discovery”
approach to find solutions to problems.
B1.2 demonstrate proper use of login
numbers and names, set-up and change
passwords, and be aware of implications
of multiple logins (Guided)
B1.2 One network account is provided. If a user tries to log into a second
computer while already being in the network the second login will fail.
Applications at school do not permit the changing of passwords. Users
at home may have access to programs which allow for the creation and
changing of passwords. When creating passwords they should be
composed of alphabetic and numeric characters so that they cannot be
easily guessed. To prevent data loss, always exit programs and log out
of the network properly.
B1.3 begin to work with more than one
file open at once (Guided)
B1.3 Windows operating environments allow for many programs to be open
simulatenously. Individual programs may allow several files to be open
at the same time (Word Perfect 9 allows nine files to be open). This
ability to “multitask” allows users to share information between
programs, quickly and easily, increasing productivity.
B1.4 differentiate between “Save” and
“Save as...”(Independent)
28
B1.4 Newly created files must be given a name using the “save as” selection.
Subsequent changes to the file will be updated with the “save” command. To avoid losing work, users should become accustomed to
saving at regular intervals.
Journey On - P.E.I. Department of Education, 2005
Grade 4
Computer Systems
Teaching Suggestions, Activities and
Assessment
Links to Specific Curriculum Outcomes
Language
Arts
Math
Science
Social
Studies
Other
Technology Lesson Plan:
What’s in the Party Bag
7.3, 10.3
B13
A1.1 Encourage “discover on your own”
strategies to implement special
features associated with particular
software or have students work
together to solve problems.
B1.2 Teachers have access to all student
logins and passwords. It is advisable to have a list of these available
should students forget.
B1.3 Demonstrate how to work with
multiple files by using a web
browser and word processor to
gather and record information.
(ALT + TAB) keys are used to
“toggle” between the two programs.
B1.4 Teachers may place activity files in the
S: network drive for students to
access. Students are required to use
the SAVE AS command to change
the file name and storage location (to
their G: drive) as students do not
have save rights to S:
SAVE AS is important when using
templates so as not to destroy the
original file. Save often.
Journey On - P.E.I. Department of Education, 2005
29
Grade 4
Computer Systems
Instructional Considerations
Students will be expected to:
B1.5 be able to identify the common
windows components of a given software screen (Awareness)
B1.5 Most application programs follow a common interface layout(i.e. menu
bar, button bar, cursor, insertion point). Terminology, layout and
functions follow a similar pattern. Consistency of function and location
of these features has allowed for easier transfer of skills.
B1.6 have an understanding of file
management (Awareness)
B1.6 File space on the server is limited. Users should be reminded to clean up
their work space. File folders should be created to keep files organized.
Files can be deleted or archived (saved on cd, memory stick or floppy
disk). A utility is available for users to maintain their files.
B1.8 understand the difference
between software and hardware
(Awareness)
B1.10 understand how and when to reboot (Guided)
B1.8 Software provides the instructions to tell the computer what to do.
There are two main categories of software: Systems software, such as
Windows, Solaris or Linux and Application software, such as Word
Perfect, Inspiration 7.5 and Ultimate Writing Creativity Center. Systems
software looks after coordinating hardware tasks such as printing and
saving files. Application software does a particular type of work such as
word processing, accounting, drawing, etc. Hardware refers to the physical
components of the computer - those that can be seen and felt such as the
monitor, keyboard, mouse, hard drive, etc.
B1.10 Always exit programs using the file - exit menu whenever possible. In
the event that a program “freezes” there are two options: 1) press ctrl +
alt + del and follow the onscreen logout or shutdown instructions(warm
boot) 2) hold in the power button until the computer shuts off(cold
boot)
Unsaved work will be lost with either option and, in addition, users may
not be able to log back into the network right away because the file server
has maintained that login. Logins are automatically released by the server
after fifteen minutes or may be manually cleared by using a “clean connection” utiltiy.
B1.12 demonstrate proper use of network printing, choose proper printer,
recognizes process and purpose of Print
Queues (Guided)
30
B1.12 During the login process users are asked to select a printer. Sometimes
there is a delay between the time a user orders a print job and when the
printer responds. Never print a task more than once as this delays
printing for others and is a waste of resources. All print jobs pass
through a software utility called a print queue. Should a number of users
request printing at near the same time, the first job is printed and the
others will be processed in order received. Teachers may monitor the
printing queue and delete any unnecessary print jobs.
Journey On - P.E.I. Department of Education, 2005
Grade 4
Computer Systems
Teaching Suggestions, Activities and
Assessment
Links to Specific Curriculum Outcomes
Language
Arts
Math
Science
Social
Studies
Other
B1.5 Use proper terminology when
discussing aspects of computer
work. Insist that students do the
same.
B1.6 Insist that work be organized into
folders. Categories may be selected
by subject, theme, or assignment.
File management skills may be part
of the assessment for a task.
B1.8 Use display items such as CD ROM,
floppy disk, and computer components to demonstrate the difference
between hardware and software. (A
CD ROM and floppy disk can be
seen and touched but contain the
software, the digital code that
provides instructions to the
computer)
B1.10 Should a computer freeze during
class, use this as an opportunity to
demonstrate the difference between
“warm” and “cold” boot.
B1.12 Users have access to a utility that
shows print jobs that are pending
for the network printer. This utility
provides information about a print
job, such as file name, user, and time
sent. These print jobs can be
deleted. Encourage students to wait
for the printer and not send the
Journey On - P.E.I. Department of Education, 2005
31
Grade 4
Computer Systems
Instructional Considerations
Students will be expected to:
B1.13 identify computer viruses, how
they are transmitted and how antivirus software is used to protect or
clean a computer
(Awareness)
B1.13 Programs designed to damage the data on a computer or disrupt its use
fall into one of the following categories:
Virus: a program that spreads from computer to computer by attaching
itself to an executable file. When this file is activated the virus supplies
instructions to the computer. These instructions can range from a mere
nuisance (eg. a message on your monitor) to the very destructive (eg.
erasing the hard drive).
Worm: a program that is written in segments and spawns copies of itself
in the computer’s memory until eventually it causes a crash.
Trojan horse: a program disguised as a game or useful application but
when executed destroys information on the computer, or gives assess or
control of the computer to another.
Care must be exercised when installing files or opening e-mail. The best
methods for prevention are: (a) to only accept programs from reliable
sources and (b) to install a reputable virus checker on the system which
scans all imported data files, diskettes and CD’s for possible viruses.
B1.14 identify spam, popup ads,
spyware and other invasive software
coding (Awareness)
B1.14 Spyware is coding that transmits information to external parties about a
users’ browsing habits. Spyware and popup screens may also take
control of the users browser and automatically redirect to an unwanted
website.
B1.15 modify and utilize master
pages/templates (Awareness)
B1.15 Master pages and style templates allow the user to setup a document
layout that will be applied to all like sections in a publication. This
makes the document uniform and consistent in appearance and saves
time producing the work. Master pages allow for automated page
numbering and document page setup.
Many types of software provide templates and examples in the “help”
menu or online. Users may create templates for frequently used activities.
32
Journey On - P.E.I. Department of Education, 2005
Grade 4
Computer Systems
Teaching Suggestions, Activities and
Assessment
Links to Specific Curriculum Outcomes
Language
Arts
Math
Science
Social
Studies
Other
B1.13 Ensure that files transferred from
home are virus checked. School
email attachments are automatically
scanned for viruses. Precautions
must be taken at home when using
private email services such as Yahoo
or Hotmail which may not scan
attached files. Private email services
must not be accessed in school.
Journey On - P.E.I. Department of Education, 2005
33
Grade 4
Social, Ethical and Health
Instructional Considerations
Students will be expected to:
A2.1 identify aspects of an ergonomic
workstation (Guided)
A2.1 Ergonomics or the relationship between people and their work is a science
with a growing body of evidence. Applying ergonomics by adjusting
your chair, work surface, monitor, keyboard, mouse, lighting and
modifying your work habits with lifting techniques all have reduced the
risk of injury at our workplaces. Furthermore, it increases productivity.
(Occupational Health and Safety Manual, Draft 2004)
Teaching young children to position themselves properly at the computer and using good posture is essential to prevent the future development of serious injury.
To prevent eye strain, encourage students to look away from the screen
every few minutes to rest their eyes. Stretching and shaking their hands at
regular intervals are also good habits.
34
Journey On - P.E.I. Department of Education, 2005
Grade 4
Social, Ethical and Health
Teaching Suggestions, Activities and
Assessment
Links to Specific Curriculum Outcomes
Language
Arts
Math
Science
Social
Studies
Other
Technology Lesson Plans:
Electronic Mail
Fishing For Facts
1.1, 3.1, 3.3,
8.3, 4.1, 10.3
107-1, 10712, 205-8
A2.1 Perform a visual inspection of work
station. Position the top of your
monitor at or slightly below eye level;
Place documents that are to be keyed
close to the monitor; Keep computer
screen clean and dust-free to minimize
glare; Arrange lighting to minimize
glare and reflections; Reduce eye strain
through changing focus. (Glance across
the room or out the window every
fifteen or thirty minutes to look at an
object at least twenty feet away);
Increase your font sizes. This discourages one from hunching forward into
the monitor to read things, putting
pressure on nerves and blood vessels
in the neck and shoulders.
See appendix for a diagram of an
ergonomic workstation. (Occupational
Health and Safety Manual, Draft 2004)
Discuss and demonstrate good posture
and work habits required to reduce the
risks of computer associated injury.
Observe position at the computer and
provide feedback to users. Create a
checklist or rubric for assessment.
Journey On - P.E.I. Department of Education, 2005
35
Grade 4
Social, Ethical and Health
Students will be expected to:
Instructional Considerations
B2.1 demonstrate proper touch
keyboading techniques (Guided)
B2.1 Young children often use the hunt-and-peck method. Beginning typists
must practice using proper fingering and home row position. Encourage
students to use the piano position (arms at right angles and wrists flat)
when they can. Initially, students will key very slowly using proper
keyboarding techniques. After practice students will be able to key much
faster than they can write with pen or pencil.
D2.1 determine the technological
requirements for specific career goals
(Awareness)
D2.1 Technology competence is identified as an “Essential Skill” by Human
Resources and Skills Development Canada. Statistics Canada has identified technology skills as important as numeracy and literacy to career
success. Earning potential of persons possessing numercy, literacy, and
technological skills is five fold higher than those who have equivalent
numeracy and literacy skills. (Murray, T. Scott. Statistics Canada. A
Presentation To Cabinet, Charlottetown, PE. January 28, 2005)
E2.1 respect equipment and other
students work (Independent)
E2.2 work cooperatively at work
station (Independent)
E2.3 adhere to acceptable use agreement for work station/network/
Internet (Independent)
E2.4 use electronic communication
etiquette (Guided)
36
E2.4 Establishing connections with classrooms in different parts of Canada or
the world can be a powerful tool for the classroom teacher in all subject
areas. Student assignments take on another level of authenticity when
they are shared with other classes via telecommunications.
Journey On - P.E.I. Department of Education, 2005
Grade 4
Social, Ethical and Health
Teaching Suggestions, Activities and
Assessment
Links to Specific Curriculum Outcomes
Language
Arts
Math
Science
Social
Studies
Other
B2.1 Encourage students to coach or
monitor each other’s position at the
computer.
Use the reproducible keyboard diagram
in the appendix to illustrate the proper
home row finger positions. These may
be posted on the walls near the
computer monitors.
For proper keyboarding skills and
improvement on speed, practice simple
online tutorials such as ....
http://www.senselang.com/ or
http://www.powertyping.com/qwerty/
lessonsq.html
D2.1 Brainstorm a list of occupations.
Identify occupations which require use
of technology and those that don’t.
Using the “Fishing For Facts” lesson
plan as a guide, research information on
the identified occupations to help
determine CIT requirements. Present
or showcase findings.
E2.4 Use e-mail accounts or collaborative
software to communicate among
students in a class, school or the world.
There are also sites to facilitate establishment of e-mail contacts between classes
for particular projects.
Journey On - P.E.I. Department of Education, 2005
37
Grade 4
Social, Ethical and Health
Instructional Considerations
Students will be expected to:
E2.7 identify ethical issues involved
with Internet content, awareness of
inappropriate use of technology
(Awareness)
E2.7 Placing student work on the Internet takes publishing to whole new level
and can be a tremendous motivator. At the same time teachers must be
cognizant of not compromising the privacy or safety of students.
Parents have to be informed and give permission before their children’s
names or photos are published on the Web.
General guidelines for finding accurate information on the Web:
Be cautious of sites created by unknown individuals or organizations.
Be aware of bias, tone and stereotyping as well as accuracy.
Compare information obtained to that of other sources.
URL's with the title (name) in the address indicate authorship of a
private person.
Sites created by government or national institutions are often the
most reliable.
The following domain abbreviations are helpful to identify authorship:
com = commercial organization
edu = educational institution
gov = government institution
org = organization
mil = military
E2.8 demonstrate caution before
sending personal information over the
internet(Awareness)
38
E2.8 Teachers and students should not supply any personal information when
publishing on the Internet.
Journey On - P.E.I. Department of Education, 2005
Grade 4
Social, Ethical and Health
Teaching Suggestions, Activities and
Assessment
Links to Specific Curriculum Outcomes
Language
Arts
Math
Science
Social
Studies
Other
E2.7 Teachers should discuss with students
the topic of privacy. Students should be
made aware of situations when they
should report to and ask adults for
help.
If students happen to open an objectionable site they should:
Immediately click on the Back button to
take them out of the site.
AND
Immediately contact the adult in charge.
BUT
If the first doesn't work, (and it
sometimes won't) turn off the monitor
and immediately contact the teacher.
The Media Awareness Network
(www.media-awareness.ca/) offers
resources for teachers to use with
students on Internet safety and ethics.
E2.8 Internet personal safety guidelines for
students:
Never give out any personal information (personal details, phone number,
address, etc.) about yourself, family or
friends without permission.
Tell an adult if something you see or
read on the Internet or in e-mail gives
you the "NO" feeling.
Tell an adult if someone you meet on
the Internet suggests that you meet
him /her in person.
Teachers may want to incorporate these
guidelines in Personal Safety units in the
grades 4-6 health curriculum.
Journey On - P.E.I. Department of Education, 2005
39
Grade 4
Social, Ethical and Health
Instructional Considerations
Students will be expected to:
E2.9 follow publishing etiquette
Adhere to the guidelines for school
web pages as outlined by PEI Department of Education. (Awareness)
40
E2.9 Consider the following:
Do not type messages in upper case since this is the equivalent of
"shouting".
Take credit for your work, sign your e-mail messages and do not send a
message using someone else's account.
Do not compose e-mail that contains objectionable language or content.
Do not send e-mail messages that contain large graphics or other components that take a long time to download.
Always include a meaningful subject description in the subject line.
Do not send junk mail to people.
Remember that e-mail is not private. Do not send confidential information via e-mail.
Use correct grammar and spelling. The use of chat programs and text
messaging has given rise to emoticons such as ;> ) and three letter
abbreviations such as lol (laughing out loud). Consider the intended
audience and whether they understand or appreciate their use.
Journey On - P.E.I. Department of Education, 2005
Grade 4
Social, Ethical and Health
Teaching Suggestions, Activities and
Assessment
Links to Specific Curriculum Outcomes
Language
Arts
Math
Science
Social
Studies
Other
E2.9 Guidelines for publishing school
material on the web may be found on
Journey On (http://www.edu.pe.ca/
journeyon/tech_support_pages/
GuidelinesforSchoolWebPages.html)
Journey On - P.E.I. Department of Education, 2005
41
Grade 4
Internet
Instructional Considerations
Students will be expected to:
A3.1demonstrate awareness of the
Internet as a source of information
(Guided)
A3.2 Use various tools and strategies
to carry out research
(Awareness)
A3.3 obtain/download material
from Internet (Awareness)
B3.1 Use the various browser
navigation tools (Guided)
B3.2 manage bookmarks/favorites
(Guided)
42
A3.1 Users have access to a vast amount of information and resources
provided by a number of organizations.
A3.2 Regardless whether one searches a database, the Internet, a digital encyclopedia or similar digital containers of information, the quality of information will be contingent upon the formulation of the query. This observation gives rise to the consideration that “new age intelligence” does not
depend upon the knowledge of a particular piece of information but
instead depends upon the skill with which one can obtain required
information.
A3.3 Information may be obtained from the Internet in a variety of ways.
Material may be copied from a webpage and pasted into a word processing document. Graphics may also be saved to the local computer by
right-clicking on it and specifiying a folder.
B3.1 Be familiar with navigation, hotlinks and the back, forward and home
buttons in the browser. For example, a student may follow any given
links to a destination several pages or sites removed from the original
starting point. At some point in time the student may realize that the
followed links are not leading to the desired results and they wish to
return to the original starting point. They could use the back button in
the browser and return, page by page, to the original site. A faster way to
return, however, is to use the "home" feature in the menubar. When the
user clicks on "home", listed at the top of the browser page. There is also
a history button for recently visited sites. By clicking on the original site in
the list, the user automatically returns to that site rather than retracing
steps through all of the visited sites with the use of the back button.
B3.2 It is possible to record the address of a Web site that has been visited as a
favorite (Internet Explorer) or bookmark (Firefox, Netscape). This
enables the user to easily visit a favourite site again and again without
retyping the address of the site.
Journey On - P.E.I. Department of Education, 2005
Grade 4
Internet
Teaching Suggestions, Activities and
Assessment
Links to Specific Curriculum Outcomes
Language
Arts
Math
Science
Social
Studies
Other
Technology Lesson Plans:
Did you hear that?
Can you find it, please?
4.1, 10.3
104-6, 106-1,
300-3
A3.3 When obtaining information from
the Internet it is advisable to check
that the material is free for educational use or contact the author for
permission.
B3.1 Using a search engine, such as
Yahooligans, practice navigating
among web sites.with the back,
forward, home and history buttons.
Observe difficulties encountered by
students while navigating sites and
provide specific feedback.
B3.2 Save a web page URL for future
reference, click on “favorites” in the
menu bar. To organize websites
folders may be created. Add the
website to the appropriate folder by
selecting it and pressing “OK”.
Sites and complete folders may be
deleted when no longer needed by
selecting “organize” from the
“favorites” menu.
Journey On - P.E.I. Department of Education, 2005
43
Grade 4
Internet
Instructional Considerations
Students will be expected to:
B3.3 distinguish among various file
formats, required plugins, file
compression/decompression utilities
(Awareness)
B3.3 Plug-ins are external browser enhancement programs which allow the user
to enable file types to load automatically within a web browser. When
using media which may require a plug-in it is a good idea to provide a
link to the website where it may be obtained. Common plug-ins include
Acrobat Reader, QuickTime, Shockwave Flash, Real Player, Windows
Media Player and Java Runtime environment.
Hypertext markup language is used to format web pages. The extension
at the end of the filename is .html or .htm. Gif, .png and .jpeg are the
main graphics file formats for web publishing. .jpeg is used for realistic
graphics (photographs, art, images with shadows and shading) and .gif
for graphics with a few colours. To reduce download times for video/
audio, commpression-decompression utilities (codec) are used to get the
smallest graphic size possible.
44
Journey On - P.E.I. Department of Education, 2005
Grade 4
Internet
Teaching Suggestions, Activities and
Assessment
Links to Specific Curriculum Outcomes
Language
Arts
Math
Science
Social
Studies
Other
B3.3 Open a document labelled .pdf and
observe that another application must
launch to display or run the file.
Repeat for Quicktime, Real Player and
Windows Media Player files.
Journey On - P.E.I. Department of Education, 2005
45
Grade 4
Internet
Instructional Considerations
Students will be expected to:
C3.1 discuss ways in which the Internet
is evolving (Awareness)
C3.1 Many Internet tools such as Gopher and Veronica, for example, that were
once important for accessing information are less important today. The
means by which we access information has been and continues to be
simplified. Search engine technology has become more powerful and
comprehensive. Commerce such as online merchandising, stock trading
and online banking/bill payment are widespread. Educational/business
tools such as whiteboards, discussion forums, chat rooms, audio/video
access, file sharing and e-mail allow for collaborative opportunities. New
concepts are constantly being developed while others are replaced. ie.
blogs, wikis, IRC, ICQ, online entertainment, streaming radio, etc.
E3.1 critically evaluate information and
its source based on pre-determined
criteria (Awareness)
E3.1 Most print publications such as magazines, journals, and books go
through an editing or peer review process. Internet publication does not
require individuals to meet these requirements. Therefore, users of
Internet content must critically evaluate a site for the authenticity and
quality of information and its source.
The Media Awareness Network website (http://www.mediaawareness.ca) provides teaching suggestions, activities and lesson plans.
46
Journey On - P.E.I. Department of Education, 2005
Grade 4
Internet
Teaching Suggestions, Activities and
Assessment
Links to Specific Curriculum Outcomes
Language
Arts
Math
Science
Social
Studies
Other
C3.1 Brainstorm new or novel uses for the
Internet. Survey family members
regarding how they use the Internet
at work or at home.
E3.1 As it is easy to publish information
on the Web, it is essential to critically
evaluate information found on the
Web. Take note of the following
features based on Kathy Schrock's
Guide for Educators: Critical Evaluation Survey: Elementary School Level
(http://school.discovery.com/
schrockguide/evalelem.html):
Page title - does it tell what the page is
about?
Graphics - how many? Are they big?
Are they slow to load?
Author's name or name of organization and e-mail address
Date page was created and date last
updated
Information that is obtained from the
site:
- does it help answer my questions?
- would another source have been
better?
- how does it differ from other
sources such as books, CD-ROMs,
magazines, etc.?
Journey On - P.E.I. Department of Education, 2005
47
Grade 4
Concept Maps
Instructional Considerations
Students will be expected to:
A4.1 use brainstorming techniques to
generate ideas (Guided)
A4.1 Concept mapping software exists to assist users in developing ideas
resulting from a brainstorming activity.
A4.2 create a web (Awareness)
A4.2 The visual nature of a web (literary, concept, character, word, venn
diagram, timeline) allows students to see patterns and relationships from
ideas. Visual learning helps students strengthen critical thinking, comprehension and writing skills across the curriculum. Students may build
graphic organizers to represent concepts and relationships.
A4.3 categorize ideas graphically
(Independent)
A4.3 Concept mapping encourages students and teachers to be creative. They
are able to work together to create concept maps, story boards, cause and
effect diagrams, and outlines.
A4.4 create links between ideas, relink or delete links between ideas
(Independent)
A4.4 Graphical software allows easy manipulation of linked ideas. Simply click
on a link and drag it to a new location.
A4.5 elaborate on ideas (Independent)
A4.5 Further explaination on an idea may be provided by adding notes. These
may be clues, activities or questions relating to clarification of ideas.
B4.1 add fonts, graphics, sound, and
colours to enhance ideas (Guided)
B4.1 Learners are able to differentiate among ideas with colors, shapes, patterns,
shadows, fonts and styles. Audio also supports multiple learning styles.
B4.2 create hyperlinks to files, web
sites, or multimedia content
(Awareness)
B4.2 Gather and present information from multiple sources, including documents, by hyperlinking to any file. Create web pages with URL hyperlinks
through the HTML export function and drag and drop JEPG and GIF
images into a concept map.
48
Journey On - P.E.I. Department of Education, 2005
Grade 4
Concept Maps
Teaching Suggestions, Activities and
Assessment
Links to Specific Curriculum Outcomes
Language
Arts
Math
Science
Social
Studies
Other
Technology Lesson Plans:
Butterflies
Environmental Impact
Natural Disasters
1.1, 1.2, 1.3, F8
1.4, 2.1, 3.1,
4.3, 5.1, 8.2,
9.1, 10.3
104-6 108-3,
108-6, 206-6,
301-7
A4.1 Inspiration 7.5 is available on all
school computers and teachers may
use this as a useful tool for organizing group discussion and prompting
students for input.
A4.2 Rearrange data and experiment with
relationships by using webbing,
mapping, and timeline strategies.
Provide a rational explaination for
the way in which data was combined.
B4.1 Express design creativity through the
use of graphics, fonts, sound and
color.
Critique aesthetic qualities of the
completed activity.
B4.2 Link supporting detail or documentation to the graphic organizer that was
created.
Explain reasoning for the selection of
particular documents used to support
the concept.
Journey On - P.E.I. Department of Education, 2005
49
Grade 4
Graphics
Instructional Considerations
Students will be expected to:
A5.1 create illustrations or graphics by
using the various drawing tools (Guided)
A5.2 apply principles of design
(Awareness)
B5.1 demonstrate various object editing
features (Guided)
B5.2 carry out various object manipulations (Awareness)
50
A5.1 Graphics programs can be used as an alternative learning strategy to
explore and experiment with geometric shapes and relationships. The
computer provides a highly interactive environment for the learner in
which precise geometic shapes can be created and then altered with repect
to their size, orientation colour and position.
A5.2 The appearance of a document can be greatly influenced by the font, text
size and layout of the text as well as the choice of graphics and the layout
of the graphics on the page. There are certain basic rules of effective page
design which are easy to implement and which can have a huge impact on
the appearance of the final product. For a document, use a consistent
font size and style for body text. Titles can be from a different font
family and larger in size. It is advisable to use no more than three font
styles per document.
B5.1 Graphics programs provide the user with on screen tools (ie. select,
unselect, resize, crop, area fill, add colour and pattern, size adjustment
using the mouse or scale, various erasing techniques, object orientation,
changing font and text size, colour or appearance, creating text blocks,
change text wrap selection and other text manipulation functions) that can
be used to design and create illustrations, slide presentations, diagrams,
timelines, graphs, maps, and charts of various sorts. In addition to
original works, students can import images acquired from a scanner,
digital camera or the Internet and incorporate these images into their
projects.
B5.2 Students can make precise geometric shapes and then change the size,
orientation, colour, and perspective of the shape. Manipulations may be
applied to several objects at the same time.
Journey On - P.E.I. Department of Education, 2005
Grade 4
Graphics
Teaching Suggestions, Activities and
Assessment
Links to Specific Curriculum Outcomes
Language
Arts
Math
Science
Social
Studies
Other
Technology Lesson Plans:
Digital Geometry,
All About Me,
Butterflies,
Shapes Make Pictures
4.3, 10.3
A1, F3, E1,
E3, E4, E7,
E10, E11
A5.1 A tutorial regarding Appleworks 5
graphics tools may be found at http:/
/www.edu.pe.ca/journeyon/
pro_d_pages/awgraphics/
awgraphics.htm
Individual lesson plans may contain
downloadable files composed of
preformatted objects.
A5.2 Prepare an assessment rubric relating
to guidelines for graphics as follows:
graphic selection, incorporates visual
elements, fonts clear, text colour and
background agree, consistency,
spelling, etc.
B5.1 Create patterns with 2D and 3D
shapes with various attributes such as
size, colour, line thickness, etc.
Alternatively, the objects found in the
downloadable files may be manipulated using a variety of tools.
Ensure that students use a variety of
techniques to modify objects.
B5.2 Align or combine objects created from
B5.1 using layering, alignment,
grouping features. Demonstrate.
Journey On - P.E.I. Department of Education, 2005
51
Grade 4
Spreadsheets
Students will be expected to:
Instructional Considerations
A6.1 plan/design a spreadsheet to
organize and tabulate data from
various sources (Awareness)
A6.1 A spreadsheet is a computer program designed to facilitate the manipulation of data in the form of words, numbers, or graphics. It is important
that learners have an understanding of the various types of data (i.e:
schedule, tally/score sheet, solve a mathematical word problem) which can
be stored and manipulated using the spreadsheet. You can enter numbers, text, or formulas into your spreadsheet.
Once the student has an understanding of the types of data which can be
entered into the spreadsheet, they are better able to design a spreadsheet
which will meet their needs.
A6.2 correct errors, modify or delete
data in a cell (Awareness)
A6.4 use different types of graphs/
charts to visually represent data; label
graph components (Awareness)
B6.1 identify spreadsheet components
and terminology (Awareness)
52
A6.2 Students should be made aware of how spreadsheets simply the task of
calculating by immediately recalculating when data is modified. Emphasize the importance of entering data correctly and estimating the expected
result. This is a necessary skill to detect an incorrectly entered formula.
A6.4 By entering data into a spreadsheet students are then able to make a variety
of charts and graphs (i.e:line, pie, bar).Labels such as legend, title,xy axis
can be created. Students will be better able to interpret charts and graphs
after having created their own using spreadsheet software.
B6.1 Spreadsheets are formatted as tables that consist of rows and columns.
Each row is identified by a number, while each column is identified by
one or more letters. Each box in the table is referred to as a cell. The row
and column that intersect at the cell provide the cell with its address. The
address consists of the letter representing the column followed by the
number representing the row.
Journey On - P.E.I. Department of Education, 2005
Grade 4
Spreadsheets
Teaching Suggestions, Activities and
Assessment
Links to Specific Curriculum Outcomes
Language
Arts
Math
Science
Social
Studies
Other
Technology Lesson Plans:
Chart It
Noise Pollution
Pocket Change
Math Facts
What’s in the Party Bag?
A6.1 Discuss situations where the use of a
spreadsheet is desirable. The
spreadsheet is better suited for
reoccuring situations where the user
wants to record numeric data and
perform calculations. ie. attendance,
growth chart, milk sales, etc.
5.1, 10.3
A7, B9,
B13, B17,
F1.2, F1.4,
F2.2, F2.5,
F3.1, F3.4,
F5.2, F5.3,
F8.2
104-1,106-4,
108-1, 1083, 204-6,
205-5, 2058, 206-2,
206-9, 207-6
4.4.2
Demonstrate the purpose of a
formula by inserting two numbers
and entering a formula to add them
together to provide a sum. Note that
this may be accomplished with the
formula “+A1 + A2” or
“=sum(A1..A 2)” in cell A3
A6.2 To delete an entry click on the cell to
activate and tap the “delete key”. To
add data, click to activate the cell. Data
will appear in the formula bar. Press
enter to place the data in the cell.
A6.4 For access to the graphing capabilities
of the AppleWorks spreadsheet, the
user must enter data into the
spreadsheet. Once the data is entered,
select the data which is to be graphed
and click on Options/Make Chart.
This will open the Chart Options
window.
B6.1 Introduce spreadsheet terminology and
insist that this terminology be used.
Journey On - P.E.I. Department of Education, 2005
53
Grade 4
Spreadsheets
Instructional Considerations
Students will be expected to:
B6.3 enter data into simple preexisting spreadsheets, auto fill data,
data entry bar, sort data (Awareness)
B6.4 edit spreadsheet layout (Awareness)
B6.6 format numbers and text
(Awareness)
54
B6.3 Students are first introduced to pre-created spreadsheets that allow them
to record simple data. This data may result from activities such as a class
survey. Pre-entered formulas allow the student to recognize that
spreadsheets can perform a calculation function.
B6.4 Once the spreadsheet is created in draft form there will be many occasions
for revision. These types of editing changes are easily carried out with
AppleWorks but it is important for students to understand the implications of these changes. Any formulas or calculations carried out on the
inserted/deleted rows or columns will be effected by these revisions. Cells
may be added, deleted , locked or unlocked in a spreadsheet by clicking on
"Calculate/Insert or Delete cells"and “Options,Lock or Unlock” and
selecting the necessary range of cells to move or lock.
B6.6 When using a spreadsheet, it is often necessary to format the data entered.
Numbers may require a certain format ie. number of decimal places,
currency or percentage. There are several preset forms in AppleWorks to
allow the user to display data in the format appropriate for that particular
situation.
Journey On - P.E.I. Department of Education, 2005
Grade 4
Spreadsheets
Teaching Suggestions, Activities and
Assessment
Links to Specific Curriculum Outcomes
Language
Arts
Math
Science
Social
Studies
Other
B6.3 Activity files are provided with lesson
plans. These files contain the structure
to organize data. Assist student with
initial procedures and monitor
progress.
B6.4 When data becomes too large for the
cell, simply drag the cell border to the
right. Alternatively, select “fomat”
from the pulldown menu and
“column width” or “row height”
option to adjust all cells in the
spreadsheet.
To insert a column or row select
“calculate” from the pulldown menu
and “insert cells” option. Demonstrate adding a row by creating space in
the example lesson plan file (ie. pocket
change) for a title.
B6.6 Select “Format” from the pulldown
menu and “number” option. Currency, percent, decimals, date, time, etc.
may be applied to the data in a cell.
Apply currency, 2 decimal places (dollar
signs) to the total row in the example
lesson plan file (ie. pocket change
lesson plan).
Note: A tutorial on Appleworks
(Clarisworks) spreadsheets exists on
the Journey On website at:
http://www.edu.pe.ca/journeyon/
tech_support_pages/help_manual/
ssheet/default.html
Journey On - P.E.I. Department of Education, 2005
55
Grade 4
Word Processing
Instructional Considerations
Students will be expected to:
A7.2 identify examples of desktop
publishing (Independent)
A7.2 Use concrete examples of computer generated media such as magazines,
brochures, catalogues, newspapers to demonstrate how technology is
used to create written and illustrated text.
B7.1 use a grade level appropriate
word processor to create and edit
written work (Independent)
B7.1 Students can be introduced to using word processing to develop effective
writing. As students develop new skills in writing, they can be introduced to new keys and functions. Once students become familiar with
the various components of the writing process, cut and paste functions
can be introduced.
B7.2 locate characters on a keyboard
and identify functions of word
processing (Independent)
B7.3 use editing tools to revise work
(Guided)
56
B7.2 Writers will become familiar with the keyboard through use. It is simply
necessary that writers be able to key their ideas at a pace similar to composing with pencil and paper. Keyboarding skills for independent
writers should be sufficient for them to keep up with their line of
thought. (APEF English Language Arts Curriculum Document for
Grades Entry-3, page 240 ).
B7.3 The advantage of using a word processor as a writing tool can be attributed to the ease with which text can be inserted, deleted, rearranged, and
corrected.
Journey On - P.E.I. Department of Education, 2005
Grade 4
Word Processing
Teaching Suggestions, Activities and
Assessment
Links to Specific Curriculum Outcomes
Language
Arts
Math
Science
Social
Studies
Other
Technology Lesson Plans:
Environmental Impact
The outcomes related to word processing
can be taught when using the computer in
any curriculum area. Teachers are encouraged to introduce one or two word processing skills in each lesson.
4.3, 4.4, 8.1,
8.2, 9.1,
10.2, 10.3
206-2
A7.2 Provide or create an examplar. Publish
written work by printing a hard copy.
B7.1 Begin to use a simple word processor
such as Appleworks or Ultimate
Writing Creativity Centre.
B7.2 Use the characters of the keyboard and
the simple function keys such as the
space bar and enter key. Change the
style of the characters, words, lines,
paragraphs, and pages of the written
work. These changes are termed
formatting and enhance the presentation of student writing.
B7.3 All work must be spell checked.
Encourage students to increase their
vocabulary with the use of the
thesaurus.
Journey On - P.E.I. Department of Education, 2005
57
Grade 4
Word Processing
Students will be expected to:
Instructional Considerations
B7.4 change font, size, colour, and
style of text (Independent)
B7.4 Change text attributes by selecting upper and lower case letters, underlining
text, placing spaces between words and changing font, style,colour and size
of text.
B7.5 format text (Guided)
B7.5 Word processing is one strategy to develop effective writing. As students
develop new skills in rearranging sentence structures and sequencing of
events. Publication of projects can develop more of a professional
appearance by introduction to more advanced stylistics (i.e., justification,
columns, line spacing, outlines, text wrap, and bullets).
B7.6 format documents (Awareness)
B7.6 Pages may be formatted by inserting page numbers, changing margins,tab
rulers, and creating borders, headers and footers. Single pages may be
centered vertically. A watermark is text or graphics that appear in the
background of each page ie. the word “Draft” is often inserted in documents before becoming accepted or an image may be placed as a background of a story or poem ie. image of a soldier in a Remembrance Day
poem.
B7.7 insert a graphic and manipulate
(Guided)
B7.7 Graphics may be manipulated in either a graphics program, such as
Paintshop Pro, or in the word processor. Images may be imported,
acquired from a scanner, digital camera or from the Internet. Many word
processors come with a clipart library or a text art feature that allows text to
be created as a graphic. ie. templates for placing text in arcs, circles, waves,
2D or 3D format, and in different colors.
B7.8 insert and format tables (Awareness)
B7.8 The presentation of data may be enhanced by placing it into a table.
Individual cells in the table may contain their own formatting attributes.
Text may be aligned, border lines added or removed, thickness adjusted and
pattern, colour or shading added. The entire table may be resized and
moved around within the document.
58
Journey On - P.E.I. Department of Education, 2005
Grade 4
Word Processing
Teaching Suggestions, Activities and
Assessment
Links to Specific Curriculum Outcomes
Language
Arts
Math
Science
Social
Studies
Other
B7.4 to B 7.8 The design needs of a document will determine the appropriate use
of these features.
Suggested activities which may incorporate some or all of these outcomes
follow:
- create a story by providing a starting
sentence and students take turns by
adding a sentence.
- create a class story to provide a model
for writing.
- write a group story or report. Each
student can have the responsibility for a
section which can be combined into one
publication.
- create an on screen book or presentation.
- create a new story by revising a story
read in class.
Journey On - P.E.I. Department of Education, 2005
59
Grade 4
Multimedia
Instructional Considerations
Students will be expected to:
A8.1 apply planning strategies (Awareness)
A8.2 create an age/grade appropriate
slide show presentation that may contain one or more of the following objects :text, graphics, images, animations,
audio and video (Awareness)
A8.5 select appropriate medium to convey a message (Awareness)
B8.1 navigate multimedia resources such
as slide shows, online resources or CDROM interactive educational activities
(Independent)
60
A8.1 Time devoted to pre-production planning (i.e: storyboards, scripts,
graphic organizing, brainstorming) with paper and pen or software tools
will result in a better quality product and save time in the long run.
Should group work be involved in the production process, this planning
will help to organize and coordinate individual activities.
A8.2 A slideshow allows curriculum to be presented using new media in fun
and interesting ways. This can be very motivating for the student. Use
existing multimedia resources or create multimedia components using
equipment available in schools.
A8.5 Choice of media may include slideshow, web page, brochure, newsletter,
report, etc. Every media has its particular strengths. The choice of media
would depend upon the intended audience and the activity.Be concious
of file size, formats and storage locations.
B8.1 Navigation is similar for most multimedia resources. With the advent of
home entertainment centers, most students have experience with alternative navigational schemes. Should the navigation sytem not be apparent,
users should consult the help section or user manual.
Journey On - P.E.I. Department of Education, 2005
Grade 4
Multimedia
Teaching Suggestions, Activities and
Assessment
Links to Specific Curriculum Outcomes
Language
Arts
Math
Science
Social
Studies
Other
Technology Lesson Plans:
All About Me
Natural Disasters
Shapes Make Pictures.
A8.1 Use Inspiration software as a planning,
brainstorming, organizational tool.
Submit or present a plan for the
activity.
1.2, 2.1, 1.1,
4.3, 5.1,
6.2, 8.2, 9.1,
10.3
206-2, 301-7
4.3.2
Art:
GCO 2,
GCO 7
A8.2 Use Appleworks or Presentations 9 to
create a presentation about a research
project or topic. Depending upon the
project, groupwork may be assigned
with individuals being responsible for
different aspects of the slideshow ie.
graphics, text, spreadsheet graph,
sound, etc.
A8.5 Discuss project possibilities and
mediums. Front Page Express (web
authoring), Appleworks (newsletters,
brochures, slideshows), Presentations
9 (slide shows), Ultimate Writing
Creativity Center (newsletters, reports),
Inspiration 7.5 (web pages, images)
software may be used.
B8.1 Demonstrate navigational conventions
used with various media.
Journey On - P.E.I. Department of Education, 2005
61
Grade 4
Database
Instructional Considerations
Students will be expected to:
A9.1 use and existing database (Independent)
A9.1 Databases can help students to develop organizational and problem
solving skills by engaging them in tasks that involve organizing and
sorting information from research to test hypotheses, retrieving information, discovering relationships and commonalities, and predicting trends.
A9.2 perform searches on a database
file using logical and boolean operators
(Guided)
A9.2 The primary purpose of any database file is to store information so that it
can be retrieved quickly and accurately. A database query can range from the
simple (eg. Show all the records which are located in Charlottetown) to the
complex (eg. Show all the records located in Charlottetown, who are
younger than 35 and are females only). The second example demonstrates
the use of logic operators (less than,less or equal than, greater than, greater
or equal than, not equal and equal) as well as the use of Boolean operators
(AND, OR, NOT, AND NOT).
A9.3 design/plan a database to use as a
method of organizing information
(Awareness)
A9.3 The selection of database fields, field types and the format that information is entered has an effect on the information that can be retrieved when
the database is complete. For this reason it is important that students
have some practice in the practical application of database principles.
Proper understanding of a particular problem and the types of questions
to be answered from the data will make the design and use of the
database more efficient.
A9.4 create and modify a form
(Awareness)
A9.4 A data input form may be designed to house fields that will allow users
to enter data for a particular record i.e. reading log with fields for title,
author, date, genre, and response. Graphics, text and colour may be
added to this form. Data must be entered consistently and accurately for
later data retrieval. If spelling errors occur, search strategies will not be
reliable. Some databases have features that help reduce the occurrance of
errors such as drop-down menu choices i.e. Mr., Mrs., Ms. or a rule that
will check to make sure that data is not outside a certain range i.e. age is
not over 100.
Terminology: All data about a particular topic is known as a file or
database (i.e. all books); data is grouped into records (all data concerning
one book); records are divided into fields (individual pieces of data
about a book i.e. title, author, etc).
62
Journey On - P.E.I. Department of Education, 2005
Grade 4
Database
Teaching Suggestions, Activities and
Assessment
Links to Specific Curriculum Outcomes
Language
Arts
Math
Science
Social
Studies
Other
Technology Lesson Plans:
Exploring Canada
Creatures
Canadian Mammals
What Are You Reading
4.3, 5.1, 9.1,
10.3, 10.5
F1,F8
205-5
206-2
302-1
4.3.1
4.4.2
A9.1 Submit queries in a pre-existing
database such as a search engine or
library book database.
A9.2 Visit a search engine
(www.altavista.com) which is a very
large database. Practice searching for
statistics for PEI using Boolean
operators in the “advanced search”
area. eg. pei “lobster OR shellfish”, pei
tourism NOT guide, pei AND rockets
(note that using “quotations” is the
same as using AND to limit a search)
A9.3 A database provides a way to record
independent reading. Brainstorm
fields that will be required to provide
useful information. Identify the field
types necessary.
A9.4 Create the data input form for the
activity in A9.3. Add a graphic relating
to reading, a title such as “Indepentent
Reading Log” and colours for the field
data entry box. Identify fields for
which drop-down or error checking
routines may be applied. i.e.: pulldown menu for genre and error
checking for date falling within 19002005 range, “field cannot be empty” or
“field must be unique” i.e.: Dewey
Decimal number
Journey On - P.E.I. Department of Education, 2005
63
Grade 4
Database
Instructional Considerations
Students will be expected to:
A9.5 use databases to analyze data and
look for trends (Awareness)
A9.5 Databases created in Appleworks use query techniques. Layouts may be
created that contain specified fields. Records may be sorted into ascending
or descending order. Particular records may be searched through the “find”,
“match records” or “omit” features. See the Journey On online tutorial
relating to Appleworks databases (http://www.edu.pe.ca/journeyon/
tech_support_pages/help_manual/database/default.html )
B9.1 enter data into a pre-existing
database, edit cell data, and use
automated text (Guided)
B9.1 Compare non-computer databases to electronic databases. Convey to
students that computers are advantageous because of the speed and ease
with which information can be organized, stored, searched and retrieved.
B9.2 create fields and with variable
field types and properties (Awareness)
B9.2 Fields are assigned a “data type” which will allow the program to store data
in a particular format. i.e. date will allow options for specifying information
display as day, month, year or month, day, year or year, month, date, etc.
Numeric fields allow calculations to be performed with the data in reports.
B9.3 restructure database (Awareness)
B9.3 No matter how well the database is planned, there will be times when certain
elements of the database must be changed. There may be need to add a
field that was omitted, delete a field that is no longer required, change the
size of the field to allow for more informtion etc. In all cases, the information in the database will also have to be modified manually. For example, if
a field is added to the database where there are already 100 records, then each
piece of information that goes into the new field will have to be added for
each of the 100 records. Also, when deleting fields, data contained in the
field to be deleted will also disappear. For this reason, it is important to be
careful when making changes to an existing database as the consequences
could be the inadvertent loss of data.
B9.4 sort records alphabetically ,
numerically and by multiple fields
(Awareness)
B9.4 In the What are you Reading example, the records may be sorted by “Author” as key one. Should two authors have the same last names a second
key “first name” sort can be specified.
64
Journey On - P.E.I. Department of Education, 2005
Grade 4
Database
Teaching Suggestions, Activities and
Assessment
Links to Specific Curriculum Outcomes
Language
Arts
Math
Science
Social
Studies
Other
A9.5 Refer to the lesson plan “What are You
Reading”. Review the chosen fields for
this database. Under “Suggestions For
Further Activities” a number of
questions are provided. Use these as
an assessment or as a resource to
brainstorm further questions/trends.
B9.1 Enter new information into a preexisting database. This information
may result from their own research
activity. Refer to the following activity
file for entering information into a preexisting database
4bkrec.cwk(Appleworks)
B9.2 Assign field types to match the data
that will be placed in the fields i.e.
number, text, date. Change text colour
and font. Provide any prompts for the
user as to the format in which data
should be entered.
B9.3 Add a new field to the database ie:
ISBN number; Remove this field
from the database.
B9.4 Once students have entered data records
for the lesson plan activity demonstrate
multiple field sorting with the following examples: sort the data by title,
genre, rating, etc
Journey On - P.E.I. Department of Education, 2005
65
Grade 4
Database
Instructional Considerations
Students will be expected to:
B9.5 create a report from the entire
database or selected records
(Awareness)
B9.5 Users may create a report from the database. These reports will contain
parts of the information arranged in some particular fashion. To create a
report, a layout containing the necessary fields is prepared. Once this
layout has been created, and sort and match criteria specified, the report can
be printed in this format. Alternatively, the information can be cut and
pasted into another wordprocessor as part of a larger written report or
presentation.
E9.1 examine functions and implications
of database driven websites (Awareness)
E9.1 Database software is the most widely used business application. It is
used to track inventory, customer information, supplier information,
sales and banking data, etc. Electronic commerce (e-business) has
required that databases be connected to Internet web sites to provide
specific information to customers or to collect information from them.
Special Internet security features must be built into these online
database systems to prevent identity theft, fraud and to protect credit
card transactions.
66
Journey On - P.E.I. Department of Education, 2005
Grade 4
Database
Teaching Suggestions, Activities and
Assessment
Links to Specific Curriculum Outcomes
Language
Arts
Math
Science
Social
Studies
Other
B9.5 Create a report from the data in the
lesson plan. Create a new layout and
select the fields for the second sort
from B9.4 -author, title, genre . From
the pull-down menu select “Layout” “New Layout” - “Columnar Report”.
Enter a name for the report i.e.
Favorite Books. Set the field order as
author, title, genre . To sort the
records for this report select “Organize” - “Sort Records”. Move
theauthor, title, genre field names into
the sort order box and specify
ascending or descending. Click OK.
Observe progress and check that
records are in specified sort order.
Specify records to be included in the
report by selecting “Organize” “Show All Records” and “Layout” “Find” and specify the field data you
would like.
E9.1 Visit an online business site such as
Veseys Seeds (http://
www.veseys.com) and search for a
product. Identify the features that are
associated with a database application.
Journey On - P.E.I. Department of Education, 2005
67
Grade 4
Telecommunications
Students will be expected to:
Instructional Considerations
A10.1 collaborate using software
(Awareness)
A10.1 Within the classroom, collaborative tools (ie. whiteboard, slideshow,
application sharing, chat, messaging, send and receive files, photos, group
file sharing, resource sharing (links), online content creation and sharing,
assignment drop box, video and audio, discussion forums, journal.)
make it possible for students and teachers to work together in a virtual
workspace. This is particularly useful when students are involved in
groupwork outside of class time and live a distance apart. These tools
may also make it possible for students with illness to stay in touch with
peers and class activities.
Establishing connections with classrooms in different parts of Canada
or the world can be a powerful tool for the classroom teacher in all
subject areas. Student assignments take on another level of authenticity
when they are shared with other classes via telecommunications.
Every student is issued a web accessible email account. With use their
abilities will evolve and they will make more use of this tool for collaboration.
B10.1 send messages (Independent)
B10.1 Each student on Prince Edward Island is provided with an e-mail
account. As with regular mail, e-mail requires an address. The address
begins with a username followed by an @ symbol and the domain
name. It is important to write the full e-mail address without any
spaces.
B10.2 open messages (Independent)
B10.2 The language skills of grade four students may be sufficiently developed
to independently send an e-mail message.
68
Journey On - P.E.I. Department of Education, 2005
Grade 4
Telecommunications
Teaching Suggestions, Activities and
Assessment
Links to Specific Curriculum Outcomes
Language
Arts
Math
Science
Social
Studies
Other
Technology Lesson Plan:
E-mail: Electronic Mail
1.2, 3.3, 10.3
A10.1 Use of collaborative tools expands
the resources available to the
classroom. The teacher and students
can communicate with each other
regarding questions from discussion
in class.
Teachers can model the information
process by accessing online experts.
This demonstrates that teachers, just
like students, do not have all the
answers but have the skills to find
out.
During an author study, students
may correspond with the author by
e-mail. Questions concerning the
publication could be directed to the
author and the response reported
B10.1 Grade four students are sent and
email message by their classmates.
B10.2 Alternatively, students could be
paired with students from another
school.
Journey On - P.E.I. Department of Education, 2005
69
Grade 4
Telecommunications
Instructional Considerations
Students will be expected to:
B10.3 manage mail/folders (Awareness)
B10.4 manage address books
(Awareness)
B10.5 use distribution lists
(Awareness)
70
B10.3 Mail messages that a user may want to save for future reference may be
organized into separate folders. i.e. friends, projects, teacher, family, etc.
Storage space is limited, therefore, users must periodically review mail
messages and delete those that are no longer useful.
B10.4 An address book maintains the email addresses of correspondents.
When composing new mail messages, the address book may be accessed
to provide the correct user. All students and teachers will be listed in the
main address book area. Multiple personal address books may be created
and outside or frequently used addresses may be added. i.e. friends,
family, project group, team, etc.
B10.5 A distribution list allows a user to send a single message to many recipients without having to type individual addresses. i.e. the teacher may
want to send the same message to everyone in a particular class. To create
a distribution list, the user adds individual addresses and saves the
“group” with an identifiable name. eg. grade 4 class. This distribution list
or “group” is saved in a particular address book.
Journey On - P.E.I. Department of Education, 2005
Grade 4
Telecommunications
Teaching Suggestions, Activities and
Assessment
Links to Specific Curriculum Outcomes
Language
Arts
Math
Science
Social
Studies
Other
B10.3 Create folders to organize received
email. Transfer mail messages into
created folders.
B10.4 Create an address book for classmates. Add individual addresses to
this book.
B10.5 Divide students into small groups.
Each student create a distribution list
for the members in their group. Save
the distribution list in the address
book created in B10.4 with an
indentifiable name. Send a message
to all members in the group by
placing the distribution list name in
the TO: field from the address book.
Journey On - P.E.I. Department of Education, 2005
71
Grade 4
Telecommunications
Students will be expected to:
Instructional Considerations
B10.6 send and open attachments
(Awareness)
B10.6 Files may be sent “attached” along with an email. There are file size
restrictions on attachments sent through providers such as Sympatico.
Should an attachment exceed the limit the email will be undeliverable.
The school email system scans and filters email for viruses. Any suspect
files will be filtered and deleted. Program and other files with particular
extensions are automatically filtered. (For a complete listing of these file
extensions please see http://www.edu.pe.ca/sats/standards/update/
blocked_attachments.pdf)
Emails with attachments that are stored in the inbox or a mail folder
take up mailbox storage space. Attachments should be saved to a local
drive location and the email deleted.
B10.7 create signatures (Awareness)
72
B10.7 A signature is an automatic message that is placed at the bottom of a
sent email. In business, signature information will often contain the
company name, individuals’ name, phone/cell/ fax numbers, email
address, mailing address, web site URL, etc.
Journey On - P.E.I. Department of Education, 2005
Grade 4
Telecommunications
Teaching Suggestions, Activities and
Assessment
Links to Specific Curriculum Outcomes
Language
Arts
Math
Science
Social
Studies
Other
B10.6 Assign a peer editing activity in which
one student composes story in a
word processor. A second student is
sent the file as an attachment and
suggests improvements. (designate
whether this might be spelling,
punctuation, sentences, etc.) The file
with suggested changes is returned
by email.
B10.7 Choose a short quotation from a
selected reading activity that has
personal meaning. Setup this
quotation as an email signature.
Journey On - P.E.I. Department of Education, 2005
73
Grade 4
Web Authoring
Students will be expected to:
Instructional Considerations
A11.1 identify web page creation
possibilities (Guided)
A11.1 Many opportunities exist within the grade four curriculum for publishing class activities. This may be a method of celebrating the completion
of a theme or unit. It provides a means for parents to see their child’s
work or activities. Many PEI Elementary school websites contain
numerous completed activities that may be used as examples.
74
Journey On - P.E.I. Department of Education, 2005
Grade 4
Web Authoring
Teaching Suggestions, Activities and
Assessment
Links to Specific Curriculum Outcomes
Language
Arts
Math
Science
Social
Studies
Other
Technology Lesson Plans:
Butterflies
Fishing For Facts
4.1, 4.3, 5.1,
8.1, 9.1, 10.3
201-4, 2055, 302-1
A11.1 Visit numerous sites to identify their
characteristics.
Journey On - P.E.I. Department of Education, 2005
75
Grade 4
Lesson Plan: E-Mail
Outcomes
Technology A10.1, B10.1, B10.2,
B10.3, B10.4, B10.5
Language Arts 1.2, 3.3, 10.3
Activity
Electronic mail is an important component of communication and information technology. E-mail is an instant, free, “no stamps required” form of
communication. This introductory activity introduces students to the basics of
electronic mail and the idea of having penpals over the Internet, a partnership
known as keypals.
Resources
• E-Mail
• Class list of e-mail addresses
Suggestions
A Classroom Discussion: Why??
Sending a message (Groupwise):
Students should be reminded that
e-mail is not private but should be
thought of as a postcard. School
administration has access and the
right to read any e-mail on the
school system. This includes both
student and staff e-mail.
Currently, teachers are using Novell
Groupwise Web Access.
1. Click on the new messsage icon.
2. Click Address Book to add recipients in the To, CC, and BC boxes.
or Type a recipient’s address in the To, CC, or BC box. The address can be a
GroupWise user ID, GroupWise full name, or external e-mail address.
Separate each address with a comma.
3. Type a subject and message.
4. You can include Web site locations or addresses (URLs) in both the Subject
and Message boxes.
5. (Optional) Click Spell Check to spell check the message. For this feature to
work, your browser must be enabled for Java. (Optional) Click Attach to
attach files to the message. For this feature to work, your browser must
support attachments.
6. Click Send Options to select a security setting (classification), assign a priority
(high, standard, low), request a reply, or select to receive return notification.
7. Click Send.
As of September 2005, all students
will be using Netmail which has the
“look and feel” of Groupwise.
76
Instructions
Journey On - P.E.I. Department of Education, 2005
Grade 4
Lesson Plan:
E-Mail
Instructions (continued)
The teacher, or designated student, can e-mail on-line “experts” with questions from discussion in class. The responses can be shared with classmates.
Accessing resources allows teachers to model the information process and
demonstrates that teachers, just like students, do not have all the answers but
have the skills to find out. On-line “experts” also allow for discussion on the
importance of the credibility of the source when using the Internet as a
learning resource.
Sending Attachments with your e-mail message: (Groupwise)
1. In the mail message window, click on the Attachments button.
2. In the Attachments window, click on Browse.
3. In the Choose File window, locate the file that you wish to attach and then
click on Open.
4. Click on the Add button. The file will now be listed below the line.
5. To add another file as an attachment, click on Browse once again and
repeat the above steps.
Once all the files you wish to attach are listed, click on OK. You will return to
the Mail Message window and the attached files are listed with a small paper
clip image just under the subject field.
Viewing Attachments
When you view an attached file, GroupWise WebAccess attempts to convert
the file to HTML and display it in your browser. If GroupWise WebAccess
cannot convert the file, you can try to have your browser display the file.
Depending on how your browser is configured to handle the file, the browser
may display the file, launch an application to view the file in its native format,
or save the file.
Opening Attachments
When you open an attached file, the file is opened in your browser in its
native format if your browser supports the file format and if your browser is
set up with the correct association for the file format. In addition, you might
be able to edit the file if you have the appropriate plug-in (for example, the
MSWord plug-in allows you to edit a .doc file in the browser). If you try to
open a file with a format that is not supported in your browser or that does
not have an association in your browser, you are prompted to save the file to
disk.
Journey On - P.E.I. Department of Education, 2005
77
Grade 4
Lesson Plan: E-Mail (KeyPals)
Instructions (Keypals)
STEP 1 - Learn to Use E-Mail
Before you get things rolling, it is important that you know how to use e-mail
and that you recognize its strengths and limitations. Students should also know
how to use e-mail before the project gets started. Usually it takes one or two lab
sessions to learn how to send and receive e-mail messages independently.
STEP 2 - Find a Partner
The next step is to find a partner class with which your students can correspond.
Keep in mind that this class can be anywhere in the world, including your own
province (another class following the same curriculum) or your own school (another class at the same level or perhaps another grade). Finding partner classes in
your own school or province is easy since you can network with your colleagues.
Consider how students will correspond with one another. You may want to have
student-to-student correspondence (each student sends a message to his/her
keypal) or class-to-class correspondence (each class composes one message and
sends it to its partner class). You want to have students outline their e-mail
messages before each computer session to make good use of their time at the
computer. Also, keep in mind that keypal messages don’t have to be as long as
traditional penpal letters because the communication between keypals will happen very quickly and more often. You and your partner teacher should outline a
reasonable time frame for students to send and receive messages. It is important
to determine these expectations up front, so one class will not end up sending all
the messages and receiving none.
Your access to the computer lab (or students’ access to the computer in your
classroom) will affect how often your students can send messages to their
keypals. You should also consider how long your computer session will run
because you don’t want to end up saving a lot of half written messages.
After the initial “get to know you” messages, do you want to have the students
exchanging ideas or comments on specific topics? For example, they could
discuss what it means to be an Islander, how the farming or fishing industry
affects their communities, or share their creative writing . By outlining (with
your partner, teacher) specific topics for discussion, you can guide students in
their message writing and, at the same time, discourage too much idle chatting.
78
Journey On - P.E.I. Department of Education, 2005
Grade 4
Lesson Plan:
All About Me
Outcomes
Technology A5.1, A5.2, B5.1,
B5.2
Language Arts 4.3, 10.3
Activity
The grade 4 theme Collections: Within My Circle focuses on identity, family,
relationships and friendship. Students have many opportunities as they read
the selections in this theme to think about their own identity and the
relationships they have in their lives. As part of the introduction of this
theme or as a wrap up final activity for the theme, students can create a slide
show to show to the rest of the class. The content of the slide show is all
about them, who they are, what they like and the relationships they have in
their lives.
Resources
• A word processor-Appleworks (slideshow)
• Collections: Within My Circle anthology
Suggestions
• It might be helpful for students
if they planned their slide show
on paper first. Having a
storyboard to work from may
also save some time in the
computer lab.
• Use a large font, at least 24 pt.
Instructions
This activity can serve as an introduction to or a culminating activity for the
Within My Circle theme. Students can use AppleWorks slide show to create a
presentation to introduce themselves to the class. Here is an example of what
the slide show might include:
Slide One - Title Slide - (whatever the student would like to include along
with the title of the slide show.
Slide Two - Facts about me: name, age, hair and eye colour
Slide Three - Interests and hobbies
Slide Four - Family Members
Slide Five - Favourites (favourite food, colour, movie, television show,
sport, etc.)
See next page for examples of each of the slides.
Instructions on how to create a slide show follow on the next few pages. In
creating their slide show, students can use the clipart that comes with
AppleWorks and Colour Magic.
Journey On - P.E.I. Department of Education, 2005
79
Grade 4
Lesson Plan:
All About Me
Here is an example of what a finished product of a slide show might look
like:
80
Journey On - P.E.I. Department of Education, 2005
Grade 4
Lesson Plan:
All About Me
Creating the slide show in AppleWorks:
To create the slide show, go into AppleWorks and choose the Drawing
application. Once you are in the AppleWorks Drawing, click on FORMAT in
the menu bar and then choose DOCUMENT.
When the Document Window pops up (see picture below), click into the
box beside Pages Down and erase the 1 and type in the number of pages
you want in your slide show. For this slide show we will create 5 slides.
Now click on WINDOW/PAGE VIEW.
Journey On - P.E.I. Department of Education, 2005
81
Grade 4
Lesson Plan:
All About Me
Instructions (continued)
In AppleWorks Drawing, you can use the different graphic tools (seen below)
to add text and pictures (that you draw) to your slides.
The tools seen above will ceate exactly what they appear to create. The Rectangle
tool will create squares and rectangles, the Oval tool makes ovals and circles, the
Line tool will draw straight lines, and the Text tool writes text on your slide, etc.
When the slide show is complete click on WINDOW /SLIDE SHOW. When
the Slide Show Window pops open (see diagram below), you can choose a
Border and Background colour by clicking on the boxes before these words.
When you click on these boxes you will see the colour palette. Simply click the
colour that you want for the Border and the Background. The default colours are
white for the background and black for the border.
Other Activities
• Slide shows can be created for
many different purposes. As a
final product for a research
project, students can choose a
slide show to present their
research.
• Import graphics from the web.
When you click Start, you will see your first slide. Hit the Enter key or click the left
mouse button to advance to the next slide. When you have gone through all of
the slides, hit the Q key or the Esc key to quit the show.
82
Journey On - P.E.I. Department of Education, 2005
Grade 4
Lesson Plan:
Chart It
Outcomes
Technology A6.1, A6.2, A6.4, B6.1
Math F1.2, F1.4, F2.2, F2.5, F3.1,
F3.4, F5.2, F5.3, F8.2
Science 204-6, 205-5, 206-2
Activity
General Curriculum Outcome F of the Mathematics APEF curriculum states
that students will solve problems involving the collection, display, and
analysis of data. AppleWorks Spreadsheet is an excellent tool for students
and teachers to use to organize and display their data. Once data is organized
in a spreadsheet, it is very easy to use AppleWorks to create a pictorial
representation of this information in the form of a graph. In Grade 4 math,
students can use the AppleWorks Spreadsheet tool to create bar and line
graphs. This lesson is an introductory lesson to spreadsheets so students
need no prior experience with them.
Resources
Suggestions
• If students have never used a
spreadsheet before, have them try
the Count the Shapes lesson from
the Grade 1-3 technology lesson
plan book. This is a quick and simple
activity that will familiarize them
with how to enter data into a
spreadsheet and how to move
around inside a spreadsheet.
• When you are organizing data on
a spreadsheet to create a graph, you
must organize the data in
consecutive columns and rows. It
does not matter which rows or
columns you choose, but you must
remain consecutive. In organizing
the favourite subject categories, we
began in cell B2 and continued
down to cell B6, without skipping
a cell. We began again in column C
and organized the corresponding
numbers in their appropriate
locations next to their categories.
The next column began in cell C3
and continued down to cell C6,
again without skipping a cell. It is
very important that you organize
your information consecutively,
otherwise your graph will not turn
out exactly as you want it to.
• AppleWorks spreadsheets
Instructions
When students begin to work with a spreadsheet, it is helpful if they are aware
of the following information:
1. Open up AppleWorks and choose the Spreadsheet application.
2. The blocks that make up the spreadsheet are called cells. The cells are organized
into rows and columns.
3. Move the mouse pointer over the spreadsheet. Click once on a cell to
activate the spreadsheet tool. Notice that the mouse pointer has changed
from an arrow to a thick cross. (If you click too many times you may open
a window called Numeric. If this happens click on Cancel.)
4. Move the cross over the cell to which you wish to add data. Click once to
activate that cell. You can tell that a cell is activated when it is enclosed in a
box.
Journey On - P.E.I. Department of Education, 2005
83
Grade 4
Lesson Plan:
Chart It
Instructions (continued)
5. Type in the appropriate number you wish to record and tap the Enter key.
Note: The number will not automatically appear in the cell when you first type
it. You must tap the Enter key. However, as you type data, it appears at the
top of the screen under the menu bar. (This area is called the data entry bar in
the spreadsheet environment.)
6. To delete an entry, click on the cell to activate it and tap the Delete key. Enter
more numbers as described above.
After surveying your fellow classmates in your school, you have determined the
favourite subjects of the students in your school. Here is the data you collected:
Favourite Subject
Mathematics
Language Arts
Physical Education
Music
# of Respondents
100
60
80
75
Enter this information into a spreadsheet and construct a bar graph to display
the information.
1. Open up AppleWorks and choose the Spreadsheet application.
2. Click on cell B2, type Favourite Subjects, then hit the Enter key. This is the title
for the information we are graphing. We will begin to enter the data in cell B3.
Click on cell B3, type Mathematics, then hit the Enter key
Click on cell B4, type Language Arts, then hit the Enter key
Click on cell B5, type Physical Education, then hit the Enter key
Click on cell B6, type Music, then hit the Enter key
You may notice that the words you have typed in column B are hanging over the
line and into column C. You can increase the width of this column so that all of
the words will fit in column B and not intrude on column C. To do this
highlight cells B2 to B6. To highlight, click on cell B2 and hold your left mouse
button down while you drag your mouse down to cell B6. All of the cells
should turn black as you are dragging except for cell B2, the cell you started with.
Now that the cells are highlighted, you can click on FORMAT in the menu bar
and choose COLUMN WIDTH. A little box will appear with a number in it.
Erase the number and type in 125. This will increase the width of column B so
that all of the information will fit.
Now that you can see column C, starting with cell C3 and continuing down to
cell C6 , type the number of students that corresponds to each of the subjects in
your list.
84
Journey On - P.E.I. Department of Education, 2005
Grade 4
Lesson Plan:
Chart It
Instructions (continued)
3. Once all your information is entered, you are ready to create the graph. In
order to create a graph in AppleWorks Spreadsheet, you must first indicate
what information it is you would like to graph. This is done by
highlighting the information. Click on cell B2, hold your left mouse
button down and drag across to cell C2 and then down to cell C6. When
you highlight information in a spreadsheet, the first cell in the block that
you highlight will remain white, while all the others will be black.
4. To create the bar graph,Click on OPTIONS in the menu bar and then
MAKE CHART. A window titled Chart Options will open and you will
see that you can choose from many different kinds of graphs. The bar
graph is the very first option, click on this. Now click OK and your bar
graph will appear. It may look something like this:
Notice that your bar graph is inside of a box, and that in each of the four
corners of this box there is a handle (a small black square). This means that
your graph is selected and that you can make changes to it. For example, if you
click in the middle of your graph and drag your mouse, you will move your
graph around without resizing it. If you click on any of the four corners where
the handles are, you can make your graph larger or smaller depending on the
direction that you drag the mouse. If your graph looks like the one above, the
names of your subjects are squashed together. You can fix this by clicking on
one of the handles and making the graph wider. This will allow for more
room for the subject names that appear along the X axis. Because we highlighted
the title when we created the graph, the title appears on the chart.
Journey On - P.E.I. Department of Education, 2005
85
Grade 4
Lesson Plan:
Chart It
Instructions (continued)
Present the stem-and-leaf-plot below showing the amount of television time
for different students.
Number of Minutes Students Watched Television
Ask students to construct a bar graph to display the same information. Students
can make two columns, one labelled # of People and the other # of Minutes,
like the columns you see below:
Notice that instead of using numbers to represent the number of people, the
number was written out. This how the students will need to enter the data into
the spreadsheet, otherwise, the spreadsheet will not properly chart the data.
Ask the students which graph they prefer to interpret the data from and why?
What is the average amount of time that this group of students watch television?
Use the spreadsheet to calculate the average.
86
Journey On - P.E.I. Department of Education, 2005
Grade 4
Lesson Plan:
Chart It
Instructions (continued)
Students can interpolate data, ie. find information about a situation which was
not specifically provided in the data or on the graph. For example, the graph
below shows the multiples of 4. Use of the graph makes it clear that 4 groups
of 2 1/2 must be 10, even though students have not yet studied multiplication
involving fractions. A graph such as this one made into a transparency can be
a great teaching tool to help students with the concept of interpolating data.
Once students understand how to gather information that is not written in
black and white on the graph, they can try the exercise below on their own or in
pairs/groups.
Have students create a line graph to display the 3x tables (or any of the fact
families that they are studying.)
NOTE: After the students enter the data into the spreadsheet, they will choose
the type of graph they want to create, for this graph, they need to choose X-Y
line, not just the plain line graph.
Journey On - P.E.I. Department of Education, 2005
87
Grade 4
Lesson Plan:
Digital Geometry
Outcomes
Technology A5.1, A5.2, B5.1,
B5.2
Math A1, E7, E11
Activity
Within the graphics environment, students can explore and experiment with
relationships and properties of geometric shapes. Computer technology
allows students to experiment with geometric shapes in a colourful, paperless
medium.
Resources
• graphics program, such as AppleWorks Drawing
Necessary Files
Grade 4: fraction.cwk and triangle.cwk
Background
Math - AppleWorks Drawing can be used to achieve many of the outcomes in
the math curriculum.
In the computer lab - Any graphics program can be used for this exercise,
however AppleWorks Drawing allows the beginning user the greatest ease
when editing, moving and deleting objects that they have drawn. Only brief
reminders of features that students need to know to complete this exercise are
mentioned here.
Introduce students to the tool bar. Clicking on the tools enables you to make
shapes.
If the mouse pointer looks like an arrow you can delete or move the shape
that you have drawn. Put the pointer on your object and click to selectl it. An
object is selected if the little square handles can be seen around the object.
88
Journey On - P.E.I. Department of Education, 2005
Grade 4
Lesson Plan:
Digital Geometry
Background (continued)
Once the object is selected, tap the DELETE key to remove the object from
the screen. Point to the object and click and hold the left mouse button. While
holding the button down, move the mouse. The object will also move on the
screen. If you place the tip of the mouse pointer exactly on the handles, and
then click and hold, you can stretch or shrink your object as you move the
mouse.
The fill tools are located below the tool panel. They allow you to add colour
inside your object. The object must be selected in order to colour it. Once an
object is selected click the colour palette and then the colour of your choice.
Have students explore some of the advanced features of AppleWorks Drawing
such as the duplicate command, flip horizontal, flip vertical and layering (move
to back, move backward, move to front, move forward).
Instructions
There are many ways that a drawing program can be used to build students’
knowledge of spatial concepts. The following activities provide some first
steps. After trying the activities, classroom teachers can adapt and build from
these initial lessons.
Use file distribution to distribute files to students. When the student opens
the file for the first time, they should save it as different name to keep a copy
of the original file. Distribute file: fraction.cwk
MATHEMATICS - The Fraction Path!
Journey On - P.E.I. Department of Education, 2005
89
Grade 4
Lesson Plan:
Digital Geometry
Instructions (continued)
Create a path across the grid by filling each square with colour or pattern using
the fill palette. Two rules:
1. The path can only touch the opposite sides of the square once.
2. A shaded square can only touch one or two other shaded squares (not 3).
Count the squares - what fraction of the grid is your path? What is the
decimal form? Use the text tool to record your fraction and decimal below the
grid.
OR
Give students specific fractions and decimals to shade.
HINT: to get a blank grid, close the file and do not save the changes. When you
open the file again, the grid will be empty.
Have each student (or pair of students) create and label a path. Then have the
class rotate to see other paths and verify the fractions.
Using the geoboard and the irregular polygon tool in the toolbar of AppleWorks
drawing, have students create as many isosceles triangles as they can with a base
of two units along the bottom row. Have students rotate computers to see
other attempts. Try different line colours for each base.
Vary the activity, i.e., how many scalene triangles with a base of four units on the
bottom row?
90
Journey On - P.E.I. Department of Education, 2005
Grade 4
Lesson Plan:
Digital Geometry
Instructions (continued)
Steps:
1. Make a shape.
2. Duplicate the object four times and move the objects away from each
other.
3. For each of the duplicates, change the colour and do one of the following
a ¼ turn, a ½ turn, and a reflection (horizontal flip).
4. Have your partner or another student identify the ¼ turn, the ½ turn, the
reflection, and the slide.
Variations: Use a different number of sides, use the regular polygon tool or
...
Journey On - P.E.I. Department of Education, 2005
91
Grade 4
Lesson Plan:
Butterflies
Outcomes
Technology A5.1, A5.2, B5.1,
B5.2, B7.1, B7.2, B7.3,
B7.4, B7.7
Language Arts 4.3, 10.3
Activity
1. Read about the Monarch Butterfly in “Animal Profiles”, in Furs, Feathers,
Scales and Skin. Discuss the language of the headings with a partner.
Summarize what you learned about Monarch Butterflies by sharing three
facts with your partner.
2. Research another butterfly using the Internet . Find out in particular about
its habitat and enemies.
3. Remember to reference any webpages where you found information.
(Example: Title of webpage, date, URL)
4. Create a poster in Ultimate Writing and Creativity Center to advertise issues
related to the butterfly you researched. Make use of the Picture Place
backgrounds and Picture Binder as you create your graphic. Then type a few
sentences describing the issues facing your chosen butterfly.
Resources
• Collections Anthology: Furs, Feathers, Scales and Skin “Animal Profiles”
(pp. 4-11)
• Internet
• Ultimate Writing Creativity Center
Assessment
1. Have students brainstorm what makes a poster effective. Together create a
rubric that reflects their ideas.
2. Have each student responsible for evaluating the posters of the next three
students that follow them alphabetically on the classlist using this rubric.
3. Average each person’s three results.
4. Discuss students’ feedback to this method.
92
Journey On - P.E.I. Department of Education, 2005
Grade 4
Lesson Plan:
Canadian Mammals
Outcomes
Technology A9.1, A9.2, A9.3,
A9.4, A9.5, B9.1, B9.4,
B9.5, E9.1
Language Arts 5.1, 9.1, 10.3
Math F1, F8
Science 205-5, 206-2, 302-1
Activity
1. Choose one Canadian animal mentioned in your Collections Anthology:
Fur, Feathers, Scales and Skin. Create a web of information about that
animal.
2. Now choose another Canadian animal. Use the fact-finding sheet from the
Creatures Lesson Plan to gather information from Internet sources
about your chosen creature. (Search for information that fits the following
categories: Name of animal, type of animal, description, habitat, range,
food, predators, lifestyle, Too good to miss facts).
3. Discuss what you learned about your two Canadian animals within small
groups of three people.
4. Refer to the Journey On website for information on databases .
5. Take turns editing and searching your database. Create questions based on
the information in your database. Then swap databases/questions with
another group.
Resources
• Internet
• Appleworks Database
• Activity File:vanishdb.cwk
Assessment
In your science journal, describe in words and pictures how one of the
animals from your group’s database meets its basic needs in its habitat.
Journey On - P.E.I. Department of Education, 2005
93
Grade 4
Lesson Plan:
Environmental Impact
Outcomes
Technology A4.1, B7.3, B7.5,
B7.7
Language Arts 3.1, 5.1, 9.1
Science 104-6, 108-3, 108-6
Activity
1. In groups, brainstorm, using Inspiration 7.5, to gather items to include in
a newsletter to represent what you have been learning about the impact you
and your family are having on your local habitats. (Some of the issues can be
explored by looking at other Island school webpages on environmental issues prior to
brainstorming).
2. Use the step-by-step instructions for Ultimate Writing and Creativity Center
to assist you.
3. Use the terms “habitats”, “population” and “community” properly in your
newsletter.
4. Create graphics and use those available by clicking the binder icon in the
Picture Place.
Resources
• Internet
• Ultimate Writing Creativity Center
• Inspiration 7.5
Assessment
1. Present the group newsletters to the class. Take anecdotal notes about the
presentation, including depth of understanding, clarity and group participation.
2. Students evaluate their group effectiveness/growth as part of their learning
log. Categories could include:
What we did well as a group
What I learned from someone else in our group
What I shared in our group
What we could do differently next time...
94
Journey On - P.E.I. Department of Education, 2005
Grade 4
Lesson Plan:
Outcomes
Technology A9.2, B9.1, B9.2, B9.4,
B9.5
Language Arts 4.3, 5.1, 10.5
Suggestions
• For more information on
databases, visit the Journey On
website at http://www.edu.pe.ca/
journeyon/pro_d_pages/
appleworks.htm
• This lesson is closely related to
another lesson plan, Explore
Canada.
Creatures
Activity
Creatures ties into the grade four curriculum through the Fur, Feather,
Skins, and Scales unit of the Collections Program. This unit explores
numerous different kinds of animals, their characteristics, habitats, etc. This
activity is designed to help students organize information into a database
format. Students will collect data from previously viewed texts (Collections
Anthology and library resources) and enter it into an existing database.
From there, they will proofread and edit existing data submissions.
Students will create their own file of creatures and will be responsible for
updating their database as the unit progresses. At the end of the unit,
students will be required to submit their creatures portfolio (5 database
entries), hard copy and disk.
Resources
• Library resources
Collections: Fur, Feathers, Skins and Scales anthology
• Necessary File
database file: creature.cwk
Instructions
As the students read the first animal profile, the Monarch Butterfly, in the
Fur, feather, Skins and Scales anthology, instruct them on note-taking and
have them compile notes using categories (fields) to be used in the database
- Name of Animal, Type of Animal, Description, Habitat, Range, Food,
Predators, Lifestyle, Too good to miss facts and .... (Note-taking sheets
provided in this lesson plan.) Teachers may want to edit the file provided
(creature.cwk) after class discussion. A drop down list might be created for
the field, Type of Animal. The first creature, the Monarch Butterfly, can be
done as a class so that everyone goes through the process together. Students
will see that even though everyone uses the same text, no notes are the same.
The notes are similar but different. Discuss specific terminology that may be
unfamiliar to the students (habitat, species, range, predators, etc..)
The next two animals they will choose from the anthology (Snowy Owl,
Whale Shark, Black Bear, or Panther Chameleon) and the final two they can
choose from the literature available through the library.
Using the material collected from the library, have students choose one or
two other animals which they would like to include in their database. Have
students share and discuss their personal findings - Is there anything new
and unusual about the information collected? Did they discover any strange
facts about the animals they chose? How did their impressions about the
animals they researched change as they found out more information about
them? Which animals are similar? How are they similar?
Journey On - P.E.I. Department of Education, 2005
95
Grade 4
Lesson Plan:
Creatures
Instructions (continued)
The research process should occur over a period of a week, each day looking at
one animal and discussing their findings and opinions with peers. At the end
of the week, each students should have their teacher-guided selection, two
selections from the anthology and two individual selections from library
resources.
When students have gathered all of their notes from research they are ready to
enter the information (data) into the database. If students have already completed
the Exploring Canada database, they may be familiar with a database and
therefore may only need a brief review. If not, students should be introduced
to the terminology and the technology:
• Distribute the file creatures.cwk
• In the computer lab have students open the file creature.cwk.
• Have students compare their information sheets with what they see on the
screen. Explain database terminology (field, record). Talk about the reasons
people use databases: way to organize information for quick retrieval.
• Instruct students to fill in the information on the first animal they researched,
since everyone’s is the same, this can be done as a class.
• Show students how to get a new blank record for the next animal (Click on
Edit in the menu bar and then New Record) also show them how to save the
database file (Click on File and Save). For every animal they will be entering
into the database, they need to bring up a new record.
• Discuss the importance of saving files numerous times as they enter their
research into the database.
Editing Data
Have students scroll up to the first record entered. Have them proofread
information for errors. Instruct students to click on the field boxes to edit any
incorrect entries. NOTE: If the entire record becomes highlighted, it can be
deleted. To remove highlight, students should hold down the CTRL key and
click on any field box.
Search
The power of a database is not realized fully in a database of only five records.
However, students can gain a better understanding of searching capabilities of
a larger database, such as their school library collection.
96
Journey On - P.E.I. Department of Education, 2005
Grade 4
Lesson Plan:
Creatures
Instructions (continued)
When the students have their database of five records created, they can then
search the database to find specific information. For example, let’s pretend
that they wanted to find all the animals in their database that live in the forest.
Students could search the database and draw up the records for all the animals
from the forest.
To do this:
Then click in the “Habitat” field and type “forest.” All the records that have
“forest” in “Habitat” field will be drawn up. Spelling is critical as, “forist,”
would not draw up any records.
Any of the fields can be searched. This is similar to searching the author field
in school library database. Students should see that the benefits of an electronic
way of organizing information, a database, are greater as the size of the
database increases.
Journey On - P.E.I. Department of Education, 2005
97
Grade 4
Lesson Plan:
Creatures
Other Activities
• a database can be done on any
topic that relates to your curriculum
98
Journey On - P.E.I. Department of Education, 2005
Instructions (continued)
Grade 4
Lesson Plan: Exploring
Canada
Outcomes
Activity
Technology A9.1, A9.2, A9.3, A9.4,
A9.5, B9.1, B9.4, B9.5
Exploring Canada is similar to the Dinosaurs lesson plan from the Grade 1-3
integration document. It has been included in the grade 4-6 integration using
a grade 4 Language Arts theme, Collections: Building Communities, as the
topic. It has been included at this level as a transition lesson plan to provide
teachers in the grade 4-6 levels who have not used databases with a complete
description of how databases can be used as part of a theme. Students are
introduced to databases using a pre-computer activity. Students then manipulate the data in the pre-created database on Canadian communities and
perform simple queries to pick out certain information. As an option,
students can enter new information into the database that they have gathered
from their own research.
Social Studies 4.3.1, 4.4.2
Resources
•
•
•
•
5 x 7 index cards or prepared exploring Canada layout sheets
AppleWorks database
Overhead projector/LCD
Question sheet
E-Mail
• Class list of e-mail addresses
Necessary File
database file: explore.cwk
Instructions
Database applications are software tools used for recording and organizing
related data in a systematic way. Databases can be used to help students develop
a higher level of critical thinking as students engage in organizing and sorting
information, discovering relationships and trends, predicting, questioning and
problem solving.
Terminology - All of the information stored in a database is stored as a file
such as a card catalogue. Information within a database is grouped into records.
A card catalogue in a library is an example of a database. The information for
each book represents one record. Within a record the specific data is divided
into fields. The fields in our analogy of a card catalogue are Title of Book,
Author, and Date. Every record in a database has the same fields. The data
within a field, differs from record to record. For example, in one record the date
may be 1998, while in another it could be 2005.
Journey On - P.E.I. Department of Education, 2005
99
Grade 4
Lesson Plan:
Exploring Canada
Instructions (continued)
Keywords - It is very important that students understand the significance of
entering data consistently and accurately for later retrieval. In a research project
on Canadian Communities, a general question that may be generated by the
student is: Who were the first settlers?. The title of the field used in a database
may be First Settlers. Possible settlers could include, First Nations people,
Acadian people, English people etc. The way in which this is entered into the
database needs to be agreed upon by all individuals entering the data, otherwise
data will not easily be retrieved. For example, if in a database on Canadian
Communities, students enter the following data in three records:
Later when searching for the answer to the student question: What communities
were settled by First Nations people?, only one community will show up;
Edmonton. In the case of Arviat, record 1, the use of 1st instead of First
would result in this record not appearing in this search. Sault Ste. Marie, even
though the settlers were First Nations people, would also be omitted since the
settlers were entered without the First Nations preceding the name of the people.
When there are a number of possibilities of descriptive terms, a common word
or phrase should be chosen and used universally. Some databases will also make
the distinction between words using capital letters and words without capital
letters. Therefore, it is important to be consistent with the use of capitals.
Part 1. Pre-computer introduction of the database concept
1. Discuss the database concept (organized collection of information) using
examples such as phone books, the library catalogue system, a hockey card
collection, and recipe cards. Ask students for other suggestions of databases
and why they think that databases might be useful.
100
Journey On - P.E.I. Department of Education, 2005
Grade 4
Lesson Plan:
Exploring Canada
Instructions (continued)
2. Brainstorm with students about some of the things they know and some
of the things that they would like to know about Canadian Communities
(place names, population, and location, etc.).
3. Create a non-computer database about Canadian cities using the blank
Canadian cities layout sheets or index cards. If index cards are being used,
the information should be arranged so that it appears in a similar format to
that which appears in the computer version of the database. If teachers
wish to emphasize interacting with the information, rather than gathering
it, they can provide the information for students to enter.
Students enter facts on their cards while the teacher completes a sample
sheet on an overhead projector. The terms record and field, and the concept
of keywords are introduced at this point. To encourage collaborative learning,
have each student or pair of students fill in information about Canadian
Cities.
4. Have the students sort the completed index cards on the floor in a variety of
ways; alphabetically, smallest population to largest population, etc. Have
them further analyze the data and look for trends. This may be facilitated by
prompting them with questions such as: Which city is the oldest?, Which
city has the smallest population? and How many cities were settled by First
Nations people?.
Journey On - P.E.I. Department of Education, 2005
101
Grade 4
Lesson Plan:
Exploring Canada
Suggestions
• If you ever have difficulty seeing
your data, click on BROWSE under
LAYOUT in the menu bar.
• If one or more records become
highlighted (outlined in black), it
means that they are selected and can
be deleted. To remove the
highlight, hold down the CTRL key
and click on any field title.
• When students are working with
a prepared database make sure that
they do not use the SAVE
command when exiting or the
original material could be changed
(Click on NO when asked to save).
For extra assurances always have a
backup copy of the original.
Instructions (continued)
Part 2: Introduction to an electronic database
1. Point out to the students that answering some of the questions by
reorganizing the index cards in the previous exercise was a lot of work. Other
databases such as telephone books do not even permit us the flexibility of
reorganizing information. If we have a persons address but not their full
name for example, it would take us a long time to find their phone number.
Electronic databases are much more flexible and let us reorganize and search
for information in a much more efficient manner.
2. Open the file explore.cwk and compare the prepared database with the student
prepared cards. Review the database concept and terminology (database, record
and field). Compare the facts on the computer screen in column format with
those entered on the note-taking sheets. Have students switch to the card
layout to see how this view is like the printed sheet.
3. Introduce students to the notebook. Clicking on the top page moves you
back one record, while clicking on the bottom page advances you one record.
The number of the active record (i.e., the one that you can edit or delete) is
indicated in the bottom right hand corner. When you click and hold on the
bookmark you can move from record to record by sliding the bookmark up
or down.
4. Briefly introduce the concept of layouts. The way information in the database
appears on the screen is referred to as the layout. Click on LAYOUT in the
menu bar and then Canadian Columns. You will notice that the same
information is organized differently. The field headings are now arranged
across the top of the page and the information within the fields (data) is
located in columns going down the page (see last page of this lesson plan).
5. Introduce the SORT function. It is sometimes useful to reorganize
records in the database alphabetically. Click on ORGANIZE in the menu
bar and the Sort Records window appears.
102
Journey On - P.E.I. Department of Education, 2005
Grade 4
Lesson Plan:
Exploring Canada
Instructions (continued)
Click on CLEAR if any fields names are located in the Sort Order box on the
right hand side. Click on the field title Place Name in the field list and then
click on the MOVE button (double-clicking on the field name will achieve
the same thing). Notice that the field title Place Name appears in the Sort
Order box. The little symbol in front of it indicates ascending order (meaning
we wish to alphabetize the names of the cities from A-Z). Click OK. The
records are rearranged alphabetically. Try sorting by population.
6. Have students return to the Canadian Cards layout by clicking on LAYOUT
in the menu bar and choosing Canadian Cards. Introduce the FIND feature.
It is sometimes useful to use the find feature instead of having to go
through all the records to pick out a certain piece of information. If for
instance the students were looking for the community in their database that
is known for being home to Canadian Astronaut, Roberta Bondar, they
could sort their community by the Known For field and search through all
of the records until they find Roberta Bondar in this field. However, if they
use the FIND feature this task is much quicker.
The FIND feature will search the database for an exact match and report all
the records in which the keyword was found. For example, typing the words
Roberta Bondar into the Known For field, will find all the records pertaining
to Roberta Bondar. Under the LAYOUT menu in the menu bar, you will
find the word FIND. A blank record will appear and you can type what it is
you are looking for. If we continue with the example noted above, then we
would type Roberta Bondar into the Known For field. On the left hand
side of the screen beneath the notebook appears an icon:
Click on ALL (or tap the ENTER key) to start the FIND command. All of
the information pertaining to the specified keyword(s), Roberta Bondar
appears. Beneath the notebook you will now see the words Records X(Y)
sorted. This indicates that X records pertaining to the keyword were found
out of the total Y records in the database. For example, if 9 records were
found to have the words Roberta Bondar in the Known For field out of
the possible 12 records that were entered into the database you would see:
Journey On - P.E.I. Department of Education, 2005
103
Grade 4
Lesson Plan:
Other Activities
Instructions (continued)
• Have students research and enter
other Canadian Communities into
the database.
7. Click on ORGANIZE in the menu bar and then SHOW ALL RECORDS to
display all of the records in the database once again. Now you can go on and
complete another FIND if you wish. Once students are familiar with how to
complete sorts and finds, have them complete a question sheet like the sample
sheet provided below.
• Have students prepare questions
for other students. They should
also provide the answers to their
questions.
104
Exploring Canada
Journey On - P.E.I. Department of Education, 2005
Grade 4
Lesson Plan:
Outcomes
Technology A3.1, A3.2, A3.3,
B3.1, B3.2, B3.3, C3.1, E3.1
Science 104-6, 106-1, 300-3
Suggestions
• If your school has a multimedia
projector, this activity can be done
as a class activity. Set the projector
up in your class, call up the Web
sites and search for the
information as a class.
• Students could also work in
small groups or pairs.
Did You Hear That?
Activity
As part of the Grade 4 Physical Science theme on Sound, students learn
about the anatomy of the ear and how the human ear is designed to detect
vibrations. Students will investigate and learn about the processes and
structures of the ear by exploring and gathering information from preselected colourful and descriptive World Wide Web sites.
Resources
• Internet access
• Did You Hear That? activity sheet
• Web site evaluation sheet
Instructions
1. Ask the students to close their eyes, be very quiet and listen closely to the
sounds around them.
2. Invite students to come to the front of the class to draw or otherwise
explain how they think humans hear. If they are going to use a diagram to
help their explanation, they can draw their diagram on the board. Ask
students, What are the processes involved in hearing? What parts of the ear
and brain are involved in hearing? Students do not have to know the exact
processes and structures involved in hearing. At this point they are sharing
what they do know. This is their opportunity to guess and discuss together,
as they will be exploring how we hear thoroughly throughout this lesson.
3. Distribute the activity sheets and go over the questions with the students to
help focus their Internet explorations. Direct students to the following
Web site to find the information they need to complete the activity sheets.
NOTE: The Web site listed above was current as of June 2005. Because
Web sites have a tendency to move and/or disappear, it is a good idea to
check to see if they are still active and preview them for content before giving
the addresses to the students. Students should bookmark the sites.
http://yucky.kids.discovery.com/noflash/body/pg000144.html (June
2005)
Have students evaluate one of the Web sites they use (see the evaluation
sheet available at the end of this lesson). They should also cite the Internet
sites they use in the following format:
1. Author (if known)
2. Title of article (in quotation marks)
3. Title of complete work (underlined)
4. <full http address> (enclosed in angle brackets)
5. (date of your visit in parentheses)
Journey On - P.E.I. Department of Education, 2005
105
Grade 4
Lesson Plan:
Did You Hear That?
Instructions (continued)
106
Journey On - P.E.I. Department of Education, 2005
Grade 4
Lesson Plan:
Did You Hear That?
Instructions (continued)
Use the following site to explore what parts make-up your ear and how you
hear.
http://yucky.kids.discovery.com/noflash/body/pg000144.html
1. In your own words, briefly describe the processes involved in human
hearing.
_______________________________________________________________________
_______________________________________________________________________
_______________________________________________________________________
_______________________________________________________________________
2. Identify the following structures as belonging to the outer ear, middle ear,
or inner ear.
anvil _________________
auricle ________________
hammer ______________
cochlea _______________
cilia _________________
eardrum ______________
stirrup ______________
3. Besides the ear, what other parts of the human body are involved in
processing sound?
_______________________________________________________________________
_______________________________________________________________________
4. What are some ways that hearing can be damaged?
_______________________________________________________________________
_______________________________________________________________________
_______________________________________________________________________
_______________________________________________________________________
_______________________________________________________________________
5. What are some instruments that are used to help people who have
damaged hearing hear?
_______________________________________________________________________
Journey On - P.E.I. Department of Education, 2005
107
Grade 4
Lesson Plan:
Did You Hear That?
Instructions (continued)
TITLE: ___________________________________
TODAY’S DATE: _____________________
QUESTIONS TO THINK ABOUT.
A. Does the page title tell what the page is about? ___________________
_______________________________________________________
B. GRAPHICS:
How many graphics are on the page? _______________
Are they big? _________________
Are they slow to download? ___________________
C. What is the author’s name or the name of the organization that created
this Web page and e-mail address?
____________________________________________________
D. What date was the page created? ________________
E. What is the date that the page was last updated? _____________
F. Is the page very large? _________________
EVALUATING THE INFORMATION
Does it help to answer my questions? ______________________
Would another source have answered my questions better?
____________________________________________________________
How do I know that this information is correct?
____________________________________________________________
Does the information differ from that found in other sources (books,
magazines, Internet sites, etc.?)
____________________________________________________________
____________________________________________________________
108
Journey On - P.E.I. Department of Education, 2005
Grade 4
Lesson Plan:
Noise Pollution
Outcomes
Technology A6.1, A6.4, B6.1,
B6.4
Language Arts 5.1, 10.3
Math F1, F3, F5, F8
Science 104-1, 108-1, 108-3, 2069, 207-6
Activity
1. Brainstorm noise pollution . What is it? What are some sources of noise
pollution in various environments of students - home, school, community?
2. Explore various means of recording noise pollution - sound meter,
microphone connected to computer, tape recorder, distance from sound
before can no longer hear it, etc..
3. Choose an environment. Collect noise level data from at least five sources
of noise pollution, using a tally sheet to record the results.
4. Create a graph using the spreadsheet portion of AppleWorks.
5. Create three questions based on the information provided in your graph.
6. Share your graph and questions with a partner.
7. Answer your partners’ graph questions.
8. Revise/edit your original questions based on feedback from your partner.
9. Post the graphs on a bulletin board display. Post the questions and see if
people can guess which graph the questions are based on.
10. Make three recommendations for decreasing noise pollution and
protecting your hearing based on what you learned from the environment you explored.
11. Share each students’ recommendations in a newsletter to parents.
Resources
• Internet
• Appleworks Spreadsheet
Assessment
Choose three sources of noise pollution. In your learning log, make a chart
that lists the source of noise pollution, positive and negative aspects of the
source, potential for hearing loss and safety procedures.
Journey On - P.E.I. Department of Education, 2005
109
Grade 4
Lesson Plan:
Pocket Change
Outcomes
Technology A6.1, A6.2, A6.4,
B6.1, B6.3, B6.4, B6.6
Math B17, F1, F2, F3, F8
Activity
One of the important features of the AppleWorks Spreadsheet utility is that
it allows individuals to perform numerous calculations, organize, and display
data in tabular and/or graphical form. In this activity, students will learn how
to create a spreadsheet and perform calculations. Once the student has created
the spreadsheet, he/she will be given a math problem to solve using their
spreadsheet. In this activity, students are told the total number of coins and
the amount of money those coins equal. The task is to find combinations of
coins which equal the given amount. Using a spreadsheet simplifies this task.
Suggestions
• For more information on
AppleWorks Spreadsheets, see the
Journey On website at :
http://www.edu.pe.ca/
journeyon/tech_support_pages/
help_manual/ssheet/
default.html
Resources
• The Drawing application in AppleWorks.
• Pocket Change problems
• Necessary File: pocket.cwk
Instructions
The following exercise takes students through the process of creating their own
spreadsheet to help them calculate different sums of pocket change. Students
can create the spreadsheet themselves, or they can simply be given the file
pocket.cwk and then use the spreadsheet to figure out the problems listed
below.
Students are given two pieces of information. They are told the number of
coins they have in their pocket and how much money these coins add up to.
Their task is to figure out what coins make up the sum of money they have in
their pocket. If for example, they were told they have $7.87 as the sum of
money, and this 7.87 is made up of 11 coins, then they need to figure out what
coins they have. This is where the spreadsheet comes in. Students will use the
spreadsheet to help them figure out what coins they have. The spreadsheet
allows them to guess and check their answer. As they enter possible amounts
of different coins into the spreadsheet, the spreadsheet will total the data.
When the data they enter into the spreadsheet adds up to the desired $7.87, they
have solved the problem.
110
Journey On - P.E.I. Department of Education, 2005
Grade 4
Lesson Plan:
Pocket Change
Instructions (continued)
Pocket Change Problems To Solve Using Spreadsheets:
NOTE: In each of the following problems it is possible to have more than
one correct solution. For each problem try to figure out all of the possible
answers.
1. You have 5 coins which add up to $3.55. Figure out how many of each coin
you have.
2. You have 7 coins which add up to $9.01. Figure out how many of each coin
you have.
3. You have 6 coins which add up to $5.27. Figure out how many of each coin
you have.
4. You have 14 coins which add up to $15.96. Figure out how many of each
coin you have.
5. You have 14 coins which add up to $11.07. Figure out how many of each
coin you have.
6. You have 25 coins which add up to $35.72. Figure out how many of each
coin you have.
Extension: Have each student in the class make up a problem to pass along
to a classmate.
Setting Up A Spreadsheet For Pocket Change
1. Open a new file in the Spreadsheet application of AppleWorks. Click on
FORMAT in the menu bar and choose DOCUMENT. In the box that
appears change the size of your spreadsheet to have 4 columns across and
12 rows down. Enter the following information in the corresponding cells:
A1 - coin, A2 - pennies, A3 - nickels, A4 - dimes, A5 - quarters, A6 - loonies,
A7 - toonies, A8 - Total, B1 - Value, C1 - Number, D1 - Worth
2. Left click the mouse in cell B1 and then drag to select all of the cells in
columns B, C, and D. Now, from the FORMAT menu, choose COLUMN
WIDTH, change it to 50, and click OK.
3. Because students are going to be working with money in this spreadsheet
it is necessary to display these values using dollar signs and decimal points.
Thus, the cells must be formatted for currency. Select cells B2 to B7. From
the FORMAT menu choose NUMBER, click on the circle beside Currency
and click OK. Do the same for cells D2 to D8.
4. In column B, the Value column, enter the value for the six coins listed in
column A.
Journey On - P.E.I. Department of Education, 2005
111
Grade 4
Lesson Plan:
Pocket Change
Instructions (continued)
Entering Formulas in your Spreadsheet:
1. In cell D2, (Worth column) we want the spreadsheet to do some calculating
for us. This cell is in the Pennies row, therefore we want this cell to calculate
the number of pennies entered in the Number column by the value of the
penny. This calculation will give us the total amount we have in pennies. We
must enter a formula to do this. The formula will take the number in the
Number column and multiply it by the value of a penny which is entered in
the Value column. The formula is =B2*C2. Notice as you enter the formula
it can be seen in the entry bar at the top of your screen. The = sign means this
is a formula and the * sign means multiply. Because there is no number in the
Number column a $0.00 will appear in cell D2.
2. We want the same formula to appear in cells D3 - D7. The only difference will
be the number of the row because the Nickels are in row 3, Dimes row 4,
Quarters row 5, Loonies row 6, and Toonies row 7. We can copy the formula
from one cell to another and the spreadsheet will change the number of the
row for us. To do this click in cell D2 and drag down to D7 so that these cells
are highlighted. Choose the CALCULATE menu and then choose FILL
DOWN. $0.00 will appear in each of these cells because there are no numbers
in the Number column.
3. It is possible to create a formula to total columns C and D in this
spreadsheet. In cell C8 type =Sum(C2..C7). This formula tells the
computer to add the values in cells C2, C3, C4, C5, C6. and C7, and display
the answer in cell C8.
4. Copy the formula from cell C8 to cell D8 by clicking on C8 and dragging your
mouse to highlight cell D8. Next choose FILL RIGHT from the
CALCULATE menu. Notice that there will be no value for the totals of
columns C and D because there are no values entered in column C. Your
spreadsheet is now complete and ready to use to help you solve the problems.
112
Journey On - P.E.I. Department of Education, 2005
Grade 4
Lesson Plan:
Outcomes
Technology A6.1, A6.2, B6.1,
B6.3, B6.4, B6.6
Math B9
Math Facts
Activity
As students are learning multiplication and division, this learning activity
will reinforce their math facts through the instant positive or negative reply
that the spreadsheet provides. Thanks to Gail Finniss from Greenfield
Elementary for suggesting this idea for a lesson plan.
Resources
• AppleWorks files: multipl4.cwk and divide4.cwk
Suggestions
• Students only need to use
column C of the spreadsheet.
This is where they enter their
answers.
• For more information on
AppleWorks Spreadsheets, see the
Journey On website at:
http://www.edu.pe.ca/
journeyon/tech_support_pages/
help_manual/ssheet/
default.html
Instructions
The files that accompany this lesson plan offer students a different way to
practice and test their math facts. These spreadsheets can be used for practice or
for review, depending on the skill level of the students.
The grade 4 files multipl4.cwk and divide4.cwk are a mix of different fact
families. They should be done toward the end of grade four after students
have worked with all the fact families.
The math facts that students are to solve are listed in column A as is seen in
the diagram below. The answers to these facts are in column B, which is
hidden. Students enter their answers in column C and immediate feedback is
given in column D. If the student gets the answer correct, column C will
change to Excellent, Super Job or Wow! If the students does not get the
answer correct, the column will stay at Try Again, Don’t Give Up or Keep
Trying. Instructions on how to create this kind of spreadsheet file follow on
the next two pages.
Journey On - P.E.I. Department of Education, 2005
113
Grade 4
Lesson Plan:
Math Facts
Instructions (continued)
The following instructions explain how to create the spreadsheet file for math
facts practice.
1. Open AppleWorks and from the Welcome to AppleWorks window select
Create a New Document. Click Continue.
2. From the New Document Window, select Spreadsheet and click OK. The
spreadsheet program will open. Click in cell A1 so it becomes the active cell.
Type the word Solve and then hit the enter key. In cells A2, A3, A4, etc., type
the mathematical equations that you would like your students to solve.
3. Starting in cell B2, type the answer to the equation that precedes this cell in
column A. Leave column C blank. This is where the students will enter their
answers and column D will tell them if they got the answer correct.
4. After having typed all of the problems and their corresponding answers in
columns A and B, click on cell A2, hold you left mouse button down and
drag your mouse down to highlight all the rows containing problems and
across to highlight the four columns, A, B, C and D.
5. In the Format menu select Size. In the size menu choose 34 or 36 point. This
will make the font large. It may also make your text disappear. This is because
what is written in the cells in larger than the size of the cell. We will have to
increase the size of your cells so that you can read what is in them.
6. Highlight all of the cells that you want to increase in size (see step 4). Click on
Format in the menu bar and then choose Column Width, enter a number
that is larger than the number that you see in the Column Width window
(try 100). Your columns should have increased in width. Now let’s increase
the height of the rows. Make sure your cells are still highlighted, click on
Format again, but this time choose Row Height and again enter a number
larger than the number you currently see in the row height window (try 40).
You may have to try a couple of numbers before you get your cells the right
size.
You can also increase the size of your rows and columns by placing your cursor
in the gray area that is known as the row and column indicators. If you place
your cursor between two columns or rows in this gray area, your cursor will
turn into a double headed arrow.
114
Journey On - P.E.I. Department of Education, 2005
Grade 4
Lesson Plan:
Other Activities
• You can make a spreadsheet file
such as the files that accompany
this lesson plan for any math facts
your students may be learning and
practising or, as a challenge for the
students, have them create a
spreadsheet for their classmates to
solve.
Math Facts
Instructions (continued)
You can click and drag to increase or decrease the size of the column or row. We
want to use this technique to hide column B. Currently column B has the
answers to the math facts in column A, we do not want the student to see this
so we will hide column B. Click in the gray area between columns B and C so
that the mouse pointer turns into a double headed arrow. Click and drag to
the left until column B disappears.
7. Click on cell D2. Here we will enter the formula that will tell the students if
they have entered the correct answer.
Formula:
In cell D2 enter: =IF(C2=B2, “Excellent”,”Try Again”) The formula reads: if
the number that the student enters in cell C2 equals the answer that the teacher
entered in cell B2, then the word Excellent will appear in cell D2, if the number
in C2 does not equal what is in B2, then cell D2 will read Try Again. In cell D3
enter: =IF(C3=B3,”Wow”,”Keep Trying”). There are no spaces in this formula,
except between Keep and Trying and Try and Again in the other formula..
In cell D4 enter: =IF(C4=B4,”Super Job”,”Don’t Give Up”) etc, until all of
your cells have the correct formula. To save the time and effort of having to
retype that formula for every cell, you can copy and paste in the formula. To do
this, click on cell D1 and from the Edit menu choose Copy. Now click on the
next empty cell that you want to paste the formula into and click on Edit and
then Paste. Continue copying and pasting the various formulas into the cells
until all of the cells in column D have been filled.
8. If you want to dress up your spreadsheet, you can change the colour of the
font in your cells by highlighting the cells you want to change colour, click on
Format in the menubar and choose Text Colour and from the palette of
colours that appears, pick the colour you would like for your text.
Journey On - P.E.I. Department of Education, 2005
115
Grade 4
Lesson Plan:
What’s In The Party Bag?
Outcomes
Activity
Technology A6.1, A6.2, B6.1, B6.3,
B6.4, B6.6
Treat bags are an important part of almost every childhood birthday party. In
most cases, the host or hostess takes great care in picking out the treats and
trinkets that will be included in the party bag. In this activity, students are
given a budget of $32.50 and will use this money to buy treats for their
birthday party bags. Each student must first decide how many children will be
invited to his/her party, since this will affect how much money will be spent
on each party bag. Using a spreadsheet and their estimation skills, each
student will determine which objects (from a selected list) he/she will buy for
the birthday party bags.
Math B13
Suggestions
• For more information on
AppleWorks Spreadsheets, see
Journey On website at:
http://www.edu.pe.ca/
journeyon/tech_support_pages/
help_manual/ssheet/default.html
Resources
• AppleWorks Spreadsheet
• File: partybag.cwk
Instructions
1. Students will need to be reminded to use spreadsheet terminology. To
conduct a mini-lesson on spreadsheet terminology, you can use a multimedia
or LCD projector. If one is not available, you can print an empty spreadsheet
chart similar to the chart presented below and make a transparency for use on
an overhead projector.
All information stored in a spreadsheet is stored in a file. Spreadsheets are
formatted as tables that consist of rows and columns. Each column is
identified by one or more letters, while each row is identified by a number.
Each box that is formed when a column and row intersect is called a cell.
Each cell has a unique cell address that is made up of the column letter(s)
followed by the row number.
116
Journey On - P.E.I. Department of Education, 2005
Grade 4
Lesson Plan:
What’s In The Party Bag?
Instructions (continued)
2. Students open the file partybag.cwk and read the instructions provided.
3. The first step is to decide how many friends will be invited to the birthday
party and enter this into the appropriate box. To enter the number of kids
invited to the party, click on the box with the question mark in it. Use the
backspace or delete key to erase the question mark, and type the appropriate
number.
4. The second step is to find how much money can be spent on each birthday
party bag. Students use their division skills and scrap paper to figure out
the amount that can be spent on each party bag. This amount is entered
into the appropriate box again by clicking on the box with the dollar sign
in it and typing the amount.
5. Once students have figured the amount of money that can be spent on
each party bag, this amount must be entered into the spreadsheet. To do
this, students click on cell E3, type the amount, and press the enter key.
6. Next, students read through the list of potential party bag items and their
respective prices. They will choose which treats they will buy to fill a single
treat bag. Students must spend exactly the amount that they determined
on each treat bag. They may buy more than one of any item, but they can’t
exceed the amount they have budgeted for a single party bag.
7. To buy treats for Party Bag #1, students will start in Column C and click the
cell opposite each item they would like to buy. Then, they will enter the
number of treats they want to buy. The spreadsheet will automatically
calculate the cost of the treats purchased and deduct it from the total
amount they can spend on one party bag.
8. If students overspend, they can go back and reduce the number of items
purchased by clicking on the appropriate cell in Column C and either
changing or deleting the amount.
9. Once they have completed Party Bag #1, students will move on to Party
Bag #2 and buy a different combination of treats for this party bag, again
never overspending the amount they have budgeted for each party bag.
10. Students should be encouraged to save their work often.
11. When they have finished, students can print their work and compare the
party bags they have created with each other.
Journey On - P.E.I. Department of Education, 2005
117
Grade 4
Lesson Plan:
What Are You Reading?
Outcomes
Technology A9.1, A9.3, A9.4,
A9.5, B9.1, B9.3, B9.4
Language Arts 5.1, 10.3
Activity
Each student throughout the school year will read a number of books be it
for silent reading, as part of a theme, for general interest, or some other aspect
of school work. Many teachers have their students keep a log in a scribbler of
the books they read. This lesson allows students to use a computer database
as their reading log. The template database files that are needed to begin are
available.
Suggestions
• The following activity gives
students the opportunity to use a
database to keep track of their
reading. A file is provided which
can be distributed to students for
an electronic reading log. For more
information on databases, see the
Journey On website at :http://
www.edu.pe.ca/journeyon/
tech_support_pages/
help_manual/database/
default.html
Resources
• AppleWorks Database
• File: 4bkrec.cwk
Instructions
The database template file is shown below. The field for “What is the book
about?” students select from a drop down list: adventure, animals, biography,
fact book, relationships, school stories, sports, and other.
• If you decide to use the file
provided, have the students open
the file and save as a different
name so they have a copy of the
original file.
• Remember if you want to build
a database for the whole class, each
student has to start with the same
file and can make changes to the
layout or field structure.
• Adapt the database files for your
class.
118
The Rating field for all grades is a drop down list: fantastic, great, very good,
O.K., so so, poor, and never again.
Teachers can modify the database files as fields can be added or dropped. Drop
down lists can be modified. Teachers can discuss with their classes the fields to
include in the database. Students can be challenged to create an attractive layout
for their reading record. A word of caution, if teachers want to create a reading
log database for the whole class, all students have to start with the same file.
Records can be added but the field structure and layout has to remain the same.
Journey On - P.E.I. Department of Education, 2005
Grade 4
Lesson Plan:
What Are You Reading?
Instructions (continued)
Entering Information into the Database
It is suggested that the students can practice entering the information about
their books on paper before going to the computer. The printout of the
database is a good form for students to use to record the information on
paper. If students record their first books on paper, the transition to the
computer will be easier. What students see on the computer will be exactly like
the pages they filled out on paper. The paper version should become
unnecessary and students will enter information on books read directly into
the electronic database.
How you choose to structure how students put information into their database
depends on your school situation. If you have a networked computer in your
class, students can enter the information as they finish reading a book. With a
computer lab, teachers can have students record the information on paper to
be entered when the class has time in the lab.
What can you do with the database?
A database of a student’s reading allows the records to be sorted alphabetically
for text fields, numerically for number fields, or by date for date fields. Each
field can be searched for specific information such as: all the books by one
author, all the books that have a fantastic rating, all the books by a category
(i.e., school stories), or even a key word search of the My response field.
Imagine the questions and analysis possible from a database of the books
read by your class for a month, a term or over a year.
Journey On - P.E.I. Department of Education, 2005
119
Grade 4
Lesson Plan:
Can You Find It, Please?
Outcomes
Activity
Technology A3.1, A3.2, A3.3, B3.1,
B3.3, C3.1, E3.1
With Internet access, anyone can search the resources available in our Provincial Library system. Being able to access resources on-line from our public
library database, is a useful skill for our students (and adults). Teachers can
adapt the searching exercises to the needs of their classroom and this lesson is
appropriate for grades four through to adults.
Language Arts 4.1, 10.3
Resources
Suggestions
• Teachers may want to use the
following two page activity with their
students to provide a guided
opportunity for searches by author,
title, and subject. This activity
(individually or in pairs) should be
completed within a forty minute
period.
Copies of activity sheet for students (a master sheet is provided)
Instructions
Visit the ABBYCAT WEB SITE http://www.library.pe.ca/abbycat
• Working in pairs allows for students
helping students.
• Try to encourage independent use
by not giving answers. The task sheet
can have blanks spaces.
Other Activities
• Teachers may want to follow up
an interest from the class to gather
additional resources from the Public
Library.
• Almost all school libraries have an
electronic database for the school
collection and although the
computer software is not the same,
searching features are similar. Classes
may want to try a search on the
school’s system then try the Public
Library system.
120
Journey On - P.E.I. Department of Education, 2005
Grade 4
Lesson Plan:
Can You Find It, Please?
Instructions (continued)
Searching by title:
Change the Index to search in drop down menu to “Title Words.”
When you can’t remember the author’s name, but can remember a few words
of the title, an electronic database can find the book. For example, Charlie
and the Chocolate Factory can be found by entering a word from the title.
In July, 2000 here are the results when searching for:
“Charlie” found 149 titles, “chocolate” found 90 titles, and “factory” found 48
titles
This strategy helps as the book, Charlie and the Chocolate Factory, is in the
list, but the list is too long. The book is hidden among too many titles.
How many books are listed when using two words from the title in the
search?
Try entering: factory and Charlie _______ Try entering: Charlie and chocolate
_______
Why might you use as many words as you can remember from the title to find
a book? _______________________________
(When you use more than one word to limit you search, this is an example of
Boolean logic. All good electronic databases such as libraries and CD-ROM
encyclopedias have this capability.)
Does it matter if the search words are different order? ______________ (Try
it.)
Search for chocelate. Why don’t you find any titles?
______________________
Journey On - P.E.I. Department of Education, 2005
121
Grade 4
Lesson Plan:
Can You Find It, Please?
Instructions (continued)
Subject searching
Change the Index to search drop down menu to “Subject Words.”
Let’s pretend that you want to find a book that has poems about sports. How
many headings do you see when you search for:
sports __________ poetry _________
Now try a search using both words, sports and poetry
How many headings? ________ How many titles? __________
Independent searching
Try a search of your own to find a title that would interest you and record
the following information.
________________ ________________
____________
Author’s last name
first name
Copyright Date
______________ __________________
Title
Call number
What search index did you use? _____________________________
What search terms did you use?______________________________
122
Journey On - P.E.I. Department of Education, 2005
Grade 4
Lesson Plan:
Fishing For Facts
Activity
Outcomes
Technology A3.1, A3.2, A3.3, B3.1,
B3.3, C3.1, E3.1
Language Arts 4.1, 10.3
Students are directed to specific Web sites to complete a task sheet or learning
station. These structured activities can be designed for almost any topic.
Students will come to see the Internet as an additional source of information. The fact finding nature of the activities can introduce children to a
variety of topics that could become the focus for more in-depth research.
Suggestions
• Students work very well on
learning stations in pairs. The pair
can help each other and switch
between controlling the computer
and recording responses on the task
sheet. Insist on students
bookmarking the sites. This allows
them to easily return to the site if
they don’t finish or for further
research. (Also keep in mind that
the websites given on the activity
files may or may not be active).
Resources
• Internet
• Files:
Bridges 4bridges.cwk
Canada 4Canada.cwk
Pioneers 4pioner.cwk
Instructions
The learning stations provided on disk are examples of using the Internet to
support a topic studied in the classroom. The stations provide a good first
step in using the Internet. The structure provided makes it clear to the students
what is expected and allows teachers to evaluate task sheets. Learning stations
lead to students becoming more independent in gathering information online. Additional learning stations can be created for library resources, both in
conventional print form or in CD-ROM databases.
Journey On - P.E.I. Department of Education, 2005
123
Grade 4
Lesson Plan:
Fishing For Facts
Instructions (continued)
Other Activities
• Limitless. Learning stations can
be set up for almost any topic. Relax
the structure and allow students to
visit the sites and record the three
things they found the most
interesting.
• Have the students evaluate the
site based on criteria discussed in
class. (Again, refer to page 45 in
Journey On Grades 4-6, the green
book.)
• Have the students record and cite
the Web page in proper form.
1. Students carefully type the address in the location bar. If it is not exactly
correct, it will not work. This is not an easy task.
2. Once the site is reached, have the students bookmark the site. This means
that they can come back to the site without having to retype the address.
To bookmark a site:
a) Make sure that you are at the correct site.
b) Right click on the mouse.
c) Click on Add to Favorites
d) The other option would be to click on the “Favorites” button
on the browser menu bar.
Students should be taught to critically evaluate Web sites. Students at an
early age should credit the sources of their information and Internet sources
are no different.
World Wide Web:
1. Author (if known)
2. “Title of article.” (in quotation marks)
3. Title of complete work. (underlined)
4. <full http address> (enclosed in angle brackets)
5. (date of your visit in parentheses)
124
Journey On - P.E.I. Department of Education, 2005
Grade 4
Lesson Plan:
Natural Disasters
Outcomes
Technology A8.1, A8.2, A8.5,
B8.1
Language Arts 1.2, 4.3, 5.1, 10.3
Science 301-7
Activity
1. Have students brainstorm natural disasters, such as flash flood, mudslide,
volcanic eruption, earthquake, avalanche, tornado, forest fire, meteor
collision, etc. With a partner, chose one natural disaster to research
further.(You may wish to use Inspiration 7.5)
2. With a partner, brainstorm questions about the selected natural disaster.
3. Students should provide their theories about the answers to the questions
as a next step, prior to beginning their research.
3. Use a variety of resources (human, text, internet) to explore background
information on the event, as well as how the natural disaster affects the
landscape, and what preventative measures could be taken to lessen the
impact.
4. Create a slideshow using AppleWorks to share the key points of the
findings. Include text as well as a combination of clipart, scanned images,
student created graphics and digital photos in the slideshow.
5. Have students document the sources utilized in the slideshow.
Resources
• Internet
• Inspiration 7.5
• Appleworks Slideshow
Journey On - P.E.I. Department of Education, 2005
125
Grade 4
Lesson Plan:
Shapes Make Pictures
Outcomes
Technology A5.1, A5.2, B5.1,
B5.2
Art GCO 2, GCO 7
Activity
A graphics program is both a tool and a medium for the developing artist.
The skills acquired in this lesson allow for artistic creativity in the digital
environment and are transferable to all other digital presentations such as
word processing and presentations (slide shows). This lesson builds upon
what students have learned about the drawing program in AppleWorks from
the primary lessons, but students who have never used the program before,
need only to be shown the basics to successfully complete this lesson.
Resources
•
•
•
•
AppleWorks Drawing
Word Perfect
Ultimate Writing Creativity Center
Inspiration 7.5
Background
The Mouse - While the mouse can vary, the basic variety has a left and right
button, and a little movable ball on the underside. The mouse is used for
opening, closing, moving and resizing windows. In graphics programs it is
also used to manipulate objects about the screen. In word processing applications
it is used to select text and move the cursor about the document. The mouse
has three operations:
1) Clicking - to move the cursor or select an object, the left mouse button is
clicked once. The right button is only used in some programs for special
functions. However, the settings for these two buttons can be switched to
make clicking easier for the left-handed user.
2) Double-clicking - clicking the left mouse button quickly twice in succession
without moving the mouse in between clicks.
3) Dragging - click the left mouse button and hold it down while moving the
mouse pointer across the screen. This allows for text to be selected and
selected objects to be moved.
Art - as budding young artists, students can use the drawing application in
AppleWorks to create some very elaborate illustrations. The sky is the limit!!
In the computer lab - Any graphics program can be used for this exercise,
however AppleWorks Drawing allows the beginning user the greatest ease
when editing, moving and deleting objects that they have drawn. Detailed
explanations on the topics can be found on the Journey On website at:
http://www.edu.pe.ca/journeyon/tech_support_pages/help_manual/
drawing/default.htm
126
Journey On - P.E.I. Department of Education, 2005
Grade 4
Lesson Plan:
Shapes Make Pictures
Background (continued)
Introduce students to the tool bar. Clicking on the tools enables you to make
shapes.
If the mouse pointer looks like an arrow you can delete or move the shape
that you have drawn. Put the pointer on your object and click to “select” it. An
object is selected if the little square handles can be seen around the object.
Once the object is selected, tap the DELETE key to remove the object from
the screen. Point to the object and click and hold the left mouse button. While
holding the button down, move the mouse. The object will also move on the
screen. If you place the tip of the mouse pointer exactly on the handles, and
then click and hold, you can stretch or shrink your object as you move the
mouse.
The fill tools are located below the tool panel. They allow you to add colour
inside your object. The object must be selected in order to colour it. Once an
object is selected click the colour palette and then the colour of your choice.
Journey On - P.E.I. Department of Education, 2005
127
Grade 4
Lesson Plan:
Shapes Make Pictures
Instructions
Have students explore some of the advanced features of AppleWorks Drawing
such as the group command, duplicate, flip horizontal, flip vertical and layering
(move to back, move backward, move to front, move forward).
Students will quickly learn the necessary skills to create a picture. The introduction
of the program tools can be brief with more time given for creation and
exploration.
The pictures found on the next few pages are provided to give teachers a
starting point for digital representations. After some exploration, you might
have students try to create their own versions of the pictures on the next few
pages. The grade levels indicated are only given to show the levels of
development. Ignore (white out) the grade levels and try to match the skill level
of your students to one of the pictures. Or, allow students to develop a theme
from the classroom or personal interest.
Take a close look at this picture of a castle. It was created using the rectangle,
oval, irregular polygon, freehand, and line tools of the AppleWorks graphics
program. Can you recreate this castle, or create a castle of your own using only
the tools mentioned above?
128
Journey On - P.E.I. Department of Education, 2005
Grade 4
Journey On - P.E.I. Department of Education, 2005
129
Grade 4
130
Journey On - P.E.I. Department of Education, 2005
Grade 4
Glossary
Abbycat: PEI Public library database system
Absolute: a cell reference that remains constant in a formula. Dollar signs are used to force the spreadsheet to keep
the cell reference in a formula the same when it is copied. (i.e. when the formula =A6/$B$6 is copied the
numerator A6 will change to A7, A8, etc. while the denominator $B$6 will stay the same)
APA: abbreviation of American Psychological Association. The APA standard is used for quoting references for the
sciences.
Applet: An application, written in Java, that can run inside a web page but is not limited by the functionality of
HTML. Java applet and Java script differ that a Java applet needs to be downloaded. Java script is incorporated in a web page with HTML tags.
Application sharing: a program that is installed on the server computer which allow all computers on the
network to have access to that software.
Assignment drop box: a mechanism for uploading electronic assignment files for an instructor using an online
content management system such as WebCT or ATutor.
Attachment: file that is attached to an email
Auto fill data: spreadsheet feature that will complete a series of entries such as the “days of the week” or “months
of the year”. (i.e. enter January, February and select the corresponding cells with the mouse and select “auto
fill”. The remaining 10 months will be automatically entered)
Automated text: database input form feature that will automatically fill a field with a predetermined value (i.e.
current year, telephone area code, etc.)
Background: display behind graphics and text on a web page. A background can be a colour or a tiled graphic.
Bitmap: pixel (picture element) representation of a graphic. The image is made by small dots (pixels) of different
colors.
Bookmark (Favorite): a saved link to a specific place on the Internet.
Boolean operators: logic system that returns “true or false”, “yes or no”, “AND”, “OR”, “NOT”. These terms
are used to set parameters for searching.
Browser: a program that accesses and displays files and other data available on the Internet and other networks.
(i.e. Internet Explorer, Netscape)
Bullets: a symbol appearing before items in a list.
Button bar: a bar of graphical buttons found in a program that contain “short cuts” for commonly used tasks.
131
Journey On - P.E.I. Department of Education, 2005
Grade4
Cascading style sheet (CSS): a feature of HTML that allows users to create style templates (sheets) that specifies
how different text elements (paragraphs, headings, hyperlinks, etc.) appear throughout a website.
Cell address: coordinate of a cell. It is represented by a letter and a number such as A2
Cell: the area in a spreadsheet where rows and columns intersect. Data and formulas are placed in cells. Cells are
identified by the alphabetical column and numeric row i.e. A1
Clone brush: a graphics tool used to copy all or part of an image.
CMYK: a subtractive color model used in color printing. This color model is based on mixing pigments of cyan,
magenta, yellow and black in order to make other colors.
CODEC: abbreviation for COmpression/DECompression. Software or hardware that compresses and decompresses audio and video data streams into smaller sizes while maintaining the quality. (.wmv, .ra, SVCD,
MPEG, mp3, etc.)
Cold boot: powering off the computer completely and restarting it.
Column: vertical section of a spreadsheet, identified by a letter
Commercial ware: commercial software which requires purchase and registration.
Compatibility: whether or not hardware or software will work on a computer.
Compression: process of encoding data, video, or audio in order to reduce its size (.zip, .jpg).
Connection line type: how a computer is linked to a network (i.e. T3, modem, DSL, etc.)
Connection speed: the speed of information transfer among networked devices.
Cursor (Pointer): the symbol used to represent the movement of the mouse. (i.e. arrow)
Data entry bar: space in the spreadsheet to enter the cell data or formulas.
Database report: data from fields specified in a search query sorted into a particular order. Calculations and formatting may be applied to the reports generated.
Database: collection of structured, searchable electronic data (i.e. search engines are data bases)
Decompression: process of decoding or reading encoded data.
Desktop publishing: combination of text, images and graphics to produce publications such as newsletters, posters
and brochures
Display format: the way the files and folders are being displayed in the windows (i.e. thumbnails, icons, details, etc.)
Journey On - P.E.I. Department of Education, 2005
132
Grade 4
Distribution list: a list of email addresses that are grouped together so that one email message may be sent to all
members of the group. (i.e. all students in a class, all teachers on a particular committee)
Download / Upload: refers to the transfer of information between computers. The person/computer sending the
information refers to the transfer as an upload, while the person/computer receiving the information refers to
it as a download.
Drive: name that refer to a storage location such as C:, G:, or A:
Dynex: PEI (French) school library database system
Effect: graphical manipulation that applies special effects to objects (i.e. chrome, neon ).
Embed object: objects (audio, video, animation, etc.) that load with the HTML tags when the page is visited. Those
items will be downloaded and run automatically
Ergonomic: workplace designed for maximum comfort, efficiency, safety, and ease of use.
Error checking routine: features in a database input form that checks to see that entered data corresponds to some
pre-defined criteria (i.e. ticket number must fall within the range of 1-500, and no two records may have the
same ticket number)
Export: to transfer information to another format for use in a different program.
Field types: identifies the type of information that is to be entered into a field in a database (i.e. date, numeric, text)
Fields: different categories in a database (i.e. first name, middle initial, last name, street)
File extension: alphanumeric characters located after the period at the end of a filename. This identifies the type of
software than can open the file. (i.e. .mp3, .wpd, .gif, .html, etc.)
File management: process of organizing files into folders and sub-folders and selecting storage medium (i.e. hard
disk, floppy disk, CD)
File properties: detailed information on the file. (i.e. size, date, extension)
File size: storage space taken by a file in the computer system (i.e. kilobytes - kb, megabytes - mb, gigabytes - gb)
Filter (graphic): graphical manipulation that applies special effects to images (i.e. blur, sharpen).
Filters: search criteria that allow particular emails to be located. Filters may be set with “rules” that provide directions
on tasks to perform with selected emails.
Fixed/locked titles: feature in spreadsheet program to keep certain cells showing (i.e. headings) while scrolling
Flash: developed by Macromedia, Flash is a software used to create web content that interacts with the users by
providing animations, audio, games, etc.
Flat database: is a single database table structure (i.e. Appleworks, MS-Works) Searches can be performed within this
table but it is not capable of organizing complex applications.
133
Journey On - P.E.I. Department of Education, 2005
Grade4
Folder (Directory): an electronic storage area that can contain a group of files and/or other directories.
Font: the style of text characters. (Times New Roman, Arial, Garamond, etc.)
Footer: text placed automatically at the bottom of each page in a document
Frame: a webpage that has separate divisions (windows) within the web browser. The content for each frame area
comes from a different .html file.
Freeware: software distributed by the creator free of charge under certain conditions.
Functions: pre-defined mathematical rules that are available in spreadsheet programs i.e. mean, round, standard
deviation, exponents, payment amount, etc.
Graphics in layers: objects placed over other objects to create one image. This allows for easier editing and manipulation.
Group file sharing: a specific network folder that a workgroup member can share
Grouping: creating one single object made up of several other objects. This allows for resizing the object as a whole.
Hardware: all physical parts of a computer (i.e. monitor, mouse, keyboard, etc.).
Header: text placed automatically at the top of each page in a document
Hexadecimal: a numbering system with base of 16 includes only the digits 0 through 9 and the letters A, B, C, D, E,
and F. Used to identify large numbers accurately i.e. identify colors, network addresses.
Hosting service: service that companies provide to store data on their server
HTML tags: Hypertext Markup Language tags are instructions within brackets < > that tell the web browser how to
display the page information.
Image map: an alternative navigational structure whereby an image on a webpage has “programmed coordinates”
that allow the user to navigate the site intuitively, using the mouse.
Import: to bring in external information
Insertion point: the insertion point is where the next character typed from the keyboard will appear. (i.e. “I beam”)
Interactive syllabus: an electronic course outline
Java Script: a scripting language developed by Netscape to enhance the capability of HTML language
Justification: adjustment of text to ensure that margins will align throughout the document (i.e. left, center, right)
Layer: visualized as electronic “transparencies” which allow users to display and manipulate information separately.
Link (Hyperlink): a clickable link to another file (i.e. web page).
Lock cell: locking a cell will prevent any changes on its content. It doesn’t hide the content of the cell.
Journey On - P.E.I. Department of Education, 2005
134
Grade 4
Logical operators: used to compare variables such as greater (>) greater or equal (>=), equal (==), less or equal
(<=) and less (<).
Macro: a group of repeated commands that are recorded and saved for later use.
Mail merge: a word processing feature that allows a user to create a “data records” database to record information
about a number of people, and a form letter template. Based upon a search criteria, names, addresses and
other recorded data are combined with fields found in the form letter. Completed forms may be displayed on
the screen or sent directly to a printer.
Menu bar: a horizontal bar at the top of a window, below the title bar, that contains drop-down menus.
Microcat: PEI (English) school library database system
MLA: abbreviation of Modern Language Association. The MLA standard is used for quoting references for the
humanities.
Multimedia: the use of several media to convey information (text, audio, graphics, animation, video).
Multiple logins: simultaneously logging into multiple computers on the same network using the same username.
Network: a communication system connecting two or more computers.
Notebook: another name for an individual spreadsheet.
Object alignment: positioning of an object with respect to other objects.
Panorama: a series of picture “stitched” together using software to create a picture wider than what the camera is
normally capable of capturing. Some panorama can offer user a 360 degree view.
Plug-in: an auxiliary program that works within a browser to enhance its capability. The plug-in can be a third party
product. (adobe reader for .pdf, Real Audio, Shockwave, etc.)
Pop-up ads: a form of online advertising that open a new window automatically to display advertisements.
Principles of design: five universally recognized principles are contrast, unity, pattern, movement, and rhythm.
Used in combination these principles create a esthetically pleasing product.
Print queues: set of printing tasks waiting to be processed.
Publishing etiquette: acceptable guidelines for publishing. (i.e. non-biased, inclusive language).
Record: all fields relating to one “object” in a database (i.e. all information regarding one student)
Relational database: is the creation of multiple tables linked to each other through a common “key” such as a
customer number. (i.e. a travel agency may have customer contact information in one table, airline reservations
in a second, hotel and car reservations in a third. If any piece of information changes only one table needs to
be updated.)
Relative: a cell reference that will automatically update itself in a formula when it is copied. (i.e. a formula =A6/B6
will update itself to =A7/B7, =A8/B8, etc. as it is copied downward in a column)
135
Journey On - P.E.I. Department of Education, 2005
Grade4
Rename: change the name of the file or folder to another name.
RGB: a color model that utilizes the additive model in which red, green, and blue light are combined in various ways
to create other colors (i.e. pixels on a computer monitor). Colours created on the computer monitor sometimes may not be able to be reproduced when printed.
Rollover (mouse over): a “change of state” when the mouse is positioned above an object.(i.e. colour changes,
cursor changes, image changes)
Row: horizontal section of a spreadsheet, identified by a number
Rule: a task to perform on emails that meet a particular criteria. (i.e. send a return message for all incoming emails,
such as “on vacation until ..”, delete message from particular sources, or automatically place mail in a particular
folder)
Save as: same as “Save” but allows user to save a copy of current file under a new name or location.
Save: permanently record data to a storage medium such as a floppy disk or hard disk.
Screen capture: saving a portion of the current screen as an image file to be inserted into a document. Paintshop
Pro includes a screen capture utility.
Search engine: a program designed to help find information on the Internet. (i.e. Google, Ask Jeeves,
Yahooligans)
Server: the central computer in a network. (i.e. contains shared data, programs, etc.)
Shareware: trial version of any commercial software.( i.e 30 days) Shareware is also known as demoware, trialware
and many other names.
Signature: text added automatically at the end of an email (i.e. name, position, return address, phone/fax number,
email address)
Software: program or application that runs on a computer.
SPAM: acronym of the words: Stupid Pointless Annoying Messages. These messages are often advertising emails
sent out massively on the internet.
Spreadsheet: a grid which helps you organize data in rows and columns. Calculations may be performed by inserting formulas. Charts or graphs may be generated from the data.
Spyware: computer software that gathers and reports information about the computer usage without the user’s
knowledge or consent.
Streaming video and audio: refers to a technique of transferring media over the Internet to the user’s computer so
that it is available without having to download the whole file. The media will begin to play once a predetermined amount of data is transferred to the computer “buffer”
Tab rulers: guides found in word processors allowing the user to graphically set and delete tab indents
Template (Master page): a model page that provides a basic structure for adding content
Journey On - P.E.I. Department of Education, 2005
136
Grade 4
Text art: tool found in Word Perfect that allows the user to create text in 2D and 3D formats in a variety of shapes
Text wrap: word processing feature that automatically places the text on the next line
Touch keyboarding: the ability to type without looking at the keyboard.
Un-grouping: separating objects that were previously grouped.
Unlock cell: this allows modification be to performed on cells that were previously “locked”
Vector: mathematical representation of a graphic. The image is made from mathematical equations that represent the
curves, lines, area, color, etc. This form of representation allows for small file sizes while maintaining detail
when increasing picture size.
Virtual reality: an artificial environment created with computer technology
Virus: a virus is a program or piece of code that causes an unexpected, usually negative, event.
W3C accessibility guidelines: World Wide Web Consortium organization that provides standards for web page
creation. These include accessibility issues (challenged users, slow line speeds, older processing equipment) and
equipment compatibility.
Warm boot: restarting the computer using reset button, Ctrl+Alt+Del, etc.
Watermark: a graphic or text appearing in the background of a page (i.e. the word “Draft” or a graphic of a soldier
in a Remembrance Day poem)
Web Server: a computer that stores data (i.e.: web sites) for the world wide web
Whiteboard: a whiteboard is a shared electronic workspace. Each participant can add text, make drawings or paste
pictures on the whiteboard. Other participants can immediately see the result on their workstation.
Wireless connection: connection to another device without physically connecting a wire.
WYSIWYG: Acronym for“What You See Is What You Get”. WYSIWYG is used to describe applications that let
you see what documents will look like
137
Journey On - P.E.I. Department of Education, 2005