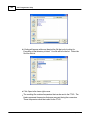
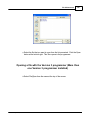
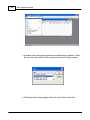
Download VX-7 Programmer Help

Transcript
VX-7 Programmer Help
© 2013 RT Systems, Inc.
VX-7 Programmer Help
by RT Systems, Inc.
The Programmer is designed to give you the ease and
convenience of programming the memories and options of the
radio from your PC.
Using the Programmer, you can create separate files for
unique applications such as travel, emergency activities, or
special events. These files can contain different settings, such
as memories, power management features, and DTMF
numbers, for each purpose.
The Programmer also gives you the ability to read a
configuration from the radio. The configuration would be stored
in a file on your computer to be changed easily. Then, with
minimal button pushing, you can send the altered file back to
program the radio.
VX-7 Programmer Help
© 2013 RT Systems, Inc.
All rights reserved. No part of this work may be reproduced in any form or by any means - graphic, electronic, or
mechanical, including photocopying, recording, taping, or information storage and retrieval systems for other than
your own use - without the written permission of the publisher.
Products that are referred to in this document may be either trademarks and/or registered trademarks of the
respective owners. The publisher and the author make no claim to these trademarks.
While every precaution has been taken in the preparation of this document, the publisher and the author assume no
responsibility for errors or omissions, or for damages resulting from the use of information contained in this
document or from the use of programs and source code that may accompany it. In no event shall the publisher and
the author be liable for any loss of profit or any other commercial damage caused or alleged to have been caused
directly or indirectly by this document.
Printed: January 2013
4
VX-7 Programmer Help
Table of Contents
Foreword
8
Part I What Is the Radio Programmer
10
Part II Getting Started
12
Part III Using the Programmer - Overview
22
1 Working
...................................................................................................................................
with Programming Files
22
2 Creating
...................................................................................................................................
a New Programming File
22
3 Multiple
...................................................................................................................................
Global Settings Files
23
4 Tying...................................................................................................................................
a Global Settings File to a Memory Channel File
24
Part IV Viewing and Changing Programming Files
27
Part V Easy Editing in the Grid
30
Part VI Screen Appearance and Default Options
52
Part VII Split Screen for Multiple Files
57
Part VIII Menu Item Cross Reference
60
Part IX Auto Range Transponder System
66
Part X Emergency Operation
69
Part XI Internet (WIRES) Functionality
72
Part XII Memory Banks (Groups)
74
Part XIII Programming Memory Channels
77
1 Home...................................................................................................................................
Channels
78
2 HyperMemories
................................................................................................................................... 79
3 Limit ...................................................................................................................................
Memories
80
4 One Touch
...................................................................................................................................
Memories
81
5 Regular
...................................................................................................................................
Memories
82
Bank
.......................................................................................................................................................... 88
Clock Shift .......................................................................................................................................................... 87
Com m ent
.......................................................................................................................................................... 88
CTCSS
.......................................................................................................................................................... 86
DCS
.......................................................................................................................................................... 86
Entering a "Split"
..........................................................................................................................................................
Pair
83
© 2013 RT Systems, Inc.
Contents
5
Half Deviation .......................................................................................................................................................... 87
Icon
.......................................................................................................................................................... 87
Mask
.......................................................................................................................................................... 87
Mem ory Groups
..........................................................................................................................................................
(Banks)
88
Nam e
.......................................................................................................................................................... 84
Nonstandard Offset
.......................................................................................................................................................... 84
Offset Direction
.......................................................................................................................................................... 84
Offset Frequency
.......................................................................................................................................................... 83
Operating Mode
.......................................................................................................................................................... 84
Receive Frequency
.......................................................................................................................................................... 82
Sim ple Mode .......................................................................................................................................................... 82
Skip
.......................................................................................................................................................... 86
Split Pair
.......................................................................................................................................................... 83
Step
.......................................................................................................................................................... 87
Tone Mode .......................................................................................................................................................... 85
Transm it Frequency
.......................................................................................................................................................... 82
TX Pow er
.......................................................................................................................................................... 86
6 VFO Memories
................................................................................................................................... 89
Part XIV Programming Other Set Menu Items
92
1 Radio...................................................................................................................................
Menu Settings - Toggles
96
ARS
.......................................................................................................................................................... 96
ARS Enable .......................................................................................................................................................... 96
ATT
.......................................................................................................................................................... 96
Auto Pow er Off
.......................................................................................................................................................... 96
Auto Rx Mode.......................................................................................................................................................... 96
Band
.......................................................................................................................................................... 96
Band Link
.......................................................................................................................................................... 96
Beep
.......................................................................................................................................................... 96
Bell
.......................................................................................................................................................... 96
Busy Channel..........................................................................................................................................................
Lockout
96
Busy LED
.......................................................................................................................................................... 97
Ch 1 User Write
.......................................................................................................................................................... 97
DTMF Dialer .......................................................................................................................................................... 97
Dual Receive .......................................................................................................................................................... 97
Edge Beep .......................................................................................................................................................... 97
Hom e\Reverse
.......................................................................................................................................................... 97
HyperWrite .......................................................................................................................................................... 97
Internet
.......................................................................................................................................................... 97
Lock
.......................................................................................................................................................... 97
Lock Mode .......................................................................................................................................................... 97
Mic Monitor .......................................................................................................................................................... 98
Moni/F Change
.......................................................................................................................................................... 98
Moni/TCall
.......................................................................................................................................................... 98
Rx Save
.......................................................................................................................................................... 99
Scan Lam p .......................................................................................................................................................... 99
Scan Resum e.......................................................................................................................................................... 99
Split Tone
.......................................................................................................................................................... 99
Squelch
.......................................................................................................................................................... 99
Sub-Band Mute
.......................................................................................................................................................... 99
Tim e Out Tim er
.......................................................................................................................................................... 99
Tx Save
.......................................................................................................................................................... 99
VFO
.......................................................................................................................................................... 99
© 2013 RT Systems, Inc.
5
6
VX-7 Programmer Help
2 Radio
...................................................................................................................................
Menu Settings - Display
101
Contrast
.......................................................................................................................................................... 101
Dim m er
.......................................................................................................................................................... 101
Display 2X .......................................................................................................................................................... 101
Display Mode.......................................................................................................................................................... 101
Em ergency Operations
.......................................................................................................................................................... 104
Em ergency Settings
.......................................................................................................................................................... 105
Icon Set
.......................................................................................................................................................... 106
Icon Select .......................................................................................................................................................... 106
Lam p Mode .......................................................................................................................................................... 106
Language .......................................................................................................................................................... 106
Meter & Sub..........................................................................................................................................................
Meter Sym bol
106
Strobe
.......................................................................................................................................................... 106
3 Radio
...................................................................................................................................
Menu Settings - General
108
Alt Offset .......................................................................................................................................................... 108
Altim eter
.......................................................................................................................................................... 110
ARTS
.......................................................................................................................................................... 108
Baro Offset .......................................................................................................................................................... 108
Baro Units .......................................................................................................................................................... 108
Channel Counter
.......................................................................................................................................................... 108
Sensor Display
.......................................................................................................................................................... 108
Special Select
.......................................................................................................................................................... 109
Spectrum Analyzer
.......................................................................................................................................................... 109
Tem perature.......................................................................................................................................................... 110
Tim er
.......................................................................................................................................................... 110
VOX
.......................................................................................................................................................... 110
Wave Monitor
.......................................................................................................................................................... 110
4 Radio
...................................................................................................................................
Menu Settings - Icon/Font
111
5 Radio
...................................................................................................................................
Menu Settings - Wx Names
112
Part XV Computer / Radio Data Transfer
114
1 Communications
...................................................................................................................................
| Get Data
115
2 Communications
...................................................................................................................................
| Send Data
118
3 Radio
...................................................................................................................................
to Computer Cabling
122
4 Comport
...................................................................................................................................
Setup
123
Part XVI File Maintenance
125
1 File ...................................................................................................................................
| Exit
127
2 File ...................................................................................................................................
| New
128
3 File ...................................................................................................................................
| Open
130
Opening files..........................................................................................................................................................
from older program m ers
131
Opening a V3..........................................................................................................................................................
or V4 file from a different radio
138
Opening a V3..........................................................................................................................................................
or V4 file
142
4 File ...................................................................................................................................
| Print
146
5 File ...................................................................................................................................
| Print Preview
147
6 Saving
...................................................................................................................................
Programming Files
150
File | Save .......................................................................................................................................................... 151
File | Save As.......................................................................................................................................................... 153
© 2013 RT Systems, Inc.
Contents
Part XVII ARRL TravelPlus*
7
155
1 Creating
...................................................................................................................................
a list in TravelPlus*
156
2 Opening
...................................................................................................................................
the list in the Programmer
158
3 Using
...................................................................................................................................
the TravelPlus* List with existing programmer file
163
Part XVIII Copying From an Excel Spreadsheet
168
1 Step...................................................................................................................................
1
169
2 Step...................................................................................................................................
2
171
3 Step...................................................................................................................................
3
172
4 Step...................................................................................................................................
4
173
5 Step...................................................................................................................................
5
174
6 Step...................................................................................................................................
6
177
Part XIX Importing a file
180
1 Creating
...................................................................................................................................
a file for Import
182
2 Import
...................................................................................................................................
- Step 1
189
3 Import
...................................................................................................................................
- Step 2
191
4 Import
...................................................................................................................................
- Step 3
193
5 Import
...................................................................................................................................
- Step 4
195
Part XX Export
198
Part XXI Troubleshooting
200
1 Get Data
...................................................................................................................................
from Radio Required
208
Part XXII Invalid Frequencies
210
Part XXIII Hardware Error Troubleshooting
215
Part XXIV Contact Us
220
Index
0
© 2013 RT Systems, Inc.
7
8
Foreword
Foreword
These help files are offered as reference for the features of the programmer and with some added
information about the features and functionality of the radio.
The final reference for a feature of the radio is the Users' Manual for that radio. Any error, omission or
misrepresentation of a radio's ability is unintentional.
The Programmer cannot mak e the radio do anything that it cannot do from the face of the unit. It mak es it
easier to set options for the existing functions.
© 2013 RT Systems, Inc.
Part
I
10
1
VX-7 Programmer Help
What Is the Radio Programmer
The Programmer is designed to give you the ease and convenience of programming
the memories and options of the radio from your PC.
Using the Programmer, you can create separate files for unique applications such as
travel, emergency activities, or special events. These files can contain different
settings, such as memories, power management features, and DTMF numbers, for
each purpose.
These files are saved separately to be sent to the radio at any time. One file can be
sent to the radio at any one time. Be sure to put everything you want into each file as
you build it.
The Programmer also gives you the ability to read a configuration from the radio. The
configuration would be stored in a file on your computer to be changed easily. Then,
with minimal button pushing, you can send the altered file back to the radio.
Hardware Requirements
Hardware requirements for the Version 4 Programmers include
A PC running Microsoft Windows: XP, Vista (32 or 64 bit), Windows 7 (32
or 64 bit) or Windows 8 (full version). The programmer will NOT work on
Windows 98, ME, NT or 2000.
The correct computer interface cable as shown in the Radio to Computer
Cabling chapter under Radio / Computer Data Transfer section of this
help.
© 2013 RT Systems, Inc.
Part
II
12
2
VX-7 Programmer Help
Getting Started
Creating the file
The Programmer gives you an easy way to access details for memory channels and
other settings of the radio.
Open the programmer by clicking on the icon that was created during installation. The
programmer opens to a default file.
Note: The default file contains memory channel information on
several of the screens. This information is needed by the radio to "fill
spaces in its little brain". You can change the default entries that you
see; but anything that is completed in the default file cannot be left
blank. The Programmer will help you with this. If information is
required, it will warn you when it is missing.
Enter a receive frequency
© 2013 RT Systems, Inc.
Getting Started
13
In this example we'll enter 147.240 MHz with standard offset, a Name of Local, and a
tone of 100hz.
Type one four seven period two four zero into the receive frequency
column.
Press Enter.
The program completes much of the channel information with defaults. The
Transmit frequency, Offset frequency, Offset Direction and Operating Mode
are completed. This satisfies the "Standard offset" requirement from the
original information.
Press tab or use your mouse to select the Name cell. Type LOCAL. You
choose upper or lower case on many radios. On others, only upper case
letters are allowed. The programmer will help you. If a letter or symbol will
not work on the radio, you will not be able to enter it here.
© 2013 RT Systems, Inc.
14
VX-7 Programmer Help
Press tab to move to the Tone Mode cell. Setting up the tone of 100hz
requires TW steps (just as it would if you were doing this from the face of
the radio). Turn on Tone Mode AND then set the 100hz tone.
This channel is ready to use.
The other columns are set only if you need them for better radio
performance. See Regular Memory Channels in this help and the User's
Manual for the radio for details on what these features do and the settings
© 2013 RT Systems, Inc.
Getting Started
15
for them.
There is more to this radio than just memory channels. So, there is more to the
programmer. Tabs at the bottom of the main screen give you access to Limit
memories, Home channels, Hypermemories, VFO, Marine and Shortwave channels,
that apply to your radio.
Click a tab. A screen opens with the details that can be entered for these radio
functions. You can work with the radio without ever using these tabs. There are default
values on these screens that never need to be changed. Make changes for your
special activities when you plan to use one of these functions of the radio.
Save the file
Now that you have the frequencies entered into the memory channels, Save the file.
© 2013 RT Systems, Inc.
16
VX-7 Programmer Help
In the menu, click File | Save As
© 2013 RT Systems, Inc.
Getting Started
17
Enter a filename. You can be as descriptive as you want. 256 characters including
spaces, upper and lower letters, and much more to describe this file. The programmer
will enter the extension so it can find the file later.
Once you complete this part of the process, the program will open the last file when it
starts up.
Even More Radio Functions
Today's radios can do so much. Many of the features are not a part of the details for a
memory channel. These other options are set once for the radio to use no matter what
channel you're operating on: memory channel, limit memory, VFO or Home channel.
These options may include, but are not limited to, Lock mode, ARTS details, display
brightness and color, DTMF memories, scan resume options, and many others.
Select Settings | Radio Menu settings from the menu at the top of the main screen to
access these options. The Settings screen opens to a page with check boxes, list
boxes and edit fields. A sample Settings screen would look like this.
Set the options as you need them to get the performance you want from your radio. The
settings shown for your radio will correspond to your radio's features.
© 2013 RT Systems, Inc.
18
VX-7 Programmer Help
Once you have the options like you want it, save this file. Yes, this is saved separately
from the frequencies in the memory channels.
To save the file, select File | Save from the menu on the Settings page. Enter a name
when the window opens. You will not have to set these options again when you start a
new file of memory channels.
Once the file is saved, select File | Exit to return to the main screen of the programmer.
Sending the file(s) to the radio (programming the radio)
The new RT Systems' Version 4 programmers have no comport setup. Using the RT
Systems' USB cable, you attach the cable, attach the radio, and get the programming
done.
First: Communications | Get data from
Although you really want to put the details of your file into your new radio so you can
use it, doing Get data from with this new radio gets the process started and may
help prevent problems sending the file to the radio.
This process is REQUIRED if your radio has been modified to
transmit outside the ham band.
From the menu at the top of the main window, select File | New. Open a
new file to protect the file that you created.
Connect the RT Systems USB cable to a port on your computer. Wait until
the New Hardware Found process completes.
With the radio off, connect the other end of the cable to the radio.
From the menu at the top of the main window, select Communications | Get
data from.
A screen will open with details about this process specific
to your radio.
Follow these steps carefully until this process is complete.
Open the file that you created earlier. To open a file select File | Open from
the menu at the top. Select your file from those in the list. Or with Version 4,
your file may already be open in the other tab.
© 2013 RT Systems, Inc.
Getting Started
19
Second: Communications | Send data to
When your file is ready, select Communications | Send data to from the
menu at the top of the main screen.
A screen will open with details about this process specific to
the radio.
Follow the steps carefully to complete this process and program the radio.
Read the screen carefully. The steps are often different from those used to
get data from the radio.
Turn off the power. Disconnect the programming cable from the radio.
Your radio may still be in VFO mode after it is programmed. This is a
normal mode for the radio. Press the key on the face of the radio as
described in the User’s Manual for the radio to put the radio into
Memory mode and see what you programmed.
Hardware Requirements
Hardware requirements for the Version 4 Programmers include:
© 2013 RT Systems, Inc.
20
VX-7 Programmer Help
A PC running Microsoft Windows (XP, Vista or Windows 7). The Version 4
RT Systems' software will not work on Windows 98, 2000, ME, or NT.
Version 4 - An open USB port or the RTS-03 USB to serial adapter to work
with an original RT Systems' 9-pin serial cable.
Note: The Version 4 programmers will not recognize any other cable
or USB adapter. They will not work through a serial port.
The correct computer interface cable as shown in the Radio to Computer
Cabling section of this help.
© 2013 RT Systems, Inc.
Part
III
22
3
VX-7 Programmer Help
Using the Programmer - Overview
The Programmer is designed to be used in conjunction with the manual for the radio.
The Programmer provides easy feature configuration while the written manual provides
an explanation of a feature and its use.
Working with Programming Files
The radio Programmer has the ability to work on more than one file at a time. These
can be files for the same radio or for different radios: even radios from different
manufacturers.
You can copy and paste frequencies from one file to another. This added feature
makes it even easier to create new files as you take pre-programmed memory
information from other files.
The name of the file currently being edited is shown in the title bar at the top of the
window. If the file has not yet been named, "Untitled #" appears. The "#" increments
when multiple new files are being worked on. Note: Untitled #, the default filename,
should not be used for permanent file storage. Even if you work in this file, be
sure to enter a different filename when you save. The file being edited is referred
to in this help as the current file.
Creating a New Programming File
Just like in any other editor, there are several ways to create a new cloning file.
You can open an existing file, save it with a different filename.
You can use the File | New command as a starting point for a new "blank"
file. This file begins with default information for the radio. The "default'
information you see in the file is the same as what was in your radio when
you bought it new.
Another way to create a data file is to upload the contents of the radio with
the Communications | Get data from menu command. After executing this
command, the current file will reflect the memory channels and feature
settings of the radio. Changes are easily made to these settings and the
new file saved.
© 2013 RT Systems, Inc.
Using the Programmer - Overview
23
Note: Not all the menu settings of the radio are associated with
memory channels. Many are "global" settings that affect the radio
during memory or VFO operations. These settings are handled in the
fields found on the screen accessed under Settings | Radio Menu
Settings.
The global settings will be read from the radio; however, by default, these settings are
not saved with the file. Select Settings | Radio Menu Settings to view, change and save
these settings. Once saved, these global settings will be sent to the radio every time it
is programmed. If they are not saved, default settings will be sent to the radio with the
memory programming.
To save these Global settings
Select Settings | Radio Menu Settings in the menu on the main screen. The
Settings screen opens.
Verify that your settings are as you want them or make changes.
From the top of this screen, select File | Save. A Save dialog opens into
which you enter a filename. Enter the name for this file and click Save.
Exit the Settings screen by selecting File | Exit.
This settings file is now available for use by any saved file that you send to your radio.
Creating and using multiple Global settings files
There may be global settings of the radio that you want configured differently for
different activities. You can make changes to your settings file and save it separately.
To select a settings file for use:
Select Settings | Radio Menu Settings from the main page of the
programmer.
From the Radio Menu Settings screen, select File | Open. A list of settings
files will be presented.
Select the file you want to use and click Open.
Verify that this is the settings file that you want to use. Check also that the
proper filename appears in the bar at the top of the Menu Settings window.
© 2013 RT Systems, Inc.
24
VX-7 Programmer Help
Select File | Exit to close this screen. These settings will be sent to the
radio with each memory channel file until you change this file selection
again.
Having multiple memory channel files and multiple global setting files gives you the
ability to mix and match the features of your radio to suit your needs. This makes it easy
to customize the radio for a special event without disturbing the original programming
files. Then once the event is over, simply reprogram the radio with the memory channel
information and settings that you use everyday.
Tying Global Settings to a Memory Channel File
The Version 3 and Version 4 programmers have the option of saving the global
settings with the memory channel information. This new feature is not the default for the
programmer; but may be valuable under certain programming circumstances (i.e.,
programming many radios when you want to be absolutely certain that the settings and
the frequencies are properly set for a given activity).
To contrast and compare the two Radio Menu Setting options:
Use Separate file for menu settings (default)
This is the default for the programmer.
This option is based on a "Set and Forget" plan. Once the global
settings are configured to your liking and saved, you do not have to
repeat this process. This configuration does not change with a new
memory channel file.
The last settings file saved is the one that will be used when a memory
file is sent to the radio.
You can save several different settings files (i.e., one for your radio
and a different one for your son’s radio). Then easily match the
settings to the radio being programmed without having to make
changes in the file repeatedly.
Keep menu settings and frequencies in a single file. (option)
This option is set on the Settings | Preferences screen.
With this option selected, the Radio Menu Settings as assigned on the
Settings | Radio Menu Settings screen are assigned ONLY in this file.
With each new file created the Radio Menu Settings return to factory
defaults.
© 2013 RT Systems, Inc.
Using the Programmer - Overview
25
You have the ability to customize the global settings just as you
customize the memory channel file. This would be useful if you are
programming each radio uniquely.
No guesswork about what the configuration of the global settings.
Once they are set, they stay set in this file until you make a change to
them.
© 2013 RT Systems, Inc.
Part
IV
Viewing and Changing Programming Files
4
27
Viewing and Changing Programming Files
The Programmer begins in a screen displaying memory channel information for the
radio. Default information found in a factory fresh radio is contained in the file. Anywhere
this information is displayed it can be changed.
Memory information is easily entered in a spreadsheet style layout. You can view,
rearrange, eliminate, or edit these entries. Memory channel 1 must be programmed in
most radios. VFOs and Home channels must be programmed. Memory channel 1 and
limit memory channels. VFO and Call channels must each contain a frequency
appropriate for the band. The programmer checks for missing data when Send data to
is executed.
Columns not regularly used are easily hidden with the selections under Settings |
Preferences (View | Preferences in earlier versions). Customize your screen for the
information you use most often.
Radio Menu Settings
Global menu settings which in earlier programmers occupied the opening screen are
now entered on a Settings screen accessed under Settings | Radio Menu Settings
(View | Settings in earlier versions). Here options are set for menu settings of the radio
that do not change with each memory channel. These settings affect the radio whether it
is in memory mode or VFO mode.
The Radio Menu Settings screens contain check boxes for single click settings and
easily filled blanks for personalized options. Once configured, these Settings are saved
for use by new files. There is no longer a need to reset the options in each new file or to
begin a file from an existing one.
Note: Radio Option Settings (including Lock, Beeps, etc) are read
from the radio with the Get data from command. Be sure that settings
you have customized are saved in the programmer. Access the
Settings screen and use File | Save to make the options that were
taken from the radio permanent for programming the radio later.
Once saved, the settings will be repeated with each new file of
memory channel details.
The programmer has two options for these Settings. Multiple Settings files can be
created just as multiple frequency files. Then you can "mix and match" as needed to
program a radio for a given situation. Alternately, you can opt to save the Settings as
part of an individual file.
You can find more details on these two options under Using the Programmer © 2013 RT Systems, Inc.
28
VX-7 Programmer Help
Overview and Radio Menu Settings - General Overview in this help. Using
individual and separate settings files is the default.
© 2013 RT Systems, Inc.
Part
V
30
5
VX-7 Programmer Help
Easy Editing in the Grid
Many new data management commands are available in the programming software
from RT Systems.
The commands listed here are available through a right click menu or from the list that
opens when you select Edit from the menu at the top of the screen. These commands
can be used on any of the spreadsheets in the program.
Right Click Menu
Select a row to be edited by clicking on the number to the left of that row. You
will notice that the entire row is highlighted (not just the Receive Frequency
cell). Release the left mouse button. You will notice that the row remains
highlighted until you left click someplace else on the screen of the
programmer.
Note: You can select several rows at once (to copy, delete, etc) by
clicking on the number to the left of the first of the selection then
while holding the left mouse button, drag the mouse across the
number of each of the channels to be included. This must be a
continuous group.
With the mouse pointing at the highlighted area (anyplace as long as the
point of the mouse pointer is within the highlighted area), press the right
mouse button. A menu opens with editing options. Release the right mouse
button once that menu opens.
Use the mouse to point at the desired command. Left click the mouse to
execute that command.
Edit Menu
Select a row to be edited by clicking on the number to the left of that row. You
will notice that the entire row is highlighted (not just the Receive Frequency
cell). Release the left mouse button. You will notice that the row remains
highlighted until you left click someplace else on the screen of the
programmer.
Note: You can select several rows at once (to copy, delete, etc) by
clicking on the number to the left of the first of the selection then
while holding the left mouse button, drag the mouse across the
number of each of the channels to be included. This must be a
© 2013 RT Systems, Inc.
Easy Editing in the Grid
31
continuous group.
Holding neither of the mouse buttons, move the mouse pointer to Edit in the
menu at the top of the screen. Press the left mouse button to select this menu
option.
Holding neither of the mouse buttons, use the mouse pointer to select one of
the editing options shown in the menu. Click the left mouse button to execute
this command.
Editing Commands
The examples here will use the programmers for the Yaesu FT-60 (ADMS-1J) and the
Icom IC-91 (WCS-91). You will see by the screen shots that you can copy and paste
between files: even files for radios from different manufacturers. The programmer will
take care of the similarities and differences.
Cut (Ctrl+X) - Removes the selected entry and leaves the memory channel blank.
This feature is designed to work for deletion of all the data in a memory channel rather
than data in a specific column.
Copy (Ctrl+C) - Copies the selected data.
You can copy two different ways:
Copy all the details of a Memory Channel (one or several at once) or Copy
details within one column (from one cell to one or many at one time)
In most cases, data can be copied from one tab to another (as in left
and right memories).
It can also be copied from one programmer to another (both files
Version 3 or Version 4 or even between Version 3 and Version 4
files).
Data that is not appropriate for where it is to be pasted (i.e., a VHF
frequency into a UHF channel) will not be pasted.
Copying an entire memory channel or group of channels
Shown here are details for copying within a file. The same actions apply to
copy data to another tab of the file or to another programmer.
Open the file.
© 2013 RT Systems, Inc.
32
VX-7 Programmer Help
Select the data to be copied.
To select an entire row, point your mouse at the number in the blue box at
the left of the row. Click and release the left mouse to select that row. The
entire row will be highlighted when it is selected.
To select multiple rows, point your mouse at the number in the blue box at
the left of the first row to be selected. Click and hold the left mouse button as
you drag the pointer over the next several channels that you want to copy.
The channels must be sequential for multi channel copying. All the selected
channels will be highlighted.
To select all rows, point your mouse at the number in the blue box at the left
of the first row. Left click the mouse. Release the mouse. Press Ctrl A to
select all. The entire page will be highlighted. Note: If you have a lot of
channels to select, rather than trying to select them with the mouse,
simply select the first one and press Ctrl A. The copy and paste
process does not care if blank channels are selected.
© 2013 RT Systems, Inc.
Easy Editing in the Grid
33
Copy Command
From the menu at the top of the screen, use your mouse to left click on
Edit. From the menu that opens, use the mouse to left click on Copy.
You can also copy by pressing Ctrl C on the keyboard.
Or while pointing at the screen of the programmer, right click and select
Copy from the menu that opens.
© 2013 RT Systems, Inc.
34
VX-7 Programmer Help
It will appear that nothing has happened. The program in conjunction with
built in commands of the operating system of the computer has copied the
data. It is waiting for you to Paste it where you want it.
Paste (Ctrl+V) - Writes the selected data to the current position of the cursor overwriting
the data from that point.The Version 3 and Version 4 programmers have the ability to
copy and paste data in a single column as well as for an entire row.
Paste Complete Channels
Use the mouse to select the channel where you want the data to start.
This can be in another file for the same radio or one for any radio for
which you use an RT Systems Version 4 programmer.
Select the row that is the first into which the data is to be pasted. The
Paste process will begin in that location with the first copied channel
and continue in each channel after that with the rest of the channels
that were copied.
© 2013 RT Systems, Inc.
Easy Editing in the Grid
35
From the menu at the top of the screen, use your mouse to left click on
Edit. From the menu that appears, use the mouse to left click on
Paste.
You can also paste by pressing Ctrl V with the mouse pointing within
the selected area (i.e., just look at where the mouse pointer is on the
screen. It must by within the black area on the screen of the
programmer for this keystroke to have any effect.).
Or while pointing within the highlighted area, right click and select
Paste from the menu that opens.
© 2013 RT Systems, Inc.
36
VX-7 Programmer Help
The information is pasted into the selected channels.
© 2013 RT Systems, Inc.
Easy Editing in the Grid
You can make this process even easier by splitting the screen into two parts. Select
Window New Vertical Tab Group for this result.
© 2013 RT Systems, Inc.
37
38
VX-7 Programmer Help
Copying details from one cell to change many rows at once.
Column editing: This editing allows you to change the data in the same
column of several rows at once. It works a little differently for columns with text
(including those into which you enter text and those that you select text from a
list) and check box fields. Each of these scenarios is presented here in an
example.
Text Cell Editing - To change Tone Mode to Tone for several
channels.
Select the Tone Mode field of the first of the channels to be
changed.
Make the change by pulling the drop-down and selecting Tone
from the list.
© 2013 RT Systems, Inc.
Easy Editing in the Grid
39
Once the selection is made, the focus will move to the next field.
Click back into the Tone Mode field that displays the correct value.
When you move back into the field you can copy the information if
the field is highlighted with a ring around its border or if the text
within is shaded (indicating that it is selected).
Press Ctrl + C, select Edit | Copy from the menu at the top of the
screen, or right click and select Copy from the menu that appears.
(Just as with row copying in the first example.)
Select the first cell to be changed by pressing Down arrow until
that cell is highlighted (the cell will be in the same column so using
the Down Arrow key will easily move you to another nearby cell). If
you need to move quite a way in the file, move to the first cell to be
changed and click the mouse to select that cell.
© 2013 RT Systems, Inc.
40
VX-7 Programmer Help
If several consecutive rows are to be changed, select them all by
holding the Shift Key while you Down Arrow through them or hold
the Left Mouse Key while you move your mouse over them (normal
Windows selection processes). When they are selected, they will
be highlighted in a color based on the scheme of your computer.
Press Ctrl + V, select Edit | Paste from the menu at the top of the
screen, or Right Click and select Paste from the options in the
menu that opens. The copied value will appear in each of the
fields.
© 2013 RT Systems, Inc.
Easy Editing in the Grid
41
Column editing will address a selection of consecutive cells all at
once or individual cells repeatedly. If the items to be changed are
not consecutive, you can select and paste repeatedly until all the
cells are addresses. You do not have to copy again. The
programmer retains the copied value.
Check Box Cell Editing - If you want to put several channels into a
Bank, there is no reason to do this one row at a time.
This process varies from the other by how the cells are selected.
Check box cells act differently than those that contain text. You can
copy from one check box column into another.
In this example, put channels several into Bank 1 without checking the
Bank 1 box for each channel.
First, select Settings from the menu at the top of the page. From
that menu, select Bank Settings. Several columns of the screen will
be hidden leaving only Receive Frequency, Name and Banks.
This makes working on the screen easier since you no longer must
scroll through several columns that you are not using now.
For Channel 1, put a check in the box under Bank 1.
© 2013 RT Systems, Inc.
42
VX-7 Programmer Help
At this point you CANNOT copy this field. Press Tab or Enter to move
out of the field.
The process is more easily done now with the keyboard rather than
the mouse.
Press Right Arrow to move focus back into the Bank 1 column. Notice
that there is now a black border on that cell. The cell is now ready to
be copied. Press Ctrl C or select Edit from the menu then copy from
the list that opens to copy the cell.
© 2013 RT Systems, Inc.
Easy Editing in the Grid
43
Press and Hold the Shift key while pressing the Down Arrow key to
select the rows that will be set with this information.
Press Ctrl V to paste the selecting into the fields.
© 2013 RT Systems, Inc.
44
VX-7 Programmer Help
Simple Mode: Hides several of the columns for each memory channel. Those
remaining are the ones that are most needed for any memory channel. Those
remaining include:
Receive Frequency - A channel cannot be programmed without a receive
frequency. This is the frequency you listen to.
Transmit Frequency - The programmer will complete this automatically.
The column is included in case you need to enter the value other than the
default for the receive frequency based on the band plan (i.e., an odd split
pair).
Offset Direction - Again, the programmer will complete this automatically
based on the band plan for the receive frequency. However, an
occasional repeater will differ from the band plan. Including this column
gives you the ability to address that difference.
Name - This column is for personalized information to identify the
channel.
Tone Mode - The repeater operator controls this detail for the repeater.
There is nothing standard that can be completed automatically. You need
© 2013 RT Systems, Inc.
Easy Editing in the Grid
45
to select the Tone Mode then assign the CTCSS frequency or DCS code
as needed for a particular repeater.
Skip - Use at your discretion to include or exclude a frequency during
memory channel scanning.
Comment - Personalized notes up to 80 characters. This information
remains a part of the file and is not transferred to the radio.
Note: While in Simple Mode, you cannot access the Preferences
screen (Settings | Preferences). The columns that are hidden in
Simple mode are predetermined by the programmer.
All columns are visible on the screen when you are no longer in
Simple Mode. If you want to hide other columns, you can do that
through individual selection on the Settings | Preferences page.
Find (Ctrl+F) - Finds specific text in a specified column. Once you select this
command or press Ctrl+F a screen opens into which you enter the text (or number)
to be found.
© 2013 RT Systems, Inc.
46
VX-7 Programmer Help
Select the field to be searched (i.e., Receive frequency, Transmit
frequency, etc.)
Enter the text (or numbers) to be found.
Click OK to move to the first item found. The search always begins at
the top of the list and stops at the end.
Find Next (F3) - Use the F3 function key to repeat the specified find and move to
the next item. For example: You choose to search for 145 in the Receive Frequency
column in a file with 5 channels beginning with 145. OK in the Find box takes you to
the first one. F3 takes you to the second; then the third; then the fourth: and so on
until you have stopped at each of those that match the criteria.
Goto Channel (Ctrl+G) - Moves to the indicated channel number. When this
option is selected a screen opens into which you enter the channel number. Enter
the number and click OK to move to that memory channel (programmed or not).
Insert Channel (Shift+Ins) - Inserts a blank row without deleting information
present. The current information and all that follows is "pushed-down" to make
room. The number of rows inserted will equal the number of rows selected. This is a
great way to slip channel information into a list of channels.
© 2013 RT Systems, Inc.
Easy Editing in the Grid
47
Note: Insertion of rows can result in the loss of data from the bottom
of the list. You will be warned if there is danger of data loss and given
the opportunity to cancel the process to prevent this loss.
Delete Channel (Shift+Del) - Removes the selected row. All the data following the
deleted row is "pulled-up" to eliminate the blank row. Beware!! Deleted data cannot
be recovered. Neither the Insert nor the Paste commands write the data to the grid.
If you accidentally delete data, exit the Programmer WITHOUT saving. The file will
be restored to its condition when you last saved and the last deleted data will be
restored. Multiple channels can be deleted by selecting them all at once and
selecting delete.
Clear Channel - Removes the data from the selected channel without moving all
those that follow up to fill this space. Leaves the channel blank.
Move Up (Ctrl+U) - The ability to select a channel and have it "change places" with
the channel immediately preceding it. Repeat this command on a selected channel
to "walk" it into place in your list. Sequential channels can be selected and moved at
once. The group will move up one channel at a time. The displaced memory channel
will move to the end of the group being moved.
Move Down (Ctrl+D) - The ability to select a channel and have it "change places"
with the channel immediately following it. Repeat this command on a selected
channel to "walk" it into place in your list. Sequential channels can be selected and
moved at once. The group will move down one channel at a time. The displaced
memory channel will move to the top of the group being moved.
Add Frequency Range - A convenient way to add lots of channels at once. This is
great for setting up a radio for scanning a certain range of channels. When this
option is selected you are presented with a window into which you enter the details
of the channels to be entered.
© 2013 RT Systems, Inc.
48
VX-7 Programmer Help
Enter Starting Frequency: The value of the first frequency of the list to be
entered. Any allowable frequency of the radio being programmed.
Number of channels - Enter the number of channels to be entered. You
can insert as few as 1 to as many as 1000 channels at once. You are not
warned if you select more than the number of memory channels. The
process just inserts all that it can and ignores the rest.
Frequency Step - Enter the value that will separate each of the
frequencies in these channels. Select 5kHz to 200 kHz.
Click OK and watch the screen fill. Or Cancel to exit the process without
change to your file.
The channels are inserted beginning at the currently selected channel (i.e., if
you have selected channel 40, the first channel will be added at channel 40).
You are warned if a channel will be overwritten and given the ability to not
overwrite or to cancel the process. If you choose No to prevent loss of the
current channel information, the skipped frequency is entered into the next
available space and not lost.
Sort - Great for data management or to arrange your channels permanently for a
special use. The version 3 and Version 4 programmers have the ability to Undo a
sort. You can now sort the list on a given parameter, touch-up a group of entries,
then put the list back in its original order with the changes that you made. When this
option is selected you are presented with a window for selection of the options.
© 2013 RT Systems, Inc.
Easy Editing in the Grid
49
Sort by - Select a column for the initial sort.
Then Sort By - Select a second column for a secondary sort.
Sort Mode - Ascending for lowest to highest. Descending for highest
to lowest.
Channel Sort Selection - Selected Channels to sort only a group form
the file. All Channels to sort all the channels in the file.
If the result is not quite what you expected, select the Undo Sort option to
return the list to the point you left it last.
Always save your file before you sort. At the very worst you can exit the file
without saving to return to the order of that last save.
Blank memory channels are always sorted to the top of bottom of the list
based on the Ascending or Descending selection.
Different fields sort differently. If a field is a text field in one programmer and
a drop down list in another, the sort results will be different. It has to do with
how the computer interprets the values in these different types of fields.
While this was present in the older programmers, it should not be a problem
in the Version 3 or Version 4 programmers where the fields are consistent
between the radio programmers.
Unsort - For use after sorting to return the list to the last saved order. Use Sort
and Unsort to easily edit channels with the same info that needs to be changed.
Sort to bring those channels together. Edit the details (see cell editing). Then
unsort to return the list to the last saved order with the edits in place.
© 2013 RT Systems, Inc.
50
VX-7 Programmer Help
Quick File Access Commands
Ctrl 0 (Control zero) - Open existing file for same radio. Calls the Open dialog for
the programmer being used allowing you to select a file to be opened without
having to select the file type first. This is especially helpful when several
programmers are loaded on one system. (i.e., Lets you select another FT-7800
file without having to select that file type first from the open box.)
Ctrl O (Control letter "O") - File | Open. Presents the box from which the file type is
selected just as File | Open. Select the type of file to be opened. The programmer
will look in the location of that last file for that particular file type. (i.e., you can open
an FT-60 file while working with the FT-7800 programmer as long as you have the
Version 3 or Version 4 module for the FT-60. With both open, you can copy and
paste between the files or send each to the proper radio without having to close
and reopen the Version 3 or Version 4 programmers separately.)
Ctrl M - Automatically create a new file for the programmer being used. Eliminates
having to select the file type first.
Ctrl N - File | New. Presents the box from which the file type is selected just as in File |
New in the menu. Select the file type for the programmer to create a new file for
that radio (the same as the one you're working with now or for a different radio for
which you have the Version 3 or Version 4 module.)
© 2013 RT Systems, Inc.
Part
VI
52
6
VX-7 Programmer Help
Screen Appearance and Default Options
The screen of the programmer can be customized to make data entry that much easier.
Options for screen appearance are accessed under Settings | Preferences from the
menu on the main screen of the programmer. This screen appears when that option is
selected:
Freeze Columns
The option to "freeze" can be applied to any or all columns. Select the
number of columns to remain on the screen at all times as you scroll to the
right of the spreadsheet.
Having these columns always available for reference can be a great help for
identifying the memory channel being edited.
Hidden Columns (Mark the columns to hide)
Selected columns can be marked as hidden which removes them from the
screen display. During editing, these fields are completed with default
© 2013 RT Systems, Inc.
Screen Appearance and Default Options
53
information for the radio. This option is a global setting and will affect every
file, new or existing.
In an existing file the data in these columns is not lost: it is simply not
displayed.
In a new file, a hidden column is filled with a default value.
Hidden column data is not printed. Columns can be marked as hidden to
customize printed output and then restored for additional data management.
Note: Several columns are hidden and unhidden with the Simple
Mode option found under Edit from the menu of the main screen.
Simple mode hides all but the columns required for memory channel
operations. When you leave Simple Mode, all columns will again be
visible.
Alternate row colors
Select a color for the text (Fore) and/or background (Back) for rows 2, 4, 6,
etc. This can help the readability of the spreadsheet.
Radio Menu Settings
Sets the option for how the global settings of the radio are saved in the file.
These options for saving are explained in great detail in the Using the
Programmer - Overview section of this help.
Briefly, the radio settings contained on the Settings screen are options that
are not specific to any one memory channel. The radio uses this setting
whether it is in memory mode, VFO, on a Home channel, or, basically,
whenever it is on. The settings for these options are sent automatically to the
radio with the channel information.
The Settings can be saved as part of the channel data file or in a separate
file.
As part of the channel data file, they are reset to defaults each time you
start a new file. You set them to your specifications for the file that is
being created.
As a separate file, they are set once, saved, then sent to the radio with
every saved channel data file.
The pros and cons of both of these option are discussed in detail in the
Using the Programmer - Overview section of this help.
© 2013 RT Systems, Inc.
54
VX-7 Programmer Help
Memory Defaults
You have complete control of the programmer. These options control default
values for the channel data for memory channels, VFOs, Limits, Home, etc.
Making one change here controls how a channel will be completed when a
frequency is entered.
To access the Memory Defaults screen,
Select Settings from the menu at the top of the screen.
Select Preferences
Once on the Preferences screen select the Memory Defaults tab.
Check Show Name Automatically - For radios with an extra column for show
name, having this option selected (checked) lets the programmer mark that
check automatically when you enter a name for that memory channel. this
eliminates that extra step.
With this option checked, you can uncheck a Show Name box at any time
if you would rather display the frequency for a given memory channel.
© 2013 RT Systems, Inc.
Screen Appearance and Default Options
55
Convert Split Offsets to standard Plus and Minus when available - This option
is for programming Yaesu radios only as Icom radios work only with Plus
(+Dup) and Minus (-Dup) offsets. See the discussion of Non-standard offsets
in the Programmer Main Window section of this help for a complete
explanation.
Disable CTCSS, DCS and other Tone columns according to the Tone Mode
selection - Beginning in the Version 3 programmer and continuing into future
versions, the programmers have been designed to help you enter information
for tones used for repeater access. You cannot enter a tone unless you have
selected a Tone Mode which tells the radio to use that tone. The tone value
columns are disabled until you turn the tone on. Then only the appropriate
column is made active. When this option in unchecked, you will be able to
adjust the tone value even if the Tone Mode has not been set for that memory
channel.
Offset Frequency Defaults - Defaults are set for US radios. Others are
presented to make data entry easier in other countries where those defaults
are different.
© 2013 RT Systems, Inc.
Part
VII
Split Screen for Multiple Files
7
57
Split Screen for Multiple Files
The Version 4 programmer can display more than one file simultaneously in the
programmer's main window. Opening several files at once makes it even easier to
copy and paste between them (even files for different radios from different
manufacturers) or just to compare the frequency lists.
Open the files
From the menu at the top of the main screen, select Window | New Vertical
tab group
The screen will separate into two parts taking the selected file to the new
group.
To work with three as shown above, simple select another file and repeat the
process.
A horizontal split is also possible.
© 2013 RT Systems, Inc.
58
VX-7 Programmer Help
Open the files
From the menu at the top of the main screen, select Window | New Horizontal
tab group
The screen will separate into two parts taking the selected file to the new
group.
To work with three as shown above, simple select another file and repeat the
process.
Note: Once you divide the screen horizontally or vertically, the other
separation is not available. Selections for vertical and horizontal
groups will be enabled and disabled in the menu as necessary.
© 2013 RT Systems, Inc.
Part
VIII
60
8
VX-7 Programmer Help
Menu Item Cross Reference
The Programmer presents all the options for the radio in easy to use grid, check box,
list and combo box formats. Most radios these days have so many options that
organizing them in the Programmer can be a challenging task.
The location in the Programmer is described as a "path". For example.
Settings | Radio Menu Settings | Toggles tab | DTMF Dialer
Click on Settings at the top of the screen
Select Radio Menu Settings from the menu that opens
Select the Toggles tab
The option is named DTMF Dialer on the Toggles tab.
Set Mode
Menu Item
Basic Setup
1 SQL NFM
Programmer Item
Settings | Radio Menu Settings | Toggles tab | Squelch (Main and
Sub)
2 SQL WFM
Settings | Radio Menu Settings | Toggles tab | Squelch (Wide)
3 VFO Step
Main Screen | VFO tab | Step
(This option can be set individually for each VFO channel)
4 Rx Mode
Main Screen | Operating Mode
(This option can be set individually for each memory channel)
5 ARS
Settings | Radio Menu Settings | Toggles tab | ARS (checkbox)
6 Shift
Main Screen | Offset Frequency
(This option can be set individually for each memory channel)
7 Rpt Shift
Main Screen | Offset Direction
(This option can be set individually for each memory channel)
8 Mute Set
Settings | Radio Menu Settings | SubBand Mute (checkbox)
© 2013 RT Systems, Inc.
Menu Item Cross Reference
9 Key Beep
Settings | Radio Menu Settings | Toggles tab | Beep (checkbox)
10 Lock Mode
Settings | Radio Menu Settings | Toggles tab | Lock Mode
11 Name Set
Main Screen | Name
(This option can be set individually for each memory channel)
61
12 Memory
Not accessible from the Programmer
Write Mode
13 Memory
Main Screen | Skip
Scan Mode (This option can be set individually for each memory channel)
14 Hyper Write Settings | Radio Menu Settings | Toggles tab | Hyper Write
(checkbox)
Display Setup
1 Busy LED
Settings | Radio Menu Settings | Toggles tab | Busy LED
(checkbox)
2 Contrast
Settings | Radio Menu Settings | Display tab | Contrast
3 Dimmer
Settings | Radio Menu Settings | Display tab | Dimmer
4 Display
Settings | Radio Menu Settings | Display tab | Display Mode
Mode
5 Lamp Mode Settings | Radio Menu Settings | Display tab | Lamp Mode
6 LED Color 1 Settings | Radio Menu Settings | Display tab | LED (colors)
7 LED Color 2 Settings | Radio Menu Settings | Display tab | LED (colors)
8 Meter
Symbol
Settings | Radio Menu Settings | Display tab | Main and Sub Meter
Symbol
TSQ\DCS\DTM
F
1 SQL Type
Main Screen | Tone Mode
(This option can be set individually for each memory channel)
2 Tone Set
Main Screen | CTCSS
(This option can be set individually for each memory channel)
3 DCS Set
Main Screen | DCS
(This option can be set individually for each memory channel)
4 DCS
Not accessible from the Programmer.
© 2013 RT Systems, Inc.
62
VX-7 Programmer Help
Complement
5 Bell
Settings | Radio Menu Settings | Toggles tab | Bell (list selection)
6 Split Tone
Settings | Radio Menu Settings | Toggles tab | Split Tone (checkbox)
7 DTMF Dialer Settings | Radio Menu Settings | Toggles tab | DTMF Dialer
(checkbox)
8 DTMF Set
Settings | Radio Menu Settings | Toggles tab | DTMF (grid)
Scan Modes
1 Ch Counter
Settings | Radio Menu Settings | General tab | Channel Counter (list
selection)
2 Edge Beep
Settings | Radio Menu Settings | Toggles tab | Edge Beep
(checkbox)
3 Resume
Settings | Radio Menu Settings | Toggles tab | Scan Resume (list
selection)
4 Scan Lamp
Settings | Radio Menu Settings | Toggles tab | Scan Lamp
(checkbox)
5 Smart
Search
6 Spec
Analyzer 1
Not addressed in the programmer.
7 Spec
Analyzer 2
Settings | Radio Menu Settings | General tab | Audio Center Freq
(Spectrum Analyzer section)
Settings | Radio Menu Settings | General tab | Mode (Spectrum
Analyzer section)
Note: Spec Analyzer 1 sets the sweep mode.
Measurement
1 Sensor
Display
Settings | Radio Menu Settings | General tab | Sensor Display (list
selection)
2 Wave
Monitor
Settings | Radio Menu Settings | General tab | Wave Monitor (list
selection)
3 Temp Unit
Settings | Radio Menu Settings | General tab | Temperature
4 Baro Unit
Settings | Radio Menu Settings | General tab | Baro Units
5 Baro Offset
Settings | Radio Menu Settings | General tab | Baro Offset
© 2013 RT Systems, Inc.
Menu Item Cross Reference
63
6 Altitude Unit Settings | Radio Menu Settings | General tab | Altimeter
7 Altitude
Offset
Settings | Radio Menu Settings | General tab | Alt Offset
Save Modes
1 APO
Settings | Radio Menu Settings | Toggles tab | Auto Power Off (list
selection)
2 Rx Save
Settings | Radio Menu Settings | Toggles tab | Rx Save (list
selection)
3 Tx Save
Settings | Radio Menu Settings | Toggles tab | Tx Save (checkbox)
4 TOT
Settings | Radio Menu Settings | Toggles tab | Time out timer (list
selection)
5 On Timer
Settings | Radio Menu Settings | General tab | On Enable (Timer
section)
6 Off Timer
Settings | Radio Menu Settings | General tab | Off Enable (Timer
section)
ARTS
1 ARTS Beep Settings | Radio Menu Settings | General tab | Arts Beep (ARTS
section)
2 ARTS
Interval
Settings | Radio Menu Settings | General tab | Arts Speed (ARTS
section)
3 CW ID
Settings | Radio Menu Settings | General tab | CW ID (ARTS
section)
Misc
1 BCLO
Settings | Radio Menu Settings | Toggles tab | BCLO
2 Home/Rev
Settings | Radio Menu Settings | Toggles tab | Home\Reverse
3 Moni/T-Cal
Settings | Radio Menu Settings | Toggles tab | Moni\TCall
4 Mon-F
Change
5 EMG Set
Settings | Radio Menu Settings | Toggles tab | Moni/F Change
© 2013 RT Systems, Inc.
Settings | Radio Menu Settings | Display tab | Emergency (list
selection)
64
VX-7 Programmer Help
6 Half
Deviation
Main screen | Half Dev
(This option can be set for each memory channel.)
7 VOX Sens
Settings | Radio Menu Settings | General tab | Vox Sensitivity
8 VOX Delay
Settings | Radio Menu Settings | General tab | Vox Delay
9 Band Link
Settings | Radio Menu Settings | Toggles tab | Band Link
(This item cannot be set in the Programmer. It is available to be
turned off only if the item has been turned on in the radio.)
10 VFO Mode
Settings | Radio Menu Settings | Toggles tab | VFO (All or Band)
11 Font Editor
Settings | Radio Menu Settings | Icon/Font tab | Font Editor
12 Icon Set
Settings | Radio Menu Settings | Display tab | Icon Set (checkbox)
13 Icon Editor
Settings | Radio Menu Settings | Icon/Font tab | Icon Editor
14 Icon Select
Main screen | Icon
(This item can be set for each memory channel.)
15 Clock Shift
Main screen | Click Shift
(This item can be set for each memory channel.)
16 Time Set
This item is not available from the Programmer.
17 Language
Settings | Radio Menu Settings | Display tab | Language (list
selection)
18 ATT
Settings | Radio Menu Settings | Toggles tab | ATT (checkbox)
19 Mic Monitor Settings | Radio Menu Settings | Toggles tab | MicMonitor
(checkbox)
(This item cannot be set in the Programmer. It is available to be
turned off only if the item has been turned on in the radio.)
20 Wx Alert
Settings | Radio Menu Settings | WxNames tab | WxAlert (checkbox)
© 2013 RT Systems, Inc.
Part
IX
66
9
VX-7 Programmer Help
Auto Range Transponder System
The Automatic Range Transponder System (ARTS) uses DCS signaling to inform you
and another ARTS-equipped station that they are within range for communication. You
need not have two matching radios to use this function. Any two radios equipped with
the ARTS function can be used.
ARTS is used in simplex mode. The radio must receive on the same frequency as that
transmitted by the other radio.
When setting up a channel for ARTS (VFO or memory), set the
Offset Direction to SIMPLEX,
Tone Mode to DCS,
DCS code to the same value in each radio.
Besides its value in search and rescue operations, ARTS makes a great "did you hear
me" feature. As long as the two radios show "IN RANGE", you can be sure that the
radio received your audio . Presuming that the volume on the receiving radio is
sufficient, you can be sure that your signal was heard. Especially when driving, the other
operator may not be able to respond immediately to your communication. If ARTS
remains successful, you can be sure that the voice transmission was heard (just as the
ARTS signal is heard).
During the ARTS function, your radio will transmit a signal every 15 (or 25) seconds.
This transmission includes the DCS tone. The receiving radio will hear only the signal
with the tone. An extraneous signal that lacks the tone will not interfere with the ARTS
functionality between these two radios.
The other radio does the same in a comparable time period. As long as the two remain
within range, the displays will show "IN RANGE". Should one of the radios move too far
from the other, three beeps will sound and the display changes to "OUT RANGE". Once
with radios are again within range, a single beep will sound and the display will change
to "IN RANGE". Whether or not you talk, the ARTS function continues until you deactivate it.
During ARTS operation, it is impossible to change the operating frequency or other
settings of the radio. This prevents accidental loss of contact. You must terminate
ARTS operations to resume normal operations including access to menu settings on
the radio. The radio can be turned off even with ARTS engaged. This will cause an outof-range situation for other radios.
Options for ARTS operations are entered on the [ARTS, CW, EAI] tab of the Settings
© 2013 RT Systems, Inc.
Auto Range Transponder System
67
screen of the Programmer.
The ARTS options include:
Transmissions during the ARTS function, whether or not
accompanied by voice transmissions, require that you ID every 10
minutes to satisfy FCC identification requirements. Remember to
enter your callsign into the CW ID field and check Enable to engage
this part of the function.
ARTS Beep - The ARTS function can operate either silently or audibly. Silently, the
display shows the IN RANGE or OUT RANGE condition of the transceivers. The beep
alerts you to the location status of the radios. The available options include:
OFF for silent operations.
IN RANGE for a beep only when the radios first confirm that you are within
range. The radios then remain silent as long as you remain within range.
ALWAYS for a beep to sound every time a polling transmission is received
from the other station.
ARTS Speed - Set the frequency for ARTS polling. Available options are 25 seconds
for maximum battery conservation or 15 seconds for extra security.
ARTS Switch - Disabled in the Programmer, the ARTS functionality is to be turned on
from the face of the radio after it is programmed. To engage or disable ARTS, press
and hold the "atomic looking" key for one seconds.
Note: ARTS will not function if the PTT is locked.
Also, most models cannot be programmed if ARTS mode is activated
when the radio is turned off. If you cannot initiate Tx or Rx in Clone
mode, turn the radio off then back on in normal mode checking that
ARTS mode is not engaged.
CW ID - Transmissions during the ARTSTM function, whether or not accompanied by
voice transmissions, require that you ID every 10 minutes to satisfy FCC identification
requirements. This identification can be done manually with verbal ID during a
conversation or automatically by the radio with your callsign transmitted via CW. This
automatic ID option is especially useful if you are using ARTS without voice
transmission. To activate the CW ID, check the box and enter your callsign in the space
provided.
© 2013 RT Systems, Inc.
Part
X
Emergency Operation
10
69
Emergency Operation
Emergency Operations
The radio has an Emergency feature that must be activated from the face of the radio.
This feature would be helpful for finding someone lost, but not incapacitated, or for
alerting others traveling with you of a danger in your vicinity.
The Emergency feature is activated by pressing and holding in the [Hm/RV] key for
one-half second.
When this is feature is engaged
The radio is placed on the UHF amateur band Home channel (be sure
everyone in the group is on the same frequency);
The radio emits a loud "Alarm" sound (the volume is controlled by the VOL
knob);
It flashes the STROBE in sequential colors;
The emergency feature can be disabled temporarily when the PTT is
pressed, allowing for transmission on the UHF Home channel frequency;
and
The emergency feature automatically begins again 2 seconds after the
transmission has ended.
Using the settings of the Emergency option on the General tab of the menu settings
screen (Settings | Radio Menu Settings | Display), select the alarm used when the
Emergency function is engaged. Available values include the following with a default
of Beep and Strobe.
Beep+Strobe: Loud alarm sounds along with flashing of the STROBE in
sequential colors.
Beep: Loud "Alarm" sounds.
Strobe 1: Flashes the STROBE in sequential colors.
Strobe 2: Continuation changes the STROBE in sequential colors
Strobes 3~5: Flashes the STROBE in white (3=slow flashing; 4=medium
© 2013 RT Systems, Inc.
70
VX-7 Programmer Help
flashing, and 5=rapid flashing)
Beam: The STROBE glows continuously in white.
© 2013 RT Systems, Inc.
Part
XI
72
11
VX-7 Programmer Help
Internet (WIRES) Functionality
The radio can be used to access a “node” (repeater or base station) which is tied into
the Vertex Standard WIRES™ (Wide-Coverage Internet Repeater Enhancement
System) network, operating in the “SRG” (Sister Radio Group) mode.
Details may be found at the WIRES-II Web site: www.vxstd.com/en/wiresinfo-en/
The Internet function settings area part of the Radio menu settings in the Programmer.
Access that screen by selecting Settings | Radio Menu Settings from the menu at the
top of the main screen of the Programmer.
Settings for Internet Access
Enable - Enables or disables the Internet functionality of the radio.
Mode - Select the Internet Link Connection mode.
Vertex: Sets up the Internet Link Connection mode for WIRES™ access.
User: Sets up the Internet Link Connection mode for other (DTMF string)
Internet Link System access.
DTMF Code: Select the Access Number (DTMF digit) for WIRES™ operation.
Available values are CODE 0 - CODE 9. The default is CODE 1
DTMF Ch #: Select the memory register for an Access Number (DTMF code) for nonWIRES™ Internet Link System access. Available values are D1 - D9. The default is D1
Note: If other users report that you always have a DTMF “beep” at
the beginning of each transmission, and you are not operating in
conjunction with Internet access, disable the Internet access feature
from the face of the radio by holding the [Tx PO LK] button for 1/2
second. The icon that indicates use of this feature will disappear from
the screen once the feature is disabled.
© 2013 RT Systems, Inc.
Part
XII
74
12
VX-7 Programmer Help
Memory Banks (Groups)
Memory banks ('Groups' in this radio) offer a way to organize your channels for
specialized operations. The Memory Banks (Groups) can contain 48 memory channels
each. A memory channel can be included in none, one, or all the banks (groups).
A simple scenario of this organization might include:
Putting all your VHF and UHF ham repeaters into Bank 1. If you use your
radio mainly for "hamming" you would operate in Bank 1 most of the time
so you can scan without having to listen to all the other traffic.
Then put your Fire and Rescue channels into Bank 2. When you're on the
scene of an emergency, you would operate in Bank 2 to eliminate
interference from the amateur traffic.
If you travel for business to one other location repeatedly, put the channels
for that location into Bank 3. When you are there, you operate in Bank 3.
Then when you scan for activity, you scan 10 channels instead of the 100
you now have in memory. Remember, if one of these repeaters is the
same as one in your "home" group, including Tone mode and value), there
is no need to program that repeater into another memory channel. Simply
include it in both Banks 1 and 3 to have it available in both locations.
This is a simple example. The types of activities may not even apply to you; but the
concept is the same no matter what the activities.
Once programmed, banks are accessed from the face of the radio. To recall a
memory bank (group)
Set the radio to the Memory mode on the “Main” Band by pressing the [V/
M] key, if necessary.
Press the [MoniF] key, then press the [9] key to recall the Special Memory
Menu.
Rotate the DIAL knob to select the “2 MR Group” mode.
Press the PTT switch to activate the “Memory Group” mode.
Rotate the DIAL knob to select the desired Memory Group (“MG1” ~
“MG9”).
Press the [V/M] key momentarily to lock in the selected Memory Group.
© 2013 RT Systems, Inc.
Memory Banks (Groups)
75
In the Memory Group mode of operation, you can only select memory
channels in the current memory group (up to 48 channels).
To change the Memory Group to another Group, press the [V/M] key
momentarily, then rotate the DIAL knob.
To exit from Memory Group operation, recall the Special Memory Menu
(press [MoniF] + [9] ) then change the setting to “1 OFF.”
© 2013 RT Systems, Inc.
Part
XIII
Programming Memory Channels
13
77
Programming Memory Channels
The radio has lots of different types of memory channels. In the Programmer, these all
program in a spreadsheet dedicated to that "type" of memory.
Use the links to access details for any one of these.
Regular memory channels - The several hundred all radios have these
days. The ones you will use most often.
Home Channels - These are special memory channels that have one button
access from the face of the radio.
Limit Memories - These memory channels can be used as "regular"
memories giving you that many more memory channels for individual use;
however, these also control the top and bottom range of scanning when you
begin scanning on one of these.
VFO Memories - Settings for VFO operations when the file is first sent to the
radio. This channel has no one button recall on the radio and will change
when the tuning knob is used. To be able to recall settings at any time, use
the Regular Memory Channels.
One Touch Memories - .Ten special memory channels that are accessed
through the touch of a single button when the One Touch Memory Mode is
activated. These memories differ from Home channels, which are also
accessible through one key stroke, in that the Home channels are limited to
one per band while One Touch Memories will store any combination of
frequencies from any operating band.
HyperMemories - Ten special memories that contain details for both Band
A and Band B memory channels.
Details on the special editing abilities of the Programmer are included in the Easy
Editing in the Grid section. Review these details to make data entry even easier.
At any time, these topics are available from the Table of Contents at the left.
© 2013 RT Systems, Inc.
78
13.1
VX-7 Programmer Help
Home Channels
One Home channel memory is available for each band of the radio. The Home channel
provides convenient, one-touch access to your most often used frequency in each
band. Home channel memories are programmed on the Home tab of the Programmer.
The information to be programmed for the Home Channels is the same as that for the
regular Memories. See Regular Memory Channels for the details.
Once programmed and sent to the radio, the Home channels are recalled by pressing
the [Mon/F] then the [Hm/Rv] key while operating in either VFO or Memory Mode. The
radio will access the Home channel for the band on which you are currently operating.
Note, the UHF (430) Home channel is the one used during
"Emergency channel operations". Plan carefully if you are using the
Emergency operations feature of the radio along with other Home
channel activities.
© 2013 RT Systems, Inc.
Programming Memory Channels
13.2
79
HyperMemories
The radio has ten special hypermemory channels that hold detail for Band A and Band
B memory channels. These memories provide immediate recall for special
applications.
Details for the hypermemories are set on the screen accessed by selecting the
Hypermemories tab at the bottom of the screen. The details to be completed are the
same as those for regular memory channels. See the section in this Help on Regular
Memory Channels for details on these settings.
Once set, hypermemories are accessed from the face of the radio by setting the
Special Memory Menu to "4 HYP". Then select the hypermemory to be used with the
number keys of the keypad.
© 2013 RT Systems, Inc.
80
13.3
VX-7 Programmer Help
Limit Memories
This feature allows you to set sub-band limits for either scanning or manual VFO
operation.
For example, you might wish to set up a limit (in North America) of 144.300 MHz to
148.000 MHz so as to prevent encroachment into the SSB/CW "Weak Signal" portion
of the band below 144.300 MHz. Then when you scan using this limit pair, you will
begin scanning at 144.300 and continue to scan up to 148.000 before returning to
144.300 to begin the cycle again.
The Limit Memory channels are entered on the Limit Memories page accessed through
the tab of the same name at the bottom of the screen. The same information as that
entered for any memory channel is entered for these. See the Regular Memory
Channels section for the details about the information to be entered. In the Limit
Memory channels, Step becomes much more important since you plan to begin
scanning from one of these channels. Remember that scanning will increment the
frequency by the value in the Step field. Choose your value to be sure you do not miss
channels in your range.
Some options for scanning can be set from the Programmer. These are global items
that are accessed from Settings | Radio Menu Settings from the menu at the top of the
screen. Once on the Settings screen, scanning functions are found on the first screen
that opens, the Common screen.
© 2013 RT Systems, Inc.
Programming Memory Channels
13.4
81
One Touch Memories
Ten special memory channels that are accessed through the touch of a single button
when the One Touch Memory Mode is activated.
These memories differ from Home channels, which are also accessible through one
key stroke, in that the Home channels are limited to one per band while One Touch
Memories will store any combination of frequencies from any operating band.
One Touch Memories are entered into the Programmer on the screen accessed by
selecting the One Touch tab at the bottom of the screen. The details to be entered are
the same as those for Regular Memory Channels. See the section on Regular Memory
Channels for details on the settings for these channels.
© 2013 RT Systems, Inc.
82
VX-7 Programmer Help
13.5
Regular Memories
The Main window of the Programmer is designed for memory channel entry.
All details associated with the memory channels are programmed from this screen.
These are not all the functions of the radio. Other features are set once for the radio to
use no matter which memory channel you're on, if you're in VFO mode, or if you're
operating on the Home channel (ie, whenever the radio is in use.) These items are set
on the Settings screen accessed through Settings | Radio Menu Settings from the
menu at the top of the screen. There are lots of other options to be set.
Columns continue off the right side of the window. Use the bar at the bottom of the
screen to move to these columns or press ENTER to step through each column.
Columns can be hidden using the selections of the Preferences screen. Select Settings
| Preferences in the menu to access this screen. These columns remain hidden in this
and any other file (new or otherwise) until they are "unhidden" on the Preferences
screen. Information is entered into these columns automatically when a new frequency
is entered. The information in a hidden column is always there: it is just not visible.
Make programming extra easy. Try Simple Mode in the software for even less
to enter. The Programmers is a "Simple Mode" for quick memory channel entry. In
Simple Mode only the columns needed for the minimum information to set up the
channel are shown on the screen. Extra columns are hidden and filled with default
information. To put the screen into Simple Mode, select Edit | Simple Mode from the
menu. While in Simple Mode, you cannot access the Preferences screen. The
Programmer controls what columns are hidden while in this mode.
Details to be entered for Memory Channels
Receive Frequency: Enter a receive frequency for the memory channel.
Unacceptable frequencies cannot be entered into the Programmer. Cellular
frequencies are blocked. Memory channels can store any acceptable frequency in any
order (i.e., UHF can follow VHF or any other band order). The first memory channel
must be programmed.
While memory channels can be entered in any order, the sub-band many be used on
the amateur bands only, even if it is designated as the "Operating" band. Extended
coverage is only possible on the "main" band. Realize that memory channels
containing frequencies outside the range of the sub-band will not be displayed there as
they are on the main band. The radio will simply skip over that memory channel when
tuning in memory mode or scanning on the sub-band.
Transmit Frequency: Enter a specific transmit frequency or let the Programmer
© 2013 RT Systems, Inc.
Programming Memory Channels
83
calculate this frequency based on the offset. This field is always available; however the
transmit frequency for an "odd split" is the only value that must be manually entered.
Note: In the Programmer you can enter details for frequencies
outside the transmission abilities of the radio. However, the software
will not enable transmission on these frequencies. Transmission will
be possible only if the radio has been properly modified.
Entering a "Split" pair: When you are given information to program your radio, you
may be given a "pair" of frequencies (one for transmit and a different one for receive).
This pair is referred to as a split.
In a Yaesu radio, a split is truly "odd" if the difference between the two frequencies is
not evenly divisible by 50. If this is the case, the pair can be entered with a plus or
minus offset making the radio perform more efficiently. It also gives you back the
Reverse function should you ever need to listen to the input frequency for the repeater. If
this is the case, see the section on Using a Non-Standard Offset Frequency Value just
below in this help section.
This information is easily entered into the Programmer and sent to the radio.
First, enter the Receive Frequency into that column of the Programmer.
This will be the frequency that you list on.
Press Enter. The Programmer will fill the remaining columns with default
information which may or may not be right for your particular situation.
The Transmit field will be active as indicated by the dark border. Enter the
Transmit Frequency from the information you have into this field. (Note:
Simply type the first number of that frequency. The field will change without
having to erase what is there.)
Press Enter.
The Programmer will set the Offset Frequency and Offset Direction as
needed for this pair. Ignore these two columns. The information in these
two columns may change when the file is opened again if the offset can be
figured to a 50kHz value and the direction set to plus or minus. This gives
you back functionality on the radio that is lost with a channel marked "Split".
If you see this change, ignore it. The radio will function exactly the same
when you use it with these different settings.
You are finished with this entry unless you need to enter Name, Tone, or other details
for this memory channel.
Offset Frequency: Standard offsets include 100, 500, and 600 kHz and 1.0, 1.6, 3.0,
5.0, 7.6 and 99.0 MHz. The default Offset Frequency depends on the band of the
© 2013 RT Systems, Inc.
84
VX-7 Programmer Help
Receive Frequency being entered (i.e., 2M Band is 600 kHz, 430 Band is 5.0 MHz,
etc). Yaesu radios can use an Offset Frequency of any value in 50 kHz steps (i.e., any
value ending in .x00 or .x50 where x is any digit from 0 to 9) with a Plus or Minus Offset
Direction.
A nonstandard Offset Frequency value is entered by typing that value into the Offset
Frequency field after the Receive Frequency has been entered for that channel. Then
select Plus or Minus in the Offset Direction column and watch the Programmer
calculate the Transmit Frequency.
Values would be entered as an exact number including the decimal to denote kHz.
Given the pair 146.650 and 147.300
The Offset Frequency entered would be .650 (decimal six five zero).
Without the decimal, an error is raised in the Programmer that a valid Offset
Frequency should be entered.
The Offset Direction would be set to Plus
As another example:
The pair 147.255 and 145.940 could not be entered with an Offset
Frequency and an Offset Direction.
The resulting offset for this pair us 1.315 MHz, which is not on a 50 kHz step
(does not divide evenly by 50).
This pair requires entry of both the Receive and Transmit frequency with the
Offset Direction set to Split.
In this case, any value that appears in the Offset Frequency column will be
ignored by the radio when it uses this memory channel.
Offset Direction: This function denotes how the receive and transmit frequency differ.
Simplex - transmit and receive frequencies are the same;
Minus - the offset is subtracted from the receive frequency;
Plus - the offset frequency is added to the receive frequency;
Split - for a non-standard offset. The user enters both the receive and transmit
frequencies.
Operating Mode: Assign FM, AM, or WFM as appropriate for the frequency.
Name:Enter an Alpha/Numeric tag (up to 8 characters) to a memory channel to provide
© 2013 RT Systems, Inc.
Programming Memory Channels
85
an easy reminder of the function of a particular channel. The name is displayed
automatically when you are operating in large characters.
Note: To toggle the display to large characters press the [MoniF] key
followed by the [Main] or [Sub] key repeatedly through double-size
(frequency only) then large (frequency and name) characters. The
name is not displayed when operating in Dual Receive mode or
when in mono receive mode with double-size characters.
Tone Mode: Use of the tone systems of the radio allows for silent monitoring until a call
is received with a corresponding tone. Tone mode also allows access to repeaters that
are made private with a PL tone. The radio offers CTCSS (Continuous Tone Coded
Squelch System) or DCS (Digital Coded Squelch) to be tailored to your particular
needs.
Use of either of the tone systems requires two steps:
1) Turning on the Tone Mode and
2) Selecting the CTCSS tone or DCS code from the values in the
appropriate column.
The Tone Mode options are:
None - No tone system activated. Even if the CTCSS Tone or DCS Code
column is set to the appropriate value, transmissions will not get through
unless this column is set to an appropriate function.
Tone - CTCSS tone generator is activated for transmission only (this mode is
used for many if not most repeater operations). When this option is selected,
the CTCSS column becomes available. Select the tone frequency from those
in the list. The value must be in the list. With Tone selected as the Tone
Mode, the value that appears in the DCS code column is ignored by the
radio.
TSql - CTCSS tone squelch is activated for both transmission and reception
(only signals "encoded" with the matching tone will open the squelch. Your
radio will remain silent otherwise). When this option is selected, the CTCSS
column becomes available. Select the tone frequency from those in the list.
The value must be in the list. The radio uses the frequency set in the CTCSS
Tone column for both Encode and Decode (transmission and reception) With
TSql selected as the Tone Mode, the value that appears in the DCS code
column is ignored by the radio.
DCS - Digital Coded Squelch mode is activated for transmission and
reception. When this option is selected, the DCS column becomes available.
Select the code from those in the list. The value must be in the list. The
radio uses the DCS Code for both transmissions and reception. With DCS
© 2013 RT Systems, Inc.
86
VX-7 Programmer Help
selected as the Tone Mode, the value that appears in the CTCSS tone
column is ignored by the radio.
D Code - Digital Coded Squelch mode is activated for transmission only.
With D selected as the Tone Mode, the value that appears in the CTCSS
Tone column is ignored by the radio. The radio uses the DCS Code set in the
DCS code column for transmissions only. Reception is open for any signal.
T DCS - CTCSS encode (tone squelch) is activated for transmission and
Digital Coded Squelch for reception. With T-DCS selected as the Tone
Mode, the values that appear in the CTCSS Tone and DCS Code columns
are both used by the radio. The CTCSS Tone selection is used for
transmissions while the DCS Code selection is used for reception. Be sure
that you set both the CTCSS Tone and the DCS Code once this option is
selected.
D Tone - Digital Coded Squelch is activated for transmission and CTCSS
decode for reception. With D - TSQL selected as the Tone Mode, the values
that appear in the CTCSS Tone and DCS Code columns are both used by
the radio. The CTCSS Tone selection is used for reception while the DCS
Code selection is used for transmission. Be sure that you set both the
CTCSS Tone and the DCS Code once this option is selected.
CTCSS Tone: This field is available when Tone Mode is set to Tone, T Sql, T DCS or
D Tone. Select one of 50 tone frequencies to be used in the Encode or Decode
modes. This value is set independently for each memory channel. A value that
appears in this field is ignored by the radio if one of the tone modes that uses CTCSS
is not activated.
DCS Code: This field becomes active when Tone Mode is set to DCS, D Code, T
DCS or D Tone. Select one of the 104 codes available for use when the radio is in
DCS mode. This value is set independently for each memory channel. A value that
appears in this field is ignored by the radio if one of the tone modes that uses DCS is
not activated.
Tx Power: The output power can be set individually set for each memory channel to
address the exact needs of each operation. Select Low,Low2, Low3, or High for each
memory channel. The power out for each of these settings varies for this radio
depending on its power source (battery or DC power supply) and frequency.
Skip: Marks selected memory channel to be skipped during scanning These channels
remain available for manual selection by turning the knob.
Off - The channel will be scanned for activity whenever scanning is done.
Skip - The channel will be skipped.
© 2013 RT Systems, Inc.
Programming Memory Channels
87
P-Scan - The channel is included in a special scanning group. These
channels are scanned when scanning is begun on a P-scan channel.
Step: The frequency that the radio is on changes by the value of the step when tuning
manually. This value is used by the radio in Memory Tune mode. This value is not
critical in memory mode since the original memory channel frequency can be retrieved
by exiting Memory Tune mode. In VFO, this value could keep you from returning to your
original frequency. Select from 5 / 10 / 12.5 / 15 / 20 /25 / 50 or 100 kHz steps as
needed. Auto is not included in the Programmer because when set to Auto, the radio
sets a value much as the Programmer sets that value based on the frequency entered
for the memory channel.
Note: There are some special exceptions for setting Step including
AM Broadcast band - only step values of 9.0 and 10.0 kHz are
available;
Air band - includes 8.33 kHz. This step value is not available in
other modes;
5 kHz - not available in 250 - 300 MHz range or above 580 MHz.
Clock Shift: Shifts the internal reference frequency slightly to eliminate "birdies" that
interfere on other channels.
Half Dev(iation): Check the box to engage Narrow (+ 2.5 kHz) Deviation as compared
to + 5 kHz normally or when this option is off. This change helps prevent interference
with other stations in a crowded environment.
Note: The receiver's IF filter bandwidth is not changed via this setting.
This setting will not enable the radio to perform on new commercial
channels that are on 2.5kHz steps. Those frequencies are reserved
for commercial use and are not available to amateur equipment.
Icon: Select the icon to use to identify this memory channel.
Note: To activate this feature, turn "Icon Set" to On (checked) on the
Display tab of the settings screen. "Icon Set" is a global setting that
affects all memory channels at once. It is a necessary part in setting
up this function.
Mask: A masked channel is not available for use either during scanning or when the
radio is tuned manually in memory mode.
Note: Masking a channel "hides" it until you "unmask" it from the
face of the radio or by sending a file with this option unchecked. Only
then will it be available for use. This is a good way to prevent another
user from accidentally accessing a channel or to store memories for
another area that are used only when you visit that place.
© 2013 RT Systems, Inc.
88
VX-7 Programmer Help
Bank: Check the box to assign a memory channel to a given Bank. More details about
using banks can be found in the Memory Banks section of this help.
A memory channel can be assigned to all Banks by checking all of the columns or it can
be omitted completely by not checking a box at all. When the radio is operated in
Memory Bank Mode only those channels assigned to the selected Bank will be
available for use and scanning.
There is no need to put all the memories in all the memory banks. All the memories are
available when you are not operating in a selected memory bank.
Note: If you are assigning channels to banks after you have entered
all of them, use Bank Settings (Settings | Bank Settings or Ctrl B) in
the Programmer to make access to these columns easier by hiding
several of the columns that are not needed for this operation. To
return all the columns to the screen, select Settings | Bank Settings
again.
Comments: An identifying comment up to 80 characters. This information is not
transferred to the radio.
© 2013 RT Systems, Inc.
Programming Memory Channels
13.6
89
VFO Memories
The VFO memories provide "temporary" memory channels for quick access. The VFO
memory is temporary since it is lost when the radio is tuned while in VFO mode.
Note: Remember, the VFO memory is temporary. The programmed
frequencies appear immediately after the file is sent to the radio. When
the radio is manually tuned in VFO mode, the programmed frequency
cannot be recalled as a memory channel frequency will be.
Programming the VFO memory from the Programmer can be particularly helpful for
reoccurring events for which the details of this channel are needed along with other
memory channels.
Memories do not have to be programmed into VFO before being programmed into the
memory channels when entering details in the Programmer. Memory channels are
programmed directly into the spreadsheet that appears when the Programmer opens.
To program the VFO memories, select the VFO tab at the bottom of the screen. Enter a
frequency that is appropriate for the band. The details that you enter will replace the
default of the radio. Simply type over the information shown to make the changes.
These channels must contain a frequency appropriate for the band. They cannot be
blank.
The defaults for the VFO memories are:
BC
SW
FM
V-TV
6m
2m
1.25
70cm
Air
Act1
Act2
0.54000
1.80000
59.00000
174.00000
50.00000
144.00000
222.00000
430.00000
108.00000
380.00000
860.00000
The defaults are offered for reference only. The VFO can contain any frequency that is
valid for the band.
The information to be entered is the same as that for regular Memories except that the
VFO’s do not have an alpha label available to be programmed. See Regular Memory
Channels for details of the fields.
In VFO mode, Step is important to ensure that you can tune manually to a certain
© 2013 RT Systems, Inc.
90
VX-7 Programmer Help
frequency. Pay careful attention to this column when programming the VFOs.
© 2013 RT Systems, Inc.
Part
XIV
92
14
VX-7 Programmer Help
Programming Other Set Menu Items
There is a lot more to this radio than just the memory channel.
Things like Beep, Squelch, ARTS settings, Lock, and APRS, just to name a few, are
set for the radio to use whenever it is being operated . . . no matter the channel or mode
(VFO or memory).
Radio Menu Settings are set from the Radio Menu Settings screens in the
Programmer. These screens are accessed by selecting Settings | Radio Menu
Settings from the menu on the main screen.
The Programmer offers three options for managing the global settings:
Set and forget - The Radio Menu Settings screens are there for you to use to
easily customize your radio to suit your use. Once you make your selections
and save them, you don't have to do it again, even it you start a new
frequency file.
Create and use multiple global settings files - This might be the best option if
you program the frequencies for several different people. You can customize
the global functions for the individual without having to recreate the frequency
file.
Save the settings as part of the file with the memory information - This might
be best if you are programming different frequencies AND different global
settings for different groups. You might even want to use this option if you
travel. How you use your radio at home may differ from how it should function
on the same frequency in another city. Then each time you travel, simply load
the corresponding file into the radio to have frequency and global settings as
you need them for where you're going.
The three options are discussed in detail below. Once you decide, set the Programmer
for the option that you want on the Preferences screen (Settings | Preferences) in the p
Programmer.
Set and Forget
This is the default of the Programmer.
Not using the Radio Menu Settings (Settings | Radio Menu Settings) settings can result
in your radio "acting funny" every time you program it. That's because something is
getting reset in the radio by a setting in this file.
© 2013 RT Systems, Inc.
Programming Other Set Menu Items
93
From the main screen of the Programmer, select Settings | Radio Menu Settings.
Explore these screens. If you fear you have made changes you don't want, click the "X"
at the upper right of the Settings screen. Answer No to the prompt to save. Then click
the "X" again to close. The screen will close without saving anything you have done.
Details for the options on this page are found on several pages of this help. Each page
contains the details for the options on that page. The pages in the TOC begin with the
words "Radio Menu Settings". The information there can help you decide how best to
customize a setting.
Once you complete your selections:
Click File | Save
If you are working in a default file (Untitled.rsf), you will be prompted for a
filename.
Enter a name for this file. This can be the same as the name you're using
for the memory channel information or it can be a name unique to these
settings. IKf you're at a loss, use "Settings".
Click Save to close the Save dialog
Click File | Exit to close the Settings screen.
The Programmer will take it from here making sure these customized settings go to the
radio along with the memory channel information.
Creating and using multiple global settings files
There may be global settings of the radio that you want configured differently for
different activities. You can make changes to your settings file and save it separately.
Having multiple memory channel files (."radio name") and multiple global setting files (.
rsf) gives you the ability to mix and match the features of your radio to suit your needs.
This makes it easy to customize the radio for a special event without disturbing the
original programming files. Then once the event is over, simply reprogram the radio
with the memory channel information and settings that you use everyday.
When a new file is begun, the same settings used in the last settings file saved will
be used automatically. You need not re-enter the settings each time, nor are you forced
to always begin a new file by renaming an existing file. You need only enter memory
channel details.
To select a settings file for use:
Select Settings | Radio Menu Settings from the main page of the
© 2013 RT Systems, Inc.
94
VX-7 Programmer Help
Programmer.
From the Radio Menu Settings screen, select File | Open. A list of settings
files will be presented. - Do not change the Files of Type selection at the
bottom. The Programmer presents appropriate files to choose from.
Select the file you want to use and click Open.
Verify that this is the settings file that you want to use. Check also that the
proper filename appears in the titlebar at the top of the Menu Settings
window.
Click File | Save to reset the Programmer to use this file.
Select File | Exit to close this screen. These settings will be sent to the
radio with the memory channel file until you change this file selection again.
Save the settings as part of the file with the memory
information
You have the option of saving the global settings with the memory channel information.
This feature is good two ways. First, if you think that you'll always use only one file for
programming and you are more comfortable knowing that EVERYTHING that is going
to the radio is in this one file, select this option. Second, if you are programming
similar, but not identical, memory channel information for people who use their radios
very differently, keeping Radio Menu Settings in the file with the memory channel
information would reduce the chance of programming a radio incorrectly.
Keep menu settings and frequencies in a single file. (option)
From the main screen of the Programmer, select Settings | Preferences
Click OK to close this screen.
From the main screen of the Programmer, select Settings | Radio Menu
Settings.
Make changes as needed.
Click Close | Apply changes and close (if you want to save) or Discard all
changes and close (if you think you're made mistakes and need to return to
the last time you saved this file).
Remember, with each new file created the Radio Menu Settings return to factory
defaults. You must set these option for EACH memory channel file created.
© 2013 RT Systems, Inc.
Programming Other Set Menu Items
95
Another feature of this option is the ability to use the settings from a settings file that you
already created.
From the Menu Settings screen, select External Setting Files
From that menu select Open
Select a settings file from the list presented. The settings file must be for
the same radio.
To set these to be used in this file, select Close | Apply changes and close.
The settings from the other file will be saved to this file and sent to the radio with this
memory channel programming.
© 2013 RT Systems, Inc.
96
14.1
VX-7 Programmer Help
Radio Menu Settings - Toggles
ARS Enable - Indicates that the ARS function of the radio is enabled. This function is
not set in the Programmer; however, it will show that the setting is active when it is read
from the radio.
ATT - Enables or disables the ATT (Front end attenuator) that will reduce all signals
and noise by 20 dB which may make reception better in a noisy setting. The options
are On (checked) and Off (unchecked). The default is Off.
Auto Power Off – Set the time after which the transceiver will automatically shut off in
an attempt to conserve battery life. Available values are Off, 30min, 1hr, 3hr, 5hr, 8hr.
Default is Off.
Auto Repeater Shift (ARS) - Enables/ disables the Automatic Repeater Shift function.
This function causes the offset to be set automatically as the radio changes frequencies
in VFO mode. The default is On.
Auto RX Mode - Enable or disable the radio’s ability to set the Rx mode to Narrow
FM, AM, or Wide FM automatically. When off, the user sets the receive mode manually
for a given receive frequency. The options are On (checked) and Off (unchecked). The
default is On.
Band: Sets the Main or Sub band for transmit.
Band Link - Enables or disables the Band Link feature that changes the frequency of
both bands at once when tuning in VFO mode. This feature requires that the VFO mode
is set to BAND and that the radio is being operated in Dual In-band receive. This
feature is disabled in the Programmer unless you read from a radio that has this feature
enabled.
Remember: If you plan to use the Band Link feature, VFO must be set
to Band. With Band Link set to On (as read from the radio), you
should not change the VFO setting in the Settings file if you want the
process to continue to work after the radio is programmed with this
file.
Beep - Enable an audible indication of an action or operation of the radio.
Bell – Set the number of rings for the bell that sounds when a call is received during
tone squelch operations. Available choices are Off, 1, 3, 5, 8, or Continue. The default
is Off.
Busy Channel Lockout - (BCLO) Enables or disables the Busy Channel Lockout
feature that prevents the radio’s transmitter from being activated if a signal is being
© 2013 RT Systems, Inc.
Programming Other Set Menu Items
97
received. The options are On or Off. The default is Off.
Busy LED – Enables or disables the LED ‘strobe’ that appears when the squelch is
open. The options are On (checked) or Off (unchecked). The default is On.
Ch 1 User Write - This option is not available to be set from the Programmer.
DTMF Dialer - Enables or disables the DTMF Autodialer feature to allow transmission
of DTMF tones for autopatch or Internet-link access. The values are On and Off. The
default is Off.
Note: The tones that will be transmitted are entered into the DTMF
fields at the bottom of the screen. Allowable characters are 0-9, A, B,
C, D, *, # and space (for a pause).
Dual Receive - Enables or disables reception of two frequencies at once: Main band
and Sub band. Options are On (checked) or Off (unchecked). The default is On.
Note: Alphanumeric display will not appear when this option is
enabled.
Edge Beep – Enables or disables the audible tone that sounds when the radio
reaches a band edge during scanning. The options are On (checked) and Off
(unchecked). The default is Off.
Home\Reverse - Enables or disables the function of the [HM/RV/(EMG)] button. When
that button is pressed, the radio will complete one of the following options:
Home – Instantly recall a “Home” channel
Reverse – Reverses the transmit and receive frequencies (Default Checked)
HyperWrite - Enables or disables the Hyper Write feature that writes the current
configuration of the radio into a special "Hyper" memory bank. Available options are
On (checked) and Off (unchecked). The default is On.
Internet - The radio can be used to access the WIRES Internet system. See Internet
(WIRES) Functionality of this Help for details of this functionality and the option
settings.
Lock - Enable locking as set in the Lock Mode set in the field. The options are On
(checked) or Off (unchecked). The default is Off.
Lock Mode - Set the lockout combination for the Lock function. Select from
Key – The front panel keys are locked
© 2013 RT Systems, Inc.
98
VX-7 Programmer Help
Dial – The dial on the top panel is locked
Key + Dial – Both the keypad and dial are locked
PTT – The PTT switch is locked and transmission is not possible
Key + PTT – Both the keys and the PTT switch are locked
Dial + PTT – Both the dial and the PTT switch are locked
All – The front panel keys, the top panel dial and the PTT switch are all
locked.
Note: The radio cannot be programmed if the keys are locked. If once
you are in CLONE mode and nothing happens when the PTT is
pressed (i.e., the display of the radio does not change), turn the radio
off and back on in regular mode to check for and if necessary turn off
the Lock function.
Mic Monitor - Enables or disables the Microphone Monitor feature that allows you to
monitor your voice signal using the optional VC-27 Earpiece/Microphone.
Note: This option is not available to be set through the Programmer.
The field will be enabled if the setting is On when the file is read from
the radio. The only option in the Programmer will be to uncheck the
field and turn the option setting to Off. Once unchecked in the
Programmer, the field becomes unavailable.
Moni\TCall – Sets the function of the [MONI] key (the one just below the [PTT] key).
When that button is pressed the radio will complete one of the following options. The
default is Moni.
Moni – Open the squelch to allow weak signals to be heard
T-Call – Activated a 1750-Hz burst tone used for repeater access in many
countries
Note: Making a change to this setting does not affect the ability of the
radio to access the startup set menu or to enter CLONE mode.
Moni/F Change - Interchanges the functions of the [MoniF] key on the front of the radio
and the Moni key on the side of the radio.
Unchecked - The [MoniF] key on the front of the radio is the FUNCTION key
and the Moni key on the side of the radio performs the "Monitor" function.
Checked – The [MoniF] key on the front of the radio performs the "Monitor"
function and the Moni key on the side of the radio is the FUNCTION key
© 2013 RT Systems, Inc.
Programming Other Set Menu Items
99
Rx Save - Set the Receive-mode battery saver interval that controls the "sleep"
function. This battery saver mode puts the radio to "sleep" at times of little activity. The
radio then "wakes" at a given interval to listen for activity. The available values are Off,
200 ms, 300 ms, 500 ms, 1 second, or 2 seconds. The default is 200 ms.
Scan Lamp - Enables or disables illumination of the LCD Lamp whenever the scanner
stops on a signal while scanning. This allows you to see the frequency of the incoming
signal more easily in a low light setting. The options are On or Off. The default is Off.
Scan Resume - Set the condition for that will make scanning begin again after a
signal is received. Available options are described below. The default is 5 sec.
3/5/10 Seconds – Scanning will resume after the designated time even if the
signal continues.
Busy – Scanning will resume two seconds after the signal is lost
Hold – Scanning will be halted and will not begin again automatically when a
signal is heard.
Split Tone - Enables or disables split CTCSS/DCS tones. When one of the split tone
indicators is set and saved for a memory channel, this selection is set automatically.
The default is Off.
Squelch - Adjust the RF Squelch threshold level. As the squelch level is increased,
weaker signals are not heard. If after you download to the radio and it receives
continuously or does not receive an expected signal, an increase in or reduction of this
setting may be necessary.
Sub Band Mute - Enables or disables the Auto Mute feature while using Dual Band
reception. The options are On (checked) and Off (Unchecked). The default is Off.
Time Out Timer - Set the maximum time of continuous transmission after which the
radio is forced back into receive mode. Available values are Off and 1, 2.5, 5, and 10
minutes. The default is 2.5 minutes.
TxSave – Enables or disables the Transmitter Battery Saver function that automatically
lowers the power output level based on the strength of the last signal received. The
options are On (checked) and Off (unchecked). The default is Off.
VFO - Sets the VFO band edge for scanning the current band. The available values
include:
All – When the VFO frequency reaches the high edge of the current band,
scanning will continue with the low edge of the next band
Band – When the VFO frequency reaches the high edge of the current band,
© 2013 RT Systems, Inc.
100
VX-7 Programmer Help
scanning will continue with the low edge of the current band.
© 2013 RT Systems, Inc.
Programming Other Set Menu Items
14.2
101
Radio Menu Settings - Display
Contrast – Move the slide to the right to increase the contrast of the display
Dimmer – Move the slide to the right to increase the brightness of the display.
Display 2x – Enable or disable double-size characters for the frequency during "mono"
band operations. Available values are On (checked) and Off (unchecked). The default
is On.
Remember, the Name tag will not be displayed with this mode
engaged.
Display Mode – Select the information to be displayed when the radio is off. While
other information is available, not all are available to be displayed when the radio is off.
The information that can be displayed includes:
None – No display when the transceiver is off.
Temperature – Display of the current time, plus temperature, when the
transceiver is off.
Baro – Display of the current time, plus barometric pressure, when the
transceiver is off. (Requires optional SU-1).
Alt1 – Display of the current time, plus current altitude, when the transceiver is
off. (Requires optional SU-1).
Temp + Baro – Display of the current time, temperature, and barometric
pressure.
Temp + Alt1 – Display of the current time, temperature, and altitude.
All – Display of the current time, temperature, barometric pressure, and
altitude.
Emergency – Sets the action of the radio when Emergency channel operation is
engaged. The available values are:
Beep + Strobe – The radio will emit a loud audible tone and the strobe will
flash
Beep – The radio will emit a loud audible tone
Strobe 1 - 5 – The strobe will flash in varying colors as set in the color
selection for LED 1 - 5
© 2013 RT Systems, Inc.
102
VX-7 Programmer Help
Beam – The strobe will be lit continuously
More details on this function of the radio can be found in the Emergency Operations
section of this help.
Icon Set – Enables or disables the icon display. The available values are On
(checked) and Off (unchecked). The default is Off.
Icon Select – Choose one of the 27 default icons to be displayed for each band. Icons
28 - 30 are custom displays that are created with the Icon Editor on the Settings | Icon/
Font tab.
Lamp Mode – Set when the LCD/keypad lamp will be lit. Available options are:
Key – Illuminates the lamp for 5 seconds when any key is pressed
Continuous – Pressing the [LAMP] key to toggle the lamp On/Off
Off – The lamp is disabled
Language – Set language for the display to English or Japanese. The default is
dependant on the version of the radio.
Meter and Sub Meter Symbol – Selects the S and TX power meter symbol. Select
from S1 to S5 or Char corresponding to the symbols depicted on page 76 of the Users
Manual.
The STROBE features of the VX-7 lights to indicate that a certain function of the radio
is engaged. The displayed color can be adjusted to provide a custom-designed color
hue. Click on LED# to display available colors from which to choose. Then assign a
color to each of the functions as detailed below.
Main Busy Strobe – Sets the color displayed by the strobe while the squelch
is open on the Main band. Available values are 1-10. The numbers
correspond to the standard colors available as defaults with the radio or to
the custom colors displayed on the right.
Sub Busy Strobe – Sets the color displayed by the strobe while the squelch is
open on the Sub band. Available values are 1-10. The numbers correspond
to the standard colors available as defaults with the radio or to the custom
colors displayed on the right.
Dual Busy Strobe – Sets the color displayed by the strobe during Dual
Receive operation. Available values are 1-10. The numbers correspond to
the standard colors available as defaults with the radio or to the custom
colors displayed on the right.
© 2013 RT Systems, Inc.
Programming Other Set Menu Items
103
Main Tx Strobe – Sets the color displayed by the strobe while transmitting on
the Main band. Available values are 1-10. The numbers correspond to the
standard colors available as defaults with the radio or to the custom colors
displayed on the right..
Sub Tx Strobe – Sets the color displayed by the strobe while transmitting on
the Sub band. Available values are 1-10. The numbers correspond to the
standard colors available as defaults with the radio or to the custom colors
displayed on the right.
Charge Complete – Sets the color displayed by the strobe when battery
charging is complete. Available values are 1-10. The numbers correspond to
the standard colors available as defaults with the radio or to the custom
colors displayed on the right.
© 2013 RT Systems, Inc.
104
VX-7 Programmer Help
14.2.5 Emergency Operations
Emergency Operations
The radio has an Emergency feature that must be activated from the face of the radio.
This feature would be helpful for finding someone lost, but not incapacitated, or for
alerting others traveling with you of a danger in your vicinity.
The Emergency feature is activated by pressing and holding in the [Hm/RV] key for 1/2
second.
When this is feature is engaged
The radio is placed on the UHF amateur band Home channel (be sure
everyone in the group is on the same frequency);
The radio emits a loud "Alarm" sound (the volume is controlled by the VOL
knob);
The Tx Busy led of the radio flashes bright white;
The emergency feature can be disabled temporarily when the PTT is
pressed allowing for transmission on the UHF Home channel frequency;
and
The emergency feature automatically begins again 2 seconds after the
transmission has ended.
Using the settings of the Emergency option on the General tab of the menu settings
screen (Settings | Radio Menu Settings | General) select the alarm used when the
Emergency function is engaged. Available values include the following with a default of
Beep+Strobe.
Beep+Strobe: Loud alarm sounds along with flashing of the Busy Tx led
Beep: Loud "Alarm" sounds.
Strobes 1- 5: The Busy Tx led flashes bright white.
Beam: The Busy Tx led glows continuously in white.
© 2013 RT Systems, Inc.
Programming Other Set Menu Items
105
14.2.6 Emergency Settings
Contrast – Move the slide to the right to increase the contrast of the display
Dimmer – Move the slide to the right to increase the brightness of the display.
Display 2x – Enable or disable double-size characters for the frequency during "mono"
band operations. Available values are On (checked) and Off (unchecked). The default
is On.
Remember, the Name tag will not be displayed with this mode
engaged.
Display Mode – Select the information to be displayed when the radio is off. While
other information is available, not all are available to be displayed when the radio is off.
The information that can be displayed includes:
None – No display when the transceiver is off.
Temperature – Display of the current time, plus temperature, when the
transceiver is off.
Baro – Display of the current time, plus barometric pressure, when the
transceiver is off. (Requires optional SU-1).
Alt1 – Display of the current time, plus current altitude, when the transceiver is
off. (Requires optional SU-1).
Temp + Baro – Display of the current time, temperature, and barometric
pressure.
Temp + Alt1 – Display of the current time, temperature, and altitude.
All – Display of the current time, temperature, barometric pressure, and
altitude.
Emergency – Sets the action of the radio when Emergency channel operation is
engaged. The available values are:
Beep + Strobe – The radio will emit a loud audible tone and the strobe will
flash
Beep – The radio will emit a loud audible tone
Strobe 1 - 5 – The strobe will flash in varying colors as set in the color
selection for LED 1 - 5
© 2013 RT Systems, Inc.
106
VX-7 Programmer Help
Beam – The strobe will be lit continuously
More details on this function of the radio can be found in the Emergency Operations
section of this help.
Icon Set – Enables or disables the icon display. The available values are On
(checked) and Off (unchecked). The default is Off.
Icon Select – Choose one of the 27 default icons to be displayed for each band. Icons
28 - 30 are custom displays that are created with the Icon Editor on the Settings | Icon/
Font tab.
Lamp Mode – Set when the LCD/keypad lamp will be lit. Available options are:
Key – Illuminates the lamp for 5 seconds when any key is pressed
Continuous – Pressing the [LAMP] key to toggle the lamp On/Off
Off – The lamp is disabled
Language – Set language for the display to English or Japanese. The default is
dependant on the version of the radio.
Meter and Sub Meter Symbol – Selects the S and TX power meter symbol. Select
from S1 to S5 or Char corresponding to the symbols depicted on page 76 of the Users
Manual.
The STROBE features of the VX-7 lights to indicate that a certain function of the radio
is engaged. The displayed color can be adjusted to provide a custom-designed color
hue. Click on LED# to display available colors from which to choose. Then assign a
color to each of the functions as detailed below.
Main Busy Strobe – Sets the color displayed by the strobe while the squelch
is open on the Main band. Available values are 1-10. The numbers
correspond to the standard colors available as defaults with the radio or to
the custom colors displayed on the right.
Sub Busy Strobe – Sets the color displayed by the strobe while the squelch is
open on the Sub band. Available values are 1-10. The numbers correspond
to the standard colors available as defaults with the radio or to the custom
colors displayed on the right.
Dual Busy Strobe – Sets the color displayed by the strobe during Dual
Receive operation. Available values are 1-10. The numbers correspond to
the standard colors available as defaults with the radio or to the custom
colors displayed on the right.
© 2013 RT Systems, Inc.
Programming Other Set Menu Items
107
Main Tx Strobe – Sets the color displayed by the strobe while transmitting on
the Main band. Available values are 1-10. The numbers correspond to the
standard colors available as defaults with the radio or to the custom colors
displayed on the right..
Sub Tx Strobe – Sets the color displayed by the strobe while transmitting on
the Sub band. Available values are 1-10. The numbers correspond to the
standard colors available as defaults with the radio or to the custom colors
displayed on the right.
Charge Complete – Sets the color displayed by the strobe when battery
charging is complete. Available values are 1-10. The numbers correspond to
the standard colors available as defaults with the radio or to the custom
colors displayed on the right.
© 2013 RT Systems, Inc.
108
14.3
VX-7 Programmer Help
Radio Menu Settings - General
ARTS - See the section on Auto Range Transponder System for details on this function
of the radio.
Baro / Alt Offset – The Barometric Pressure requires calibration so that differences in
pressure can be used to calibrate altitude. The procedure requires that you have a
calculated barometer and that you know your current altitude. Enter the calibrated
barometer value (in "hpa" units) and the true altitude at your location (in meters) into the
corresponding fields.
Baro Units – Select the unit of measure for display of the atmospheric pressure. The
available units include hpa, mbar, mmHg, and inch.
Channel Counter – The VX-7 has the ability to give a good indication of a
transmission frequency without knowing that exact frequency in advance. This feature
works when the VX-7 is close to the transceiver that is transmitting. Through a high
speed search the VX-7 identifies the strongest signal in the set range. The identified
channel is then written into a special "Channel Counter" memory.
The Channel Counter feature can be used only when the VX-7 is in
Mono mode.
With the radio set in a desired range, the receiver will scan across a set range above
and below the starting frequency until an acceptable signal is identified. If a signal is not
identified in the range, the radio will return to the beginning frequency when the Channel
Counter is disabled.
The Channel Counter option in the Programmer allows you to set the "sweep width" for
the channel counter function. The available values are 5, 10, 50, and 100 MHz. The
default is 5 Mhz. The radio scans in a range that is above and below the starting
frequency by the value set. More frequencies are scanned by the radio when the range
is set to a higher value.
Sensor Display – The VX-7 can display various information while the radio is
operating in Mono band mode: except the Weather Forecast mode. With the sensor
mode enabled, the measurements are calculated continuously. Available selections
include:
TIME: Displays the current time
DC: Indicates the batter type and voltage
TEMP: Display the current temperature inside the transceiver’s case
WAVE: Depicts the Rx and Tx audio waveform
© 2013 RT Systems, Inc.
Programming Other Set Menu Items
109
BARO: Displays the barometric pressure and relative changes in the
pressure: 2 bars per hour. (Optional SU-1 required)
ALT1: Displays the altitude (Optional SU-1 required)
WX: Displays the weather forecast (Optional SU-1 required)
OFF: Disables the sensor (information and display)
Special Select – Puts the radio into one of several Memory Modes available.
Available values are:
MR Group – Memory Groups. Once in this group, the exact memory group is
selected on the radio after the file has been sent to the radio.
OTM - One-Touch Memories. Once this group of memories is selected, the
exact memory is selected on the radio after the file has been sent to the
radio.
HyperMemory -- . Once this group of memories is selected, the exact channel
is recalled by pressing the appropriate number on the radio after sending the
file to the radio.
BC Station - Short-wave Broadcast Station Memory Channel Bank. Once this
group of memories is selected, the 89 available stations are accessed by
rotating the DIAL on the radio after the file has been sent to the radio.
Marine – VHF Marine Channel Bank. Once this group of memories is
selected the 280 available channels are accessed by rotating the DIAL on the
radio after the file has been sent to the radio.
Note: These Memory groups are available only if the radio is in Mono
band. When set up with the Programmer, the sub band frequency
remains available to receive in the UHF band. The frequency setting
for the sub band is set in the VFO memory for the UHF band.
Once the Special Select option is sent to the radio, it is turned off by
pressing [MoniF] then [9(SPCL)]. Although all of the options are
available, the [PTT] will respond only if Off is selected. This is normal
functionality for the radio in this mode.
Spectrum Analyzer – The Spectrum Analyzer allows the user to view operating
activity on channels above or below the current operating channel in VFO mode. The
display indicates the relative signal strength on channels immediately adjacent to the
current operating frequency. The Spectrum Analyzer can be activated only while the
VX-7 is operating in Mono band mode. The options to be set are:
Mode – Set to Single to sweep the band once or to continuous to sweep the
© 2013 RT Systems, Inc.
110
VX-7 Programmer Help
current band repeatedly until the process is manually halted.
Channel Span – Sets the bandwidth to be scanned. Select from 5, 8, 14, 29,
or 60 channels to be scanned above and below the center frequency.
Audio Center Freq. – Enable audio output on the center (beginning)
frequency when the Spectrum Analyzer is engaged.
Temperature / Altimeter – Select the units to be displayed for the Temperature and
Altimeter. Available are
Temperature: Celsius (C) or Fahrenheit (F)
Altitude: Meters (m) or Feet (ft)
Timer – The VX-7 has the ability to turn on or off automatically at a preset time. The
clock of the VX-7 must be set before this feature can be used. Available options for this
function include an On time and an Off time, a check box to enable either or both, and
an option for an alert that sounds at a given time.
VOX – The VOX system provides automatic transmit/receive operations based on
voice input into the microphone of the radio. There is no need to press the PTT to
transmit when VOX is enabled. Options that affect VOX operations are:
Vox Sensitivity – Set to High, Low, or Off to control how much or little sound is
needed to cause the radio to transmit
Vox Delay – Set to .5, 1, or 2 seconds to control the transmit-receive delay
after cessation of speech for VOX operations.
Wave Monitor – With the Sensor Display set to Wave, the wave display can be
customized to display RX Signal, TX Modulation, or All. Default is ALL.
Note: When the Wave option is selected for the Sensor display, there
is no need to adjust the display unless lesser measurement display is
desired.
© 2013 RT Systems, Inc.
Programming Other Set Menu Items
14.4
111
Radio Menu Settings - Icon/Font
The VX-7 gives the user custom Icons with which to identify the band being used and
custom fonts that can be used as alpha-numeric tags and as a customized S or Tx
power meter symbol. These are entered in a typical grid type editor found on the Icon/
Font tab of the Settings file.
Icon Editor - Enter and save up to three custom drawn icons for use in identifying
bands in a way that may be easier for you. Once drawn and saved, these icons are
available to be assigned as numbers 28 through 30 of the Icon Select list on the
Display tab of the Settings file.
Font Editor - The VX-7 has the ability to save five custom "fonts" for use by the S and
Tx Power meter symbol display or for the alpha-numeric tag. Once drawn and saved,
these "fonts" are set from the settings menu in the radio.
Marks are made in the editor with the left mouse button and are removed with the right
mouse button. Holding the Shift key and the mouse button repeats the draw or remove
process (i.e., you draw or erase continually).
Check Show Guides to show 5 X 5 grids in red to guide drawing. These grids are not
saved as part of the Icon or Font.
© 2013 RT Systems, Inc.
112
14.5
VX-7 Programmer Help
Radio Menu Settings - Wx Names
Wx Names: The Programmer for the VX-7 lets you enter names for the ten preprogrammed NOAA weather channels.
Use the Wx Name page of the Settings screen to label these memories for easy
identification. These names can be entered only from the Programmer. Enter up to
8 characters to identify each.
Just as with the Name for a memory channel, the weather channel name is
displayed only if the radio is in Mono mode (Dual receive disabled) with a normal
display (not 2x display).
These names are displayed when the weather band is selected from the radio’s
keyboard with the [MoniF] and [3(Wx)] keys.
Wx Alert – Enables and disables receipt of the warning sent by NOAA during extreme
weather disturbances. This alert includes a 1050 Hz tone followed by the weather
report.
© 2013 RT Systems, Inc.
Part
XV
114
15
VX-7 Programmer Help
Computer / Radio Data Transfer
Data flow two ways: from the computer to the radio or from the radio to the computer.
Even when you are sending a file to the radio, some data must be sent from the radio
to the computer to ensure that the two are "talking" before transfer of the file ever gets
started.
In all cases, be sure to follow the directions presented on the screen carefully.
The wrong button press can result in a failure to transfer the data.
Details for this process are contained in these sections:
Communications | Get Data From - Always the best place to start. Even if
there is nothing in your radio. It gets the data "flowing" between the two.
Communications | Send Data To - This process programs the radio with the
details of the file that is on the screen. If the file is blank, you will have a blank
radio. Be sure you see your frequencies on the screen before you start this
part of the process.
Radio to computer cabling - Check the photos to be sure you are using the
correct cabling for your radio.
Comport Setup - The RT Systems' Version 4 Programmer does not have
comport setup. The program finds the USB cable automatically. This section
contains some troubleshooting details that you might find helpful.
© 2013 RT Systems, Inc.
Computer / Radio Data Transfer
15.1
115
Communications | Get Data
Uploads the contents of the radio memory to the computer. This function is often
referred to as "reading" the radio since memory information is "read" from the radio.
The radio must be connected to the computer with the cables that address its specific
programming jack. Details of that cabling can be seen in the Radio to Computer
Cabling section of this help.
Be sure the battery is fully charged. Loss of power during Programmer could result in
a reset radio.
This process is completed in two parts.
1). The first screen that opens has details for putting the radio into Clone mode. The
screen shown in the help serves as an example.
Read the screen carefully. The steps to put the radio into clone mode
differ with each model. Pressing the wrong button will result in no
response or the wrong response for the process.
Once the radio is in CLONE mode, click OK on the computer to continue
this process.
2). A second window opens with the last instruction for the process.
Read the screen carefully. The steps to put the radio into clone mode
© 2013 RT Systems, Inc.
116
VX-7 Programmer Help
differ with each model. Pressing the wrong button will result in no
response or the wrong response for the process.
A transfer status bar is displayed on the computer immediately to let you know
that the computer is receiving the data being sent from the radio. If the "blue/green
bar" does not appear and fill, cancel the process and try again.
When the Get Data From process is complete, the Programmer will return to the
spreadsheet of the main window where the information taken from the radio is
displayed. This information is ready to be edited and saved.
The radio can remain connected to the computer while changes are being made in the
Programmer. These changes are not reflected in the radio until you complete the Send
Data To process in the Programmer.
If you are doing major editing, turn the radio off and remove the cloning cable. Then
return to the Programmer for editing the file. Once your editing is complete, connect the
radio to the computer and complete the Send Data To process to transfer the changes
to the radio.
Troubleshooting
Using the RT Systems' software and new USB cable, there is really only one error that
you may see occasionally when transferring data to or from the radio.
Once you click OK on the first "Get Data From" screen, the following window may
appear indicating a communications error.
© 2013 RT Systems, Inc.
Computer / Radio Data Transfer
117
Click OK and attach the correct cable. Then try the process again.
Be sure you are using the RT Systems' USB-57B. The Version 4 program will work
with no other USB.
Be sure to wait long enough for Windows to acknowledge the cable and let you know
that your hardware is attached and ready to use.
Should the problem persist, contact RT Systems tech support for assistance.
© 2013 RT Systems, Inc.
118
15.2
VX-7 Programmer Help
Communications | Send Data
Sends the contents of the current file and the settings file to the radio.
Note: In the Version 4 Programmers you can have files open for
several different radios at one time. The Programmer can send a file
only to the radio it is for. The extension of the file tells you which
radio it is for.
You can open and send a file created for one radio to another;
however, you must open that file as one for the receiving radio. See
the File | Open section of this Help for details on this process.
Current File
The Programmer can work with several radio files at one time. There is no need to
close extra files before executing the Send Data To process.
The current file will be sent to the radio during the Send Data To process. The current
file is the one that appears in the main window of the Programmer. Basically, what you
see on the screen is what is sent to the radio.
Settings File
Check your global settings under Settings | Radio Menu Settings to be sure the right
information is being sent. The items on this screen are the radio settings that are not
associated with a specific memory channel.
These settings are set once to be sent to the radio with any file that you create. Details
on these settings can be found in the Radio Settings options of this Help.
If the radio "acts funny" after it is programmed, check the Radio Menu Settings.
Make changes to the settings as needed.
Save the settings file.
Do Communications | Send Data To with the same memory channel file.
The settings will be sent with the memory data.
Completing the Send Data To Process
© 2013 RT Systems, Inc.
Computer / Radio Data Transfer
119
When you execute the Radio | Send Data To command, you are presented with
instruction for putting the radio into clone mode.
Read the screen carefully. The steps to put the radio into clone mode
differ with each model. Pressing the wrong button will result in no
response or the wrong response for the process.
Follow the steps on this screen. When you click OK a progress bar appears letting you
know that the process is being completed.
When the transfer is complete, the transfer status window disappears and the
Programmer returns to the Main Window.
With the radio off, remove the cloning cable. The radio is ready to power-up and use
with the newly programmed settings.
Note: The radio may be in VFO mode even after it is programmed.
This is a normal mode of the radio and the one you found it in the first
time you turned it on.
If the radio did not report an error and the "blue bar" filled without
error during the Send Data To process, the radio is programmed.
Change the radio into Memory mode (generally pressing an MR, V/M
or D/MR button on the face of the radio). Once in Memory mode you
will see the channels programmed into the radio.
Troubleshooting
© 2013 RT Systems, Inc.
120
VX-7 Programmer Help
Communications | Get Data From Radio required first
The first time you attempt to send your file to the radio, this message may appear.
This indicates that you have not read the configuration of the radio into the
Programmer.
There are details that the Programmer can get only from the radio. Even if the radio is
not yet programmed, these "background" details are necessary for the Programmer to
send a file to your radio successfully.
To complete this process:
1) Select File | New from the menu at the top of the screen.
2) Turn off the radio.
3) Select Communication | Get Data From Radio from the menu at the top of
the screen.
4) Complete the process detailed on the screen.
5) Once the process is complete, click the tab at the top of the screen
showing your filename. The file that you want to send to the radio will be
displayed on the screen.
6) Select Communications | Send Data To Radio from the menu at the top of
the screen.
7) Complete the process following each step carefully to program these
channels into the radio.
Troubleshooting details can be found in the Troubleshooting section of this Help. If
necessary, contact RT Systems for assistance.
© 2013 RT Systems, Inc.
Computer / Radio Data Transfer
© 2013 RT Systems, Inc.
121
122
15.3
VX-7 Programmer Help
Radio to Computer Cabling
The radio must be connected to the computer with the proper cable. The Version 4
Programmer will work only with the RT Systems USB-57B. No other USB cable or USB
adapter with the serial cable will work with the Version 4 software.
This cable is easily identified by its yellow color, the USB connection with "RT
Systems" on the hood at the computer end of the cable, and a 4-conductor extended
3.5mm plug at the other end of the cable.
© 2013 RT Systems, Inc.
Computer / Radio Data Transfer
15.4
123
Comport Setup
In the Version 4 RT Systems' Programmers there is no comport setup. The software
finds the USB cable automatically.
Troubleshooting
When I select Communications | Send Data To, I get the following error:
The only cable configurations that work with the Version 4 RT Systems' Programmers
are
The RT Systems' USB cable; or
The RT Systems' original serial cable connected to the computer via the
RTS-03 USB to serial adapter.
Be sure to give the computer enough time to do its internal setup once the cable is
attached. On some machines this can take up to a minute (a long time in computer
time). Once the cable is ready for use, the program will continue into the steps for
transferring data between the radio and the computer.
Follow the steps carefully. They are unique to each radio and different for the same
radio for Get Data From or Send Data To.
If the problem persists although you know you have an RT Systems' cable securely
attached, contact RT Systems for assistance. An occasional cable needs a special
process done to them to make them work properly. The process is quick and easy to
complete.
© 2013 RT Systems, Inc.
Part
XVI
File Maintenance
16
125
File Maintenance
Just as in a word process or other Windows based program, you will create files in the
programmer for use in the radio. You can create as many files as the space on your
hard drive will allow.
Remember, with the exception of the Icom IC-7000, all other programmers erase
everything in the radio and replace it with what is in the file. Be sure everything you
want in the radio is in the file that is sent. This is an "all or nothing" process.
From the File menu at the top of the main window, select:
New - Create a new file in any Version 3 programmer you have installed.
Open - Open an existing file in any of the Version 3 programmers you have
installed.
Open Travel Plus Link - Active only if a list is open in Travel Plus. Accesses
that Travel Plus list. Details on this functionality are available in the ARRL
Travel Plus section of the help.
Close - Closes the current file.
Save - Saves the current file.
Save As - Saves the current file giving you the opportunity to enter a new
name. This creates a copy of the file and saves it with the new name you
entered.
Import - Advanced functionality that addresses data from a "flat" ASCII file.
Details on this process are found in the Import and Export section of the help.
Export - Extracts data from the programmer file to a "flat" ASCII file. Details
on this process are found in the Import and Export section of the help.
Print Preview - Lets you see the formatted information on the screen before it
prints.
Print - Prints the current file
Send File as E-mail - Sends the current file to RT Systems' tech support.
This functionality is dependant on the e-mail program of your computer.
Files 1-4 - Up to four files that you last worked in and saved.
Exit - Closes the programmer.
© 2013 RT Systems, Inc.
126
VX-7 Programmer Help
© 2013 RT Systems, Inc.
File Maintenance
16.1
127
File | Exit
Exits the Programmer.
If files have been changed, you will be prompted to save or cancel the Exit command to
avoid data loss in that file.
Yes - Exits the program saving the file.
No - Exits the program without saving any work done in the file since the last
time you saved.
Cancel - Halts the Exit option. The program returns to the open file.
© 2013 RT Systems, Inc.
128
16.2
VX-7 Programmer Help
File | New
Use this command for setting up a "clean slate" into which you enter memory
frequencies. A "clean slate" or default file will often have at least one channel
programmed on the memory channel screen. This is a factory default that is in your
radio when it is new. The information for this channel can be changed; however, in
most radios, channel 1 must be programmed.
Use the quick key command of Ctrl M for easy access to a new file.
If you have been working to create a file with memory channels, use File | New before
using Communications | Get data from to prevent losing all the work you have done in
this file. The Get data from process will replace the information in the open file with what
is in the radio.
Other Radio Menu Settings and a New File
The radio is more than just memory channels. There are features that are controlled
once for the radio. They cannot be customized for each memory channel. These
features are address in the programmer under Settings | Radio Menu Settings.
The settings for these features that were last saved are use whenever a New file is
created. There is no need to reset these features for each new file. If you have not
saved a settings file, factory these radio menu items are set to factory defaults( as if
you reset your radio).
Note: If you radio "acts funny" after you download to it (i.e., keypad
beeps are different, squelch is open, Scan resume settings are
changed, etc.,) you have not yet set these options in the Settings
portion of the programmer. To make these option settings
permanent:
Select Settings | Radio Menu Settings from the menu at the top
of the screen.
Personalize your options just as you did on the radio.
Select File | Save from the menu on the Settings screen.
Enter a filename when prompted and click Save.
Select File | Exit from the menu on the Settings screen.
You will not have to change these again unless you want them
to function differently.
© 2013 RT Systems, Inc.
File Maintenance
129
The settings file will change only if you read from the radio
(Communications | Get data from) and send that file back to the radio
(Communications | Send data to) without saving the memory
information that you retrieved. This is helpful if you are programming
a friend’s radio in which he has all these options set up as he wants
them.
The File|New command can be used to open several new files at once. Memory
channel information can be copied between these files (even from V3 to V4),
regardless of which radio they are for.
© 2013 RT Systems, Inc.
130
16.3
VX-7 Programmer Help
File | Open
Just as in a word processor or other Windows programs, the command opens a
previously saved file.
You are not limited to one programming file for your radio. Make as many as you want.
Then choose the one you want when you open the programmer.
Working with the programmers is a little different if you have one programmer or
several programmers installed on this machine. Click the topic for details on
Opening a file with the Version 3 or Version 4 programmer (One Version 3 or
Version 4 programmer installed)
The Version 3 and higher programmers allow you to "share" Version 3 and higher files
from other radios...even radios from other manufacturers. Click the topic for details.
Opening ANY Version 3 file
There have been many RT Systems' programmers over the years. The Version 3 or
higher programmers can open and convert files from those older programmers. Click
to topic for details.
Opening existing programming files (*.rdf or *.icf files)
© 2013 RT Systems, Inc.
File Maintenance
131
16.3.1 Opening files from older programmers
Opening existing programming files (*.rdf or *.icf files)
The Version 3 or higher programmers can open a file created with an original RT
Systems' ADMS or WCS programmer for the same radio.
In this example, a file for the Yaesu FT-60 that was created in the original ADMS-1J
programmer (an .rdf file) will be opened in the Version 3 programmer for the FT-60.
This process is the same in the Version 4 programmers although the screens will look
a little different.
Directory selections may vary on your system depending on your choices in the original
programmer. This example is designed based on defaults from the original
programmers.
To open an existing file from the original programmer:
In the V3 Programmer, select File | Open.
If you have several Version 3 programmers installed, you will need to select
FT-60 Radio Data File from the list in box that opens next. This step is omitted
if only one programmer is installed.
© 2013 RT Systems, Inc.
132
VX-7 Programmer Help
An Open Dialog appears
Since the Version 3 programmer is geared to look in its own directory, we
need to "find" the original file to be opened (We must change filing cabinet
drawers as the old analogy was described.) Use your mouse to left click the
down arrow to the right of the Look In box. A directory listing appears. The
one highlighted in the list simply indicates the "drawer" you are in now. Do not
be afraid. This is only a list from which we will make a selection. You cannot
hurt anything with these steps and actions.
© 2013 RT Systems, Inc.
File Maintenance
133
Use your mouse to left click on Local Disk (C) in the list. On your machine this
wording can vary a little. In general, you're looking for that "(C)" to know you've
made the correct selection.
What you see now are directories (the ones with the little yellow folders) and
files. Find the little yellow folder that says Yaesu next to it. Put your mouse on
it and Left click. Once Yaesu is highlighted, let go of the mouse button, move
the pointer to the Open button, then use your mouse to left click on the Open
button.
© 2013 RT Systems, Inc.
134
VX-7 Programmer Help
After clicking Open, the contents of the Yaesu directory appear.
In this example, there are lots of directories (the ones with the little yellow
folders) since all the original programmers were installed on this machine. In
your case, there is probably only one directory (little yellow folder). In either
case, find the FT-60 directory (the one with the little yellow folder and the
words "FT-60" next to it. Find the FT-60 directory. Point at it with your mouse.
Use the Left mouse button to click on it. Release the mouse button. Move the
pointer to the Open button. Left click the mouse once on the Open button.
© 2013 RT Systems, Inc.
File Maintenance
135
Yes, a blank screen appears. This is normal. At the bottom of that screen,
find the "Files of type" box. Use the left mouse button to click on the down
arrow at the right of that box. Select Old Radio Files (*.rdf) from that list. The
names of the available files will appear on the screen.
Use the mouse to point at the name of the file that you want to open. Click the
left mouse button once to select that file.
© 2013 RT Systems, Inc.
136
VX-7 Programmer Help
Release the left mouse button. Move the pointer to Open. Click the left
mouse button once to open the file.
All the data of the original file is converted into a new Version 3 file for the FT60.
Now, save this new file so you don't have to do this again every time. Also,
once saved as a new Version 3 file, you can use this data for other radios
once you have the Version 3 programmer for them. (Advanced feature
explained below). From the menu, select File then Save as from the list. Use
the left mouse button to make this selection.
© 2013 RT Systems, Inc.
File Maintenance
137
Enter a filename in the File name field at the bottom of this screen. Use your
left mouse button to click Save.
Note: Only files from the original ADMS-1J for the FT-60 Version 2
programmer can be accessed with the FT-60 Version 3 programmer.
Files ending in *.rdf for other Yaesu radios cannot be opened in the
FT-60 Version 3 programmer.
© 2013 RT Systems, Inc.
138
VX-7 Programmer Help
16.3.2 Opening a V3 or V4 file from a different radio
The Version 3 programmers have the ability to "share" memory channel information
between radios. It makes o difference if the radios are from the same manufacturer or
not. As long as both files are from an RT Systems' Version 3 programmers, they can
be used by the Version 3 programmer for any other radio.
To open a Version 3 file from a different radio:
The steps detailed here are based on the directory structure of this machine. Make
changes to directories as needed to locate files that you want to open.
Files that you create in Version 3 can now be shared easily with anyone else who has
a Version 3 programmer. Simply post the Version 3 file for anyone to download.
In this example, a file for the Icom IC-T81 will be opened to be sent to the Yaesu
FT-60.
Open the FT-60 Version 3 programmer.
From the menu at the top of the screen, select File | Open. A box appears
from which you select the programmer for the radio to be programmed (in
this case, the FT-60).
© 2013 RT Systems, Inc.
File Maintenance
139
An Open Dialog box appears. By default it is looking in the FT-60 directory
since it is trying to help you find an FT-60 programming file. You will change
directories to where the file is stored that you want to open. (Note: If you
received the file via e-mail or from an Internet site, you chose where it was
saved. Personalize the steps here to move to that location.)
When the contents of that directory are displayed, it probably will be blank
as shown. You have done nothing wrong. This is normal. The process is
still looking for an FT-60 file. From the Files of type field at the bottom of the
screen (the one highlighted blue in the figure above), select All files (*.*).
© 2013 RT Systems, Inc.
140
VX-7 Programmer Help
A listing will appear with more than just the file that you're looking for.
Everything in that directory is listed. Your file will be in the list. Select the
file from the list.
Click Open in the lower right corner.
The resulting file contains frequencies that can be sent to the FT-60. The
blanks represent frequencies that were removed during the conversion.
These frequencies would be invalid for the FT-60.
© 2013 RT Systems, Inc.
File Maintenance
141
Creation of this file did not disturb the original file. The memory channel information
was not removed from the original. A copy was made by the programmer for the
conversion.
You can edit the file. In this case it needs to be edited to be sure that memory channel
1 is programmed. You can remove the blank channels if you want. You can add
others.
Alternately, you can send this file to the radio just as it is...other than channel 1 needing
to be programmed with something allowable for the radio.
Once you have used this to program the FT-60, you can save the file or close without
saving depending on your needs for the data.
© 2013 RT Systems, Inc.
142
VX-7 Programmer Help
16.3.3 Opening a V3 or V4 file
Opening a file with the Version 3 programmer (One Version
3 programmer installed)
Select File|Open from the menu at the top of the screen.
A Windows Open dialog appears.
© 2013 RT Systems, Inc.
File Maintenance
143
Select the file that you want to open from the list presented. Click the Open
button at the bottom right. This files opens in the programmer.
Opening a file with the Version 3 programmer (More than
one Version 3 programmer installed)
Select File|Open from the menu at the top of the screen.
© 2013 RT Systems, Inc.
144
VX-7 Programmer Help
A window opens listing the programmers installed on this machine. Select
the radio from the list that will be programmed by this file being opened.
A Windows Open dialog appears with a list of the files for that radio.
© 2013 RT Systems, Inc.
File Maintenance
145
Select the file that you want to open from the list presented. Click the Open
button at the bottom right. This files opens in the programmer.
© 2013 RT Systems, Inc.
146
16.4
VX-7 Programmer Help
File | Print
Prints the Memory channel information of the displayed page of the current file (i.e., if
you are on the memories tab, the memory channel information is printed. Similarly, if
you are on the VFO tab, the VFO channel information is printed. )
When this command is selected, a print dialog will give you the opportunity
to setup your printer.
Hidden columns are not printed. A printout can be customized (including
increasing type size) by deliberately hiding columns before printing. To hide
column, select Settings | Preferences from the menu of the programmer.
Only memory channels that are programmed are printed. Your printout will
not include the blank channels in the file.
Use Print Preview to see what your printout will look like and how many
pages will be included before you send it to the printer. This new option will
help save lots of wasted paper.
© 2013 RT Systems, Inc.
File Maintenance
16.5
147
File | Print Preview
This new feature of the Version 3 programmers lets you preview the data to be printed
before you waste paper sending it to the printer.
With the file open that you want to print, select File | Print Preview.
You will notice first that the screen changes. It is filled with the data that will
be printed. This is just a temporary change. The order of your channels has
not been changed in the file.
Then the screen opens to display the printed output you can expect.
© 2013 RT Systems, Inc.
148
VX-7 Programmer Help
Notice at the top of the page you can see that your have "X of X pages".
Making small changes can help reduce this number if it is not as you expect.
For example, reduce the size of the comment column since it is not being
used (or hide it completely). This move could save an additional page (or
pages) by getting all the columns to fit on one page.
Under Printer setup, change the margins to print on as much of each page of
paper as possible. Again, this can make it possible for all the columns to fit
on one (or half the number of) page.
© 2013 RT Systems, Inc.
File Maintenance
149
Use Zoom to read the data in the preview more easily. Click Zoom again to
return to this view.
© 2013 RT Systems, Inc.
150
16.6
VX-7 Programmer Help
Saving Programming Files
Many different files can be saved to your hard drive for permanent storage giving you
the ability to reprogram your radio quickly and easily to suit your current use.
Files are saved using the File | Save or File | Save As command.
When the window opens for the filename, enter any name up to 256
characters (including spaces) but without a period at the end or an
extension. The Programmer will enter that information for you automatically.
© 2013 RT Systems, Inc.
File Maintenance
151
16.6.1 File | Save
Saves the current file to your computer hard drive.
If several files are open, the current file (the one on top: the one you are working in) is
the one that will be saved. Be sure to save the changes to each of the open files before
closing the Programmer.
It is recommended that you save the current file during data input and before sending it
to the radio. Just as with a word processor, it’s an awful shame to lose everything if
something happens to the computer during either of these processes.
If the name of the current file is Untitled (in the main window title bar), you will be
presented with a save file dialog and should enter a new filename.
The filename can be any combination of characters and spaces including numbers and
letters.
When saving a file, let the Programmer do the work. All you need to enter is the name
you want for the file.
© 2013 RT Systems, Inc.
152
VX-7 Programmer Help
© 2013 RT Systems, Inc.
File Maintenance
153
16.6.2 File | Save As
Saves the current file under a new name. Used if you want to make a copy of the file
that you're working in to maintain the original without the changes you're making now.
If several files are open, the one that is active is the current file. This file will
be saved with the Save As command.
This is a good way to start another file for editing. Changes made to this file
do not affect the data in the original file.
When this command is selected, a save file dialog containing a list of
existing files is presented. You can either select one of these to be
overwritten or enter a new filename. The Programmer will add the extension
so you should not enter an extension or a period at the end of the filename.
The title bar of the window changes to reflect the new filename.
When saving a file, let the Programmer do the work. All you need to enter is
the name you want for the file.
© 2013 RT Systems, Inc.
Part
XVII
ARRL TravelPlus*
17
155
ARRL TravelPlus*
RT Systems' Version 4 programmers have a feature that opens a TravelPlus list in the
radio programmer. This makes the data available for creating files for programming
your radio without the need to import the data from a file.
This Help file contains sections on creating the list in TravelPlus* and on getting that list
ready to program your radio. Takes only a few mouse clicks to have your radio
programmed for that trip or other special event.
Creating a list in TravelPlus* - Brief details on this process. For more
details, see the help file in TravelPlus*.
Opening the list in the radio Programmer - Details on opening the list in the
radio programmer and the controls on that list.
Using the TravelPlus* list with an existing radio programming file Sometimes you don't want all the repeaters found for an area by TravelPlus*...
or you want to put what you found into a certain group of memory channels in
the radio programming file. This section details how to use the list selectively
in the radio file.
*TravelPlus is a product of the American Amateur Radio League.
Any images from TravelPlus included in this help are copyrighted to DHF Systems, LLC.
© 2013 RT Systems, Inc.
156
17.1
VX-7 Programmer Help
Creating a list in TravelPlus*
RT Systems' Version 4 programmers have a feature that opens a TravelPlus* list in
the radio programmer. This makes the data available for creating files for
programming your radio without the need to import the data from a file.
These instructions very briefly cover creation of the list from TravelPlus*. It is not
intended to teach you to use that program. Detailed instructions are included in this
help for using the information from that list in a file for programming your radio.
Open TravelPlus* from the link provided when that program was installed. Select a
location or create a route.
Once you have the area defined on the map, click the Create List button from the top of
the screen. TravelPlus* displays the list of repeater frequencies found within your
search area.
© 2013 RT Systems, Inc.
ARRL TravelPlus*
157
Check the list. If you don't like the results, try again. Once you are satisfied with the list,
you are finished with TravelPlus*. You can exit that program or leave it running while
you access the RT Systems' radio programmer.
Run the RT Systems programmer (Version 4 only). If the programmer is already
running, switch to it now to create a file from this list for programming the radio.
*TravelPlus is a product of the American Amateur Radio League.
Any images from TravelPlus included in this help are copyrighted to DHF Systems, LLC.
© 2013 RT Systems, Inc.
158
17.2
VX-7 Programmer Help
Opening the list in the Programmer
Once you have created a list in TravelPlus* (Version 10.0 or higher), open any one of
the Version 4 programmers installed on your machine.
To access the list:
Select File from the menu at the top of the screen.
Select Open TravelPlus* list (this option was disabled until you created the
list)
The list appears in the window of the programmer
© 2013 RT Systems, Inc.
ARRL TravelPlus*
159
Customizing the list for the radio file:
Several selections appear at the bottom of the window that contains the list. These
options control how the programmer will handle the data from the list in creating the
radio programming file. These fields and their options are described below.
Selected Bands: Lists the bands of the frequencies in the list. All the
bands are selected by default. Uncheck those that you don't want as part of
the file for the radio.
If you are programming a 2 Meter radio with a file that contains 6 Meter
repeaters, you can choose to eliminate those frequencies in this step to
better understand what will be contained in your resulting file. If you skip
this step, the programmer will omit these frequencies in the resulting radio
file since the radio does not operate on these frequencies.
If you do not eliminate the bands that cannot be used by your radio, the
resulting radio file will contain blanks for each frequency the programmer
removes during file creation. Although the radio does not care, you may
not want all those blanks in your radio file.
If the TravelPlus* list contains too many frequencies for the radio, using
© 2013 RT Systems, Inc.
160
VX-7 Programmer Help
the Selected Bands option would remove unused frequencies thus
lowering the number in the file and making it possible to create a radio file
with all those frequencies that you want. (i.e., Your TravelPlus* file has
512 frequencies in the selected area. Your radio has 450 channels. You
Select Bands and eliminate 6M, 10M and 220 Mhz Bands. The resulting
list now has 432 frequencies... few enough that they all will fit into the radio
file.)
Name: The TravelPlus* list contains information that does not "match" directly to a
column in the radio programmer. One of the columns in the programmer accept data
from these columns is the Name field.
Name in the programmer is the field that sets the alpha display on the
radio. Generally, this display is limited to 5-8 characters depending
on the radio (other than the VX-8 that allows 16 characters).
By default, the programmer associates Callsign from the TravelPlus*
list to Name in the programmer.
You can change that association by selecting another column from
those listed.
© 2013 RT Systems, Inc.
ARRL TravelPlus*
161
Comment: The TravelPlus* list contains information that does not "match"
directly to a column in the radio programmer.One of the columns in the
programmer accept data from these columns is the Comment field.
Comment in the programmer is a field of information that helps you
while you work with the programmer. This information does not
transfer to the radio.
By default, the programmer associates City from the TravelPlus* list
to Comment in the programmer.
You can change that association by selecting another column from
those listed.
Module: Select the radio for which you want to create a file.
The resulting file appears in its own tab.
© 2013 RT Systems, Inc.
162
VX-7 Programmer Help
The file is ready to be sent to the radio.
*TravelPlus is a product of the American Amateur Radio League.
Any images from TravelPlus included in this help are copyrighted to DHF Systems, LLC.
© 2013 RT Systems, Inc.
ARRL TravelPlus*
17.3
163
Using the TravelPlus* List with existing programmer file
You may not want to use all the information from the TravelPlus* list in a separate file for
your radio. You may already have a file to which you want to add only some of the
information from the List.
Using the list from TravelPlus* along with a Version 4 RT Systems radio programmer,
you can copy and paste selected channels from the list to a file for your radio.
Begin by creating your list in TravelPlus* as detailed in Creating a List in
TravelPlus* in this help.
Open the programmer.
Open the file into which the frequencies are to be inserted.
Access the TravelPlus* list through the link in the file menu. Both the list and
the file are now open in the programmer. Working in reduced screen mode
is helpful with this process to let you see both files at one time.
© 2013 RT Systems, Inc.
164
VX-7 Programmer Help
Select a group of channels.
Point your mouse at the CHANNEL NUMBER (the grey shaded
column on the left) and left click. Don't let go of the left click button if
you want more than one.
While holding the left mouse button, drag the mouse over the
CHANNEL NUMBER of all the channels you want. If there are more
than those on the screen, just keep going at the bottom. The screen
will scroll to let you continue your selection.
Note: The entire row of a selected channel will turn be
highlighted. If only the Receive Frequency is highlighted, then
ONLY that information will be copied.
Copy the channels
With the mouse pointing at the highlighted channels right click and
select Copy from the menu that opens.
OR... with your mouse, left click to select Edit from the menu at the top
© 2013 RT Systems, Inc.
ARRL TravelPlus*
165
of the screen. From the menu that opens, select Copy.
It will appear that nothing has happened; however, Windows has
copied the information.
Use the mouse to click into the programmer file.
Note: If you are using the programmer in full screen mode, select
Window from the menu then the programmer file name from the
bottom of that list to switch between the two screens.
Alternately, you can select Window | Tile to have the programmer
display the two windows equally in the main window.
Select the first channel in the file into which the information is to be pasted.
Paste the information into the radio file
With the mouse pointing at the highlighted channels right click and
select Paste from the menu that opens.
OR... with your mouse, left click to select Edit from the menu at the top
of the screen. From the menu that opens, select Paste.
View the results
The resulting file now contains only those selected pieces of
information from the TravelPlus* list along with all the original
information of that file.
© 2013 RT Systems, Inc.
166
VX-7 Programmer Help
Save the programmer file to make this change permanent.
Press Ctrl S or select File then Save from the menu that opens
With either process it will appear that nothing happens; however,
Windows has made the change to the radio file permanent.
Send the file to your radio.
*TravelPlus is a product of the American Amateur Radio League.
Any images from TravelPlus included in this help are copyrighted to DHF Systems, LLC.
© 2013 RT Systems, Inc.
Part
XVIII
168
18
VX-7 Programmer Help
Copying From an Excel Spreadsheet
The Programmer can handle information copied from an Excel spreadsheet.
Although this process is very valid for transferring data between these programs, it is
not recommended for original file creation. It can be tedious getting all the information
into the file to be copied. For example, why struggle to find information for the offset
frequency and offset direction for your Excel list when the programmer will complete this
information automatically when frequencies are entered there.
Limitations for use of another commercial spreadsheet program include:
The spreadsheet program will know none of the limitations of the radio. It
will allow you to enter any value in any space. You will have to enter transmit
and receive frequencies, CTCSS tones, and DCS codes carefully to be
sure they are imported correctly to the radio.
You will need to organize your data carefully. The Programmer will import all
the items from a single column as the same thing. This can cause an odd
split to be entered as Simplex or a non-standard offset to be ignored if nonsimilar data is listed in the same column.
Let the Programmer help you as you create your original file with its defaults and
automatic settings. Once the file is created you could export the data for other uses.
© 2013 RT Systems, Inc.
Copying From an Excel Spreadsheet
18.1
169
Step 1
The Programmer makes no assumptions about the information being handed to it from
the Excel file. You need to be familiar with the data in the file to the point you can
identify that data to the programmer during the copy process.
Step 1
Open the Excel file. Select and copy the information you want to put into the
programmer.
© 2013 RT Systems, Inc.
170
VX-7 Programmer Help
© 2013 RT Systems, Inc.
Copying From an Excel Spreadsheet
18.2
171
Step 2
Open the Programmer to which the data is to be pasted.
It is recommend that you import into a new file to prevent loss of data from an
existing file. Channel information can be copied to an existing file, and put exactly
where you want it, after the process of copying from Excel is complete.
Note: The FT-60 is used here as an example. The process works the
same for any RT Systems Version 4 programmer although column
names may differ or not be available.
© 2013 RT Systems, Inc.
172
18.3
VX-7 Programmer Help
Step 3
Paste: Ctrl V or right click and select Paste or select Edit then Paste from the
menu at the top of the screen.
A window opens to complete the process.
© 2013 RT Systems, Inc.
Copying From an Excel Spreadsheet
18.4
173
Step 4
On this screen, you may need to use the Text Qualifier to remove quotes from your
data.
The data should be appear as it does in this image: without quotes and separated
into columns.
Click Next to continue.
© 2013 RT Systems, Inc.
174
18.5
VX-7 Programmer Help
Step 5
In this step of the process, you identify the information in your spreadsheet for the
programmer. The programmer attempts to identify the columns based on the
headers that you have for the columns.
The programmer makes no assumptions and will set any non-matched column to
"Ignore". The data in an ignored column will not be used in this process.
© 2013 RT Systems, Inc.
Copying From an Excel Spreadsheet
175
The column header changes to show your selection. Be sure to identify each of the
columns you want used. The data in an "ignored" column will be set to defaults in
the resulting file. Your specifics will not be used.
© 2013 RT Systems, Inc.
176
VX-7 Programmer Help
Click Next to continue.
© 2013 RT Systems, Inc.
Copying From an Excel Spreadsheet
18.6
Step 6
Complete the options on the final screen and click Finish.
The resulting file contains the data just as it was in the Excel spreadsheet.
© 2013 RT Systems, Inc.
177
178
VX-7 Programmer Help
© 2013 RT Systems, Inc.
Part
XIX
180
19
VX-7 Programmer Help
Importing a file
The Programmer can Import data from delimited text files. These files can be created
using the Export feature of the Programmer for another radio, Travel Plus for Repeaters
by ARRL, commercial spreadsheet programs, or text editors.
Limitations for use of another commercial spreadsheet program include:
The spreadsheet program will know none of the limitations of the radio. It
will allow you to enter any value in any space. You will have to enter transmit
and receive frequencies, CTCSS tones, and DCS codes carefully to be
sure they are imported correctly to the radio.
You will need to organize your data carefully. The Programmer will import all
the items from a single column as the same thing. This can cause an odd
split to be entered as Simplex or a non-standard offset to be ignored.
The easiest way to begin a text file for your Programmer is to Export a file from the
Programmer first. In that exported file, you will see column headers for the details that
the Programmer expects to import. You will also see the format of the information. You
can edit or add to this file with any commercial spreadsheet program or text editor.
Note: The new features off the programmer include the ability to
enter a series of channels by entering just a beginning frequency and
the number to be entered, column editing, copy and paste of one or
multiple rows of data, rearrangement of columns, hiding columns that
need not be edited, and automatic completion of data based on band
defaults for a frequency entered. Given that the programmer is
designed for the data of the radio, you might find editing in the
programmer easier than using another spreadsheet program.
The file to be imported must contain at a minimum Receive frequency to define a valid
memory channel. The programmer will fill the rest of the details for that channel with
defaults just as if that frequency had been entered.
The Programmer makes no assumptions about the information available. If a piece of
information is omitted, the Programmer imports the memory as a simplex channel and
fills other fields with defaults.
Although this process is very valid for transferring data from one radio Programmer to
another and for using the data from other sources such as ARRL Travel Plus, it is not
recommended for original file creation. It can be tedious getting all the information into
the file to be imported just like the Programmer wants it. Let the Programmer help you
© 2013 RT Systems, Inc.
Importing a file
181
as you create your original file with its defaults and automatic settings. Once the file is
created you could export the data for other uses.
© 2013 RT Systems, Inc.
182
19.1
VX-7 Programmer Help
Creating a file for Import
Checking a file to use with the Programmer
If you are given a file that you want to import into a programmer for use by your radio
and are not sure if it is a "flat file", test the file by opening it with Windows notepad.
If the Notepad display is full of strange characters with very little legible text, this file is
not ready to be imported by the programmer. The file may or may not be able to be
used for import depending how it was created and saved.
Try opening the file in Microsoft Excel or other commercial spreadsheet program. If
everything looks good there carefully save the file in as delimited text (this could be
called several different things in the program that you are using. If the first one you try
does not produce the file format that you want, try selecting a different File Type during
the save process. The details for this process are included below for Microsoft Excel.
Open the file that you created during the save process in Notepad. As before, if the
display is legible data separated by commas you are well on your way. If, however, the
data appears in one very long line, you should return to the original source to extract the
data with line feed breaks at the end of each record.
If the Notepad display has orderly lines of legible data separated by commas, it is
ready for use by the programmer. It is fine if you see two commas right together. The
process can handle a blank field.
Saving an Excel file for import
If you work on a file in Excel for import to the programmer, that file must be saved as a
comma delimited file before you leave Excel. The Programmer cannot import an
Excel file with all its formatting codes. What it can work with is the "flat file" output of
that file.
In Excel, select File|Save as
In the Save As window change the Save as Type to CSV (comma
delimited) *.csv
Enter a file name for the output file. Pay attention to the drive and directory
to which the file is being saved. You will need to be able to find the file later
for use during import.
© 2013 RT Systems, Inc.
Importing a file
183
Excel will raise a warning(s) about worksheets and formatting that will be
lost if the file is saved in this format. Answer to the affirmative (OK or Yes)
to the message(s);eliminating the formatting is exactly what you want.
When you exit Excel, you will be asked again if you want to save the *.csv
file. If you have made no changes since you lost saved, answer No. If you
have made changes, answer Yes and proceed through the warnings again
to save the file again.
Limitations for use of another commercial spreadsheet program include:
The spreadsheet program will know none of the limitations of the radio. It
will allow you to enter any value in any space. You will have to enter transmit
and receive frequencies, CTCSS tones, and DCS codes carefully to be
sure they are imported correctly to the radio.
You will need to organize your data carefully. The Programmer will import all
the items from a single column as the same thing. This can cause an odd
split to be entered as Simplex or a non-standard offset to be ignored if the
data is not in a column labeled correctly or is mixed in with dissimilar data.
The Import File
The Import function is designed to assimilate some if not all of the following pieces of
information for use by the Programmer. As radio features vary, so will the information
to be imported (i.e., frequency ranges, the way offsets are handled, special options
such as mask, clock shift, etc.)
Channel Number: If your file has channel numbers and you opt to use this column
during import, your resulting file might not be what you expect.
If the "Overwrite existing channels" option is checked: The information will
be inserted into the specific channel no matter what is in the file at that
location now . While the channel numbers can help to organize the
information being imported, it can result in data being overwritten in the
process
© 2013 RT Systems, Inc.
184
VX-7 Programmer Help
If the "Overwrite existing channels" option is unchecked: The information
from the file being imported will be skipped if there is already information in
the channel. The data in the existing radio file will not be overwritten.
It is always recommended that you import into a new file to prevent
data loss in an existing radio file. Once the information is in the
programmer file, it can be copied into an existing file. With the copy
process, you have more control of where the data is inserted into the
file.
Receive Frequency: The very least a file must have to be imported is the receive
frequency. This may be called the "output frequency" depending on whether you're
referring to the radio or the repeater. If the column header is "Receive Frequency", the
import process will recognize this label and identify the information automatically.
Acceptable receive frequencies are detailed in the User's Manual for the
radio. In the text file, the frequency should be entered in the format "MHz
decimal kHz" (i.e., 146.450) with up to five digits following the decimal.
Although, unacceptable frequencies can be entered into the text file, they
will not be imported into the Programmer. They will result in a blank memory
channel when import is completed.
Transmit Frequency: Enter a specific transmit frequency in the format "MHz decimal
kHz" (i.e., 146.450) with up to five digits following the decimal.
This information can be omitted from the file.
If you are importing repeater information where all the repeaters have
standard offsets (none operates on an "odd" split) the import process will
calculate the Transmit Frequency from other information in the file.
This information must be included in a separate column for an "odd
split".
The column cab be empty other than the specific information for those few
"odd split" repeaters. The import process will calculate the Transmit
Frequency from other information in the file for the other channels.
Acceptable transmit frequencies are detailed in the manual for your radio.
Note: In the Programmer you can enter details for frequencies
outside the transmission abilities of the radio; however, the software
will not enable transmission on these frequencies. Transmission will
© 2013 RT Systems, Inc.
Importing a file
185
be possible only if the radio has been properly modified.
Offset Frequency: This is the amount that the Receive Frequency changes to
produce the Transmit Frequency. Standard offsets in the programmer include 100,
500, and 600 kHz (0.1, 0.5 and 0.6 MHz) and 1.0, 1.6, 3.0, 5.0, and 7.6 MHz.
In Yaesu radios any value in 50 kHz increments can be used as an offset (i.
e., .650, .550, .050)
In an Icom radio, there are no Splits. Everything must be entered with an
exact Offset Frequency.
The Offset Frequency is used by the radio along with the Offset Direction to
calculate the Transmit Frequency. The Programmer does the same.
This is one place that the import process will make an assumption for you. It
uses 600 kHz for the offset for VHF and 5 MHz for the offset for UHF if no
other offset is specified.
Non-Standard Offsets
The Offset Frequency can be used in conjunction with Offset Direction for a
value in 5 kHz steps (i.e., any value ending in .xx5 where x is any digit from 0
to 9). This gives you the ability to use the Reverse function of the radio
although your frequency pair is not separated by a standard offset value. This
is considered a non-standard offset.
To use a non-standard offset in your text file enter the Receive Frequency.
Then the Offset Frequency as an exact value including the decimal to denote
kHz. For example, given the pair 146.650 and 147.300, the Offset Frequency
entered would be .650 (decimal six five zero). And the Offset Direction as
Plus or Minus. With these three pieces of information, the import process will
setup this memory channel correctly for use by the radio with the most
functionality.
Note: You may see this import with one of the standard Offset
Frequencies; however, once the file is saved, closed and reopened,
the Plus or Minus and the Offset Frequency value as entered will
appear.
Offset Direction: The Offset Direction lets the Import process know whether to add
(plus) or subtract (minus) the Offset Frequency from the Receive Frequency when
calculating the Transmit Frequency for the memory channel.
Enter Plus, Minus, + or - for the process to recognize the command.
© 2013 RT Systems, Inc.
186
VX-7 Programmer Help
NOTE: Be sure to use Offset Direction if your file contains + and
&endash; in this column. Using Offset Frequency for this column will
result in all channels being imported as simplex.
Operating Mode: Enter FM, AM, or WFM as appropriate for the frequency.
Name: Enter an Alpha/Numeric tag (up to 8 characters) for the memory channel to
provide an easy reminder of the function of a particular frequency. Not all radios have
this available for each memory channel. Consult your Users’ Manual for details.
Tone Mode: Use of the tone systems of the radio allows for silent monitoring until a
call is received with a corresponding tone. Tone mode also allows access to
repeaters that are made private with a PL tone. Most radios offer CTCSS (Continuous
Tone Coded Squelch System) or DCS (Digital Coded Squelch) to be tailored to your
particular needs. Consult your Users’ Manual for details specific to your model.
Use of either of the tone systems requires two steps. Your import file will handle
these steps in THREE (3) columns.
Step 1: Turning on Tone Mode
There are now so many different tone modes and combinations of them, we
recommend that you use the designation just as it appears in the
Programmer for your radio to identify the Tone Mode to be used. Examples
would include but not be limited to:
None - Tone mode off
Tone - Encode
T Sql - Encode/Decode
DCS - DCS Tone
Others specific to your radio as detailed in the Tone Mode column of the
programmer.
Step 2: Setting the tone frequency (CTCSS) or selecting the code for the tone
(DCS).
Note: The CTCSS tone frequencies and the DCS tone codes should
be stored in TWO separate columns in your file to be imported. The
import process does not separate. It will ignore incorrect values
leaving the tone set incorrectly for the channel.
CTCSS Tone: Enter one of the 50 tone frequencies in the format MHz
decimal kHz with only one digit to the right of the decimal.
© 2013 RT Systems, Inc.
Importing a file
187
This value must be entered exactly as shown in the chart in the Users
Manual. A value that is not in the table will result in an incorrect tone
value setting in the resulting Programming file.
This value is set independently for each memory channel.
DCS Code: Enter one of the 104 codes in a three digit format (This will
appear as two digits if you editor does not show leading zeroes. Two
digits are acceptable when the third is a leading zero).
This value must be entered exactly as shown in the chart in the Users
Manual.
A value that is not in the table will result in an incorrect tone value
setting.
This value can be set independently for each memory channel that
uses a DCS tone.
Skip: Marks selected memory channel to be skipped during scanning This field
should contain one of the following:
Scan, 0, or Stop to include the channel to be scanned
Skip or 1 to mark the channel to be skipped.
PScan or 2 to mark the channel as Preferential Scan
Step: The frequency being used by the radio changes by the value of the step when
tuning manually. This value is used by the radio in Memory Tune mode. This value is
not critical in memory mode since the original memory channel frequency can be
retrieved by exiting Memory Tune mode.
Enter 5/10/12.5/15/20/25/50 or 100 as needed.
Clock Shift: Shifts the internal reference frequency slightly to eliminate "birdies" that
interfere on other channels.
Enter On or 1 / Off or 0
Tx Power: The output power can be set individually set for each memory channel to
address the exact needs of each operation.
Enter High / Med / Low
© 2013 RT Systems, Inc.
188
VX-7 Programmer Help
Half Deviation: Enter On or Off as needed for the channel
Comments: Enter an identifying comment up to 80 characters.
You can see by the details here that creating a file for import can be a tedious process.
Although this process is very valid for transferring data from one radio Programmer to
another and for using the data from other sources such as ARRL Travel Plus, it is not
recommended for original file creation.
Let the Programmer help you as you create your original file with its defaults and
automatic settings. Once the file is created you could export the data for other uses.
The comma-delimited file can contain this information in any order. It must contain only
the Receive frequency to be a valid memory channel. The Programmer makes no
assumptions about the information available. If a piece of information is omitted, the
Programmer imports the memory as a simplex channel and fills other fields with
defaults.
This data can be entered in any order. You will identify the specifics to the Programmer
during the Import process. If you find after several entries that you need another column
for additional information, simply add it at the end. The Programmer will correct the
order when it imports.
Save the data in your file often to prevent loss. Be sure to save the file as text with
delimiters (separators) rather than as a worksheet of the program in which you are
working. The Programmer cannot use a worksheet created by the other program.
To save as a text file, select File | Save (in the spreadsheet program). In the Save file
window, select a different file type from the selection at the bottom of the screen.
Acceptable formats are those that specify Text (i.e., .cvs, or .txt file extension).
Exit the spreadsheet program. Your file is ready to be imported into the Programmer.
Changes can be made within the Programmer after you import the data.
© 2013 RT Systems, Inc.
Importing a file
19.2
189
Import - Step 1
In the Programmer, select File | New.
It is always best to import to an "Untitled" or new file. The new file is used as
a temporary stopping point for the data. This way, if the results as not quite
as you expected, you simply close the file without saving and begin again... in
another new file.
Working in a new file eliminates the possibility that existing data will be
overwritten and lost during the import process. From there use the tools
available in the programmer (copy and pate, column editing, sort and unsort,
etc) to get the data just as you want it.
If you want the data to be a part of an existing file, use copy and paste to
move it from the new file to exactly where you want it in the existing file.
Importing
In the Programmer select File | Import.
From the Import Radio File dialog that opens, select the file to be opened.
This screen gives you the ability to find and open the file to be imported.
Use "Look in:" at the top to change directories as needed
Use "File of type:" at the bottom to show other files in the directory you
selected. Since the most common file types are *.csv and *.tab you may
need to change types for your file to appear.
© 2013 RT Systems, Inc.
190
VX-7 Programmer Help
Once your file is highlighted, select Open to proceed.
Import Step 1 of 4: Identify one or more of the first rows of data to be omitted
This screen was used originally to omit headers, columns without data, from the import.
This is no longer necessary.
Actually, it is recommended that you leave the headers to help you
more easily identify the information in a later step.
This step remains useful for eliminating a number of memory channels from the import
process. For example if your file contains more channels than are allowed by the radio.
You could eliminate multiple channels here rather than later in the import process.
Click Next to continue.
© 2013 RT Systems, Inc.
Importing a file
19.3
191
Import - Step 2
Import Step 2 of 4: Identify the delimiters (separators) used in your file.
The data in the file to be imported is separated by tabs, semicolons, commas, space
or other non-text characters. Select from the list at the top of the screen or enter the one
you used.
Once you select the correct delimiter, the data will properly separate into columns.
Examine the data to be sure that it is ready for the Programmer to process. Look at the
data in the window. Select the proper Text Qualifier if you have single or double quotes
within a data field. With quotes present, the import process will handle all the data
© 2013 RT Systems, Inc.
192
VX-7 Programmer Help
incorrectly resulting in a blank file. Once selected, the quotes are removed and the data
appears as shown.
Click Next to continue.
© 2013 RT Systems, Inc.
Importing a file
19.4
193
Import - Step 3
Import Step 3 of 4: Identify the data to the Programmer
The Programmer will make an attempt to identify the information in your file. In this step
of the process, you can make corrections to the assignments the Programmer has
made and identify other columns that you want imported.
For the columns to be imported, select the header of the column (the little grey box just
above the column) then select the proper identifier from the drop down list at the top of
the screen
You need to identify only those columns to be imported.
© 2013 RT Systems, Inc.
194
VX-7 Programmer Help
Click Next to continue.
© 2013 RT Systems, Inc.
Importing a file
19.5
195
Import - Step 4
Import Step 4 of 4: Limit the channels that are imported by the Programmer
Again, you can make adjustments to the data to be imported without having to edit the
original file. Select all or any part of the list by checking the box at the left of the screen.
Since the data can be imported into an existing file, use the boxes at the top of the
screen to place the data in the file where you want it to appear.
Starting radio memory - Insert the channels into the file somewhere other
than at the beginning (i.e., At the end of a list that has the last channel of
21. Enter 22 in this box to begin with the next memory channel of that file).
Overwrite existing channels - Tells the process to replace data it finds in the
existing file or to skip that data and write in the next available channel. For
example:
Unchecked - If you import into a file with memories in channel numbers 110, 12, 15 and 16 the process would write the imported channels in order to
11, 13, 14, then 17 on to the end of the imported list.
Checked - If you import to a file with memories in channel numbers 1-10,
12, 15 and 16 the process would write the imported channels in order
beginning at channel 1and continue in order to the end of the imported list.
The existing channel data of the file would be lost in the process as it is
replaced with that of the imported file.
Finish - Click to compete the process. The resulting file in this example
would look like this:
© 2013 RT Systems, Inc.
196
VX-7 Programmer Help
© 2013 RT Systems, Inc.
Part
XX
198
20
VX-7 Programmer Help
Export
The programmer can export, "convert" , the data of a radio programming file to a flat file
for use in other programs. This will create the file that you need is someone asks you
for a "csv" or Excel file.
You control two parts of export
What is exported from the file
Where the exported file is saved on your hard drive.
What is exported from the file
The file created through export contains the data on the screen that is open when
the process is begun.
If a radio has Right Memories and Left Memories, it will export the data of the Right
Memories when you are viewing that screen when the process is begun and the
data from the Left memories if you are viewing that screen.
Each export should be directed to a separate file. If you use the same filename,
you will replace the data from the first export with that of the next.
Where the exported file is saved on your hard drive
Select the section of the file to be exported.
Click File | Export
A Save dialog box opens. You have complete control of the filename and location
of the file on your hard drive in the options in that Save dialog box.
Pay close attention to the filename and directory designation of the resulting file.
You want to be able to find it easily later.
© 2013 RT Systems, Inc.
Part
XXI
200
21
VX-7 Programmer Help
Troubleshooting
Technical support is available from RT Systems at the times and number shown in the
Contacting RT Systems of this help.
As issues are addressed by Techsupport personnel, the issue and the result are often
detailed on the FAQ page of www.rtsystemsinc.com Check there for additional
information that might pertain to the exact issue you’re seeing with your radio.
Detailed here are several of the more common problems that you may want to check
before you contact technical support.
"The data from the radio will overwrite this file. Continue?"
This message will be raised by the programmer when you select Communications | Get
data from radio with a file open that is not a new (default) file into which no entries have
been made.
This message is warning you that you will replace any information you have entered
with whatever is in the radio. The "whatever" could be all blank channels.
Answer "yes" if you want to lose all the information that appears on the screen. Answer
"no" if you don't want to lose several hours of work spent creating the file on the screen.
To prevent loss of information, first do File | New to open a new (default) file. Then
while looking at that file, do Communications | Get data from radio and complete that
process. Your file will drop to the background and be protected from during this part of
the process.
Once you complete Communications | Get data from radio, return to your file a) select
the tab at the top of the page; or b) select File | Open and open the file from the list
presented (if you closed it some time during the process.)
Program cannot find cable
© 2013 RT Systems, Inc.
Troubleshooting
201
This message can appear when you are attempting to get data from the radio or send
data to the radio. There can be several causes. The most common are:
The cable is not attached to the computer or you have the wrong
programming cable attached. The cable for this radio is pictured in the
Computer to radio cabling section of this help.
The communications process was accessed too quickly after the cable was
attached. It can take some computers a minute or more to recognize the
cable properly. Give the computer a little more time and try again.
The problem may lie in the electronics of the cable. If this is the first time you
have attempted this process, contact RT Systems for assistance. This can
be corrected easily in just a few minutes with the computer and an Internet
connection. Note: This can be corrected using a machine that has an
Internet connection that you don't plan to use for the programming software.
The software for the radio does not have to be installed to complete the
correction.
HotSync, the program for the Palm Pilot, is running on this computer. Hotsync
immediately takes control of an available comport. Since the RT Systems
programming cable establishes a comport, Hotsync takes control before you
have a chance to use it. Look for the icon, red and blue arrows chasing each
other, in the tray at the right of the task bar. If found, right click and exit. That
program will load again when you re-boot your computer. You will need to
disable this software any time you program your radio.
Interference from other cables attached
The Programmer is designed to find the cable to be used by this radio for
programming. This process is done through special identifying numbers programmed
into the electronics of the USB connector.
The process looks at each USB device attached. Other items attached, especially
other programming cables, may cause the programmer to wrongly identify the cable it
© 2013 RT Systems, Inc.
202
VX-7 Programmer Help
must use for a specific radio.
Two different errors can occur in this configuration. Either the programmer will report
that the cable is not attached to the USB port or the Communications process will not
respond since the data being transferred from the radio (you did press all the right
buttons) is traveling along a cable other than that the programmer is connected to.
Interference from other applications
Your radio is not the only device you attach to your computer for programming or data
interchange. I-Pads, I-Pods, Palm Pilots and other PDA devices, printers, cameras
and others all install programs for their use. Unfortunately, many of these programs run
constantly looking to be used any time a cable is attached.
These programs take control of the cable even if it is not for their device. This renders
the cable useless for its intended purpose.
You may not even be aware that these programs are running. You may have sold the
device months ago; but unless you took steps to permanently disable the software for it,
the problem remains. These programs run start whenever the computer is started or
brought back from hibernation then run in the background with little indication that they
are there.
Begin checking by hovering over each icon at the lower right of your screen. Those in
the taskbar. A name will appear as you pass over each. You may recognize the one
that needs to be disabled. Usually an option to Exit or Close will be available from a
right click menu. Don't worry about exiting something you might need. The application
will begin again when you restart your computer.
After addressing a program, check in the programmer. You should be able to click OK
on the Communications | Get Data from screen and have the process continue instead
of raising the error message.
Tech support at RT Systems will be glad to help you with this; but we are limited given
this is an issue specific to the applications running on your machine. You are welcome
to contact us for help with this issue.
Defective Cable
Cables from RT Systems are 100% tested prior to packaging. Even with this level of
control, occasionally a cable fails in the field. Contact RT Systems tech support if to
determine if the cable is at fault and a replacement is needed.
© 2013 RT Systems, Inc.
Troubleshooting
203
A replacement can be initiated when you send a copy of your receipt as proof of
purchase and the issue has been diagnosed with a tech support representative at RT
Systems. In this case, a replacement will be sent immediately with a prepaid label for
return of the defective item. The replacement will be sent to the address on the
receipt.
If the receipt is not available, return the original cable for replacement. A replacement
cable will be sent immediately when the defective item is received at our location.
USB Driver Installation
On some systems running Windows 2000 or early versions of XP, the drivers for the
cable will need to be installed manually. This is a normal thing in the USB world and is
easily done.
We are RT Systems will be happy to help you through this process.
With the USB cable detached from the computer, start the New Hardware Wizard from
the indication for the device in the Device Manager.
The drivers have been installed on your machine in the following directory.
C:\Program Files\Common Files\RT SystemsV4\RTDrivers\USBComDrivers\Drivers
Run the New Hardware Wizard twice. The first time use ftdibus.ini in that directory. The
second time use ftdiport.ini in that same directory.
Then attach the cable again. Check in Device Manager to be sure it is now listed under
Ports (Com and Lpt) with a comport designation assigned.
Modified Radio
© 2013 RT Systems, Inc.
204
VX-7 Programmer Help
This error is raised when you attempt to send a file to a radio that is modified before
the programmer is given that information.
If your radio has been modified, you must complete Communications | Get data from
radio into a new file before you attempt to write data to the radio. When the Get data
from radio process is used, even if the radio is not yet programmed, the Programmer
gets the data it needs to know that the radio is modified.
When you use Communications | Get data from for the sake of establishing
communications, you need to save the file ONLY if you want to save the memory data
that is currently in the radio. The Programmer already has what it needs. The option to
save is available should you want to save the pre-programmed data.
Cabling to properly address the radio
The Version 4 RT Systems Programmers work only with the
RT Systems' USB cables OR
Original RT Systems' serial cable with the RTS-03 USB to
serial adapter.
No other USB cable will be recognized by the programmer.
RT Systems' programmers address over 50 different radios. Of those, some program
through the speaker jack, some through the mic jack, some through the data jack and
some through the CAT port. These ports must be addressed by the correct cable for
communications to be successful.
Be sure to use the correct cabling to address the radio being programmed. Check the
User’s Manual for the radio if you are not sure where the port is on the radio that is
specified in the programmer. The cables for this particular radio are pictured in the
Radio to Computer Cabling section of this help.
Specific to the FT-857/D and FT-897D: The cable used for programming is the USB62 cable with the 8-pin mini din plug. This plug is attached to the CAT jack on the back
of the radio. Forcing this connector into the data port will ruin the plug and could
damage the radio. There have been cases where the power pin and the PTT were
connected (since you never know which pin will go which way when you force them out
of place) causing several hundred dollars in damage. Check to be sure you are
connecting the cable to the matching jack before forcing the pins into the holes.
At the time of this writing (2009), none of the Yaesu VHF/UHF mobile radios used the
USB-62 cable with its 8-pin plug. We have seen this tried. It will not work. The mobile
radios that program through the data jack require a 6-pin mini din connection on the
© 2013 RT Systems, Inc.
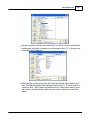
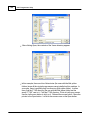
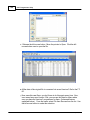
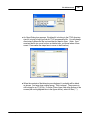
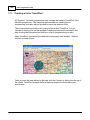
Troubleshooting
205
cable. Check the cabling specified in the help for the radio that you're programming to
be sure that you're using the right one to address the radio.
Icom specific issue for Clone mode
Other than the Icom IC-R10, at the time of this writing, Icom radios are NOT put into
CLONE mode for programming. CLONE mode is used only when you transfer data
from one radio to another.
The process for programming the radio from the computer is simple. When the
instructions say to "Turn the radio on", do just that, press the power button to turn it on.
If pressing a key is needed as a part of this step, it will be included with the instructions
on the Get data from screen.
Yaesu Radio does not go into Clone mode after initial menu
selection
Many Yaesu radios, handheld and mobiles, access Clone mode from a startup menu.
When you turn the radio on holding the specified key, you are in that menu with several
options of radio functions. Clone is only one of these options.
Once the Clone option is found in that menu, another key on the radio is pressed to
activate that mode. You know the options has been activated when the radio cycles off
and back on. Only then is it in Clone mode and ready to program.
If the radio does not cycle off and back on when that next button is pressed, one of the
following may address the issue:
The keys on the face of the radio are locked. Turn the radio off and back on in
normal mode to check for the Lock symbol on the screen. Unlock the keys
and try again.
You have pressed the designated key too long or not long enough. Try again
until you get the feel for the process.
Yaesu Radio does not change to Tx or Clone Out when
button is pressed
Many Yaesu radios have a key sequence that starts Clone mode without having to
select that option from a startup menu: the radio simply comes on in Clone mode.
© 2013 RT Systems, Inc.
206
VX-7 Programmer Help
With CLONE displayed on the face of the radio, a button is pressed to begin
communications.
If the radio comes on displaying CLONE; but then is unresponsive when the button is
pressed to begin (i.e., the screen does not change from Clone) check these two
common causes:
First, be sure you are using the correct cabling for the radio being
programmed. If an adapter was included with the kit, use it.
Check that the keys are not locked. To check, turn the radio off. Turn it back
on in normal mode and check for the Lock symbol on the screen. Unlock the
keys from the face of the radio and try again.
Windows Version Compatibility
The Version 4 Programmer is designed to work with Windows XP, VISTA (32 or 64 bit)
or Windows 7 (32 or 64 bit).
RT Systems no longer supports use of the programmers on Windows 98, Windows
98SE, Windows 2000, or Windows ME.
Note: If you plan to use an older computer for programming your
radio, you may experience problems with the program resulting from
files that are missing from the operating system. These files would
have been delivered through normal Windows updates to the
operating system.
If the machine has been out of service for several years, set it up with
an Internet connection and Automatic Updates activated. Let it sit for
several days while it finds what it needs.
Once the updates are installed, you will have no other problems
related to the operating system relative to the programmer.
NACK/ACK Error
© 2013 RT Systems, Inc.
Troubleshooting
207
As ugly as this error appears. it actually is only a generic message saying the
Communication process failed. Try again after reading the hints here.
Do NOT turn the radio off. It may display Error. It is not terrible unhappy and
is still in Clone Mode.
Cancel all Communications screens that are open in the programmer.
Open a new file ( File | Open form the menu at the top of the screen).
Select Communications | Get data from radio. Doing Get Data from often
gets the process going.
Skip the steps for putting the radio into Clone mode. It is already there.
Click OK
Press the key as instructed to begin the process (sometimes you need to
press it twice... once to return to Clone mode... then again to begin the
process.)
Once Get data from is successful, attempt Send data to. In this scenario, you can skip
the steps to put the radio into Clone mode since it usually remains in Clone mode after
Get data from is completed.
© 2013 RT Systems, Inc.
208
21.1
VX-7 Programmer Help
Get Data from Radio Required
The first time you attempt to send your file to the radio, this message may appear.
This indicates that you have not read the configuration of the radio into the
programmer.
There are details that the programmer can get only from the radio. Even if the radio is
not yet programmed, these "background" details are necessary for the programmer to
send a file to your radio successfully.
© 2013 RT Systems, Inc.
Part
XXII
210
22
VX-7 Programmer Help
Invalid Frequencies
This information is meant to address radio operators in the US. While many of these
details are true in other countries, some are not. Band plans, allowable frequencies,
and other details differ around the world; but many of the functions of the radio remain
the same making this information useful to everyone.
This section is offered to help users understand why a frequency is rejected by an
amateur radio. The Programmer will not allow you to enter a frequency that your
particular radio cannot use.
Your radio is designed to work on all frequencies in the amateur bands. Problems
arise when frequencies from commercial operations are used on this amateur
equipment. This explanation is offered to help you understand where the radios differ.
How Radios Work
A little here about how radios work. As for an allowable frequency, three factors are
important: Reference Frequency, Reference Step and Step.
Reference Frequency - Based on its internal electronics, the radio uses a value
based off the frequency you enter along with the Reference Frequency Oscillator to
generate the desired frequency.
Reference Step - The difference between any two Reference Frequencies. This
value is set as a part of the internal workings of the radio. It cannot be changed.
Step - The difference between two frequencies displayed on the face of the radio
when the tuning knob is turned while operating in VFO mode.
Reference step and Step work in conjunction with each other allowing or prohibiting
you from tuning to a given frequency.
Commercial radios have a Reference Step of 2.5 kHz.
Amateur radios are generally designed with Reference Steps of 5, 6.25, 12.5, 9 (only
AM) and 8.333333 (air band only) kHz. While a few models have all these Reference
Steps, many more remain with only Reference Steps of 5 and 12.5 kHz. These two
are sufficient for accessing any repeater in the Amateur Bands.
While in the mathematics of things there will be frequencies in the commercial bands
that match the available Reference Steps of Amateur radios, the Step of the Amateur
radio will not allow you to tune to the desired frequency.
© 2013 RT Systems, Inc.
Invalid Frequencies
211
It takes both working together to achieve a valid frequency.
Testing the validity of a frequency
The question of validity is seen with frequencies with four digits following the decimal
(i.e., 154.03125 may be your local volunteer fire department frequency and while their
commercial radios can do this frequency, your amateur radio cannot... and it cannot be
made to do it with any software.)
Let's take 154.03125 and put it to the test.
Step 1:
The first and easiest test for the validity of a frequency is to attempt to dial to that
frequency in VFO mode on the face of the radio. Remember in your attempts
that it may be necessary to adjust the Step (see your Operator's Manual for
details) to get to a certain frequency.
Turn on your radio.
Access VFO mode
Turn the tuning knob.
WIth the frequency changing by 5kHz steps, the frequency changes
from 154.030 to 154.035 to 154.040 (oops... lost the 3 in the second
position... let's try something else).
Change Step to 12.5 kHz (see Operator's Manual for your radio. This
is generally done in the Set menu; however a shortcut key on the face
of the radio may give you easier access to this menu item.)
With the frequency changing by 12.5kHz steps, the frequency changes
from 154.025, to 154.0375 (hey, at least I have the fourth digit now), to
154.050... oops, missed the 154.03125 completely. Again, can't get
there tuning on the face of the radio.
Try other Step values until you're satisfied that the radio just cannot be
made to do that frequency.
Step 2:
Compare your frequency to this list. If you find it here, it will work. Note: "x'
represents any number.
© 2013 RT Systems, Inc.
212
VX-7 Programmer Help
1. xxx.xx500 - Generally only 5 or 0 allowed in the third position with all
0s after that. A few exceptions are shown below.
2. xxx.x12500 - Allowable for four digits after the decimal. The first
digit after the decimal can be any from 0 to 9.
3. xxx.x375 - Allowable for four digits after the decimal. The first digit
after the decimal can be any from 0 to 9.
4. xxx.x625 - Allowable for four digits after the decimal. The first digit
after the decimal can be any from 0 to 9.
5. xxx.x875 - Allowable for four digits after the decimal. The first digit
after the decimal can be any from 0 to 9.
Comparing 154.03125:
There is a 1 in the third position after the decimal. By Rule 1, this is
not allowed for an amateur radio.
The frequency does not fit into any of the others that allow 4 digits after
the decimal.
Step 3: Do the math.
Allowable frequencies (in Hz) must be evenly divisible by 5000 or 12500 or
6250 Hz.
Convert your frequency to Hz:
154.03125 x 1,000,000 = 154031250
Divide that number by 5000
154031250 / 5000 = 30806.25
154031250 / 12500 = 12322.5
154031250 / 6250 = 24645
The 6250 Hz division was successful. There is a possibility that this frequency
can be used by an amateur radio.
As discussed earlier, both the Reference Step and the Step of the radio are
used to determine a valid frequency. Models vary. While this frequency passed
© 2013 RT Systems, Inc.
Invalid Frequencies
213
the validity test for certain amateur radios, that in no way implies that it will work
on your particular radio.
For this particular frequency to work in your particular radio, it is necessary that
the radio have a 6.25 kHz step available in the Step option of the Set menu.
© 2013 RT Systems, Inc.
Part
XXIII
Hardware Error Troubleshooting
23
215
Hardware Error Troubleshooting
"Well of course the information in the radio and the file do not match. I just made
changes to the file and I want the different information in the radio!!"
This is a common first reaction to this error. However, that is not the file information
involved in this error. There are several causes for this error. They include incorrect key
strokes on the radio, interference on the computer by another application or device, a
faulty cable or the presence of a radio that has been modified for out of band use.
Below are various steps offered as corrections. At the end of each section try again to
transfer data to the radio again.
Try this First
The error most likely indicates that "behind the scenes" information about the radio
does not match that of a factory radio. This is most common when a radio has
been modified for our of band transmission.
1. Create a new file (press Ctrl M on the keyboard or select File | New from
the menu at the top of the screen). This protects the file that you are trying
to send to the radio.
2. Select Communications | Get data from Radio from the menu at the top of
the screen.
3. When this is completed successfully, return to your file (click to tab at the
top of the screen that displays the filename or select File | Open to reopen
your file.)
© 2013 RT Systems, Inc.
216
VX-7 Programmer Help
4. Select Communications | Send data to Radio. Be careful to follow these
steps shown on this screen. Generally, they are different from the Get Data
from radio steps.
Radio Issues
"Error" is displayed on the radio.
"Behind the scenes" information about the radio does not match that of a factory
radio. This is most common when a radio has been modified.
1. Create a new file (Ctrl M or File|New)
2. Execute Communications | Get data from Radio. This is the only way this
"behind the scenes" information can be obtained for your radio.
3. When this is completed successfully, return to your file.
4. Execute Communications | Send data to Radio begin careful to follow
these steps since they are different from the Get Data from radio steps.
The radio does not change when "OK" clicked on the screen in the
programmer (never indicates receive).
There is no communication between the radio and the computer. Check through
the Cable issues to be sure you are using the right cable and that it is connected
properly to the radio and to the computer.
The radio never goes to CLONE.
On many radios you hold buttons during power on to access a startup menu. Once
you select the clone option of the menu (the radio is NOT YET IN CLONE MODE).
You press a key to accept the CLONE option. When you press the button to
access the startup menu option, the radio does not change.
1. The keys on the radio may be locked. Turn the radio off then back on in
normal mode to check for a lock symbol on the screen. If the keys are
locked, unlock them. Once unlocked, power off the radio and begin the
Communications process again.
2. The key specified is "touchy" and responds if it is touched just the right way.
© 2013 RT Systems, Inc.
Hardware Error Troubleshooting
217
This has been the case on several of the mobile radios. Try again with a
shorter or longer touch on the button. When you get that touch just right, the
radio will respond.
3. The wrong cable is being used. This is true for several of the hand held
radios that use the 4-pin plug. If you attempt this process with a stereo plug,
the radio will not respond when you attempt the cloning process.
The radio never went into send (TX) mode (Get data from radio process).
Now that the radio is in Clone mode, one more button press is required to start the
data transfer (Get data from) or to make the radio ready to receive the data (Send
data to).
1. The wrong cable is being used. This is true for several of the hand held
radios that use the 4-pin plug. If you attempt this process with a stereo plug,
the radio will not respond when you attempt to access the Clone option of the
startup menu.
2. The keys on the radio are locked. Turn the radio off then back on in normal
mode to check for a lock symbol on the screen. Once the keys have been
unlocked, power off the radio and begin the Communications process again
Radio is not on at the time of data transfer.
This can get the process "out of sync". Cancel the Communications screen on the
computer. Then access that screen again and start over with turning the radio on in
Clone mode. Be sure the battery is charged on your handheld radio or that you are
connected to external power to prevent an unexpected shutdown during this
process.
General Issue
Followed the Steps Incorrectly or executed the wrong process.
Get data from the radio:
1. Go to “Communications” in the top menu.
2. Click “Get Data from Radio”.
3. Read and follow each step. (Remember, the keystrokes are different for each
© 2013 RT Systems, Inc.
218
VX-7 Programmer Help
radio. They are detailed for a particular radio on the Get Data from radio
screen. The trick is to follow each step... one at a time.)
Send data to the radio:
1. Go to “Communications” in the top menu.
2. Click “Send Data to Radio”.
3. Read and follow each step. (Remember, the keystrokes are different for each
radio. They are even different for this process than they were for the Get Data
from Radio process. They are detailed for a particular radio on the Get send
data to radio screen. The trick is to follow each step... one at a time.)
Cable Issues
Check that you are using the correct cable for this radio.
Many radios have jacks that will accommodate the programming cable from a
different radio. Although the cable fits in the jack, the radio does not accept
programming through the wrong jack.
You can see the cables for each radio by clicking on Programming Cable Chart
Check that the cable is securely in the USB Port.
Be sure it has not pulled loose (this is easy to do with a USB). Also, the cable
should be plugged into a USB port on the computer rather than on a USB hub.
Check that the cable is plugged into the radio securely.
On cables with 6- or 8-pin round din plugs, you may want to check that the pins are
not bent in such a way that they are making a bad connection. Unplug the cable
from the radio and check by looking at the pins in the plug.
On cables with 4, 6, or 8 pin modular plugs that address the mic jack, push the
cable toward the connector to be sure the modular plug is plugged into the mic jack
completely. There can be a good bit of play between the mic jack and the plug.
Hold the cable securely until the process is complete.
© 2013 RT Systems, Inc.
Part
XXIV
220
24
VX-7 Programmer Help
Contact Us
RT Systems, Inc.
510 Compton Street, Suite 105
Broomfield, CO 80020
Technical
support
303-586-6510
Fax
770-216-1836
Technical
Support Hours
Monday through Friday
10:30AM until 6:00 PM
9:30AM until 5:00 PM
8:30AM until 4:00 PM
7:30AM until 3:00 PM
(Eastern Time)
(Central Time)
(Mountain Time)
(Pacific Time)
Other times by appointment. Call or e-mail to make
arrangements.
Web Page
www.rtsystemsinc.com
Program updates
Answers to frequently asked questions can be
reviewed under FAQs on our site.
E-mail
[email protected]
Should you choose to send a message via e-mail, be
sure to include at the very least the following details:
The radio with which you use the Programmer
The version number of the Programming software
© 2013 RT Systems, Inc.
Contact Us
(found in the Programmer under
Help | About)
Based on the information given, we will respond as
quickly as possible.
Be sure that rtsystemsinc.com is set as an
acceptable address for your e-mail program. Or
watch for your response in your spam or junk mail
folder.
© 2013 RT Systems, Inc.
221
© 2013 RT Systems, Inc.