1
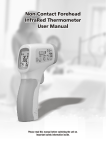
Siren & Strobe Alarm User Manual SSA3 Thank you for purchasing the SSA3 Indoor / Outdoor* wired and wireless Siren Strobe alarm. The SSA3 works with a TM traditional wired trigger from a security control panel or as a wireless Z-Wave enabled alarm device and will sound a TM loud siren and flash a strobe light when an alarm message or alert is received on the Z-Wave network. The SSA3 will also sound the siren based on a home security panel trigger (when wired to the panel). The SSA3 will wirelessly TM activate (or deactivate) the siren and/or the strobe light, if it is included in a Z-Wave network. *Outdoor Use The SSA3 is not recommended for direct exposure to harsh elements such as rain, snow, and sun. Specifications Power: Distance Range: Product Size (LxWxD): Product Weight: Operating Temperature: Sound Intensity: Anti-tamper switch: IP Rating System Requirement: DC Power adapter 9V to 16V/300mA or wire from Security Panel, Max 100ft line of sight in unobstructed environment, Approx 200mm x 10mm x 60mm height, 500g (1 lb) total weight including power adapter, -10ºC (14F) to +70ºC (158F) 120dB @10cm; 105dB@1m included IP54 TM Any Z-Wave enabled network and controller. Cautions The SSA3 is based on wireless (RF) transmissions. Any wireless transmission can be subject to RF interference and, although unlikely, this interference may cause the SSA3 to not operate as intended. RF transmissions will be attenuated by tinted glass, in wall isolation with metal foils, metal objects etc. Test communication to the SSA3 before final placement. Add additional Z-Wave repeater modules to improve RF communication if necessary. Z-Wave is a mesh network; more units provides more reliable communication. The SSA3 must not be used in life support and/or safety applications. Information provided in this document is for your convenience and may be superseded by updates to either the document or the product. It is your responsibility to ensure that the SSA3 meets with your specifications. The SSA3 is extremely loud! Wear ear Protection! Be careful when power (permanent or 9V backup) is applied! Using the SSA3 in a Z-Wave TM Network The button inside the unit SW1 is used for including or excluding the SSA3 in a ZTM Wave network. Refer to your controller’s User Manual for details on network inclusion, exclusion, and association. Inclusion in (adding to) a network: 1) Set up the inclusion mode at the controller (If the controller is in Network Wide Inclusion (NWI) mode, the SSA3 will automatically be included at power on); 2) If the controller does not support NWI, press the SW1 button once to exit NWI mode. 3) Press the SW1 button again to include the unit in the network. The controller will indicate that the unit has been included in the network. Also, the Status LED will flash when the inclusion completes. Inclusion and exclusion are always done at normal transmit power mode. Exclusion from (removing from) a network: 1) Set up the exclusion mode at the controller; 2) Press the SW1 button once. The SSA3 will be removed from the network and the Status LED will flash. TM Associations: Once in a network, a controller can be used to associate other devices in the Z-Wave network so they can control the SSA3. Refer to your controller’s documentation on how to associate another device with the SSA3. Devices performing other functions and from other vendors can also be part of your network and can act as repeaters to extend the network range. See www.fortrezz.com for controller examples. Testing the SSA3 (prior to installation) CAUTION: The SSA3 is extremely loud! Wear ear Protection! The siren functionality can be tested before including the unit in the network and after manually exiting the Network Wide Inclusion (NWI) mode. Exit NWI mode by pressing the button once; the status LED will then continually blink 4 times. Press and hold the button to test the siren. The SSA3 will turn the siren and strobes on and will remain on until the button is released. While the siren is on, it will continually sound until the button is released. While the strobe is on, the unit will flash at a rate of once per second. 1080 Centre Rd. Suite C Auburn Hills, MI 48326 www.fortrezz.com Phone: (248) 481-7092 [email protected] Made in USA 09Sep2013 (P3/4) Installation Suggested sequence for installation and testing: Mount the SSA3’s bottom plate at its permanent location Plug in the power adapter Open the SSA3 by unscrewing the screw on the front Include the SSA3 in the network via automatic NWI mode or by exiting NWI mode and pressing / releasing the the button on the circuit board (see Inclusion section above) e) After the SSA3 has been included in your network and it communicates with the controller, scenes / rules / associations may be set up f) Check the SSA3 using your controller (for example, turn on the strobe) g) Install the 9V battery, close the SSA3, and plug in the power adapter. a) b) c) d) Note that the SSA3 tamper switch (lever through bottom plate) is not activated when the SSA3 is not included in the ZTM Wave network. The tamper switch also is not activated for 30 minutes after inclusion into the network. This is to make it easier (and quieter) to install the SSA3 and position the red cover after inclusion. Controlling the SSA3 (MultiLevel Switch Command Class or Basic Command Class) If a Z-Wave MultiLevel Switch Set or Basic Set signal with a value of 67 to 99 or 255 is received by the SSA3, the unit will sound a 120-decibel audible alarm and will flash the strobe lights. A value of 1 to 33 will turn on only the strobe lights while a value of 34 to 66 will turn on only the siren. The same messages with value 0 will turn off both the siren and strobe lights. Or, the SSA3 can be turned off locally by quickly pressing the button three (3) times. The SSA3 only returns 0, 33, 66, or 99 in response to a Multilevel Switch Get or Basic Get command depending on the mode. With a controller, the status of any SSA3 in the network can be checked. Your controller’s remote access capabilities may allow you to control or to check the status of any SSA3 in your network from a remote location such as from another city, state, or country. Check your controller’s documentation for its features/capabilities and for instructions. TM Other Z-Wave Information Generic Device Class: GENERIC_TYPE_SWITCH_MULTILEVEL; Specific Device Class: SPECIFIC_TYPE_NOT_USED Manufacturer Specific Command Class: Manufacturer ID: 0x0084, Product Type ID: 0x0343 (US) 0x0341 (EU), Product ID: Version and Revision may vary TM Version Command Class: Provides Z-Wave and application version information Configuration Command Class: Parameter 1: Delay, from the time the siren-strobe turns on, before the Basic Set Off command is accepted; 1 Byte (in seconds, default is 0, interpreted as unsigned integer for negative values sent in set command). This could be used, for example, to avoid the situation where an associated window/door sensor turns the SSA3 alarm on and immediately off when the window/door is opened and then quickly closed. Application Status Command Class: Responds with Application Busy / Try Again in Waittime seconds if a delay is Configured and if Basic Set is used to try to turn off the SSA3 before the delay time has expired. Waittime is the number of remaining seconds in delay. Multilevel Switch Start and Stop Level Change Commands are implemented; levels change at 10sec intervals. Alarm Command Class (V2) reports: a) the main power has dropped out or has been applied if a 9V battery is installed (Alarm Type 8, Event 5), b) the security panel trigger is active (Alarm Type 7, Event 2); c) the tamper switch is active (Alarm Type 7, Event 3). Note that automatic reporting is disabled by default, but can be enabled by using the Alarm Set command. Association Command Class: allows the above alarms to be automatically sent to up to two nodes per alarm type (per association group). See table below. Association Group 1 2 3 Alarm Description Tamper switch on back of SSA3 is active (level is 0xFF) Main power has dropped (level is 0xFF) Security panel trigger is active (level is 0xFF) Status LED Indications *If the LED remains on after connecting power, please disconnect and contact FortrezZ, LLC customer service. 1 Fast Blink (periodic) – Network Wide Inclusion Mode (NWI), automatic at power up if not in a network 2 Fast Blinks – After Inclusion or at power-up, if already in a network 4 Fast Blinks (periodic) – After exiting NWI mode and SSA3 is not in a network or after exclusion 2 Slow Blinks (periodic) – Main power dropout, SSA3 is running on 9V battery 1080 Centre Rd. Suite C Auburn Hills, MI 48326 www.fortrezz.com Phone: (248) 481-7092 [email protected] Made in USA 09Sep2013 (P3/4) Advanced Installation Instructions If the SSA3 is to be used inside a security loop, connect wires to terminal block JP2 terminals labeled GND and SECURITY LOOP and disconnect shunt from JP6. If the SSA3 needs to be triggered from the Security Panel, connect wires to terminal block JP2 terminals labeled GND and TRIG-ON GND. In this case, confirm that your Trigger from the Security Panel goes to GND when active. If the STROBE function is necessary for alarms from Security Loop or from Security Panel, connect a solder bridge on R25 Jumper. Note that connecting R25 Jumper will disable the Multilevel Function of TM the SSA3 in Z-Wave mode of operation. Main Power Dropout - optional 9V battery If main power drops, the SSA3 can continue to operate on the internal 9V battery if installed, but, if triggered, will only sound the Siren for approx. 5 seconds and flash the Strobe for 30 seconds. Also, two seconds after power drops, the SSA3 will sound the siren for 5 seconds and strobe the LEDs for 30 seconds if a 9V battery has been installed. Power dropout status can be monitored by a controller, using the Alarm Command Class. If the 9V backup battery is not discharged, the SSA3 will send an alert to that controller at regular intervals when it detects that main power has dropped out. In addition, the status LED will periodically blink. Under power dropout conditions, if the SSA3’s periodic alerts are not being received, this might be an indication that the backup battery has discharged or that transmissions from the SSA3 can no longer be routed (perhaps because of power off to the entire house). The 9V backup battery should be replaced once per year or more often if main power drops out. Do not install batteries that appear damaged or unsealed. Caution: The siren will sound when the SSA3 is opened to change the battery. To avoid this, the SSA3 can be excluded (removed) from the network before opening and then re-included after replacing the battery. If this is not desirable, the internal button can be pressed 3 times in quick succession to stop the siren when the SSA3 is opened. FCC Compliance Statement Statements Contains Transmitter Module FCC ID: XCT-Z3US This device complies with Part 15 of the FCC Rules. Operation is subject to the following two conditions: 1. This device may not cause harmful interference, and 2. This device must accept any interference received, including interference that may cause undesired operation. This equipment has been tested and found to comply with the limits for a Class B digital device, pursuant to part 15 of the FCC Rules. These limits are designed to provide reasonable protection against harmful interference in a residential installation. This equipment generate, uses and can radiate radio frequency energy and, if not installed and used in accordance with the instructions, may cause harmful interference to radio communications. However, there is no guarantee that interference will not occur in a particular installation. If this equipment does cause harmful interference to radio or television reception, which can be determined by turning the equipment off and on, the user is encouraged to try to correct the interference by one or more of the following measures: Reorient or relocate the receiving antenna. Increase the separation between the equipment and receiver. Connect the equipment into an outlet on a circuit different from that to which the receiver is connected. Consult the dealer or an experienced radio/TV technician for help. CAUTION: To satisfy FCC RF Exposure requirements for mobile and base station transmission devices, a separation distance of 20cm or more should be maintained between the antenna of this device and persons during operation. To ensure compliance, operation at closer than this distance is not recommended. 1080 Centre Rd. Suite C Auburn Hills, MI 48326 www.fortrezz.com Phone: (248) 481-7092 [email protected] Made in USA 09Sep2013 (P3/4) Canada: Industry Canada Statement per Section 4.0 of RSP-100. The term "IC:" before the certification/registration number only signifies that the Industry Canada technical specifications were met. From section 7.1.5 of RSS-GEN. Operation is subject to the following two conditions: 1) This device may not cause harmful interference, and 2) This device must accept any interference received, including interference that may cause undesired operation. From section 7.1.1 RSS-Gen, Issue 2, June 2007 a) The host device, as a stand-alone unit without any separately certified modules, complies with all applicable Radio Standards Specifications. b) The host device and all the separately certified modules it contains jointly meet the RF exposure compliance requirements of RSS-102, if applicable. c) The host device complies with the certification labeling requirements of each of the modules it contains. From section 5.2, RSS-Gen, Issue 2, June 2007 Equipment Labels: Contains IC: 8156A-Z3X From section 7.1.6, RSS-Gen, Issue 2, June 2007 Digital Circuits: If the device contains digital circuitry that is not directly associated with the radio transmitter, the device shall also have to comply with ICES-003, Class A or B as appropriate, except for ICEC-003 labeling requirements. The test data obtained (for the ICES-003 tests) shall be kept by the manufacturer or importer whose name appears on the equipment label, and made available to Industry Canada on request, for as long as the model is being marketed in Canada. Europe The SSA3 module has been certified for use in European countries. Completed testing: Test standard: ETSI EN 300 328 V1.7.1 (2006-10). The Waste Electrical and Electronic Equipment (WEEE) directive (2002/96/EC) was approved by the European Parliament and the Council of the European Union in 2003. This symbol indicates that this product contains electrical and electronic equipment that may include batteries, printed circuit boards, liquid crystal displays or other components that may be subject to local disposal regulations at your location. Please understand those regulations and dispose of the product in a responsible manner. LIMITED WARRANTY THE PRODUCT IS PROVIDED WITH ONE YEAR LIMITED MANUFACTURER WARRANTY. FORTREZZ, LLC warrants its products to be free from defects in material and workmanship under normal use for one year, and is not responsible for consequential damages or installation costs of any nature. FORTREZZ, LLC. expressly disclaims all implied warranties, including but not limited to the implied warranties of merchantability and fitness for a particular purpose. FORTREZZ, LLC does not warrant, guarantee, or make any representations regarding the use or the results of the use of the products or any accompanying materials in terms of their correctness, accuracy, reliability or otherwise. In no event shall FORTREZZ, LLC. be liable to Purchaser hereunder or in respect of any products ordered or delivered to Purchaser, whether in contract, tort including negligence or otherwise for a loss of profits or loss of use or for any incidental, consequential, special or indirect damages howsoever caused whether or not FORTREZZ, LLC. has been advised of the possibility of such loss or damage. FORTREZZ, LLC's maximum liability to Purchaser under these conditions shall in no event exceed the amount paid by Purchaser for the products that are the subject of the claim and in respect of all claims for products ordered from FORTREZZ, LLC to which these conditions apply to the amount paid by Purchaser for the products which are the subject of the claims. Specifications subject to change without notice. As the end-user, it is your responsibility to ensure the SSA3 meets the requirements of your application. If you are not comfortable with your limited warranty, or not completely satisfied with the SSA3, or the SSA3 does not perform as expected we encourage you to return the SSA3 to your DISTRIBUTOR for an exchange or for a full refund within 30 days of purchase. Or, you can return the SSA3 to FORTREZZ with an RGA number. All products to be returned to FORTREZZ, LLC. must have a valid Returned Goods Authorization (RGA). Send the returned unit to: FortrezZ, LLC Warranty Replacement, 1080 Centre Rd. Suite C Auburn Hills, MI 48326, return postage prepaid. You must use the original packaging and include a proof of purchase (photocopy of receipt) along with the RGA #. Refer to the latest User Manual at www.fortrezz.com 1080 Centre Rd. Suite C Auburn Hills, MI 48326 www.fortrezz.com Phone: (248) 481-7092 [email protected] Made in USA 09Sep2013 (P3/4)