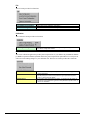
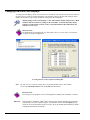
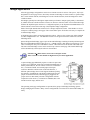
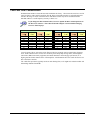
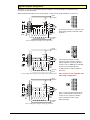
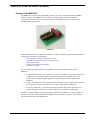
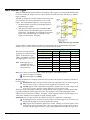
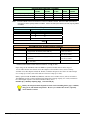
1
USER’S MANUAL
StrainBook/616
Ethernet-Based Strain Gauge
Measurement System
Measurement Computing
*324338B-01*
324338B-01
1137-0901 rev 2.1
10 Commerce Way
Norton, MA 02766
(508) 946-5100
Fax: (508) 946-9500
[email protected]
www.mccdaq.com
StrainBook/616 User’s Manual
1137-0901
Warranty Information
Contact Measurement Computing by phone, fax, or e-mail in regard to warranty-related issues:
Phone: (508) 946-5100, fax: (508) 946-9500, e-mail: [email protected]
Limitation of Liability
Measurement Computing cannot be held liable for any damages resulting from the use or misuse of this product.
Copyright, Trademark, and Licensing Notice
All Measurement Computing documentation, software, and hardware are copyright with all rights reserved. No part of
this product may be copied, reproduced or transmitted by any mechanical, photographic, electronic, or other method
without Measurement Computing’s prior written consent. IOtech product names are trademarked; other product names, as
applicable, are trademarks of their respective holders. All supplied IOtech software (including miscellaneous support
files, drivers, and sample programs) may only be used on one installation. You may make archival backup copies.
CE Notice
Many Measurement Computing products carry the CE marker indicating they comply with the safety and emissions
standards of the European Community. When applicable these products have a Declaration of Conformity stating which
specifications and operating conditions apply. You can view the Declarations of Conformity at
www.mccdaq.com/legal.aspx (CE Information page).
Warnings, Cautions, Notes, and Tips
Refer all service to qualified personnel. This caution symbol warns of possible personal injury or equipment damage
under noted conditions. Follow all safety standards of professional practice and the recommendations in this manual.
Using this equipment in ways other than described in this manual can present serious safety hazards or cause equipment
damage.
This warning symbol is used in this manual or on the equipment to warn of possible injury or death from electrical
shock under noted conditions.
This ESD caution symbol urges proper handling of equipment or components sensitive to damage from electrostatic
discharge. Proper handling guidelines include the use of grounded anti-static mats and wrist straps, ESD-protective bags
and cartons, and related procedures.
This symbol indicates the message is important, but is not of a Warning or Caution category. These notes can be of great
benefit to the user, and should be read.
In this manual, the book symbol always precedes the words “Reference Note.” This type of note identifies the location
of additional information that may prove helpful. References may be made to other chapters or other documentation.
Tips provide advice that may save time during a procedure, or help to clarify an issue. Tips may include additional
reference.
Specifications and Calibration
Specifications are subject to change without notice. Significant changes will be addressed in an addendum or revision to
the manual. As applicable, the hardware is calibrated to published specifications. Periodic hardware calibration is not
covered under the warranty and must be performed by qualified personnel as specified in this manual. Improper
calibration procedures may void the warranty.
CAUTION
Using this equipment in ways other than described in this manual can cause
personal injury or equipment damage. Before setting up and using your
equipment, you should read all documentation that covers your system.
Pay special attention to Warnings and Cautions.
Note:
During software installation, Adobe® PDF versions of user manuals will automatically
install onto your hard drive as a part of product support. The default location is in the
Programs group, which can be accessed from the Windows Desktop. Initial
navigation is as follows:
Start [on Desktop] ⇒ Programs ⇒ IOtech WaveBook Software
You can also access the PDF documents directly from the data acquisition CD by using
the <View PDFs> button located on the opening screen.
Refer to the PDF documentation for details regarding both hardware and software.
A copy of the Adobe Acrobat Reader® is included on your CD. The Reader provides
a means of reading and printing the PDF documents. Note that hardcopy versions of
the manuals can be ordered from the factory.
StrainBook_616Users Manual.pdf
PDF
489-0901
Explains how to make signal and power connections and how to install software. The
document includes an operational reference and a chapter on troubleshooting and
customer support. The following PDFs are companion documents.
WaveView_WaveCal.pdf
PDF
Discusses how to install and use two “out-of-the-box” applications that are intended
for use with WaveBook systems. WaveView is a data acquisition program with a
“spread-sheet” style interface that makes it easy to set up your application quickly and
begin acquiring data within minutes of completing hardware connections. The second
program, WaveCal, is used for periodic calibration of system devices.
PostAcquisition Analysis.pdf
PDF
This PDF discusses the eZ-PostView post-data analysis application. eZ-PostView
is included on the data acquisition CD and can be used in StrainBook applications.
1086-0926
WBK Options.pdf
PDF
489-0902
The WBK Option Cards and Modules Manual discusses each of the WBK products
available at the time of print. The WBK16 and WBK30 sections of that document
may apply to your StrainBook/616 system.
ProgrammersManual.pdf
PDF
1008-0901
iv
User’s Manual
The programmer’s manual pertains to developing custom programs using
Applications Program Interface (API) commands.
Note that the install CD-ROM includes WaveBook program examples.
968594
StrainBook/616
About StrainBook/616 Documentation
In addition to the StrainBook/616 User’s Manual there are several PDF documents of importance. During
software installation, Adobe® PDF versions of documents are automatically installed onto your hard drive. The
default location is in the Programs group, accessible through the Windows Desktop. The documents may also
be viewed directly from the data acquisition CD via the <View PDFs> button located on the CD’s opening
screen.
Unless you have hardcopy equivalents, you should refer to the PDF version documents for details regarding
both hardware and software.
The StrainBook/616 User’s Manual consists of the following chapters. These contain references to other
documents when applicable.
Chapter 1 – Introduction
Chapter 2 – Operation Reference
Chapter 3 – Connectors, Indicators, and Cables
Chapter 4 – Software
Chapter 5 – Setup and Connecting to the Ethernet
Chapter 6 – Bridge Configurations
Chapter 7 – Triggers
Chapter 8 – Digital I/O, TTL Trigger, and External Clock
Chapter 9 – CE Compliance and Noise Considerations
Chapter 10 – System Expamsion
Chapter 11 – Troubleshooting and Customer Support
Chapter 12 – Specifications
Appendices
Appendix A – Using the Daq Configuration Applet with StrainBook
Appendix B – TCP/IP and Resource Tests
Glossary
CAUTION
Using the equipment in ways other than described in the documentation can cause
personal injury or equipment damage. Pay attention to all Warnings and Cautions.
Reference Notes:
Information (not available at the time of publication), will be made available in ReadMe files,
or in supplemental documentation.
Note:
StrainBook/616
A copy of the Adobe Acrobat Reader® is included on your CD. The Reader provides a means of
reading and printing the PDF documents. Note that hardcopy versions of the manuals can be
ordered from the factory.
968594
User’s Manual
v
This page is intentionally blank.
vi
User’s Manual
968594
StrainBook/616
Table of Contents
Chapter 1 – Introduction
What is StrainBook/616? …… 1-1
What are WBKs? …… 1-3
How is StrainBook/616 Powered? …… 1-3
How are Multiple StrainBooks Synchronized? …… 1-4
Chapter 2 – Operation Reference
A Note Regarding WBK Option Cards and Modules …… 2-1
Basic Operation (Includes Block Diagrams) …… 2-2
Triggers …… 2-7
Synchronizing Multiple StrainBooks …… 2-8
Programmable Features …… 2-10
Operational Tips …… 2-10
Chapter 3 – Connectors, Indicators, and Cables
Front Panel Connectors and Indicators …… 3-1
Rear Pannel Connectors, Indicators, and Power Switch …… 3-2
Associated Cables …… 3-4
Chapter 4 – Software
Accessing Software-Related PDF Documents …… 4-1
An Introduction to Software …… 4-2
WaveView …… 4-2
eZ-PostView …… 4-2
WaveCal …… 4-4
Icon-Based Software (DASYLab® and LabVIEWTM) …… 4-4
Language Drivers for Programmers (DaqXTM and DaqCOMTM) ….. 4-4
Programmable Features in WaveView …… 4-5
Sensor Calibration …… 4-8
Changing Low-Pass Filter Displays …… 4-20
Chapter 5 – Setup and Connecting to the Ethernet
System Requirements …… 5-1
Software Installation …… 5-2
Ethernet Connection and System Power-up …… 5-3
StrainBook/616
967594
vii
Chapter 6 – Bridge Configurations
Introduction …. 6-1
CN-115 Headers, Associated Jumpers, and Plug-In Options …… 6-2
Bridge Applications …… 6-3
Removing the Cover Plate …… 6-4
Excitation Connection …… 6-5
Installing a CN-115 ….. 6-6
Low Pass Filter Customization …… 6-7
Configuration Diagrams …… 6-8
Full-Bridge …… 6-8
Half-Bridge …… 6-9
Three-Wire Quarter-Bridge …… 6-10
High-Gain Amplifier …… 6-11
Connecting to the DB9 Channel Input Connector …… 6-12
CA-177 Strain Gage Cable …… 6-12
CA-189, DB9 Adapter Option …… 6-13
WBK16/LC Load Cell Shunt Cal Internal Option …… 6-15
CN-115-1 User-Configurable Plug-In Card Option …… 6-20
Chapter 7 – Triggers
Introduction …… 7-1
Digital (TTL) Trigger …… 7-1
Multi-Channel Trigger …… 7-2
Digital-Pattern Trigger …… 7-6
External Clock and Counter Timer …… 7-7
Chapter 8 – Digital I/O, TTL Trigger, and External Clock
Introduction …… 8-1
Connections for 16-Bit Mode …… 8-1
Connections for 8-Bit Mode …… 8-2
TTL Trigger …… 8-3
External Clock …… 8-3
Chapter 9 – CE Compliance and Noise Considerations
Overview …… 9-1
CE Standards and Directives …… 9-1
Safety Conditions ……9-2
Emissions/Immunity Conditions ……9-3
Using Shielded BNC Connectors for CE Compliance …… 9-3
CE Compliance for StrainBook/616 System Expansion …… 9-3
Noise Considerations …… 9-4
Chapter 10 – System Expansion
Memory Expansion using a WBK30 Option …… 10-1
Channel Expansion…… 10-2
Using WBK16 Modules with StrainBook …… 10-2
Using WBK40 or WBK41 Modules with StrainBook …… 10-5
Synchronizing Multiple StrainBooks …… 10-8
Connecting the System to Power ……10-9
viii
929494
StrainBook/616
Chapter 11 – Troubleshooting and Customer Support
Electrostatic Discharge (ESD), Handling Notice…… 11-1
Product Care …… 11-1
ReadMe Files and the Install CD-ROM ……11-2
Driver Support …… 11-2
Troubleshooting Tables …… 11-2
Frequently Asked Questions …… 11-11
Customer Support …… 11-13
Chapter 12 – Specifications
Appendices
Appendix A – Using the Daq Configuration Applet
Appendix B – TCP/IP and Resource Tests
Glossary
StrainBook/616
967594
ix
This page is intentionally blank.
x
967594
StrainBook/616
Introduction
1
What is StrainBook/616? ...... 1-1
What are WBKs? …… 1-3
How is StrainBook/616 Powered? …… 1-3
How are Multiple StrainBooks Synchronized? …… 1-4
StrainBook/616
What is StrainBook/616?
Features
o
o
o
o
o
o
o
o
o
o
o
o
8 built-in channels, expandable up to 64 channels per StrainBook/616
Multiple StrainBook/616 system support to expand beyond 64 channels
Expansion options for: voltage, temperature, vibration, velocity, and sound measurement
High-speed Ethernet interface for continuous measurement transfer to the host PC
1 MHz scanning A/D converter
Simultaneous Sample and Hold (SSH), user-selectable on a per-channel basis
100% programmable; no pots to adjust
Full, Half, and Quarter bridge support
60 to 1000 Ohm bridge support
Software selectable Shunt-Cal
Independent filter per channel
Programmable excitation source
Product Overview
StrainBook/616 is a portable strain gage measurement system that connects to a PC’s Ethernet port. Each
unit includes 8 built-in channels for strain measurement and can be expanded to measure up to 64 channels.
Expansion is accomplished via optional WBK16 strain gage modules.
For applications requiring more than 64 channels, multiple StrainBook/616 units can be combined and
synchronized to obtain a virtually limitless number of channels. In addition to strain measurement,
StrainBook/616 is capable of measuring voltage, temperature, vibration, and sound with the use of other
WBK signal conditioning options.
StrainBook/616 is shipped with WaveView software. WaveView allows for set-up, data-acquisition, realtime display, and storage to disk. No programming knowledge is needed.
StrainBook /616
967794
Introduction 1-1
WaveView supports up to 64 channels of strain, voltage, or sound/vibration input. For applications beyond
64 channels, or for custom applications, comprehensive drivers are included for Windows languages,
LabVIEW®, and DASYLab®.
StrainBook/616 includes a 1 MHz A/D converter that can scan all selected channels at 1µs per channel and
continuously transmit acquired data to the PC in real time. However, when the simultaneous sample and
hold option (SSH) is turned on, amplifiers ensure that all channels are measured within 100 ns of each
other. The amount of data acquired is only limited by the storage capacity of the host PC. If the channels
are in SSH mode the maximum sample rate is further reduced by one sample. This is to give the SSH
amplifier time to sample. This means that each of the 8 StrainBook channels (when in SSH) can be
scanned at 111 kHz. This equals 1 MHz divided by 9; where the 9 is from the 8 channels plus the 1
additional sample rate reduction and the 1 MHz is from the A/D converter processing speed.
When all 8 channels of the StrainBook/616 are configured the maximum sample rate per channel is
125 kHz. This maximum rate per channel is derived by dividing the 1 MHz [from the A/D converter] by
the number of channels. Thus, when 64 channels of strain are configured the rate is 15.6 kHz per channel.
StrainBook/616 supports a wide range of bridge values configured for full, half, and quarter bridge
configurations. Excitation with remote sensing is supplied from an internal regulator, eliminating the need
for an external voltage source. The unit includes wide gain ranges and filter selection which make it an
excellent general purpose or high gain amplifier for other transducer inputs.
Up to 8 input signals attach to the unit, each via a DB9 connector on the front panel. Each channel has an
independent gain stage. The stage is software programmable in more than 50 steps from 1 to 20,000 to
provide optimal gain for any strain application. The excitation source is accurate to ±5 mV with very low
drift over time.
The dual excitation sources are set through software to 0.5, 1, 2, 5, or 10 volt excitation and can be used in
either a standard or 6-wire Kelvin configuration. Each channel is individually current limited to 85 mA to
protect against accidental short circuits.
Both high-AC coupling and low-pass noise rejection filtering can be enabled through software. Two 4pole Butterworth filters factory-set to corner frequencies of 10 Hz or 1 kHz pass can be selected. The
filters can be modified over a range of 2 Hz to 20 Hz by inserting a user-supplied resistor pack.
Unlike most strain instruments that make use of a single fixed configuration, both the StrainBook/616 and
the WBK16 option allow multiple bridge-configurations to be pre-configured on a user-installed header.
Once installed, each configuration can be selected via software. In addition, many configurations can be
changed via software. For example, you can change a transducer from full-bridge to quarter-bridge using
software alone, i.e., with no physical alteration to the bridge. Transducer resistance can also be changed
via software.
Each header supports: 2 half-bridge resistors, 3 quarter-bridge values, and 3 shunt-cal values per channel.
Three software-selectable shunt calibration resistors [to be supplied by the customer] are user-installable
for each channel. This allows each channel to be placed into a known imbalance condition to set or verify
channel calibration. Shunt-cal allows a full-scale gain to be set without physically loading the bridge to
capacity.
Bridge balancing is quick and convenient as there are no potentiometers to adjust. Just select “autobalance” for the associated channels. Auto-balance removes the static portion of the strain load and autozeros the input to compensate for any input drift.
1-2 Introduction
929494
StrainBook/616
What Are WBKs?
You can use optional modules and cards to enhance or expand your StrainBook/616 system. These options
are known as WBKs.
Typically, the StrainBook/616 is used with one or more WBK16 modules when you require more than 8
channels. The WBK16 is an 8-channel strain-gage signal-conditioning module. Up to 7 WBK16 modules
can be accommodated by the StrainBook/616 (for a total of 64 channels) and scanned at 1 µs/channel.
Almost all bridge configurations are supported via a bridge-completion network and software. High-gain
differential-amplifier applications are also supported. Software controls bridge configuration, gain, offset,
excitation voltage, polarity, filtering, and the calibration process.
Another WBK option popular with the StrainBook/616 is the WBK30 memory board. WBK30 is a
DRAM-based memory board that installs inside a StrainBook. There are three models of WBK30
available; each significantly increases the capacity of a StrainBook’s standard data buffer of 64 K samples.
Capacities are as follows:
WBK30/16 — 16 MB
WBK30/64 — 64 MB
WBK30/128 — 128 MB
The WBK30 option, if selected for use in StrainBook, must be factory installed.
Reference Note:
o The WBK16, WBK30, WBK40, and WBK41 are briefly discussed in Chapter 10,
System Expansion. A more detailed discussion of these and other WBK is presented
in the WBK Option Cards and Modules User’s Manual, p/n 489-0902. A PDF version
of the document is included on your data acquisition CD.
o The WBK16/LC Shunt Relay Module option is a small card that can be plugged into a
channel’s CN-115 header on the StrainBook and WBK16 printed circuit boards.
WBK16/LC is used for shunt calibration and is discussed in Chapter 6 of this user’s
manual.
How is StrainBook/616 Powered?
Power supply input voltage to the StrainBook/616 and to the system modules, e.g., WBK10A, WBK14,
WBK15, WBK16, WBK17, WBK18, WBK40, and WBK41 must be in the range of 10 VDC to 30 VDC
and can come from an appropriate AC-to-DC adapter or a battery option. The latter includes DBK power
modules and batteries in the range of 10 VDC to 30 VDC.
Available AC-to-DC adapters include the TR-40U, which has an input of 90-264 VAC and an output
rating of 3.3 amps @ 15 VDC. Note to check the specifications of your specific TR-40U as some earlier
models have lower current ratings.
Battery options include the DBK30A, DBK34A, and other 10 to 30 VDC sources, such as car batteries.
The DBK30A provides 14 VDC and when fully charged has a storage capacity of 3.4 A⋅hr; car batteries
have much higher capacities. The basic formula for battery life is:
Runtime (hr) = Battery capacity / load
(W⋅hr / W)
Where: W = Supply Voltage x Input Current
StrainBook /616
967794
Introduction 1-3
How are Multiple StrainBooks Synchronized?
Up to four StrainBook/616 units can be synchronized to each other via their SYNC ports. Each unit has
two identical SYNC ports. Either or both SYNC ports can be used to connect to the units via SYNC cables
CA-74-1 or CA-74-5 (1-foot or 5-foot cables, respectively). The units can be scan-synchronized and
triggered from any other SYNC-connected unit.
Ethernet Cable
to PC
TR-40U Power
Adapter
SYNC Cables
CA-74-1 (1 ft.) or
CA-74-5 (5 ft.)
Three StrainBook/616 Units, Synchronized
Not all trigger modes are supported in multiple StrainBook/616 Systems.
Synchronization Concept Block Diagram
The preceding diagram shows how a StrainBook/616 can input or output synchronization timing and
trigger events on either SYNC connector.
SYNC cables are not to exceed a total combined length of 15 feet (4.57 m).
1-4 Introduction
967794
StrainBook/616
Operation Reference
2
A Note Regarding WBK Option Cards and Modules …… 2-1
Basic Operation …… 2-2
Triggers …… 2-7
Synchronizing Multiple StrainBooks …… 2-8
Programmable Features …… 2-10
Operational Tips …… 2-10
A Note Regarding WBK Option Cards and Modules
Reference Note: The following WBK options can be used with StrainBook systems.
o WBK16/LC is discussed in chapter 6 of this user’s manual.
o Refer to the WBK Option Cards and Modules User’s Manual (p/n 489-0902) for detailed information
regarding other WBK options. A PDF version of the document is included on the data acquisition CD.
WBK
WBK10A
Description
8-Channel Expansion Chassis
Hardware Type
Expansion Module
WBK11A *
8-Channel SSH Card
Signal Conditioning Card
WBK12A *
8-Channel Programmable Low-Pass Filter Card
Signal Conditioning Card
WBK13A *
8-Channel Programmable Low-Pass Filter Card with SSH**
Signal Conditioning Card
WBK15
8-Channel Isolated (5B) Signal Conditioning Module
Expansion Module
WBK16
8-Channel Strain Gage Module
Expansion Module
WBK16/SSH
8-Channel Strain Gage Module with SSH
Expansion Module
WBK16/LC
1-Channel Load Cell, Shunt Cal Internal Option (see ch. 6)
Shunt Relay, plug-in
WBK17
8-Channel Counter-Input Module with Quadrature Encoder Support
Expansion Module
WBK18
8-Channel Dynamic Signal Conditioning Module with Transducer
Electronic Data Sheet support (T.E.D.S.)
Expansion Module
WBK30
Memory Expansion Cards; 16 MB, 64 MB, or 128 MB
(WBK30/16, WBK30/64, WBK30/128)
Memory Expansion Cards
WBK40
14-Channel Thermocouple Input Module
Expansion Module
WBK41
Multi-Function I/O Module (14-Channel T/C, 40-Channel Digital I/O,
4 Counter Inputs, 2 Timer Outputs, Optional 4 Analog Output
Channels)
Expansion Module
* WBK11A, WBK12A, and WBK13A cannot be used directly with StrainBook. Each requires mounting within a
WBK10A if it is to be used in a StrainBook system.
** SSH is Simultaneous Sample and Hold
StrainBook Fan
The internal components of StrainBook/616 are air-cooled. Cooling to ambient occurs as long
as the surrounding environment is cooler than the unit. When the unit becomes too warm for
ambient cooling, a temperature sensor signals the fan to run.
Fan speed varies according to the unit’s internal temperature. In cooler temperatures the fan
operates at lower speeds, thus reducing audible noise.
To allow for sufficient cooling, it is important to keep the fan and vents free of obstruction.
StrainBook/616
967794
Operation Reference
2-1
Basic Operation
StrainBook/616 Block Diagram
The Expansion Port is typically used to connect a WBK40 or WBK41, when applicable.
2-2 Operation Reference
967794
StrainBook/616
Signal Conditioning, per Channel
StrainBook/616 includes signal-conditioning circuitry (following figure) for eight channels. In addition, up
to seven WBK16 strain gage modules can be added to a single StrainBook/616. This results in a system of
up to 64 channels, scanned at 1 µs/channel.
Almost all bridge configurations are supported via a bridge-completion network and software. High-gain
differential-amplifier applications are also supported. Software is used to control bridge configuration,
gain, offset, excitation voltage, polarity, filtering, and the calibration process.
Each Input Channel has a Dedicated Signal Conditioning Circuit
Channel Selection
The eight independent, signal-conditioned channel signals are routed to the Channel Selection MUX
(multiplexer) for output through the Analog Expansion Interface (see main block diagram). Another
interface, the Expansion Control Interface, controls the channel-scanning process and allows digital
configuration of all channels through the Serial Control Bus.
Dual-Programmable DC Reference and Excitation
Excitation power is programmable from a dual source. Channels 1 through 4 have a common source (Bank
1 DC Reference). Channels 5 through 8 use a second source (Bank 2 DC Reference). Each channel has a
separate regulator with a fold-back current limiter. Up to 85 mA is provided at 10 V out, decreasing to
30 mA when shorted. This is sufficient current to operate 120 Ω gages at any voltage. Programmable
output voltages of 0, 0.5, 1, 2, 5, and 10 volts are available. Remote-sense inputs are provided and should
be connected at the strain gage for best accuracy. If they are not used, they need to be jumpered to the
excitation output at the connector. The remote-sense inputs are fully differential, and may even be
connected across the completion resistor to form a constant-current linearized quarter-bridge configuration.
StrainBook/616
967794
Operation Reference
2-3
Bridge Configuration
The strain gage, connected to a DB9 connector, connects to amplifiers through a channel-dedicated Bridge
Completion and Shunt Cal Network. This network consists of user installed resistors for bridge completion.
Several combinations of resistors and three different shunt values may be installed simultaneously.
External connector tie points and the programmable Input Configuration & Cal MUX determine the actual
configuration in use. Once the network is fully configured, most bridge configurations and resistances can
be accommodated without re-opening the StrainBook.
The shunt resistors allow each bridge to be put into a known imbalance condition for setting or verifying
channel calibration. Shunt calibration allows a full-scale gain to be set without physically loading the
bridge.
Reference Note:
Chapter 6 contains detailed information regarding bridge configuration and includes
discussion of the convenient CN-189 DB9 adapter option.
Amplifiers
Each channel has its own amplifier consisting of two series-connected stages. The instrumentation
amplifier (PGIA) has programmable gains of x1, x10, x100, and x1000. A programmable gain amplifier
(PGA) follows, with a gain range of 1 to 20 in 28% steps. This results in a combined programmable gain
range
of 1 to 20,000 in 28% steps. The optimal gain is automatically determined during the gage calibration
process.
Offset Source
A low-drift, programmable offset voltage source with a range of ±3.0 V is used to balance the bridge
during the gage calibration process. This offset source will correct for mismatched bridge resistors and
quiescent loads of the strain gage and still retain the full dynamic range.
Auto-zero removes the static portion of the strain load and zeros the input to compensate for any input
drift. Because this is done electronically, zeroing is independent of the user. Simply select the channels
that are to be auto-zeroed and the StrainBook will automatically complete the task.
Filters
Two different 4-pole Butterworth low-pass noise rejection filters are selectable through software by the
Output Selection MUX. The filters have a nominal cutoff frequency of 10 Hz and 1 kHz. Four SIP resistor
networks allow you to determine two cutoff frequencies. See the Hardware Configuration section for
details. If full bandwidth is required, a filter bypass mode is software selectable.
Output Selection
An AC coupling circuit with a 1-Hz cutoff frequency can be software selected by the MUX. This MUX
can also select an Inverting Amplifier for proper output signal polarity. The Inverter avoids having to
rewire the gage if the polarity is reversed. Note that the Inverter option is not available for AC-coupling
modes.
Digitizing Signals
One digital signal processor (DSP) is shared by all channels, including expansion channels. The DSP
processes digitized input signal values (directly from the StrainBook and from expansion modules) and
corrects the values for gain and offset errors. The DSP places the corrected result into the FIFO data buffer
that holds the samples until the PC reads the data. If the sample is used for triggering, the DSP determines
if a valid trigger event has occurred.
2-4 Operation Reference
967794
StrainBook/616
Using a Sample for Triggering
TTL-level Triggering
StrainBook includes TTL-level triggering through the digital I/O port. A detailed discussion of triggering
begins on page 4-7.
Sync Ports
StrainBook includes two SYNC ports. Up to four StrainBooks can be scan-synchronized and triggered by
connecting one of the two SYNC ports of a unit to a SYNC port on a second StrainBook. StrainBooks can
also be connected in this manner to a SYNC port on a WBK40 or WBK41 module.
Additional information on synchronization begins on page 4-8.
Control, Timing, and Signal Processing
At each sample time, the DSP: (a) reads from the scan sequence table, and (b) accordingly programs a
Control-and-Timing Circuit for the next sample. The Control-and-Timing Circuit waits precisely until the
start of the next sample, then selects:
the input channel
PGA gain
level-shifter offset
A/D input source
The control-and-timing circuit conveys this information to any attached expansion units and precisely
controls the A/D conversion timing.
An EEPROM holds the calibration information needed for real-time sample correction.
The digital I/O port is read and written by the Digital Signal Processor to transfer bytes of digital data.
It may be used as a simple 8-bit input port or as a 32-address byte-wide I/O port.
StrainBooks and the Ethernet, General Information
The most common and highest-performance Ethernet connection for StrainBook is achieved via a
dedicated, point-to-point Ethernet link between the PC and the unit’s Ethernet port. Data transfer rates
in this configuration will accommodate continuous 1 Mreading/sec transfers from the StrainBook to the
PC.
With an enterprise-wide Ethernet network connection, any number of StrainBooks can be connected to the
network. Enterprise-wide Ethernet networks are typically shared amongst a large number of devices. In
such a scenario, the data transfer rates from the StrainBook are dependent on other network traffic at the
time of data transfer.
If you need to have continuous, 1 Mreading/s transfers from the StrainBook, you should
avoid connecting StrainBooks to an enterprise-wide Ethernet network. However, to
improve the data transfer performance of StrainBooks that are connected to such a
network, a factory-installed WBK30 memory option should be employed. Contact the
factory for additional information.
Up to four StrainBooks can be synchronized to each other via their SYNC ports. Each unit has two
identical SYNC ports. Either or both SYNC ports can be used to connect to the units via SYNC cables
CA-74-1 or CA-74-5 (1-foot or 5-foot cables, respectively). The units can be scan-synchronized and
triggered from any other SYNC-connected unit. The StrainBooks are individually connected to the
Ethernet, as indicated in the following figure.
This application is useful when the channel requirements exceed the 64 channel capability of one
StrainBook. It is also useful when the per-channel bandwidth exceeds that which could be accomplished
by a lone StrainBook, or if multiple time bases are required.
StrainBook/616
967794
Operation Reference
2-5
Ethernet Cable
to PC
TR-40U Power
Adapter
SYNC Cables
CA-74-1 (1 ft.) or
CA-74-5 (5 ft.)
Three StrainBook/616 Units, Synchronized
Not all trigger modes are supported in multiple StrainBook/616 Systems.
Note: In multiple StrainBook applications, the system can appear as one large, synchronous system.
However, a system composed of many StrainBooks can be configured as several independent
systems, and with each system having its own triggering and sampling rates.
The parallel Expansion Port on a StrainBook can be used to attach a WBK40 thermocouple module or a
WBK41 Multi-Function module. The units are briefly discussed in chapter 10 of this manual and are
detailed in the WBK Options User’s Manual (p/n 489-0902). A PDF version of the document is included
on the data acquisition CD. Note that the SYNC signal on a StrainBook can connect to a SYNC port
theWBK40 or WBK41, ensuring that both A/Ds will operate in synch.
There are two advantages of seamlessly supporting multiple StrainBooks in one system.
o
First, expansion beyond the 64 channel capacity of a single StrainBook.
o
Second, more bandwidth per channel.
For example, a 16 channel system consisting of one StrainBook and one WBK option
provides a maximum bandwidth of 62.5 kHz/channel, i.e., 1M divided by 16.
However, a sampling rate of 125 kHz/channel can be achieved by using one master
StrainBook connected to one slave StrainBook. This new “per-channel” sampling
rate is calculated as follows: 1 MHz divided by 8 equals 125 kHz/channel.
2-6 Operation Reference
967794
StrainBook/616
Digital I/O Connections
Digital I/O can be connected for 16-bit mode or 8-bit mode via the StrainBook’s DB25F high-speed digital
I/O connector labeled “Digital I/O, Ext. Clock, TTL Trigger.” The following signals are accommodated by
the connector.
High-Speed Digital I/O Lines
TTL Trigger Input (TTLTRG) (pin 13)
+15 V (pin 23), -15 V (pin 22), 50 mA max. (each)
two +5 V (pin 19 and pin 21), 250 mA max. (total)
External Clock Input (pin 20)
Digital Clock (pin 18), only used for WBK17 applications
two Digital Grounds (pins 24 and 25)
Reference Note:
The 16-bit and 8-bit modes are both detailed in Chapter 8. That chapter includes a separate
pinout for each mode.
Triggers
External signals can be used to start or synchronize the data acquisition process.
StrainBook supports the following trigger sources:
Software Trigger. This trigger event is generated by a software command from the PC
without waiting for an external event. This feature may be used to begin a data acquisition
immediately or to force an acquisition to occur if the expected trigger did not occur.
Digital Trigger. Digital (or TTL-level) triggering (either rising- or falling-edge input) is
performed by digital logic connected to the digital expansion connector.
Multi-Channel Trigger. Here, the trigger event is a combination of measured channel
values. StrainBook's Digital Signal Processor (DSP) performs multi-channel triggering. The
DSP samples the specified channels; if programmable conditions are met, a trigger is
generated. Multi-channel triggering examines digitized data, and the trigger latencies are
much greater.
Digital-Pattern Trigger: This expanded digital-trigger capability allows data collection to
start when a user-defined 16-bit digital pattern is matched on the digital I/O connector.
This feature is useful when trying to capture noise, vibrations or some other physical
disturbance; such as those that can occur in a programmed logic controller’s digitally
sequenced process.
Reference Note:
Trigger Information is detailed in Chapter 7.
StrainBook/616
967794
Operation Reference
2-7
Synchronizing Multiple StrainBooks
StrainBooks can be synchronized to other StrainBooks, WBK40, or
WBK41 modules via SYNC ports. Each unit has two identical SYNC
ports located on the rear panel. Either [or both] SYNC ports can be
used to connect to the other devices via SYNC cables CA-74-1 or
CA-74-5 (1 ft. or 5 ft. cables, respectively). A StrainBook can be
scan-synchronized and triggered from any other StrainBook that is
connected to it via a SYNC cable.
The diagram shows how a StrainBook can input or output synchronization timing and trigger events on
either SYNC connector. A more detailed block diagram follows shortly.
Reference Note: The SYNC features are programmable via software. For detailed
information see the Using Multiple Devices and the daqAdcSetClockSource sections of
the Programmer’s Manual (p/n 1008-0901). A PDF version of the document is included on
the data acquisition CD.
PDF NOTE:
During software installation, Adobe® PDF versions of user manuals automatically install onto
your hard drive as a part of product support. The default location is in the Programs group,
which can be accessed from the Windows Desktop. Refer to the PDF documentation for
details regarding both hardware and software.
Synchronization Model
The synchronization model illustrates the SYNC function available with StrainBook/616.
Reference Note:
Chapter 10, System Expansion, includes a discussion of how up to 4 StrainBooks can be
synchronized.
2-8 Operation Reference
967794
StrainBook/616
The following apply:
One of three clocks can be used to drive the StrainBook’s acquisition scan rate. These are:
- the internal clock
- an external clock connected via pin 20 of the front panel DB25 connector labeled
“Digital I/O, Ext. Clock, TTL Trigger”
- the global sync (G-SYNC) input from the SYNC ports on the StrainBook’s rear panel
Both the SYNC connector input and the external clock input can be divided down.
When a StrainBook is in Master Mode both the trigger condition and the scan timing are output
on the SYNC port. The global trigger (G-TRIG) is selected instead of the TTLTRIG input from
the front panel DB25 labeled “Digital I/O, External Clock, TTL Trigger.”
Whether the StrainBook is using its internal scan clock or external clock input [from the front panel
DB25] it can be programmed to output the clock on the SYNC connector. In either case, the StrainBook is
behaving as a synchronization master. Other StrainBooks connected to the master via a SYNC port
should be programmed as synchronization slaves.
When a StrainBook is programmed as a synchronization slave it will derive its scan
period from the SYNC port.
If the slave StrainBook must be triggered at the same time as the master StrainBook
the slave unit should use TTL Trigger as its trigger source.
Not all trigger modes are supported for multiple StrainBook systems.
SYNC Notes:
When a StrainBook is programmed as a synchronization slave the TTL trigger source is
automatically derived from the SYNC port.
When a StrainBook is programmed as a synchronization master it will output its trigger
condition on the SYNC port.
When synchronizing two or more StrainBooks the slave StrainBooks should have at least
0.1 µs of dead time in the scan period. By “dead time,” we mean a duration in which no
channels are sampled. This accommodates for fundamental differences in StrainBook
clocks.
All StrainBooks that are connected via SYNC cables can be scan-synchronized to
within 0.1µs of each other.
Not all trigger modes are supported for multiple StrainBook systems.
A maximum of 4 units can be synchronized, scan-synchronous (post trigger).
SYNC cables are not to exceed a total combined length of 15 feet (4.57 m).
StrainBook/616
967794
Operation Reference
2-9
Programmable Features
Channels can be configured through your own custom programs or through the included out-of-the-box
WaveView software. WaveView includes a Channel Configuration screen that allows you to turn channels
on or off, select channel ranges, change channel labels, and select engineering units.
Reference Notes:
o The WaveView PDF document contains detailed information regarding general
WaveView operations.
o Chapter 4 of this manual includes WaveView information that pertains to StrainBook
and also to the WBK16 expansion module.
o In regard to the location of API reference material, including program examples,
individuals who write their own programs should refer to the readme.txt file located on
the install CD-ROM.
Operational Tips
The following tips should help you get the most out of your StrainBook.
(1) Keep things cool.
Operating 120 ohm bridges on 10 volts of excitation is possible with the StrainBook and with the WBK16.
But the strain gages and bridge completion resistors must both be rated for this voltage; otherwise
excessive drift will occur as the gages and resistors heat up. The 120 ohm bridge completion resistors we
offer (part number R-17-120) are of insufficient power rating for 10 volt bridges. If the excitation level is
set to
5 volts, drift is not a problem with our 120 ohm resistors. An alternative is to purchase higher quality,
higher power and higher cost bridge completion resistors (part number S-120-01) from the Measurement
Group.
(2) Understand the difference between calibration and set-up.
Calibration requires measurements of channels with external wiring and gages connected to establish
computational data on which to base gain and offset settings. WaveView’s two-point manual and shunt cal
menu choices provide calibration. Set-up uses manually entered parameters to computationally choose
gain and offset settings. The two-point automatic and nameplate menu choices provide channel set-up.
The nameplate menu selection for strain gages cannot effectively calibrate field configured strain gage
bridges which have not been externally hardware nulled because the software algorithm assumes the zero
point and computes the other settings based on the excitation voltage, gage factor and full scale value
entered by the user. Nameplate “calibration” is intended for packaged and pre-calibrated devices, such as
load cells and pressure transducers with nameplates listing their output sensitivity in mV/V and full-scale
output in engineering units.
(3) Do not attempt to “calibrate” all the channels simultaneously.
Although desirable, it is not possible to globally calibrate all the channels without making any actual
measurements. It is possible to apply global auto-zero to previously calibrated channels that have auto-zero
enabled. However, the original requirement for the channel to have been externally nulled prior to
performing nameplate calibration remains. The overall settings for all of the channels can be stored as a
configuration for re-use; but assuming the overall calibration and external system are unchanged between
chronologically separated tests is risky and not recommended.
2-10 Operation Reference
967794
StrainBook/616
(4) Know an unbalanced bridge when you configure one.
Theoretically, a strain gage bridge is balanced with zero output until strain is applied producing an output
voltage linearly proportional to the strain. In the real world the bridge is slightly unbalanced due to
component tolerances. There are two approaches that allow accurate strain measurements with the slightly
unbalanced bridge: (1) balance the bridge, or (2) compensate for the error with correction factors. If you
do neither, the bridge will provide erroneous results.
(5) Take it easy on the excitation regulators.
The excitation outputs of the StrainBook and WBK16 expansion module each will deliver up to 85 mA
without any degradation in output voltage. If this level of current is exceeded the voltage is reduced to
protect the regulator.
It is important to consider the current drawn by the internal reference node resistors. These resistors are
never switched off. They continue to load the excitation regulator no matter what bridge configuration is
chosen. If these resistors are 120 ohm resistors [which they never really need to be] they will be drawing
41.7 milliamps at 10 volts. An external full bridge of 120 ohm resistors will require an additional
83.3 milliamps. This will overload the regulator, resulting in both a reduced excitation level and an
incorrect signal level.
The best choice for the reference node resistors is 1000 ohms. There are two reasons: (1) The parts will
draw less excitation current, thus helping the regulators to stay cooler. (2) The lower degree of self-heating
will result in less drift.
(6) Provide adequate input power to each StrainBook and to each WBK16 expansion
module in the system.
Providing the proper level of input supply voltage is very important. Insufficient input voltage can cause
the StrainBook or WBK16 expansion module to exhibit channel-to-channel excitation interaction. All
individual channels can be set properly and then begin to lose voltage as additional channels are connected.
It is imperative that the unit not be “starved” for input voltage. This can easily happen if more than one
WBK16 is powered from a TR-40U power adapter. It could also happen if an inadequate power source
was being used for the StrainBook or WBK16.
A StrainBook or WBK16, each can require as much as 25 watts of input power if configured for eight
channels of 120 ohm bridges at 10 volts of excitation. The 15V, 3.33A (50 watts) output of the TR-40U is
not sufficient for two WBK16 modules. A variation of this problem can occur if a group of WBK16
modules is daisy-chained together with an insufficient wire size feeding the group. Voltage drop in the
wiring can also starve the modules to a greater degree as distance from the source increases. It is strongly
recommended that individual WBK16 units each operate from the TR-40U provided or from an individual
power lead from an adequately sized source such as a large battery or power supply.
A StrainBook and a WBK16 [together] may be powered from a single TR-40U [15 V, 3.33A] by:
(a) connecting the TR-40U to the WBK16 DIN5 POWER IN connector and then, (b) connecting a CA-115
cable from the WBK16 DIN5 POWER OUT connector to the StrainBook DIN5’s POWER IN connector.
This is advantageous in that it reduces incursion of common mode noise [resulting from power supplies].
(7) Handle channel configuration headers carefully.
The 16-position, machined-pin IC sockets [into which the bridge completion headers are inserted] have
demonstrated a tendency to become unreliable if the headers are rocked sideways to remove them, or if
resistors with larger leads than those we supply are plugged directly into them. The unreliability manifests
itself with widely fluctuating readings, especially if touched, or if the unit is subjected to shock or
vibration. Cold solder joints on the headers will exhibit similar symptoms.
StrainBook/616
967794
Operation Reference
2-11
(8) Install internal reference node resistors if you plan to use half or quarter bridges.
Internal 1 Meg ohm bias resistors [located between the excitation rails] create a very high impedance
“reference node voltage” in the StrainBook and WBK16 when the recommended resistors are not installed.
Do not attempt measurements using these default resistors, even though it seems to work. Install the
previously recommended 1000 ohm components and use a calibration method which compensates for the
slight bridge imbalance.
(9) Do not neglect the excitation regulator remote sense leads.
The remote sensing feature of the StrainBook [and WBK16] will compensate for voltage drop in long lead
wires to provide accurate excitation levels at the terminals of full-bridge and half-bridge configurations.
If the remote sense lines are not used be sure to tie them to their respective output lines to minimize
excitation noise.
(10) Spend your resistor dollars wisely.
For the widely used 3-wire quarter bridge configuration purchase the lower bridge completion resistor (RA)
with the best available temperature coefficient and sufficient power rating as to minimize self-heating. The
tolerance of the resistance is not as critical, but it should be 0.1% or better.
The internal bridge completion locations for the reference node (RG and RH) have about 50 milli-ohms
resistance between their midpoint connection pads and the tap to the amplifier is at the lower end of this
resistance. This resistance nullifies the benefit of using bridge completion resistors with better than 0.1%
resistance tolerance because offset nulling will still be necessary.
If using shunt calibration purchase high-precision shunt calibration resistors with micro-strain values
appropriate to your application. These are the closest to “standards” short of a very high precision strain
calibrator.
2-12 Operation Reference
967794
StrainBook/616
Connectors, Indicators, and Cables
3
Front Panel Connectors and Indicators …… 3-1
Rear Pannel Connectors, Indicators, and Power Switch …… 3-2
Associated Cables …… 3-4
Front Panel Connectors and Indicators
StrainBook/616 Front Panel
CH1 through CH8
Channel Input DB9 Female Connectors: These eight DB9 connectors are used for channel input.
Status LEDS
ACTIVE – Lights when a sample has been converted by the A/D converter.
READY – Lights when the unit is fully booted and is ready for software access.
POWER – Lights when power is turned on and is present.
Digital I/O, External Clock, TTL Trigger
Digital I/O, External Clock Input, and TTL Trigger Input connect to the StrainBook via a front panel
DB25F high-speed digital I/O connector.
For the16-bit mode, which is the default setup for WaveView, the following signals are present on the
DB25.
16 High-Speed Digital I/O Lines (D0 through D15)
TTL Trigger Input (TTLTRG) (pin 13)
+15 V, 50 mA max. (pin 23)
-15 V, 50 mA max. (pin 22)
two +5 V (pin 19 and pin 21), 250 mA max. (total)
External Clock Input (pin 20)
Digital Clock Output (pin 18) – for WBK17applications only
two Digital Grounds (pins 24 and 25)
To sample just 16 digital input signals, connect them directly to the digital I/O data lines as indicated
in the following pinout. D15 is the most significant bit, and D0 is the least.
StrainBook/616 User’s Manual
967794
Connectors, Indicators, and Cables
3-1
Digital I/O Connections, 16-Bit Mode
D0 through D15
High Speed Digital I/O data lines
TTLTRG
TTL trigger input
External Clock
Input
16 bit mode, read/write strobe,
Pin 20
+5 VDC
250 mA maximum
+15,-15 VDC
50 mA maximum (each)
Digital Clock
Pin 18, only used for WBK17
applications
Digital Grounds
Pins 24 and 25
DB25 Pinout, 16-Bit Mode
Reference Note:
In regard to 8-bit mode refer to Chapter 8, Digital I/O, TTL Trigger, and External Clock.
Chapter 8 repeats the 16-bid mode pinout and also discusses a dual-cable BNC option for
easily connecting the TTL Trigger and/or External Clock Input to the front panel DB25
connector.
Rear Panel Connectors, Indicators, & Power Switch
StrainBook/616 Rear Panel
The StrainBook/616 Rear Panel includes an LED legend in the upper left corner. Wording of the legend is
duplicated below. The rear panel also includes connectors, LED indicators, and a power switch.
LED Legend: Applies to the three LEDs located between the Ethernet Port and the Expansion Port.
LED
ON
OFF
L
LINK
NO LINK
T
100 BASE-T
10 BASE-T
D
FULL-DUPLEX MODE
HALF-DUPLEX MODE
ETHERNET: The 10/100BaseT Ethernet port can connect to the Ethernet port of the host PC, or to an
Ethernet network. Either of two Ethernet patch cables may be used to make the connection. CA-242 is a
1.5 foot cable. CA-242-7 is a 7-foot cable. Note that the Ethernet connector has two built in LEDs that
indicate traffic flow. These are discussed with the three other Ethernet-related LEDs. Note that the
Ethernet cable length must be <10m in order for the system to be CE Compliant.
3-2
Connectors, Indicators, and Cables
967794
StrainBook/616 User’s Manual
LEDs: There are 5 ETHERNET Status LEDS. Two rectangular LEDs (Tx and Rx) are built into the
frame of the Ethernet jack. The other three LEDs, located just to the right of the jack, are round and are
labeled L, T, and D.
Tx – “ON” indicates traffic is being transmitted (see figure at right).
Rx – “ON” indicates that the port is receiving traffic.
L (Link) “ON” indicates a link exists. “OFF” indicates no link.
T (BaseT) “ON” indicates 100BaseTx, “OFF” indicates 10BaseT.
D (Duplex) “ON” indicates full duplex, which allows simultaneous
two-way data traffic. “OFF” indicates half-duplex, which only allows
one-way data traffic at any given time.
Tx and Rx LEDs
EXPANSION PORT: The 25-pin Expansion Port can be used to connect the StrainBook to a WBK40 or
WBK41 as discussed in chapter 10 of this manual. Refer to the WBK Options Users Manual (489-0902)
for detailed information regarding WBK options. A PDF version of the document is included on your data
acquisition CD.
MAC Address Label: The Media Access Control (MAC) label shows the
device serial number in barcode and base 10 formats. It also shows the
Ethernet address (MAC Address) which is derived from the serial number in
hexadecimal. If prompted to enter a serial number in software, use the base
10 number. Conversion to a hexadecimal number for use in addressing will
be automatic.
Note: If your network administrator asks you for a MAC number or MAC Address, provide the
hexadecimal number that is located at the bottom of the label.
SYNC: (Qty of 2) – Two “synchronization ports” provide a means of synchronizing up to four
StrainBook/616 units in regard to post-trigger scanning. The ports accept CA-74-1 (1 foot) and CA-74-5
(5 foot) cables. Both are 6-conductor RJ-11 cables.
Up to four units can be synchronized. The total combined length of the SYNC cables
is not to exceed 15 feet (4.57 m).
POWER Switch: A rocker-type switch with a “0” label for Power Off, and a “1” for Power On.
POWER IN: +10 VDC to +30 VDC, through a socket type DIN5 connector on the chassis.
Power is typically supplied from a TR-40U power adapter.
EXPANSION CONTROL: The HD15 EXPANSION CONTROL connector provides a means of
connecting a control output signal [from the StrainBook/616 to the 15HD EXPANSION CONTROL IN
connector of the first WBK expansion module used in the system. Expansion Control signal lines can be
daisy-chained, as indicated in Chapter 10, System Examples.
EXPANSION SIGNAL IN: This BNC connector provides a way for the StrainBook/616 to receive return
signals from the EXPANSION SIGNAL OUT BNC connector of the first WBK expansion module in the
system. Expansion Signal lines can be daisy-chained, as indicated in Chapter 10, System Expansion.
StrainBook/616 User’s Manual
967794
Connectors, Indicators, and Cables
3-3
Associated Cables
CA-115 Power Cables. CA-115 cables are 6 inches long and have two 5-pin male DIN
connectors. CA-115s are frequently used to link StrainBook/616’s POWER OUT connector to a
WBK expansion module’s POWER IN connector. CA-115 cables are also used to link an
expansion module’s POWER OUT connector to the next daisy-chained module’s POWER IN
connector.
CA-115 cables and the device DIN5 connectors (see following figure) are limited to 5 amps
at 15 VDC.
Power is supplied to each optional WBK expansion
Return
2
module via a DIN5 connector located on its rear
+10 to +30 V 4
5 No connection
panel
+10 to +30 V 1
3 Return
*The DIN5 pinout [to the left] is based on an external
view of a rear panel.
DIN 5 Power Pinout*
Note:
An optional CA-116 power cable is available. The CA-116 permits the system to be plugged into
a vehicle cigarette lighter, allowing use of the vehicle’s battery as a power supply for the device.
Calculate system amp load prior to creating a system daisy-chain. The connectors and
CA-115 and CA-116 power cables have 5 amp limits, TR-40Us have a 3.33 amp limit.
Tables for determining amp load are included in Chapter 10, System Expansion.
CA-129 Expansion Control Cables. Control messages are carried by CA-129 expansion-control
cables with HD-15, plug and socket connectors. The first expansion unit’s control input is driven
from the main unit’s control output. Control inputs of additional WBK modules are driven from
the preceding unit’s control output.
CA-150 Expansion Signal Cables. Expansion signals are carried by a CA-150-1 male BNC to
male BNC coaxial cable. Each WBK module drives a common analog bus that carries the signals
to StrainBook/616’s Analog-to-Digital Converter (ADC). Each WBK module has EXPANSION
SIGNAL IN and EXPANSION SIGNAL OUT connectors for daisy-chaining multiple units.
CA-242 and CA-242-7 Ethernet Patch Cables. CA-242 is a 1.5 foot cable that can be used to
connect a StrainBook/616 to an Ethernet port on a PC or network. CA-242-7 is a 7-foot cable
that can be used for the same purpose.
CA-74-1 and CA-74-5 SYNC Cables. 1-foot and 5-foot cables, respectively.
Used to synchronize multiple devices.
3-4
Connectors, Indicators, and Cables
967794
StrainBook/616 User’s Manual
Software
4
Accessing Software-Related PDF Documents …… 4-1
An Introduction to Software ….. 4-2
WaveView …… 4-2
eZ-PostView …… 4-2
WaveCal …… 4-4
Icon-Based Software (DASYLab® and LabVIEW™) …… 4-4
TM
Language Drivers for Programmers (DaqX and DaqCOM ) …… 4-4
Programmable Features in WaveView …… 4-5
Sensor Calibration….. 4-8
Changing Low-Pass Filter Displays…… 4-20
Accessing Software-Related PDF Documents
During software installation, Adobe® PDF versions of user manuals will automatically install onto your
hard drive as a part of product support. The default location is in the Programs group, which can be
accessed from the Windows Desktop. Initial navigation is as follows:
Start [Desktop “Start” pull-down menu]
⇒ Programs
⇒ IOtech WaveBook Software
You can also access the PDF documents directly from the data acquisition CD by using the <View PDFs>
button located on the opening screen.
A copy of the Adobe Acrobat Reader® is included on your CD. The Reader provides a means of reading
and printing the PDF documents. Note that hardcopy versions of the manuals can be ordered from the
factory.
Software-Related PDFs Applicable to StrainBook/616
WaveView_WaveCal.pdf
PDF
Discusses how to install and use two “out-of-the-box” applications that are intended
for use with StrainBook/616 and WaveBook systems. WaveView is a data acquisition
program with a “spread-sheet” style interface that makes it easy to set up your
application quickly and begin acquiring data within minutes of completing hardware
connections. The second program, WaveCal, is used for periodic calibration of system
devices.
PostAcquisition Analysis.pdf
PDF
This PDF consists of two documents. The first discusses eZ-PostView, a post data
acquisition analysis program that can be used to view StrainBook/616 data after an
acquisition. eZ-PostView is included on the data acquisition CD.
ProgrammersManual.pdf
PDF
The programmer’s manual pertains to developing custom programs using
Applications Program Interface (API) commands.
Note that the install CD-ROM includes program examples.
StrainBook/616 User’s Manual
967594
Software
4-1
An Introduction to Software
WaveView
WaveView is a graphical Windows-based program for use in WaveBook and StrainBook/616 applications.
The program allows users to acquire data for immediate viewing or for storage to the PC's hard disk.
WaveView’s “spread-sheet” style interface makes it easy to set up your application quickly and begin
acquiring data within minutes of completing hardware connections. No programming knowledge is
required.
WaveView contains special sensor configuration features for both StrainBook and the associated straingage expansion module, the WBK16. The Sensor Configuration aspect of WaveView is discussed in this
chapter.
Reference Note:
For general WaveView information (not specific to StrainBook or WBK16 expansion) refer to
the WaveView PDF. The document can be accessed from the data acquisition CD via the
<View PDFs> button on the CD’s opening screen.
From WaveView you can:
•
•
•
•
•
Set up all analog or digital input parameters.
Acquire and save data to disk.
View the acquisition in real-time.
Send data to other Windows applications, such as spreadsheets and databases.
Launch an independent, post acquisition data analysis program, such as eZ-PostView to view
and analyze data that was previously acquired with WaveView.
WaveView does not support WBK40 or WBK41.
4-2
Software
967594
StrainBook/616 User’s Manual
1
2
3
4
5
6
7
8
9
10
11 12 13 14 15 16
17 18 19 20
21
WaveView Configuration Main Window, Button Identification
#
Item
Description
1
Module
Configuration
Displays the current inventory of devices and relevant WBK options. Note that the WaveView Configuration
main window provides a means of setting certain parameters for WBK options. When applicable, the WBK
options will be listed in the Module Type column.
2
Acquisition
Configuration
Opens the Acquisition Configuration display window to allow selection of the number of scans, scan rate, and
the triggering method to be used for starting the scan.
3
Scope Window
Opens the Scope Window to display data acquisition waveforms in real-time.
4
Direct to Disk
Window
Provides a means of writing acquired data to disk files.
5
View File Data
Starts an independent, post-data acquisition viewing program.
6
Bar Graph Meters
Used to display one or more channels in bar graph format.
7
Analog Meters
Used to display one or more channels in analog meter format.
8
Digital Meters
Used to display one or more channels in digital meter format.
9
Sensor Calibration
Applies to StrainBook and WBK16 Modules. Use of the button temporarily disables WaveView and opens a
sensor calibration spreadsheet so that each strain-gage channel can be calibrated to the specifications of the
sensor in use.
10
Shunt Mode
With shunt mode enabled StrainBook and WBK16 channels are set to their shunt position for all acquisition
operations if they were most recently calibrated using the shunt method.
11
Enable [Disable]
Spreadsheet
Readings
Column
Enable/Disable toggle button. “Enable” causes all channels that are “On” to display an actual reading of the
input signal in the channel reading column. The readings column is updated about twice per second. A
status indicator “READINGS” appears above the spreadsheet when the column is enabled.
12
Make All Channels
Active
Makes all channels active. When this button is pressed, the word “On” appears in the On/Off column for
every channel.
13
Make All Channels
Inactive
Makes all channels inactive. When this button is pressed, the word “Off” appears in the On/Off column for
every channel. If your channel scan includes only a few channels, it may be easier to make all of the
channels inactive, then turn on the few desired channels.
14
Fill Down
When multiple cells within a column are selected, this command takes the top-most selected cell and copies
its contents to the selected cells below.
15
Auto Zero Active
Channels
This button zeros out a DC offset signal on all channels that are “On” and have Auto Zero set to “Yes.” Note
that Auto Zero does not apply to WBK17.
16
Clear All Zero
Offsets
This button clears the zero offset that was set with the Auto Zero Active Channel button. Note that Auto Zero
does not apply to WBK17.
17
Hide Inactive
Channel Rows
Only active (On) channels will be displayed. A status indicator “HIDDEN ROWS” appears above the
spreadsheet when one or more channels are hidden. When a channel is hidden, its configuration settings
cannot be changed. Block operations and other “All” actions, like the Make All Channels Active menu item,
have no effect on hidden channels.
18
Show All Rows
Makes all channel rows visible. Can be used to restore the full spreadsheet.
19
Customize Column
Layout
Opens a Customize Column Layout window that allows you to select the columns that you want to have
displayed. This feature allows you to hide columns that do not apply to your application. For example,
WBK17 users may want remove the Auto Zero, Source Level, Bridge Type, and Invert columns.
20
Show All Columns
When this push-push button is depressed, all spreadsheet columns are shown and the button remains
indented. Pushing the button again shows the spreadsheet with the customized column layout, as set up
using button # 19.
21
Copy Visible Cells
to Notepad
Places a tab-delimited text version of the spreadsheet into Microsoft’s Notepad application. The information
can be imported into various spreadsheet programs, such as Microsoft Excel.
StrainBook/616 User’s Manual
967594
Software
4-3
eZ-PostView
eZ-PostView provides simple “time-domain” viewing. From this application you can display up to 8 timedomain function windows and display up to 16 channel traces per window. Data is automatically scaled to
optimize its fit in the window. Window, channel trace, and cursor colors can be customized.
The application can be accessed through WaveView’s <View Data> button, or accessed independently
from your program files group, i.e., where you installed your software.
Note that eZ-PostView has no Transfer Function Display Types, Complex Function Display Types, or FFT
Windows available. You cannot record data from eZ-PostView.
WaveCal
StrainBook/616 does not make direct use of WaveCal; but instead uses WaveView’s StrainBook / WBK16
Sensor Configuration feature (discussed shortly). WaveCal is used to calibrate WBK modules supported
by StrainBook. The application is discussed in the WaveView_WaveCal pdf document, include on your
data acquisition CD.
Icon-Based Software
Most StrainBook/616 users do not need to go beyond WaveView and eZ-PostView (the included post
acquisition data analysis program) to satisfy their application needs. However, for individuals who want to
customize their applications “icon-based” programs such as DASYLab® and LabVIEW™ offer a great
degree of flexibility.
The installation CD includes language drivers for DASYLab® and LabVIEW™. The CD also includes
program examples for each.
Individuals using either of these programs should refer to their DASYLab® or LabVIEW™ user manuals,
as applicable. You can obtain additional information from your sales representative.
Language Drivers for Programmers
DaqX
StrainBook/616 is supplied with DaqX Subroutine API Libraries. These provide complete support for all
of the functionality available on each data acquisition device in Visual Basic®, and C/C++. In addition,
DaqX is supported under all versions of Windows®. Over 100 program examples are included with DaqX
Subroutine API Libraries. API documentation is provided in a Programmer’s Manual (p/n 1008-0901),
which is included on the installation CD.
DaqCOM™
The DaqCOM suite of programming allows applications developers to rapidly develop and deploy custom
systems by leveraging COM (Component Object Model) technology. DaqCOM does this by providing a
powerful easy-to-use interface to most programming languages including, Visual Basic®, VBA, C++, and
J++. In addition, DaqCOM supports the new Windows.NET architecture and includes examples for
VisualBasic.NET and C++. Support for VisualStudio.NET is accomplished via the COMInterop feature
within VisualStudio.NET.
4-4
Software
967594
StrainBook/616 User’s Manual
Programmable Features in WaveView
Channels can be configured through your own custom programs, third-party software such as DASYLab or
LabVIEW, or through the included out-of-the-box WaveView software. WaveView includes a Channel
Configuration screen (following figure) that allows you to turn channels on or off, select channel ranges,
change channel labels, and select engineering units.
Reference Note:
The WaveView document module contains more detailed information. Individuals who write
their own programs should refer to the readme.txt file [on the install CD-ROM] in regard to
the location of API reference material, including program examples.
Configuring Channels from WaveView’s Main Window
Selecting a Channel’s Range
You can use WaveView to select a channel’s range in one of two ways.
(1) Click in a channel’s Range cell; then select the desired range from the “Select Range”
pull-down list.
(2) Continue to double-click in the applicable channel’s Range cell to cycle through the
available ranges. Stop double-clicking when the desired range is indicated.
StrainBook/616 User’s Manual
967594
Software
4-5
Selecting a Channel’s Units
You can use WaveView to select a channel’s units in one of two ways.
(1) Click in a channel’s Units cell; then select the desired units from the “Select Units” pull-down
list.
(2) Double-click in a channel’s Units cell to cycle through the units. Note that after the mX+b
dialog box appears you must click “OK” to continue cycling.
Note: You can use the mX+b equation to adjust a channel’s scale and offset. You can enter user-defined
units from the mX+b dialog box. An example of using mx + b is provided below, and on the
following page.
After completing channel configuration, you can select the Acquisition Configuration option from
WaveView’s View menu or tool bar. The figure to the right represents the Acquisition Configuration
dialog box. The parameters shown are a result of the values entered below the figure.
Clicking the Close button sets the acquisition parameters as the active parameters.
Acquisition Configuration Dialog Box
Triggering
Type: Manual
Scanning Duration
Convention: Scans
Pre-Trigger: 1000 scans
Post-Trigger: 5000 scans
Scanning Rate
Clock: Internal
Convention: Frequency
Pre-Trigger: 50 kHz
Post-Trigger: 50 kHz
mX + b, an Example
From the Customize Engineering Units dialog box (see figure
at right), you can enter values for m and b components of the
equation that will be applied to the data. There is also an entry
field that allows you to enter a label for the new units that
may result from the mX+b calculation.
An example of mX + b equation use follows.
4-6
Software
967594
StrainBook/616 User’s Manual
Engineering Units Conversion Using mx + b
Most of our data acquisition products allow the user to convert a raw signal input (for example, one that is
in volts) to a value that is in engineering units (for example, pressure in psi). The products accomplish this
by allowing the user to enter scale and offset numbers for each input channel, using the software associated
with the product. Then the software uses these numbers to convert the raw signals into engineering units
using the following “mx + b” equation:
Engineering Units = m(Raw Signal) + b
(1)
The user must, however, determine the proper values of scale (m) and offset (b) for the application in
question. To do the calculation, the user needs to identify two known values: (1) the raw signal values, and
(2) the engineering units that correspond to the raw signal values. After this, the scale and offset
parameters can be calculated by solving two equations for the two unknowns. This method is made clear
by the following example.
Example
An engineer has a pressure transducer that produces a voltage output of 10.5 volts when the measured
pressure is 3200 psi. The same transducer produces an output of 0.5 volt when the pressure is 0 psi.
Knowing these facts, m and b are calculated as follows.
A - Write a pair of equations, representing the two known points:
3200 = m(10.5) + b
0 = m(0.5) + b
(2)
(3)
B - Solve for m by first subtracting each element in equation (3) from equation (2):
3200 - 0 = m(10.5 – 0.5) + (b - b)
Simplifying gives you:
This means:
3200 = m(10)
m = 320
(4)
(5)
(6)
C - Substitute the value for m into equation (3) to determine the value for b:
So:
0 = 320 (0.5) + b
(7)
b = - 160
(8)
Now it is possible to rewrite the general equation (1) using the specific values for m and b that we just
determined:
Engineering Units = 320(Raw Signal) - 160
(9)
The user can then enter the values of m and b into the appropriate location using the facilities provided by
compatible data acquisition software, for example: WaveView, DaqView, Personal DaqView, LogView,
and TempView. The software uses equation (9) to calculate signal values in engineering units from that
point on.
StrainBook/616 User’s Manual
967594
Software
4-7
Sensor Calibration
To use the Sensor Calibration Program you must first launch WaveView. This can be done from a shortcut
on the desktop, or by selecting WaveView from the Programs group, accessed from the desktop Start
menu.
WaveView holds user-configured parameters that can be saved to disk. The default configuration filename
is WAVEVIEW.CFG. When WaveView starts up, it proceeds to search the working directory for this file.
WaveView also holds a default sensor calibration file. The WAVEVIEW.CFG file holds the name of this
calibration file so that all sensor calibration information from the last WaveView session is also loaded into
WaveView during initial boot-up. If the default configuration file is found, all the required setup
information will be extracted from it, and the application’s main window will open. When connection is
established, the application’s main window will open with the default setting. If these options fail, a dialog
box will ask if you want to open a different setup file.
Reference Notes:
o For detailed WaveView startup information, refer to the WaveView PDF. The document
can be accessed from the data acquisition CD via the <View PDFs> button on the CD’s
opening screen.
o
The WBK16/LC Load Cell Shunt Cal internal option board may be required to calibrate
load cells and transducers that have internal shunt cal resistors. See the WBK16/LC
section of chapter 6 for details.
WaveView Configuration Main Window(Top) and
Sensor Configuration [Calibration] Window (Bottom)
4-8
Software
967594
StrainBook/616 User’s Manual
To open the Sensor Configuration [Calibration] window, click on WaveView’s Sensor
Calibration button. The button is depicted at the left and pointed out in the upper portion of the
previous figure. You can also open the window from WaveView’s System pull-down menu.
You can use the Sensor Configuration window’s File pull-down menu to Load an Existing
Configuration. This option opens a standard dialog box that allows you to select and open the
desired file.
Sensor Configuration Main Components
Sensor Configuration [Calibration] Window
Sensor Configuration Toolbar and Pull-Down Menus
Control functions in the sensor configuration window are available through the pull-down menus or the
toolbar. For descriptions of button functions, see the related menu selections. Note that some menu
selections have no corresponding button.
Sensor Configuration Window Toolbar
1 – New Configuration
2 – Load an Existing Configuration
3 – Save Current Configuration
4 – Take a Single Reading
5 – Calibrate Enabled Channels
6 – Return to WaveView
StrainBook/616 User’s Manual
967594
Software
4-9
File
The File menu provides four functions:
New Configuration
Load an Existing Configuration
Save Current Configuration
Return to WaveView
Set all parameters to their default startup setting.
Load a saved sensor calibration configuration.
Save the current sensor calibration configuration for later recall.
Exit the Sensor Configuration window and return to WaveView.
Calibration
The Calibration menu provides two functions:
Take a Single Reading
Calibrate Enabled Channels
This command allows the user to take a single reading and display the values in
the Sensor Configuration window.
This command will calibrate all enabled channels.
Password
The sensor calibration application provides password protection. If you calibrate any StrainBook channels
[or WBK16 expansion channels] and then choose the password protection option WaveView will prevent
other users from making changes to your calibration file. The Password menu provides three functions:
Enter Password
Set a New Password
Clear Password
4-10
Software
Use this command to enter a previously selected password, enabling you to
change parameters.
This command allows the user to select a 4-7 character password. A message
box will prompt you to enter a new password. Type a password and press
“enter”, or click on the “OK” button.
This command clears the password protection. A message box will prompt you
to enter the current password. Type the current password and press “enter”, or
click on the “OK button.
967594
StrainBook/616 User’s Manual
Calibration Parameters Tab Selected
Sensor Configuration Window
Column
Description
Calibrate?
“Yes” enables the selected channel to be calibrated with the “calibrate enabled channels”
option. “No” prevents the channel from being calibrated. All other columns for that channel
will be disabled if “no” is selected. The channel can still be turned on in WaveView.
Provides a means of selecting the sensor type. The three available sensor types are:
Strain Gage, Load Cell, and Transducer.
Provides a means of selecting the bridge type. Choices are full-bridge, half-bridge, and
quarter-bridge. This option is only available for a strain gage sensor in the calibration
program. The bridge type for any sensor can be changed from the Sensor Configuration
window.
Allows the calibration method to be selected.
Possible selections are indicated in the
figure to the right. These calibration
methods are explained later in the
document.
Sensor Type
Bridge Type
Calibration Method
Calibration Date
Displays the time and date that the channel was calibrated. If the channel has not been
calibrated, “Not Calibrated” appears in the box.
Units
To change the units: highlight the desired box, type-in the new parameters, and then press
<Enter> on the keyboard or select another box with the mouse. Up to 5 characters can be
entered into this column. To fill the entire column with the value of channel one, make sure
“yes” is selected in the “Calibrate” column. Then click on the column label with the mouse.
A message box will appear. Click on “yes”. All channels with the “calibrate” function
enabled will be filled. Changing the units here will also change the units column in the
WaveView Configuration main window.
Used to label channels.
A serial number or other identifying label for the sensor can be entered here. Up to 39
characters may be entered and 16 will be displayed. The fill option is available for this
column (see Units).
Label
Sensor Label
StrainBook/616 User’s Manual
967594
Software
4-11
Calibration Parameters Section of Window
Two Views Obtained by Scroll Bar Movement
Column
Description
Exc. Volts
Used to change the excitation voltage. Choose between 10.0, 5.0, 2.0, 1.0, .5, and “Off.”
Changing the excitation voltage on any channel between one and four will change the value
on all four lower channels. Likewise, changing the excitation voltage on any channel five
through eight will change the value on all four upper channels. Changing the Excitation
Voltage here will also change the Source Level column in the WaveView Configuration
main window.
Used for calibrating strain gages with the Name Plate calibration method. To change this
value, select the box and enter a number greater than 0 and less than 1000. The fill option
is available for this column (see Units).
This column is used for calibrating a load cell or transducer using the Name Plate
calibration method. To change this value, select the box and enter a number greater
than 0 and less than 1000. The fill option is available for this column (see Units).
This column is used for calibrating any sensor using the Shunt calibration method. The
value must equal the value of the shunt resistor in ohms. To change the value, select the
box and enter a number greater than 0 and less than 1000000. The shunt value must not
exceed the value entered as the maximum load. The fill option is available for this column
(see Units).
Used for calibrating any sensor using the Shunt calibration method. The value refers to the
bridge arm that is shunted during shunt calibration. To change the value, select the box and
enter a number from 60 to 1000. The fill option is available for this column (see Units).
This column is used for calibrating a load cell or transducer using the Name Plate
calibration method. To change this value, select the box and enter a number greater than 0
and less than 100000. The full-rated load must be greater than the value entered for the
maximum applied load. The fill option is available for this column (see Units).
Used for calibrating any sensor using any calibration method. To change the value, select
the box and enter a number greater than 0 and less than 1000000. This value must be
greater than the quiescent/tare value. The fill option is available for this column (see Units).
This column is used for calibrating any sensor using any calibration method. The value
entered is the value of the quiescent load on the sensor. To change the value, select the
box and enter a number between –1000000 and 1000000. This value must be less than the
maximum applied load value. The fill option is available for this column (see Units).
This column is used for calibrating any sensor using the Shunt, or 2-Point Automatic
calibration method. The number must equal the input value, in mV, of the first point in the
calibration. To change the value, select the box and enter a number between -10000 and
10000. The fill option is available for this column (see Units).
This column is used for calibrating any sensor using the Shunt, 2-Point Automatic, or
2-Point Manual calibration method. The number must equal the value, in the selected
units, of the first point in the calibration. To change the value, select the box and enter a
number between -1000000 and 1000000. The fill option is available for this column (see
Units).
Used for calibrating any sensor using the 2-Point Automatic calibration method. The
number must equal the input value, in mV, of the second point in the calibration. To change
the value, select the box and enter a number between -10000 and 10000. The fill option is
available for this column (see Units).
This column is used for calibrating any sensor using the 2-Point Automatic, or 2-Point
Manual calibration method. The number must equal the value, in the selected units, of
the second point in the calibration. To change the value, select the box and enter a number
between -1000000 and 1000000. The fill option is available for this column (see Units).
Gage Factor
Sensitivity
(mV/V)
Shunt Resistor
(Ohm)
Bridge Resistor
(Ohm)
Full Rated Load
(Units)
Max Applied Load
(Units)
Quiescent/Tare
(Units)
Point 1
(mV)
Point 1
(Units)
Point 2
(mV)
Point 2
(Units)
4-12
Software
967594
StrainBook/616 User’s Manual
Displaying a Single Reading. In the sensor calibration program, it is possible to take a single reading and
display it in the Sensor Configuration [Calibration] window. First, click on the Channel Values tab. Then
click on the Take a Single Reading button on the tool bar, or choose Take a Single Reading from the
Calibration menu item.
Displayed readings are based on the most recent calibration. Changing the calibration parameters,
without calibrating the system, will not affect the channel values.
Channel Values Tab Selected
Channel Values, Simplified Block Diagram
The simplified block diagram (above) can be used to better understand the relationship of channel amplifiers and their
corresponding user interface columns (visible in the Channel Values Tab). These columns are represented in the tab
figure, and in the following table.
Column
Display Description
Bridge (mV)
Input Gain
The input value from the bridge. The value is in millivolts.
The Gain setting of WBK16’s Input Amplifier. Any one of the following four settings is possible:
x1, x10, x100, or x1000.
The Voltage summed into WBK16s Scaling Amplifier. The voltage is to compensate for any
offset that is present in the sensor’s output. The Offset Null voltage is in the range of
-3 to +3 volts.
The Gain setting of WBK16’s Scaling Amplifier. Any one of the following 13 gain settings can
be used: 1.0, 1.28, 1.65, 2.11, 2.71, 3.48, 4.47, 5.47, 7.37, 9.46, 12.14, 15.58, or 20.0.
The digital voltage value that is received as input by WaveView software. This value is also
referred to as sensor output voltage.
The Multiplier value [used by the software] for converting sensor output voltage into User Units.
The Offset value that is added to “Units Scaling” for fine adjustment of what will be the final
reading (Bridge Units).
The Reading (in User Units, for example: lbs, psi, kg) that results from converting the initial
sensor reading (Bridge mV).
Offset Null (Volts)
Scaling Gain
A/D In (Volts)
Units Scaling
Units Offset
Bridge (Units)
StrainBook/616 User’s Manual
967594
Software
4-13
The Five Methods of Sensor Calibration
Before proceeding with calibration, remember to enter your password. The password
must be entered before channel parameters can be changed.
Unless all of the parameters (for each channel to be calibrated) are accurately entered
into the spreadsheet, the calibration will produce incorrect results.
The sensor calibration program uses five methods of calibration:
o
o
o
o
o
2-Point Manual
2-Point Automatic
Shunt (Internal)
2-Point Shunt (External)
Name Plate (for load cell or transducer)
Table of Calibration Methods and Required Parameters
Excitation
Gage
Factor
Sensitivity
Shunt
Ohms
Bridge
Ohms
Full
Load
Max.
Load
Quiescent
Pt-1
Pt-1
Pt-2
Pt-2
(mV)
(Units)
(mV)
(Units)
2 Point
Manual
9
9
9
2 Point
Auto
9
9
9
Shunt
(Internal)
9
9
9
9
2 Point
Shunt
(External)
9
9
9
9
Nameplate
9
9
9
9
9
9
9
9
9
9
9
9
9
9
9
9
To use any of these calibration methods, enter the appropriate values into the required spreadsheet columns
of the Sensor Calibration window, as listed above, and click on the Calibrate Enabled Channels button on
the toolbar.
In 2-Point Manual calibration, a message box prompts you to apply the first load. When
prompted, apply the load and click the OK button. A second message box will prompt
you to apply the second load. When prompted, apply the second load and click OK.
Saving a Calibration File. After calibrating the enabled channels, a message box asks if you want to save
the changes. Click on the Yes button to save the calibration and a dialog box will appear. If you choose not
to save the changes at this time, another message will appear asking if you want to save the changes when
you click on the Return to WaveView button on the tool bar. Click on the Yes button to save these changes
and a dialog box will appear. The most recently saved calibration file will be recorded in the
WAVEVIEW.CFG default configuration file and will be loaded into WaveView whenever a new session is
started. The current configuration can also be saved from the toolbar or File menu item.
4-14
Software
967594
StrainBook/616 User’s Manual
2 Point Manual Calibration
In the 2 Point Manual Calibration method two readings are taken from the gage with different loads applied for each
reading. For this method, the user must enter the following 5 parameters:
Excitation - The value of the constant voltage source used to excite the gage.
Max Load - The maximum load value the gage is expected to measure. This value could be less than the
max rated load of the gage.
Quiescent Load - The minimum load value the gage is expected to measure. This value could be greater
than the min rated load of the gage.
Point 1 Units -The load that will be placed on the gage for the first calibration measurement.
Point 2 Units - The load that will be placed on the gage for the second calibration measurement.
Example: Excitation voltage is set to 10 volts. A strain gage with a full load rating of +/- 1000 µe is connected to
a StrainBook [or WBK16] channel. However, the gage will be used in an environment were the expected range of
measurement is limited to 0 to 600 µe. Two certified loads of 50 µe and 500 µe are available for calibration. In
the Calibration Parameters spreadsheet, the user would enter the values as follows:
Excitation = 10V
Max Load = 600
Quiescent Load = 0
Point 1 Units = 50
Point 2 Units = 500
1.
2.
3.
4.
5.
When the <Calibrate Enabled Channels> toolbar button is pressed, the user is prompted to load the gage
with 50 µe.
After the load is applied, and the <Ok> button pressed, WaveView takes several voltage readings in an attempt
to find the best gain setting for the first load value.
When finished, the user is prompted to load the gage with 500 µe.
After the load is applied, and the <Ok> button pressed, WaveView again takes several measurements to find
the best gain settings for the second load value.
After both voltage measurements are obtained, WaveView configures the input channel to provide the optimum
settings for the two amplifier gain stages, and the Offset DAC. WaveView also sets the channels mX+b
parameters for proper conversion of the input voltage measurements to units of µe (or whatever units have been
specified by the user).
Note: The greatest accuracy is obtained from 2 Point Manual calibration when the two calibration points are at the
min and max load range of the gage. In the above example, the greatest possible accuracy would be
obtained if Point1 was equal to the Quiescent load, and Point 2 was equal to the Max load.
2 Point Auto Calibration
For 2 Point Auto Calibration the user must enter the following 7 parameters:
Excitation - This is the value of the constant voltage source used to excite the gage.
Max Load - Is the maximum load value that the gage will be expected to measure. This value could be
less than the max rated load of the gage.
Quiescent Load - Is the minimum load value that the gage will be expected to measure. This value could
be greater than the min rated load of the gage.
Point 1 mV - This is the output voltage generated by the gage at the Point 1 Units load.
Point 1 Units - This is the load that is associated with the Point 1 millivolt value.
Point 2 mV - This is the output voltage generated by the gage at the Point 2 Units load.
Point 2 Units - This is the load that is associated with the Point 2 millivolt value.
No actual readings are taken when a 2 Point Auto Calibration is performed. Calibration constants are calculated
from the values entered by the user.
StrainBook/616 User’s Manual
967594
Software
4-15
Shunt (Internal Shunt) Calibration
The Shunt calibration method pertains to an internal shunt. For this method two readings are acquired from a
bridge. The first reading is obtained with the bridge in its quiescent state; the second is taken with one leg of the
bridge shunted by one of three selectable resistors. The resistors are located on a plug-in header inside the
StrainBook or WBK16 module. Shunt calibration appears as "Shunt (RB)", "Shunt (RD)", and "Shunt (RF)" in the
list of calibration methods.
The Internal Shunt Calibration requires that the user enter the following 7 parameters:
Excitation - The value of the constant voltage source used to excite the gage.
Gage Factor - The Gage Factor value of the gage used in the bridge. A Gage Factor of 2 is typical.
Shunt Ohms - The value in Ohms of the shunt resistor mounted on the header inside the StrainBook or
WBK16 module.
Bridge Ohms - The resistance value of the gage. Typically 120 or 350 Ohms.
Max Load - The maximum load value the gage is expected to measure. This value could be less than the
max rated load of the gage.
Quiescent Load - The at rest value of the load applied to the gage. If no load will be applied to the gage in
its quiescent state, enter “0” zero.
Point 1 Units - The minimum load value the gage is expected to measure. This value could be greater than
the minimum rated load of the gage.
Example: Excitation voltage is set to 2 volts. A Quarter Bridge circuit employing a 350 Ohm strain gage with a
Gage Factor of 2 and a full load rating of +/- 1500 µe is connected to a StrainBook [or WBK16 channel]. The gage
will be used in an environment were the expected range of measurement is limited to -200 to +1000 µe. This gage
[in its quiescent state] has a 500 µe load. A 349,650 Ohm precision resistor is available that will be mounted on the
plug-in header in Shunt location R(B). Instructions for installing shunt resistors are provided elsewhere in the
document. In this example the user would enter the following values in the Calibration Parameters spreadsheet:
Cal Method Shunt R(B)
Excitation = 2V.
Gage Factor = 2
Shunt Ohms = 349,650
Bridge Ohms = 350
Max Load = 1000
Quiescent Load = 500
Point 1 Units = -200
The accuracy of Shunt Calibration is directly related to the tolerances of the Shunt resistor, Gage(s), and Bridge
Completion resistors used in the circuit. In the event that a precision shunt resistor is unavailable, WaveView
provides an alternate way of calculating Shunt calibration constants. This method is as follows:
(a) Install an appropriate non-precision shunt resistor of a value that creates the degree of bridge
imbalance desired.
(b) Press and hold the <Alt> key on the computer’s keyboard; then start the calibration process.
(c) Once the calibration process has started you release the <Alt> key.
This alternate Shunt Calibration method calculates the shunted load value from shunted and un-shunted bridge
voltage measurements; and then performs the equivalent of a 2 Point Manual calibration.
4-16
Software
967594
StrainBook/616 User’s Manual
External Shunt Calibration (2 Pt Shunt)
This calibration method requires the use of a WBK16/LC option, which is discussed elsewhere in the document.
The method supports the use of an external shunt resistor. The resistor is shunted across the gage using the (RF)
switch in the StrainBook or WBK16. The method appears simply as "Shunt" in the list of calibration methods
when either “Load Cell” or “Transducer” is selected as the sensor type.
Note: The WBK16/LC provides a non-committed dry contact on two pins of a single StrainBook or WBK16
channel connector. The WBK16/LC can be used for virtually all single value shunt calibration requirements,
some of which are not possible with the internal FET/analog switch provisions in the standard channel
configurations.
WBK16/LC
CAUTION
Make the DB9 pin # 2 connection to the “low-side” or the “high-side” of the
circuit. BUT NEVER TO BOTH! Doing so will create a short circuit that could
damage equipment.
External Shunt Resistor, Low-Side Connection
(see chapter 6 in regard to making a “High-side” connection)
Full Bridge (+) with External Shunt Resistor
DB9 Pin 2 Connected to the Low-Side
Reference Note:
The WBK16/LC Load Cell Shunt Cal internal option board is detailed in chapter 6.
That chapter includes an alternate schematic for connecting Pin 2 to the High-side.
StrainBook/616 User’s Manual
967594
Software
4-17
The External Shunt Calibration method requires that the user enter the following 5 parameters:
Excitation - The value of the constant voltage source used to excite the gage.
Max Load - The maximum load value that the gage is expected to measure. This value could be less than
the max rated load of the gage.
Quiescent Load - The minimum load value that the gage is expected to measure. This value could be
greater than the minimum rated load of the gage.
Point 1 Units - The user-supplied, at rest value of the load applied to the gage. If no load is applied to the
gage in its quiescent state, enter “0”zero.
Point 2 Units - The user-supplied effective load value that will appear at the gage when the external shunt
resistor is switched into place. This load value must be calculated based on the value of the
external shunt resistor.
As with the Internal Shunt method, calibration accuracy is directly tied to the accuracy and stability of the shunt
resistor used.
Name Plate Calibration
Name Plate Calibration is similar to the 2 Point Auto Calibration method. No actual measurements are taken
during the calibration process. The calibration constants are calculated from information provided by the user. The
method is called “Name Plate” because the calibration information is obtained from the Name Plate or Label that is
attached to the gage or load cell.
The Name Plate Calibration method requires that the user enter the following 5 parameters:
Excitation - The value of the constant voltage source used to excite the gage.
Sensitivity - The output of the gage measured in millivolts per volt.
Full Rated Load - The maximum rated load of the gage.
Max Load - The maximum load value that the gage will be expected to measure. This value could be less
than the max rated load of the gage.
Quiescent Load -The minimum or at rest value of the load applied to the gage. If no load is applied to the
gage in its quiescent state, enter zero. WaveView assumes the Min Load value is equal to the
quiescent load value.
Calibration Example using the Name Plate Method and a Load Cell
The following example uses Name Plate calibration with a load cell.
Load cells come with a mV/V specification (frequently referred to as sensitivity) which means for each volt
of excitation at maximum load, the load cell will output a specific millivolt level.
Consider a 3000-pound load cell rated at 3 mV/V using 10 V of excitation. When the load cell is used,
a 10-pound platform will be placed on it. Although the load cell is rated at 3000 pounds, 1500 pounds is
the maximum load that will ever be applied for this example.
From the above data we know the following parameters:
•
•
•
•
•
Excitation Voltage = 10 volts
Maximum Applied Load = 1500 pounds
Quiescent Tare = 10 pounds
Sensitivity = 3 mV/V
Full Rated Load = 3000 pounds
Note: These 5 values are used in the following figure.
4-18
Software
967594
StrainBook/616 User’s Manual
To calibrate this load cell using the sensor calibration program:
1.
2.
3.
4.
Enter the 5 necessary parameters (see preceding bulleted list) into the calibration spreadsheet. These
values are used in the following figure, in which a load cell is connected to channel 7-1.
Once the parameters are entered into the spreadsheet, select Calibrated Enabled Channels either from
the menu bar or from the tool bar.
After the calibration is complete, the sensor calibration program will ask you if you want to save the
calibration data.
The calibration is now complete. To use the load cell, exit the Sensor Calibration window and return
to the main WaveView Configuration main window.
Calibration (View of window with scrollbar to the left)
Calibration (View of window with scrollbar to the right)
StrainBook/616 User’s Manual
967594
Software
4-19
Changing Low-Pass Filter Displays
To change the LPF display, choose Advanced Features from the System menu item. Enter desired values in
the LPF Corner Frequencies Settings dialog box. The frequency range for the first LPF setting is 2Hz to
200Hz. The frequency range for the second LPF setting is 200 Hz to 20000 Hz.
Making changes to the “LPF Settings” or the “LPF Cutoff Column”(of WaveView’s Main
Window) will not result in any change to the actual filter. You must physically change
frequency cutoff selection resistors so they correspond with the values indicated by the
software (or visa versa).
Reference Note:
For information on customizing the Low-Pass Filters refer to Low-Pass Filter Customization
in Chapter 6, Bridge Configurations.
Accessing the LPF Corner Frequencies Dialog Box
Note: The LPF Corner Frequencies Dialog Box is accessed from WaveView’s main window
by selecting Advanced Features from the System pull-down menu.
Reference Note:
If creating your own programs, refer to the Programmer’s Manual, p/n 1008-0901, as needed.
PDF Note:
4-20
Software
During software installation, Adobe® PDF versions of user manuals automatically install onto
your hard drive as a part of product support. The default location is in the Programs group,
which can be accessed from the Windows Desktop. Refer to the PDF documentation for details
regarding both hardware and software.
967594
StrainBook/616 User’s Manual
Setup and Connecting to the Ethernet
5
System Requirements …… 5-1
Software Installation …… 5-2
Ethernet Connection and System Power-up …… 5-3
System Requirements
Verify that you have the following items:
StrainBook/616
TR-40U Power Supply
Ethernet Patch Cable
Data Acquisition CD
Monitor: SVGA, 1024 x 768 screen resolution
An Ethernet jack [on the computer, or on a hub connected to the Ethernet].
Windows 2000 SP4 and Windows XP users:
PC with Intel™ Pentium, 1 GHz or equivalent;
512 MB memory; 10 GB disk space
Windows Vista users:
PC must be Windows Vista Premium Ready
Power Note:
StrainBook requires an input voltage between +10 and +30 VDC. The DC source should be
filtered but not necessarily regulated. The TR-40U AC-to-DC power adapter is recommended for
AC-line applications. However, StrainBook can be powered from any isolated +10 to +30 VDC
source of at least 25 W.
Before plugging the unit in, make sure the power switch is in the “0” (OFF) position.
If you will be using an AC-to-DC power adapter [such as the TR-40U] plug it into an AC outlet; then
connect the DIN5 end of the cable to the StrainBook’s 10 to 30 VDC Input connector.
If you are using another power source [such as a battery] ensure the leads are connected to the proper
DIN5 pins as indicated in the figure.
CAUTION
Do not exceed the 5 amp maximum DC current limit of the POWER IN DIN5
connector.
StrainBook/616 User’s Manual
947191
Setup and Connecting to the Ethernet
5-1
Software Installation
Remove any previous version WaveView driver. This can be done through Microsoft’s
Add/Remove Programs feature.
1.
Start Windows.
2.
Close all running applications.
3.
Insert the Data Acquisition CD into your CD-ROM drive and wait for the CD to auto-run.
If the CD does not start on its own:
(a)
(b)
(c)
(d)
click the desktop’s <Start> button
choose the Run command
select the CD-ROM drive, then select the setup.exe file.
click <OK>.
An Opening Screen will appear.
4.
Click the <ENTER SETUP> button.
5.
From the hardware selection screen [which follows a licensing agreement], select
StrainBook/616 from the drop-down list and follow the on-screen instructions.
Reference Notes:
Adobe Acrobat PDF versions of documents pertaining to StrainBook/616 are
automatically installed onto your PC’s hard-drive as a part of product support at the time
of software installation. The default location is the Programs group, which can be
accessed via the Windows Desktop Start Menu.
5-2
Setup and Connecting to the Ethernet
947191
StrainBook/616 User’s Manual
Ethernet Connection and System Power-up
Overview
StrainBook/616, Rear Panel
StrainBook/616 connects directly to an Ethernet port on a PC or network hub, via the unit’s built-in
10/100BaseT Ethernet interface. An Ethernet patch cable CA-242 (1.5 foot) or CA-242-7 (7 foot) cable is
used to make the connection. Note that either a straight-through or a cross-over cable may be used. The
circuitry automatically adjusts for the cable type to ensure proper connection.
Connecting a StrainBook/616 to the Ethernet
CAUTION
Turn off power to the system devices and externally connected equipment before connecting cables.
Electric shock or damage to equipment can result even under low-voltage conditions.
Take ESD precautions (packaging, proper handling, grounded wrist strap, etc.)
Reference Note:
Adobe PDF versions of user manuals will automatically install onto your hard drive as a part of product
support. The default location is in the Programs group, which can be accessed from the Windows Desktop.
You can also access documents directly from the data acquisition CD via the <View PDFs> button located on
the CD’s opening screen.
StrainBook/616 User’s Manual
947191
Setup and Connecting to the Ethernet
5-3
STEP 1 – Install the Software
Install the software prior to connecting the StrainBook/616 to the Ethernet. If you have not already
installed the software, do so at this time. Refer to the section entitled Software Installation, page 5-2.
STEP 2 – Determine the type of Network Connection
To properly connect and configure a StrainBook/616, you must determine the type of network that the
device will become part of. This is because the type of network used has a direct bearing on the IP address
of the device.
The four network types are as follows:
Dedicated Network - with a direct cable connection from the PC to the device
Dedicated Network - making use of a network hub or switch
LAN with a DHCP server
(Local Area Network with a Dynamic Host Configuration Protocol)
LAN without a DHCP server
(Local Area Network with no Dynamic Host Configuration Protocol)
Brief descriptions and illustrations follow.
Dedicated Network - with a direct cable connection from the PC to the device
In this scenario a StrainBook/616 is connected directly to an Ethernet jack on a host computer.
Dedicated Network using a Direct Cable Connection
5-4
Setup and Connecting to the Ethernet
947191
StrainBook/616 User’s Manual
Dedicated Network - making use of a network hub or switch
In this scenario the StrainBook/616 connects to the Ethernet through a network hub or switch. At least one
computer is also connected to the hub.
Dedicated Network using a Hub/Switch
Some network devices such as a wireless access point may act as a DHCP server. If this is
the case, follow the instructions for the LAN with a DHCP server. For detailed information
consult the documentation that is specific to your network device.
LAN with a DHCP Server (Local Area Network with a Dynamic Host Configuration Protocol server)
Many corporations use the LAN/Server with DHCP arrangement for their networks. In this type of setup
several computers are typically connected to a network that makes use of a DHCP server. In addition, a
StrainBook/616 is connected to the network hub/switch.
LAN with a DHCP Server
Notes:
Using a StrainBook/616 on a typical LAN may affect the speed of the network and internet data
transfer. Because of this we recommend adding a network card to the computer and using one of
the two dedicated network configurations.
Contact your network administrator before connecting a StrainBook/616 to a corporate network.
StrainBook/616 User’s Manual
947191
Setup and Connecting to the Ethernet
5-5
LAN with no DHCP Server
(Local Area Network with no Dynamic Host Configuration Protocol server)
This scenario looks the same as that shown in the previous illustration, except there is no Dynamic Host
Configuration Protocol (DHCP). In this type of setup, one or more computers are connected to a network;
and each computer has a static IP address.
STEP 3 – Connect the System Components
Reference Note:
For examples of StrainBook/616 system connections, including cable use, refer to Chapter 3, Connectors
and Indicators and Chapter 11, System Expansion.
What you will need to connect a StrainBook/616 to the Ethernet:
An available connection to the Ethernet. The connection can be either
- an Ethernet jack on a computer or
- an Ethernet jack on a hub that is connected to the Ethernet.
An Ethernet patch cable, e.g., a CA-242 (1.5 foot cable) or a CA-242-7 (7-foot cable).
1.
Connect the Ethernet cable to the Ethernet jack on the StrainBook/616.
2.
Connect the other end of the Ethernet cable to the Ethernet jack on the host computer or
network hub.
STEP 4 – Power-up the System Components
When powering up a StrainBook/616 system it is important that the StrainBook/616 is powered
last, and that the most remote system components are powered first. Other power-up sequences
may result in software’s failure to recognize all components.*
First, power-on the WBK expansion modules, if applicable.
Second, power-on the StrainBook/616.
* An exception to this power-up scheme is to power-on the entire system at once.
What you will need:
One or more +10 to +30 VDC power supplies with a male DIN5 connector. The number of supplies
depends on the devices in your acquisition system.
Note: The switching-mode power supply that is commonly used with these systems has an input
range of 100 VAC to 240 VAC at 50 Hz to 60 Hz. The power supply’s output [to the
device] is typically 15 VDC @ 3.33 amps via a DIN5 connector.
It is likely that you will use a TR-40U AC power adapter with your StrainBook/616 and a
separate TR-40U for each WBK expansion module, if applicable.
Note: Various AC adapter models support power grids of USA, Europe, Japan, and Asia.
5-6
Setup and Connecting to the Ethernet
947191
StrainBook/616 User’s Manual
How to make the connection:
1.
Using the unit’s power switch, turn the StrainBook/616 “OFF.”
The switch will be in the “0” position and the Power LED will be unlit.
2.
Connect the DIN5 end of the adapter’s cable to the Power Input connector on the
StrainBook/616.
3.
Connect the adapter’s plug to a standard AC outlet.
4.
If your adapter has a power switch, position it to “ON.”
5.
Turn ON the StrainBook/616 by placing the power switch to the “1” position.
The Power LED will light up.
STEP 5 - Configure the Computer’s Network Settings
[Applies to “dedicated networks” only]
The StrainBook/616 Ethernet port typically requires 30 seconds after power-up to configure,
before the unit can be accessed via the network.
If using a LAN (Local Area Network), which has a DHCP server, skip this section and continue
with STEP 7 - Configure and Test the System using the DaqConfiguration Applet (page 5-11).
If using a LAN (Local Area Network), which has no DHCP server, skip this section and
continue with STEP 6 - Configure Device Network Settings using DaqIPConfig (page 5-10).
1.
Open the Control Panel by navigating from the Windows Desktop as follows:
Settings
Control Panel.
Start Menu
2. Double-click the “Network and Dial-up Connections” icon.
3. Double-click the “Network Connection” icon for the network StrainBook/616 is connected to.
Local Area Connection Status
StrainBook/616 User’s Manual
947191
Setup and Connecting to the Ethernet
5-7
4.
In the “Local Area Connection Status” box (previous figure), click on the <Properties> button.
The “Local Area Connection Properties” box will appear (following figure).
Local Area Connection Properties
5.
Double-click the “Internet Protocol (TCP/IP)” component (previous figure).
The “Internet Protocol (TCP/IP) Properties” box will appear (following figure).
Internet Protocol (TCP/IP) Properties
5-8
Setup and Connecting to the Ethernet
947191
StrainBook/616 User’s Manual
Configure the Computer’s TCP/IP settings as follows.
Internet Protocol (TCP/IP) Properties
6.
Select the “Use the following IP Address” radio button.
7.
Set the IP address field to 10.0.0.x where x is some number from 1 to 254.
Make sure that each computer on the dedicated network has a unique IP address.
8.
Set the Subnet mask to 255.0.0.0. Note that the remaining fields can be left unchanged.
StrainBook/616 User’s Manual
947191
Setup and Connecting to the Ethernet
5-9
STEP 6 - Configure Device Network Settings using DaqIPConfig
Applies only to a LAN (Local Area Network), which has a no DHCP server.
Never set the TCP/IP for the device to be the same as the host computer’s IP address!
Each computer and each device on a dedicated network must have a unique IP address!
If using a LAN (Local Area Network), which has a DHCP server, skip this section and continue
with STEP 7 - Configure and Test the System using the DaqConfiguration Applet (page 5-11).
Multiple devices on a LAN are each identified by their unique (device-specific) serial number.
Ensure that the serial number displayed for the unit [being configured] agrees with the serial
number on the MAC label, located on the rear panel of the device.
The DaqIPConfig applet is designed for 32-bit Windows/2000/XP/Vista systems. You can use DaqIPConfig to
change the IP address of the device to be compatible with networks that require fixed IP addresses. As a precaution,
you should always consult with your IT administrator before using the applet to ensure that each device and host
computer connected to the network maintains a unique IP address. The applet is located in the program group for
the associated device and can be accessed from the Windows Desktop via the start menu.
Reference Note:
Appendix A contains general information regarding how to use the Daq Configuration Applet.
1. Locate the DaqIPConfig Applet.
Locate the DaqIPConfig applet by navigating from the
Windows’ Desktop as follows:
Start Menu
Programs
StrainBook/616 Software
DaqIPConfig
2. Open the DaqIPConfig Applet.
Click on the DaqIPConfig selection to open the applet.
3. Select the device that is to have the address
change.
Note: In the above figure there is only one device to
select, i.e., StrainBook/616.
4. Set the internet protocol (TCP/IP) settings to be
compatible with host computer.
(a) Select the radio button labeled “Use the
following IP address.”
DaqIPConfig
(b) Enter the new internet protocol settings. If
needed, consult your network administrator for acceptable
numbers. Do not set the TCP/IP to the computer’s IP address!
(c) Click the <OK> button.
5. Reboot the device.
The new IP address will not take affect until the device has been powered-off, then powered back on.
6.
Repeat steps 3, 4, and 5 for other devices in the system.
After configuring the network settings for all devices, proceed to Step 7.
5-10
Setup and Connecting to the Ethernet
947191
StrainBook/616 User’s Manual
STEP 7 - Configure and test the System using the Daq Configuration Applet
The Daq Configuration applet is located in the Windows Control Panel. It allows you to add or remove a
device and change configuration settings. The included test utility provides feedback on the validity of
current configuration settings, as well as performance summaries.
1. Open the Daq Configuration Applet.
a.
Open the Control Panel by navigating from the Windows’ Desktop as follows:
Start Menu
Settings
Control Panel
b.
From the Control Panel, double-click the Daq Configuration icon.
2. Add the first-level device to the list of installed devices.
The first-level device is the device that will be connected directly to the Ethernet, via a host computer’s
Ethernet jack or a jack on a network hub. The StrainBook/616 is an example of a first-level device.
a.
Select the Computer image in the Device Inventory configuration tree (following figure).
b.
Click the <Add Device> button. The “Select Device Type” box will appear.
c.
Select the StrainBook/616 from the list of devices, as applicable.
d.
Click the <OK> button. The “Properties” box will appear for the selected device.
Using Daq Configuration Device Inventory & Select Device Type to Add a Device
StrainBook/616 User’s Manual
947191
Setup and Connecting to the Ethernet
5-11
3. Set the properties of the first-level device.
In this step you will set the device properties according to one of the following two methods, depending on
whether you have a “Dedicated Network” or a “LAN with DHCP Server Network.”
Users of Dedicated Networks follow these 2 steps.
a.
Enter the Serial Number of the first-level device (StrainBook/616). In the following screen
shots the Serial Number is 800000.
b.
Select the “Auto IP Setting” radio button. Note that the IP Address of the StrainBook/616
will automatically be calculated and displayed in the IP Address field as indicated in the
following left-hand figure.
c.
Click the <OK> button.
For DEDICATED Networks
For LAN with DHCP Server Networks
Daq Configuration, Properties Dialog Boxes
Users of LAN with DHCP Server Networks follow these 3 steps.
The DaqIPConfig applet provides the Serial Number and the IP Address of the device. Users of LAN
with DHCP Server Networks will need to enter both numbers in the Daq Configuration, Properties
dialog boxes (previous right-hand figure). Page 5-10 includes instructions for accessing DaqIPConfig.
If needed, refer to the upper right-hand figure in regard to
radio-button and data entry locations.
a. Enter the base 10 version of the Serial Number of
the StrainBook/616.
b. Select the “Manual IP Setting” radio button.
c. In the IP Address field, enter the IP address.
Partial View of DaqIP Config
Showing IP Address & Serial Number
d. Click the <OK> button.
Provide your network administrator with the information on the device’s MAC label.
Also, find out from the administrator if the IP Address will be changing. If so, see if
you can obtain a permanent IP Address dedicated specifically to your device.
5-12
Setup and Connecting to the Ethernet
947191
StrainBook/616 User’s Manual
4. Test the system connections.
a.
Make sure the device has been properly installed and is powered-on.
b.
Make sure all cables are properly and securely connected.
c.
Click the “Test Hardware” tab.
d.
Click the <TCP/IP Test> button. This tests the Transmission Control Protocol / Internet
Protocol.
The TCP/IP test results have two components: Pinging Device and TCP Connection.
Appendix B, TCP/IP and Resource Tests, includes a brief explanation of each.
e.
Upon completion of the TCP/IP test, click the <Resource Test> button.
The Resource Test consists of two components: Resource Tests and Performance Tests.
Appendix B, TCP/IP and Resource Tests, includes a brief explanation of each.
When testing a StrainBook/616, if the unit does not respond after 30 seconds perform the
following steps:
1)
2)
3)
4)
reboot the system
upon power-up, re-open the Daq Configuration applet
select another configuration setting
reinitiate the test
This completes the procedure for connecting a StrainBook/616 to the Ethernet. At this point you should refer
to other sections of the manual, e.g., information on system expansion and data acquisition.
Reference Notes:
Although the signal conditioning aspect of the WBK16 is inherent in the StrainBook/616 and is
therefore discussed in this manual, specific WBK16 documentation is contained within the
WBK Options Manual (p/n 489-0902).
Note: You can access PDF documents directly from the opening screen of the data acquisition CD
via the <View PDFs> button.
StrainBook/616 User’s Manual
947191
Setup and Connecting to the Ethernet
5-13
5-14
Setup and Connecting to the Ethernet
947191
StrainBook/616 User’s Manual
Bridge Configurations
6
Introduction …. 6-1
CN-115 Headers, Associated Jumpers, and Plug-In Options …… 6-2
Bridge Applications …… 6-3
Removing the Cover Plate …… 6-4
Excitation Connection …… 6-5
Installing a CN-115 ….. 6-6
Low Pass Filter Customization …… 6-7
Configuration Diagrams …… 6-8
Full-Bridge …… 6-8
Half-Bridge …… 6-9
Three-Wire Quarter-Bridge …… 6-10
High-Gain Amplifier …… 6-11
Connecting to the DB9 Channel Input Connector …… 6-12
CA-177 Strain Gage Cable …… 6-12
CA-189, DB9 Adapter Option …… 6-13
WBK16/LC Load Cell Shunt Cal Internal Option …… 6-15
CN-115-1 User-Configurable Plug-In Card Option …… 6-20
Introduction
The strain gage is connected to the amplifiers through the Bridge Completion and Shunt Cal Network. This network
consists of user-supplied / user-installed resistors for bridge completion. Several combinations of resistors and 3
different shunt values may be installed simultaneously. External connector tie points and the programmable
Input Configuration & Cal MUX determine the actual configuration in use.
Once the network is fully configured, most bridge configurations and resistances can be accommodated without reopening the box. The shunt resistors allow each bridge to be put into a known imbalance condition for setting or
verifying channel calibration. Shunt calibration allows a full-scale gain to be set without physically loading the bridge.
Page 6-12 discusses a DB9 Adapter option that provides a means of easily setting up a bridge configuration.
The following board layout shows locations of components referenced to in this chapter. The jumper positions are
default locations. Information regarding the CN-115 header and associated jumpers follows.
StrainBook Board Layout
StrainBook/616 User’s Manual
929494
Bridge Configurations 6-1
StrainBook’s upper circuit board (see preceding figure) is used to:
• Customize low-pass filter frequencies using resistor networks
• Install Bridge completion resistors
• Install Shunt calibration resistors
A fan draws air through the unit and exhausts it through the side. To maintain
sufficient cooling, it is important to keep the fan and vents free of obstruction.
CN-115 Headers, Associated Jumpers, and Plug-In Options
Each channel has a CN-115 2x8 resistor socket header and two associated jumpers (JP101 and JP102) located
on the StrainBook’s main board. The jumpers, associated with a given channel, must be installed if a CN-115
will be used for that channel. The associated jumpers must be removed if a CN-115-1 or a WBK16/LC option
will be used for configuring a channel.
Installing a CN-115 (Note B)
Installing a CN-115-1 or a
WBK16/LC (Note A)
StrainBook jumpers must be
installed for CN-115.
StrainBook jumpers must be
removed for CN-115-1 and
WBK16/LC.
CN-115 is a removable plugin adaptor that can be preconfigured for various bridge
options. It differs from the
CN-115-1 only in form factor.
CN-115-1 is a removable plugin board that can be preconfigured for various bridge
options. It differs from the
CN-115 only in form factor.
Installing a CN-189 (Note C)
CA-189 is an external screwterminal option. It can be
used in conjunction with a
CN-115 or a CN-115-1. If
used alone (without either
plug-in) the associated
channel jumpers must be
installed in the default
position.
WBK16/LC can be used for
virtually all single value shunt
calibration requirements, some
of which are not possible with
the internal FET/analog switch
provisions in the standard
channel configurations.
When installing a plug-in device, be careful to avoid bending the pins and ensure that the option
is correctly oriented. Information for these options can be found using the reference notes below.
Note A - The Note A region represents a CN-115-1 or a WBK16/LC option plugged into the board’s CN-115
header for channel 1. The dashed-rectangle indicates the relative size and orientation of these options. For
both the CN-115-1 and the WBK16/LC the two jumpers (left edge of header) must be removed.
Note B - The CN-115 plug-in adapter fits directly over the header. When using a CN-115 the two jumpers
(left edge of header) must be installed as indicated in the figure.
Note C - The CN-189 includes two 7-pad jumpers and a 9-slot screw-terminal block. With use of the terminal
block and appropriate shorting of jumper pads, the user can easily configure the option to utilize the
components of an installed CN-115 or CN-115-1. The CN-189 screw-terminal option plugs into a DB9
connector.
Reference Notes:
Schematics of various bridge configurations can be found on pages 6-8 through 6-11.
These configurations apply to both the CN-115 and the CN-115-1.
The WBK16/LC Load Cell Shunt Cal Internal Option is discussed on page 6-15.
The CN-115-1 User-Configurable Plug-In Card performs the same function as the
CN-115 Header Plug-in Option. CN-115-1 is discussed on page 6-20.
DB9 connector information, including use of the optional CN-189 adapter, begins
on page 6-12.
6-2
Bridge Configurations
929494
StrainBook/616 User’s Manual
Bridge Applications
All strain-gage bridge configurations consist of a 4-element network of resistors. The quarter, half or full
designation of a strain gage refers to how many elements in the bridge are strain-variable. A quarter-bridge
has 1 strain-variable element; a half-bridge has 2 strain-variable elements; and a full-bridge has 4 strainvariable elements.
Full-bridges generally have the highest output and best performance. Output signal polarity is determined
by whether the strain-variable resistance increases or decreases with load, where it is located in the bridge,
and how the amplifier inputs connect to it. Configuration polarity is not important in StrainBook due to an
internal software-selected inversion stage. This simplifies bridge configuration.
Each of the 8 input channels has locations for five bridge-completion resistors. These BCR’s are for use
with quarter and half-bridge strain gages. The resistors make up the fixed values necessary to complete the
4-element bridge design.
A full-bridge gage requires no internal completion resistors. However, the resistors may still be installed
for other configurations in use. The additional resistors will be ignored when the software has selected
full-bridge mode.
Quarter-bridge and half-bridge gages require an internal half-bridge consisting of header positions Rg and
Rh. The recommended minimum values are 0.1%, <5 PPM/°C drift, 1 KΩ, and 0.25-watt resistors. Lower
values will dissipate more power and add heat. Values >1KΩ will increase the amount of drift and noise.
The same value half-bridge resistors can be used for any resistance strain gage. This internal half-bridge
will be automatically selected by the software when needed.
Internal 1 MΩ shunt resistors are used to avoid open circuits.
These resistors are not suitable for high-accuracy/low-noise applications.
A quarter-bridge gage additionally requires a resistor of equal value
to itself. Up to 3 different values may be installed simultaneously in
header positions Ra, Rc, Re. All of these resistors are connected to
the (-) excitation terminal. An external jumper at the input
connector determines which resistor is utilized. Therefore, 3
different quarter-bridge values can be supported without opening
the enclosure. Each different value bridge would simply have the
jumper in a different location; when the gage is plugged in, the
proper resistor is then already selected. Configurations with the
completion resistor on the (+) excitation are redundant, due to the
internal inversion stage, and not used.
The upcoming strain-gage configurations are presented in 4 groups: Full-bridge, half-bridge, quarterbridge, and high-gain voltmeter. Many of these configurations can coexist but are shown individually for
clarity.
StrainBook/616 User’s Manual
929494
Bridge Configurations 6-3
Removing the Cover Plate
CAUTION
Remove the StrainBook from power and disconnect the unit from the host PC and
from all externally connected equipment prior to connecting cables, signal lines,
and/or removing the cover to install or remove components. Electric shock or
damage to equipment can result even under low-voltage conditions.
Take ESD precautions (packaging, proper handling, grounded wrist strap, etc.)
Use care to avoid touching board surfaces and onboard components. Only handle
boards by their edges (or ORBs, if applicable). Ensure boards do not come into
contact with foreign elements such as oils, water, and industrial particulate.
Be careful to avoid component damage while the StrainBook is open. Always remove
bridge completion headers (CN-115) from the unit before soldering resistors in the
headers.
To remove the cover plate
you must first remove the top
inward screw from each of
the four mounting brackets.
The Cover Plate is Secured by 4 Screws [2 Screws per side]
1.
6-4
Remove the StrainBook from power and disconnect the unit from the host PC and from all externally
connected equipment prior to removing the cover. As stated in the above CAUTION, electric shock or
damage to equipment can result even under low-voltage conditions.
2.
Ensure you have taken proper ESD precautions (proper handling, grounded wrist strap, etc.)
3.
Remove the top inward screw from each of the four mounting brackets [2 screws per bracketed side].
4.
Carefully remove the cover.
Bridge Configurations
929494
StrainBook/616 User’s Manual
Excitation Connection
Remote sense inputs are provided for the excitation regulators. The excitation voltage will be most accurate
at points where remote sense lines are connected, preferably at the bridge (this is often referred to as a
6-wire connection). Long cables will reduce the voltage at the bridge, due to current flow and wire
resistance, if remote sense is not used.
If the 6-wire approach is not used, the remote sense inputs must be jumpered to the excitation
outputs at the input connector. Internal 1 MΩ resistors are also connected where the jumpers would be
located to prevent circuit discontinuities. These 1 MΩ resistors are not suitable for high-accuracy
excitation-voltage regulation.
3-wire quarter-bridge configurations do not benefit from external remote sense connections. The lead
resistance is actually a balanced part of the bridge. If the + remote sense input is connected to the + input
on a quarter-bridge, the voltage is regulated across the bridge completion resistor. This results in a
constant-current linearized quarter-bridge; otherwise quarter-bridges are not perfectly linear.
Shunt-Calibration Resistors. StrainBook provides three physical locations for internal shunt-calibration
resistors for each channel. Each shunt resistor is switched in from the EXCITATION (-) to the IN (+) of
the Instrumentation Amp by a FET switch to create a repeatable bridge imbalance. Internal resistance of
the circuit is about 1 kΩ; the exact amount is automatically accounted for in the software. The software
also allows selection of the three shunt resistors ( B, D, F ). An internal inversion stage insures correct
polarity during the shunt calibration process; which arm is shunted is therefore irrelevant. Header positions
Rb, Rd, Rf correspond to the software shunt resistor selections of B, D, F.
For any balanced bridge, a resistance value can be placed in parallel with one element to create a
predictable imbalance and output voltage. This shunt-resistance value can be calculated by the following
equation, where Vout is the differential output voltage of the gage.
Example:
RShunt = RBridge Arm [ ( VExcitation / 4 (Vout)) - 0.5 ]
RShunt = 350 [ ( 10 / 4(0.020)) - 0.5 ] = 43,575Ω
CAUTION
Be careful to avoid component damage while StrainBook enclosure is open. Always
remove bridge completion headers (adapter plugs) from the unit before soldering
resistors in the headers.
Configuring the Bridge Completion Resistor Modules. For each channel, the
board has a 2×8 resistor socket with rows designated A through H. The removable
adapter plugs are included for soldering in the resistors. Additional adapter plugs
are available for convenient changeover of alternate configurations. Resistor Ra is
located nearest the front panel.
o
o
o
Solder resistor lead
into support fork.
Half-bridge completion resistors consist of Rg and Rh.
Quarter-bridge completion resistors consist of Ra, Rc, and Re.
Shunt resistors consist of Rb, Rd, and Rf.
Inserting resistors directly into the socket makes an unreliable connection and
is not recommended. Remove the plug from the main board; then solder
resistors to the adapter plug as indicated. To avoid damaging the pin
alignment on the plug, solder with minimal heat. After soldering, the resistor
leads should be snipped off close to the support.
StrainBook/616 User’s Manual
929494
Soldering Resistors to
Adapter Plug
Bridge Configurations 6-5
Installing a CN-115
CAUTION
Remove the StrainBook from power and disconnect the unit from the host PC and
from all externally connected equipment prior to connecting cables, signal lines,
and/or removing the cover to install or remove components. Electric shock or
damage to equipment can result even under low-voltage conditions.
Take ESD precautions (packaging, proper handling, grounded wrist strap, etc.)
Use care to avoid touching board surfaces and onboard components. Only handle
boards by their edges (or ORBs, if applicable). Ensure boards do not come into
contact with foreign elements such as oils, water, and industrial particulate.
Be careful to avoid component damage while the StrainBook is open. Always remove
bridge completion headers (CN-115) from the unit before soldering resistors in the
headers.
Be careful to avoid bending the pins and ensure that the plug-in is correctly oriented.
Note that the associated channel’s two jumpers (located on the StrainBook board)
must be installed for CN-115 applications; but removed for CN-115-1 or WBK16/LC
applications.
You can easily install a CN-115 as follows:
Note: If you need to add or remove resistors to the CN-115 plug-in, do so prior to the installing it.
Configuration diagrams begin on page 6-8.
1. Review the preceding CAUTIONS.
2. Remove the StrainBook [or WBK16] from power and disconnect the unit from all external
devices and signals.
3. Observe proper ESD precautions.
4. Remove the cover from the StrainBook [or WBK16].
5. Locate the CN-115 channel header(s) in which the plug-in is to be installed.
6. If the header socket is occupied, remove the CN-115-1, WBK16/LC, or previous CN-115 to
expose the header socket.
7. Add one shunt jumper to each of the two 3-pin headers. The 3-pin headers are located at the
edge of the CN-115 16-pin header sockets (see figures).
Note: For each channel the jumper headers are labeled in sets of two: JP101/JP102 for
channel 1, through JP801/JP802 for channel 8. The first digit after “JP” signifies the
associated channel number.
8. Carefully plug the CN-115 into the header socket.
9. Re-install the cover to the StrainBook [or WBK16].
CN-115 Headers for Channels 1 and 2
Channel 1 has jumpers removed. Channel 1 has no
CN-115 installed. Channel 2 shows a CN-115
installed and proper jumper installation.
6-6
Bridge Configurations
929494
Required Jumper Placement for CN-115 Plug-in
For each channel that has a CN-115 installed,
pins must be jumpered as indicated above. Each
channel has a jumper header next to the edge of
its CN-115 header.
StrainBook/616 User’s Manual
Low-Pass Filter Customization
StrainBook has 68 kΩ 4-resistor SIP networks installed at the factory. These networks result in a 10.9 Hz
cutoff for filter A and a 1092 Hz cutoff for filter B. The 4-resistor SIP networks are socketed and can be
altered to the range of values in the table below. Individual resistors may also be used but should be
matched within 2%. Cutoff frequency accuracy is about ±5%.
If you change the filter nominal values, be sure to update the filter cutoff frequencies in
the WaveView software. This is discussed in the Chapter 4 section entitled Changing
Low-Pass Filter Displays.
Filter A
Filter B
Resistance
in kΩ
Frequency
in Hz
Resistance
in kΩ
Frequency
in Hz
Resistance
in kΩ
Frequency
in Hz
Resistance
in kΩ
Frequency
in Hz
470
330
220
150
100
82
68
47
1.58
2.25
3.38
4.95
7.43
9.05
10.9
15.8
33
22
15
10
8.2
6.8
4.7
3.3
22.5
33.8
49.5
74.3
90.5
109
158
225
470
330
220
150
100
82
68
47
158
225
338
495
743
905
1092
1580
33
22
15
10
8.2
6.8
4.7
3.3
2250
3375
4950
7425
9055
10919
15798
22500
Lower frequency filters, such as the 10-Hz filter provided, are generally used to reduce higher frequency
noise. Some common sources of noise are: 50/60 Hz power line pickup on long cables, electromagnetic
interference (EMI) from nearby equipment, unwanted vibrations in the strain gage system itself, or at
higher gains the intrinsic thermal noise of the amplifiers. All information above the cutoff will also be lost
due to the filter’s function.
The 1-kHz filter provided is typically used as an anti-aliasing filter, or for slight noise reduction while still
maintaining moderate bandwidth.
StrainBook/616 User’s Manual
929494
Bridge Configurations 6-7
Configuration Diagrams
Full-Bridge Configurations
The full-bridge has four strain-variable elements and requires no bridge completion components. Quarter and
half-bridge resistors may be left installed. Any bridge resistance from 60 to 1000 ohms can be accommodated.
RH
+Sense
+Excitation
3
5
JN01 2
4
1
9
8
3
IA
7
2
6
RG
RF
RE
RD
RB
DB-9
Input
RA
External
Bridge
RC
1
Switches
accessed
through
software
-Excitation
-Sense
Internal Bridge Completion
Full-Bridge (+), Any Resistance from 60 to 1000 Ohms
In this connection, excitation voltage is
regulated at the connector. This
configuration should only be used for
short cable lengths. Output polarity may
be altered by interchanging the (+) and (-)
input or by selecting the software invert
function.
RH
+Sense
+Excitation
3
5
JN01 2
4
1
9
8
3
IA
7
2
In this connection, excitation voltage is
regulated at the strain gage.
6
RG
RF
RE
RD
RB
DB-9
Input
RA
External
Bridge
RC
1
Switches
accessed
through
software
-Excitation
-Sense
Internal Bridge Completion
This eliminates errors due to cable
losses and is the preferred connection
for longer cables.
Full-Bridge (+), with Remote Sense
RH
+Sense
+Excitation
3
5
JN01 2
4
1
9
8
3
IA
7
2
6
RG
RF
RE
RD
RB
DB-9
Input
RA
External
Bridge
RC
1
Switches
accessed
through
software
Internal Bridge Completion
Full-Bridge (+), with B, D, or F Shunt
6-8
Bridge Configurations
929494
-Excitation
-Sense
The B, D, or F shunt resistor may be
software selected when installed as
shown. Output polarity during shunt
calibration will be automatically
corrected by software. The shunt resistor
value will typically be different for each
value of bridge resistance.
StrainBook/616 User’s Manual
Half-Bridge Configurations
The half-bridge has two strain-variable elements and requires two internal bridge completion resistors (BCRs).
Any bridge resistance from 60 to 1000 ohms can be accommodated for either the internal or external bridge.
RH
+Sense
+Excitation
3
5
JN01 2
9
4
1
8
3
IA
H BCR
G BCR
F Shunt
E
D Shunt
C
B Shunt
A
7
2
In this connection, excitation voltage is
regulated at the connector.
6
RG
RF
RE
RD
RB
DB-9
Input
RA
External
Bridge
RC
1
Switches
accessed
through
software
This configuration should only be used
for short cable lengths.
-Excitation
-Sense
Internal Bridge Completion
Half-Bridge (+), Any Resistance from 60 to 1000 Ohms,
B,D, or F Shunt
Output polarity can be altered by
selecting the software invert function.
The B, D, or F shunt resistor may be
software selected. Output polarity during
shunt calibration will be automatically
corrected by software.
RH
+Sense
+Excitation
3
5
JN01 2
4
1
9
8
3
IA
7
2
In this connection, excitation voltage is
regulated at the strain gage.
6
RG
RF
RE
RD
RB
DB-9
Input
RA
External
Bridge
RC
1
Switches
accessed
through
software
This is the preferred connection for
longer cables.
-Excitation
-Sense
Internal Bridge Completion
Half-Bridge (+), with Remote Sense
RH
+Sense
+Excitation
3
5
JN01 2
4
1
9
8
3
IA
7
2
6
RG
RF
RE
RD
RB
DB-9
Input
RA
External
Bridge
RC
1
Internal Bridge Completion
Switches
accessed
through
software
-Excitation
-Sense
3-Wire TC Half-Bridge, Software Invert & B, D, F Shunt Available
StrainBook/616 User’s Manual
929494
This occasionally utilized connection can
be made as shown. Two resistors
normally reserved for quarter-bridge
completion must be used.
For compatibility with other
configurations, use of one of the above
two configurations is preferred over
this one.
Bridge Configurations 6-9
Three-Wire Quarter-Bridge Configurations
The three-wire quarter-bridge has only one strain-variable element and requires three bridge completion resistors
(BCRs). The internal half-bridge may be any two matched values, but the remaining resistor must match the
external quarter-bridge value precisely. Three of these values may be installed simultaneously when connected
as shown below; the connector pins determine which resistor is used. With all three values installed, WBK16
can accommodate all three quarter-bridge values without changing the internal resistors.
RH
+Sense
+Excitation
3
5
JN01 2
4
1
9
8
3
IA
7
2
A 120-ohm resistor and its corresponding
shunt value may be installed as shown.
6
RG
RF
RE
RD
RB
DB-9
Input
RA
External
Bridge
RC
1
Internal Bridge Completion
Switches
accessed
through
software
-Excitation
-Sense
Three-Wire Quarter-Bridge (+),
Using RA (120-Ohm nominal), B Shunt Resistor
RH
+Sense
+Excitation
3
5
JN01 2
4
1
9
8
3
IA
7
A 350-ohm resistor and its corresponding
shunt value may be installed as shown.
2
6
RG
RF
RE
RD
RC
DB-9
Input
RA
External
Bridge
RB
1
Internal Bridge Completion
Switches
accessed
through
software
-Excitation
-Sense
Three-Wire Quarter-Bridge (+),
Using RC (350-Ohm nominal), D Shunt Resistor
RH
+Sense
+Excitation
3
5
JN01 2
4
1
9
8
3
IA
7
2
6
1
RG
RF
RE
RD
RC
RB
DB-9
Input
RA
External
Bridge
Internal Bridge Completion
Switches
accessed
through
software
A 1000-ohm (or other value) resistor and
its corresponding shunt value may be
installed as shown.
-Excitation
-Sense
Three-Wire Quarter-Bridge (+),
Using RE (1-KOhm nominal), F Shunt Resistor
6-10
Bridge Configurations
929494
StrainBook/616 User’s Manual
High-Gain Amplifier Configurations
StrainBook is useful as a programmable high-gain amplifier. No external bridge is used in these cases.
The inputs are fully differential.
Note: The differential inputs are not isolated inputs. Common mode voltage should not exceed ±10 V.
RH
+Sense
+Excitation
3
5
JN01 2
4
1
9
+
8
3
-
IA
7
No pull-down resistors are required if the
input signal ground is connected to Pin 1
as shown.
2
6
RG
RF
RE
RD
RB
DB-9
Input
RA
External
Bridge
RC
1
Internal Bridge Completion
Switches
accessed
through
software
-Excitation
-Sense
Universal High-Gain Amplifier Input, Differential
RH
+Sense
+Excitation
3
5
JN01 2
4
1
9
+
8
3
-
IA
7
2
6
RG
RF
RE
RD
RB
RA
DB-9
Input
RC
1
External
Bridge
Internal Bridge Completion
Switches
accessed
through
software
-Excitation
-Sense
Universal High-Gain Amplifier Input, Differential with Pull Downs
A floating input without a ground
reference, such as a battery, requires a
path for input bias currents. Pull-down
resistors of 1k to 10MΩ may be installed
as shown to provide this function.
A 10MΩ resistor would be suitable in
most cases.
These resistors are not compatible with
other bridge configurations.
RH
+Sense
+Excitation
3
5
JN01 2
4
1
9
+
8
3
IA
7
2
6
RG
RF
RE
RD
RB
DB-9
Input
RA
External
Bridge
RC
1
Internal Bridge Completion
Switches
accessed
through
software
-Excitation
-Sense
If the (-) input is ground referenced, the
input is non-differential and pull-down
resistors are not required. A floating
source would still result in a truly
differential input.
Universal High-Gain Amplifier Input, Single-Ended
StrainBook/616 User’s Manual
929494
Bridge Configurations 6-11
Connecting to the DB9 Channel Input Connector
CAUTION
Remove the StrainBook from power and disconnect the unit from the host PC and
from all externally connected equipment prior to connecting cables, signal lines,
and/or removing the cover to install or remove components. Electric shock or
damage to equipment can result even under low-voltage conditions.
Take ESD precautions (packaging, proper handling, grounded wrist strap, etc.)
Use care to avoid touching board surfaces and onboard components. Only handle
boards by their edges (or ORBs, if applicable). Ensure boards do not come into
contact with foreign elements such as oils, water, and industrial particulate.
The figure shows the pinout of the DB-9 connector used for channels 1
through 8 located on StrainBook’s front panel. The strain gage will
connect directly to these pin sockets, unless the CN-189, DB9 Adapter
option is used. The CN-189 option is discussed in the following
sub-section.
StrainBook’s DB9 Pinout
A quality cable (such as the CA-177 strain-gage cable) can improve performance of the system, especially
with long cable runs. Use cable with an overall shield connected to the DB9 metal shell. Twisted pair cable
with paired leads for signal input, excitation output, and remote sense input is also beneficial.
The wires should be soldered to the DB9 to eliminate noise created by contact resistance variations. The
protective hoods should be installed over the 9-pin connectors during use to avoid draft-induced thermalelectric noise in the connector solder joints. Molded cables wider than 1.23 inches will not fit WBK16's
connector spacing.
CA-177 Strain-Gage Cable
Use cable with an overall shield connected to the DB9 metal shell. Twisted pair cable with paired leads for
signal input, excitation output, and remote sense input are also beneficial.
The wires should be soldered to the cable’s DB9 connector to eliminate noise created by contact resistance
variations. The protective hoods should be installed over the 9-pin connectors during use to avoid draftinduced thermal-electric noise in the connector solder joints.
Molded cables wider than 1.23 inches will not fit the StrainBook’s DB9 connectors due to available space
between the unit’s connectors.
6-12
Bridge Configurations
929494
StrainBook/616 User’s Manual
Cable Pinout*
CA-177 Strain-Gage Cable Pinout*
DB9 Male End (P1)
Pin 1
Pin 2
Pin 3
Pin 4
Pin 5
Pin 6
Pin 7
Pin 8
Pin 9
Shell
Cable CA-177 Specifications
Unterminated End (P2)
Brown wire
Red wire
Orange wire
Yellow wire
Green wire
Blue wire
Purple wire
Black wire
White wire
Drain wire
---
P1 Cable End: DB9 male, assembled metal
hood with thumbscrews
(solder cup DB9).
P2 Cable End: Unterminated, blunt cut.
Cable Type: Belden 9614 or equivalent.
Wire Gauge: 24 AWG.
Outer Shield: Foil and 65% braid.
Number of Conductors: Nine (9) plus drain.
Dimensions: Length: 72" ± 4",
Connector width: 1.220" maximum
P1-to-P2 Pinout Specifications:
As indicated at left.
*Cable DB9 numbering is opposite of that found on the StrainBook to allow for correct pin mating.
CN-189, DB9 Adapter Option
CAUTION
Remove the StrainBook from power and disconnect the unit from the host PC and
from all externally connected equipment prior to connecting cables, signal lines,
and/or removing the cover to install or remove components. Electric shock or
damage to equipment can result even under low-voltage conditions.
Take ESD precautions (packaging, proper handling, grounded wrist strap, etc.)
Use care to avoid touching board surfaces and onboard components. Only handle
boards by their edges (or ORBs, if applicable). Ensure boards do not come into
contact with foreign elements such as oils, water, and industrial particulate.
If the CN-189 will be used (a) with a CN-115 installed in the associated
channel, or (b) will be used alone, then the associated channel’s CN-115
header jumpers must be installed as indicated in the figure.
The CN-189 option consists of two 7-pad jumpers (P3 and P4), a DB9 connector, and a 9-slot screwterminal block. The adapter plugs into channel input DB9 connectors on StrainBooks and WBK16
expansion modules.
With use of the terminal block and appropriate shorting of jumper pads, the user can easily set up the
desired bridge configuration. A table indicating bridge types and the respective CN-189 jumper pad shorts
follows shortly. In some cases, the user may want to install a resistor at location R1. The electrical
relation of CN-189 components is shown in the following schematic.
StrainBook/616 User’s Manual
929494
Bridge Configurations 6-13
CN-189 DB-9 Adapter Option
The CN-189 is intended for convenience and is not shielded. Higher signal quality will
be obtained with the use of shielded cables, such as the CA-177 strain gage cable.
CN-189 Schematic
The CN-189 can be configured to utilize the components of an installed CN-115 or CN-115-1 in accordance
with the following table.
CN-189 DB9 Adapter for WBK16, Configuration Table
1
2
3
4
5
6
7
8
9
10
11
Function
P3 (on CN-189)
P4 (on CN-189)
Internal Excitation Sense
¼ Bridge Using (RA) 2-Wire
¼ Bridge Using (RC) 2-Wire
¼ Bridge Using (RE) 2-Wire
High Gain Amp Ground Path (Short)
High Gain Amp (Resistive)
Ground Path (EXT)
High Gain Amp (RE) Ground Path (INT)
High Gain Amp (RC) Ground Path (INT)
High Gain Amp (RA) Ground Path (INT)
Current Measurement (Differential)
Differential Load Resistor
Short 1 and 2
Short 3 and 4
Short 5 and 6
Short 6 and 7
Short 6 and 7
Short 5 and 6
Resistor
between 5 and 6
Short 1 and 2
Short 2 and 3
Short 4 and 5
Resistor Used in R1
Shunt resistor in R1
Load resistor in R1
For the functions listed in the preceding table, internal StrainBook configurations
still apply as indicated on pages 6-8 through 6-11 .
6-14
Bridge Configurations
929494
StrainBook/616 User’s Manual
WBK16/LC Load Cell Shunt Cal Option
Purpose of the WBK16/LC
The WBK16/LC provides a non-committed dry contact on two pins of a single StrainBook or WBK16
channel connector. The WBK16/LC can be used for virtually all single value shunt calibration
requirements, some of which are not possible with the internal FET/analog switch provisions in the
standard channel configurations.
WBK16/LC
Shunt calibrations of load cells and pressure transducers, while conceptually equivalent to shunt calibration
of strain gages, do exhibit a few differences.
o
o
o
Varying physical locations of the shunt cal resistor
The shunt resistors are often expressed in engineering
units instead of ohms
A shunt switch contact with nominally
zero-ohms is required
Any of the following situations can be accommodated by the uncommitted shunt contact of the
WBK16/LC:
•
A shunt calibration resistor can be internal to a load cell or transducer, with an extra connector pin
or additional wire in the cable with the requirement that the line be connected to one of the
excitation lines to produce a signal equivalent to a specific physical stimulus applied to the
transducer.
•
A shunt calibration resistor with a defined physical equivalence may be supplied with a transducer
giving specific instructions for connections to provide a signal output from the device.
•
A user may, empirically, or by electrical calculation, determine the physical equivalence of an
available resistance connected to accessible transducer lines to produce an output signal.
The shunt calibration resistor can be located internal (soldered onto the WBK16/LC in the provided “R1”
location) or external to the host StrainBook or WBK16 at a wiring transition location. Four schematics
which include an External Full Bridge follow.
StrainBook/616 User’s Manual
929494
Bridge Configurations 6-15
CAUTION
Make the DB9 pin # 2 connection to the “low-side” or the “high-side” of the
circuit. BUT NEVER TO BOTH! Doing so will create a short circuit that could
damage equipment.
Internal Shunt Resistor, Low-Side Connection
Full Bridge (+) with Internal Shunt Resistor Installed at R1 on the WBK16/LC
DB9 Pin 2 Connected to the Low-Side
Internal Shunt Resistor, High-Side Connection
Full Bridge (+) with Internal Shunt Resistor Installed at R1 on the WBK16/LC
DB9 Pin 2 Connected to the High-Side
CAUTION
Make the DB9 pin # 2 connection to the “low-side” or the “high-side” of the
circuit. BUT NEVER TO BOTH! Doing so will create a short circuit that could
damage equipment.
Note 1: The switches represented in the schematics are controlled by software.
6-16
Bridge Configurations
929494
StrainBook/616 User’s Manual
CAUTION
Make the DB9 pin # 2 connection to the “low-side” or the “high-side” of the
circuit. BUT NEVER TO BOTH! Doing so will create a short circuit that could
damage equipment.
External Shunt Resistor, Low-Side Connection
Full Bridge (+) with External Shunt Resistor
DB9 Pin 2 Connected to the Low-Side
External Shunt Resistor, High-Side Connection
Full Bridge (+) with External Shunt Resistor
DB9 Pin 2 Connected to the High-Side
CAUTION
Make the DB9 pin # 2 connection to the “low-side” or the “high-side” of the
circuit. BUT NEVER TO BOTH! Doing so will create a short circuit that could
damage equipment.
Note 1: The switches represented in the schematics are controlled by software.
StrainBook/616 User’s Manual
929494
Bridge Configurations 6-17
Caveats
Transducers and load cells, most often employ full bridges with four active strain gages to benefit from
inherent temperature compensation and maximum output signal levels.
The mV/V sensitivities vary from unit to unit, but series resistors may be placed in the excitation lines to
adjust them into a particular range window. This technique makes externally connected shunt calibration a
little less exacting if the shunt resistor is not connected directly across the desired bridge arm. A shunt
calibration resistor provided internally by the transducer manufacturer will usually require connection to an
externally accessible node to activate the shunt. The variations in connection requirements require the
flexibility of a non-committed dry contact as provided by the WBK16/LC module.
Shunt calibration generally is done by shunting one arm of a bridge with four active arms. For this reason,
it is recommended that simulated signal levels be limited to about 20% of the full-scale output of the
transducer. Attempting to achieve a high level output with a single resistor will introduce non-linearity
errors into the picture. For example, a 5000 pound load cell should be shunt calibrated with a resistance
that will introduce about a 1000 pound output signal. Attempting to produce a 4000 pound signal by
shunting one of the bridge legs will generally not produce the same quality result.
6-18
Bridge Configurations
929494
StrainBook/616 User’s Manual
Installing a WBK16/LC
CAUTION
Remove the StrainBook from power and disconnect the unit from the host PC and
from all externally connected equipment prior to connecting cables, signal lines,
and/or removing the cover to install or remove components. Electric shock or
damage to equipment can result even under low-voltage conditions.
Take ESD precautions (packaging, proper handling, grounded wrist strap, etc.)
Use care to avoid touching board surfaces and onboard components. Only handle
boards by their edges (or ORBs, if applicable). Ensure boards do not come into
contact with foreign elements such as oils, water, and industrial particulate.
Be careful to avoid component damage while the StrainBook is open. Always remove
the WBK16/LC from the unit before soldering resistors.
Be careful to avoid bending the pins and ensure that the card is correctly oriented.
Note that the associated channel’s two jumpers (located on the StrainBook board)
must be removed prior to installing the card.
You can easily install a WBK16/LC as follows:
Note: If a shunt calibration resistor is to be mounted on the WBK16/LC it should be done prior to the
installing the WBK16/LC. Shunt calibration resistors should be soldered in location R1 on the
WBK16/LC.
1.
2.
3.
4.
5.
6.
7.
8.
9.
Review the preceding CAUTIONS.
Remove the StrainBook [or WBK16] from power and disconnect the unit from all external
devices and signals.
Observe proper ESD precautions.
Remove the cover from the StrainBook [or WBK16].
Locate the CN-115 channel header(s) in which the WBK16/LC modules are to be installed.
If the header socket is occupied, remove the CN-115-1 (or CN-115) to expose the header
socket.
Remove one shunt jumper from each of the two 3-pin headers. The 3-pin headers are located
the edge of the CN-115 16-pin header sockets (see following figure).
Note: For each channel the jumper headers are labeled in sets of two: JP101/JP102 for
channel 1, through JP801/JP802 for channel 8. The first digit after “JP” signifies the
associated channel number.
Carefully plug the module into the header socket.
Re-install the cover to the StrainBook [or WBK16].
CN-115 Headers for Channels 1 and 2
Channel 1 has jumpers removed and has a WBK16/LC
installed. Channel 2 still has jumpers. These would
have to be removed if a WBK16/LC was to be
installed.
StrainBook/616 User’s Manual
929494
Jumpers Removed for WBK16/LC Plug-in
For each channel that is to have a WBK16/LC
installed, jumpers must be removed as indicated
above. Each channel has a jumper header next to
the edge of its CN-115 header.
Bridge Configurations 6-19
Calibration Using WaveView
Reference Note:
The Calibration Parameters Tab Selected section of Chapter 4 includes screen shots
and text related to the following steps.
1.
Select ‘load cell’ or ‘transducer’ from the pull-down ‘Sensor Type’ menu.
2.
Select ‘shunt’ from the pull-down ‘Calibration Method’ menu.
3.
Enter a maximum intended value in the ‘Maximum Applied Load’ cell in engineering units.
4.
Enter a value slightly below zero engineering units in the Quiescent/Tare cell in engineering
units.
Note: If the transducer must measure bi-directionally, for example, pressure and vacuum,
enter the maximum anticipated negative engineering units.
5.
Enter the physical equivalence in engineering units in the ‘Point 2’ cell of the shunt calibration
resistance.
6.
This method assumes the 0.00 engineering units already in the ‘Point 1’ cell is the intended
physical equivalence of the non-shunted transducer or load cell. [Possible exceptions are
atmospheric pressure transducers and load cells installed under load in which the relative
change is not the measurement of interest.]
7.
Push the channel calibrate button and wait for the window verifying successful calibration.
CN-115-1 User-Configurable Plug-In Card Option
The CN-115-1 serves the same function as the CN-115 adapter plug discussed on page 6-4 and can be used for
all of the same bridge configurations detailed in the Configuration Diagrams section of this chapter. The CN115-1 can be populated with either standard axial lead resistors or square precision resistors.
Each StrainBook (and WBK16) channel has a on-board 2×8 resistor socket with rows designated A through H.
CN-115-1 is a removable plug-in board that can be pre-configured for various bridge options.
It will often be the case that both the top and bottom (plug-in) sides of the CN-115-1 card will need to have
resistors installed to create the desired bridge configuration. The configurations are illustrated earlier in the
chapter. In general, note that:
o
Half-bridge completion resistors consist of RG and RH (or RG1 and RH1).
o
Quarter-bridge completion resistors consist of RA, RC, and RE (or RA1, RC1, and RE1).
o
Shunt resistors consist of RB, RD, and RF (or RB1, RD1, and RF1).
Configuration examples, using different resistor types, immediately follows the installation section.
6-20
Bridge Configurations
929494
StrainBook/616 User’s Manual
Installing a CN-115-1
CAUTION
Remove the StrainBook from power and disconnect the unit from the host PC and
from all externally connected equipment prior to connecting cables, signal lines,
and/or removing the cover to install or remove components. Electric shock or
damage to equipment can result even under low-voltage conditions.
Take ESD precautions (packaging, proper handling, grounded wrist strap, etc.)
Use care to avoid touching board surfaces and onboard components. Only handle
boards by their edges (or ORBs, if applicable). Ensure boards do not come into
contact with foreign elements such as oils, water, and industrial particulate.
Be careful to avoid component damage while the StrainBook is open. Always remove
bridge completion headers (CN-115) from the unit before soldering resistors in the
headers.
Be careful to avoid bending the pins and ensure that the card is correctly oriented.
Note that the associated channel’s two jumpers (located on the StrainBook board)
must be removed prior to installing the card.
You can easily install a CN-115-1 as follows:
Note: If you need to add or remove resistors to the CN-115-1 option, do so prior to the installing the
card.
1. Review the preceding CAUTIONS.
2. Remove the StrainBook [or WBK16] from power and disconnect the unit from all external
devices and signals.
3. Observe proper ESD precautions.
4. Remove the cover from the StrainBook [or WBK16].
5. Locate the CN-115 channel header(s) in which the option is to be installed.
6. If the header socket is occupied, remove the CN-115, WBK16/LC, or previous CN-115-1 to
expose the header socket.
7. Remove one shunt jumper from each of the two 3-pin headers. The 3-pin headers are located
at the edge of the CN-115 16-pin header sockets (see figure).
Note: For each channel the jumper headers are labeled in sets of two: JP101/JP102 for
channel 1, through JP801/JP802 for channel 8. The first digit after “JP” signifies the
associated channel number.
8. Carefully plug the card into the header socket.
9. Re-install the cover to the StrainBook [or WBK16].
CN-115 Headers for Channels 1 and 2
Channel 1 has jumpers removed and has a CN-115-1
installed. Channel 2 still has jumpers. These would have to
be removed if a CN-115-1 was to be installed.
StrainBook/616 User’s Manual
929494
Jumpers Removed for CN-115 Plug-in
For each channel that is to have a
CN-115-1 installed, jumpers must be
removed as indicated above. Each
channel has a jumper header next to the
edge of its CN-115 header.
Bridge Configurations 6-21
Configuring a CN-115-1
In the example below CN-115-1 is being used to create a half-bridge configuration with two Bridge Completion
Resistors (BCRs) and three Shunt resistors. The half-bridge to the left (using standard resistors) is functionally the
same as the half-bridge on the right (using “precision” resistors). The center illustration represents an unpopulated
card to permit reading of the silk-screen.
Shown Unpopulated
Using Standard Resistors
[Top Side of Card]
BCR at “RG1”
[Top Side of Card]
Using Standard Resistors
BCR at “RH1”
Shunts at “RB1” “RD1” “RF1”
[Plug-In Side of Card]
Shown Unpopulated
[Plug-In Side of Card]
Using Precision Type Resistor
BCR at “RG”
[Top Side of Card]
Using Precision Type Resistors
BCR at “RH”
Shunts at “RB” “RD” “RF”
[Plug-In Side of Card]
For the functions listed in the preceding table, internal StrainBook configurations
still apply as indicated on pages 6-8 through 6-11 .
How to Interpret Resistor Connection Points
The CN-115-1 plug-in card’s silk-screen makes use of dual templates. For example, if we look at the RG / RG1
section [on the top side of the card] we will see a small resistor image “RG1” with lines connecting to two solder
points. Thus we know the connection points for standard resistors. If we are using a flat, relatively square
precision-type resistor we would look at the square “RG” portion of the template (right image in the following
figure) and ignore the RG1 image. We can see that the lower left solder point remains, however, the second point
has changed.
Determining Solder Points for Resistor Leads
6-22
Bridge Configurations
929494
StrainBook/616 User’s Manual
Note that the two half-bridges previously described are identical [circuit wise] to the one illustrated below,
which is being repeated from page 6-6.
The A thru H bridge-completion relations are the same, regardless of whether or not you choose to use a
CN-115-1 plug-in option. Refer to the configuration diagrams to set up your desired circuit(s).
+Sense
+Excitation
RH
H BCR
G BCR
F Shunt
E
D Shunt
C
B Shunt
A
3
5
JN01 2
9
4
1
8
3
IA
7
2
6
RG
RF
RE
RD
RB
DB-9
Input
RA
External
Bridge
RC
1
Internal Bridge Completion
Switches
accessed
through
software
-Excitation
-Sense
Half-Bridge (+), Any Resistance from 60 to 1000 Ohms,
B,D, or F Shunt
Half-Bridge Circuit Created by using the CN-115 Header Only, i.e., no plug-in card
If present, read the manufacturer’s data that applies to your resistors. Important soldering and
lead-bending information may be present.
CN-115-1 Mounting Orientation
When installing a CN-115-1 be careful to avoid bending the pins and ensure that the card is oriented in relation to
the DB9 connector as indicated below. Note that the associated channel’s two jumpers (located on the StrainBook
board) must be removed.
Jumper Pin Sections Must be Aligned
No Card Installed
Card Installed
The main Pins Must be Aligned with Corresponding Sockets
CN-115-1 Orientation, Shown for Channel 1
StrainBook/616 User’s Manual
929494
Bridge Configurations 6-23
6-24
Bridge Configurations
929494
StrainBook/616 User’s Manual
Triggers
7
Introduction …… 7-1
Digital (TTL) Trigger …… 7-1
Multi-Channel Trigger …… 7-2
Digital-Pattern Trigger …… 7-6
External Clock and Counter-Timer …… 7-7
Introduction
External signals can be used to start or synchronize the data acquisition process.
StrainBook supports the following trigger sources:
Software Trigger. This trigger event is generated by a software command from the PC
without waiting for an external event. This feature may be used to begin a data acquisition
immediately or to force an acquisition to occur if the expected trigger did not occur.
Digital Trigger. Digital (or TTL-level) triggering (either rising- or falling-edge input) is
performed by digital logic connected to the digital expansion connector.
Multi-Channel Trigger. Here, the trigger event is a combination of measured channel
values. StrainBook's Digital Signal Processor (DSP) performs multi-channel triggering. The
DSP samples the specified channels; if programmable conditions are met, a trigger is
generated. Multi-channel triggering examines digitized data, and the trigger latencies are
much greater.
Digital-Pattern Trigger: This expanded digital-trigger capability allows data collection to
start when a user-defined 16-bit digital pattern is matched on the digital I/O connector.
This feature is useful when trying to capture noise, vibrations or some other physical
disturbance; such as those that can occur in a programmed logic controller’s digitally
sequenced process.
Digital (TTL) Trigger
The input of the digital (TTL) trigger is connected directly to hardware circuits to provide low-latency
triggering. StrainBook can respond to a TTL trigger with a jitter (or uncertainty in latency) of no more
than 100 nanoseconds (ns).
If not collecting pre-trigger data, StrainBook responds to the trigger with a latency of less than
200 ns for TTL.
If collecting pre-trigger data, then triggers are not acted upon until the end of the current pretrigger scan. This increases the trigger latency and jitter, but preserves the specified scan rates.
When the digital trigger is used, the TTL trigger signal from the digital I/O connector is used directly. The
resulting TTL signal is examined under program control for either a false-to-true (rising edge) or true-tofalse (falling edge) transition. When the transition occurs we have a trigger event.
If the system is ready for a trigger, then the trigger event will be acted upon. If the system is not ready
(due to incomplete configuration or because it is still finishing the previous trigger's action), the trigger will
be ignored. No indication of an ignored trigger is given.
StrainBook/616
977694
Triggers
7-1
Multi-Channel Trigger
When the small hardware-limited latencies of the digital (TTL) triggers are not required the DSP chip may
be used to examine the samples from one or more channels and to decide if they constitute a pre-defined
trigger condition.
The DSP can sample up to 64 input channels and examine each
one to determine if it meets programmed levels for a valid
trigger. This multi-channel triggering is a two-step process:
1. The DSP examines each of its specified input signals to
determine trigger validity.
2. After all of the channels have been examined, the DSP
logically combines the individual triggers to generate the
actual trigger. The DSP may be programmed to generate a
trigger if any individual trigger is valid (OR) or if all
triggers are valid (AND). See figure.
Multi-Channel Trigger Detection
Trigger validity in a multi-channel environment is determined by the logical relationship among three
elements (slope, duration, and initialization) as discussed in the next section.
Multi-Channel Trigger Types
The first step in multi-channel
triggering is to examine the input
signals. To determine trigger
validity, StrainBook can examine
each input signal in 1 of 8 ways.
Note: Each trigger type is a
combination of three
elements: slope, duration,
and initialization.
Trigger Type
Slope
Duration
Initialization
Above-level
Rising
Instantaneous
Level
Below-level
Falling
Instantaneous
Level
Above-level-with-latch
Rising
Latched
Level
Below-level-with-latch
Falling
Latched
Level
Rising-edge
Rising
Instantaneous
Edge
Falling-edge
Falling
Instantaneous
Edge
Rising-edge-with-latch
Rising
Latched
Edge
Falling-edge-with-latch
Falling
Latched
Edge
Slope (above/rising or below/falling) sets whether the trigger is valid when the signal is:
Above the trigger level (rising)
Below the trigger level (falling).
Duration (instantaneous or latched) specifies the action to take if the signal level becomes invalid after it
has been valid:
Instantaneous triggers become invalid as soon as the signal does; they are used to trigger on
the coincidence of signals, when two or more signals are simultaneously valid.
Latched triggers remain valid until the acquisition is complete; they are used to trigger on the
occurrence of signals, when two or more signals have already become valid.
The trigger duration only makes a difference in multi-channel "AND" triggering. In multi-channel "OR"
triggering, StrainBook will be triggered as soon as any channel becomes valid; what happens when a
channel becomes invalid does not matter. In contrast, "AND" triggering waits for all of the triggers to be
valid; and so, latching can be important for rapidly changing signals.
Initialization (level or edge) specifies the sequence necessary for a signal to be a valid trigger:
Level triggers become valid as soon as they reach or exceed the trigger level, even if they are
already past the trigger level when the acquisition is started.
Edge triggers first wait until the signal level is invalid. Then they wait for the signal to reach
the trigger level before becoming valid. Thus, level triggers look for a signal level, whenever
it occurs; and edge triggers look for a rising or falling transition that reaches the trigger level.
7-2
Triggers
977694
StrainBook/616
Examination of the input signals compares two specified signal levels: (a) The trigger level determines
when the input channel is a valid trigger, and (b) the hysteresis is the amount by which the channel must
differ from the trigger level for the channel to become invalid.
Above-Level Trigger
Rising slope
Trigger
Trigger
Trigger Level
Hysteresis
Instantaneous duration
No
Trigger
Level initialization
This trigger is valid whenever the signal level is above the trigger level and stays valid until the signal level
goes below the hysteresis range. In the figure, the channel trigger is valid during the 2 shaded intervals.
Whether this condition triggers StrainBook or not, depends on the type of multi-channel triggering ("AND"
or "OR") and on the state of other trigger channels. With "OR" multi-channel triggering, StrainBook will
trigger when the signal first rises above the trigger level—if ready for a new trigger, StrainBook will also
trigger the second time the signal rises above the trigger level. With "AND" multi-level triggering,
StrainBook will not trigger until every specified trigger channel is valid. If all other trigger channels are
valid, StrainBook will trigger when the signal reaches the shaded region; but if some channels are not
valid, this channel will have no effect.
Below-Level Trigger
Falling slope
No Trigger
No Trigger
Instantaneous duration
Level initialization
Hysteresis
Trigger Level
Trigger
Trigger
This trigger is valid whenever the signal level is below the trigger level and stays valid until the signal level
goes above the hysteresis range (the reverse of above-level triggering). As with all multi-channel trigger
types, StrainBook's actual trigger depends on the combination of this trigger with the other channels'
trigger states.
Above-Level-With-Latch Trigger
Rising slope
Trigger
Latched duration
Trigger Level
Level initialization
In this trigger type, the channel becomes valid when the signal level rises above the trigger level and stays
valid until the acquisition is complete and StrainBook is re-armed.
Below-Level-With-Latch Trigger
Falling slope
Latched duration
Level initialization
Trigger Level
Trigger
The channel becomes valid when the signal level rises above the trigger level and stays valid until the
acquisition is complete and StrainBook is re-armed (the reverse of above-level-with-latch triggering).
Latched triggers are often used in multi-channel "AND" triggering, where StrainBook will not trigger until
all trigger channels are valid. After a latched trigger becomes valid, it stays valid (waiting for the other
triggers to become valid) until StrainBook is triggered and the acquisition completes.
If the trigger is non-latched instead of latched, the channel may not stay valid and StrainBook will not
trigger until the channel becomes valid again and all channels simultaneously reach their trigger levels. In
other words, latched triggering is used to trigger after something has occurred, but non-latched triggering
is used only during the simultaneous occurrence of desired signal levels.
StrainBook/616
977694
Triggers
7-3
It is possible to combine different trigger types in a single multi-channel trigger. For example, StrainBook
could trigger when channel 3 is below 0.9 volts after channel 2 has gone above -1.3 volts (by configuring
channel 3 for below-level triggering and channel 2 for above-level-with-latch triggering).
Rising-Edge Trigger
Trigger
Rising slope
Trigger Level
Hysteresis
Instantaneous duration
No
Trigger
Edge initialization
This trigger becomes valid after the signal level has been below the hysteresis range and then goes above
the trigger level. This trigger becomes invalid when the signal level goes below the hysteresis range.
Unlike above-level triggering, the channel cannot become valid until the signal level first goes below the
hysteresis range. This prevents the false triggering that would occur if the signal were above the trigger
level at the start of the acquisition.
Falling-Edge Trigger
No Trigger
Falling slope
Instantaneous duration
Hysteresis
Trigger Level
Edge initialization
Trigger
This trigger is the reverse of the rising-edge trigger: the trigger becomes valid after the signal level has
been above the hysteresis range and then goes below the trigger level. This trigger becomes invalid
whenever the signal level goes above the hysteresis range. This prevents the false triggering that would
occur with below-level triggering if the signal was below the trigger level at the start of the acquisition.
Rising-Edge-With-Latch Trigger
Trigger
Rising slope
Trigger Level
Hysteresis
Latched duration
Edge initialization
This trigger becomes valid like a rising-edge trigger: when the signal level goes above the trigger level
after first being below the trigger range. However, the rising-edge-with-latch trigger does not become
invalid, regardless of the signal level, until the acquisition is complete. Rising-edge-with-latch is used to
trigger after the channel has reached the trigger level, rather than just while the channel is above the trigger
level.
Falling-Edge-With-Latch Trigger
Falling slope
Latched duration
Hysteresis
Trigger Level
Edge initialization
Trigger
This trigger is the reverse of the rising-edge-with-latch trigger: the trigger becomes valid after the signal
level has been above the hysteresis range and then goes below the trigger level. The trigger remains valid
until the acquisition is complete.
7-4
Triggers
977694
StrainBook/616
Trigger Latency & Jitter
Trigger latency and jitter depend on the trigger source and the acquisition mode:
Trigger latency is the duration between the valid trigger and the start of the acquisition.
Trigger jitter is the variation of the latency, how much time the latency can vary from trigger to
trigger.
As discussed, StrainBook has post-trigger and pre/post-trigger acquisition modes. Post-trigger modes
(N-shot, N-shot with re-arm, and infinite-post-trigger) collect scans only after the trigger has occurred.
They are different from the pre/post-trigger mode that collects scans both before and after the trigger.
This difference affects the trigger latency and jitter.
In a post-trigger mode, StrainBook is not scanning while waiting for the trigger. Thus, it is free to respond
to the trigger as soon as it occurs. This minimizes the trigger latency and jitter.
In the pre/post-trigger mode, pre-trigger data is being collected while StrainBook waits for the trigger, and
StrainBook will not respond to a trigger, until after the current scan is complete. The pre-trigger scan
period separates the first scan after the trigger from the last scan before the trigger. All the scans (up
through the one immediately following the trigger) are collected at the pre-trigger rate; and all subsequent
scans are collected at the post-trigger rate. This preserves the integrity of the acquisition timebase as
shown in the figure below:
Pre-Trigger Scan Count
Post-Trigger Scan Count
No acquisitions
before start
Trigger
Time
Start
Trigger
Armed
Pre-Trigger
Scan Period
Pre-Trigger
Scan Period
Post-Trigger
Scan Period
Pre/Post-Trigger Acquisition
The time needed to complete the final pre-trigger scan is part of the trigger latency; and so, in the pre/posttrigger mode, the trigger latency may be greatly increased.
Not only do the trigger latency and jitter depend on the pre- versus post-trigger type of acquisition, they
also depend on the trigger source, i.e., software, digital (TTL), multi-channel, digital pattern. The
following table gives the trigger latency and jitter for each of the different trigger sources and acquisition
modes:
Acquisition Type
Trigger Source
Max. Trigger Latency
Trigger Jitter
Notes
Pre-Trigger
Software
100 µs + T
100 µs + T
a, c
Digital (TTL)
200 ns + T
50 ns + T
c
Multi-Channel
2 * T - NS µs
T
c, d
Digital Pattern
300 ns + T
50 ns + T
Acquisition Type
Trigger Source
Max. Trigger Latency
Trigger Jitter
Notes
Post-Trigger
Software
100 µs
100 µs
a
Digital (TTL)
200 ns
50 ns
Multi-Channel
2 * NC + 3 µs
NC +2 µs
Digital Pattern
300 ns
50 ns
N-Shot,
N-Shot with re-arm, or
infinite-post-trigger
b
Notes:
a) Software trigger latency and jitter depend greatly on the host computer's speed, operating system, and
printer-port protocol. Most systems should take much less than 100 µs.
b) NC is the number of channel samples used for multi-channel triggering, from 1 to 64, as specified by the trigger
configuration.
c) T is the pre-trigger scan period.
d) NS is the number of samples in a scan including, if present, the first "dummy" sample, from 1 to 128.
StrainBook/616
977694
Triggers
7-5
Digital-Pattern Trigger
This type of trigger is useful when trying to capture noise, vibrations or some other physical disturbance
that occurs at a particular point in a digitally-sequenced process, such as a relay-logic-control system.
When “Digital Pattern” is selected as the Triggering Type, the 16-bit pattern extension appears (as
indicated in the following figure). The Condition box allows the following choices:
Equal To (=) / Not Equal To (< >) – These options treat each digital line as a separate input to be
compared to logical 1 or 0. Selecting “Equal To” triggers only on the exact pattern of 1’s and 0’s selected,
while “Not Equal” triggers on all others. You can also set any of the inputs to “don’t care” (X), which
excludes it from the comparison.
Greater Than (>) / Less Than (<) – These options interpret the digital inputs as a single 16-bit value and
allow a threshold trigger.
Acquisition Configuration Dialog Box, with Digital Pattern Extensions
7-6
Triggers
977694
StrainBook/616
External Clock and Counter-Timer
The Internal and External buttons located in the rate section of the screen (previous and following figures)
are used to select Internal Clock or External Clock.
The external clock is useful when data collection depends on rotational speed or axial position. By
synchronizing the system with an external event for correlation of data, you can collect event-dependent
data instead of time-dependent data.
Make sure to adhere to the minimum slew rate requirement of 20 v/µs.
StrainBook can receive external clock input through pin 20 of the DB25 connector labeled DIGITAL I/O,
EXTERNAL CLOCK, TTL TRIGGER. This enables data scanning to be correlated with an external pulse
train.
To enable the external clock select <External> for the Scanning Rate in the Acquisition Configuration
Dialog Box (see following screen shot).
With the external clock enabled StrainBook will begin a scan after a rising edge on the TTL level occurs.
Optionally, the external clock may be divided by a factor in the range of 1 to 255. This “pre-scaling”
allows the user to select a reduced scan rate.
Note: The Clock Divider
can be set to a value
from 1 to 255.
Acquisition Configuration Dialog Box with External Clock Enabled
StrainBooks have a 32-bit internal counter that calculates and reports the external clock’s period. The
counter can be read with each scan of the analog data. This is often beneficial in later analysis when there
is a need to correlate physical phenomena with speed.
The counter channel actually consists of two independent channels (CtrLo and CtrHi). These can be
turned “On” in the Channel Configuration Spreadsheet. When enabled the low (CtrLo), then high (CtrHi)
words of the counter will be configured in each scan. Note that the spreadsheet’s Units column can be
used to view a predefined period in units of seconds, ms, or µsec.
WaveView can be configured to read only the low word of the counter data
(CtrLo:“On,” CtrHi: “Off”). This decreases the minimum scan period by 1 usec.
The LoCtr only option can be used only when the external clock frequency is greater than
305 Hz (20,000,000 MHz / 65536]. However, WaveView does not enforce this.
StrainBook/616
977694
Triggers
7-7
7-8
Triggers
977694
StrainBook/616
Digital I/O, TTL Trigger, and External Clock
8
Introduction …… 8-1
Connections for 16-Bit Mode …… 8-1
Connections for 8-Bit Mode …… 8-2
TTL Trigger …… 8-3
External Clock …… 8-3
Introduction
This brief chapter exists primarily to indicate how Digital I/O connections are made for both the 16-bit and
8-bit Digital I/O modes. WaveView uses the 16-bit mode.
Connections for 16-Bit Mode
For 16-bit mode, the following signals are present on the StrainBook’s DB25F high-speed digital I/O
connector. Note that 8-bit mode is covered in the following section.
o
o
o
o
o
o
o
16 High-Speed Digital I/O Lines (D0 through D15)
TTL Trigger Input (TTLTRG)
+15 V (pin 23), -15 V (pin 22), 50 mA max. (each)
two +5 V (pin 19 and pin 21), 250 mA max. (total)
External Clock Input (pin 20)
Digital Clock (pin 18), only used for WBK17 applications
two Digital Grounds (pins 24 and 25)
To sample 16 digital input signals, connect them directly to the digital I/O data lines as indicated below.
D15 is the most significant bit, and D0 is the least. WaveView is pre-set to use the 16-bit mode.
Digital I/O Connections, 16-Bit Mode
D0 through D15
High Speed Digital I/O data
lines
TTLTRG
TTL trigger input
External Clock
Input
16 bit mode, read/write strobe,
Pin 20
+5 VDC
250 mA maximum
+15,-15 VDC
50 mA maximum (each)
Digital Clock
Pin 18, only used for WBK17
applications
Digital Grounds
Pins 24 and25
DB25 Pinout, 16-Bit Mode
StrainBook/616
977794
Digital I/O, TTL Trigger, and External Clock
8-1
Connections for 8-Bit Mode
To sample just 8 digital input signals use the following pinout, providing that the StrainBook is in 8-bit mode. Note that
WaveView is pre-set to use the 16-Bit mode. In 8-bit mode D15 is the most significant bit, and D8 is the least. The
address lines, read strobe, write strobe, and enable signal can be left disconnected.
o
o
o
o
o
o
o
o
o
o
o
8 Digital I/O Lines (D8 – D15)
5 Address Lines (A0 – A4) *
Active-low Digital I/O Enable output (EN-) *
Active-low Digital I/O Write Strobe (WR-) *
Active-low Digital I/O Read Strobe (RD-) *
TTL Trigger Input (TTLTRG)
+15 V (pin 23), -15 V (pin 22), 50 mA max. (each)
two +5 V power (pins 19 and 21), 250 mA max. (total)
two Digital Grounds (pins 24, and 25)
Digital Clock (pin 18), only used for WBK17 applications
External Clock Input (pin 20)
DB25 Pinout, 8-Bit Mode
D8 through D15
Digital I/O data lines
A0 through A4 *
Digital I/O address lines
EN- *
Active-low digital I/O enable
RD- *
Active-low read strobe
WR- *
Active-low write strobe
TTLTRG
TTL trigger input
+5 VDC
250 mA maximum
+15,-15 VDC
50 mA maximum (each)
Digital Grounds
Pins 24, and 25
Digital Clock
Pin 18, only used for WBK17
applications
External Clock Input
Pin 20
DB25 Pinout for 8-Bit Mode
* Can be left disconnected.
8-2
Digital I/O, TTL Trigger, and External Clock
977794
StrainBook/616
TTL Trigger
The TTL digital trigger signal connects via pin 13 on the DB25 digital I/O connector, and is used directly.
An optional CA-178 cable (following figure) can be connected to the front panel DB25 connector to
provide convenient Trigger and/or External Clock connection via BNC connector.
The TTL trigger signal is examined under program control for either a false-to-true (rising edge) or true-tofalse (falling edge) transition. When the transition occurs we have a trigger event.
If the system is ready for a trigger, then the trigger event will be acted upon. If the system is not ready
[due to incomplete configuration or because it is still finishing the previous trigger's action] the trigger will
be ignored. No indication of an ignored trigger is given.
Chapter 7 contains additional information regarding triggers.
StrainBook with Optional Clock and External Trigger Cable (CA-178)
External Clock
The External Clock Input connects to pin 20 on the front panel DB25 connector. An optional CA-178
cable (preceding figure) can be used to provide convenient Trigger and/or External Clock connection via
BNC connector. The External Clock feature enables data scanning to be correlated with an external pulse
train.
To enable the external clock, select the <External> button for the Scanning Rate in the Acquisition
Configuration Dialog Box (see following screen shot). When the external clock is enabled the StrainBook
begins a scan only after a rising edge on the TTL level occurs. Optionally, the external clock may be
divided [by a factor of 1 to 255]. This “pre-scaling” allows the user to select a reduced scan rate.
The external clock is useful when data collection depends on rotational speed or axial position. By
synchronizing the system with an external event for correlation of data, you can collect event-dependent
data instead of time-dependent data.
Make sure to adhere to the minimum slew rate requirement of 20 v/µs.
Note: The Clock Divider
can be set to a value
from 1 to 255.
Acquisition Configuration Dialog Box with External Clock Enabled
StrainBook/616
977794
Digital I/O, TTL Trigger, and External Clock
8-3
StrainBooks have a 32-bit internal counter that calculates and reports the external clock’s period. The
counter can be read with each scan of the analog data. This is often beneficial in later analysis, when there
is a need to correlate physical phenomena with speed.
The counter channel actually consists of two independent channels (CtrLo and CtrHi). These can be turned
“On” in the Channel Configuration Spreadsheet. When enabled, the low (CtrLo), then high (CtrHi) words
of the counter will be configured in each scan. Note that the spreadsheet’s Units column can be used to
view a predefined period in units of seconds, ms, or µsec.
WaveView can be configured to read only the low word of the counter data (CtrLo:“On,” CtrHi: “Off”).
This decreases the minimum scan period by 1 usec. This LoCtr only option can be used only when the
external clock frequency is greater than 305 Hz (20,000,000 MHz / 65536]. Note that WaveView does not
enforce this.
8-4
Digital I/O, TTL Trigger, and External Clock
977794
StrainBook/616
CE Compliance and Noise Considerations
9
Overview ……9-1
CE Standards and Directives …… 9-1
Safety Conditions ……9-2
Emissions/Immunity Conditions ……9-3
Using Shielded BNC Connectors for CE Compliance …… 9-3
CE Compliance for System Expansion …… 9-3
Noise Considerations …… 9-4
Overview
CE compliant products bear the “CE” mark and include a Declaration of Conformity stating the
particular specifications and conditions that apply. The test records and supporting
documentation that validate the compliance are kept on file at the factory.
The European Union established CE standards in 1985. The standards include specifications for safety,
EMI emissions, and immunity from electromagnetic interference. Products that are intended for placement
in the European Union must meet or exceed the standards and bear the “CE” mark.
Although not required in the USA, meeting or exceeding the CE standards is considered good engineering
practice, since doing so enhances safety while reducing noise and ESD problems.
In contracted and in-house testing most acquisition products met the required specifications. In many cases
products that were not originally in compliance were redesigned accordingly. In noted instances alternate
product versions, shield plates, edge guards, special connectors, or add-on kits are required to meet CE
compliance.
CE Standards and Directives
The electromagnetic compatibility (EMC) directives specify two basic requirements:
1.
2.
The device must not interfere with radio or telecommunications.
The device must be immune from electromagnetic interference from RF transmitters, etc.
The standards are published in the Official Journal of European Union under direction of CENELEC
(European Committee for Electrotechnical Standardization). The specific standards relevant to data
acquisition equipment are listed on the product’s Declaration of Conformity.
The safety standard that applies to data acquisition products is EN 61010-1 : 1993 (Safety Requirements
for Electrical Equipment for Measurement, Control, and Laboratory Use, Part 1: General Requirements).
Environmental conditions include the following:
indoor use
altitude up to 2000 m
temperature 5°C to 40°C (41°F to 104°F)
maximum relative humidity 80% for temperatures up to 31°C (87.8°F) decreasing linearly
to 50% relative humidity at 40°C (104°F)
mains supply voltage fluctuations not to exceed ±10% of the nominal voltage
other supply voltage fluctuations as stated by the manufacturer
transient overvoltage according to installation categories (overvoltage categories) I, II and III
For mains supply, the minimum and normal category is II
pollution degree I or II in accordance with IEC 664
StrainBook/616 User’s Manual
968594
CE-Compliance & Noise Considerations
9-1
For clarification, terms used in some Declarations of Conformity include:
pollution degree: any addition of foreign matter, solid, liquid or gaseous (ionized gases) that may
produce a reduction of dielectric strength or surface resistivity. Pollution Degree I has no influence
on safety and implies: the equipment is at operating temperature with non-condensing humidity
conditions; no conductive particles are permitted in the atmosphere; warm-up time is sufficient to
avert any condensation or frost; no hazardous voltages are applied until completion of the warm-up
period. Pollution Degree II implies the expectation of occasional condensation.
overvoltage (installation) category: classification with limits for transient overvoltage, dependent
on the nominal line voltage to earth. Category I implies signals without high transient values.
Category II applies to typical mains power lines with some transients.
Safety Conditions
Users must comply with all relevant safety conditions as stated in the user’s manual and in the pertinent
Declarations of Conformity. Both the documentation and the associated hardware make use of the
following Warning and Caution symbols. If you see any of these symbols on a product or in a document,
carefully read the related information and be alert to the possibility of personal injury and/or equipment
damage.
This WARNING symbol is used in documentation and/or on hardware to warn of
possible injury or death from electrical shock under noted conditions.
This WARNING/CAUTION symbol is used to warn of possible personal injury or
equipment damage under noted conditions.
This CAUTION symbol warns of possible equipment damage due to electrostatic
discharge. The discharge of static electricity can damage some electronic
components. Semiconductor devices are especially susceptible to ESD damage.
You should always handle components carefully, and you should never touch
connector pins or circuit components unless you are following ESD guidelines in an
appropriate ESD-controlled area. Such guidelines include the use of properly
grounded mats and wrist straps, ESD bags and cartons, and related procedures.
Unless otherwise stated our data acquisition products contain no user-serviceable
parts. Only qualified personnel are to provide service to the devices.
The specific safety conditions for CE compliance vary by product; but general safety conditions include the
following bulleted items:
The operator must observe all safety cautions and operating conditions specified in the
documentation for all hardware used.
The host computer and all connected equipment must be CE compliant.
All power must be off to the device and externally connected equipment before internal access to
the device is permitted.
Isolation voltage ratings: do not exceed documented voltage limits for power and signal inputs.
All wire insulation and terminal blocks in the system must be rated for the isolation voltage in
use. Voltages above 30 Vrms or ±60 VDC must not be applied if any condensation has formed
on the device.
Current and power use must not exceed specifications. Do not defeat fuses or other over-current
protection.
9-2
CE-Compliance & Noise Considerations
968594
StrainBook/616 User’s Manual
Emissions/Immunity Conditions
The specific immunity conditions for CE compliance vary by product; but general immunity conditions
include:
Cables must be shielded, braid-type with metal-shelled connectors. Input terminal connections are
to be made with shielded wire. The shield should be connected to the chassis ground with the
hardware provided.
The host computer must be properly grounded.
In low-level analog applications some inaccuracy is to be expected when I/O leads are exposed to
RF fields or transients over 3 or 10 V/m as noted on the Declaration of Conformity.
Using Shielded BNC Connectors for CE Compliance
Certain Declarations of Conformity identify specific cables and connectors that must be used to meet CE
requirements. CE compliant BNC-equipped cards and modules have BNC connectors that are insulated
from high voltage sources, including electrostatic discharges (ESD). Such voltages could enter the
circuitry through the exposed conductive surface of a connector, possibly resulting in damage to
components.
O-Ring
Shielded
BNC Connector
Dust Cap
Shielded BNC Connector (with O-Ring) and PVC Dust Cap
To meet CE requirements, PVC dust caps (p/n CN-96) must cover all unused BNC connectors. When dust
caps are not in place, special coaxial cables (with insulated end-connectors and rubber O-rings) must be
used. Note that part number 418-0800 includes two cables (with shielded BNC connectors at each end),
and four insulating O-rings.
Properly installed connectors and dust caps ensure the metallic surfaces of the connectors are not exposed
to undesirable electrical charges.
CE Compliance for System Expansion
StrainBook/616 is CE Compliant when shipped from the factory and will remain in compliance providing
that the conditions stated on the StrainBook/616 Declaration of Conformity (p/n 1137-0740) continue to be
met.
Prior to making any efforts to expand the system refer to the Declaration of Conformity for each intended
system component. Connecting a non-CE Compliant component to your system will make the system noncompliant. In certain scenarios the use of special shielded cables may be required.
A few general rules of thumb regarding the expansion of CE compliant StrainBook/616 systems are:
Use short cables, e.g. CA-35-12, CA-202.
When possible use shielded cables.
When assembling or disassembling components, take ESD precautions,
including the use of grounded wrist straps.
Ensure that the host computer is CE Compliant.
Ensure that expansion devices are CE Compliant; and review
the most recent Declaration of Conformity for each device.
Ensure all system components are properly grounded.
StrainBook/616 User’s Manual
968594
CE-Compliance & Noise Considerations
9-3
Noise Considerations
Controlling electrical noise is imperative because it can present problems even with the best measurement
equipment. Most laboratory and industrial environments suffer from multiple sources of electrical noise.
For example, AC power lines, heavy equipment (particularly if turned on and off frequently), local radio
stations, and electronic equipment can create noise in a multitude of frequency ranges.
Local radio stations are a source of high frequency noise, while computers and other electronic equipment
can create noise in all frequency ranges. Creating a completely noise-free environment for test and
measurement is seldom practical. Fortunately, simple techniques such as using shielded/twisted pair wires,
filtering, and differential voltage measurement are available for controlling the noise in our measurements.
Some techniques prevent noise from entering the system; other techniques remove noise from the signal.
While many techniques for controlling noise in signals provide a means of removing the noise that is
already present, the preferred solution is to prevent the occurrence of noise in the signal in the first place.
The following practices, some of which are required for CE compliance, should be employed to minimize
noise.
Make a solid earth ground connection. Required for CE Compliance. Ensure that the chassis
of the primary data acquisition device, e.g., StrainBook/616 is connected to earth ground. This
practice: (a) keeps radiated emissions low by keeping the chassis electrically quiet, (b) keeps
potential common-mode voltages low, (c) improves user safety, and (d) provides a safe path for
Electrostatic Discharge energy back to earth ground. In regard to the StrainBook/616, chassisto-earth ground can be achieved via one of the DB9 connector lock screws or a lock screw on
a DB25 connector.
Use short Ethernet cables. The use of short Ethernet cables will reduce noise. The shorter the
cable the better.
Use shielded cables. Loose wires are effective antennae for radio frequency pickup and can form
loops for inductive pickup. The use of properly connected shields will greatly reduce such noise.
Minimize ambient EMI. The lower the ambient EMI, the better. Sources of electromagnetic
interference include solenoids, motors, computer equipment, high power distribution wiring, etc.
Distance cables. Power supply switch transients can vary in strength and frequency. Ethernet
cables can radiate digital switching noise. For these reasons route the power supply and Ethernet
cables such that they are as far as possible from analog lines. By analog lines we mean both the
analog channel input lines on the front panel and the analog expansion (WBK expansion) on the
rear panel of the device.
Use ferrite inductive collars. Required for CE Compliance. A clamp-on ferrite collar is to be
secured on both ends of the Ethernet cable and on the DIN5 end of the power supply cable [and/or
near the DC power source]. The collars on the Ethernet cable will reduce digital switching noise.
The ferrite inductive collars will not reduce the integrity of the Ethernet channel if the system is
making use of shielded Ethernet cables, Measurement Computing part number CA-242. A properly
placed ferrite collar(s) on the power cable will reduce power supply switch transients.
This partial view of the host PC shows the
Ethernet cable with a ferrite collar. The
PC’s connection to the ground-line is also
visible.
9-4
CE-Compliance & Noise Considerations
968594
A view of two ferrite collars close to StrainBook’s
rear panel. The closest is clamped to the power
cable. The background collar is clamped to the
Ethernet cable.
StrainBook/616 User’s Manual
System Expansion
10
Memory Expansion using a WBK30 Option …… 10-1
Channel Expansion …… 10-2
Using WBK16 Modules with StrainBook…… 10-2
Using WBK40 or WBK41 Modules with StrainBook …… 10-5
Synchronizing Multiple StrainBooks …… 10-8
Connecting the System to Power ……10-9
CAUTION
An incorrect use of power can damage equipment or degrade performance. Prior to
connecting your devices to power, calculate your system’s power requirements.
Note: StrainBook/616 can use up to seven WBK16 modules for system expansion. As stated in the above
Caution, you will need to calculate system power requirements prior to powering the system.
Memory Expansion using a WBK30 Memory Option
WBK30 is a DRAM-based memory board option that can be installed inside the StrainBook/616. There
are three models of WBK30 available; each of which significantly increases the capacity of the
StrainBook’s standard data buffer of 64 K samples. Capacities are:
WBK30/16 — 16 MB
WBK30/64 — 64 MB
WBK30/128 — 128 MB
(8 M samples)
(32 M samples)
(64 M samples)
If the option is selected for StrainBook/616, it must be installed at the factory.
The WBK30 memory option card is installed at the factory per customer order.
Users are not to remove or install the WBK30 as it is not a “plug-and-play” device
for StrainBook/616 and erroneous signal values could result.
If you desire to remove or add a memory card to the StrainBook contact the factory
or your service representative. Please have the serial number of your StrainBook on
hand.
Note that you can use the Daq Configuration applet to check whether or not your StrainBook has a
WBK30 and if so, whether or not the memory card is working properly. Appendix B provides details.
StrainBook/616 User’s Manual
968594
System Expansion
10-1
Channel Expansion
Using WBK16 Modules with StrainBook
This section is concerned with how to connect up to seven WBK16 modules to a StrainBook/616 and how
to power the units.
Reference Note:
WBK module functions and specifications are discussed in the WBK Option Cards and
Modules User’s Manual, p/n 489-0902. A PDF version of the document is included on your
data acquisition CD.
Power requirements can vary greatly from one system to another, and will need to be calculated on a
system by system basis, before power is applied to the system. This chapter includes instructions for
calculating power requirements.
Before discussing how to calculate power, we will look at the use of connectors and the types of cables
used.
Connectors and Cables
To attach a WBK16 module, connections must be made for power, expansion control, and expansion
signals.
The relevant WBK16 connectors [located on the WBK16 modules] are as follows:
•
POWER IN [DIN5] connects to a 10 to 30 VDC source. When in a power daisy-chain,
POWER IN connects to the previous WBK module’s POWER OUT.
•
POWER OUT [DIN5] can be connected to the next module’s POWER IN, providing the
5 amp current limit will not be exceeded. It may be necessary to use a supplemental power
supply. Power requirements and discussed in the following pages.
•
EXPANSION CONTROL OUT [HD15] connects to the next module’s EXPANSION
CONTROL IN.
•
EXPANSION SIGNAL IN [BNC] connects to the next module’s EXPANSION SIGNAL
OUT.
The relevant StrainBook connectors [located on the StrainBook/616 rear panel] are:
•
POWER IN [DIN5] connects to a 10 to 30 VDC source. Typically uses a TR-40U power
supply.
•
ETHERNET connects to a PC’s 10/100BaseT Ethernet port, or to a 10/100BaseT Ethernet
network.
•
EXPANSION CONTROL [HD15] provides a means of connecting up to seven WBK16
modules (or other modules, as applicable to your system), via the daisy-chain method.
•
EXPANSION SIGNAL IN [BNC] connects to a WBK16’s EXPANSION SIGNAL OUT.
Prior to connecting your devices to power, calculate your system’s power requirements as
discussed in upcoming section of this chapter.
10-2
System Expansion
968594
StrainBook/616 User’s Manual
CE Compliance
If your system needs to be CE Compliant, refer to the Declaration of Conformity for each system
component. Also, refer to Chapter 9, CE Compliance and Noise Considerations.
Associated Cables
DIN5 Note:
Return
2
+10 to +30 V 4
+10 to +30 V 1
5 No connection
3 Return
Power is supplied to StrainBook and WBK modules
via a DIN5 type connector located on the rear panel
of the device.
* The DIN5 pinout [to the left] is based on an
external view of a StrainBook rear panel.
DIN 5 Power Pinout*
Calculate system amp load prior to creating a system daisy-chain. Although StrainBook
and WBK DIN5 connectors and CA-115 and CA-116 power cables have 5 amp limits,
TR-40Us are limited to 3.33 amps @ 15 VDC.
Earlier TR-40U units have a limit of 2.7 A @ 15 VDC. Those supplies still provide
adequate power for StrainBook and WBK16.
Tables for determining amp load are provided in the following section, Calculating System
Power.
CA-129 Expansion Control Cables. Control messages are carried by CA-129 expansion-control
cables with HD-15, plug and socket connectors. The first expansion unit’s control input is driven
from the main unit’s control output. Control inputs of additional WBK modules are driven from
the preceding unit’s control output.
CA-150 Expansion Signal Cables. Expansion signals are carried by a CA-150-1 male BNC to
male BNC coaxial cable. Each WBK module drives a common analog bus that carries the signals
to StrainBook’s Analog-to-Digital Converter (ADC). Each WBK module has EXPANSION
SIGNAL IN and EXPANSION SIGNAL OUT connectors for daisy-chaining multiple units.
CA-242 or
CA-242-7
StrainBook/616 User’s Manual
CA-242 [or CA-242-7] Ethernet patch cable connects the StrainBook to the host PC’s
Ethernet port or to a network Ethernet hub.
968594
System Expansion
10-3
StrainBook and WBK16 Daisy-Chain
TR-40U
3.3 Amp limit
@ 15 VDC *
WBK16
CA-129
CA-150
WBK16
CA-242 or
CA-242-7
StrainBook/616
Device Interface Side
Channel Input Side
StrainBook System with two WBK16 Modules
* Note that earlier TR-40U units have a limit of 2.7 A @ 15 VDC. Those supplies still provide adequate power for StrainBook and WBK16.
The illustrated system consists on one StrainBook/616 and two WBK16 Strain Gage Modules. An
explanation of connections follows.
Power – A separate TR-40U power supply is being used for each of the three devices. The DIN5 cable
end of the TR-40U connects POWER IN DIN5 connector on the device. The other end of the TR-40U
connects to an AC outlet (90 to 264 VAC).
Ethernet – The CA-242 [or CA-242-7] Ethernet patch cable connects the StrainBook to the host PC’s
Ethernet port or to a network Ethernet hub.
Expansion Control – The CA-129 is a 15 pin connector cable used for Expansion Control.
o
One CA-129 connects StrainBook’s EXPANSION CONTROL port to the first WBK16’s
EXPANSION CONTROL IN port.
o
A second CA-129 runs from the first WBK16’s EXPANSION CONTROL OUT to the second
WBK16’s EXPANSION CONTROL IN.
Expansion Signals – The CA-150 is a BNC-to-BNC cable used to carry Expansion Signals. The
signals go to the StrainBook’s Analog-to-Digital Converter (ADC).
o
One CA-150 goes from the upper WBK’s EXPANSION SIGNAL OUT (BNC connector) to
the lower WBK16’s EXPANSION SIGNAL IN.
o
A second CA-150 connects the lower WBK16’s EXPANSION SIGNAL OUT to the
StrainBook’s EXPANSION SIGNAL IN (BNC connector).
Unit
Channel
#
StrainBook/616
1-8
How Analog Input Channel Numbers are Determined
The analog input channel numbers are determined by the order in which the WBK
modules are connected to the StrainBook.
•
Channels 1 through 8 are the StrainBook/616 channel inputs (via DB9).
1 WBK16
9-16
•
Channels 9 through 16 are located on the first expansion WBK16 unit,
i.e., the module connected directly to the StrainBook.
2nd WBK16
17-24
•
For each additional WBK16 channel numbers are added in a group of 8
as indicated in the table at the right.
st
rd
3 WBK16
25-32
4th WBK16
33-40
th
41-48
th
49-56
th
57-64
5 WBK16
Note: No more than seven WBK16 Expansion Modules can be attached to one
StrainBook/616.
10-4
System Expansion
968594
6 WBK16
7 WBK16
StrainBook/616 User’s Manual
Using WBK40 or WBK41 Modules with StrainBook
This section is concerned with how to connect a WBK40 or WBK41 module to a StrainBook/616 and how
to power the units.
Reference Notes:
o WBK module functions and specifications are discussed in the WBK Option Cards and
Modules User’s Manual, p/n 489-0902. A PDF version of the document is included on
your data acquisition CD.
o Do not refer to the WaveView PDF in regard to WBK40 and WBK41 systems, as these
devices are not supported in WaveView.
The WBK40 is a 14-Channel Thermocouple Input Module. The WBK41 is a Multi-Functional I/O
Module. The latter includes the thermocouple functionality of the WBK40 and additional features, as will
be discussed shortly. A WBK40 or WBK41 can be attached to the DB25 parallel expansion port on the
StrainBook’s rear panel.
Because the modules each have a built-in 16 bit, 200-kHz A/D converter, measurements do not consume
valuable sampling time from the StrainBook’s 1-MHz A/D converter. For this reason, there are no speed
implications to StrainBook [or other WBK] measurements when a WBK40 or a WBK41 is attached.
Measurements can be made synchronous with the StrainBook to provide precise time correlation between
readings from both measurement devices.
Features common to WBK40 and WBK41
•
Provides a means of adding from 14 to 224 thermocouple inputs to the StrainBook
•
Provides linearized and cold-junction compensated readings for all thermocouple types
•
Exhibits 1.0°C [or better] accuracy for most ranges and TC types
•
Consumes no measurement bandwidth from the StrainBook
•
Detects open thermocouples
Additional features of the WBK41
•
16 Digital I/O Lines (via front panel screw-terminal blocks)
•
24 Digital I/O Lines (via a rear panel 37-pin connector, P2)
•
4 Counter Inputs (via front panel screw-terminal blocks)
2 Timer Outputs (via front panel screw-terminal blocks)
•
4 Channel, 16-bit, 100 kHz Analog Output (via front panel screw-terminal
•
blocks; but only when a factory-installed DBK46 option is in place)
A setup example follows shortly.
Power requirements can vary greatly from one system to another, and will need to be calculated on a
system by system basis, before power is applied to the system. This chapter includes instructions for
calculating power requirements.
Before discussing how to calculate power, we will look at the use of connectors and the types of cables
used.
StrainBook/616 User’s Manual
968594
System Expansion
10-5
Connectors and Cables
WBK40 and WBK41 are connected to StrainBook in the same manner.
The relevant WBK connectors [located on the rear panel of the WBK modules] are as follows:
•
POWER IN [DIN5] connects to a 10 to 30 VDC source. Typically uses a TR-40U power
supply.
•
PARALLEL PORT [DB25] connects to the StrainBook’s EXPANSION PORT. Typically
connects via a CA-35-12 cable.
•
P1 – ANALOG EXPANSION PORT [DB37] connects to an optional DBK84 (14 Channel
thermocouple module). Typically uses a CA-37-x cable, where “x” equals the number of
expansion devices. Connects to an optional DBK84 (14 Channel thermocouple module).
Typically uses a CA-37-x cable, where “x” equals the number of analog expansion devices.
•
P2 – DIGITAL EXPANSION PORT [DB37] [included on WBK41, but not on WBK40].
Can be used to connect the WBK41 to an optional DBK20 Series device. The connection is
typically made via a CA-37-x ribbon cable, where “x” equals the number of digital expansion
devices. If P2 is not used for DBK20 Series expansion, it allows for 24 bits of Digital I/O,
which is in addition to the 16 bits of Digital I/O that are provided by front panel terminal
blocks.
•
SYNC – Use either of the 2 SYNC ports and a CA-74-1 or CA-74-5 cable to provide a
synchronization link from a WBK40 [or WBK41] module to the host StrainBook.
The relevant StrainBook connectors [located on the StrainBook/616 rear panel] are:
•
POWER IN [DIN5] connects to a 10 to 30 VDC source. Typically uses a TR-40U power
supply.
•
ETHERNET connects to a PC’s 10/100BaseT Ethernet port, or to a 10/100BaseT Ethernet
network.
•
SYNC – Use either of the 2 SYNC ports and a CA-74-1 or CA-74-5 cable to provide a
synchronization link from the StrainBook to a WBK40 [or WBK41] module.
•
EXPANSION PORT [DB25] connects to the PARALLEL PORT on the WBK40 or
WBK41. Typically connects via a CA-35-12 cable.
Prior to connecting your devices to power, calculate your system’s power
requirements as discussed in upcoming section of this chapter.
CE Compliance
If your system needs to be CE Compliant, refer to the Declaration of Conformity
for each system component. Also, refer to Chapter 9, CE Compliance and Noise
Considerations.
10-6
System Expansion
968594
StrainBook/616 User’s Manual
StrainBook, WBK41, DBK84 Daisy-Chain
TR-40U
3.3 Amp limit
@ 15 VDC *
Device Interface Side
Channel Input Side
StrainBook System with a WBK41 and two DBK84 Modules
* Note that earlier TR-40U units have a limit of 2.7 A @ 15 VDC. Those supplies still provide adequate power for StrainBook and WBK16.
The illustrated system consists on one StrainBook/616 and two WBK16 Strain Gage Modules.
An explanation of connections follows.
Device Interface Connections
Power – A separate TR-40U power supply is being used for the StrainBook and the WBK41. The DIN5 cable end
of the TR-40U connects POWER IN DIN5 connector on the device. The other end of the
TR-40U connects to an AC outlet (90 to 264 VAC). Note that the two DBK84 modules each get their power
through their P1 connector via the ribbon cable.
Ethernet – The CA-242 [or CA-242-7] Ethernet patch cable connects the StrainBook to the host PC’s
Ethernet port or to a network Ethernet hub.
Expansion to WBK41 – A CA-35-12 [25 conductor] cable connects the WBK41’s PARALLEL PORT to the
StrainBook’s EXPANSION PORT.
SYNC – A CA-74-1 [or CA-74-5] cable is typically used to provide synchronization.
Channel Input Connections
o
14 Thermocouples can be connected to the first DBK84
o
14 Thermocouples can be connected to the second DBK84
o
14 Thermocouples can be connected to the WBK41 (or WBK40).
o
In addition, for WBK41 the following can be connected:
Digital I/O - 16 via front panel screw terminal blocks
Digital I/O – 24 via rear panel P2 (DB37 connector)
Counter Input (CNTR) - 4 via front panel screw terminal blocks
Timer Output (TMR) - 2 via front panel screw terminal blocks
Analog Output (DACS) lines 16-bit, 100 kHz Analog Output via front panel screw-terminal blocks, but
only when a factory-installed DBK46 option is within the WBK41.
WBK40 and WBK41 systems are not supported in WaveView.
StrainBook/616 User’s Manual
968594
System Expansion
10-7
Synchronizing Multiple StrainBooks
Up to four StrainBook/616 units can be synchronized to each other via their SYNC ports. Each unit has
two identical SYNC ports. Either or both SYNC ports can be used to connect to the units via SYNC cables
CA-74-1 or CA-74-5 (1-foot or 5-foot cables, respectively). The units can be scan-synchronized and
triggered from any other SYNC-connected unit.
Ethernet Cable
to PC
TR-40U Power
Adapter
SYNC Cables
CA-74-1 (1 ft.) or
CA-74-5 (5 ft.)
Three StrainBook/616 Units, Synchronized
Not all trigger modes are supported in multiple StrainBook/616 Systems.
Synchronization Concept Block Diagram
The preceding diagram shows how a StrainBook/616 can input or output synchronization timing and
trigger events on either SYNC connector.
SYNC cables are not to exceed a total combined length of 15 feet (4.57 m).
10-8
System Expansion
968594
StrainBook/616 User’s Manual
Connecting the System to Power
CAUTION
An incorrect use of power can damage equipment or degrade performance. Prior to
connecting your devices to power, calculate your system’s power requirements.
If you assign one TR-40U per device your system’s power needs will be met and you
will not need to make power requirement calculations. However, such calculations are
required if you intend to “power daisy-chain” units, or have a critical battery runtime.
Each StrainBook/616 and Expansion Module is shipped with a TR-40U power adapter, which converts AC
power to +10 to +30 VDC power. The adapter’s DIN5 connector connects to the device’s mating POWER
IN DIN5. The other end of the adapter connects to a standard AC power outlet.
It is often possible to create a power daisy-chain. For example, a WBK16’s POWER OUT connector
could be connected to the next module’s POWER IN, providing that current limit will not be exceeded.
Note that TR-40U power supplies distributed today have a limit of 3.33 amp @ 15 VDC. Some earlier TR40U models have a limit of 2.7 A @ 15 VDC. Both values are more limiting than the 5 amp max limit of
the DIN5 connectors and the CA-115 power cables used for power daisy-chains.
Daisy-chaining power may result in inadequate power. For this reason, you need to know your system’s
power requirement. Computing power use is also important when using batteries to power modules, as you
will need to know a safe runtime before recharging is required.
The following statements relate to system power. They should be reviewed before
proceeding.
•
Higher voltages draw fewer Amps for the same power.
Remember: Watts = voltage x current (W = V*I).
•
The TR-40U power adapter provides power that is sufficient for the StrainBook/616
and the optional WBK16 modules, i.e, one TR-40U per unit. You do not need to
make power requirement calculations unless you intend to “power daisy-chain”
units, or you have a critical battery runtime. In other words, if you assign one
TR-40U per device your systems power needs will be met.
•
Do not overload your power supplies. TR-40U power adapters are limited to
3.33 amps @ 15 VDC (2.7 amps @ 15 VDC if an early model). The best power
connection scenario is to use a single TR-40U for each unit in the system.
•
Current drawn from other sources, such as car batteries, can be estimated from the
following Current Requirements table.
Use the following current requirements and worksheet tables to calculate your system’s total power
requirement. Take the appropriate amperage values from the first table to fill in the second table; then
perform the indicated multiplication and addition operations to calculate the amperage for all units in
your system.
StrainBook/616 User’s Manual
968594
System Expansion
10-9
Current Requirements (in Amps)
Products
DBK30A
14 VDC
DBK30A
28 VDC
DBK34A
12 VDC
DBK34A
24 VDC
TR-40U
15 VDC
StrainBook/616 (alone)
1.93
1.01
2.25
1.15
1.80
WBK16
1.44
0.73
1.68
0.84
1.33
WBK30
WBK40 or WBK41
(Note 1)
0.01
0.01
0.01
0.01
0.01
1.64
0.90
1.92
0.96
1.53
Note 1: Assumes 8 DBK84 modules are attached to P1 and that no DBK46 is installed. Refer to the WBK Options Manual
(489-0902) for details regarding WBK40 and WBK41. Refer to the DBK Options Manual (457-0905) regarding DBK46
and DBK84.
Worksheet for Power Requirements
Product
Qty
×
Amps
=
Totals
StrainBook/616
WBK16
×
=
WBK30
×
=
WBK40 or WBK41
Maximum
Amps
StrainBook/616 Product Power Supplies
Item
Name/Description
Capacity
TR-40U
AC Power Adapter
(shipped with StrainBook/616 & WBK16)
90-264 VAC input;
3.33 A @ 15 VDC *
DBK30A
Rechargeable Battery/Excitation Module (optional)
12-14 VDC, or 24-28 VDC
3.4 A-hr @ 14 VDC
DBK34A
UPS (uninterruptible Power Supply)/Battery Module
(optional)
12 VDC, or 24 VDC
5.0 A-hr @ 12 VDC
Other
10 to 30 VCD source, such as a vehicle battery via a
CA-116 cable.
Depends on source
* Note that some earlier TR-40U units have a limit of 2.7 A @ 15 VDC.
Input voltage to the StrainBook and to the WBK16 expansion modules must be in the range of
10 to 30 VDC and can come from an AC-to-DC adapter or from another source, such as a battery.
Available AC-to-DC adapters include the TR-40U, which has an input of 90 to 264 VAC and an output
of 3.33 amps @ 15 VDC (some earlier units are rated at 2.7 amps @ 15 VDC).
Battery options include the DBK30A, DBK34A, and other 10 to 30 VDC sources, such as car batteries.
The DBK30A provides 14 VDC and when fully-charged has a storage capacity of 3.4 A⋅hr; car batteries
have much higher capacities. The basic formula for battery life is:
Runtime (hr) = Battery capacity (A⋅hr) / Current load (A)
Battery life and performance depend on various factors including battery type, condition,
charge level, and ambient temperature. Be sure you consider these factors, especially
when runtime is critical.
10-10
System Expansion
968594
StrainBook/616 User’s Manual
Troubleshooting and Customer Support
11
Electrostatic Discharge (ESD), Handling Notice…… 11-1
Product Care …… 11-1
ReadMe Files and the Install CD-ROM ……11-2
Driver Support……11-2
Troubleshooting Tables ….. 11-2
Frequently Asked Questions …… 11-11
Customer Support …… 11-13
Electrostatic Discharge (ESD), Handling Notice
The discharge of static electricity can damage some electronic components. Semiconductor devices are
especially susceptible to ESD damage. You should always handle components carefully, and you should never
touch connector pins or circuit components unless you are following ESD guidelines in an appropriate ESDcontrolled area. Such guidelines include the use of properly grounded mats and wrist straps, ESD bags and
cartons, and related procedures.
Product Care
StrainBooks and WBK options are essentially maintenance free and require a minimal amount of care.
They should be treated much like other high-tech equipment. In general:
• Keep them clear of harsh chemicals and abrasive elements.
• Avoid exposing the products to extreme heat, for example, avoid setting up a StrainBook system near
a boiler or furnace.
• Avoid extreme shock and vibration.
• Avoid subjecting the units to liquids and extremely fine air particulate, such as silica dust.
• Never touch circuit boards without proper ESD (Electrostatic Discharge) measures in place.
A “common-sense” approach to handling StrainBook and WBK options will go a long way in protecting
them from inadvertent damage.
Note that you can use lint-free rags and Isopropyl Alcohol (Rubbing
Alcohol) to clean the outer plate surfaces of StrainBook and WBK
modules.
StrainBook/616 User’s Manual
968594
Troubleshooting
11-1
ReadMe Files and the Install CD-ROM
The Install CD-ROM includes ReadMe Files. These files often contain late-breaking information that may
not appear in the user documentation. During installation you should review the ReadMe files when
prompted to by the program.
The Install CD-ROM includes:
• StrainBook Windows NT/2000/XP driver
• DaqX.DLL (32-bit API) for StrainBook
• Microsoft C/C++ API support
• Microsoft VB API support
• Daq Configuration Control Panel Applet
• User documentation in Adobe® PDF format
Upon installation, the user needs to run the Daq Configuration Control Panel applet. The applet is used to
configure StrainBook. This must be performed in order for the application to access StrainBook through
the Windows driver.
Driver Support
The daqX API can be used with StrainBook, WaveBook, DaqBook, DaqBoard, Daq PC Card and
TempBook product lines. All daqX functions share the daq prefix.
The API support examples can be found by navigating as follows:
\DaqX\Programming Language Support\WaveBook
Troubleshooting Tables
This section of the chapter pertains to StrainBook systems. Tables are used to identify potential problems, probable
causes, and possible solutions. If you are using the pdf version of the document, you can click on the appropriate
link below to quickly access the table associated with your system’s problem.
11-2
Troubleshooting
Symptom
Pg.
1
No communication with the PC.
11-3
2
“Simulated Device” is the only device.
11-3
3
WBK modules and expansion channels are not recognized.
11-4
4
Channel readings are wrong.
11-4
5
WBK15 channel readings are wrong.
11-5
6
WaveView Scope stops.
11-5
7
“Insufficient Memory”
11-6
8
Scan rate – the maximum rate cannot be reached.
11-6
9
External acquisition pacer does not work.
11-6
10
WBK16 channels won’t calibrate.
11-7
11
Ethernet problems.
11-8
9\68594
StrainBook/616 User’s Manual
1.
StrainBook does not communicate with the PC.
Possible Causes
Details and Possible Solutions
There is a
problem with
StrainBook’s
power.
If the StrainBook system and the host PC fail to communicate with each other, verify that:
(1) the StrainBook is powered on, and that (2) the power supply is not overloaded.
Faulty Ethernet
cable or
connection
The Ethernet cable may be loose, damaged, or not connected. Check the Ethernet line and its
connections at the StrainBook and at the PC Ethernet jack, or Ethernet Network hub, as applicable.
The selected
protocol is not
compatible.
In regard to Ethernet Connections – Run the Daq Configuration applet from the Windows Control
Panel. Make sure the device is configured to the appropriate Ethernet port with the appropriate
protocol. Run the device test and if it fails try other protocols for the device.
Check the power requirements of each component to ensure that the use of the system’s existing AC
adapters is sufficient. If not, use additional AC adapters, for example, one for each component; or at
least to create smaller power daisy-chains that do not exceed the adapter’s limits.
For related information refer to table 14, Ethernet Problems.
Note: Before re-running the test, be sure to click on the <Apply> button to apply the settings.
For related information concerning Ethernet connections refer to table 14, Ethernet Problems.
Another
application is
communicating
with
StrainBook.
StrainBooks are limited to communicating via one software application at a time. Thus, if an
application such as LabVIEW, DASYLab or a custom API currently has communication established
with the StrainBook, WaveView will not be able to communicate with the device. In the case of
DASYLab, simply having a worksheet open that references a particular unit, will not allow any other
application [such as WaveView] to open communications with that unit.
A WBK30 has
been removed.
If a WBK30 memory option has been removed and the three associated bypass jumpers have not been
installed inside the StrainBook (on header J101), communications to the PC will not occur.
StrainBook users will need to contact the factory in regard to WBK30 issues.
2.
“Simulated Device” is the only device.
Possible Causes
Details and Possible Solutions
There is no
device handle
for the
StrainBook in
the Daq
Configuration
applet.
When the simulated device is the only device that can be selected in WaveView, the problem is most
likely that there is no device handle for the StrainBook. Device handles are created in the Daq
Configuration control panel applet by the user. The applet can be accessed from the Windows desktop
by navigating from the Start menu as follows:
Start ⇒ Settings ⇒ Control Panel ⇒ Daq Configuration
Any StrainBook devices that are currently configured in this utility will appear in the list of available
devices in WaveView. Refer to Appendix A, Using the Daq Configuration Applet for details on how to
create a device handle.
StrainBook/616 User’s Manual
968594
Troubleshooting
11-3
3.
WBK modules and expansion channels are not recognized.
Possible Causes
Details and Possible Solutions
The expansion
control cable or
connection is
bad.
Make sure that each expansion control cable (p/n CA-129) is connected to the proper port of the
StrainBook and associated WBK Module. The cable coming from the StrainBook must be connected to
the port labeled “Expansion Control.” The expansion control cable is connected to the “Expansion
Control In” port of the WBK Modules. Each WBK Module is equipped with an “Expansion Control
Out” port for “daisy-chain” connection to other WBK Modules.
The expansion
signal cable or
connection is
bad.
Make sure that each expansion signal connection cable (p/n CA-150) is properly connected to
expansion signal BNC ports. If the cable is defective, not present, or poorly connected, the host
StrainBook won’t be able to identify the associated WBK Module’s voltage signature.
There is
insufficient
power to one or
more system
components.
Proper operation is unlikely if any component of the StrainBook system is not adequately powered.
Check the power requirements for each attached WBK module and make sure that adequate power is
provided for each. Pay special attention to scenarios in which one AC adapter is shared between
multiple units. Chapter 2, System Setup and Power Options, includes power requirement tables.
4.
Channel readings are wrong.
Possible Causes
Details and Possible Solutions
The channel is
turned off.
The On/Off column in WaveView’s Channel Configuration screen must be selected to “On” for the
applicable module.
There are no
input signals
connected.
Verify that the channel inputs actually have input signals connected to them. Inputs that are not actually
connected to a signal may behave erratically and result in erroneous readings. Unused channels should
be turned off or at least shorted to analog common to prevent their values from floating.
The Simulated
Instrument
mode is
selected.
Channel readings will not be true if WaveView is in the “Simulated Instrument” mode. When in this
mode the readings displayed are, as the mode’s name implies, simulated and there is no correlation to
the signal lines connected to the hardware. If this is the case, simply select the desired StrainBook from
the “Select Device” option in WaveView’s System pull-down menu.
The scaling via
y = mx + b
needs adjusted.
Readings can be off due to improper scaling such as volts to millivolts, incorrectly configured TC or 5B
module types or user defined mX+b equations. In the case of voltage readings (V), ensure that the units
being displayed are not being displayed in mV. The “Units” section of the WaveView document
includes an example of how the y = mx + b equation is used for scaling.
The chart’s
limits need
adjusted.
Make sure that the amplitude of the signal being measured falls within the current min./max. scale
settings of the chart’s Y axis. The upper and lower limits can be changed after the acquisition is
stopped. Simply type the new scale limits over the current ones. The Collect and View Data section of
the WaveView document provides additional information.
The wrong
channel is
assigned to the
chart.
Erroneous readings can be due to the wrong channel having been assigned to the chart. Make sure that
the intended channel was selected. In WaveView, the channel is selected from a list box in the upper
right-hand corner of the chart. The channels will appear in the list based on their “Label” from the main
Channel Configuration spread sheet.
A WBK30 was
installed or
removed by the
user.
The WBK30 memory card is installed in StrainBook at the factory per customer order. Users are not to
remove or install these cards as the cards are not “plug-and-play” with respect to StrainBook. Erroneous
signal values can result. If you desire to remove or add a WBK30 to contact the factory or your service
representative.
WBK15
Channel
Issues
In regard to WBK15, in addition to this table refer to table 8, WBK15 channel readings are wrong.
11-4
Troubleshooting
9\68594
StrainBook/616 User’s Manual
5.
WBK15 channel readings are wrong.
Possible Causes
>
The wrong 5B
type has been
selected.
Details and Possible Solutions
Note: The preceding table also applies to WBK15.
Check that the correct 5B Module type is selected in WaveView. Selection is made by clicking on the
applicable WBK15 channel’s Range / Mode cell in WaveView’s Channel Configuration screen. This
brings up a pull down list from which you can select the proper 5B module, for example, a 5B30-06 or
a
5B47-B-11
The WBK15 section of the WBK Options Manual includes software setup information pertaining to 5B
modules. A PDF version of the document is included on the data acquisition CD.
The wrong
scaling
is in effect.
WaveView automatically selects the scale related values m and b (in the y = mx + b equation) according
to the type of 5B module; however, a user can easily change these values to customize the engineering
units. Refer to the technical information for the specific 5B Module to ensure that the proper
correlation exists between the input sensor’s units and 5B module’s output scale. In regard to
customizing the scale via WaveView, refer to the WBK15 Software Setup section in the WBK Options
Manual.
There is
insufficient
power to the 5B
module.
5B Modules require +5VDC power and some minimum amount of available current, which is typically
supplied by the WBK15. In cases where strain gage modules are used, ensure that no overloading of
the excitation output is occurring through bridge circuits.
The
thermocouple
leads are
reversed.
If readings appear to be negative when they should be positive, verify that the thermocouple leads are
not reversed.
The load cell
excitation source
is overloaded or
not connected
properly.
Some 5B Module types, for instance strain gage conditioners, provide an excitation source for the
connected sensor. Check the specifications for the module and make sure that the excitation source is
properly connected and not over-loaded.
6.
WaveView Scope stops.
Possible Causes
Details and Possible Solutions
Auto-Rearm is
disabled.
If the WaveView Scope acquires and displays data but then stops running, it is most likely due to the
Auto-rearm feature being disabled. If you desire to view data continuously click the auto-rearm button
in the scope window, or select auto-rearm in the Scope window’s Acquire pull-down menu.
Refer to the section, WaveView Scope Window, in the WaveView & WaveCal document for additional
information.
StrainBook/616 User’s Manual
968594
Troubleshooting
11-5
7.
“Insufficient Memory”
Possible Causes
Details and Possible Solutions
The PC’s
memory is low.
An “Insufficient Memory” message should appear when the host PC doesn’t have enough free memory
for the acquisition. The only solution is to use a PC that has sufficient free space to hold the amount of
data that the scan will produce. Note that each reading will occupy one 16-bit memory location.
The buffer size
is set too low in
WaveView.
An “Insufficient Memory” message can result from the Acquisition Buffer Size having been set too low
in WaveView. To view or change the buffer size, open WaveView’s System pull-down menu, then
select “Options.” A System Options dialog box will appear. In the bottom panel you can check a box to
indicate that you want to “Set a maximum acquisition buffer size (MB).” You can enter the desired
value for the buffer size, for example 32 MB. WaveView will report the total amount of memory
currently installed in your PC. If errors pertaining to available memory occur, try increasing the buffer
size. Additional information is included in the System Options section of the WaveView document.
8.
Scan rate – The maximum rate cannot be reached.
Possible Causes
Details and Possible Solutions
The SSH
function is in
effect.
Use of the SSH (Simultaneous Sample and Hold) function adds the equivalent of one more channel to
the scan, essentially reducing the scan rate. This channel addition is inherent to the use of the SSH
function.
The Multiple Ch
Analog trigger
is in effect.
Use of “Multiple Ch Analog” as the trigger type adds the equivalent of one more channel for each
channel in the trigger scheme. This reduces the maximum available scan rate. For more information,
refer to “Trigger Types” in the Acquisition Configuration section of the WaveView document.
9.
External acquisition pacer does not work.
Possible Causes
Details and Possible Solutions
The external
clock is not
enabled.
Before the external pacer clock feature can be used it must be enabled in WaveView. To enable the
external pacer clock: (1) Open the Acquisition Configuration window, (2) In the area labeled “Rate,”
click the <External> button. A Clock Divider field will appear. (3) Optional - In the divider field enter
a divisor that is to be applied to the external clock signal. This is an 8-bit divisor with valid values from
1 to 255. For additional information refer to “External Clock and Counter-Timer” in the Acquisition
Configuration section of the WaveView document.
The clock signal
line is not
connected.
The external pacer clock, if enabled, still won’t work if it has no input signal. A signal line must be
connected to the StrainBook port labeled DIGITAL I/O, EXTERNAL CLOCK, TTL TRIGGR. A
“Clock and External Trigger Cable” p/n CA-178 can be used for this purpose. The cable connects to
the StrainBook via a DB25 connector and includes a line with a BNC connector to connect to the
external clock signal. Note that the clock signal goes through pin 20.
The clock source
is not TTL
compatible.
The clock source must produce a square-wave signal between 0 and 5 volts to be TTL compatible. If
your clock signal does not meet these requirements switch to a clock source that does.
The clock source
exceeds 1MHz
or exceeds the
maximum scan
rate.
The external clock source must not exceed 1MHz or the maximum available scan rate. The maximum
scan rate is determined by channel count, channel type (SSH) and multi-channel trigger configurations.
11-6
Troubleshooting
9\68594
StrainBook/616 User’s Manual
10. WBK16 channels won’t calibrate.
Possible Causes
Details and Possible Solutions
Resistors are
positioned wrong
and/or poorly
soldered.
If the bridge completion resistors (BCRs) and/or shunt calibration resistors were improperly positioned
or poorly soldered, the WBK16 will not calibrate properly. Check the BCR and shunt arrangements for
the applicable bridge configuration. Also verify that the BCRs and shunt resistors are properly
soldered. Test the solder joints by measuring the resistors through the header pins, which they are
soldered to. If they don’t measure within the allowed tolerance the associated resistors should be
unsoldered, the old solder removed, and then the resistors should be properly re-soldered.
The WBK16’s hardware setup section, in the WBK Options Manual, includes illustrations of various
bridge configurations. A PDF version of the document is included on the data acquisition CD.
Calibration
parameters are
invalid.
If invalid calibration parameters are entered into the WBK16’s calibration program, the channels will
not calibrate correctly. See note.
If using shunt cal, make sure that the resistor values used are actually simulating the expected amount
of bridge deflection.
Verify that units are used consistently in all pertinent entry fields. For example, if you enter the
maximum applied load as units of micro-strain, then enter the shunt units in units of micro-strain too.
For additional information see the “Using the Sensor Calibration Program” section of the WBK
Options Users Manual and the Wave Cal section of the WaveView and WaveCal document. PDF
versions of the documents are included on the data acquisition CD.
Note: WaveView’s System pull-down file includes an “Options” selection. If selected, a dialog box
will appear with a Calibration panel. This panel contains 2 radio buttons. The first selects the
Factory Calibration Table, the second selects a User Calibration Table.
Factory Calibration Table (default), the software uses the factory generated calibration constants
of each system component to achieve calibration of the system. This is useful if the system
calibration changes often.
User Calibration Table, the WaveCal program lets you perform a calibration of the complete
signal path from input to A/D stage. The cal constants are stored in the Calibration Table on the
StrainBook main board. Recalibration is required when any part of the signal path changes.
This method is useful when the configuration remains stable and you want slightly better
accuracy.
Active Bridge
Elements, or
Load Cell are
not adequately
powered.
Ensure that bridge circuits [including load cells] are adequately powered. Refer to theWBK16 section
of the WBK Options Manual for additional information.
StrainBook/616 User’s Manual
968594
Troubleshooting
11-7
11.
Ethernet Problems
Possible Causes
Details and Possible Solutions
Ethernet
Your system could be setup correctly; however, the Ethernet itself could be experiencing problems.
Check with your Network Administrator.
Device
configuration is
wrong
Ensure that your system is properly configured in the Daq Configuration Applet [located in the
Windows’ Control Panel]. If the device is not configured correctly it will not be accessible from an
application. Refer to the Ethernet Connections section of the manual for additional information.
MAC number
is wrong.
Check the addressing entries where the MAC (Media Access Control) number is used to ensure that the
number is correct. The MAC number is clearly visible on the casing of the StrainBook. Refer to the
Ethernet Connections section for additional material regarding the use of serial numbers and IP
Addressing.
Faulty Ethernet
cable or
connection
The Ethernet cable may be loose, damaged, or not connected. Check the Ethernet line and its
connections at the StrainBook and at the PC Ethernet jack, or Ethernet Network hub, as applicable.
Refer to the following section, Troubleshooting the Device Ethernet Connection Using the “Ping”
Method.
Ethernet port
and/or protocol
is configured
wrong.
Make sure the device is configured to the appropriate Ethernet port with the appropriate protocol. Run
the Daq Configuration applet from the Windows Control Panel. Run the device test and if it fails try
other protocols for the device.
Note: Before re-running the test be sure to click on the <Apply> button to apply the settings.
Troubleshooting the Device Ethernet Connection using the “Ping” Method
1. Find the IP Address of the StrainBook.
a.
Open the Control Panel by navigating as follows from the Windows Desktop:
Start Menu ⇒ Settings ⇒ Control Panel
b.
Double-click the Daq Configuration icon.
c.
Select the device in the device tree.
d.
Click the Properties button.
e.
Make note of the IP Address displayed in the IP Address field.
2. Test the connection with the ping command.
a.
Open the Command Prompt by navigating as follows from the Windows Desktop.
Start Menu ⇒ Programs ⇒ Accessories ⇒ Command Prompt.
b.
Run ‘ping x.x.x.x’ where x.x.x.x is the IP Address of the StrainBook.
If the ping command does not time out, the computer and device are communicating.
11-8
Troubleshooting
c.
Verify that your computer is running Windows NT/2000/XP.
d.
Verify the name of the device that your software is trying to open matches
the device name that is configured in the Daq Configuration Applet.
9\68594
StrainBook/616 User’s Manual
Did Not Time Out
Timed Out
Command Prompt, Ping Examples
If the ping command timed out and you are on a Dedicated Network, check the following:
1.
Verify that the 6-digit serial number of the StrainBook, such as 800000, is entered correctly
in the Serial Number field of the Device Properties page.
2.
Verify that the “Auto IP Setting” radio button is selected on the Device Properties page.
3.
Verify the IP settings of the computer using the ipconfig command (discussed shortly).
The IP address should be 10.x.x.x with a subnet mask of 255.0.0.0.
4.
Verify that there is no DHCP server on the network (see the following “if” statement.)
If the ping command timed out and you are on a LAN with a DHCP Server, check the following:
1.
Verify that the Manual IP Setting radio button is selected on the device properties page.
2.
Verify the IP Address of the StrainBook with your system administrator and that it is entered
correctly in the IP Address field of the device properties page.
3.
Have your network administrator verify that your computer is configured properly to use the
DHCP server. Your computer should be configured to automatically get an IP address from
the DHCP server or configured with a static IP address that is compatible with other
computers and devices on the network.
4.
Verify the IP settings of the computer using the ipconfig command (see below).
Using the ipconfig Command to find the computer’s TCP/IP Settings
You can use the ipconfig command to find the computer’s TCP/IP Settings. This is done as follows:
StrainBook/616 User’s Manual
1.
Open the Command Prompt by navigating as follows from the Windows Desktop.
Start Menu ⇒ Programs ⇒ Accessories ⇒ Command Prompt.
2.
Run ‘ipconfig /all’ at the command prompt.
3.
Make note of the IP address, subnet mask and DHCP enabled setting.
968594
Troubleshooting
11-9
How to check for the existence of a DHCP Server
1.
Open the Control Panel by navigating from the Windows Desktop as follows:
Start Menu ⇒ Settings ⇒ Control Panel.
2.
Double-click Network and Dial-up Connections icon.
3.
Double-click the Network Connection icon for the network that the StrainBook is connected
to.
4.
In the Local Area Connection Status box, click on the <Properties> button.
The Local Area Connection Properties box will appear.
5.
Double-click the “Internet Protocol (TCP/IP)” component.
The Internet Protocol (TCP/IP) Properties box will appear.
6.
Verify that the “Obtain an IP address automatically” radio button is selected.
7.
Get the computer IP configuration settings using the ipconfig command.
8.
Verify the DHCP Enabled value in the ipconfig output is set to “yes.”
9.
Check the output of the ipconfig command for Lease Obtained and Lease
Expired lines. The presence of these lines indicates that there is a DHCP server on the
network. If this is the case, notify your network administrator and follow the instructions in
your network device documentation. The instructions should have a heading to the effect of:
Configuring a Device on a LAN with a DHCP Server.
WaveView Issues
• Acquisition parameters can not be changed during an active acquisition.
• International settings are supported, but some text boxes may not completely show the comma when it is used as the
decimal place holder.
• The Scope Mode’s print resolution is determined by the host computer’s video driver. Some graphics drivers may
require adjustment of the resolution and/or color palette for proper print operation. For some printers, better output
is attained by changing the printer's dithering setting to "None".
• Scope scale changes do not become effective until the focus changes. This is best accomplished by hitting
<Enter>.
• Text boxes for the filter settings may not display the proper setting if the number entered must be rounded to the
nearest filter setting. This is a problem only with the number displayed and does not affect the actual filter setting
that is passed down to the driver.
• Conversion to Snap Master format from the menu option is not supported. Snap Master format conversion does
work properly when done as part of a direct-to-disk acquisition.
11-10
Troubleshooting
9\68594
StrainBook/616 User’s Manual
Frequently Asked Questions
(1) Topic: Environmental Factors
Question: What Environments are StrainBook Systems Intended for?
Answer:
StrainBook Systems are designed to operate within 0° to 50°C ( 32° to 122°F) and with a
relative humidity of up to 95%RH, non-condensing. The products can be stored at temperatures
within the range of -20° to +70°C (-40° to 158°F). StrainBook systems should always be
protected from snow, rain, extreme dust, and harsh sun.
(2) Topic: 32-Bit API Support, DaqX
Question: I am writing my own application that interfaces to the StrainBook. Is the 32-bit enhanced mode
support available?
Answer:
Yes, the current version of the DaqX software supports 32 bit enhanced mode programming.
Question: What is DaqX software?
Answer:
DaqX software is low-level software support for application development. DaqX is installed
during the installation of the WaveView application. DaqX supports Visual C++ and Visual
Basic programming environments.
Question: Where can I get the latest version of WaveView/DaqX software?
Answer:
You can download the latest versions from our website. This service is free.
(3) Topic: WBK14 - Dynamic Signal Conditioning Module
Question: Why can't I use the external clock feature on the WBK14 to control my acquisition speed?
Answer:
The external clock on the WBK14 is used to dynamically move the corner frequency of the
filter, not pace the A/D in the StrainBook. This feature is often required in vibration
applications where the filter is moved as the device under test is vibrated (or excited) at varying
frequencies.
Question: Is there anything special I should know about WBK14’s power-up state?
Answer:
At power-up the current output of the WBK14 is open circuited. It is only after being
programmed that the current source is engaged.
Question: In regard to attenuation, what is the filter roll-off for the WBK14 filter?
Answer:
StrainBook/616 User’s Manual
The WBK14's Butterworth filter is down 3 dB at the corner frequency. Beyond that point, the
signal attenuates at 48 dB per octave or 160 dB per decade. This is a substantial amount of
attenuation for most applications.
968594
Troubleshooting
11-11
(4) Topic: Sampling Rates
Question: Does the StrainBook really collect data at 1 MHz and what should I expect on my PC?
Answer: Yes, the StrainBook samples at 1 MHz. But your computer may not. The PC’s performance is a
function of the hardware configuration, operating system, background task, and other factors.
The PC could very well be a bottleneck in regard to sampling.
(5) Topic: Calibration
Question: Should I calibrate my StrainBook system when I receive it?
Answer:
No, because each StrainBook and WBK is factory-calibrated to its rated accuracy before it
leaves the factory.
Question: When is calibration required?
Answer:
Depending on your operating guidelines, your equipment will require periodic calibration to
ensure the original accuracy is maintained. We recommend that you have your StrainBook
system calibrated at least once a year.
(6) Topic: Computers for Data Acquisition
Question: What type of computer do you recommend for use with data acquisition devices such as
StrainBook?
Answer:
When selecting a computer for use as a data acquisition system look for one with an Ethernet
port, fast parallel port, disk drives with high rotation speeds and low access times. If you are
using a notebook PC, it should have a PCMCIA or PC Card slot.
Your operating system should be Windows NT, 2000, XP or later.
11-12
Troubleshooting
9\68594
StrainBook/616 User’s Manual
Customer Support
If you want to Expand or Enhance Your StrainBook System . . .
You can visit our internet site at www.mccdaq.com to find the latest accessories and WBK options
that are available for your system, or call our sales department at (508) 946-5100.
If you need to Report Problems or Request Product Support
Note:
Please do not return any equipment to the factory unless it has an RMA number (Return
Merchandise Authorization number). RMA numbers are issued by the factory.
To report problems or request support, call the manufacturer’s Applications department. Contact
information follows shortly. When you contact us, please have the following information available, as
applicable:
• Hardware model numbers and software version numbers.
•
Operating system, type of computer, and device information in the Windows control panel,
such as interrupts and address settings for our hardware and others.
•
Results of tests, such as the Daq Configuration control panel.
•
Hardware setup and software configuration.
•
Information on input signals, including voltage ranges, signal impedance ranges, noise
content, and common mode voltages.
•
The name of a contact person from your company who can discuss the problems encountered.
•
•
Instructions for return shipping.
All troubleshooting notes and comments on tests performed, and all problem-related
conditions.
Note: Before calling for assistance, take a few minutes to read all parts of the manual that may be relevant
to the problem. Also, please review the troubleshooting material.
You can reach Measurement Computing by one of the following means:
Phone:
(508) 946-5100
Fax:
(508) 946-9500
E-mail (Product Information/Sales/Technical Support): [email protected]
Internet: www.mccdaq.com
Mail: Measurement Computing Corp. z 10 Commerce Way
z
Norton, MA 02766
All equipment returned to the manufacturer must have an RMA (Return Material Authorization) number.
You can obtain an RMA number by calling the Customer Service or Applications departments. When
returning the equipment, use the original shipping container (or equivalent) to prevent damage. Put the
RMA number on your shipping label to ensure that your shipment will be handled properly. After
receiving your equipment, we will fax a confirmation form that summarizes the charges (if applicable) and
expected return date.
StrainBook/616 User’s Manual
968594
Troubleshooting
11-13
11-14
Troubleshooting
9\68594
StrainBook/616 User’s Manual
Specifications – StrainBook/616
12
General
Name/Function: Ethernet-Based Strain Gage Measurement System
Number of Channels: 8 built-in, expandable to 64
Input Connector: Standard female DB9 per channel
Input Type: Differential
Input Impedance: 100 MΩ
Coupling: AC and DC, software selectable
Accuracy:
Offset Drift: 1µV RTI/°C
CMRR @ DC to 60 Hz: 100 dB at gains > 100
Cross-Talk Rejection: > 90 dB @ less than 1 kHz
Bandwidth:
50 kHz @ gains < 1 to 100
10 kHz @ gains > 100 to 2000
1 kHz @ gains > 2000
Bridge Configuration:
Full-bridge (4 and 6 wire)
Half-bridge
Quarter-bridge (2 and 3 wire)
Bridge Completion: User supplied resistors on removable headers (headers included)
Bridge Resistance: 60 to 1000 Ω
Overall Gain: 1 to 20,000, software selectable in more than 50 steps
Shunt Calibration: software selection of 3 user-supplied resistors
Auto-Balance: Selected per channel
Auto-Calibration: Either by actual measurement or by calculated load
Offset Adjustment:
±3 V RTI @ gains 1 to 10
±300 mV RTI @ gains 10 to 100
±30 mV RTI @ gains 100 to 2000
±3 mV RTI @ gains 2000 to 20000
Excitation Source: Two banks can be independently set to 0.5, 1.0, 2.0, 5.0, 10.0 VDC or “off”
Bank 1 is for Channels 1 through 4; Bank to is for Channels 5 through 8.
Excitation Accuracy: ±5 mV
Excitation Capacity: 85 mA per channel with fold-back current limiting
Filtering: 4-pole Butterworth, software-selectable and factory-set to 10 Hz, 1 kHz, or bypass;
field-changeable
Warm-up: 30 minutes to rated specifications
Environment:
Operating: 0° to 50°C, 0 to 95% RH, non-condensing
Storage Temperature: -20° to 70°C
Power Consumption: 1.22A @ 15V (min)
1.84A @ 15V (max)
Input Power Voltage Range: 10 to 30 VDC
Vibration: MIL STD 810, Category 1 and 10
PC Communication: 10/100BaseT Ethernet
Dimensions: 285 mm W x 220 mm D x 70 mm H (11” x 8.5” x 2.70”)
Weight: 1.32 kg (2.9 lb)
Note: Specifications subject to change without notice.
StrainBook/616 User’s Manual
939294
Specifications
12-1
Triggering
Multi-Channel Analog Trigger (up to 64 channels):
Range: Selectable per channel to input range
Latency: 2 µs/channel, plus 4 µs maximum
TTL Trigger
Input Signal Range: 0 to 5V
Input Characteristics: TTL-compatible with 10K Ohm pull-up resistor
Latency: 300 ns
Software Trigger
Latency: 100 µs typical
External Clock
Connector: Available on DB25 digital input
Input Signal Range: 5V TTL compatible
Input Characteristics: 50K Ohms pull up (to +5V) in parallel with 50 pF
Input Protection: Zener clamped -0.7 to +5V
Delay: 200 ns
Signal Slew Rate Requirement: 20V/µs minimum
Rate: Up to 1 MHz
Divisor Ratio: Divide by 1 through 255, selectable
Clock Counter Accuracy: <0.02%
Clock Counter Range: 0.01Hz to 100KHz
External Sync Ports
Number of External Sync Ports: 2, on rear panel
Maximum Number of Units to be Synchronized: 4 units, scan-synchronous (post trigger)
Maximum Length of Sync Cables: 15 feet (4.57 m), total for all cables
Sequencer
Operation: Programmable for channel, gain, and for unipolar/bipolar range in random order
Depth: 128 location
Channel-to-Channel Rate: 1 µs to 1.1 µs/channel, all channels equal
Maximum Repeat Rate: 1 MHz
Minimum Repeat Rate: 100 seconds per scan
Expansion Channel Sample Rate: Same as on-board channels, 1 to 1.1 µs, fixed
High-Speed Digital Inputs/General-Purpose Outputs
Connector: DB25 Female
Configuration: 16 TTL-compatible pins, selectable for input or output
Input Characteristics: TTL-compatible
Output Characteristics: ALS TTL output in series with 33 Ohms
Output Updates: Outputs may be changed via program control
Input/Output Protection: Diode clamped to ground and +5V
Period Counter
Operation: Internal counter calculates and reports the external clock’s period; counter can be read with each scan
Clock Counter Accuracy: <0.02% error
Clock Counter Range: 0.01 Hz to 100 kHz
Note: Specifications are subject to change without notice.
12-2
Specifications
939294
StrainBook/616 User’s Manual
Expansion Options
Number of
Channels
Item
Description
WBK10A
voltage expansion chassis
8
WBK11A*
simultaneous sample and hold (SSH) card for WBK10A
8
WBK12A*
programmable Low-Pass Filter card for WBK10A
8
WBK13A*
programmable Low-Pass Filter card with SSH for WBK10A
8
WBK15
isolated 5B signal conditioning module; 5B modules sold separately
8
WBK16/SSH
strain gage expansion module with simultaneous sample and hold (SSH)
8
WBK16
strain gage expansion module (without SSH)
8
WBK17
Counter Input Module with Quadrature Encoder Support
8
WBK18
Dynamic signal conditioning module with Transducer Electronic Data Sheet
support (T.E.D.S.)
8
WBK40
Thermocouple Input Module
14
WBK41
Multi-function I/O module (14 channel T/C, 40 channel digital I/O, 4
counter-inputs, 2 timer outputs, optional: 4 analog output channels
* WBK11, WBK12, and WBK13 cannot be used directly with StrainBook.
(see
description)
Each requires mounting within a WBK10A
if it is to be used in a StrainBook system.
Note: Specifications subject to change without notice.
StrainBook/616 User’s Manual
968494
Specifications
12-3
This page is intentionally blank.
12-4
Specifications
968494
StrainBook/616 User’s Manual
Appendix A – Using the Daq Configuration Applet with StrainBook
A
Quick Guide
To open the Daq Configuration Applet:
a.
b.
Open the Control Panel by navigating from the Windows Desktop as follows:
Start Menu ⇒ Settings ⇒ Control Panel
Double-click the Daq Configuration icon.
To add a StrainBook/616 to the list of installed devices:
a.
b.
c.
d.
Select the Computer in the device tree.
Click the <Add Device> button.
Select the StrainBook/616 from the list of devices, as applicable.
Click the <OK> button.
To add an optional WBK40 or WBK41 to the list of installed devices:
Note: The expansion device is connected to the Expansion Port on StrainBook’s rear panel.
a.
b.
c.
d.
Select the host StrainBook/616 in the device tree.
Click the <Add Device> button.
Select the WBK40 or WBK41 from the list of devices.
Click the <OK> button.
To set the properties of a StrainBook/616 connected to a dedicated network:
a.
b.
Enter the serial number of the StrainBook.
Select the Auto IP Setting Radio button. The IP address of the StrainBook will automatically
be calculated and displayed in the IP Address field.
To set the properties of a StrainBook/616 on a LAN with DHCP server:
a.
b.
c.
d.
Enter the base 10 version of the serial number of the StrainBook. The number is on the MAC
label, located on the rear panel.
Get the IP address of the device from your network administrator. The network administrator
will need the unit powered-on and connected to the network. The administrator will also
need the MAC address label’s hexadecimal number (the label’s bottom number) for the
StrainBook.
Select the “Manual IP Setting” radio button.
In the IP Address field, enter the IP address obtained from your network administrator.
To set the properties of a WBK40 or WBK41 connected to the Expansion Port of a StrainBook:
Simply select the Expansion Port number of the StrainBook. This number must be “Port 1” as
StrainBook only has one Expansion Port.
To test the StrainBook connection:
a.
b.
c.
Click the “Test Hardware” tab.
Click the <Resource Test> button.
You can also perform a TCP/IP test (see Appendix B).
Note: Devices have default names, e.g., StrainBook_0, WBK40_0, WBK41_0.
If desired, you can change the device name.
Appendix A
977194
Using the Daq Configuration Applet with StrainBook
A-1
The Daq Configuration applet, designed for 32-bit Windows systems, is located in the Windows
Control Panel. It allows you to add or remove a device and change configuration settings. The included
test utility provides feedback on the validity of current configuration settings, as well as performance
summaries.
To open the Daq Configuration Applet, navigate from the Windows Desktop as follows:
Start Menu ⇒ Settings ⇒ Control Panel; then, from the Control Panel, double-click the
Daq Configuration icon.
Device Inventory Dialog Box
After double-clicking on the Daq Configuration icon in the Windows Control Panel, the Device Inventory
dialog box will open. The box displays all currently configured devices. Displayed devices show their
name and an associated device icon, which identifies the device type.
Note: If no devices are configured, no devices will appear in the Device Inventory field.
Daq Configuration - Device Inventory Dialog Box
The four buttons across the bottom of the dialog box are used as follows:
•
Properties: Current configuration settings for a device can be changed by first bringing up the
corresponding Properties dialog box. Open the Properties dialog box by double-clicking on the device
icon or selecting the device and then clicking on the Properties button.
•
Add Device: The Add Device button is used to add a device configuration whenever a new device is
added to the system. Failure to perform this step will prevent applications from properly accessing the
device. Clicking on the Add Device button will open the Select Device Type dialog box.
•
Remove: The Remove button is used to remove a device from the configuration. A device may be
removed if it is no longer installed, or if the device configuration no longer applies.
Note:
•
A-2
If a device is removed, applications may no longer access the device. However, the device
can be re-configured at any time using the Add Device function described above.
Close: The Close button may be used at any time to exit the Daq Configuration applet.
Using the Daq Configuration Applet with StrainBook
977194
Appendix A
The “Select Device Type” Dialog Box
This dialog box opens when the Add Device button of the Device Inventory dialog box is selected.
The device type you select for configuring will appear in the main edit box. Clicking on the <OK> button
will then open the Properties Dialog Box.
Daq Configuration - Select Device Type Dialog Box
Properties Dialog Box
This dialog box opens when the Properties button of the Device Inventory dialog box is selected, or when
the <OK> button of the Select Device Type dialog box is selected. It displays the properties for the
StrainBook device with the default configuration settings.
Daq Configuration - Properties Dialog Box
Appendix A
977194
Using the Daq Configuration Applet with StrainBook
A-3
The tab label of the Properties Dialog Box, as well as the box itself, will appear different, depending on
whether the device is a “first level” or a “second level” device. StrainBook/616 is a first level device
because it connects directly to the Ethernet [via a PC jack or network hub]. The associated Properties Box
[for first level devices] includes a Serial Number field and an IP Address Setting panel.
WBK40 and WBK41 cannot connect directly to the Ethernet. However, one of these devices can be
connected to the StrainBook’s expansion port. In this case the Property Dialog Box has an Expansion Port
pull-down menu; but no Serial Number field and no IP Address Setting panel. The attached WBK40 [or
WBK41] would use the same address as the host StrainBook.
Reference Notes:
Refer to Appendix B in regard to TCP/IP and Resource Tests.
Configuring for Ethernet
First Level Ethernet Device
StrainBook is a first level device as it connects
directly to a PC Ethernet jack, or to an Ethernet
network hub
A-4
Configuring for Ethernet
Second Level Ethernet Device
WBK40 and WBK41 are second level devices.
Either can be connected to StrainBook’s Expansion
Port. Second level devices do not have a direct
connection to the Ethernet.
•
Device Name: The Device Name field is displayed with the default device name. The field can be
changed to any descriptive name. This device name is the name to be used with the daqOpen function
to open the device. This name will also be displayed in the device lists for opening the device in the
WaveView.
•
Device Type: The Device Type field indicates the device initially selected. StrainBook is a first level
device as it connects directly to the Ethernet. A WBK40 or WBK41 can connect to the Ethernet via
StrainBook’s Expansion Port.
•
Expansion Port [second level devices only]: Used to select the Expansion Port on the first level
device. For StrainBook only one Expansion Port is present so the port value must be set to “Port 1.”
Other devices such as WaveBook/516E have 3 Expansion Ports.
•
Serial Number: The serial number field pertains to the first level Ethernet device, e.g., StrainBook.
The device serial number is used in the Auto IP Address Setting process.
Using the Daq Configuration Applet with StrainBook
977194
Appendix A
Appendix A
•
IP Address Setting Panel: From this panel the user can select one of two radio buttons.
o The first is Auto IP Setting. If selected, the software will automatically derive the Internet
Protocol Address. To do so, the serial number of the device must be entered in the Serial
Number field. The resulting IP address will appear in the IP Address text box.
o The second radio button is labeled Manual IP Setting. This feature can be used when the IP
address is already known. When the “manual” radio button is selected the desired address
can be entered into the text field.
•
OK: Click on the OK button to store the configuration and exit the current dialog box.
•
Cancel: Click on the Cancel button to exit the current dialog box without storing any changes.
•
Apply: Click on the Apply button to store the configuration. Or you can click the Test Hardware tab.
977194
Using the Daq Configuration Applet with StrainBook
A-5
A-6
Using the Daq Configuration Applet with StrainBook
977194
Appendix A
Appendix B – TCP/IP and Resource Tests
B
Before you run a test
Before testing the system, make sure the StrainBook has been properly installed and powered-on.
Make sure all cables are properly and securely connected.
When testing a StrainBook, if the unit does not respond within 30 seconds perform the
following steps:
1)
2)
3)
4)
reboot the system
upon power-up, re-open the Daq Configuration applet
select another configuration setting
reinitiate the test
How to run the TCP/IP Test
(The TCP/IP test is for Ethernet devices only)
The TCP/IP (Transmission Control Protocol/Internet Protocol) test is accessed and initiated as follows.
a.
Open the Control Panel by navigating from the Windows Desktop:
Start Menu ⇒ Settings ⇒ Control Panel
b.
From the Control Panel, double-click the Daq Configuration icon.
c.
Select the StrainBook from the Device Inventory configuration tree.
d.
Click the <Properties> button. The Properties dialog box will open.
e.
Click the “Test Hardware” tab.
f.
Click the <TCP/IP Test> button.
Results of a TCP/IP Test for a
StrainBook/616
Appendix B
977194
TCP/IP and Resource Tests for StrainBook
B-1
What does the TCP/IP test tell me?
The TCP/IP test provides test results for “Pinging Device” and “TCP (Transmission Control Protocol)
Connection Test.”
o
Pinging Device
The Pinging Device test is an ICMP (Internet Control Message Protocol) ping test. In addition to
indicating either “Passed” or “Failed,” the test displays;
(a) The round-trip time of the ping, for example, <10 ms.
(b) Packet Loss expressed as a percent of data lost.
A long ping round trip time [for example >50 ms] and/or any packet loss indicates a slow network
that is not optimized.
o
TCP (Transmission Control Protocol) Connection Test
The result of the TCP test will be either passed or failed.
If the TCP test failed a <Details> button appears just above the <Resource Test> button.
If this is the case click the <Details> button to obtain possible causes and possible solutions.
How to run the Resource Tests
After successful completion of the TCP/IP test you can run the Resource Test with a simple click of the
<Resource Test> button.
Preparing to Run a Resource Test
B-2
TCP/IP and Resource Tests for StrainBook
977194
Appendix B
What does the Resource Test tell me?
The Resource Test includes two categories of test: Resource Tests and Performance Tests.
Resource Tests are used to verify that the system can handle the device configuration. Resource tests
are pass/fail. Test failure may indicate a lack of availability of the resource, or a possible resource conflict.
Testing includes checking the base address for the selected interface. Failure of this test may indicate that
the interface is not properly configured within the system. See relevant operating system and computer
manufacturer’s documentation for information on how to correct the problem.
Performance Tests check various device functions
using the current device configuration. Performance tests
provide quantitative results for each supported functional
group.
Test results represent maximum rates the various
operations can be performed. The rates depend on the
selected interface protocol and vary according to interface
and hardware capabilities.
The ADC FIFO Input Speed part of the test results in a
display of the maximum rate at which data can be
transferred from the tested device’s internal ADC FIFO to
the host computer’s memory. Results are given in
samples/second, where a sample (2 bytes in length)
represents a single A/D value.
If the device has a WBK30 card installed, a WBK30
FIFO Test can be run.
WBK30 FIFO Test checks the data-storing capabilities
of the optional WBK30 memory card.
Note that the figure to the right represents results from a
previous test.
Daq Configuration
Test Hardware Dialog Box
When the test is completed successfully, the Daq
Configuration Test Dialog Box indicates a passed
condition. For example, as seen in the figure:
“WBK30 FIFO Test Æ Passed”
“Passed” messages indicate that you can exit the test
program and run your application.
Reference Notes:
If you experience difficulties please consult additional user documentation, as applicable, before
calling technical support. User documentation is included on your data acquisition CD and is
installed on your computer automatically as a part of product support during software installation.
The default location is the Programs group. The documentation includes API information and a
great deal of material regarding WBK options.
Documents can be read directly from the data acquisition CD via the <View PDFs> button located
on the CD’s opening screen.
Appendix B
977194
TCP/IP and Resource Tests for StrainBook
B-3
B-4
TCP/IP and Resource Tests for StrainBook
977194
Appendix B
Glossary
Acquisition
A collection of scans acquired at a specified rate as controlled by the sequencer.
Analog
A signal of varying voltage or current that communicates data.
Analog-to-Digital
Converter (ADC)
A circuit or device that converts analog values into digital values, such as binary bits, for use in
digital computer processing.
API
Application Program Interface. The interface program within the data acquisition system’s
driver that includes function calls specific to the acquisition hardware and can be used with
user-written programs. Several languages are supported.
Bipolar
A range of analog signals with positive and negative values (e.g., -5 to +5 V); see unipolar.
Buffer
Buffer refers to a circuit or device that allows a signal to pass through it, while providing
isolation, or another function, without altering the signal. Buffer usually refers to:
(a)
(b)
(c)
A device or circuit that allows for the temporary storage of data during data transfers. Such
storage can compensate for differences in data flow rates. In a FIFO (First In - First Out)
buffer, the data that is stored first is also the first data to leave the buffer.
A follower stage used to drive a number of gates without overloading the preceding stage.
An amplifier which accepts high source impedance input and results in low source
impedance output (effectively, an impedance buffer).
Buffer Amplifier
An amplifier used primarily to match two different impedance points, and isolate one stage from
a succeeding stage in order to prevent an undesirable interaction between the two stages. (Also
see, Buffer).
Channel
In reference to data acquisition, channel simply refers to a single input, or output entity.
In a broader sense, an input channel is a signal path between the transducer at the point of
measurement and the data acquisition system. A channel can go through various stages
(buffers, multiplexers, or signal conditioning amplifiers and filters). Input channels are
periodically sampled for readings.
An output channel from a device can be digital or analog. Outputs can vary in a programmed
way in response to an input channel signal.
Common mode
Common mode pertains to signals that are identical in amplitude and duration; also can be used
in reference to signal components.
Common mode
voltage
Common mode voltage refers to a voltage magnitude (referenced to a common point) that is
shared by 2 or more signals. Example: referenced to common, Signal 1 is +5 VDC and Signal
2 is +6 VDC. The common mode voltage for the two signals is +5.5 VDC [(5 + 6)/2].
Crosstalk
An undesired transfer of signals between systems or system components. Crosstalk causes
signal interference, more commonly referred to as noise.
Detection Signal
In relation to WBK17, a detection signal is one of 8 outputs of the pattern detection module.
Each input channel has an associated detection signal (Detect 1 for Channel 1, Detect 2 for
Channel 2, etc.) A channel’s detection signal will go active high when that channel’s counter
value meets the setpoint criteria programmed into the pattern detection module. Detection
signals can be scanned along with any other channel in the scan group.
Data Acquisition
969597
Glossary G-1
Digital
A digital signal is one of discrete value, in contrast to a varying signal. Combinations of binary
digits (0s and 1s) represent digital data.
Digital-to-Analog
Converter (DAC)
A circuit or device that converts digital values (binary bits), into analog signals.
DIP switch
A DIP switch is a group of miniature switches in a small Dual In-line Package (DIP). Typically,
users set these switches to configure their particular application.
Differential mode
The differential mode measures a voltage between 2 signal lines for a single channel. (Also see
single-ended mode).
Differential mode
voltage
Differential mode voltage refers to a voltage difference between two signals that are referenced
to a common point. Example: Signal 1 is +5 VDC referenced to common. Signal 2 is +6 VDC
referenced to common.
If the +5 VDC signal is used as the reference, the differential mode voltage is +1 VDC
(+ 6 VDC - +5 VDC = +1 VDC).
If the +6 VDC signal is used as the reference, the differential mode voltage is -1 VDC
(+ 5 VDC - +6 VDC = -1 VDC).
Encoder Mode
The encoder mode allows the WBK17 to make use of data from optical incremental quadrature
encoders. When in the encoder mode, the WBK17 accepts either differential or single-ended
inputs and provides power for up to four encoders. When reading phase A, phase B, and
index Z signals, the WBK17 provides positioning, direction, and velocity data.
ESD
Electrostatic discharge (ESD) is the transfer of an electrostatic charge between bodies having
different electrostatic potentials. This transfer occurs during direct contact of the bodies, or
when induced by an electrostatic field. ESD energy can damage an integrated circuit (IC); so
safe handling is required.
Excitation
Some transducers [e.g. strain gages, thermistors, and resistance temperature detectors (RTDs)]
require a known voltage or current. Typically, the variation of this signal through the
transducer corresponds to the condition measured.
Gain
The degree to which an input signal is amplified (or attenuated) to allow greater accuracy and
resolution; can be expressed as ×n or ±dB.
Gating
Isolation
In relation to the WBK17, any counter can be gated by the mapped channel. When the mapped
channel is high, the counter will be allowed to count, when the mapped channel is low, the
counter will not count but hold its value.
The arrangement or operation of a circuit so that signals from another circuit or device do not
affect the isolated circuit.
In reference to data acquisition, isolation usually refers to a separation of the direct link between
the signal source and the analog-to-digital converter (ADC). Isolation is necessary when
measuring high common-mode voltage.
Linearization
G-2
Glossary
Some transducers produce a voltage in linear proportion to the condition measured. Other
transducers (e.g., thermocouples) have a nonlinear response. To convert nonlinear signals into
accurate readings requires software to calibrate several points in the range used and then
interpolate values between these points.
969597
Data Acquisition
Mapped Channel
In relation to the WBK17, a mapped channel is one of 16 signals that can get multiplexed into a
channel’s counter module. The mapped channel can participate with the channel’s input signal
by gating the counter, clearing the counter, etc. The 16 possible choices for the mapped
channel are the 8 input signals (post debounce) and the 8 detection signals.
Multiplexer (MUX)
A device that collects signals from several inputs and outputs them on a single channel.
Sample (reading)
The value of a signal on a channel at an instant in time. When triggered, the ADC reads the
channel and converts the sampled value into a 12- or 16-bit value.
Scan
The channels that are selected for sampling.
Sequencer
A programmable device that manages channels and channel-specific settings.
Simultaneous
Sample-and-Hold
An operation that gathers samples from multiple channels at the same instant and holds these
values until all are sequentially converted to digital values.
Single-ended mode
The single-ended mode measures a voltage between a signal line and a common reference that
may be shared with other channels. (Also see differential mode).
Start of Scan
In relation to the WBK17, “start of scan” is a signal that is internal to the WBK17. It signals the
start of a scan group and therefore pulses once every scan period. It can be used to clear the
counters and latch the counter value into the acquisition stream.
Terminal Count
In relation to theWBK17, this signal is generated by the counter value. There are only two
possible values for the terminal count: 65,535 (for a 16-bit counter) and 4,294,967,295 (for a
32-bit counter.) The terminal count can be used to stop the counter from rolling over to zero.
Ticksize
In relation to theWBK17, the ticksize is a fundamental unit of time and has four possible
settings: 20ns, 200ns, 2000ns, 20000ns. For measurements that require a timebase reference
like period or pulsewidth, the ticksize is the basic unit of time. The count value returned in the
scan is the number of ticks that make up the time measurement.
Trigger
An event to start a scan or mark an instant during an acquisition. The event can be defined in
various ways; e.g., a TTL signal, a specified voltage level in a monitored channel, a button
manually or mechanically engaged, a software command, etc. Some applications may use preand post-triggers to gather data around an instant or based on signal counts.
TTL
Transistor-Transistor Logic (TTL) is a circuit in which a multiple-emitter transistor has replaced
the multiple diode cluster (of the diode-transistor logic circuit); typically used to communicate
logic signals at 5 V.
Unipolar
A range of analog signals that is always zero or positive (e.g., 0 to 10 V). Evaluating a signal in
the right range (unipolar or bipolar) allows greater resolution by using the full-range of the
corresponding digital value. See bipolar.
Data Acquisition
969597
Glossary G-3
G-4
Glossary
969597
Data Acquisition