1
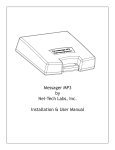
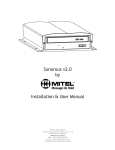
Messager MP3
by
Installation & User Manual
Magic On Hold
720 Brooker Creek Blvd., Ste. 215
Oldsmar, FL 34677
800.584.HOLD (4653)
Fax: 727.785.7659
http://magiconhold.com
[email protected]
Index:
Introduction ........................................................................................................................3
Messager MP3 Layout Summary...................................................................................... 4
Installation ....................................................................................................................... 5
Message Programming & Operation................................................................................ 6
Warranty & FCC ....................................................................................................................
7
Introduction:
The Messager MP3 is a solid-state digital messaging system that can be utilized to create productions that
require a continuous message playback. Messages are stored on removable flash memory cards called Message Mates. Message programming is simple, just plug the Messager MP3 into an available USB port on your
computer, and you instantly have the ability to drag ‘n’ drop MP3 files onto the Message Mate flash memory.
Unpacking and Inspection:
Before you begin installation, unpack and verify you have all the correct parts.
(1) Messager MP3
(1) Message Mate cartridge
(1) 12VDC @ 500mA power supply
(1) Instruction manual
(1) RCA to RCA cable
(1) USB cable
(1) 1/8˝ Adapter
(2) Wall mount screws
(4) Rubber feet
If you are missing any of these parts STOP and call your dealer.
Important Notes:
The Messager MP3 will not play audio when its USB port is connected to a computer.
Computer connection via USB port is only necessary to program Message Mate cartridges.
Computer must be running a minimum of Windows XP Home or Professional with Service Pack 1 or later.
3
Messager MP3 Layout Summary:
Front of Unit
MESSAGE MATE SLOT - The slot on the front of the Messager MP3 accepts a proprietary flash memory
cartridge which stores all of the MP3 files.
STATUS - The STATUS LED indicator is located on the front right side of the units printed circuit board. During
playback this LED will be SOLID BLUE. If there is a problem with the cartridge, it is not inserted correctly or if
it is empty, the LED will BLINK BLUE.
Rear of Unit
USB JACK - This jack is used to connect the Messager MP3 to a computer via the USB cable supplied.
Note: The Messager USB will not play audio while connected to a computer.
8Ω and 600Ω OUTPUT - This jack connects to the INPUT of the phone systems MOH port or PA system.
Depending upon the systems impedance use either the 8Ω or 600Ω jack - DO NOT USE BOTH!
VOLUME - This pot is used to control the 8Ω and 600Ω output level of the stored messages. Volume up is
clockwise, volume down is counter-clockwise.
12VDC - This is where the supplied 12VDC @ 500mA power pack is connected.
4
Installation:
The Messager MP3 should be installed using the following steps outlined below:
Step 1: Wall or shelf mount the unit. Screws and rubber feet are supplied in the accessory kit.
Step 2: If connecting to an amplifier make sure it is turned OFF for this part of the installation.
Step 3: Connect a RCA cable (supplied in the accessory kit) to the OUTPUT jack on the rear of the unit. Depending
upon the required impedance use either the 8Ω or 600Ω output RCA jack. Connect the other side to the MOH port
on the phone system, PA system or speaker.
Step 4: Insert the Message Mate cartridge. If insertion of the cartridge is difficult, turn it over and try reinserting.
The cartridge should slide into the slot smoothly. See Message Programming & Operation section if cartridge is
blank.
Step 5: Attach the included power pack to a wall or power strip receptacle, then attach the other end to the jack on
the rear of the unit labeled 12VDC.
Step 6: If any amplifiers were turned OFF during installation then turn then back ON now.
Step 7: Adjust the volume level pot labeled VOLUME on the rear of the unit. Depending upon the application
either call into the phone system and be placed on hold OR listen to the PA systems speakers to fine tune volume.
Volume up is clockwise, volume down is counter-clockwise.
Optional: Plug to
computer to program
OR
To MOH port
or PA System
Wiring Diagram
5
Messager MP3 Operation:
The Messager MP3 has an on-board LED status indicator. When a Message Mate cartridge is inserted in the
Messager MP3 the LED will turn SOLID BLUE. When a Message Mate cartridge is not present, does not have
audio programmed onto it or is in programming mode then the LED will FLASH BLUE.
Volume can be adjusted by the knob labeled VOLUME on the rear of the unit. Clockwise will increase the
volume, counter-clockwise will decrease the volume. If you have poor quality (such as muffled or clipping audio)
it may be connected to the wrong output; try switching from 8Ω to 600Ω or vice-versa until the desired volume
and clarity is achieved.
When changing the Message Mate cartridge, power should be removed from the unit. Changing the Message
Mate while power is on may result in damage to the cartridge or the playback unit.
The Message Mate cartridge supplied has been pre-loaded with audio. Continue to the next section ONLY if you
need to ADD or REMOVE audio from the card.
Messager MP3 Programming:
Step 1: Place the Messager MP3 with the pre-inserted Message Mate cartridge, next to a computer running a
minimum of Windows XP Service Pack 1.
Step 2: (optional): Connect the included RCA cable to the 8Ω or 600Ω output of the Messager MP3. Connect
the other side of the RCA cable to a speaker or receiver for testing the audio. We have included an optional 1/8˝
adapter for use on some inputs.
Step 3: Plug the included power pack into a standard wall outlet. Plug the other end into the connector marked
12VDC on the rear of the Messager MP3.
Step 4: Plug the included USB Cable into the back of the Messager MP3. Plug the other end into an available
USB port on the computer. Windows should recognize the device.
Step 5: Locate the .MP3 files you wish to add to the Message Mate cartridge. (Mono files insure the best
playback.)
Step 6: Drag ‘n’ drop the file(s) to the Message Mate cartridge (which is normally displayed in Windows as
“Removable Disk”).
Step 7: Remove the USB cable from the Messager MP3, then listen to the production to ensure it is of acceptable
quality.
Notes:
If you need to remove any audio simply select the audio file and hit delete on your keyboard.
The Messager MP3 will play audio in the order that is was placed on the Message Mate cartridge.
If the Message Mate cartridge needs to be reformatted use FAT, do not use FAT32.
6
Limited Warranty
TERMS: Avaya warrants to the original purchaser (“Buyer”) that the Product sold is free from defects in material and workmanship
at the time of purchase. The warranty period begins at the time of Product’s original purchase by the first end-user. The warranty
applies for five (5) years from the original date of purchase, or as long as the product is owned by the original purchaser, whichever
comes first. Included in the warranty are parts and labor. Buyer must provide written notice to Avaya of any defective part or
conditions within the warranty period. If the defect is not the result of improper use, service, maintenance or installation, and if the
equipment has not been otherwise damaged or modified after shipment, Avaya or its authorized representative shall either replace
or repair the defective Product at Avaya’s option. No credit shall be allowed for work performed by Buyer or unauthorized parties.
Out-of-warranty repairs are invoiced at the current hourly rate plus the cost of parts, shipping and handling. In the event that the
product serial number is missing or has been tampered with in any way, the foregoing warranty is void and without effect and Avaya
shall have no liability whatsoever on account of defects to such product.
LIMITATIONS: Except as stated above, there are no warranties, expressed or implied, that extend beyond the specifications for the
product. Avaya expressly disclaims any warranty, expressed or implied, that equipment sold hereunder is of merchantable quality or
that it can be used, or is fit for any particular purpose. Buyer purchases and accepts equipment solely on the basis of the warranty here
in above expressed. Under no circumstances shall Avaya be liable by virtue of this warranty or otherwise for any special indirect,
secondary or consequential damages to any person or property arising out of the use or inability to use the product.
REPAIRING OR REPLACING PRODUCT: Buyer may obtain the repair or replacement of any eligible part or equipment
covered under this warranty through Avaya only. Buyer is responsible for all shipping and handling charges in connection with the
performance of this warranty. Products returned to Avaya must be securely packaged to prevent damage in transit, freight prepaid,
and insured for replacement value. A return authorization number assigned by Avaya must be clearly marked on the outside of the
shipping container. Proof of purchase must accompany shipment. Items delivered to Avaya without a return authorization clearly
marked on the outside of the shipping container, and/or without proof of purchase is refused.
COPYRIGHT NOTICE: The Avaya Magic On Hold Messager MP3 is strictly used for Licensed Music only. Use of copyrighted
music is illegal and AMS, LLC takes no responsibility for that action.
FCC Part 15 : This equipment has been tested and found to comply within the limits for a Class A digital device, pursuant to Part
15 of the FCC rules. These limits are designed to provide reasonable protection against harmful interference when the equipment is
operated in a commercial environment. This equipment generates, uses and can radiate radio frequency energy and, if not installed
and used in accordance with the instruction manual, may cause harmful interference to radio communications. Operation of the
equipment in a residential area is likely to cause harmful interference in which case the user will be required to correct interference at
his own expense. In order to maintain compliance with FCC regulations shielded cables must be used with this equipment. Operation
with non-approved equipment or unshielded cables is likely to result in interference to radio & television reception.
Changes or modifications not expressly approved by Avaya could void the users’ authority to operate the equipment.
IC ES 003 : This Class A digital apparatus complies with Canadian ICES-003 C et appareil numérique de la classe A est conform e
à la norme NMB-003 du Canada.
CE CONFORMITY : The Avaya Magic On Hold Messager MP3 conforms with the following standards, in accordance with the
EU Safety, EMC Emissions, & EMC Immunities : EN 60950-1:2001, EN 55022:1998 for Class A, EN 55024:1998 + A1:2001 +
A2:2003, EN 61000-4-2:1995 + A1:1998, EN 61000-4-3:1995, EN 61000-4-4:1995, EN 61000-4-5:1995, EN 61000-4-6:1996, EN
61000-5-11:1994.
7