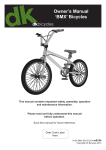
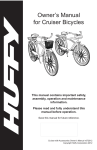
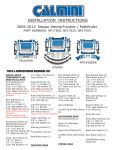
1
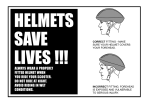
Stabilizer
Wheels
TOOLS REQUIRED
The following tools or their
equivalently required to
complete assembly and the
adjustments detailed in the
manual
ADJUSTABLE WRENCH
(4” 8” and 12”)
PLIERS
OWNER’S INSTRUCTION MANUAL
Please direct questions, comments and requests for warranty replacement parts to:
Bike USA Inc.
2811 Brodhead Rd.
Bethlehem, PA 18020
1-800-225-2453
www.StabilizerWheels.com
1
OWNER’S INFORMATION AND RESPONSIBILITY
Throughout the manual you will find WARNINGS,
CAUTIONS and NOTES or NOTICES.
WARNINGS: Pay special attention to these since failure to
do so may result in injury to the rider or others.
CAUTIONS: If not followed, these could result in
mechanical failure or damage.
NOTES or NOTICES: These specify something that is of
special interest.
It is the responsibility of the person who initially assembles
the bicycles to do so correctly and make any necessary
adjustments for proper operation. The owner or principle
rider is then responsible for normal maintenance of the
bicycle to keep it in good operating condition.
1. Make certain that all assembly instructions and
necessary adjustments have been followed.
2. Perform the safety check list and mark each item listed.
3. Know how to operate all standard and accessory
equipment on the bicycle.
4. Make sure that anyone who uses the bicycle has been
fully instructed in its operation.
5. Your bicycle conforms to all Federal CPSC regulations.
There may be other federal, state or local regulations,
restrictions or equipment laws: therefore, you should make
sure your bicycle complies with all applicable regulations
before it is ridden.
BIKE USA STABILIZER WHEEL SET
We hope you enjoy using your new Bike USA Stabilizer Wheel Set. It was designed to add versatility
and safety to your riding experience. It was designed to be attractive and easy to use. It will fit most
bicycles with a 24 to 27 inch wheel diameter.
Bike USA understands that the need and hope of today’s physically challenged to have as normal
and complete lifestyle as possible. No longer does the handicapped child or older adult have to “sit
on the sidelines”.
INCLUDED PARTS IDENTIFICATION
1) twelve locking nuts
2) four short u-bolts
3) two long u-bolts
4) two extra long u-bolts
(for alloy frame bicycles only)
5) two stabilizer brackets
6) two wheels with tires
7) six steel spacers
8) four plastic thin spacers
9) four plastic thick spacers
2
ASSEMBLY INSTRUCTIONS
Step 1:
Remove the brackets from their packaging and place
on either side of the bike. Each bracket is different and
should have the BIKE USA stamped logo facing
forward when the bracket plate is against frame.
Hold against bike to check correct placement.
Step 2:
Start by placing the short u-bolt on the seat stay (upper
frame tube) of the frame and slide the thin plastic
spacer over the u-bolt up against the frame. (Note: ubolts come in three sizes; small, long and extra long.
Plastic spacers come in two sizes; thin and thick)
Step 3:
Place the bracket against the frame. Align the u-bolt
ends to be approximately in the center of the top grove
on bracket. (Note: slide u-bolt and bracket up and
down frame to align bottom row of holes on bracket so
it is slightly below frame chain stay (lower frame tube)).
Step 4:
Place the steel spacer over the ends of the u-bolt and
up against the bracket. (STOP: double check you have
used the correct sized parts, in this order: short u-bolt,
thin plastic spacer, stabilizer bracket, then steel
spacer).
3
ASSEMBLY INSTRUCTIONS
Step 5:
Loosely tighten the nuts on the ends of the u-bolt. Do
not tighten down yet. (Note: the stabilizer bracket
should be against the frame of the bike, with the Bike
USA logo facing forward, and the bottom slots slightly
below the level of the frame chain stay (lower frame
tube)).
Step 6:
From behind the stabilizer bracket, put the short u-bolt
around the frame chain stay (lower frame tube) and
through the rear bottom slots in bracket. Lift the
bracket up slightly, place a thin plastic washer between
frame tube and bracket. Then put u-bolt through
bracket again. Place a steel washer over u-bolt ends
up against bracket face. The order of u-bolt and
spacers should look identical with the set on the upper
frame seat stay (upper frame tube).
Step 7:
From behind the stabilizer bracket, put the long u-bolt
around the frame chain stay (lower frame tube) and
through the front bottom slots in bracket. Lift the
bracket up slightly, place a thick plastic washer
between frame tube and bracket. Then put u-bolt
through bracket again. Place a steel washer over ubolt ends up against bracket face. (STOP: double
check that you used a long u-bolt and thick plastic
washer). Loosely tighten the nuts on the ends of the ubolt. Do not tighten down yet.
Step 8:
Pick up one of the wheels. (Note: you should have two
of the same wheel). Remove the axle nuts and
retaining washers. Place the wheel in between the
stabilizer bracket fork ends, with axle resting in the fork
ends.
4
ASSEMBLY INSTRUCTIONS
Step 9:
Slide retaining washers over each side of axle and
hook into little hole on fork end. (Note: the retaining
washer helps hold the wheel from falling off in the event
of a loose nut). Loosely tighten the nuts on the ends of
the axle. (STOP: double check that each side retaining
washer is hooked into the fork hole). Visually check
that the wheel is centered evenly in the fork, then
tighten down the axle nuts completely.
Step 10:
With the bike standing completely upright, slide the
bracket on the frame forwards or backwards, raising or
lowering the whole assembly, until the stabilizer wheel
is ½” off of the floor surface. (Note: the stabilizer
wheels should not be touching the ground when the
bike is upright, but should touch the ground when the
bike is leaned slightly left or right).
Step 11:
Securely tighten down all six lock nuts on the end of
the u-bolts. (Caution: all nuts and bolts on the stabilizer
bracket, stabilizer wheel and bike need to be double
checked for tightness. Loose nuts could result in
unsafe riding).
Step 12:
Repeat steps 1 – 11 of the bracket assembly on the
other side of the bike. When complete, both wheels
should be ½” off of the ground. Both brackets should
be level and both wheels should be parallel with the
rear wheel of the bike. Double check all assembly,
tightness of lock nuts, and safety washers. Your
assembly is complete and bike is ready to ride.
5
SAFETY CHECKLIST
Even under the best of circumstances, bicycling can be a
hazardous activity, and as in many recreational activities,
accidents can and do occasionally occur. It is for this reason that
we specifically bring the following safety points to your attention.
We ask that you read each point carefully; if you do not clearly
understand any particular point addressed, please call our 800
number for additional information.
Perform each check below after all the assembly instructions
and any necessary adjustments have been completed.
q 1. STEERING: Make certain that the stem is inserted into the
head tube to at least the minimum insertion line. Check the
clamp nut and stem bolt to make sure they are tightened
securely. (See the handlebar and stem assembly sections for
recommended torque.)
q 2. BRAKES: Check and adjust, if necessary (See the brake
adjustment section.)
WARNING: Before riding, activate front and rear
brakes 20 to 25 times, and then make final brake
adjustments. This procedure takes care of the initial cable
stretch.
q 3. SEAT: Check for tightness of the seat clamp and the seat
post clamp and that the minimum insertion line is inside the
frame. See that the seat is at the proper height for the intended
rider. (See the seat assembly section)
q 4. PEDALS: Check the pedal spindles, making sure that they
fit tightly against the crank arms. (See the pedal assembly
section for recommended torque.)
q 5. TIRES: Check and inflate, using a hand pump if necessary.
The correct pressure is marked on the side of the tire. DO NOT
OVER-INFLATE.
q 6. GENERAL INSPECTION: See that all reflectors have been
properly installed. Replace any missing or damaged reflectors.
Check all fasteners and tighten, if necessary.
q 7. TO THE RIDER OF THIS BICYCLE: Make certain that you
know how to operate the bicycle. We recommend that you read
all safety and warning information in the manual before riding.
q 8. WHEEL QUICK RELEASE: If the wheels are equipped
with Quick Release Hubs, make sure they are properly
tightened. Check the procedure in the manual.
q 9. HELMET: I understand that all riders (adults and children)
should wear a bicycle helmet whenever riding the bicycle.
q 10. LAWS: I understand that this bicycle is subject to all the
laws of the road, and that many states and localities have
additional laws which specifically apply to bicycles. I understand
that it is my responsibility to make myself familiar with and to
observe these laws.
q 11. LIGHTS: I understand that riding this bicycle at dawn, at
dusk, after dark or at times of poor visibility, is extremely
dangerous and I understand that it is my responsibility to equip
the bicycle with an appropriate lighting system, which meets or
exceeds local and state law requirements before I ride the
bicycle under these conditions.
q 12. MAINTENANCE: I understand that regular maintenance
is required to keep this bicycle operating properly, and that
failure to maintain it may void the manufacturer’s warranty and
may make the bicycle unsafe. Regular maintenance includes
frequent inspection of all quick release mechanisms and wheel
retention devices and maintaining the recommended tire
pressure as marked on the tire.
q 13. EQUIPMENT: I understand that the manufacturer of this
bicycle has incorporated many components in its design which
are important to the safe operation of the bicycle. I understand
that removing, modifying or replacing any original equipment
components may result in making the bicycle unsafe.
MAINTENANCE
Your bicycle will require regular maintenance. Although simple
in most cases, there are times when the repairs and adjustments
take special knowledge and proper tools. We recommend that
when service is required, you should have a qualified bicycle
repairman do it for you.
RECOMMENDED GENERAL MAINTENANCE SCHEDULE
To maintain the original brilliant painted and chrome finish, keep
your bicycle clean and dry. Wipe off dirt, moisture and oil with a
clean, soft cloth. Periodically, polish with a clear coat of wax.
WARNING: Do not use a wax polish or oils of any kind on
the rims of your bicycle. In order for the caliper brakes to
operate properly, the rims should be kept clean and free of
dirt and lubricants.
Due to wear of new parts, we recommend that you inspect the
bicycle frequently for adjustment of brakes, bearings, wheels,
etc. Adjust or tighten nuts and screws. The frequency of
inspection would depend on how much and how hard you ride.
Normally, we recommend an annual service check. Any
6
(General Information For
All Bicycle Owners)
(General Information For
All Bicycle Owners)
component that does not function properly should be checked
and corrected immediately. If you do not feel qualified to make
the adjustment, we recommend that you take your bicycle to a
qualified bicycle repairman.
REAR WHEEL REMOVAL
1. Place bicycle upside down, resting it on the seat and
handlebars. Cushion handlebars to prevent damage to stem
shifters and caliper brake levers.
2. If necessary, remove one caliper brake shoe to allow
clearance for the wheel removal.
3. Shift chain onto the small sprocket.
4. Remove the axle nuts and washers from both sides of the
axle.
5. Pivot the derailleur to the rear of the bicycle. Guide the wheel
out of the frame and remove the chain from the sprocket.
6. Remove the wheel from the frame. Release the derailleur.
WARNING: For your safety, read, understand, and obey these rules of the road.
RULES OF THE ROAD
1) In the interest of safer cycling, make sure your read and
understand your owner’s manual.
2) NOTICE: Some state and local laws may require that your
bicycle be equipped with a warning device such as a horn or bell
and light, if the bicycle is to be ridden after dark.
3) ALWAYS WEAR SHOES when riding a bicycle and AVOID
loose fitting clothing.
4) CHECK YOUR BREAKS FREQUENTLY. The ability to stop
your bicycle is CRITICAL. Roads are SLIPPERY in wet weather,
so AVOID sharp turns and allow more distance for stopping.
Caliper breaks may become less efficient when wet. Leaves,
loose gravel, and other debris on the road can also affect the
stopping distance.
5) The kickstand is designed to support the bicycle only, not the
bicycle and rider.
6) REPLACE bent or BROKEN spokes and bent or damaged
wheel rims.
7) OBEY ALL TRAFFIC REGULATIONS. Most traffic regulations
apply to bike riders as well as automobile operators.
8) KEEP TO THE RIGHT. Follow the traffic flow in a straight line
close to the curb. Watch for cars moving in and out of traffic.
9) NEVER CARRY RIDERS. Only a properly installed child
carrier is acceptable, if it used safely.
10) WHEN RIDING IN PAIRS or in large groups, form a single
line along the right side of the road. Set up a sensible distance
between riders. DON’T TAILGATE.
11) ALWAYS BE ALERT. Animals or people may dart in front of
you. Be on the ALERT-people have the right-of-way. Be ALERT
to people opening doors when passing parked cars. Your bicycle
was not designed for stunting and experimentation. Enjoy riding
it in a safe manner.
12) BE CAREFUL AT ALL INTERSECTIONS. Slow down and
look both ways before crossing.
13) USE HAND SIGNALS. Always let other drivers and
pedestrians know what you are going to do. Signal 100 ft. before
turning unless your hand is needed to control the bike.
14) HAVE PROPER LIGHTS AND REFLECTORS. Never ride
at night without a white front reflector and headlight, a red rear
reflector and light and wheel reflectors. Other devices, like flags
and reflective tape, also help you become more visible.
15) DO NOT CARRY PACKAGES or OBJECTS which obstruct
vision, restrict control or could get entangled in the spokes.
16) NEVER HITCH RIDES. Never hold onto a moving vehicle
while riding. Never “stunt”
17) AVOID the following HAZARDS: Drain grates, pot holes, ruts,
soft road edges, gravel, sand and leaves especially when they
are wet.
SAFETY WARNINGS
Before you ride, please read all of the following items making
sure you understand them. Failure to do so could cause
damaged to the bicycle or possible injury to yourself or others.
Your bicycle meets or exceeds industry standards. It is NOT
designed for off-road use, jumping, stunts and other types of
abusive riding.
ALWAYS WEAR A HELMET!
BRAKE PRECAUTIONS:
1) Do not ride the bicycle until you have checked for proper
brake adjustments.
2) When riding your bicycle for the first time, test the brakes at
a slow speed on a large level surface without obstructions. Also,
never attempt to stop suddenly using the front brake only, as this
could throw the rider off the front of the bicycle.
3) Check and adjust the brakes, if necessary at the first sign of
failure. This will enable the rider to make a quick and smooth
stop. On caliper brakes, if a brake lever touches the grip when it
is squeezed, adjust the brakes.
4) Going downhill fast is dangerous since you can’t stop nearly
as fast as you can on level ground. A curve at the bottom of a
hill could force you into oncoming traffic or off the road if you are
going at an excess speed.
5) Use the front brake slowly and carefully, especially while
turning or when the road is wet or covered with gravel, sand or
leaves. Start braking sooner under these conditions and with
less force to reduce the chance of skidding. Wet brakes shoes
mean that this will require more distance to stop. Start braking
sooner than normal in wet conditions.
(General Information For
All Bicycle Owners)
(General Information For
All Bicycle Owners)
6) NIGHTTIME RIDING:
a) You can’t see the controls on your bicycle at night,
so you must know where they are by touch.
b) Slow down. Debris and holes are much harder to
see at night.
c) If possible, ride on streets that are familiar to you.
Terrain that you have never seen during the day is dangerous
at night.
d) Use well lighted streets whenever possible. Avoid
unlighted bike paths.
e) Comply with all legal requirements in your state. You
must at least have a “white light”, (not just a white reflector), on
the front and a rear red light. All states require that a lamp that
emits a white light be used.
f) Children generally should not be allowed to ride a
bicycle at night and adults should avoid night riding, if possible.
g) Always wear a helmet, and it is a good idea to have
a rear view mirror.
7) If the stem is not inserted into the head tube to at least the
minimum insertion line, or if the stem bolt is over tightened, the
fork could become damaged. This could cause an unsafe
condition and risk of injury to the rider.
8) For safe operation, the handlebar stem bolt and clamp nut
must be securely tightened. Check them often.
9) For safe operation, you must secure the pedal spindle tightly
against the crank arm with a wrench that fits the shoulder of the
pedal spindle. This is important; it avoids stripping the threads.
Always replace damaged pedals.
10) When adjusting the seat height, you must have the minimum
insertion mark on the seat post remaining inside the frame.
7
Limited Warranty
1) Warrantee: This warranty applies only to the original retail purchaser and is
not transferable.
2) The Stabilizer is warranted to be free from defects in materials and
workmanship under normal use of the Stabilizer for the lifetime of the Stabilizer.
3) Defective Parts: All original parts, except tires, and tubes, are warranted for
one year from the date of purchase. During the warranty period, all original
parts, as determined by the manufacturer found to be defective in workmanship
or material, will be repaired or replaced free of charge, except for shipping and
dealer labor charge.
4) Warranty Exclusions: This warranty does not cover failure due to accident,
abuse, neglect, normal wear, improper assembly, improper fit, or use of
unauthorized replacement parts. This warranty does not cover any personal
injuries, damage or failure of the bicycle if it is used in any competitive event,
including bicycle racing, motocross, stunt, or similar activities or when in training
for the above. Motors or other accessories inconsistent with normal use will
negate this warranty.
5) This warranty is expressly in lieu of any other written warranty and/or any
implied warranty including any warranty of merchantability or fitness and is
limited in duration to the conditions specified in this warranty. (Some states do
not allow a limitation on how long an implied warranty lasts, so the above
limitation may not apply to you).
6) We shall not be responsible for consequential or special damages, nor for
transportation charges or for dealer labor charge except as set for above.
7) This warranty gives you specific legal rights, and you may also have other
rights which vary from state to state.
Please direct questions, comments, and requests for warranty replacement
parts to:
Bike USA Inc.
1-800-225-2453
8