1
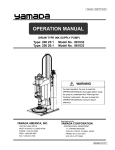
Doc.No. OSA044U-03
7. Types of Grease Fittings
■ Hydraulic fittings
JIS B 1575
Type A
Type B
Type C
Grease Gun User’s Manual
In general, hydraulic fittings are most commonly used as the lubrication points for bearings. These fittings
areavailable in straight and angle types to be selected by installation location.
(KH·CH·GC Series)
1. Introduction
■ Buttonhead fittings
Standard type
Large type
(D=φ15, D’=φ12)
(D=φ22, D’=φ17)
Buttonhead fittings are commonly used as the lubrication inlets for construction equipment. These fittings are
available in two types large and small in button diameter.
Thank you very much for purchasing a Yamada’s grease gun. This document describes how to use your grease gun
correctly to get the most out of it without malfunctioning and provides some notes on use. The grease gun looks partly
discolored because of “trivalent chromium plating” (for environmental protection). However, there is no problem with
its function.
2. Warnings and Cautions
■ Pin-type fittings
The grease gun discharges grease at a high pressure. Discharging it toward your hand or any other person may
result in serious injury. When using the grease gun, take the following precautions.
WARNINGS
Pin-type fittings are used as the lubrication inlets for farm equipment and railway vehicles. This type may be
installed inside a concave element and sealed above.
- Before using the grease gun, always make sure that the greasing nozzle, greasing hose, screws, or any
other part do not have any damage.
- Before greasing, be sure to put on safety glasses and thick gloves (such as leather gloves).
The heads of grease fittings are common to Japan, US, and Germany as specified in JIS, SAE, and DIN, respectively.
Our products are manufactured in accordance with the relevant JIS standards. Note, however, that recently some
dimensions do not conform to the standards.
- If the lever of the grease gun feels heavy or its tip leaks grease, remove the cause before greasing
without forcing grease into the grease fitting.
- Should grease intrude into your body or get into your eyes, seek immediate medical attention from a
specialist and take proper treatment. Grease adhering to the skin can cause inflammation and thus
must be washed out sufficiently with water and soap.
CAUTIONS
- Do not touch the nozzle or hose during greasing as it may be highly
pressurized inside depending on the greasing point.
- The hose used in place of the greasing nozzle is deteriorated as it
serves. It is advisable to replace the hose with a genuine part every two
years.
3. Specifications
Product
No.
854297
853920
853923
853935
853926
853926
854284
Manufactured by
YAMADA
CORPORATION
INTERNATIONAL DEPARTMENT
No.1-3, 1-Chome, Minami-Magome, Ohta-ku, Tokyo, 143-8504, Japan
PHONE
: +81-(0)3-3777-0241
FAX
: +81-(0)3-3777-0584
Grease
Overall Length Weight
Cylinder
(mm)
(kg)
Diamete
GC-57K
411
1.70
56.5
KH-120
250
0.55
36.1
KH-35
319
1.23
60.5
KH-32
393
1.44
60.5
CH-400
397
1.68
60.5
CH-400G
397
1.68
60.5
CH-650LL
401
1.69
60.5
Model
Maximum
Discharge/Stroke
Pressure
(mL)
(MPa)
500(Combined to 420mL cartridge and manual filling.)
1.60
25
140 (85 mL cartridge)
0.60
20
400 (210 mL cartridge)
1.00
25
200 (dedicated to manual filling)
1.00
25
400 (dedicated to 420 mL cartridge)
0.93
50
400 (with 420 mL cartridge dedicated grease)
0.93
50
400(Combined to 420mL cartridge and manual filling.)
0.93
80
Capacity
The KH and CH Series comes standard with the HSP-1 straight nozzle.(CH-650LL and GC-57K come standard with
the CNP-2 chuck nozzle.)
In the above specifications table, the overall length and weight do not include the nozzle. The displayed pressures
indicate the maximum pressures; the nozzle values assume the use of the CNP-2 chuck nozzle.
201006 OSA044U
5. How to Use
4. Preparation for Use
Manually filled type
Cartridge-acceptable type
4-1 Preparation
Manually filled type
GC-57K(For cartridge)
1. Remove the grease cylinder
by screwing it back from the
main body.
2. Pull the handle to lock
it to the cut slot at the
constriction on the grease
cylinder.
3. Use a spatula to take a small
amount of grease (specified
mL), then fill the grease
cylinder from its edge. At
this time, take meticulous
care not to let dirt, sand,
or air in grease. When the
grease cylinder is filled, tap
it once or twice to degas and
fix grease.
4. Pull the handle fully, then
attach the grease cylinder to
the main body.
5. Taking the above steps
completes filling the grease
cylinder. Add grease as
required in the same way.
6. When using the grease gun,
remove the handle from
the cut slot and put it back.
Grease will be pressurized
by the spring.
* Grease may not come
out soon even after you
operate the lever. As this is
caused by an air pocket in
grease, loosen the grease
cylinder once or twice to
degas it. For manual filling,
use grease not exceeding
the specified amount.
1. Remove the grease cylinder
by screwing it back from the
main body.
2. Pull the handle to lock it to
the cut slot at the constriction
on the grease cylinder.
3. Remove the caps from both
sides of the grease cartridge.
Insert the grease cartridge
to the grease cylinder
from the wide-mouth side
first(indicated by an arrow).
4. Unlock the handle and put it
into the grease cylinder.
5. Taking the above steps
completes filling the grease
cylinder. Add grease as
required in the same way.
6. Grease may not come out
even though grease is still
inside. As this is caused
by an air pocket in grease,
dagas it by moving the rod
back and forth.
Attach the accessory nozzle or a separately purchased hose or nozzle to the grease gun by screwing onto the
grease outlet (Rp1/8). Fill the grease gun with grease according to the filling procedure for the model in use.
4-2 Greasing
Wipe clean the grease fitting and the tip of the nozzle, connect the nozzle, then reciprocate the lever. If grease
is charged normally, old grease is pushed out from the groove or clearance near the fitting. For the amount of
grease to charge, refer to the instruction manual for the target machine, or charge the machine with new grease
until old grease is completely pushed out. Note, however, that old grease does not come out depending on the
greasing point.
4-3 Maintenance
Although the grease gun does not require special routine maintenance check, be careful not to introduce foreign
material into grease. As the fitting at the lubrication inlet gathers dirt and sand, keep it clean along with the
grease gun. Check the fitting if you need a strong force to move the lever.
4-4 Tip
Grease may not come out easily when you use the grease gun for the first time. In that case, be sure to fully
open or close the lever. Note that operating the lever halfway through the stroke cannot draw grease in the
grease cylinder.
4-5 Replacing the nozzle
When removing the accessory nozzle or replacing it with a separately purchased
hose or nozzle, hold the nozzle bracket (on the grease gun) with a wrench,
remove the nozzle, then attach a new nozzle.
4-6 Connecting the nozzle to the fitting
Fig. 1 standard nozzle
hydraulic fittings
Fig. 2 chuck nozzle
hydraulic fittings
Fig. 3 for pin-type
pin-type fitting
Fig. 4 for buttonhead
buttonhead fitting
Grease while pressing the tip of the nozzle
vertically
Push the nozzle vertically onto the fitting until it
grips
the fitting, then start greasing. Before removing the
nozzle from the fitting after greasing, lean the
Push the nozzle vertically onto the fitting until it
grips
the fitting completely up to the pin along the cut
Insert the chuck at the end of the hose to the fitting
from the side, tighten the screw on top, then start
greasing.
1. Remove the grease cylinder
by screwing it back from the
main body.
2. Pull the chain to lock it to the
groove at the bottom of the
grease cylinder.
3. Remove the cap from the
grease cartridge (specified
mL), then screw the
cartridge into the main body.
* If you do not use a grease
cartridge, directly fill the
grease cylinder with
grease. At this time, be
careful not to let air or dirt
in grease.
4. Attach the grease cylinder to
the main body.
5. Unlock the chain and put it
into the grease cylinder.
6. Reciprocate the lever two or
more times and make sure
that grease comes out from
the tip of the nozzle.
* If you directly fill the
grease cylinder with
grease, grease may not
come out soon even after
you operate the lever.
As this is caused by an
air pocket in grease,
loosen the grease cylinder
once or twice to degas
it. For manual filling, use
grease not exceeding the
specified amount.
6. Genuine option nozzle
Applicable to any lever-type grease gun.
Fig. 1
Fig. 2
Fig. 3
Fig. 4
Classification
Product No.
Model
“MICROHOSE”
Normal operation
pressure: 21 MPa
850664
850665
850666
850478
850489
850490
850392
850381
851268
SPK-1C
SPK-2C
SPK-3C
SPK-1C/1M
SPK-2C/1M
SPK-3C/1M
SPK-5
SPK-20C
SPK-700E
Overall Length Weight
Application
(mm)
(g)
355
141 For pin-type fitting
375
180 For buttonhead fitting
330
83
For hydraulic fitting
1069
189 For pin-type fitting
1070
242 For buttonhead fitting
7030
132 For hydraulic fitting
414
300 For hydraulic fitting
377
320 For buttonhead fitting
691
510 For hydraulic fitting