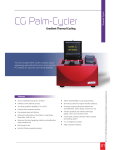
Download User Manual SuperCycler
Transcript
User Manual
SuperCycler
SC-200
Revision 2.2
2010
Korea
Kyratec Life Sciences
Woolim Lions Valley B-308
Gasan-dong Geumcheon gu
Seoul Korea, 153-803
Telephone : +82 2 2105 7020
Email : [email protected]
Web : www.kyratec.com
Australia
Kyratec
Brisbane, Queensland
Australia
Email : [email protected]
Web : www.kyratec.com
Contents
1.1 Forward
1.2 Features
2.1 Initial Power On
2.2 Navigating the Software
3.1 Wizard Mode (Basic Profile Setup)
4.1 Advanced Profile Generation and Execution
4.2 Creating a new Event
4.3 Starting a run
4.4 Manual Block Control
5.1 User Accounts
6.1 Device Setup
7.1 User Tips
8.1 Specifications
1.1 Forward
Congratulations on purchasing a Kyratec SuperCycler. You are now one of a growing number of
highly skilled customers worldwide to adopt the SuperCycler as their preferred Thermal Cycling
Engine.
Our philosophy has been to generate user friendly yet powerful cycling workhorse. We trust you
will be most pleased with our product however always welcome any suggestions you may have to
make our products better for the future. Feel free to email us : [email protected]
1.2 Features
General
The SuperCycler is a high performance block cycling system configured and optimised for Industry
standard 200ul individual or strip tubes (domed or flat-capped) or 96-well plates (low or high skirt)
with strip caps or adhesive film seals. It incorporates state of the art electronics, precision quality
Ferrotec™ peltier devices and a flexible user interface.
Configuration
The SuperCycler utilises eight Peltier devices to actively heat and cool the block between 4°C and
99°C. Peltier devices are driven by four independent thermal sensors arranged evenly across the
block. This Configuration of peltiers and sensors enables a highly linear gradient to be established
via a sophisticated computer control system.
Linear Gradient
Thermal gradient technology enables a varying temperature to be set across the reaction wells of
the block. Applications of this feature include the ability to optimize the annealing temperature of
an assay in a single experiment by determining the temperature of the wells that yield the best
result. The SuperCycler is capable of generating a linear gradient of between 0°C and 20°C
across the block. The software interpolates and displays the temperature of each column of wells
in real-time during a run.
Thermal profile engine
The SuperCycler has a powerful thermal profile engine implemented within. A profile may contain
up to 100 events. Each ‘event’ can be either a hold at temperature, pause or 2 to 5 step cycling
with up to 100 repeats. Any event or step can contain gradient, touchdown or long range features.
An almost unlimited number of profiles may be stored on the device for re-running. Despite its
capabilities profile setup is straightforward.
LongRange
The Long Range feature enables the time of a particular cycling step to be automatically increased
or decreased by a preset amount over a specified range of cycle repeats. The Long Range
increasing time mode feature is often used to provide gradually extended times for enzymatic
polymerization of longer products during later cycle repeats of an amplification reaction. It is most
useful for targets longer than about 1kb. Long Range decreasing time mode can be used to
shorten the total run time. During later cycles the majority of enzymatic polymerization is
occurring on previously generated amplicons which are shorter in length than the original
template. Shorter hold times are often sufficient for polymerization of these shorter length
products.
TouchDown
The Touchdown function enables the temperature of a step to be automatically decreased by a
preset amount over a range of successive cycle repeats. Its primary use is as a mechanism to
minimise primerdimer artifacts by gradually decreasing the annealing temperature during initial
cycle repeats of an amplification profile.
Pause
The Pause function allows the user to pause the profile at any number of pre programmed points
while emitting an alert beep. The current set temperature is held indefinitely until the Continue
button is pressed. Holds are useful if there is a need to remove tubes or add reagents at a
particular point in a run.
Manual control
The SuperCycler also supports Manual Mode control. This mode enables the user to set the
block to a specific temperature quickly without creating a thermal profile. This function is useful
for incubating reactions such as DNA digestion or ligation. Manual Mode also supports thermal
gradient.
Condensation Free Heated Lid
The SuperCycler employs a heated lid design to keep the air contained within the tube hotter than
the reaction volume. This causes any evaporation to condense back into the cooler reaction liquid,
thereby eliminating the need for oil or wax condensation overlay.
User Interface
The SuperCycler has a 7” colour touch screen giving a vibrant and flexible means of run setup and
monitoring. This internal graphical user interface controller provides a powerful yet intuitive and
easy to use interface. All SuperCyclers have a USB port and (soon to be released) Windows
based PC software. This software opens the user up to easier profile setup, sharing of files, and
post run examination of any temperature data.
New software features and updates are regularly incorporated and available for either system as
free upgrades via web download.
2.1 Initial Power On
Plug the unit into a power outlet and power the unit on with the switch located on the rear of the
unit. Do not worry about selecting the correct power voltage for your country, The SuperCycler is
designed to operate in any country in the world with no changes. The unit is also designed to be
be resistant to power surges and drop-outs that occur in countries with less reliable power grids.
On power up the SuperCycler will display the logo and take a few moments to initiate the software.
Once initiated the unit will perform a quick power on self test (POST) to ensure all the modules in
the unit are operating and ready for trouble free use.
2.2 Navigating the Software
After power up the unit defaults to the main screen from where all the features may be accessed.
You may return to this screen at any time without interrupting a run by pressing the Kyratec logo in
the bottom left hand corner for the screen.
The 5 icons on the screen access the following features :
USERS – allows you to select and setup a user profile for the machine.
PROFILE – is the advanced mode to configure an thermal profile and initiate its execution.
MANUAL MODE – allows immediate manual setting of block temperature.
WIZARD – is a utility which allows quick easy profile setup.
CONFIGURATION – allows configuration of machine options.
INFORMATION – Displays a general information screen which includes such information as serial
number, software and hardware version numbers.
The bar at the bottom of the screen displays some useful information about the device and run
status. The first box displays the current activity, it displays such information as 'idle', 'ramping to
temperature' and 'hold – xx' with a countdown of the remaining hold time at the particular step.
The second box displays the Elapsed run time and the last box the total Estimated run time. The
actual run time may slightly differ from the estimated time depending on factors such as the
ambient air temperature, humidity and the type of plasticware and liquid volumes on the block. The
current user name and profile picture is also displayed as well as the current time and date.
3.1 Wizard Mode (Basic profile setup)
The SuperCycler software includes a Wizard utility which enables the user to configure easy to
moderate complexity profiles in just moments. To activate select 'Wizard' from the main menu.
The Wizard screen displays each of the steps which occur in a typical range of profiles. At a
minimum there are 3 steps, Preheat and then denaturation and aneal which are cycled. You may
enable up to a further 3 steps (cDNA, Extension & post run hold) by clicking on the corresponding
check boxes. Each of the steps will be executed in the order they are shown arranged down the
screen with the Denaturation, Aneal and Extension (if enabled) steps being cycled. After the
amplification run has been completed the temperature may be held at a defined temperature until
the user dissables the unit. To adjust any of the parameters click on the corresponding time or
temperature boxes and a keypad will be presented allowing entering of new numbers. The number
of cycles can also be adjusted between 1 (single execution, no loops) and 99 cycles.
When the user is happy with the profile parameters just click on the tick. A run review screen will
now be shown with a text description of the profile steps. Click on OK to commence run execution
or cancel if changes need to be made.
Once the profile is confirmed, If the 'Use Top Heater' checkbox option is selected (default) then
you will be prompted with a screen asking if you wish to wait for the top heater to reach target
temperature before commencing the run. If you select to wait for the top heater to achieve
temperature a waiting screen will be displayed. You may skip the waiting step at any time if you
wish to commence the run immediately. Depending on the set temperature of the Top Heater it will
take up to several minutes to pre heat to this temperature.
When the run commences the software will automatically proceed to the 'Run' screen. You are not
able to modify the profile once a run has commenced.
From the run review screen you may also check the option 'run in virtual mode'. This will make the
SC simulate the run rather than performing the actual thermal steps on the block. This can be
useful if you wish to check complicated runs prior to performing them.
4.1 Advanced Profile Generation and Execution
The profile generation screen contains 6 icon buttons with the following functionality:
CLEAR PROFILE – will erase the current profile. User confirmation is requested before execution.
SAVE – Allows a given profile to be saved to internal flash memory disk. The unit has very large
internal memory allowing virtually unlimited profiles to be saved (in the order of millions). Saving a
profile also stores the device options configurable under the setup menus, ie top heater
temperature and other functionality. You may enter any valid file name for saving. Profile file will be
saved to the current user directory, or the Default directory if no user is selected.
LOAD – loads from the internal permanent memory a presaved profile. The SuperCycler displays
a list of the saved files on the unit in the directory of the currently selected user. If no user is
selected it will show the files saved in the default user directory. To access a different users files
you need to log in as that user.
ADD EVENT – Evokes the Add Step wizard to build the profile step.
START RUN – This button is used to activate a run. Pressing this button will show a profile review
ADD NOTES – Allows the operator to write and save any notes along with the run.
The graph in the centre of the screen will display the thermal profile of the currently selected
The event list shows each of the events in the current profile. To see or edit any step in the profile
select it in the event list box. The selected event will be displayed in the graph area. Note that only
the first few minutes of any step are displayed graphically. When an event is selected a sub menu
will be displayed giving further options for this event. The selected event may be moved up or
down in order within the profile events, deleted, or edited.
4.2 Creating a new Event
The first screen of the Add Event Wizard lets the user select the type of event.
You may choose from 4 event types.
HOLD – Is a simple hold at given temperature for a set time. It may be performed either with or
without a gradient across the block.
The hold screen allows the operator to set the hold time and temperature. If the Gradient option is
selected both the left and right temperatures may be set separately and the predicted well
temperatures can be shown by clicking the Predicted Temps link.
RAMP – Allows the block temperature to be ramped either up or down between two set
temperatures over a preset length of time. The block target temperature is updated every second
and with a 0.025 degree minimum step resolution. It may be performed either with or without a
gradient across the block.
The ramp screen shows the initial and final ramp temperatures. If the Gradient option is selected
both the left and right temperatures may be set separately and the predicted well temperatures
can be shown by clicking the Predicted Temps link.
PAUSE – will hold the temperature at the last set point and pause the run with an audible warning.
This is useful if the operator needs to perform a certain action of the samples at a given point in
the run. The operator clicks ok when complete and the run will continue with the next event.
CYCLING x STEP – will proceed to generate a multi step cycling event. The scroll button to the
right allows you to change the number of steps between 2 and 5 for the cycling event.
Within the cycling configuration screens there are numerous options. Once again If the Gradient
option is selected both the left and right temperatures may be set separately and the predicted
well temperatures can be shown by clicking the Predicted Temps link. There are also options for
Touchdown and Long range features. Selecting these checkboxes will display extra buttons to
configure these features.
Touchdown – allows for the temperature of a given step within a cycling event to be progressively
increased or decreased from an initial value to a final value over a defined number of steps.
LongRange – allows the hold time of a given step within a cycling event to be progressively
increased or decreased from an initial value to a final value over a defined number of steps.
Any or all of the steps within a cycling event may use these features. The following picture
displays the same screen with all options (Gradient, Touchdown & LongRange) enabled.
The 'Next' button will proceed through each of the parameter screens for each step contained
within the cycling. After the parameters for each step are configured the operator is prompted to
enter the number of times to repeat the cycle.
4.3 Starting a run
Activating the Start Run button will show a profile review page which allows the operator to check
over the profile (displayed in text format) before confirming commencement. The profile review will
also contain general run options regarding the Top Heater evaporation control and actions on run
completion. These are configurable under the configuration menu. You have the option to perform
the run in virtual mode, this will simulate the run without actually thermally varying the block.
Once the profile is confirmed, If the 'Use Top Heater' checkbox option is selected (default) under
the setup menu then you will be prompted with a screen asking if you wish to wait for the top
heater to reach target temperature before commencing the run.
If you select to wait for the top heater to achieve temperature a waiting screen will be displayed.
You may skip the waiting step at any time if you wish to commence the run immediately.
Depending on the set temperature of the Top Heater it will take up to several minutes to pre heat
to this temperature.
Once the run commences the software will automatically proceed to the 'Run' screen. You are not
able to modify the profile once a run has commenced.
4.4 Manual Block Control
The manual mode screen allows immediate manual setting of the block temperature. To activate
this mode simply press the blue 'start' button. Terminating the mode is achieved by pressing the
red 'stop' button. To Program the set temperature press the temperature button to the left of the
graph and enter the desired value. You may program the temperature setpoint to 0.1 degree C
resolution. If the 'Gradient' checkbox is checked the 'Temp Right' button appears and you are able
to set different temperatures for both the left and right sides of the block with a roughly linear
thermal gradient presented between the two outer well sides. To enable the Top Heater
evaporation control click the 'Top Heat' checkbox. The target temperature of the top heater is
configured under the setup menu. Note the top heater will take a few minutes to reach its
operating temperature. The lower left side of the screen displays the temperatures of each of the 4
zones. Other information also displayed is the event, step and cycle numbers for when a profile is
being executed. At the bottom of this display box is the top heater (TH) and internal heatsink (HS)
temperatures.
5.1 User Accounts
In the users area you are able to select an existing user or create or delete a user profile. When a
user is selected Thermal profiles will be loaded or saved to a directory specific to that user.
Logging out will change back to default user. To create a new user select the 'Add New User' icon
and then enter the user name and select a user profile image.
6.1 Device Setup
The setup area allows various device parameters to be changed. Once in the setup area use the
tab buttons to navigate the different setup features.
File Manager
File manager area enables you to transfer run files between the default or individual user
directories and a usb memory drive. Plug your USB drive into the connector on the front of the unit
and you may browse the directories on the SC and transfer files to or from. You may also delete
any thermal profiles from the SC. Press on the 'Home' icons to refresh the directory list back to the
root directories. Select files in either the SC or the USB stick and press the transfer logos to copy
the files across.
Block Setup
The following features are available under this tab:
–
–
–
–
–
'Hold at last temperature on run completion' will maintain the last profile temperature after the
run has completed.
'Disable Peltiers on run completion' will deactivate the peltiers at the end of the run. When this
is selected the temperature of the samples will come to rest at approximately the internal
heatsink temperature. Typically this will be about 35deg C at the completion of a run. Selecting
this check option will toggle between the 'Hold at last temperature' and this option. This is the
preferred option as it will provide for a longer peltier service life.
'Audible alarm on run completion' toggles whether there is an audible alarm or just a screen
message to alert the operator that the run has completed.
'Use Predicted Temperature for Hold times' The SC software implements a thermal model
which predicts the actual liquid temperature inside the reaction vessels. Hold times can be
based on this model (default) or based purely on the block temperature. Using the predicted
temperature effectively increases the hold times (and total run time) slightly but gives a more
accurate representation of the hold time of the actual sample liquid. Most manufacturers
thermal cyclers purely use the block temperatures for timing.
'Auto Resume Run After Power Outage' If this feature is available on your cycler (not available
on all models) then when this box is checked a run will automatically resume at the same
place if power should be momentarily lost during a run.
'Set Time & Date' using these drop boxes.
TopHeater Setup
The following features are available under this tab for the top heater evaporation control:
–
–
–
–
'Use Top Heater' will cause the top heater to be used during a run if it is checked.
'Leave heater enabled on run completion' will cause the top heater to be left on indefinitely at
the end of a run. This is useful if you are holding the samples at a high temperature on run
completion.
Entry box for top heater temperature. Temperature is programmable between 30 – 110deg C
(default 100 deg)
'Disable top heater when set temperature < 30deg' feature is implemented to reduce the high
thermal load placed on the peltiers when holding the samples at low temperatures (ie
4degrees) . This prevents excess heat from the top heater heating the chilled samples. It is
best to leave this option enabled.
Note that the top heater is only activated when a run is started or the operator enables it in manual
mode.
Calibration
The calibration screen is used to adjust the machine calibration. SuperCyclers are factory
calibrated and should not require user recalibration. The recalibration procedure is not covered in
this user manual. If it is required contact the distributor the equipment was purchased through for
'SC Service note – Thermal recalibration'.
The native calibration option bypasses all preprogrammed calibration and runs uncalibrated. This
mode should only be used if there is a problem with the unit calibration.
You can also perform a calibration of the touchscreen interface using the calibration wizard. If the
calibration has varied click on this button and follow the instructions to re-calibrate the screen.
Software Update
A facility has been provided to update the software which resides on the SuperCycler. The
upgrade file you receive from our support team or the website should be placed on the main root
directory of your usb memory stick. You may then select it to upgrade the units software.
IMPORTANT NOTE : Do not interrupt the unit while a file upgrade is in progress. Switching off the
power during upgrade may render the unit inoperable.
Extras
Under the extras tab you will find some other programs. The Oligo Calculator is useful for
calculating the theoretical melt temperature and other information pertaining to the oligo design.
Simply enter the sequence and it does the rest. Several popular Games are also provided for your
your enjoyment !
8.1 User Tips
It is recommended before you use the device for the first time with biological samples that you
experiment with setting up runs and trialling these to familiarise yourself with the machine to
ensure correct operation on your valuable samples.
To achieve the maximum lifespan and best clarity from you SuperCycler touchscreen please only
use the stylus provided (or equivalent) or your fingers for selecting on the touchscreen. Using a
ball point pen, pencil or anything sharp will cause the screen to scratch.
To maximise the lifespan from the peltier devices which effect the heating and cooling there are a
number of actions the user may take :
–
–
Do not run the unit with no tubes in the plate and the lid closed. When the lid is closed and no
tubes are present the top heater rests close to the 96 well block and will place high thermal
load on the peltier devices. Extended operation in this situation will shorten the lifespan of the
peltier devices.
Attempt to minimise the time holding the samples at below ambient temperatures longer than
required. It is recommended against using the device as a refrigerator to hold samples at 4
degrees C temperature for long periods of time if you wish to maximise the lifespan of your
instrument.
9.1 Specifications
Thermal Cycling Technology
High performance active heating and cooling using quality
elements x 8 & precision sensors x 4
Temperature Range
4°C–99°C
Temperature Accuracy
±0.5°C of set temperature, 1 minute after target
Temperature Uniformity
±0.5°C, 30 seconds after target
Temperature Resolution
0.1°C increments
Heating/Cooling Rate
3.25°C/sec maximum (block)
Well Configuration
96-Well block supporting : 0.2 mL tubes or strip tubes with
flat or domed caps; 96-well high- or lowskirt plates with
strip caps, adhesive cover, or oil overlay
Linear thermal gradient
Programmable 0 – 20°C across block width (12 wells)
Condensation control
Automatic utilising applied pressure heated lid
Heated Lid Temperature Range
Controllable 60°C–110°C
Dimensions
W 180 mm
D 270 mm (10.6”); 340 mm (13.4”) including cables
H 190 mm lid closed (320 mm (12.6”) lid open)
Weight
5.5kg (12.1 lbs)
Colour
Arctic pearl white & frosted black
Electrical
100–240 VAC @ 4 Amp (50/60 Hz) Automatic voltage sense
Standard IEC Inlet plug
External Interface
USB interface to Windows XP / Vista based PC
USB host port for memory stick, mouse, keyboard etc.
Internal Interface
Embedded graphical controller with 7”
widescreen touch sensitive colour backlit display
Software
Supplied with unlimited user license. Free upgrades available via
web download.
Functionality
Touchdown, long-range, linear thermal gradient, program
pauses, temperature graphing, temperature logging (PC
only),
Profile load & saving. Manual mode
Included Accessories
Power Cable, User manual, Stylus
Warranty
1 year on instrument typical (check with your local distributor)


