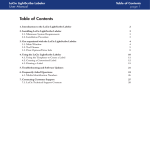
1
Multimedia Module
FINAL CUT PRO 2
INSTRUCTOR MANUAL
For information and permission to use these training modules, please contact:
Limell Lawson - [email protected] - 520.621.6576
or
Joe Brabant - [email protected] - 520.621.9490
Modules available online at http://mll.arizona.edu/workshops.shtml?tutorialpdfs
FinalCutPro_Instructor.pmd
Last modified: 06/03/02
2
FINAL CUT PRO 2: Instructor Manual
TABLE OF CONTENTS
Instructor Setup ............................................................................................................................. 3
Introduction and Overview .............................................................................................................. 5
Lecturette 1: The Final Cut Pro Desktop ........................................................................................ 6
Exercise 1: Matching Terms and Concepts .................................................................................... 7
Exercise 2: Connecting a DV Camera via FireWire to the Computer ............................................. 8
Exercise 3: Opening Final Cut Pro 2 .............................................................................................. 8
Exercise 4: Set Up Audio and Video Settings ............................................................................... 9
Exercise 5: Set Preferences ........................................................................................................ 10
Exercise 6: Easy Set Up .............................................................................................................. 11
Lecturette 2: Importing Files ......................................................................................................... 11
Exercise 7: Importing Files .......................................................................................................... 12
Exercise 8: Log and Capture Window .......................................................................................... 12
Exercise 9: Capturing Video into Final Cut Pro ............................................................................ 15
Exercise 10: Adding Clips to the Timeline ................................................................................... 16
Exercise 11: Shortening and Splicing Clips ................................................................................. 16
Exercise 12: Adding Transitions Between Clips ........................................................................... 17
Exercise 13: Changing Opacity of a Clip ...................................................................................... 18
Exercise 14: Adjusting Audio Levels and Panning ....................................................................... 19
Exercise 15: Changing the Speed and Play Direction of a Clip .................................................... 20
Exercise 16: Creating Text Titles ................................................................................................. 20
Exercise 17: Rendering Work Area .............................................................................................. 21
Exercise 18: Re-Linking Media Files ............................................................................................ 21
Exercise 19: Printing to Video ..................................................................................................... 22
Exercise 20: Exporting to QuickTime ........................................................................................... 22
Conclusion ................................................................................................................................... 23
Criterion Test................................................................................................................................ 24
File name: FinalCutPro_Instructor.pmd
Last modified: 06/04/02
Copyright Arizona Board of Regents, 2002
University of Arizona
3
FINAL CUT PRO 2: Instructor Manual
INSTRUCTOR SETUP:
Prerequisites:
♦
iMovie 2 module
Materials:
♦
♦
♦
Final Cut Pro 2 Instructor Manual with disk of accompanying files
Final Cut Pro 2 User Manual (1 copy per user)
Job Aid (1 copy per user)
Equipment::
♦
♦
♦
♦
♦
♦
♦
Electronic Classroom (class size is limited by available equipment)
PC or Mac workstations (1 per user) with Final Cut Pro installed
Instructor PC or Mac workstation with Final Cut Pro installed
1 DV Camera, 1DV Tape, 1DV Camera battery, and 1 FireWire cable per user
1 DV Camera, 1DV Tape with prerecorded footage, 1DV Camera battery, and 1 FireWire
cable for instructor
Overhead projector connected to instructor workstation
Flip Chart and markers
Setup:
♦
♦
♦
♦
♦
♦
♦
♦
♦
♦
♦
♦
Session length is approximately 2 hours
Instructor should be familiar with aspects/components of Final Cut Pro and non-linear
digital video editing
Instructor should be familiar with all aspects/components of this Final Cut Pro module
Instructor should be familiar with DV Cameras and FireWire setup
Check that all computers and equipment are functioning properly
Turn on and test projector
Prepare flip chart of key points/items to be covered (listed on next page). Make sure
view is unobstructed
Have users sit at their own computer
The disk contains some sample files that the users may use to practice importing. Copy
these files onto each workstation, including the instructor station
The Instructor Manual is set up so that you can see the corresponding User Manual page
next to it. To make copies of the User Manual for the participants of the workshop, print
out the PDF version from http://mll.arizona.edu/workshops.shtml?tutorialpdfs
When teaching this module, make sure you demonstrate steps and ideas for the
users FIRST. Do not allow them to follow along on their own while you are
demonstrating; they will have the opportunity to practice steps on their own after.
Be sure to read through and go over all material for the users, as they may not have
all of this information in their User Manuals
File name: FinalCutPro_Instructor.pmd
Last modified: 06/04/02
Copyright Arizona Board of Regents, 2002
University of Arizona
4
FINAL CUT PRO 2: Instructor Manual
Flip Chart Preparation:
♦
Flip Chart #1 - Key points to be covered
♦
♦
♦
♦
♦
♦
♦
♦
♦
File name: FinalCutPro_Instructor.pmd
Last modified: 06/04/02
Intro to Final Cut Pro
Key words/terms for Final Cut Pro
How to attach a DVCamera
How to open Final Cut Pro
Basic set up in Final Cut Pro
Capturing video and importing files
Basic Editing
Advanced Editing
Exporting and Printing to video
Copyright Arizona Board of Regents, 2002
University of Arizona
5
FINAL CUT PRO 2: Instructor Manual
INTRODUCTION AND OVERVIEW
Instructor Note: At this time, pass out the User Manual to the students. Turn the flip chart to page #1 so
the users may see the key points. Indicate that the students are Not to get ahead and do anything
without the instructor. Indicate that the students are Not to do anything on the computer besides the
indicated tasks at the indicated times. Remind them that they are to watch you first as you demonstrate,
then they will be able to practice on their own.
In this class, you will learn the basic layout and key terms to using Final Cut Pro 2. You will learn
how to open the program and set up the Project Settings, capture video and import files, edit, and
export the finished video to tape and QuickTime formats. Once you have successfully completed this
course, you will be able to answer most questions dealing with the basics of Final Cut Pro 2.
The following are the key points we will be covering:
♦
♦
♦
♦
♦
♦
♦
♦
♦
Intro to Final Cut Pro
Key words/terms for Final Cut Pro
How to attach a DVCamera
How to open Final Cut Pro
Basic set up in Final Cut Pro
Capturing video and importing files
Basic Editing
Advanced Editing
Exporting and Printing to video
File name: FinalCutPro_Instructor.pmd
Last modified: 06/04/02
Copyright Arizona Board of Regents, 2002
University of Arizona
6
FINAL CUT PRO 2: Instructor Manual
LECTURETTE 1: THE FINAL CUT PRO DESKTOP
Instructor Note: Read and go over the following information for the users. Be sure to demonstrate on
the overhead.
All of these are movable and the standard positions can be accessed again by selecting: Window >
Arrange > Standard
1.
The VIEWER is analogous to a source monitor. You use it to watch individual clips, mark edit
points, and apply effects. You can also load clips from the current sequence into the Viewer to
refine details such as edits, effects, and audio volume.
2.
The CANVAS is analogous to a record monitor and looks like the Viewer. It displays the
composited results of the edited sequence as you are creating it. You also use the Canvas to edit
clips in relation to one another in the sequence.
3.
The TIMELINE displays a chronological view of a sequence. As you drag the playhead along the
Timeline ruler, the current frame of the sequence is updated in the Canvas window and vice versa.
Video tracks are displayed in descending order. Track V1 is the base layer. Clips placed on track
V2 are composited onto the clips in track V1, and so on.
4.
The BROWSER is used to organize and locate the source material for your project and the finished
product. The Browser is not a collection of files; it is a collection of references to files, which you
organize in the context of your project. You can group Browser items in bins, which are similar to
folders. The Browser’s scrollable columns provide information about your files. When you move
Browser resources from one bin to another, their corresponding files are not moved. This means
that disk organization is independent of Browser organization. It also means that you can place the
same clip in the Browser for several projects.
5.
The MENU BAR is at the top of the screen and offers many options, including HELP
6.
The TOOL PALETTE contains tools for selecting and manipulating items in the Timeline (and
Canvas)
**NOTICE** there are familiar tools like the Magnifying glass to zoom in and out of the Timeline, the
Hand tool to move around, etc. Move and pause mouse over tool to read its name label, and there
are tools that have hidden tools underneath which are accessed by clicking and holding on them.
File name: FinalCutPro_Instructor.pmd
Last modified: 06/04/02
Copyright Arizona Board of Regents, 2002
University of Arizona
7
FINAL CUT PRO 2: Instructor Manual
EXERCISE 1: MATCHING TERMS AND CONCEPTS
Instructor Note: Have the users turn to Exercise 1 in their User Manuals. Allow them to complete the
matching exercise on their own. They must match the names to the windows that correspond to them.
After they have finished, go over the answers with them quickly.
Browser
Timeline
File name: FinalCutPro_Instructor.pmd
Last modified: 06/04/02
Menu Bar
Canvas
Tool Palette
Copyright Arizona Board of Regents, 2002
University of Arizona
8
FINAL CUT PRO 2: Instructor Manual
EXERCISE 2: CONNECT DV CAMERA VIA FIREWIRE
Instructor Note: Remember to demonstrate first, then allow the users to complete on their own, following
the steps in their User Manuals.
Steps:
1.
Connect firewire cable to breakout box
2.
Connect firewire cable to DVCam
3.
Turn DVCam On and switch to VCR/VTR mode
4.
Connecting DVCam via firewire is the only way to insure device control
EXERCISE 3: OPENING FINAL CUT PRO 2
Instructor Note: Remember to demonstrate first, then allow the users to complete on their own, following
the steps in their User Manuals.
Steps:
1.
Locate and Open Final Cut Pro 2
2.
If you haven’t yet connected the camera you will receive a warning that the program
doesn’t recognize the camera. Press Continue or attach camera via firewire at
this time.
3.
Open a New Project by selecting File > New Project
File name: FinalCutPro_Instructor.pmd
Last modified: 06/04/02
Copyright Arizona Board of Regents, 2002
University of Arizona
9
FINAL CUT PRO 2: Instructor Manual
EXERCISE 4: SET UP AUDIO AND VIDEO SETTINGS
Instructor Note: Remember to demonstrate first, then allow the users to complete on their own, following
the steps in their User Manuals.
Steps:
1.
Choose EDIT from menu bar
2.
Scroll down to Audio/Video Settings.
3.
Make sure the presets are as indicated by screenshot below for traditional digital
video.
4.
Notice: DV (digital video), NTSC (the color model for American TV), 48KHz (audio
level), Firewire (connection to device/camera), and 720x480 (size of digital video)
Click OK to save settings
File name: FinalCutPro_Instructor.pmd
Last modified: 06/04/02
Copyright Arizona Board of Regents, 2002
University of Arizona
10
FINAL CUT PRO 2: Instructor Manual
EXERCISE 5: SET PREFERENCES
Instructor Note: Remember to demonstrate first, then allow the users to complete on their own, following
the steps in their User Manuals.
Steps:
1.
Choose EDIT > Preferences
2.
First, check the General tab
3.
Make sure the presets are as indicated by screenshot below.
**Notice** the box next to “Abort capture on dropped frames”-This does just what it
states…it aborts the capture. It is often necessary to uncheck this box. If capture
is not able to capture the clips-even if they are short, uncheck this box. Often, one
or two frames (not a big deal) are dropped and this will abort the whole thing if the
Abort box is checked.
**Notice** The number of frames dropped will be reported because/if
the Report Dropped Frames box is selected
4.
Next, go to the Scratch Disk tab
5.
Select the first Set button
6.
Navigate to the drive and folder that you want files to be saved
7.
You MAY select other locations here in the secondary rows, but often computers
only have one hard drive so this step is unnecessary
8.
Click OK
File name: FinalCutPro_Instructor.pmd
Last modified: 06/04/02
Copyright Arizona Board of Regents, 2002
University of Arizona
11
FINAL CUT PRO 2: Instructor Manual
EXERCISE 6: EASY SET UP
Instructor Note: Remember to demonstrate first, then allow the users to complete on their own, following
the steps in their User Manuals.
If the user has no specifications you can use the Easy Setup option.
Steps:
1.
Access this through Edit > Easy Setup and selecting DV-NTSC
2.
Click SETUP
QUESTIONS FOR REVIEW
Q:
A:
How do you access the A/V Settings?
Edit > A/V Settings
Q:
A:
How do you access Preferences?
Edit > Preferences
Q:
A:
How do you access Easy Setup?
Edit > Easy Setup
Q:
A:
Which tabs should be addressed in the Preferences?
Scratch Disk, General
LECTURETTE 2: IMPORTING FILES
Instructor Note: Read and go over the following information for the users. Pass out the Job Aid. Have
everyone look at the list of files that can be imported into Final Cut Pro 2. These are specific to Final Cut
Pro 2 and are included on Job Aid.
1.
Video formats - MOV, Type 2 AVI
2.
Audio formats - AIFF, WAV, AVI, MOV, this includes an Audio CD
3.
Still image formats - TIFF, PICT, Photo JPEG, JPEG, TGA, and also PSD, GIF, SGI,
PNG, PNTG, QTIF, Quicktake, Photo CD, PCX, FLC/FLI, BMP, PICS animations
File name: FinalCutPro_Instructor.pmd
Last modified: 06/04/02
Copyright Arizona Board of Regents, 2002
University of Arizona
12
FINAL CUT PRO 2: Instructor Manual
EXERCISE 7: IMPORTING FILES
Instructor Note: Remember to demonstrate first, then allow the users to complete on their own, following
the steps in their User Manuals.
Steps:
1.
Choose FILE from the menu bar
2.
Choose Import > Import File
3.
Select desired file from hard drive
4.
Click Open to import file
Imported files will appear in the Browser
EXERCISE 8: LOG AND CAPTURE WINDOW
Instructor Note: Remember to demonstrate first, then allow the users to complete on their own, following
the steps in their User Manuals.
Steps:
1.
Make sure DVCam is connected, turned on and rewound or cued
2.
Choose FILE > Log and Capture
3.
On the left side of the Log and Capture window is the preview area. Directly below the
preview is a set of VCR controls that operate the camera.
** Directly below the controls is a display that indicates that there the device control status
that should state that “VTR OK” if there is device control. If this says “no communication”
either check the connection of camera to computer, make sure that camera is turned ON,
is in VCR or VTR- -NOT camera or record mode!
If you try this and it still doesn’t recognize the camera, you will have to manually control
the camera by pressing play on the camera itself-at which time the log and capture window
SHOULD display clip from the camera
File name: FinalCutPro_Instructor.pmd
Last modified: 06/04/02
Copyright Arizona Board of Regents, 2002
University of Arizona
13
FINAL CUT PRO 2: Instructor Manual
Additional Troubleshooting: Make sure that you check under File > Audio/Video
Settings and check that the Firewire options are selected as the Device Control
Preset and External Video. Then, try Easy Setup to see if that works.
4.
On the right of the Log and Capture window, you will see Logging, Clip Settings, and
Capture Settings tabs. First, go to the Capture Settings tab and notice the same
presets and settings that affect capture that are in the Audio/Video Settings window.
These options are also available in the Log and Capture window-specifically: Device
Control, Capture, and Scratch Disks. Whether you change these settings here, in the
Audio/Video Settings window, or by selecting the Easy Setup option- you are changing
the same settings, so whatever you select is mirrored in the other windows.
Notice that at the bottom it
states approximately how
many minutes of footage is
able to fit on the scratch disk.
File name: FinalCutPro_Instructor.pmd
Last modified: 06/04/02
Copyright Arizona Board of Regents, 2002
University of Arizona
14
FINAL CUT PRO 2: Instructor Manual
5.
Next, go to the Clip Settings tab
and make sure that you check the
setting on the bottom says that you
are capturing both Audio and Video if
you want both to be Captured/
Digitized
QUESTIONS FOR REVIEW
Q:
A:
Which settings are addressed in the log and capture window?
Clip Settings - Make sure Audio and Video is selected
Capture Settings - Select A/V settings (Device Control, CaptureInput, Scratch Disk)
File name: FinalCutPro_Instructor.pmd
Last modified: 06/04/02
Copyright Arizona Board of Regents, 2002
University of Arizona
15
FINAL CUT PRO 2: Instructor Manual
EXERCISE 9: CAPTURING VIDEO INTO FINAL CUT PRO
Instructor Note: Remember to demonstrate first, then allow the users to complete on their own, following
the steps in their User Manuals.
Steps:
1.
Make sure DVCam is connected and turned on
2.
Choose File > Log and Capture
3.
Control camera from VCR type buttons on the bottom of blank screen of Log and Capture
window
4.
Press triangular “play” button (looks like VCR play button) to begin playing using device
control of camera, press the double arrows both on the far left and right to Fast Forward
and Reverse
5.
On the lower right-hand corner of Log and Capture window notice the Capture options.
6.
Choose Now to Capture Now
7.
A Capture Now –Capturing window appears and the footage plays in this new preview
window. The computer is capturing or digitizing this footage.
8.
Press “escape” key on keyboard to end capturing
9.
If any frames were dropped it will alert you at this time, click OK
The clip is now in its own window
10.
You must then DRAG the clip into the Browser (or the Timeline)
11.
Name the clip. It is important to choose meaningful names for your clips, not something
as general as “Clip 1”.
12.
Close Clip and Log and Capture window when finished
Captured clips will should then appear in the browser
14.
BINS are folders in the Browser to help organize the browser- create a new bin by choosing
File > New > Bin
File name: FinalCutPro_Instructor.pmd
Last modified: 06/04/02
Copyright Arizona Board of Regents, 2002
University of Arizona
16
FINAL CUT PRO 2: Instructor Manual
EXERCISE 10: ADDING CLIPS TO TIMELINE
Instructor Note: Remember to demonstrate first, then allow the users to complete on their own, following
the steps in their User Manuals.
Steps:
1.
Drag desired clip from bin to
timeline, drop it into the V1 (Video
track One) row of the timeline
2.
Drag the next clip (or the same clip
if desired) into timeline, placing it
either next to the first clip, or in
another track
3.
Creating another track is achieved by dragging a clip so that it is above the default V1 track
and dropping it in the blank space (see picture). There can be 99 layers of video and audio.
4.
To play the Timeline, position the playhead at the beginning of the clip by clicking the
mouse there and press the space bar
EXERCISE 11: SHORTENING AND SPLICING CLIPS
Instructor Note: Remember to demonstrate first, then allow the users to complete on their own, following
the steps in their User Manuals.
Steps:
1.
Choose the Selection (arrow) tool
2.
Position the mouse and the end of a
clip in the Timeline, the cursor
changes to a vertical line with little
arrows- click and drag the ends of
clips in the timeline to shorten them
3.
Trim the end of the first clip and trim
the beginning of the second clip and
position them next to each other in
the same video track **Remember
that trimming the clip does not get rid
of the footage- to extend the clip just
drag it back out.
4.
You can only extend the clip to as
long as the clip that was digitized/
captured.
File name: FinalCutPro_Instructor.pmd
Last modified: 06/04/02
Copyright Arizona Board of Regents, 2002
University of Arizona
17
FINAL CUT PRO 2: Instructor Manual
5.
Choose the razor blade tool
6.
Splice clips by clicking on them with the
razor blade tool (this splits them wherever
you click). You can do this in the Timeline
and in the Viewer
7.
Click and hold the razor blade tool to expand
other tools and you will find a tool that looks
like a double razor- (see picture) using this
tool slices BOTH video and audio at the same
time
EXERCISE 12: ADDING TRANSITIONS BETWEEN CLIPS
Instructor Note: Remember to demonstrate first, then allow the users to complete on their own, following
the steps in their User Manuals.
Steps:
1.
Place first clip in V1 track and trim the
end
2.
Place second clip in V1 track and trim
the beginning. Then, position the clips
so they are touching in the timeline**notice: if you drag a clip on top of
another clip and then drag it off—you have
clipped off or clipped out of the original
clip
3.
Choose a transition from the transitions
window located in the Browser by
selecting the Effects tab, navigate to
Video Transitions > Dissolve > Cross
Dissolve
4.
Drag the transition you want into the
“transition” track of the timeline, between
clip #1 and clip #2
5.
To preview a transition do either a scrub
render or actually-physically render (rendering means preparing composited video for
viewing)
File name: FinalCutPro_Instructor.pmd
Last modified: 06/04/02
Copyright Arizona Board of Regents, 2002
University of Arizona
18
FINAL CUT PRO 2: Instructor Manual
5.
Scrub render by clicking and dragging through the top of the timeline marked with the
frames, second, etc. (see picture) while “scrubbing” through to see the transition you will
see the transition at the speed you scrub
Or
You can select the transition with the Selection (arrow) tool and select from the menu
bar: Selection > Render Selection. This will render the transition or prepare it to be
viewed in real time. It may take a few minutes. After it has finished rendering, you can
move the current time indicator in the Timeline to before the transition and you can hit the
spacebar to play the sequence and watch the transition
**Fade to Black** Fade to black is a transition that goes to between a clip and nothing.
Some programs requires you to put a black clip in the Timeline to fade between- Final Cut
Pro 2 does NOT require one. To fade in: trim the front of a clip and place a cross dissolve
on the edit point at the front of the clip. This is the same exact process as a regular
transition.
EXERCISE 13: CHANGING OPACITY OF A CLIP
Instructor Note: Remember to demonstrate first, then allow the users to complete on their own, following
the steps in their User Manuals.
Steps:
1.
Place a clip in track V2 or higher above another clip in
track V1
2.
Select the Clip Overlays button to display Opacity
Overlay (black) lines toward the top of the video clips
and Volume Level Overlay (red) lines in the middle of the audio clips
3.
Select the pen tool from the tool palette
4.
Click on the Opacity Overlay (black line) with the pen to make anchors on the black
line
5.
Anchors are movable points; drag them down and up using the Selection tool
6.
Drag Opacity Overlay (black line) to desired opacity: the top is 100% opacity-which
makes it impossible to see what is underneath and the bottom is 0% opacity in which
you see through it completely to the layer underneath
File name: FinalCutPro_Instructor.pmd
Last modified: 06/04/02
Copyright Arizona Board of Regents, 2002
University of Arizona
19
FINAL CUT PRO 2: Instructor Manual
EXERCISE 14: ADJUSTING AUDIO LEVELS AND PANNING
Instructor Note: Remember to demonstrate first, then allow the users to complete on their own, following
the steps in their User Manuals.
Steps:
1.
Place an audio clip in any audio track on
the Timeline
2.
View the volume by clicking the Clip Overlays button
3.
The volume is represented by the Volume
Level Overlay (red or green if track is
selected) line in the middle of the track
4.
Drag red line to desired levels for desired
volume
5.
For panning, there can be audio in two
different tracks. If the tracks were imported
as stereo tracks, they may be linked. To
change this so that each channel is adjusted
separately, select from the Menu Bar:
Modify > Stereo Pair so that there is NOT
a check mark by it. This is also the way to
create a stereo pair by “shift-selecting” two
tracks and then selecting Stereo Pair from
Modify again
Track On/Off button
OR
To adjust the panning in a mono channel
audio clip, drag the clip into the Viewer and
select the Channel 1 tab. Drag the purple
pan slider to adjust it. You may use the pen
tool here also to add anchor points which can
then be adjusted using the Selection (arrow)
tool
File name: FinalCutPro_Instructor.pmd
Last modified: 06/04/02
Left Channel
Right Channel
**There are yellow triangles specifying
whether the track is the right or left
channel. Also, check that the green
box is selected to have the track play.
Copyright Arizona Board of Regents, 2002
University of Arizona
20
FINAL CUT PRO 2: Instructor Manual
EXERCISE 15: CHANGING THE SPEED AND PLAY
DIRECTION OF A CLIP
Instructor Note: Remember to demonstrate first, then allow the users to complete on their own, following
the steps in their User Manuals.
Steps:
1.
Select desired clip with the Selection
(arrow) tool from the Timeline
2.
Choose from the Menu: Modify > Speed
3.
Reverse clip by checking the Reverse
box
4.
Change speed by entering new rate or
desired duration and clicking OK (a
negative number will also cause the clip
to play in reverse)
EXERCISE 16: CREATING TEXT TITLES
Instructor Note: Remember to demonstrate first, then allow the users to complete on their own, following
the steps in their User Manuals.
Steps:
1.
Select the Title button from the bottom
right hand corner of the Viewer and select
Text and then type of text that you want,
Text for stationary text, Scrolling Text,
etc.
2.
Then, select the Controls tab in the
Viewer window and replace sample text
with desired text.
3.
Click and drag the whole title screen
from the Viewer into the Browser
4.
Then, place the title into the Timeline
5.
Preview by rendering
File name: FinalCutPro_Instructor.pmd
Last modified: 06/04/02
Copyright Arizona Board of Regents, 2002
University of Arizona
21
FINAL CUT PRO 2: Instructor Manual
EXERCISE 17: RENDERING WORK AREA
Instructor Note: Remember to demonstrate first, then allow the users to complete on their own, following
the steps in their User Manuals.
Steps:
1.
Select Sequence > Render All
2.
Wait for rendering to finish (length of wait determined by length of movie and complexity of edits)
Rendering MUST be done to view transitions, titles, etc. and can sometimes take
hours (as does Exporting to QuickTime), but after rendering-Printing to Video happens
in real time
EXERCISE 18: RE-LINKING MEDIA FILES
Instructor Note: Remember to demonstrate first, then allow the users to complete on their own, following
the steps in their User Manuals.
Occasionally, when saved files are accessed from different computers- they are referenced incorrectly
and will not show up. You will then need to re-link them.
Steps:
1.
Select the clip, title, file, etc. from the Browser.
2.
Select File > Reconnect Media…
3.
Navigate to the location and re-link it to the source. It should be in the folder that was
set up on the Scratch Disk
File name: FinalCutPro_Instructor.pmd
Last modified: 06/04/02
Copyright Arizona Board of Regents, 2002
University of Arizona
22
FINAL CUT PRO 2: Instructor Manual
EXERCISE 19: PRINTING TO VIDEO
Instructor Note: Remember to demonstrate first, then allow the users to complete on their own, following
the steps in their User Manuals.
Steps:
1.
Make sure DVCam is connected and
turned on to VCR mode
2.
Select File from menu bar and hit
Print to Video
3.
Make selections for Leader, Project
Media, and Trailer
4.
Click OK
EXERCISE 20: EXPORTING TO QUICKTIME
Instructor Note: Remember to demonstrate first, then allow the users to complete on their own, following
the steps in their User Manuals.
Steps:
1.
Select File from the menu bar and go to Export
> Quicktime
2.
Select the Options button to access compression, frame rate, etc. if the end user has
specific specifications
3.
OR use a default setting. If unknown, make a
guess depending on the content of the video.
Also, 20kbps will make a smaller file size than
a 100kbps, BUT it will not look as nice-SO,
pick depending on whatever is the most
important to the end result
4.
OR Export > Final Cut Pro Movie and select
a self contained movie and then Import it into
Cleaner 5 and compress it using that program
5.
For all options, make sure that you name file
with the proper file extension (.mov) and of
course name it
File name: FinalCutPro_Instructor.pmd
Last modified: 06/04/02
Copyright Arizona Board of Regents, 2002
University of Arizona
23
FINAL CUT PRO 2: Instructor Manual
CONCLUSION
In this class you have learned the basic layout and key terms to using Final Cut Pro 2. You have
learned how to open the program and set up the Project Settings, capture video and import files, edit,
and export the finished video to tape and QuickTime formats.
Now that you have successfully completed this course, you are ready to take the Criterion test. After
passing the Criterion Test, you will be able to answer most questions dealing with the basics of Final
Cut Pro 2.
File name: FinalCutPro_Instructor.pmd
Last modified: 06/04/02
Copyright Arizona Board of Regents, 2002
University of Arizona
24
FINAL CUT PRO 2: Instructor Manual
CRITERION TEST:
25 min
Instructor Note: Instruct the students to turn to the last page of their User’s Manuals. Inform the
students they have 25 minutes to complete the Criterion Test, which should be more than enough
time. At the end of the time allowed, check the students’ final products to ensure they have passed
successfully.
This is the criterion test for the Final Cut Pro 2 module. It is going to test your comprehension of the
module you just participated in or allow you to test out of the Final Cut Pro 2 module.
1.
Capture several video clips onto the Browser in Final Cut Pro 2.
2.
Place them in the Timeline.
3.
Trim and split clips so that there are 7 different clips of about 4-5 seconds each.
4.
Put a scrolling title at the beginning that has 5 short lines of text such as:
♦
Directed by (your name)
♦
My Movie
♦
Starring Me
5.
Put a Cross Dissolve Transition between the first two clips about 1-2 seconds long.
6.
Make the third clip play in reverse.
7.
Make the fourth clip play is slow motion.
8.
Make the last clip fade to black.
9.
Put a stationary title of your choice at the end with one line of text such as:
♦
Year
10.
Adjust the fifth clip so that the audio is very soft.
11.
Export movie to Quicktime (using Streaming 20kbps-Music)
12.
Export movie again back onto the camera at the end of the footage.
File name: FinalCutPro_Instructor.pmd
Last modified: 06/04/02
Copyright Arizona Board of Regents, 2002
University of Arizona