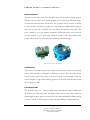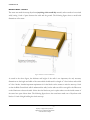
1
1 Volume APPLIED AI SYSTEMS INC. Intelligent Robotics & Artificial Intelligence Education Guide for Hemisson Intelligent Robot & Software INTELLIGENT ROBOTICS AND ARTIFICIAL INTELLIGENCE Education Guide for Hemisson Intelligent Robot & Software Applied AI Systems Inc. 3232 Carp Road Ottawa, Ontario K0A 1L0 CANADA Phone +1.613.839.6161 • Fax +1.613.839.6616 Email [email protected] • URL http://www.AAI.ca i Table of Contents BACKGROUND AND INTRODUCTION...................................................................................1 BACKGROUND/GOALS OF APPLIED AI SYSTEMS INC. (AAI) ..........................................................1 BACKGROUND OF K-TEAM, MAKER OF HEMISSON ROBOT ..............................................................2 BACKGROUND OF CYBERBOTICS, MAKER OF WEBOTS -HEMISSON, 3D SOFTWARE SIMULATION PACKAGE (USED WITH HEMISSON ROBOT) ......................................................................................2 INTRODUCTION TO HEMISSON ROBOT .............................................................................................3 CHAPTER 1: ARTIFICIAL INTELLIGENCE ..........................................................................4 WHAT IS ARTIFICIAL INTELLIGENCE?.............................................................................................4 EXAMPLE FIELDS IN AI ...................................................................................................................5 TYPES OF AI – NEW AI VS. GOFAI ................................................................................................6 GOFAI.....................................................................................................................................7 New AI – The biological perspective.......................................................................................8 REAL WORLD USES OF AI .............................................................................................................10 CHAPTER 2: COMMON ROBOTIC SENSORS/DEVICES...................................................17 PROPRIOCEPTIVE SENSORS ...........................................................................................................17 Rotational Sensors.................................................................................................................18 Limit Switch Sensors .............................................................................................................18 Inertial Measurement Units (IMU) and Gyroscopic sensors ................................................18 EXTEROCEPTIVE SENSORS ............................................................................................................18 Light Sensors .........................................................................................................................19 Ultrasonic Sensors ................................................................................................................20 Touch Sensors .......................................................................................................................20 Laser Range Finder...............................................................................................................20 Vision Sensors .......................................................................................................................21 ii Millimetre Wave Radar .........................................................................................................21 ROBOTIC DEVICES ........................................................................................................................22 GPS – Global Positioning System .........................................................................................22 CHAPTER 3: HEMISSON ROBOT...........................................................................................23 HEMISSON OPERATION .................................................................................................................23 Two Operational Switches (On/Off and Pgm/Exec) ..............................................................24 Four mode switches (Avoid, Line Follow, Dance, Run and download User Program) ........24 SERIAL PORT AND TV REMOTE COMMAND MODE .........................................................................28 Hemisson Serial Port Commands..........................................................................................31 TV remote controller commands ...........................................................................................33 CHAPTER 4: HEMISSON SOFTWARE ..................................................................................35 BOTSTUDIO SOFTWARE ................................................................................................................35 States - What the robot is doing ............................................................................................36 Transitions – What the robot is seeing ..................................................................................41 IR Light Level Detection........................................................................................................44 WEBOTS-HEMISSON AND BOTSTUDIO TOGETHER ........................................................................49 Changing Webots-Hemisson world view...............................................................................51 Opening your user program in BotStudio for simulation in Webots-Hemisson ....................51 Simulating the BotStudio file in Webots-Hemisson ...............................................................51 Moving objects in Webots-Hemisson.....................................................................................53 Webots-Hemisson World and Robot view..............................................................................55 DOWNLOADING TO THE REAL ROBOT............................................................................................56 HEMISSON UPLOADER ..................................................................................................................59 CHAPTER 5: BOTSTUDIO LESSONS AND SOLUTIONS ...................................................63 LESSON 1: OBSTACLE AVOIDANCE WITH STUCK TIMER ...............................................................63 LESSON 2: LINE FOLLOWING WITH OBSTACLE AVOID ..................................................................69 LESSON 3: LIGHT FOLLOW WITH LINE FOLLOW PROGRAM - APPLYING IT TO THE REAL ROBOT .....80 LESSON 4: WALL FOLLOWING HEMISSON .....................................................................................86 LESSON 5: MAJOR AI PROJECT ...................................................................................................102 APPENDIX..................................................................................................................................105 SOME AVAILABLE HEMISSON MODULES ....................................................................................105 B/W Linear Camera.............................................................................................................105 Ultrasonic Sensor ................................................................................................................106 iii BasicStamp2© Interface......................................................................................................106 External Programmer Interface ..........................................................................................107 Text to Speech......................................................................................................................107 Wireless Color Camera .......................................................................................................108 General I/O Turret ..............................................................................................................108 Infra-red (IrDA) Connection - Wireless communication.....................................................109 Radio Connection - Wireless communication......................................................................109 LCD Display........................................................................................................................109 In-Circuit-Debug Interface..................................................................................................110 SPECS AND DIMENSIONS FOR HEMISSON ARENA AND PERIPHERALS ..........................................111 Black Foam blocks ..............................................................................................................111 Hemisson Arena – Version 1 ...............................................................................................114 Hemisson Arena - Version 2................................................................................................117 Arena Floor .........................................................................................................................120 SUPPORT – KNOWN PROBLEMS AND SOLUTIONS .........................................................................122 iv Table of Figures Figure 1: Hemisson robot with felt pen and TV remote................................................................................................................................................... 3 Figure 2: COG Robot............................................................................................................................................................................................................ 10 Figure 3: COG robot with display screens and toys......................................................................................................................................................... 11 Figure 4: COG Playing the drums and sawing .................................................................................................................................................................. 11 Figure 5: Kizmet gazing at Dr. Breazeal............................................................................................................................................................................. 12 Figure 6: Different Kizmet faces ......................................................................................................................................................................................... 13 Figure 7: Detailed description of Kizmet feautures ......................................................................................................................................................... 13 Figure 8: PEARL robot and PEARL robot in retirement home ................................................................................................................................... 14 Figure 9: MINERVA robotic tourguide............................................................................................................................................................................. 15 Figure 10: Automated Spraying Vehicle ............................................................................................................................................................................. 15 Figure 11: Automated Golf Course mower ....................................................................................................................................................................... 16 Figure 12: Demeter harvesting a field................................................................................................................................................................................. 16 Figure 13: Hemisson IR (infra-red) sensors, two pointing down to do line following .............................................................................................. 19 Figure 14: Ultrasonic sensor for Hemisson ....................................................................................................................................................................... 20 Figure 15: SICK laser range finder with panning ability and attached digital camera ................................................................................................ 21 Figure 16: Small CCD camera module for the Hemisson robot.................................................................................................................................... 21 Figure 17: On/Off and Pgm/Exec switch on the side of the Hemisson robot.......................................................................................................... 24 Figure 18: Obstacle Avoid mode switch setting................................................................................................................................................................ 25 Figure 19: Line-Follow mode switch setting...................................................................................................................................................................... 26 Figure 20: Hole location for the felt pen that comes with each Hemisson.................................................................................................................. 26 Figure 21: Dance mode switch setting................................................................................................................................................................................ 27 Figure 22: Run and Download user program mode switch setting ............................................................................................................................... 27 Figure 23: Serial port and TV remote mode switch settings........................................................................................................................................... 28 Figure 24: Serial port of Hemisson robot and included serial port cable ..................................................................................................................... 28 Figure 25: Serial Port on the back of the computer ......................................................................................................................................................... 29 Figure 26: USB to Serial port Adapter and USB port shown on back of Notebook computer ............................................................................... 29 Figure 27: Serial port setup to communicate with Hemisson......................................................................................................................................... 30 Figure 28: TV remote direction commands....................................................................................................................................................................... 33 Figure 29: Location of IR receiver for TV remote and Hemisson being controlled by TV remote........................................................................ 34 Figure 30: Initial BotStudio start-up screen ....................................................................................................................................................................... 36 Figure 31: BotStudio button desciptions............................................................................................................................................................................ 36 Figure 32: BotStudio new state ............................................................................................................................................................................................ 37 Figure 33: BotStudio State name change............................................................................................................................................................................ 38 Figure 34: BotStudio Forward state .................................................................................................................................................................................... 39 Figure 35: BotStudio Right state with right LED turned on .......................................................................................................................................... 40 Figure 36: BotStudio saved example program................................................................................................................................................................... 41 Figure 37: BotStudio first ‘new’ transition between states .............................................................................................................................................. 42 Figure 38: BotStudio ‘Near left’ transition ......................................................................................................................................................................... 44 Figure 39: BotStudio ‘Near right’ transition ...................................................................................................................................................................... 45 Figure 40: BotStudio two added ‘Far right’ transitions .................................................................................................................................................... 46 Figure 41: Hemisson robot stuck due to sensor blind spot ............................................................................................................................................ 47 Figure 42: BotStudio Clock Timer location ....................................................................................................................................................................... 48 Figure 43: Webots-Hemisson simulation package............................................................................................................................................................ 49 Figure 44: Webots-Hemisson Lady Bug icon.................................................................................................................................................................... 49 Figure 45: Desktop with Webots-Hemisson and BotStudio........................................................................................................................................... 50 Figure 46: Logitech Laser scroll mouse .............................................................................................................................................................................. 51 Figure 47: BotStudio running simulated robot in Webots-Hemisson........................................................................................................................... 52 Figure 48: Running Webots-Hemisson simulation........................................................................................................................................................... 53 Figure 49: Moving objects along the ground plane .......................................................................................................................................................... 54 v Figure 50: Moving object to other ground planes ............................................................................................................................................................ 55 Figure 51: Webots-Hemisson World and Robot view ..................................................................................................................................................... 56 Figure 52: Propped up Hemisson robot so wheels aren’t touching the ground.......................................................................................................... 57 Figure 53: Settings of mode switches for BotStudio download ..................................................................................................................................... 57 Figure 54: BotStudio uploading user program to real robot ........................................................................................................................................... 58 Figure 55: BotStudio display when running the real robot ............................................................................................................................................ 59 Figure 56: Mode switch settings for the Hemisson Uploader ........................................................................................................................................ 60 Figure 57: Hemisson Firmware uploader v1.5 .................................................................................................................................................................. 61 Figure 58: Red and Green LED are solidly lit up when in Pgm mode ......................................................................................................................... 61 Figure 59: Hemisson Uploader success screen.................................................................................................................................................................. 62 Figure 60: Obstacle Avoidance Hemisson......................................................................................................................................................................... 63 Figure 61: Unfinished Obstacle Avoidance program....................................................................................................................................................... 64 Figure 62: Return forward transition added....................................................................................................................................................................... 65 Figure 63: Added Stuck state with timer ............................................................................................................................................................................ 66 Figure 64: Stuck state wheel speed settings........................................................................................................................................................................ 67 Figure 65: Final Transition timer out of the Stuck state.................................................................................................................................................. 68 Figure 66: Line following Hemisson................................................................................................................................................................................... 69 Figure 67: Four states added to Avoid program ............................................................................................................................................................... 70 Figure 68: Shift Left state in the line follow program ...................................................................................................................................................... 71 Figure 69: Detect Obstacle state in line follow program ................................................................................................................................................. 72 Figure 70: no obstacle transition to line following ........................................................................................................................................................... 73 Figure 71: Sense line left transition in line follow program............................................................................................................................................. 74 Figure 72: Return to Hunt line transition in line follow program.................................................................................................................................. 75 Figure 73: lost line transition in line following program.................................................................................................................................................. 76 Figure 74: Obstacle detection transitions in line follow program .................................................................................................................................. 77 Figure 75: All sensor transitions in the line following program ..................................................................................................................................... 78 Figure 76: Final Line follow program ................................................................................................................................................................................. 79 Figure 77: Light Following Hemisson ................................................................................................................................................................................ 80 Figure 78: First transition in the light following program ............................................................................................................................................... 82 Figure 79: Near right sensor settings in light follow program ........................................................................................................................................ 83 Figure 80: Modified lost line transition in light following program............................................................................................................................... 84 Figure 81: New value setting for Proximity IR Sensors................................................................................................................................................... 85 Figure 82: Wall following Hemisson................................................................................................................................................................................... 86 Figure 83: Wall follow arena to test the Hemisson........................................................................................................................................................... 87 Figure 84: Initial forward state in wall follow program ................................................................................................................................................... 89 Figure 85: Regular forward state in wall follow program ................................................................................................................................................ 89 Figure 86: Three front transitions between two forward states ..................................................................................................................................... 90 Figure 87: Front sensor value for the transitions between forward states .................................................................................................................. 90 Figure 88: Spin Right state in the wall following program .............................................................................................................................................. 91 Figure 89: Pivot Left state in the wall following program ............................................................................................................................................... 91 Figure 90: Curve Left state in the wall following program.............................................................................................................................................. 92 Figure 91: Lost Wall Transition between Forward and Pivot Left state....................................................................................................................... 93 Figure 92: Near left transition between two turning states ............................................................................................................................................. 94 Figure 93: Lost Wall transition between the left turning states ...................................................................................................................................... 95 Figure 94: See wall front transition between left turn and forward state...................................................................................................................... 96 Figure 95: Detect corner near right transition ................................................................................................................................................................... 97 Figure 96: Track wall transition back to the forward state.............................................................................................................................................. 97 Figure 97: Robot path based on Keep off wall transition sensor value ........................................................................................................................ 98 Figure 98: Keep off wall transition in wall following program....................................................................................................................................... 99 Figure 99: Stuck transitions in the wall following program...........................................................................................................................................100 Figure 100: Final Lost wall timer transition in wall follow program ...........................................................................................................................101 Figure 101: Cleaning robot arena.......................................................................................................................................................................................102 Figure 102: Arena after cleaning ........................................................................................................................................................................................103 Figure 103: Black and White foam blocks for the Hemisson .......................................................................................................................................104 Figure 104: Light source and light wall.............................................................................................................................................................................104 Figure 105: Black and White Linear camera for Hemisson...........................................................................................................................................105 Figure 106: Ultrasonic Sensor Module .............................................................................................................................................................................106 Figure 107: BasicStamp2© Interface module..................................................................................................................................................................106 Figure 108: External Programmer module.......................................................................................................................................................................107 Figure 109: Text to Speech module ..................................................................................................................................................................................107 Figure 110: Wireless Video Camera module....................................................................................................................................................................108 Figure 111: General I/O module ......................................................................................................................................................................................108 Figure 112: Hemisson Wireless communication modules.............................................................................................................................................109 Figure 113: Hemisson LCD Display module ..................................................................................................................................................................109 Figure 114: In-Circuit-Debug Interface............................................................................................................................................................................110 Figure 115: Black Foam cut-out for Hemisson...............................................................................................................................................................111 Figure 116: Foam cut-out with two sides.........................................................................................................................................................................112 Figure 117: Foam cut-out shape designed to turn with robot ......................................................................................................................................112 vi Figure 118: Foam cut-out under robot body foam layer ...............................................................................................................................................113 Figure 119: Hemisson Arena with dimensions................................................................................................................................................................114 Figure 120: Actual Arena with foam blocks on the corners .........................................................................................................................................115 Figure 121: Foam block under the arena wall with Hemisson IR detecting the wall ...............................................................................................115 Figure 122: Used Velcro to attach walls in the corners .................................................................................................................................................116 Figure 123: Long wall of the arena....................................................................................................................................................................................117 Figure 124: Short wall of the arena....................................................................................................................................................................................118 Figure 125: Four arena walls together...............................................................................................................................................................................119 Figure 126: Cardboard slot arena.......................................................................................................................................................................................119 Figure 127: 3x5 paper floor arena with line following lines ..........................................................................................................................................120 Figure 128: Arena floor – 15 pieces of white paper taped together ............................................................................................................................120 Figure 129: Arena floor inside arena .................................................................................................................................................................................121 Figure 130: Line following floor in the arena ..................................................................................................................................................................121 Figure 131: Noise Check for light saturation...................................................................................................................................................................126 Figure 132: Noise Check state set same as Straight State ..............................................................................................................................................126 Figure 133: RNC transition back to the Straight state ...................................................................................................................................................127 Figure 134: Transition that detects an actual object to avoid .......................................................................................................................................127 vii B A C K G R O U N D A N D I N T R O D U C T I O N Background and Introduction Background of AAI and K-Team companies and Hemisson robot Background/Goals of Applied AI Systems Inc. (AAI) A pplied AI Systems, Inc. was established in 1983, and is the longest standing Artificial Intelligence (AI) speciality company in Canada. We develop artificial intelligence systems with real world applications. Applied AI Systems' long-term commitment to the development of AI technology, based on the "paying respect to science" approach, is now reaching its predicted potential. Applied AI Systems Inc. has an international scope, and is in close contact with members of the Artificial Intelligence community. Our system developers constantly travel the globe to meet other researchers and practitioners, and we also participate in AI conferences, workshops, and symposia. We have written this document to not only discuss and use the Hemisson robot but also to introduce the field of AI along with real world applications and common robotic sensors and devices used in the mobile robotics field. It is our hope that the reader will gain an increased understanding of the sometimes complicated AI field of study which increases in popularity, necessity and importance every day. 1 Property of Applied AI Systems, Inc. Duplication or unauthorized distribution of this document is illegal B A C K G R O U N D A N D I N T R O D U C T I O N Background of K-Team, maker of Hemisson robot K-Team S.A. is a Swiss company that develops, manufactures and markets the Khepera Linecard, high-quality mobile minirobots for use in advanced education and research and the Hemisson Linecard, small robots for teachers and hobbyists. K-Team S.A. was the first to manufacture autonomous miniature mobile robot. The company's experience in the field of autonomous mobile robotics applications allows it to provide best of breed solutions to the most demanding academic and commercial research laboratories in the world. The Khepera Linecard is the choice of over 500 universities and industrial research centers. K-Team S.A. aims to consolidate its position as leader in the fields of research and education. Web Address: http://www.k-team.com/ Background of Cyberbotics, maker of Webots Hemisson, 3D software simulation package (used with Hemisson robot) Cyberbotics was founded in 1998 by Olivier Michel as a spin off company from the MicroComputing and Interface Lab (LAMI) of the Swiss Federal Institute of Technology, Lausanne (EPFL). Cyberbotics is developing Webots, a 3D mobile robot simulator for research and education. Cyberbotics is also developing custom 3D mobile robot simulators for a number of companies and universities. Web Adress: http://www.cyberbotics.com/ 2 Property of Applied AI Systems, Inc. Duplication or unauthorized distribution of this document is illegal B A C K G R O U N D A N D I N T R O D U C T I O N Introduction to Hemisson robot Hemisson belongs to a new robot line for teachers and hobbyists. Hemisson is the first ready-to-use programmable robot offered in this lower price range: plug it in your PC, program its behaviour with BotStudio, simulate it with Webots-Hemisson and apply it on the real robot. Figure 1: Hemisson robot with felt pen and TV remote Detailed information regarding Hemisson can be found in the Hemisson User Manual which should be read by the educator planning on teaching with this robot. A short description of the robot will be given here. Hemisson is a two wheel robot with zero turning-radius. It has 8 light sensors, six of which are for obstacle avoidance and the other two are pointed down for line following. It runs on a standard 9V battery and has a serial port through which the user can program the robot. The robot also has two LEDs located at the front and a buzzer both of which the user will be able to control when programming the robot with BotStudio. There are many more functions available on Hemisson, which will either be discussed in later chapters and/or can be found in the Hemisson User Manual. 3 Property of Applied AI Systems, Inc. Duplication or unauthorized distribution of this document is illegal A R T I F I C I A L 1 Chapter I N T E L L I G E N C E Artificial Intelligence Artificial Intelligence (AI) description, examples and uses What is Artificial Intelligence? T here is no one industry standard definition for AI, because to attempt to define it is a very complicated undertaking, to say the least. Even after years of research and study, AI continues to change and evolve, and as our understanding of both artificial and natural intelligence increases, our definition of what AI is or isn’t also must evolve, causing innumerable disagreements and discussion between AI researchers all over the world. “Simply stated, Artificial Intelligence is the study of the abilities for computers to perform tasks which currently are better done by humans. AI is an interdisciplinary field where computer science intersects with philosophy, psychology, linguistics, engineering and other fields. Humans make decisions based on experience and intuition. The essence of AI is the integration of computers to mimic this learning process.” 1. Indeed, the field of AI has grown to be so much more than attempts to simulate (human) intelligence so it is better to not initially focus on the definition but instead on the different fields in AI itself. In fact once you’ve implemented an AI concept into a computer or robot and therefore you know (or can predict) what is happening within that computer it ceases to be AI and just becomes software. The same would be said for human intelligence if one could discover exactly how we work and predict future evolution of our intelligence. 1. Text taken from http://www.cwrl.utexas.edu/~tonya/cyberpunk/projects/ai/definition.html 4 Property of Applied AI Systems, Inc. Duplication or unauthorized distribution of this document is illegal A R T I F I C I A L I N T E L L I G E N C E Example fields in AI Pattern Recognition involves determining the characteristics in specific samples and sorting them into classes; a process called classification. This is usually done with Machine Learning techniques such as Artificial Neural Networks or just Neural Networks (NN) which are based on the neurons in the human brain. These allow the system to adapt to the data given to it. It can be applied to detecting single words in speech, recognizing voices, sorting scanned objects by type and filtering out unwanted pictures (among many others). Natural Language Processing is the task of extracting meaning from text or speech. This allows a computer to not just listen and record what you are saying, but because the computer begins to understand the meaning behind what you are saying it can then begin to predict what you’ll say next and recognize errors in what it heard. If a word doesn’t fit in a sentence because it has no relation to the rest of the sentence, then it can be detected and corrected and not just blindly recorded. Another popular aspect of AI is Artificial Life which involves modelling and mimicking living systems or the Animat approach, i.e., to the synthesis of simulated animals or real robots, whose inner workings are as much inspired from biology as possible. This approach offers one of the most promising techniques of controlling robots whose primary task is mobility. Robots must navigate around unstructured (changing) cluttered environments filled with moving and fixed obstacles (chairs, tables, people, rocks and trees) but continue to follow a desired path and reach a destination without getting lost. This is something animals (including people of course) and insects do very well and is best shown when navigating an environment where one has never been and has heard nothing about. Animals and insects apply the lessons previously learned (or through instincts) to the new environment and are able to quickly and seamlessly adapt to changing conditions all the while looking for landmarks to remember where they have been and how to return. This is only simplified somewhat when given some information about the new environment such as a map 5 Property of Applied AI Systems, Inc. Duplication or unauthorized distribution of this document is illegal A R T I F I C I A L I N T E L L I G E N C E because then localization (knowing where you are) on the map and where you want to go is also extremely difficult due to imperfect sensors and an ever changing environment in the real world. It is through studying these ‘simple’ creatures and their ‘simple’ rules and trying to apply them to robots do we expect the greatest advancement in mobile robotics so this is where the lessons in this unit will be focused. This field is called Biologically Inspired AI or New AI, which will be discussed more in the next sections. Another branch of Biologically Inspired AI is Swarm Intelligence. This relates to multiple robots or systems working together to solve a given problem. As an independent entity each of the robots shows none or very little intelligence and could not hope to solve a problem on its own. When a number of these robots are placed together, however, their interactions between one another and with the environment evolve to form a problem solving intelligence seemingly by accident, which results with benefits for all. An example of this in nature is the interaction between ants and bees in their nests, which is why they are often used as models for AI researchers. Only a small part of the AI field has been mentioned here, mostly relating to robotics, but there are many more branches that are equally interesting and for more details on these and those mentioned, the internet is the easiest place to find information. Types of AI – New AI vs. GOFAI There are two main fields that you can fit AI research and researchers into. These are called “New AI” (Biological AI or Behaviour-based AI) as mentioned before and “GOFAI” (Classical AI, Symbol Handling AI or Traditional AI). John Haugeland coined the phrase “GOFAI” which stands for Good Old Fashioned AI. There is continuous on going debate, as to which of the two types is better. It would appear that New AI is winning out. 6 Property of Applied AI Systems, Inc. Duplication or unauthorized distribution of this document is illegal A R T I F I C I A L I N T E L L I G E N C E GOFAI For a field which has only been around since 1956, GOFAI has achieved a great deal. It has been used to attempt to solve such problems as reasoning, planning, natural language processing, vision and robotics. One of the more well known accomplishments was when the chess playing IBM supercomputer, Deep Blue, beat Gary Kasparov the Chess Grand Master. GOFAI is certainly not biological; it uses a rule based system, sometimes called Symbol handling, which requires the designer to develop a computer that uses a rule book to know what action to perform based on a certain input (symbol). The idea is that as more rules are created for a given environment, the computer starts to simulate intelligence as it interacts with this environment. As an example, a system (computer) will only know that bears are dangerous if it has been explicitly told this and a rule has been made. The rule book would then say if bears are around then it should climb trees. This simple example shows one of the faults of GOFAI. It requires knowledge of in which environment it will be operating and all possible things that can happen when it is operating there. For things like planning or natural language processing it becomes exponentially more difficult to predict what it will see and thus requires too much computation. GOFAI researchers believe there is no point in looking at the way nature has produced intelligence because computers are just different from brains. This is true in that computers are superior to brains in the way that they can remember huge amounts of data that they can search many times over. They can for example plan a large number of chess moves ahead, whereas people can only really best plan 3 moves ahead. Computers are also inferior to brains in that if their programs have even the slightest error, they will come to a halting stop. The details are not important, just that computers and brains solve problems differently. A common analogy for GOFAI is flight. We have built machines that fly but don’t flap their wings, in other words we have solved flight without copying nature and in fact copying nature would have been a mistake. Another famous argument was put forward by a philosopher called John 7 Property of Applied AI Systems, Inc. Duplication or unauthorized distribution of this document is illegal A R T I F I C I A L I N T E L L I G E N C E Searle in "Minds, Brains and Programs" in the journal Behavioral and Brain Sciences in 1980, called the ‘Chinese Room Argument’. The Argument (from http:// www.cit.gu.edu.au/~terryd/subjects/intro.to.ai/lecture9.html) Searle is seated at a mahogany desk with a nice inlaid leather top. On the desk are pens, pencils, a desk lamp and a cup of coffee with three lumps of sugar. In front of the desk are two windows. Pieces of paper covered in squiggles plop in through one of the windows. Searle examines the squiggles and looks them up in a rulebook (which is next to his cup of coffee). The rulebook is in English, and it tells Searle what to do with the squiggles: he can reproduce them, modify them, destroy them, and/or create new ones, and sometimes he passes the results back through the other window. Now unbeknownst to Searle, there are Chinese computer programmers outside the room, feeding Chinese sentences into it, and, from their point of view, getting Chinese sentences back in reply. The rule book is so sophisticated, and Searle so adept at using it, that the room appears to understand Chinese and this is certainly what the programmers believe. But, says Searle, the room understands nothing, for he does not understand Chinese, nor does the room, or anything else in it, and nor do the room and its contents as a whole. From this, he says, it follows that computers do not understand their input, for they too manipulate input squiggles according to formal rules, or as he puts it, "perform computational operations on formally specified elements". (Searle, 1980.) The conclusion to this is that promoters of GOFAI believe that if one can develop a system that simulates understanding so well that, from an observers point of view, it appears intelligent then they have achieved intelligence, Searle however disagrees. New AI – The biological perspective By the mid 1980s, researchers began realizing that the current way of doing AI was full 8 Property of Applied AI Systems, Inc. Duplication or unauthorized distribution of this document is illegal A R T I F I C I A L I N T E L L I G E N C E of problems. As was already mentioned, writing a ‘top-down’ program, i.e. putting a number of rules in a robot’s ‘head’ easily becomes very complicated and sometimes impossible. From a biological point of view this is backwards to nature. Nature takes a very long time to evolve its abilities and it isn’t until much later do rules emerge based on what it has learned. Researchers believe that our brains have evolved in order to control our behaviour and ensure our survival. It is now agreed that intelligence always manifests itself in behaviour, so it is behaviour that we must understand. A book was written which characterized this method of AI called, Understanding Intelligence – by Rolf Pfeifer and Christian Scheier. It consists of three components: (1) Modelling certain aspects of biological systems (2) Abstracting general principles of intelligent behaviour, and (3) Applying these principles to the design of intelligent systems. What this means is that our AI robot would be allowed to move in an environment with only the most basic rules initially programmed. Then as interactions take place, different behaviours are caused which either improves the current situation or make things worse (like in nature where the animal might get killed). After enough time performing different behaviours the robot would generalize on what it has seen and a rule would be created for that situation. The rule however would not be written in stone, and could change at a later date if a new situation warranted it. Although the New AI robot might not perform as well as the GOFAI robot in the beginning, it would be much better at adapting to unexpected changes, which are guaranteed to come up in the real world. For example, a New AI system that is always climbing trees, even when not necessary, would avoid both bears (as would the GOFAI system) and wolves (which the GOFAI system would not) possibly by accident but then later on purpose. Using a biological model is quite possibly the only hope one has in trying to develop a system that will function in the unstructured, changing and sometimes dangerous environment of the real world. The GOFAI model on the other hand, 9 Property of Applied AI Systems, Inc. Duplication or unauthorized distribution of this document is illegal A R T I F I C I A L I N T E L L I G E N C E would only excel in a structured, lab style, restricted indoor environment. Real world uses of AI This section will show a few of the more interesting AI applications, but is only a very short list of the vast amount of projects being done. MIT – Massachusetts Institute of Technology – AI Lab – Humanoid Robotics Group http://www.ai.mit.edu/projects/humanoid-robotics-group/ COG Robot COG is potentially the most advanced intelligent humanoid machine to date. Its mimicry of human motion, and learning abilities provide his makers and researchers with a fascinating and unique learning environment upon which to expand general knowledge about AI, as well as specific knowledge about the human condition. Figure 2: COG Robot 10 Property of Applied AI Systems, Inc. Duplication or unauthorized distribution of this document is illegal A R T I F I C I A L I N T E L L I G E N C E Figure 3: COG robot with display screens and toys Figure 4: COG Playing the drums and sawing Kizmet Robot Kizmet is an expressive anthropomorphic robot designed to engage people in natural and expressive face-to-face interaction. Inspired by infant social development, psychology, ethology, and evolution, this work integrates theories and concepts from these diverse viewpoints to enable Kismet to enter into natural and intuitive social interaction with a human caregiver and to learn from them, reminiscent of parentinfant exchanges. To do this, Kismet perceives a variety of natural social cues from 11 Property of Applied AI Systems, Inc. Duplication or unauthorized distribution of this document is illegal A R T I F I C I A L I N T E L L I G E N C E visual and auditory channels, and delivers social signals to the human caregiver through gaze direction, facial expression, body posture, and vocal babbles. The robot has been designed to support several social cues and skills that could ultimately play an important role in socially situated learning with a human instructor. These capabilities are evaluated with respect to the ability of naive subjects to read and interpret the robot's social cues and the robot's ability to perceive and appropriately respond to human social cues. Figure 5: Kizmet gazing at Dr. Breazeal 12 Property of Applied AI Systems, Inc. Duplication or unauthorized distribution of this document is illegal A R T I F I C I A L I N T E L L I G E N C E Figure 6: Different Kizmet faces Figure 7: Detailed description of Kizmet feautures 13 Property of Applied AI Systems, Inc. Duplication or unauthorized distribution of this document is illegal A R T I F I C I A L I N T E L L I G E N C E CMU – Carnegie Mellon University The Robot Learning Laboratory http://www-2.cs.cmu.edu/~rll/robots/ PEARL (PERSONAL ROBOTIC ASSISTANTS FOR THE ELDERLY) Robot The goal of this project is to develop mobile, personal service robots that assist elderly people suffering from chronic disorders in their everyday life. They are currently developing an autonomous mobile robot that "lives" in a private home of a chronically ill elderly person. Figure 8: PEARL robot and PEARL robot in retirement home Minerva robotic tour guide Minerva is a talking robot designed to accommodate people in public spaces. She perceives her environment through her sensors (cameras, laser range finders, ultrasonic 14 Property of Applied AI Systems, Inc. Duplication or unauthorized distribution of this document is illegal A R T I F I C I A L I N T E L L I G E N C E sensors), and decides what to do using her computers. Minerva actively approaches people, offers tours, and then leads them from exhibit to exhibit. When Minerva is happy, she sings and smiles at nearby people. But don't block her way too often-otherwise, she'll become frustrated and might frown at you and honk her horn! Figure 9: MINERVA robotic tourguide National Robotics Engineering Consortium – NREC http://www.rec.ri.cmu.edu/ Automating Spraying Vehicles The Consortium for Agricultural Spraying is automating vehicles so that one worker can remotely oversee four spraying vehicles running at night. Figure 10: Automated Spraying Vehicle 15 Property of Applied AI Systems, Inc. Duplication or unauthorized distribution of this document is illegal A R T I F I C I A L I N T E L L I G E N C E Automated Golf Course Mowing The mowing project is automating a mower so that it can mow a golf course safely and precisely, and sense small obstacles (like golf balls) reliably. Figure 11: Automated Golf Course mower Demeter Teamed with New Holland, NREC is developing three levels of harvester automation. The first two enable fewer, lesser-skilled operators to provide above-average performance. The last will enable a machine to harvest a field by itself. Figure 12: Demeter harvesting a field 16 Property of Applied AI Systems, Inc. Duplication or unauthorized distribution of this document is illegal C O M M O N R O B O T I C S E N S O R S / D E V I C E S 2 Chapter Common Robotic Sensors/Devices Most common robotic sensors and devices used in the robotic industry A utonomous mobile robots or unmanned aerial vehicles are often equipped with sensors and devices that can track position and provide information about the environment that one navigates in. These sensors/devices generally provide proximity detection, odometry and localization for a robot. A variety of different types of sensors can and should be found throughout and around a robot in order to have a robust robotic system. There are two main categories of sensors, proprioceptive and exteroceptive. Proprioceptive Sensors These are sensors which are either used to measure some kinetic quantity (such as velocity or acceleration) or sense something that is not related to the external environment. These measurements are still needed in order to manoeuvre in the external environment but are more related to what the robot senses about itself. Some examples follow. 17 Property of Applied AI Systems, Inc. Duplication or unauthorized distribution of this document is illegal C O M M O N R O B O T I C S E N S O R S / D E V I C E S Rotational Sensors These are used to measure the rotation of a shaft or axis or the angle of a robotic arm. For example, as the shaft spins to turn the wheels of the robot, a number of electrical pulses are transmitted by the rotational sensor (also called an encoder) as the shaft does each revolution. The greater the number of pulses per revolution, the more precise the sensor can be on exactly how far the robot has travelled. This of course assumes one knows the circumference of the wheel. There will of course be error in this calculation because although the number of pulses can be counted exactly, it is possible, due to wheel slippage or uneven terrain, that the estimated distance travelled by the robot will become increasingly different than the actual distance travelled as time goes on. These sensory are also used to measure acceleration and velocity of a robot as well as perform odometry. Odometry means to determine the robot’s relative change in position based on an initially known position. Limit Switch Sensors These touch sensors are used in moving parts like a gripper arm so as to know when they have reached their movement threshold. They can also sometimes be found in the steering control of robots so that the movement can be halted once the wheels have turned to the maximum range. Inertial Measurement Units (IMU) and Gyroscopic sensors These find more use in aerial or marine robots (where rotational sensors would be less effective) and can be used to detect angular velocity, linear acceleration and other sensing needs required for non-ground and therefore non-wheeled robots. Exteroceptive Sensors These sensors are used to determine a representation of the external environment such as proximity of objects to the robot or visible physical features that the robot might need to know (like cliffs or stairs). This sensor category can be further divided into passive and active sensors. Passive sensors are those that use ambient radiation (uses 18 Property of Applied AI Systems, Inc. Duplication or unauthorized distribution of this document is illegal C O M M O N R O B O T I C S E N S O R S / D E V I C E S the light or radiation that is already around us). Active sensors illuminate objects with some form of radiation in order to sense or measure. Some examples follow. Light Sensors Light sensors are used to differentiate light levels reflected from bright or dark surfaces, they can be used to determine approximate distances to objects as well as follow a dark (or bright) line on a bright (or dark) floor. This will be shown while using Hemisson. The Hemisson robot uses IR (infra-red) sensors for both proximity detection and line following as shown in the following figure. The IR sensors are used to detect obstacles at very close range (0.1-3cm), like in Hemisson, but IR’s are available which can detect up to approximately 1m range. They are best suited for detecting bright coloured, hard and shiny surfaces. Figure 13: Hemisson IR (infra-red) sensors, two pointing down to do line following 19 Property of Applied AI Systems, Inc. Duplication or unauthorized distribution of this document is illegal C O M M O N R O B O T I C S E N S O R S / D E V I C E S Ultrasonic Sensors These are also proximity sensors like the light sensors, but they offer a longer range of detection. However they cannot detect obstacles at very close range. Detection ranges in Ultrasonic sensors between 3cm and 6m. The operation of these sensors are similar to how bats detect obstacles by sending out a high frequency (40kHz which means we can’t hear it) pulse that is reflected off of an obstacle and returns to the robot. The pulse is timed so as to give distance information. Ultrasonic sensors work best with hard flat surfaces to give good pulse reflection, whereas soft round surfaces (like people) tend to absorb or scatter the pulses resulting in decreased range. Figure 14: Ultrasonic sensor for Hemisson Touch Sensors These sensors are simple switches that require a little pressure in order to be activated and are often referred to as bumpers or whiskers on a robot. They are used to detect contact between walls, other robots or any other moving or fixed obstacles. They can also be designed to keep contact with the ground so as the robot will halt before it falls off of a ledge or a table. Laser Range Finder This is a high accuracy (+/- 1mm) proximity sensor that detects in a pencil width beam all obstacles up to 50m away and at 180 degrees. This sensor is often used to build very detailed high accuracy maps of an area and can be further modified by adding a tilting system (to scan in a vertical motion) to allow 3-d map building or obstacle detection. 20 Property of Applied AI Systems, Inc. Duplication or unauthorized distribution of this document is illegal C O M M O N R O B O T I C S E N S O R S / D E V I C E S Figure 15: SICK laser range finder with panning ability and attached digital camera Vision Sensors These sensors are often but not always CCD cameras that take images of scenery for processing either onboard (done on the robot) or are transmitted to a host computer for processing. These images are used for any number of things from, obstacle detection, face acquisition, landmark detection, map building and localization of the robot. Figure 16: Small CCD camera module for the Hemisson robot Millimetre Wave Radar Some sensors such as laser range finders or vision sensors can degrade in non ideal 21 Property of Applied AI Systems, Inc. Duplication or unauthorized distribution of this document is illegal C O M M O N R O B O T I C S E N S O R S / D E V I C E S conditions such as flying ice and snow, changing light condition and lack of contrast. A millimetre wave radar is not as vulnerable to these harsh conditions and therefore is preferable in the construction, mining and agricultural industries. It is also used by NASA in planetary-exploration environments and was used on the Nomad robot in Patriot Hills, West Antarctica. It functions by transmitting electromagnetic radiation through an antenna. As the signal is sent out, objects reflect, refract and absorb it. The radiation that returns is converted to an amplitude, the larger the amplitude the larger the object that reflects it. Radar also has the added benefit of measuring the range of more than one object downrange. Robotic Devices GPS – Global Positioning System The Global Positioning System is a worldwide radio-navigation system formed from a constellation of 24 satellites and their ground stations. GPS uses these "man-made stars" as reference points to calculate positions accurate to a matter of meters. With advanced forms such as DGPS, you can make measurements with accuracy to within one centimetre. This is quite costly however. 22 Property of Applied AI Systems, Inc. Duplication or unauthorized distribution of this document is illegal H E M I S S O N 3 Chapter R O B O T Hemisson Robot Hemisson robot operation, functions and usage Hemisson Operation S ome of the different operational modes and functions of Hemisson will now be described, however this is not meant to replace the Hemisson user manual, but is meant to supplement the manual. Everything that is described here is also in the manual. For more information about Hemisson and available modules, please refer to the KTeam Hemisson website at http://www.hemisson.com/English/ . This is also a good place to go if any serious problems are encountered and you need technical support. Short of installing the standard 9V battery into Hemisson, the robot should be ready for operation right out of the box. To begin by seeing what the robot can do, a short description of the six available switches is necessary. 23 Property of Applied AI Systems, Inc. Duplication or unauthorized distribution of this document is illegal H E M I S S O N R O B O T Two Operational Switches (On/Off and Pgm/Exec) The first two switches, as shown in the following figures, are the On/Off switch and Pgm/Exec (Program/Execute) switch. Figure 17: On/Off and Pgm/Exec switch on the side of the Hemisson robot The Pgm/Exec switch should almost always be set in the Execute mode for practically all robot operations. The only time you will need to put it in Program mode, is when you need to re-install the firmware (Operating system) of the robot because it has been corrupted. This is discussed in the Hemisson Software chapter that follows this chapter. You will know it has been corrupted when the LEDs on the robot flash sporadically and the robots various installed functions like Avoid, Line follow, etc. stop functioning. Four mode switches (Avoid, Line Follow, Dance, Run and download User Program) These switches are pre-written functions each Hemisson comes with that can be easily set and run to demonstrate the robots different abilities. Remember that the operational switch ‘Pgm/Exec’ should be set on ‘Exec’. Note: The mode switches must first be set while the robot is turned off and then turned on for it to have any effect. This is because the mode switches are only checked on start-up. 24 Property of Applied AI Systems, Inc. Duplication or unauthorized distribution of this document is illegal H E M I S S O N R O B O T The first switch is an Obstacle Avoidance mode that demonstrates the robot’s ability to avoid different obstacles with the six outwardly looking IR (infra-red) sensors. The following figure shows the switch settings for this. Figure 18: Obstacle Avoid mode switch setting The next switch is the Line-Following mode, which will cause the robot to follow a dark line on a white surface using the two front IR sensors that are pointed towards the ground. The CD that accompanies Hemisson has some printable white papers with good sized lines that can be printed and used to create a long trail for the robot to follow. If the Line-Follow mode is chosen, the robot should only be turned on while the robot is on the surface where it will be using the line-follow. The robot does a calibration for lighting conditions and surface conditions during start-up and won’t be able to follow the line if it is being held in midair while it is being turned on. Note: When the robot is in Line-Follow mode there is no Avoidance running so care must be taken to make sure the robot does not lose the line and hit something. 25 Property of Applied AI Systems, Inc. Duplication or unauthorized distribution of this document is illegal H E M I S S O N R O B O T Figure 19: Line-Follow mode switch setting The following mode switch is the Dance mode. This mode causes the robot to move backwards and forwards while turning. This mode was created to be used with the felt pen inserted into the hole located in the middle of the robot, shown in the following figure. The forward-backward motion will draw a star on paper to demonstrate the ability of the robot to trace different shapes or the path that the robot is taking while it moves around. Note: As before, when the robot is in Dance mode there is no Avoidance running so it is possible for the robot to drive into any obstacles that are in close proximity. Figure 20: Hole location for the felt pen that comes with each Hemisson 26 Property of Applied AI Systems, Inc. Duplication or unauthorized distribution of this document is illegal H E M I S S O N R O B O T Figure 21: Dance mode switch setting The final mode is the Run and Download user program mode. This switch is used to prepare the robot to first receive the program that the user will write in BotStudio, and then run it after it has been downloaded. More details will be given about this in the next chapter. As for now, it should be enough to know if there had been user code downloaded to the robot, placing the mode switch, as in the following figure, with the operation switch set to ‘Exec’ and then turning on the robot would run the user code. Figure 22: Run and Download user program mode switch setting 27 Property of Applied AI Systems, Inc. Duplication or unauthorized distribution of this document is illegal H E M I S S O N R O B O T Serial port and TV remote command mode When the four mode switches are set, as in the following figure, and the ‘Pgm/Exec’ switch is still set to ‘Exec’, the robot can be commanded either through the serial port or with certain (RC5 standard) Television remotes. Figure 23: Serial port and TV remote mode switch settings The serial port on the robot can be connected to the serial port on your computer using the included serial port cable. Figure 24: Serial port of Hemisson robot and included serial port cable The serial port cable is then connected to the back of the computer where there is also a serial port as shown in the following figure. Sometimes computers or Notebook 28 Property of Applied AI Systems, Inc. Duplication or unauthorized distribution of this document is illegal H E M I S S O N R O B O T computers do not come with a serial port, but only come with USB ports, at which point you will need to get a USB to Serial port adapter. This can be found at most computer stores, but make sure it is compatible with your version of windows. Figure 25: Serial Port on the back of the computer Figure 26: USB to Serial port Adapter and USB port shown on back of Notebook computer In order to be able to command the robot through the serial port, you will need to use a terminal program such as HyperTerminal which comes with all versions of windows after Windows 95. HyperTerminal can be found by going to Start --> (All) Programs --> Accessories --> Communications --> HyperTerminal. Another good free terminal program is called TeraTerm. It can be downloaded and 29 Property of Applied AI Systems, Inc. Duplication or unauthorized distribution of this document is illegal H E M I S S O N R O B O T used for free at: http://hp.vector.co.jp/authors/VA002416/teraterm.html Now that the Hemisson robot is connected through the serial port and the terminal program is running, you will need to use the following serial port setup in order to communicate with the robot. Note: Leave the robot turned off until it is connected through the serial port, then once the serial port setup has been done, turn the robot on. You should see displayed two lines of text on the terminal screen after the robot is switched on, if you only see a few nonsense characters, it means you have set the Baud rate incorrectly. As always you need the ‘Pgm/Exec’ switch set to ‘Exec’ and mode switches as shown in Figure 27. It is a good idea to prop the robot up so that the wheels are not touching the ground, just in case one of the programs begins to run or you want to test the wheel speeds. Figure 27: Serial port setup to communicate with Hemisson The Com port setting is COM1 in the above figure but is whatever COM you put the 30 Property of Applied AI Systems, Inc. Duplication or unauthorized distribution of this document is illegal H E M I S S O N R O B O T serial port cable in. Hemisson Serial Port Commands These commands can be used to test the sensors, motors, switch readers, TV remote sensor, check the Hemisson OS software versions and more. All commands are typed using UPPER CASE (caps lock on) and robot responses are given with lower case letters. COMMAND RESPONSE Check version number B b, HemiOS_V_1.# # is the version of firmware loaded on the Hemisson robot Set wheel speeds D,left_speed,right_speed d,left_speed,right_speed The motor speeds can range from ‘-9’ for full reverse to ‘9’ for full forward and stop is ‘0’. If you set speed higher than 9 the robot will spin in a circle Turn on and off the buzzer H,# h The # can be either 1 or 0, 1 will turn on the buzzer and 0 will turn it off. Check mode switch positions I i,#,#,#,# The # can be 1 or 0 where 1 means the Switch is moved towards the robot’s left Handside, and 0 means towards the Robot’s right hand side. Turn 4 LEDs on or off 31 Property of Applied AI Systems, Inc. Duplication or unauthorized distribution of this document is illegal H E M I S S O N R O B O T L,#,#,#,# l,#,#,#,# The # can be 1 or 0, where 1 will turn on the LED at that location and 0 will turn it off. Note: the flashing green On/Off LED cannot be turned on or off with this command. Check IR proximity sensor readings N n,#,#,#,#,#,#,#,# The #’s will range between approx. 4 to 255, where 255 represents an object that is very close. The order of sensors: n, front, front right, front left, right, left, rear, ground looking right, ground looking left. Check IR light readings O o,#,#,#,#,#,#,#,# The #’s will range between approx. 4 and 255, where 255 means that no IR light was detected by that sensor, and conversely a low number means detected IR light. IR light can be found in practically any light source, just try shining a desk lamp or flashlight on the robot and it should detect it. Display last received TV remote control data T t,# The # will be the last received data from the television remote. 32 Property of Applied AI Systems, Inc. Duplication or unauthorized distribution of this document is illegal H E M I S S O N R O B O T TV remote controller commands The RC5 standard remote control like Philips, Daewoo, Goldstar, Hitachi, Loewe, Mitsubishi, Samsung, and many others can be used to control the Hemisson robot. It is important if using a remote control with a ‘VCR’ and ‘TV’ button, to make sure you press the ‘TV’ button before trying to command the Hemisson. The directional commands are as shown in the following figure. Figure 28: TV remote direction commands The robot receives these commands through an IR receiver located on top of the robot, shown in the following figure. The user should make sure to point the TV remote in the direction of the IR receiver when commanding the robot. As before the robot needs to be in the proper mode (same as that of the serial port command mode) and the ‘Pgm/Exec’ switch should be set to ‘Exec’. 33 Property of Applied AI Systems, Inc. Duplication or unauthorized distribution of this document is illegal H E M I S S O N R O B O T Figure 29: Location of IR receiver for TV remote and Hemisson being controlled by TV remote 34 Property of Applied AI Systems, Inc. Duplication or unauthorized distribution of this document is illegal H E M I S S O N 4 Chapter S O F T W A R E Hemisson Software BotStudio, Webots-Hemisson and Hemisson Uploader BotStudio Software T he BotStudio Software is what you will use to program both your simulated robot in Webots-Hemisson and the real one through the serial port. It is designed to be a simple visual programming method that is much easier than using a text based programming language like C or C++. This program allows any user to create simple programs that are logical to follow and can be debugged by simply watching the graphical program as it runs on the robot, either real or simulated. The following figure shows the initial BotStudio screen. It consists of a white space where the user will put the graphical program and a picture of a Hemisson robot on the right. To open this program double-click Webots-Hemisson (lady bug) icon or open it from the ‘Programs’ menu. Both programs should open up together. 35 Property of Applied AI Systems, Inc. Duplication or unauthorized distribution of this document is illegal H E M I S S O N S O F T W A R E Figure 30: Initial BotStudio start-up screen Figure 31: BotStudio button desciptions States - What the robot is doing This program uses two types of building blocks; the first one is called a ‘State’. A state reflects what the robot is doing, for example if it is driving forward. Other possible states could be if it was turning left or turning right or even stopped. States can also include combinations of things such as turning around while sounding the buzzer and turning on the two front LEDs. To begin let us first create a state, this is done by clicking the ‘New State’ button in the menu bar. 36 Property of Applied AI Systems, Inc. Duplication or unauthorized distribution of this document is illegal H E M I S S O N S O F T W A R E Figure 32: BotStudio new state The state, named ‘new’, is highlighted in yellow and appears on the white space. It can be moved around the white space by clicking and holding the mouse button while on top of it, and dragging it to another location. While the state is highlighted, notice how the wheels, buzzer and two LEDs (two black dots at the front) are darkened and the wheels have zeros beside them. This means that those features, which can now be modified within that state, are showing a halted state by default, with no buzzer or LEDs turned on. Let’s begin by naming the state, this is done by erasing the ‘new’ in the text box above the robot and typing in whatever name you want to give it. “Erasing” means using the keyboard backspace or delete key and NOT clicking the ‘Delete’ button in BotStudio. This ‘Delete’ button will erase the entire state. You can then type some new name in, for example “Forward”. You should see the name change from ‘new’ to ‘Forward’ as you type into the text box. 37 Property of Applied AI Systems, Inc. Duplication or unauthorized distribution of this document is illegal H E M I S S O N S O F T W A R E Figure 33: BotStudio State name change Next we will modify the state to reflect the desire to go forward. This is achieved by clicking on the zeros beside the wheels which will change them to most likely ‘+10’ and will show an arrow on top of the wheel indicating the direction the wheel will spin. Both wheel values will be set to ‘+10’ so that the robot will move forward in a straight line at the speed of 10. To change the wheel speeds to other values, just click on either of the digits and they will cycle through the possible values for each of the units up to a maximum of 16, the arrow length changes accordingly. You can also change the direction by clicking on the ‘+’ which will change to ‘-‘ and the wheel will spin backwards. The arrow again changes accordingly. 38 Property of Applied AI Systems, Inc. Duplication or unauthorized distribution of this document is illegal H E M I S S O N S O F T W A R E Figure 34: BotStudio Forward state Two more states will be created called ‘Left’ and ‘Right’, the wheel speeds will be chosen to cause the robot to spin in place either left or right by using: For Left state, ‘-10’ for left wheel and ‘+10’ for the right wheel and the opposite for the Right state. The left and right LED will also be turned on to indicate the turn the robot makes. Make new states by clicking the new state button, renaming the state from “new” then clicking it again for the third state. Note: Before clicking the ‘new state’ button, move the last state to a new position or multiple states will be created right on top of one another and you might not see them there. 39 Property of Applied AI Systems, Inc. Duplication or unauthorized distribution of this document is illegal H E M I S S O N S O F T W A R E Figure 35: BotStudio Right state with right LED turned on The ‘on state’ of each of the LEDs is indicated by placing a red dot on top of the black circle of the LED. Clicking this red dot will remove it and indicate that the LED will be off for this state. The ‘Left’ state was not shown above but it is the opposite settings as in the Right state. We have not used the buzzer (little speaker in the middle of the robot) so far in this chapter, but it operates in the same manner as the LEDs, by clicking on it you will see sound waves emanating from it and clicking again will remove the sound waves indicating that the buzzer is off. Perhaps it seemed strange that the Right and Left states were placed on the Left and Right of the screen. The reason will become apparent later in this chapter. Since the shape of the robot is somewhat round and the turning can be done in place (with a zero turning radius since there are only two wheels) these are enough states to do an obstacle avoidance program so you won’t need a Reverse state. Save what you have done before moving on by clicking the ‘Save as…’ button at the top of BotStudio, a standard window comes up asking for a name and location of where to save your file. Choose your location and name and click OK. The window closes and the name of your program is displayed in the name text box in BotStudio along with an 40 Property of Applied AI Systems, Inc. Duplication or unauthorized distribution of this document is illegal H E M I S S O N S O F T W A R E extension ‘.bsg’. To Open a file just click the ‘Open…’ button in the menu bar in BotStudio and to create a new file click the ‘New graph’ button, also in the menu bar of BotStudio. The reason its called ‘New graph’ is because this simple graphical programming system is based on a system called “Graphcets”, which uses states and transitions in this way. Figure 36: BotStudio saved example program Now that there are a number of states, there needs to be a way to move between them, otherwise you would just drive forward forever. Like in nature this is achieved by seeing something that will make us stop or turn before we hit it. Transitions – What the robot is seeing The second building block for this program is called a ‘Transition’, which is used to move between different states. Whereas for a state, which is what the robot is doing, the transition is what the robot sees while it’s doing whatever it’s doing. What it sees can and should affect what state it goes to next, for example if it senses a wall on the left side as it drives forward, then it should turn right then continuing to drive forward. 41 Property of Applied AI Systems, Inc. Duplication or unauthorized distribution of this document is illegal H E M I S S O N S O F T W A R E To create a transition, click on the ‘New transition’ button in the menu bar. The mouse pointer changes to cross hairs. To connect two states with this transition, it is just a matter of clicking on the first state and then dragging the attached line and mouse pointer over to the desired state for connection. A line appears as you do this with the word “new” attached to it that connects two states. Figure 37: BotStudio first ‘new’ transition between states Once joined, the transition name ‘new’ should be highlighted in yellow, if it is not then click on the ‘new’ name to do so. Once highlighted, you should notice that everything that was darkened when you clicked on a state is now greyed, and everything else is now dark. This includes six dark rectangles which are the IR sensors looking outward, and two dark circles representing the ground (line following sensors) sensors. There is also a dark clock close to the back of the robot, this is a timer that counts up continuously until a new state is reached, then it is reset and counting begins again. The clock value can be set by clicking on the clock to cause a transition based on an amount of time passing within a state. This will be discussed more in detail later in this document. For now we will continue with the obstacle avoidance program. Click on the IR ‘near left’ sensor, black rectangle, (not the one close to the left 42 Property of Applied AI Systems, Inc. Duplication or unauthorized distribution of this document is illegal H E M I S S O N S O F T W A R E wheel, but the one on the left of the front center sensor), the value of 128 appears with a greater than symbol (>128) all in black. Take note that the numbers are coloured in black. As before with the wheel speeds, clicking on any of the units will cause the numbers to cycle up to maximum value of 254 and minimum value of 000. The larger the value, the closer an object is to the sensor. You can also click on the greater than symbol and change it to a less than symbol (<128). The >/< symbol with the sensors indicates, for example >128, that if the sensor detects an object a distance away greater than the value of 128, then the condition is true and the transition will take place. The more sensors you give a condition to such as this one, will mean that all those conditions have to occur before the transition will take place. For our example the value of >010 will be chosen. This number was chosen somewhat at random, the only desire was that the robot transition to a turn state very soon after it detects a wall. Why not choose then the value of >000 you might wonder? As is always the case in real life, sensors always detect some obstacle even when there isn’t any one there causing what is referred to as ‘a noisy sensor’. The sensor values will hover around a value of 3 to 4 (in simulation) while nothing is there but should increase linearly once a wall is detected and the robot begins moving towards it. Since the value is being set for the near left sensor, the transition will be named ‘Near left’, which is accomplished the same way as with the states, by erasing the name ‘new’ and typing in the name text box and hitting the ‘Enter’ (Return) key afterwards. Notice that the ‘Near left’ transition went to the ‘Right’ state, this is because an object detected by the near left sensor needs to cause a right turn (a turn away from the object). 43 Property of Applied AI Systems, Inc. Duplication or unauthorized distribution of this document is illegal H E M I S S O N S O F T W A R E Figure 38: BotStudio ‘Near left’ transition IR Light Level Detection As was mentioned in chapter 3, IR sensors can detect obstacles and IR light levels which emanate from different light sources. To switch to the IR light detecting function, click again on the same near left black rectangle. It will display a >128 value, but this time coloured in red. The value and sign (>,<) can be changed just like before except that the maximum value of 254 represents no IR light detected whereas a low value represents lots of or direct IR light. To go back to IR proximity value >010 on that sensor just click again on the sensor black rectangle, the red value should disappear then click again and the old value of >010 coloured in black should be shown. The rest of this example will continue by only using the IR proximity detection. Next we need to create a ‘Near right’ transition. This is done just as before by clicking on the new transition button and then on the ‘Forward’ state and dragging the line to the ‘Left’ state. The same value of >010 is chosen for symmetry and the name ‘new’ is changed to ‘Near right’. 44 Property of Applied AI Systems, Inc. Duplication or unauthorized distribution of this document is illegal H E M I S S O N S O F T W A R E Figure 39: BotStudio ‘Near right’ transition Notice how the transition lines coming from the ‘Forward’ state start from the bottom of the state and branch out to the other two states where they enter in the top. This represents that the transitions are out of the ‘Forward’ state and into the turn states. Two more transitions will need to be created for the other two side sensors causing the turning states. They will be named ‘Far left’ and ‘Far right’. The same values of >010 will be again used just for simplicity, but a better obstacle avoid program would use different values (or weights) for each the ‘near sensor’ and ‘far sensor’ transition because more or less sensitivity might be needed. This is something that can be determined with simulation and real world testing. The following figure shows the two new transitions, notice how by placing them well it makes the control program look like the robot, and makes it simple to follow. 45 Property of Applied AI Systems, Inc. Duplication or unauthorized distribution of this document is illegal H E M I S S O N S O F T W A R E Figure 40: BotStudio two added ‘Far right’ transitions This obstacle avoidance program is coming along, but it is missing some very important features. Namely transitions back to the ‘Forward’ state, because at the moment once you get to the turn states, you will stay there forever and the robot won’t stop turning. Creating a transition back to the starting state is done just as before by dragging the transition line from the turn states up to the forward state. Finishing this avoid program will be left as lesson 1 for the reader including the following feature. Another important feature this program will need is a way to avoid being stuck. With any robot there is always a (good) chance an object can come up right in the “blind spot”, shown in the following figure. 46 Property of Applied AI Systems, Inc. Duplication or unauthorized distribution of this document is illegal H E M I S S O N S O F T W A R E Figure 41: Hemisson robot stuck due to sensor blind spot Since the robot does not ‘see’ the object it won’t avoid it and will try to drive through it and will get stuck. If left long enough in this stuck state, the motors would probably burn out due to the stress of trying to move the robot. Robots with rotational sensors (unlike the Hemisson robot) on the motor shafts can be linked with motor controllers to recognize this over-stressing and shutdown before any permanent damage occurs. With Hemisson a simpler solution is needed, namely a timer. The theory is if too much time is spent in, let’s say, the ‘Forward’ state without a transition to a turn state then the robot is assumed to be stuck and will force a turn or maybe a little reverse and then turn. The problem lies in how long to wait before you assume that you’re stuck. Since time is constant, but motor speed and room sizes are not, the timing will need to be increased or decreased depending on how big the arena is that the robot is travelling in or how fast the robot travels across the arena before it should expect a turn state to happen. You of course don’t want to turn for no reason so setting a very short transition time would not be a good idea either. These factors can be approximated based on simulation and best guess techniques. The timer is set in transitions by clicking on the clock and increasing or decreasing the time as needed. 47 Property of Applied AI Systems, Inc. Duplication or unauthorized distribution of this document is illegal H E M I S S O N S O F T W A R E Figure 42: BotStudio Clock Timer location Once the counter time is reached the transition will take place and whatever manoeuvres to get out of trouble can be made. Again you will need a return transition back to the forward state. In order to test the avoid program, a simulation with Webots-Hemisson will be needed and will be discussed in the following section. 48 Property of Applied AI Systems, Inc. Duplication or unauthorized distribution of this document is illegal H E M I S S O N S O F T W A R E Webots-Hemisson and BotStudio together This program is the simulated virtual world where you will be able to run and test your BotStudio programs before you apply them to the real robot. Figure 43: Webots-Hemisson simulation package This program should already be running when you are using BotStudio, if it is not then the best thing to do is close BotStudio (save whatever it is you are doing) and then open Webots-Hemisson either from the Programs menu or by double-clicking the Lady Bug icon. Figure 44: Webots-Hemisson Lady Bug icon 49 Property of Applied AI Systems, Inc. Duplication or unauthorized distribution of this document is illegal H E M I S S O N S O F T W A R E Both Webots-Hemisson and BotStudio should open one after another. This needs to be done like this because Webots-Hemisson and BotStudio are linked through a Java environment so if one is closed then you cannot (most of the time) simply open it up again. They must be opened together! This is also true when changing worlds in Webots-Hemisson but this will be discussed at a later time. After Webots-Hemisson is open, the ‘Botstudio line’ world, botstudio_line.wbt, will be opened and you will see the Hemisson robot waiting patiently on the black line as shown in Figure 45. There are a number of other worlds available for Hemisson to run in, called: botstudio_maze, botstudio_pen and botstudio_obstacle. Just go to ‘File’ and ‘Open’ in the Webots-Hemisson menu bar. To simulate your obstacle avoidance program, the best thing to do is first position your two windows of Webots-Hemisson and BotStudio so that you can see both of them easily. Figure 45: Desktop with Webots-Hemisson and BotStudio When you look at Webots-Hemisson you might find that the Hemisson world is 50 Property of Applied AI Systems, Inc. Duplication or unauthorized distribution of this document is illegal H E M I S S O N S O F T W A R E zoomed in too much for you to see the entire arena that Hemisson is in. To zoom out you will need a three button mouse or a mouse with a scroll wheel between the two buttons. Figure 46: Logitech Laser scroll mouse Changing Webots-Hemisson world view To zoom out, either roll the scroll wheel forward or hold the middle mouse button of a three button mouse and drag the mouse forward. The opposite will zoom in. The other mouse buttons also can make view changes within Webots-Hemisson. The left mouse button rotates the view around a point by holding the left mouse button and dragging the mouse in whichever direction you wish to rotate. By holding the right mouse button and dragging, you can shift the entire view without rotating it. Opening your user program in BotStudio for simulation in Webots-Hemisson Now that you have your preferred view, and BotStudio positioned beside it, you can open your user program (.bsg file) into BotStudio, if it is not yet loaded. Do this by clicking the ‘Open…’ button at the top of the BotStudio screen. A common Windows window should open. It is just a matter of locating your .bsg file and selecting it and clicking ‘Open’. Simulating the BotStudio file in Webots-Hemisson You can now click the ‘Simulate’ button in BotStudio, you will see the robot will begin 51 Property of Applied AI Systems, Inc. Duplication or unauthorized distribution of this document is illegal H E M I S S O N S O F T W A R E to move in Webots-Hemisson. In the figure above, the incomplete obstacle avoidance program was used, even though it will not avoid properly, just as a demonstration. While the simulation is running you will notice that as you switch between states, they are highlighted in yellow to indicate which one you are in. Also because the monitoring command (the Monitor check box is checked in BotStudio) is enabled, the sensor readings, wheel speeds, active LEDs, buzzer and timer information are all being displayed. This allows the user to monitor and debug any problems as the robot manoeuvres around the arena. Figure 47: BotStudio running simulated robot in Webots-Hemisson The figure above shows the running Webots-Hemisson simulator, notice how as the robot traverses the black line on the ground, one of the ground sensors (Two greyed circles just below the front greyed rectangle) detects this and shows an increase in value to 185 as compared to the other ground sensor at a value of 37 shown in the above figure. This is how the robot would go about following a line on a surface which it is running on. To stop the Webots-Hemisson simulation, you must click the ‘Simulate’ button in BotStudio again. Do not stop the simulation in WebotsHemisson with the square stop button this will cause instability between the 52 Property of Applied AI Systems, Inc. Duplication or unauthorized distribution of this document is illegal H E M I S S O N S O F T W A R E programs. Note: If there are any problems simulating the robot, the easiest solution is to close both Webots-Hemisson and BotStudio, and then re-open them by opening Webots-Hemisson which will open BotStudio for you. If this does not solve the problem, then re-booting windows and then opening WebotsHemisson, should fix any problems. Figure 48: Running Webots-Hemisson simulation Moving objects in Webots-Hemisson It was recently shown how to change the view of the Webots-Hemisson world using the mouse. Objects within the world can also be moved around, but care must be taken when doing this because, any object can be put either through another object or left floating in midair. These moves are done by using the mouse buttons and holding down on the Left Shift key. Rotate an object but stay on the ground plane by holding down the Right mouse 53 Property of Applied AI Systems, Inc. Duplication or unauthorized distribution of this document is illegal H E M I S S O N S O F T W A R E button and holding down the Left Shift key. The mouse pointer changes from a hand to two rotating arrows. Anything you click on will rotate in place on the ground plane. Move an object but keep it on the ground plane it is currently on, by holding down the Left mouse button and holding down the Left Shift key. The mouse pointer changes from a hand, to a four way arrow. Again, anything you click and hold the left mouse button on can be shifted, along the ground plane, to anywhere else. Use this to move the blocks around the ‘botstudio_obstacle’ world. Figure 49: Moving objects along the ground plane Moving an object to other ground planes (i.e. Up or down) can be done by using the wheel on a wheel mouse or holding down the middle button on a three-button mouse and moving the mouse forwards and backwards along with holding down the Left Shift key. The mouse pointer changes from a hand to an up-down arrow. 54 Property of Applied AI Systems, Inc. Duplication or unauthorized distribution of this document is illegal H E M I S S O N S O F T W A R E Figure 50: Moving object to other ground planes This change of ground planes as well as the other moves could possibly put the robot inside other objects where it would be forever stuck, or floating in space where it would never see any walls and would run in any direction without changing directions. You will need to look at the world form different angles and zoom in or out to be sure of which ground plane the robot is on so that it is running right on top of the surface like it would in real life. Webots-Hemisson World and Robot view Another useful feature in Webots-Hemisson is the view you use. The default view is called a World View which means you can put yourself anywhere in the world and look in any direction. Another view is called Robot view which will follow along with the robot moving in whatever direction it takes. This can be changed by clicking on ‘Simulation’ in the menu of Webots-Hemisson and choosing either Robot view or World view which ever is at the bottom of the pull down menu. 55 Property of Applied AI Systems, Inc. Duplication or unauthorized distribution of this document is illegal H E M I S S O N S O F T W A R E Figure 51: Webots-Hemisson World and Robot view Downloading to the real robot Once the user is happy with the user code, it can then be downloaded to the real robot through the serial port. This is the function of the ‘Upload’ button in BotStudio. To setup the robot for download follow these steps: - Open up BotStudio and load your user program. - Prop up the robot so the wheels are not touching the ground. This is a good idea because after you upload to the robot the program is activated right away and wheels start moving. 56 Property of Applied AI Systems, Inc. Duplication or unauthorized distribution of this document is illegal H E M I S S O N S O F T W A R E Figure 52: Propped up Hemisson robot so wheels aren’t touching the ground - The next step is to set the mode switches for user code download and execute shown in the following figure and set the Pgm/Exec switch for Exec. Plug the robot serial cable into any of the COM ports. Figure 53: Settings of mode switches for BotStudio download 57 Property of Applied AI Systems, Inc. Duplication or unauthorized distribution of this document is illegal H E M I S S O N - S O F T W A R E Turn on the robot and click the ‘Upload’ button in BotStudio. BotStudio begins by going through all the COM ports till it detects the robot and then begins uploading, shown in bottom left corner of program. Figure 54: BotStudio uploading user program to real robot - While the program is running, the robot will go through its states and show this in BotStudio as in simulation. All the sensor values can be checked and tested. The sensor value will be slightly different in the real robot than in the simulation. 58 Property of Applied AI Systems, Inc. Duplication or unauthorized distribution of this document is illegal H E M I S S O N S O F T W A R E Figure 55: BotStudio display when running the real robot - The program can be stopped by clicking the ‘Upload’ button in BotStudio again. Although this should stop the program running on the robot, sometimes it does not and to stop it you will need to upload again and try to stop it again otherwise just turn off the robot. - If you want to keep the user program on the robot, just turn off the robot after uploading. As long as the mode switches are put back the same way as when you uploaded the program, turning on the robot later should cause the user program to run again, even while not connected to the serial port. Hemisson Uploader This program is used to upgrade your robot as new firmware (Operating system) becomes available or if the firmware on your robot gets damaged for whatever reason. - To download the firmware to the Hemisson robot, you will need to connect the robot to the computer with the serial cable, set the mode switches as in the following figure and finally put the Pgm/Exec switch in Pgm, the only time 59 Property of Applied AI Systems, Inc. Duplication or unauthorized distribution of this document is illegal H E M I S S O N S O F T W A R E you will do this. Figure 56: Mode switch settings for the Hemisson Uploader - Open up the Hemisson Uploader v1.5 or v1.7 program, shown in the following figure, and use the settings shown. The COM port is whatever COM port you plugged the serial cable into. - The Hex file needs to be downloaded from the Hemisson Website, http://www.hemisson.com/English/support.html, where you will find the most updated version. It is important to use Hemisson Uploader v1.5 (or v1.7), not v1.6, because v1.5 (or v1.7) can use a transmission rate slow enough, just in case the robot firmware has had the fast transmission rate part of the firmware code corrupted also. 60 Property of Applied AI Systems, Inc. Duplication or unauthorized distribution of this document is illegal H E M I S S O N S O F T W A R E Figure 57: Hemisson Firmware uploader v1.5 - Turn on the robot now, and if all the switches are set properly you should see both the red and green LED on the back of the robot solidly lit up, indicating that the robot is ready for transfer. Figure 58: Red and Green LED are solidly lit up when in Pgm mode 61 Property of Applied AI Systems, Inc. Duplication or unauthorized distribution of this document is illegal H E M I S S O N - S O F T W A R E Now click the ‘Download’ button in the Hemisson Uploader and transmission will begin and when finished will say in the ‘Status’ text box “Not Connected” and in the ‘Infos:’ text box “Download Success”. The robot can be turned off and disconnected from the serial port. Figure 59: Hemisson Uploader success screen - Problems?: If any problems are encountered trying to download the firmware, the usual mistakes consists of using a Baudrate below 56000, using the wrong COM port setting or not setting the Pgm/Exec switch in Pgm mode. If all these are right, then make sure that no other Terminal programs are currently running on the same computer. These can affect the communication between the Uploader and Hemisson. The final solution is to restart the Uploader program and try again or reboot windows and try again. 62 Property of Applied AI Systems, Inc. Duplication or unauthorized distribution of this document is illegal B O T S T U D I O L E S S O N S A N D S O L U T I O N S 5 Chapter BotStudio Lessons and Solutions This chapter will discuss the solutions to the various BotStudio programming tasks including pictures and step by step instructions. This section is for the instructor only. The actual software files are included with this guide. Lesson 1: Obstacle Avoidance with Stuck Timer Figure 60: Obstacle Avoidance Hemisson 63 Property of Applied AI Systems, Inc. Duplication or unauthorized distribution of this document is illegal B O T S T U D I O L E S S O N S A N D S O L U T I O N S T his guide finished the obstacle avoidance program at the following point. Figure 61: Unfinished Obstacle Avoidance program Please finish the obstacle avoidance program as your first lesson. 64 Property of Applied AI Systems, Inc. Duplication or unauthorized distribution of this document is illegal B O T S T U D I O L E S S O N S A N D S O L U T I O N S Solution The next step is to add the return transitions to each of the turning states (Right and Left). Figure 62: Return forward transition added The transition lines are each made by dragging from the turning state boxes to the Forward state box (This order is important). The transitions were each named “Ret Forw” to indicate a return to the forward state. The figure above shows the values used for the transitions to occur from the Left state to the forward state. The ‘<10’ says that if the robot’s ‘Near right’ and ‘Far right’ sensors are detecting obstacles at a distance smaller than 10, then begin going forward again. Remember that obstacles that are near result in sensor readings that are very high (up to 254). Similarly for the transition out of the Right state, the same values are used but on the ‘Far left’ and ‘Near left’ sensors. The ‘Return forward’ transition encompasses both of the side sensors even though it only takes one of the side sensors detecting an obstacle to transition into a turning state. This is done because the robot should continue turning until BOTH sensors (not just the sensor that started the turn state) see no obstacles. If just one sensor was used in each ‘Return forward’ transition, the Avoid program would still work, but a slight jitter would occur as the robot transitioned back and forth between the Forward state 65 Property of Applied AI Systems, Inc. Duplication or unauthorized distribution of this document is illegal B O T S T U D I O L E S S O N S A N D S O L U T I O N S and turn state very quickly. The next step of the program is to add the ‘Stuck state’. This will occur after the robot remains in the forward state for to long. Once that occurs another timer in a transition is used to make the robot turn away from its original path, assuming that it is stuck. Figure 63: Added Stuck state with timer The transition timer was set by clicking on the black clock on the picture of the robot. As before the timer values can be set by clicking on each of the units to make the values cycle up to a maximum of 255. A value of >251 was chosen somewhat at random, any high value around that would have been sufficient. The Stuck state was set to make the robot turn in place (turn right, but left would be fine also). Both LEDs were turned on to indicate that there was a problem. 66 Property of Applied AI Systems, Inc. Duplication or unauthorized distribution of this document is illegal B O T S T U D I O L E S S O N S A N D S O L U T I O N S Figure 64: Stuck state wheel speed settings The last thing to do was make a transition out of the ‘Stuck state’. Again a timer is used, and a value is chosen to make the robot turn more than 90 degrees away from its original path. Again the value was chosen somewhat at random, a number more or less the same would still be fine as long as the robot turns more than 90 degrees. This is important because you don’t want the robot to turn so little that it will still be caught on the obstacle. 67 Property of Applied AI Systems, Inc. Duplication or unauthorized distribution of this document is illegal B O T S T U D I O L E S S O N S A N D S O L U T I O N S Figure 65: Final Transition timer out of the Stuck state A transition timer value of >21 was chosen to finish the ‘Stuck state’ right turn and go back to the Forward state. 68 Property of Applied AI Systems, Inc. Duplication or unauthorized distribution of this document is illegal B O T S T U D I O L E S S O N S A N D S O L U T I O N S Lesson 2: Line following with Obstacle Avoid Figure 66: Line following Hemisson Create a program that will both track a line on a surface and avoid any obstacles along the way. The line tracking will use the two front IR sensors that look down at the ground. If at any time an obstacle comes close to the robot, it should stop tracking the line and turn away from the obstacle. Once the obstacle is gone, the robot should begin looking for the line again. To decide on the values to use for the two front IR sensors you will need to monitor the simulated robot as it moves around in WebotsHemisson. As it passes over the black line notice how the IR readings drop. This should help the user decide what thresholds to set for the program. 69 Property of Applied AI Systems, Inc. Duplication or unauthorized distribution of this document is illegal B O T S T U D I O L E S S O N S A N D S O L U T I O N S Solution This program was written to encompass the line following with the obstacle avoidance program, previously written, with the avoid taking priority over the line following function. In simulation it was found that when the robot passes over the black line, the IR readings drop to 37, and up to 185 when on the white surface. The first step in this solution is to put four more states in the avoid program as shown in the following figure. Figure 67: Four states added to Avoid program The first state is called ‘Hunt line’, this will be the state where the robot drives straight either while it is on top of the black line or if it loses the line. Wheel speeds were chosen to be 10 on each wheel, and the two LEDs were turned on. The next states are the Shifting Left/Right states. In these states, the robot will turn towards the line. These will not be ‘spin on the spot’ turns like in the obstacle avoidance part of the program but will simply shift the robot in the direction of the 70 Property of Applied AI Systems, Inc. Duplication or unauthorized distribution of this document is illegal B O T S T U D I O L E S S O N S A N D S O L U T I O N S line. For the ‘Shift Left’ state, wheel speeds were chosen to be +01 for the left wheel and +10 for the right wheel. The left LED was turned on (the right LED stayed off) to indicate the robot shifting left. For the ‘Shift Right’ state, the opposite was done, with wheel speeds being +10 for the left wheel +01 for the right wheel and the right LED turned on this time. Figure 68: Shift Left state in the line follow program The last state was called ‘Detect Obstacle’, the purpose of this state will become clear later. The values for the wheel speeds in this state were set at +10 for both wheels and the LEDs were both left off. 71 Property of Applied AI Systems, Inc. Duplication or unauthorized distribution of this document is illegal B O T S T U D I O L E S S O N S A N D S O L U T I O N S Figure 69: Detect Obstacle state in line follow program The next step is to add the transitions between the states. The first transition is to the ‘Hunt line’ state. This should occur when the robot is moving forward (in the ‘Forward state’ and detects no obstacles). A transition is made between the Forward and Hunt line state and called “no obstacles”, shown in the following figure. The transition will occur if the front and side IRs are reading values less than 10 (<10). 72 Property of Applied AI Systems, Inc. Duplication or unauthorized distribution of this document is illegal B O T S T U D I O L E S S O N S A N D S O L U T I O N S Figure 70: no obstacle transition to line following Once the robot is “hunting” for the line, it should shift towards it when the two downward looking IRs detect the edge of the line. For the transition to the ‘Shift left’ state, the left downward looking IR will have a low value (around 37 as the black line passes under it) while the right downward looking IR will have a high value (around 188 since the line won’t yet be under it). Therefore values of <058 are used for the left IR and >058 are used for the right IR sensor shown in the following figure. The transition was called “Sense line left”. 73 Property of Applied AI Systems, Inc. Duplication or unauthorized distribution of this document is illegal B O T S T U D I O L E S S O N S A N D S O L U T I O N S Figure 71: Sense line left transition in line follow program The ‘Sense line right’ transition will have the opposite settings with the left downward looking IR set to >058 and the right set to <058. This indicates that the black line will have passed under the right IR but not under the left IR. The next transition to place is after the robot has turned for the line and ends up directly on top of it. At this point the two downward looking IR sensors will be both displaying low values. When this occurs we want the robot to transition back to the ‘Hunt line’ state so that it will drive forward until another turn is needed. The values that will be used are <058 for both downward looking IR sensors. 74 Property of Applied AI Systems, Inc. Duplication or unauthorized distribution of this document is illegal B O T S T U D I O L E S S O N S A N D S O L U T I O N S Figure 72: Return to Hunt line transition in line follow program Under the same thinking as the Return to Hunt line transition, there needs to be a transition out of the Shift states, if the robot doesn’t turn fast enough and looses the line completely. At this point we would still want the robot to go forward until it finds another line to follow. To accomplish this, the ‘lost line’ transition will go back towards the ‘Hunt line’ state. 75 Property of Applied AI Systems, Inc. Duplication or unauthorized distribution of this document is illegal B O T S T U D I O L E S S O N S A N D S O L U T I O N S Figure 73: lost line transition in line following program The transition will occur when both the two downwardly looking IR sensors do not detect a black line, in other words, when both sensors display values >058. These are the same values for both ‘lost line’ transitions. A timer is also used in this transition. The timer is in case the robot doesn’t turn as fast as necessary to stay on top of the line, it would think that it has lost the line and start to go straight even though the line is just slightly over to one side where the sensors cannot detect it. This can happen when the robot is turning at a 90 degree angle. We use a time value of 20 so that the robot will continue turning even though it has lost the line hoping that it will find the line soon after it lost it. This is often not a problem in simulation but when applied to the real robot it is much easier for the robot to lose the line due to noisy sensors. Now that we have a good line following section of our program we need to develop a way to check for obstacles while line following and react to them when they are detected. To detect for obstacles a number of transitions must be used, because each sensor must be checked individually for obstacle detection. There are 5 sensors that are important on the robot, the two side sensors and three front sensors. Each one will have a transition to the ‘Detect Obstacle’ state, and will be set to transition when the 76 Property of Applied AI Systems, Inc. Duplication or unauthorized distribution of this document is illegal B O T S T U D I O L E S S O N S A N D S O L U T I O N S sensor reading is >10. No timer value will be needed here of course. Figure 74: Obstacle detection transitions in line follow program The figure above shows the five sensor transitions and are labelled with short names to save. FL (Far left), NL (Near left), Fr (Front), NR (Near right) and FR (Far right) were used. The same five sensor transitions are still needed for the ‘Hunt line’ and ‘Shift Right’ states, so we can connect all of them now. Hopefully you can now see why it was a better idea to have these transitions go towards the ‘Detect Obstacle’ state at the bottom of the screen, because otherwise you would have fifteen lines going up into the ‘Forward’ state and that would be much harder to follow and debug. 77 Property of Applied AI Systems, Inc. Duplication or unauthorized distribution of this document is illegal B O T S T U D I O L E S S O N S A N D S O L U T I O N S Figure 75: All sensor transitions in the line following program The final step is to join all the sensor transitions back up to the ‘Forward’ state so that the robot actually avoids. This can now be done with one transition, called ‘immediate’ which will have no sensor values set and no timer used so that as soon as the ‘Detect Obstacle’ state is reached there is a transition immediately up to the ‘Forward’ state of the obstacle avoidance part of the program. This is shown in the following figure. 78 Property of Applied AI Systems, Inc. Duplication or unauthorized distribution of this document is illegal B O T S T U D I O L E S S O N S A N D S O L U T I O N S Figure 76: Final Line follow program 79 Property of Applied AI Systems, Inc. Duplication or unauthorized distribution of this document is illegal B O T S T U D I O L E S S O N S A N D S O L U T I O N S Lesson 3: Light follow with Line follow program applying it to the real robot Figure 77: Light Following Hemisson For this lesson we will modify the previous line follow program to incorporate a light (flash light or sunlight) following ability into the robot. This will require using the IR sensors and the ‘red’ value settings described in this guide. The robot will sense a light source (other than the ceiling lights) and will turn and move towards it. This can be done using the states in the previous program by just adding a few new transitions. Obstacle avoid should take priority over everything as before. It is difficult to truly test the light following program in simulation, so this final program will be tested on the real robot. Note: When shinning a light at the IR sensor, it will detect the light, but also read a proximity value of around 10. The detect obstacle part of the program should be modified to take this into consideration by setting the values up to 15 instead of 10 as was used in the guide. 80 Property of Applied AI Systems, Inc. Duplication or unauthorized distribution of this document is illegal B O T S T U D I O L E S S O N S A N D S O L U T I O N S Programming the real robot This will be the hard part of this lesson. You are about to discover that all the programs that worked perfectly in simulation are going to almost undoubtedly fail. The simulated robot returned near perfect readings from the sensors, but this will not be the case in real life. On the real robot, sensors which are technically all the same will be slightly more or less sensitive than other sensors and different values will be needed. Also, in simulation the line to follow was perfectly black and reflected very little light. If you print a black line on paper you will see that it is actually quite shiny (because the paper is shiny) and harder to follow than the simulated one. The goal here is to demonstrate that although simulation is great for proving the concept of a program, it cannot compare to the real world. Try not to get to frustrated. Sensor saturation and software filtering Sometimes when shining different lights at the Hemisson, the robot’s sensors can become saturated and believe that it is seeing obstacles and very close range, displaying values of greater than 215. This hardware problem is common when using imperfect sensors in real world environments and can be fixed using software filtering. This means incorporating a filtering stage in your program to check to see if the robot is really detecting what it thinks it is detecting. This problem is discussed in the Appendix, under Known Problems and Solutions and an example of software filtering is shown. This problem might not occur at all depending on light type, intensity and direction it is shinning. Generally if the light is not shined directly at the sensors of the robot then no filtering will be necessary. 81 Property of Applied AI Systems, Inc. Duplication or unauthorized distribution of this document is illegal B O T S T U D I O L E S S O N S A N D S O L U T I O N S Solution The solution to the light follow part will be shown here. Light following is easy to do and will easily work on the real robot. Most time will be spent on the Line follow in the real world which will take a lot of time to choose the right values for the individual robot. Since all robots are slightly different describing a solution would be pointless since it will be just a matter of testing the real robot and monitoring what it sees then adjusting the program accordingly. A program that worked on a real robot will be given along with this guide none the less as an example even though it won’t be described in this guide. For the light follow program, the first transition to add is called ‘SLFL’. This stands for Sense Light Far Left, but was shortened to save space in the program window. It uses the red values on the IR sensors by clicking twice on the IR rectangle and setting it to <50 (coloured in red). This value indicates that the transition to ‘Shifting left’ state will occur if a light is shined at the far left sensor. Figure 78: First transition in the light following program 82 Property of Applied AI Systems, Inc. Duplication or unauthorized distribution of this document is illegal B O T S T U D I O L E S S O N S A N D S O L U T I O N S This will be similar to the transition on the other side called ‘SLFR’, Sense Line Far right, except the far right IR sensor will have the <50 value coloured in red. The downwardly looking IR sensors will be the same. We also want the near left and right sensors to cause the same transitions. These will be called ‘SLNR’ and ‘SLNL’ for Sense Line Near Right and Near Left shown in the following figure. Figure 79: Near right sensor settings in light follow program Now we want to the robot to go back to going straight once the light is not shinning at the side IR sensors. This is achieved by modifying the ‘lost line’ transition from the previous program. To each of the ‘lost line’ transitions from each of the ‘Shift’ states, we add the >50 value, coloured in red, to the two side IR sensors. 83 Property of Applied AI Systems, Inc. Duplication or unauthorized distribution of this document is illegal B O T S T U D I O L E S S O N S A N D S O L U T I O N S Figure 80: Modified lost line transition in light following program This allows for the chance that the robot could lose the line after it was following it but continue to turn to find the light source. There is one problem with the timer in this transition. It will cause the turn for the light to last slightly longer causing it to continue turning after the light is removed. A good Timer value will need to be chosen to find a balance with wanting to track a line after the robot has lost it and not wanting to over turn past the light. The similar settings will be needed for the other ‘lost line’ transition on the other side. Now with this program, the user can download to the real robot and begin extensive testing to achieve proper operation on the robot. Remember that the FL, NL, Fr, NR and FR transitions will need to be changed from >10 to >15 since shinning a light at the robot makes the IR sensors detect with the proximity function an object at value 10 away from the robot. 84 Property of Applied AI Systems, Inc. Duplication or unauthorized distribution of this document is illegal B O T S T U D I O L E S S O N S A N D S O L U T I O N S Figure 81: New value setting for Proximity IR Sensors 85 Property of Applied AI Systems, Inc. Duplication or unauthorized distribution of this document is illegal B O T S T U D I O L E S S O N S A N D S O L U T I O N S Lesson 4: Wall following Hemisson Figure 82: Wall following Hemisson The wall following Hemisson program will be implemented in simulation only in this lesson. There are many different ways to make a robot follow a wall , some are better than others and some are better at different scenarios like angled (non perpendicular) walls, curving surfaces and corners. An arena will be used in Webots-Hemisson to test the wall follow program and should look like the figure below. It was built using the blocks in the botstudio_obstacle.wbt world in Webots-Hemisson. Again just to to File -> Open in the menu bar of Webots-Hemisson. It does not need to be exactly as shown, but all attempts should be made to make it as close as possible. To make it you will need to use the Webots move object commands (holding down the Left Shift key and using the mouse buttons 1 and 2, not the wheel button). Make the robot run clockwise around the arena, in other words follow walls right. 86 Property of Applied AI Systems, Inc. Duplication or unauthorized distribution of this document is illegal B O T S T U D I O L E S S O N S A N D S O L U T I O N S Figure 83: Wall follow arena to test the Hemisson 87 Property of Applied AI Systems, Inc. Duplication or unauthorized distribution of this document is illegal B O T S T U D I O L E S S O N S A N D S O L U T I O N S Solution Needed wall follow actions (states): Pivot Left: In the arena as the robot travels around in a clockwise pattern, it will have to contend with angled blocks jutting out of the walls and once the robot reaches the end of these blocks it will have to turn back and follow the block back along the other side and return to the wall. To accomplish this, the robot will need to be able to ‘Pivot Left’ which means fix the left wheel and rotate the right to cause the robot to pivot about the left wheel. This motion will be used keep the robot close to the wall end of the block as it turns around it and hopefully turn wide enough to avoid getting stuck on the corners. If a spin left was used instead of pivot the robot would be more likely to make the turn to sharply and get stuck on the end of the block. Curve Left: This is a much less sharp type of turn used to keep the robot close to a wall it is following. It is necessary to continuously turn the robot towards and away from a wall as it follows it because it is unlikely that the robot will be able to find a perfectly straight line to follow right beside the wall. Using the ‘curve left’ with ‘spin right’ in combination will result in a wall following line that approaches a straight line. Spin Right: This action will generally be used to turn the robot once it reaches a corner in the arena as well as when the robot gets to close to the wall on the left side. Spinning right will be useful for getting the robot through the tight angled corners between the angled blocks and the walls in the arena. Using these actions as well as two others we can begin building the wall follow program. The first step will be to put a state called ‘Initial Forward’, shown in the following figure. This state will be used to make the robot drive straight initially until it finds a wall then begin its wall follow manoeuvres. The wheel speeds are set to “+10” on both wheels. 88 Property of Applied AI Systems, Inc. Duplication or unauthorized distribution of this document is illegal B O T S T U D I O L E S S O N S A N D S O L U T I O N S Figure 84: Initial forward state in wall follow program The next state in the program is the ‘Forward’ state, this will also cause the robot to drive straight and will be the state that the rest of the states return to when they have finished turning the robot either right or left. Again, as before, the wheel speeds will be set as “+10” on both wheels. Figure 85: Regular forward state in wall follow program The ‘Initial Forward’ state should begin the straight movement but the robot should transition to the ‘Forward’ state when either the Front, Near Left or Near Right sensor’s detects a wall. Three transitions will be used between the two states each called 89 Property of Applied AI Systems, Inc. Duplication or unauthorized distribution of this document is illegal B O T S T U D I O L E S S O N S A N D S O L U T I O N S ‘Front’, ‘Near Left’ and ‘Near Right’ as shown in the following figure. Figure 86: Three front transitions between two forward states Each of these transitions will occur when the sensor value is ‘>014’ to indicate that a wall has been detected closer than a distance value of 14 on anyone of the three front sensors. The ‘Near Right’ transition will have the opposite sensor on the other side as the one shown above with the ‘>014’ value as does the front sensor highlighted below. Figure 87: Front sensor value for the transitions between forward states 90 Property of Applied AI Systems, Inc. Duplication or unauthorized distribution of this document is illegal B O T S T U D I O L E S S O N S A N D S O L U T I O N S Now that the robot can find a wall, it will need to turn to track it using the needed actions, discussed at the beginning of this solution. Start with the ‘Spin Right’ state used to turn the robot in corners and away from walls. The wheel speeds are set to “+10” on the left wheel and “-10” on the right wheel. Figure 88: Spin Right state in the wall following program The next state to place is ‘Pivot Left’, which will have wheel speeds of “0” for the left wheel and “+10” for the right wheel causing the robot to pivot on the left wheel as it turns, shown in the following figure. Figure 89: Pivot Left state in the wall following program 91 Property of Applied AI Systems, Inc. Duplication or unauthorized distribution of this document is illegal B O T S T U D I O L E S S O N S A N D S O L U T I O N S The last state needed will be the ‘Curve Left’ state which will have wheels speeds of “+04” on the left wheel and “+10” on the right wheel causing the robot to slowly curve left as it drives. This is shown in the following figure. Figure 90: Curve Left state in the wall following program All the states have been placed now, so only transitions remain. As the robot drives forward it detects a wall and begins to turn to track it. If the robot moves away from the wall it will loose sight of it so will need to turn back towards it. This transition will be called ‘Lost Wall’ and is highlighted in the following figure. The distance of “<014” were used for the sensors. 92 Property of Applied AI Systems, Inc. Duplication or unauthorized distribution of this document is illegal B O T S T U D I O L E S S O N S A N D S O L U T I O N S Figure 91: Lost Wall Transition between Forward and Pivot Left state This transition goes to the ‘Pivot Left’ state first so that the most drastic measures are taken first in order to keep the robot near the wall. Once in the ‘Pivot Left’ state, the transition to the ‘Curve Left’ state can occur if the wall is found to be close to the robot. It was decided, somewhat by random to have the robot transition to the ‘Curve Left’ state if the wall is detected closer than a distance value of 10, so three transitions are used between the two left turning states called ‘See wall FL’ for the far left sensor, ‘See wall NL’ for the near left sensor and ‘See wall Fr’ for the front sensor. Each of these transitions occur when the sensor has a reading that is “>010”. The near left sensor transition will be highlighted in the following figure, the others are similar. 93 Property of Applied AI Systems, Inc. Duplication or unauthorized distribution of this document is illegal B O T S T U D I O L E S S O N S A N D S O L U T I O N S Figure 92: Near left transition between two turning states These transitions combined with the previous ‘Lost Wall’ transitions mean that the robot will curve left if the wall is a distance value of 10 to 14 from the robot and less than 10, which means farther away, it will pivot left to find the wall. While in the ‘Curve Left’ state, if the robot does not track fast enough and the distance value falls below 10, the robot should return to the ‘Pivot Left’ state to catch up to the wall. This is shown in the following figure with a transition called ‘Lost Wall’ going back to the ‘Pivot Left’ state. It will use values of “<010” on the far left and near left sensors. 94 Property of Applied AI Systems, Inc. Duplication or unauthorized distribution of this document is illegal B O T S T U D I O L E S S O N S A N D S O L U T I O N S Figure 93: Lost Wall transition between the left turning states What is more likely to occur is that the robot finds the wall and then can begin going forward beside the wall as it follows it. This means three more transitions are needed back to the ‘Forward’ state from the ‘Curve Left’ state. The transitions are called ‘See wall FL’ (far left), ‘See wall NL’ (near left) and ‘See wall Fr’ (front) with the same meanings as before but different conditional values. Just as values “<014” were needed to transition into the left turning states, values “>014” on all of the three sensors, will be used to return to the forward state. Only the front sensor transition will be highlighted in the following figure, but the other two are similar. 95 Property of Applied AI Systems, Inc. Duplication or unauthorized distribution of this document is illegal B O T S T U D I O L E S S O N S A N D S O L U T I O N S Figure 94: See wall front transition between left turn and forward state Now the transitions to make the robot spin in the corners or away from the wall will be placed in the program. The transitions from the ‘Forward’ state to the ‘Spin Right’ state will be called ‘DC NL’ for detect corner near left sensor, ‘DC Fr’ for detect corner front sensor and ‘DC NR’ for detect corner near right sensor. All three of these sensors were used to detect the corners (or walls) and not just the front sensor so that the corner would be detected even in narrow angle corners like in the arena. Each of the transitions will have the condition of “>014” for each sensor. In the following figure only the near right transition will be highlighted, but the others are similar. 96 Property of Applied AI Systems, Inc. Duplication or unauthorized distribution of this document is illegal B O T S T U D I O L E S S O N S A N D S O L U T I O N S Figure 95: Detect corner near right transition The ‘Spin Right’ state is transitioned to if any of the front sensors detects a wall at distance value “>014”. The robot should stop spinning when all those front sensors stop detecting the wall, so when their values are “<014”, shown in the following figure in a transition back to ‘Forward’ called ‘Track wall’. Figure 96: Track wall transition back to the forward state Another very important transition is needed to keep the robot moving slightly away from the wall whenever it gets to close, do to a left turn. This transition is called ‘Keep off wall’ and is between the ‘Forward’ and ‘Spin Right’ states. It is only based on the far 97 Property of Applied AI Systems, Inc. Duplication or unauthorized distribution of this document is illegal B O T S T U D I O L E S S O N S A N D S O L U T I O N S left sensor of the robot and based on the value given it will cause the robot to try and stay at that distance away from the wall. For this solution, based on the other values used, the ‘Keep off wall’ transition can be between “>010” up to “>020” with different, possibly desirable outcomes, depending on the environment the robot will be in. As the robot tracks the wall it will have a curvy path for the “>010” and as the value is increased the path will straighten out and be very close to a straight line at the “>020” value. The following figure will demonstrate this. Figure 97: Robot path based on Keep off wall transition sensor value This sensor value will be set at “>020” in this solution because the straight path looks the nicest, but if the robot needed to avoid small objects along the wall and not get stuck on them or make turns around pointed ends of blocks, putting a sensor value of 98 Property of Applied AI Systems, Inc. Duplication or unauthorized distribution of this document is illegal B O T S T U D I O L E S S O N S A N D S O L U T I O N S “>010” would make the robot more robust to this type of feature. This transition will be shown in the following figure. Figure 98: Keep off wall transition in wall following program Now all that is needed in this program is some stuck timer transitions in case the robot gets stuck on the corners of the blocks as it moves around them. The best way to move off of a corner is to spin away from it, so the ‘Stuck’ transitions will all go towards the ‘Spin Right’ state. The stuck transitions will come from the ‘Curve Left’, ‘Forward’ and ‘Initial Forward’ states. A timer value of >100 was chosen to wait before transition. Just one of the stuck states will be highlighted in the following figure. 99 Property of Applied AI Systems, Inc. Duplication or unauthorized distribution of this document is illegal B O T S T U D I O L E S S O N S A N D S O L U T I O N S Figure 99: Stuck transitions in the wall following program Notice that no ‘Stuck’ transition was made between the ‘Pivot Left’ state and the ‘Spin Right’ state. This is because the ‘Pivot Left’ state will transition there indirectly. Instead another timer transition will be used off of the ‘Pivot Left’ state. The idea is that if the robot while pivoting left does a whole revolution of a circle and finds no wall it should just drive straight to find the wall again. This is accomplished putting a timer transition called ‘Lost wall’ with a timer value of >100, going from the ‘Pivot Left’ state to the ‘Initial Forward’ state. This will cause the robot to drive forward after enough time has been given to find the wall while turning. This is also how even if the ‘Pivot Left’ state is stuck on a corner, it will time out, try driving forward, still be stuck, time out and then spin to get off the corner. The following figure highlights this transition. 100 Property of Applied AI Systems, Inc. Duplication or unauthorized distribution of this document is illegal B O T S T U D I O L E S S O N S A N D S O L U T I O N S Figure 100: Final Lost wall timer transition in wall follow program This is the final step in this program. The next thing to think about is applying this program to the real robot. 101 Property of Applied AI Systems, Inc. Duplication or unauthorized distribution of this document is illegal B O T S T U D I O L E S S O N S A N D S O L U T I O N S Lesson 5: Major AI project This project will be chosen by the student. The desire is for the student to develop their own AI project using the Hemisson robot. A good project will incorporate multiple Hemisson robots each performing a task to achieve the goal or useful function. The robot should use lots of peripherals (foam blocks) or operate in a relatively complex arena, the more imaginative the project the better. Using the previously learned skills of past lessons, one should be able develop a relatively complex AI project. The arena and Black Foam blocks can and should of course be used and are described in the Appendix section of the Education Guide. An example project will be described below. Cleaning Robot example project Figure 101: Cleaning robot arena The concept of this project is that the Hemisson moves around the arena and when it picks up one of the Black Foam blocks it then turns towards the light and pushes the 102 Property of Applied AI Systems, Inc. Duplication or unauthorized distribution of this document is illegal B O T S T U D I O L E S S O N S A N D S O L U T I O N S block towards the lighted side of the arena. Once it brings the block to that side it reaches the wall and spin turns to avoid the wall and leaves the block behind and moves away to find another block to repeat its task. The following figure shows the arena at a later time once most of the blocks have been retrieved. Figure 102: Arena after cleaning This project uses obstacles avoidance, light following and line detection (or rather block detection) to accomplish its task. For this project the robot just moved around randomly until it found a block, but wall following could also be used, perhaps in another robot and they could work as a team. As far as the robot was concerned a black block looks just like a black line to the IR sensors which face the floor. The blocks can also be flipped if they have white paper on one side and then the robot will be able to differentiate between black blocks and white blocks. In case you’re wondering the white floor and white blocks DO NOT look the same to the robot so don’t worry. 103 Property of Applied AI Systems, Inc. Duplication or unauthorized distribution of this document is illegal B O T S T U D I O L E S S O N S A N D S O L U T I O N S Figure 103: Black and White foam blocks for the Hemisson Another way to use the arena with a light source is to use a point light source or light wall. This can be used to make the robot follow the light beam back to a flashlight or to keep the robot within a certain area using the light as a wall so the robot will detect the beam and turn away from it. Figure 104: Light source and light wall Hopefully this shows that there are a great number of things that can be done with the Hemisson robot, applying them to the real robot will be difficult due to noisy sensors and unpredictable environments. You will find projects where robots work together can be in fact easier to do depending on the project. Use your imagination to come up with your own ideas for this project or use those shown. 104 Property of Applied AI Systems, Inc. Duplication or unauthorized distribution of this document is illegal A P P E N D I X Appendix This section of the document lists extra modules that can also be purchased for use with Hemisson, and specs and dimensions for making Hemisson arena and peripherals. Some Available Hemisson Modules All information taken from the Hemisson website: http://www.hemisson.com/English/modules.html check there for most up to date information on available modules. B/W Linear Camera This module allows Hemisson to perceive its environment. The camera reads one line of 102 pixels in 256 levels of grey. The optic block is a standard one (M12x0.5), so that you can change it to fit to your specific needs. As all the intelligent Hemisson modules, there is an on board processor (PIC16F876), dedicated to visual processing. Like Hemisson, the source code of the visual processing is under LGPL license and you can as a result write your own visual routine. To download your own code on this module, you can use the same tools as for Hemisson (Hemisson Uploader, or the External Programmer). Figure 105: Black and White Linear camera for Hemisson 105 Property of Applied AI Systems, Inc. Duplication or unauthorized distribution of this document is illegal A P P E N D I X Ultrasonic Sensor When you want a higher range than the IR sensors, this module is able to measure distances to obstacles from 3cm to 6m with a 1cm precision. Figure 106: Ultrasonic Sensor Module BasicStamp2© Interface With this module, you can plug in BasicStamp2© modules, not provided, and control Hemisson from the Basic development environment. You can also connect all the existing BasicStamp2© extension modules into the robot. Figure 107: BasicStamp2© Interface module 106 Property of Applied AI Systems, Inc. Duplication or unauthorized distribution of this document is illegal A P P E N D I X External Programmer Interface This module is intended for the users who wish to completely re-flash the memory of their Hemisson. It is attached to a standard PIC programmer that can program PIC16F877 chips. The HEX code is provided on the Hemisson Website. Figure 108: External Programmer module Text to Speech This interface makes your Hemisson speak English. The on-board speaker will pronounce every word transferred in ASCII code on the Hemisson I2C bus. Figure 109: Text to Speech module 107 Property of Applied AI Systems, Inc. Duplication or unauthorized distribution of this document is illegal A P P E N D I X Wireless Color Camera This module wirelessly transmits video to your TV set (Cinch output). You can then watch your robot's trip. Figure 110: Wireless Video Camera module General I/O Turret The General I/O turret gives you the platform to add your own electronics. It is the perfect tool to implement your own modules. A board area allows you to add components (2.54mm/.1" spacing). The documentation explains how to access your own peripherals from the central processor (12 digital I/O, 5 analog 8-bit inputs and I2C bus). Figure 111: General I/O module 108 Property of Applied AI Systems, Inc. Duplication or unauthorized distribution of this document is illegal A P P E N D I X Infra-red (IrDA) Connection - Wireless communication The IrDA module allows a PC to communicate wirelessly with Hemisson, and reversely. The Communication IrDA contains two modules (1 for the PC, 1 for Hemisson). A possible application is to use the powerful Hemisson command line to control the robot. Radio Connection - Wireless communication The radio module allows a PC to communicate wirelessly with several Hemisson robots, and reversely, at a long distance (10m). Figure 112: Hemisson Wireless communication modules LCD Display This LCD screen and keypad provides a user interface to build interactive control program with your robot without PC. You can display messages and manage small menus. Figure 113: Hemisson LCD Display module 109 Property of Applied AI Systems, Inc. Duplication or unauthorized distribution of this document is illegal A P P E N D I X In-Circuit-Debug Interface Thanks to this RJ45 adapter, you will be able to connect to your In-Circuit Debugger from CCS and then, to reflash Hemisson memory (like HemFlexExtProg) and to debug your CCS C program step by step. Figure 114: In-Circuit-Debug Interface Beware: the In-Circuit Debugger (ICD-S 20) is not provided, you can buy it from CCS. 110 Property of Applied AI Systems, Inc. Duplication or unauthorized distribution of this document is illegal A P P E N D I X Specs and Dimensions for Hemisson Arena and peripherals Black Foam blocks These foam pieces have been designed to be easily detectable and moveable by Hemisson. Material that was used is Black-Plain Neoprene Closed Cell sponge (no adhesive), but any black foam would work. Figure 115: Black Foam cut-out for Hemisson The dimensions do not need to be precise for this block, but should be similar. The height should be ¾” as shown in the above figure. One side of the foam block should be left uncovered, but the other side should have a white piece of paper glued or taped to the foam cut-out as shown in the following figure. This is so the robot can have two different foam cut-outs by just flipping it over to the other side. 111 Property of Applied AI Systems, Inc. Duplication or unauthorized distribution of this document is illegal A P P E N D I X Figure 116: Foam cut-out with two sides The shape of the foam block will allow the Hemisson to be able to turn and move the block with it as long as a spin in place turn is not used but rather a gradual turn. The following figures will demonstrate this. Figure 117: Foam cut-out shape designed to turn with robot The height of the block will allow it to fit under both the upper foam body wall of the robot and under the wall of the arena, which will be discussed next, which is 1 inch in height. 112 Property of Applied AI Systems, Inc. Duplication or unauthorized distribution of this document is illegal A P P E N D I X Figure 118: Foam cut-out under robot body foam layer 113 Property of Applied AI Systems, Inc. Duplication or unauthorized distribution of this document is illegal A P P E N D I X Hemisson Arena – Version 1 The arena was made from scrap Styrofoam (anything white would do) material, and was made to have raised walls, leaving 1 inch of space between the walls and the ground. The following figure shows a model with dimensions of the arena. Figure 119: Hemisson Arena with dimensions As stated in the above figure, the thickness and height of the walls is not important, the only necessary dimensions are the length and width of the arena which should result in a length of 3 feet 6 inches and a width of 2 feet 9 inches. Another important requirement is for the blocks on the corners to raise the arena up 1 inch so that the Black Foam blocks will fit underneath the walls, but the walls are still low enough for the IR sensors on the Hemisson to detect the walls. Notice how the blocks are put in a place where even the inside corners of the arena have space below them. The following figure shows the actual arena made out of Styrofoam with blocks of 1 inch of height holding the whole arena up. 114 Property of Applied AI Systems, Inc. Duplication or unauthorized distribution of this document is illegal A P P E N D I X Figure 120: Actual Arena with foam blocks on the corners The following figure shows how the foam blocks fit under the wall and how the IRs are still high enough to detect the wall. Figure 121: Foam block under the arena wall with Hemisson IR detecting the wall The arena was put together using hot glue for permanent Styrofoam attachment and using Velcro in the corners so that the arena could be dismantled and reassembled easily. 115 Property of Applied AI Systems, Inc. Duplication or unauthorized distribution of this document is illegal A P P E N D I X Figure 122: Used Velcro to attach walls in the corners 116 Property of Applied AI Systems, Inc. Duplication or unauthorized distribution of this document is illegal A P P E N D I X Hemisson Arena - Version 2 An even simpler arena can be made using cardboard or a material called Hardboard found at stores like Home Depot. Hardboard is like a harder, denser version of cardboard with one side painted white. The nice thing about using either of these materials is that it will make an arena that is very simple to put together and take a part. The pieces are joined using cut slots on the ends of each of the pieces. The following figure shows the dimensions for one of the two pieces. You will need two of the following. Figure 123: Long wall of the arena The slots should be the width of the thickness of the material, so for both cardboard and Hardboard it should be 1/8” thick. If using cardboard, the slots can be made with a sharp knife, and if using Hardboard, the slots can be made with a circular saw since the saw blade should be about 1/8” thick. The next figure shows the second of the two pieces for which you will need two for the arena. 117 Property of Applied AI Systems, Inc. Duplication or unauthorized distribution of this document is illegal A P P E N D I X Figure 124: Short wall of the arena When the pieces are made they should be put together in the following manner, 1” height blocks will still be needed to raise the arena up, and can be put on the end walls that stick out. The slots should be oriented in the following figure also with the end wall slots pointing up. 118 Property of Applied AI Systems, Inc. Duplication or unauthorized distribution of this document is illegal A P P E N D I X Figure 125: Four arena walls together The following figure shows a cardboard version of the above arena. Figure 126: Cardboard slot arena 119 Property of Applied AI Systems, Inc. Duplication or unauthorized distribution of this document is illegal A P P E N D I X Arena Floor The arena floor is made using 15 scrap pieces of white letter sized paper taped together using packing tape as shown in the following figures, in a 3x5 pattern. The printable pages with line following lines which are located on the Hemisson CD can be connected to form for arena floor on the right. Figure 127: 3x5 paper floor arena with line following lines The following figure shows the real letter sized paper taped together for the floor. Figure 128: Arena floor – 15 pieces of white paper taped together 120 Property of Applied AI Systems, Inc. Duplication or unauthorized distribution of this document is illegal A P P E N D I X The floor should fit nicely inside the arena as shown in the following figure. Figure 129: Arena floor inside arena The floor need not be fixed to the table surface and won’t move around with the robot running on top of it. Other floors can be made and put inside of the arena depending on the desires of the user. Figure 130: Line following floor in the arena 121 Property of Applied AI Systems, Inc. Duplication or unauthorized distribution of this document is illegal A P P E N D I X Support – Known problems and solutions For questions, concerns and problems while using the Hemisson robot there are two places where you can get help if your problem is not solved in the following problems-solutions section. The first is to use the official Hemisson website forum where you can post your problems or questions and the engineers at K-Team, who make Hemisson, will answer them usually within 1 or 2 days. The forum is located at http://www.kteam.com/cgi-bin/spt/K-Forum/KtForum/comments.cgi?op=topicslist&sid=hemisson You can also go to the Hemisson website under the support section and click ‘KForum’, located at http://www.hemisson.com/English/support.html The second place where you can get help is from Applied AI Systems, Inc. either email us at [email protected] or call 613-839-6161. We are based in Ottawa, Canada and can hopefully solve your problem on the phone, by email or in person. Problem: Why Webots or Botstudio doesn’t work with Windows 2000 or even at all Solution: For Windows 2000 Professional you can use Java Runtime Environment 1.4.0, but you may need to upgrade your Windows 2000 Professional up to Service Pack 2 off of the Microsoft Website. Location for Java Runtime Environment http://java.sun.com/j2se/downloads.html For Windows 2000 (NOT professional), try using the Java Runtime Environment 1.3.1, also located at the above link, its older, been around longer and probably works with every operating system including Windows 2000 and Windows 2000 professional. 122 Property of Applied AI Systems, Inc. Duplication or unauthorized distribution of this document is illegal A P P E N D I X Special Notes: - DON’T use Java Runtime Environment 1.4.1, it absolutely needs Windows 2000 professional that is upgraded to Service pack 2. - TO REMOVE The Java Runtime Environment that you have already installed, follow the instructions on the Java Sun Website at http://java.sun.com/j2se/1.4/install-windows.html#troubleshooting - REMEMBER: Before installing a new version of Java Runtime Environment, UNINSTALL the old version first! Problem: Botstudio simulation problems with Webots Sometimes Webots will not respond to BotStudio when you are trying to simulate your program. Solution: The first step would be to try closing down both Webots and Botstudio and restarting them and trying again. If this does not solve the problem then restarting windows and then restarting Webots and BotStudio fixes any Java Environment problems that are probably causing Botstudio to not function properly with Webots. Problem: Hemisson Firmware code has been corrupted or observing unpredictable/strange operation (like avoid, dance, line follow don’t work) It is possible that the robots memory has been corrupted causing the robot to not function properly. This can be caused by turning on and off the robot to quickly (When the robot is switched off wait 2 second before turning it on again). This can also be cause by unplugging the robot from the serial cable while BotStudio is running a program on the robot and the user is viewing the sensor readings and seeing the States transition around. Before unplugging the robot from the serial cable for un-tethered operation, click the ‘Stop’ button in 123 Property of Applied AI Systems, Inc. Duplication or unauthorized distribution of this document is illegal A P P E N D I X BotStudio. Sometimes this will not actually stop the robot’s operation, but it will stop BotStudio from communicating with the robot which will keep the memory from being corrupted. Solution: You will need to upload the latest version of firmware from the Hemisson website at http://www.hemisson.com/English/support.html. The rest of this solution is already described in this Guide in Chapter 4: Hemisson Software, under the Hemisson Uploader section, just check the Table of Contents. Problem: The robot doesn’t follow the line when I use the switch settings for line follow on the robot. Even though you are using the proper switch settings, you are turning on the robot and putting it on the table to follow the line but it doesn’t even detect the line and just drives straight. Solution: Line following protocol uses a lighting calibration, so initiate it only when the robot is on the surface where it will be used and not being held in midair. For example, start the line following protocol while the robot is on the paper surface with the line to follow. This is because the robot does some sort of calibration when it begins line following and if it is being held in midair it will calibrate improperly and won’t be able to follow the line or even detect it. Problem: Low Battery and Dance protocol causes unpredictable operation When doing the dance protocol, if the battery is low the robot might not function properly and either spin around or drive in any random direction at full the speed. Solution: This ‘crazy’ state the robot is in is caused by the motors drawing too much current so that the 124 Property of Applied AI Systems, Inc. Duplication or unauthorized distribution of this document is illegal A P P E N D I X processor doesn’t receive enough and functions sporadically. The Battery should be re-charged or using a new battery will fix this problem. Problem: Shinning direct light at the Hemisson can cause it to detect an obstacle initiating the avoidance part of a user written BotStudio program. As was discussed previously in this guide, the Hemisson IR sensors can be used to detect proximity to objects and light sources. If the light source is intense or shinning directly into the sensors this can cause saturation in the IR sensor causing the robot to read a proximity value that is very high, above 215. This high reading might even occur on a sensor that is facing away from the light source and can occur on multiple IR sensors at once. This noise caused by the light source will cause a robot which was happily following a light to immediately turn away like an obstacle has just appeared and can effect the proper operation of the user BotStudio programs. Solution: Noisy sensors are a common problem with all robots and most of the time cannot be avoided by just improving or changing hardware filtering and sensors. Noise filtering can and must also be done in software so that the robot differentiates between real sensor readings and noise caused by the external environment or imperfect sensors. To solve this problem, it requires observing what happens when the sensors become saturated. As the light shines directly on the IR sensors, one or more will display a high proximity value. This value is always more than 215, but when an actual object is close to the sensor the proximity value will return to normal and show the distance to the object. This means to filter this high value out, you will need an extra stage between in your program. This stage will look at the IR value and if it is higher than 215 then it should be ignored and return to the previous state. Generally an object is detected by having a transition in a state that checks to see if the IR value is >015 as shown in the following figure. 125 Property of Applied AI Systems, Inc. Duplication or unauthorized distribution of this document is illegal A P P E N D I X Figure 131: Noise Check for light saturation The next step is to have a state called NC (Noise Check) which has wheel speeds set the same as the previous state before the noise check for each of the IR sensors used in the program. Figure 132: Noise Check state set same as Straight State It is now in this state that the sensor value is checked for saturation. Two transitions will come from this NC state. One called RNC (Return Noise Check) will return to the Straight state if the IR sensor value is >215 as shown in the following figure. 126 Property of Applied AI Systems, Inc. Duplication or unauthorized distribution of this document is illegal A P P E N D I X Figure 133: RNC transition back to the Straight state The other transition called Far Right will transition to the Left state assuming that the IR value is <215 meaning that the robot is detecting an actual object and is not just saturated by light. Figure 134: Transition that detects an actual object to avoid This series of steps should be followed for all the IRs used in the program which means it could take a long time to noise filter your programs. The rest of the program is the same as the regular obstacle avoidance with Left state transitioning back to Straight state when either of the right sensors no longer detects obstacles. 127 Property of Applied AI Systems, Inc. Duplication or unauthorized distribution of this document is illegal